Home>Gardening Techniques>DIY Projects>How To Prepare A Garden Bed For Planting Shrubs
DIY Projects
How To Prepare A Garden Bed For Planting Shrubs
Modified: February 10, 2024
Learn how to prepare a garden bed for planting shrubs with these helpful DIY projects. Transform your outdoor space with these simple steps.
(Many of the links in this article redirect to a specific reviewed product. Your purchase of these products through affiliate links helps to generate commission for Chicagolandgardening.com, at no extra cost. Learn more)
Table of Contents
Introduction
When it comes to creating a beautiful and thriving garden, preparing the right foundation is essential. Before planting shrubs, it’s important to prepare the garden bed properly to provide the optimal conditions for healthy growth. By following a few simple steps, you can ensure that your garden bed is ready to support and nurture your shrubs.
Preparing a garden bed for planting shrubs not only improves the aesthetic appeal of your outdoor space but also creates an environment that promotes strong root development and overall plant health. Taking the time to properly prepare the bed will pay off in the long run, as your shrubs will be more resilient to pests, diseases, and environmental stresses.
In this guide, we will walk you through the step-by-step process of preparing a garden bed for planting shrubs. From clearing the area to amending the soil and mulching, each step plays a crucial role in setting the stage for successful shrub growth. Whether you’re a seasoned gardener or a beginner, these tips will help you create a garden bed that will support the growth and beauty of your shrubs for years to come.
Step 1: Clearing the Area
The first step in preparing a garden bed for planting shrubs is to clear the area of any debris, weeds, or unwanted vegetation. Start by removing any rocks, branches, or other large objects that may hinder the growth of your shrubs or interfere with your gardening activities.
Next, it’s time to deal with any existing plants or weeds in the area. Use a garden fork or shovel to carefully dig up and remove any unwanted vegetation, including weeds, grass, or other plants that may compete with your shrubs for nutrients and space. Be thorough in your clearing process, ensuring that all roots are removed to prevent regrowth.
For particularly stubborn weeds or grass, you may consider using an herbicide. However, if you prefer to avoid chemicals, you can opt for manual removal or use natural weed control methods such as smothering the weeds with a layer of mulch or covering the area with a landscaping fabric.
Throughout the clearing process, be mindful of any beneficial plants or flowers that you wish to keep in the bed. Take extra care not to disturb or damage them while removing unwanted vegetation.
Once the area is cleared, take a moment to evaluate the space and visualize how you want your garden bed to look. This will help you plan the placement and arrangement of your shrubs and other plants in the subsequent steps. Consider factors such as sunlight exposure, spacing requirements, and the overall design aesthetic you want to achieve.
Step 2: Removing Weeds and Grass
After clearing the area, the next step in preparing a garden bed for planting shrubs is to tackle any remaining weeds and grass. These unwanted plants can compete with your shrubs for nutrients, water, and sunlight, hindering their growth and development.
Start by using a garden fork or shovel to loosen the top layer of soil. This will make it easier to remove the weeds and grass, as well as any underlying roots. Be thorough in your removal to prevent regrowth.
If the area is heavily infested with weeds, you may need to employ additional methods to ensure their eradication. One option is to use a weed killer or herbicide specifically designed for the types of weeds you are dealing with. Follow the instructions carefully and apply the herbicide only to the targeted plants, avoiding any contact with your desirable shrubs or other plants.
Alternatively, you can opt for organic weed control methods such as hand weeding or smothering the weeds with a layer of newspaper or cardboard, followed by a thick layer of mulch. This will block sunlight and suffocate the weeds, preventing them from growing.
Once you have removed the weeds and grass, take a moment to inspect the area for any remaining plant materials or roots. Remove these as well to minimize the chances of regrowth and ensure a clean garden bed for your shrubs.
Remember, weed control is an ongoing process, and new weeds may sprout over time. Regularly monitor your garden bed and promptly remove any newly emerging weeds to maintain a healthy environment for your shrubs.
By taking the time to remove weeds and grass before planting your shrubs, you are setting the stage for their successful growth and minimizing competition for resources.
Step 3: Loosening the Soil
Loosening the soil is a crucial step in preparing a garden bed for planting shrubs. It creates a favorable environment for root growth, improves drainage, and allows the shrubs to establish themselves more easily.
Start by using a garden fork or a tiller to break up compacted soil. Insert the fork or tiller into the ground and gently loosen the soil by rocking it back and forth. This helps to break up clumps and aerate the soil, allowing for better water and nutrient penetration.
Be cautious not to over-till the soil, as this can destroy its structure and disrupt the natural soil ecosystem. Aim for a loose and crumbly texture, ensuring that the soil is well-drained, but still able to retain moisture for the plants.
Remove any rocks, stones, or debris that you encounter while loosening the soil. This ensures a smoother planting surface and prevents obstructions to root growth.
It’s also beneficial to consider the pH level of the soil at this stage. Most shrubs prefer a slightly acidic to neutral soil pH. If your soil is too acidic or alkaline, you may need to amend it later in the process. A soil testing kit can help you determine the pH level and guide you in making the necessary adjustments.
Once you have loosened the soil, take a moment to observe its texture and moisture content. The soil should feel crumbly and slightly moist, indicating a good balance of air and water. If the soil is too dry, consider watering it lightly before proceeding to the next step.
Loosening the soil sets the foundation for healthy root development and ensures that your shrubs have access to the necessary nutrients and moisture. By providing a loose and well-aerated soil, you are giving your shrubs the best chance to thrive in their new environment.
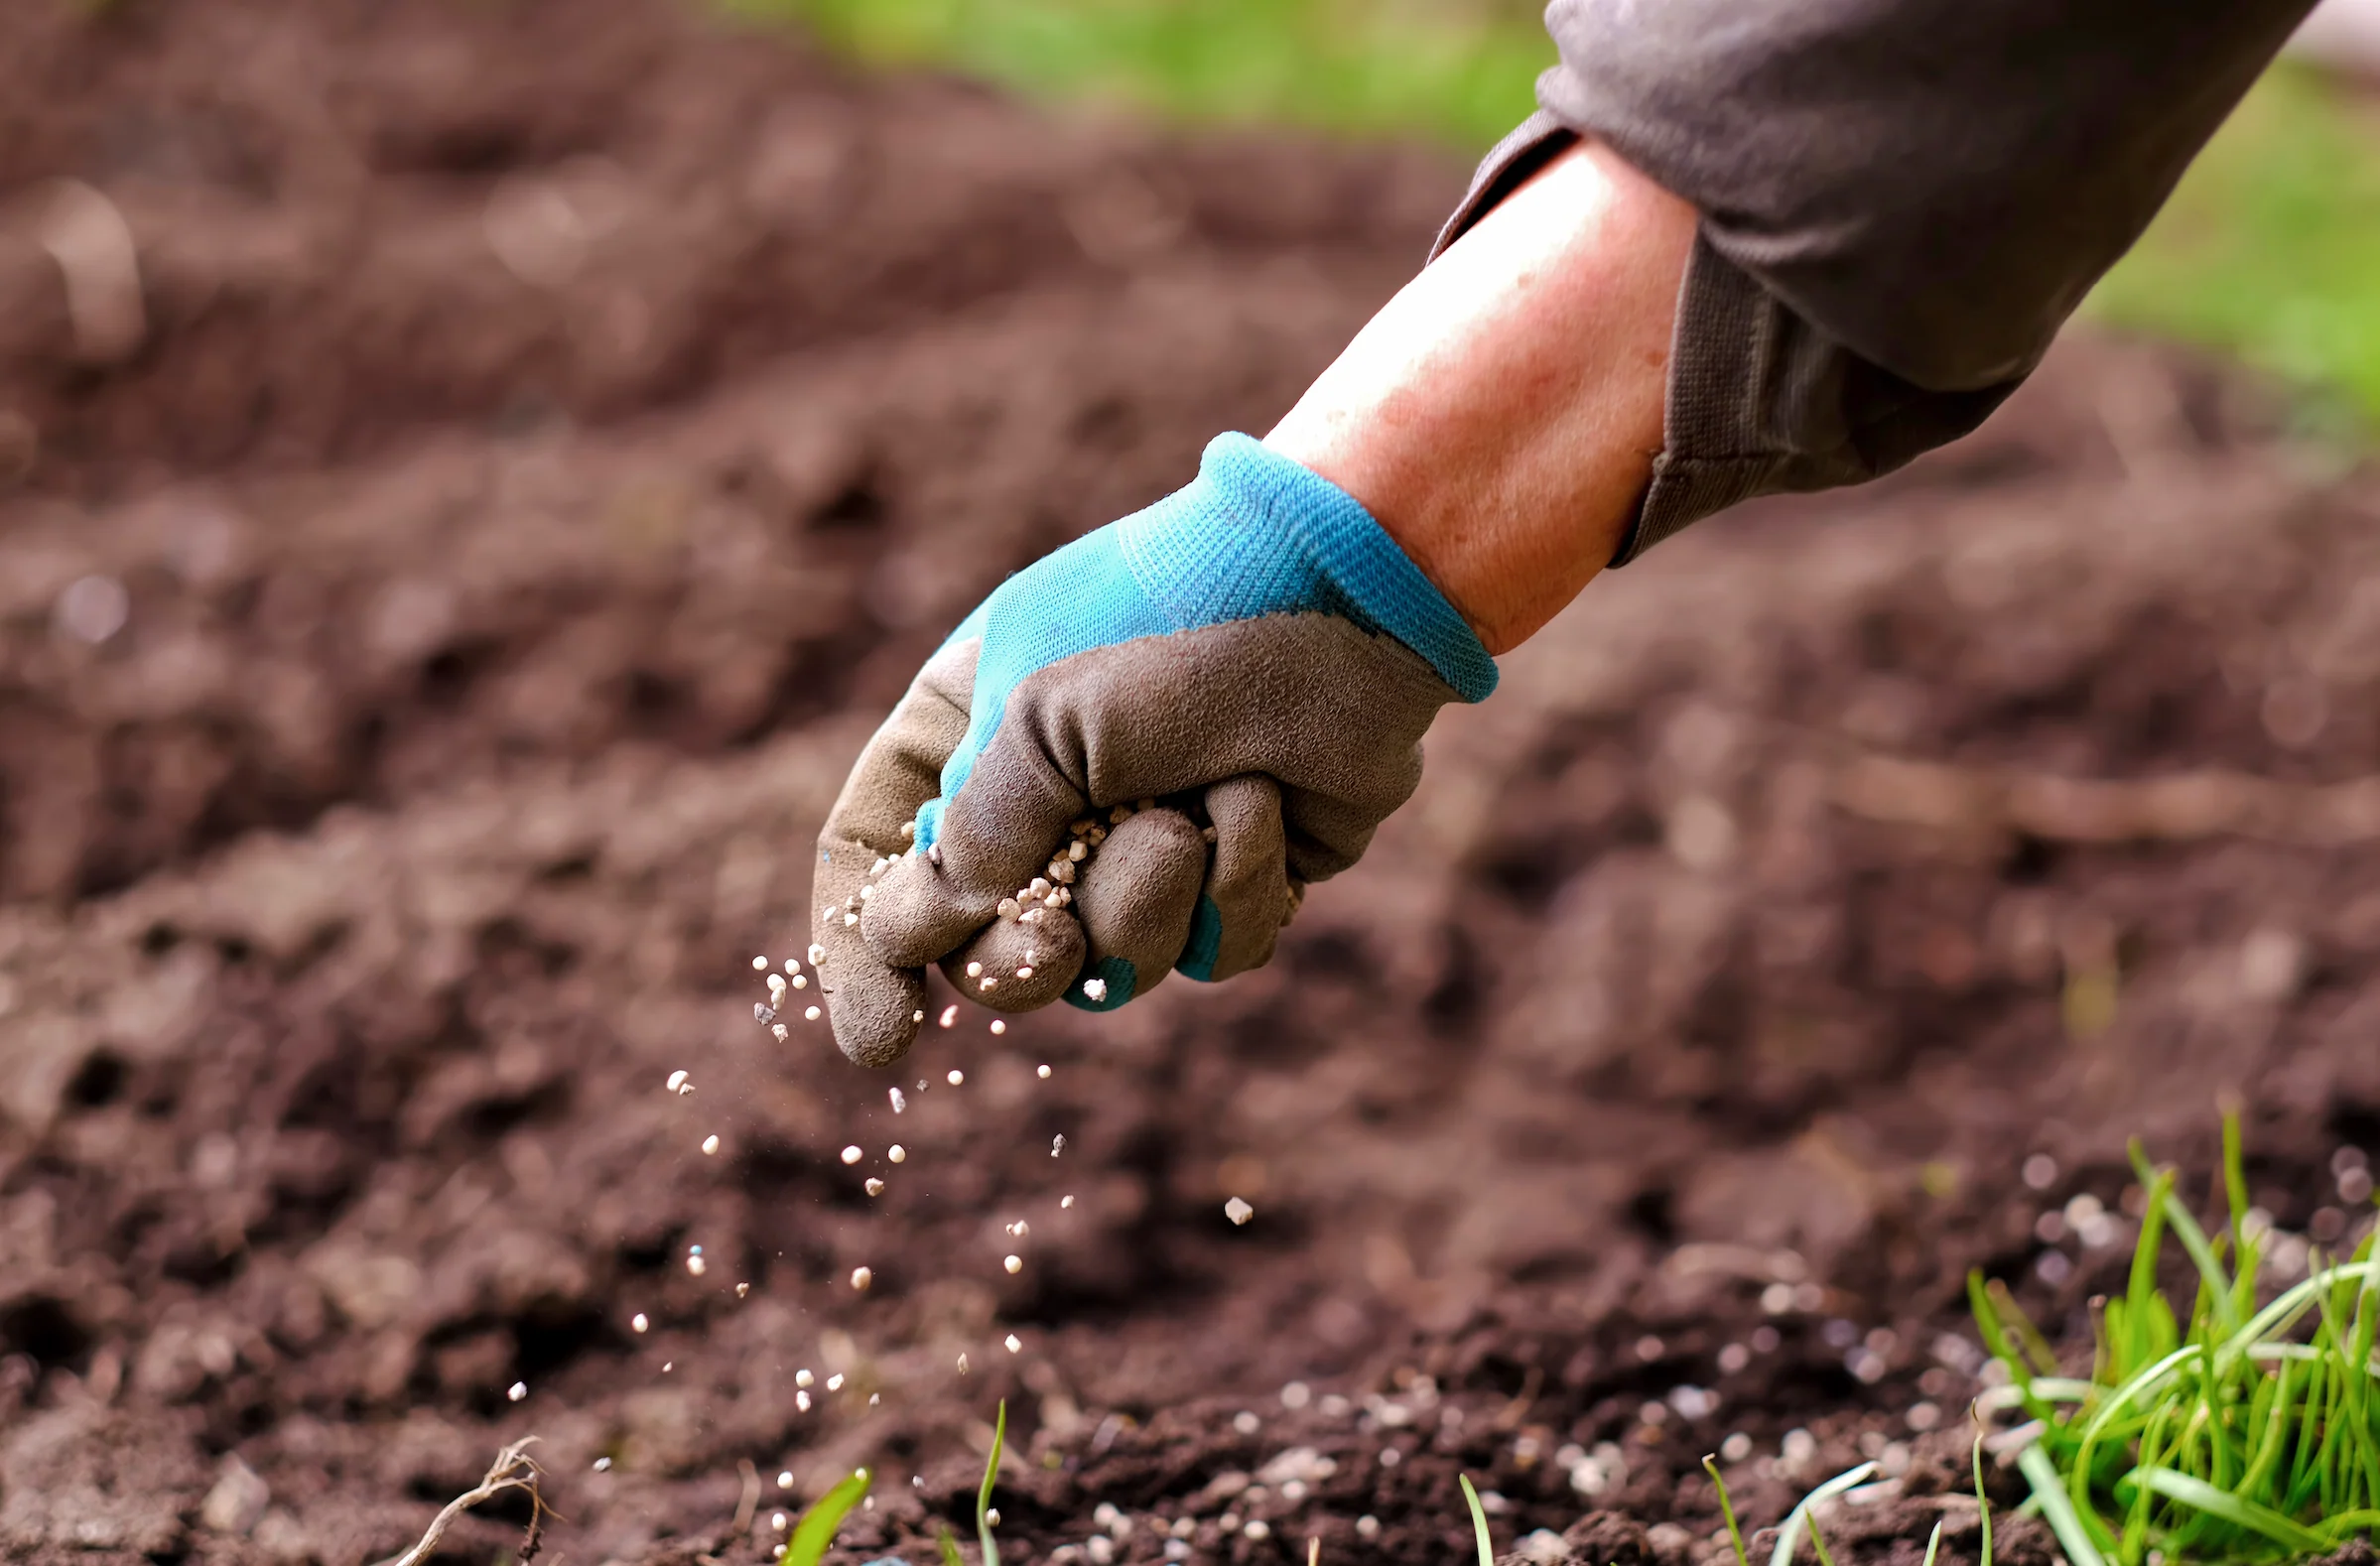
Step 4: Adding Organic Matter
Adding organic matter to the soil is a vital step in preparing a garden bed for planting shrubs. Organic matter enriches the soil by improving its structure, increasing its nutrient content, and enhancing its ability to retain moisture.
Start by spreading a layer of organic matter, such as compost or well-aged manure, over the loosened soil. Aim for a thickness of around 2 to 3 inches. Organic matter acts as a natural fertilizer, supplying essential nutrients to your shrubs as it breaks down.
Using a garden fork or a tiller, gently work the organic matter into the top few inches of soil. This helps to distribute the nutrients and improve the overall fertility of the bed. Ensure that the soil and organic matter are thoroughly mixed, creating a uniform blend.
In addition to compost and manure, you can also consider incorporating other organic materials, such as peat moss or leaf mold, to further enhance the soil’s organic content. These materials contribute to the overall health of the soil and provide a favorable environment for beneficial soil organisms.
Organic matter not only improves soil fertility but also helps to retain moisture. It increases the soil’s water-holding capacity, reducing the need for frequent watering and minimizing the risk of drought stress for your shrubs.
It’s important to note that different shrubs have specific soil requirements. Some may prefer a richer soil with higher organic content, while others may thrive in well-drained soils with less organic matter. Research the specific needs of your shrubs beforehand to ensure that you are providing the optimum growing conditions.
By adding organic matter, you are creating a nutrient-rich and well-structured soil foundation for your shrubs. This step significantly contributes to their overall health and growth, setting them up for success in their new home.
Step 5: Leveling the Bed
Leveling the bed is an important step in preparing a garden bed for planting shrubs. It ensures an even surface, promotes proper drainage, and allows for easier planting and maintenance.
Start by using a garden rake or a leveling tool to flatten the soil surface. Remove any clumps or bumps and create a smooth, level bed. Pay attention to the edges of the bed as well, ensuring that they are neatly defined and even.
Leveling the bed provides a uniform planting surface, which helps to prevent water pooling in certain areas and facilitates the even distribution of nutrients. This is especially important for shrubs, as excess water can lead to root rot and other moisture-related issues.
If you notice any low spots or depressions in the bed, fill them in with additional soil to bring the surface to a level. On the other hand, if there are any high spots, remove the excess soil or gently compact it to match the surrounding areas.
Take into consideration the slope and grading of your garden area. Ensure that the bed is not tilting or uneven, as this can result in water runoff and uneven moisture levels for your shrubs.
When leveling the bed, it’s also a good time to finalize the layout and spacing of your shrubs. Use stakes and string to mark the desired positions or lay out a temporary garden hose to visualize the placement. This will help you ensure that the bed is prepared to accommodate your shrubs accurately.
By leveling the bed, you are creating an ideal foundation for your shrubs. This step enhances drainage, prevents water stagnation, and facilitates proper planting and garden maintenance.
Step 6: Amending the Soil
Amending the soil is a crucial step in preparing a garden bed for planting shrubs. It involves adjusting the soil’s pH level and nutrient content to create the optimal conditions for your shrubs to thrive.
Start by testing the soil’s pH level using a soil testing kit. Most shrubs prefer a slightly acidic to neutral pH range, typically between 6.0 and 7.0. If your soil is outside of this range, you will need to make adjustments accordingly.
If the soil is too acidic, you can raise the pH level by adding amendments such as agricultural lime or wood ashes. Follow the instructions on the product packaging for the correct application rate based on your soil test results. Be sure to mix the amendments thoroughly into the soil to distribute them evenly.
On the other hand, if the soil is alkaline, you can lower the pH level by adding amendments such as elemental sulfur or peat moss. Again, follow the instructions on the product packaging and ensure proper mixing to achieve uniform results.
In addition to adjusting the soil’s pH level, you may need to amend the soil with specific nutrients based on your shrubs’ requirements. Research the nutritional needs of your shrub species and choose appropriate amendments, such as bone meal for phosphorus or compost for overall nutrient enrichment.
When adding amendments, it’s important to follow the recommended application rates and guidelines. Applying too much of a particular amendment can cause nutrient imbalances or even harm your shrubs. Always read and adhere to the instructions provided by the manufacturer.
After incorporating the amendments, use a garden fork or tiller to thoroughly mix them into the soil. This ensures that the amendments are evenly distributed and well-blended with the existing soil, providing a consistent growing medium for your shrubs.
Amending the soil helps create an optimal environment for your shrubs by adjusting the pH level and nutrient content. This step ensures that your plants have access to the necessary elements for healthy growth and development.
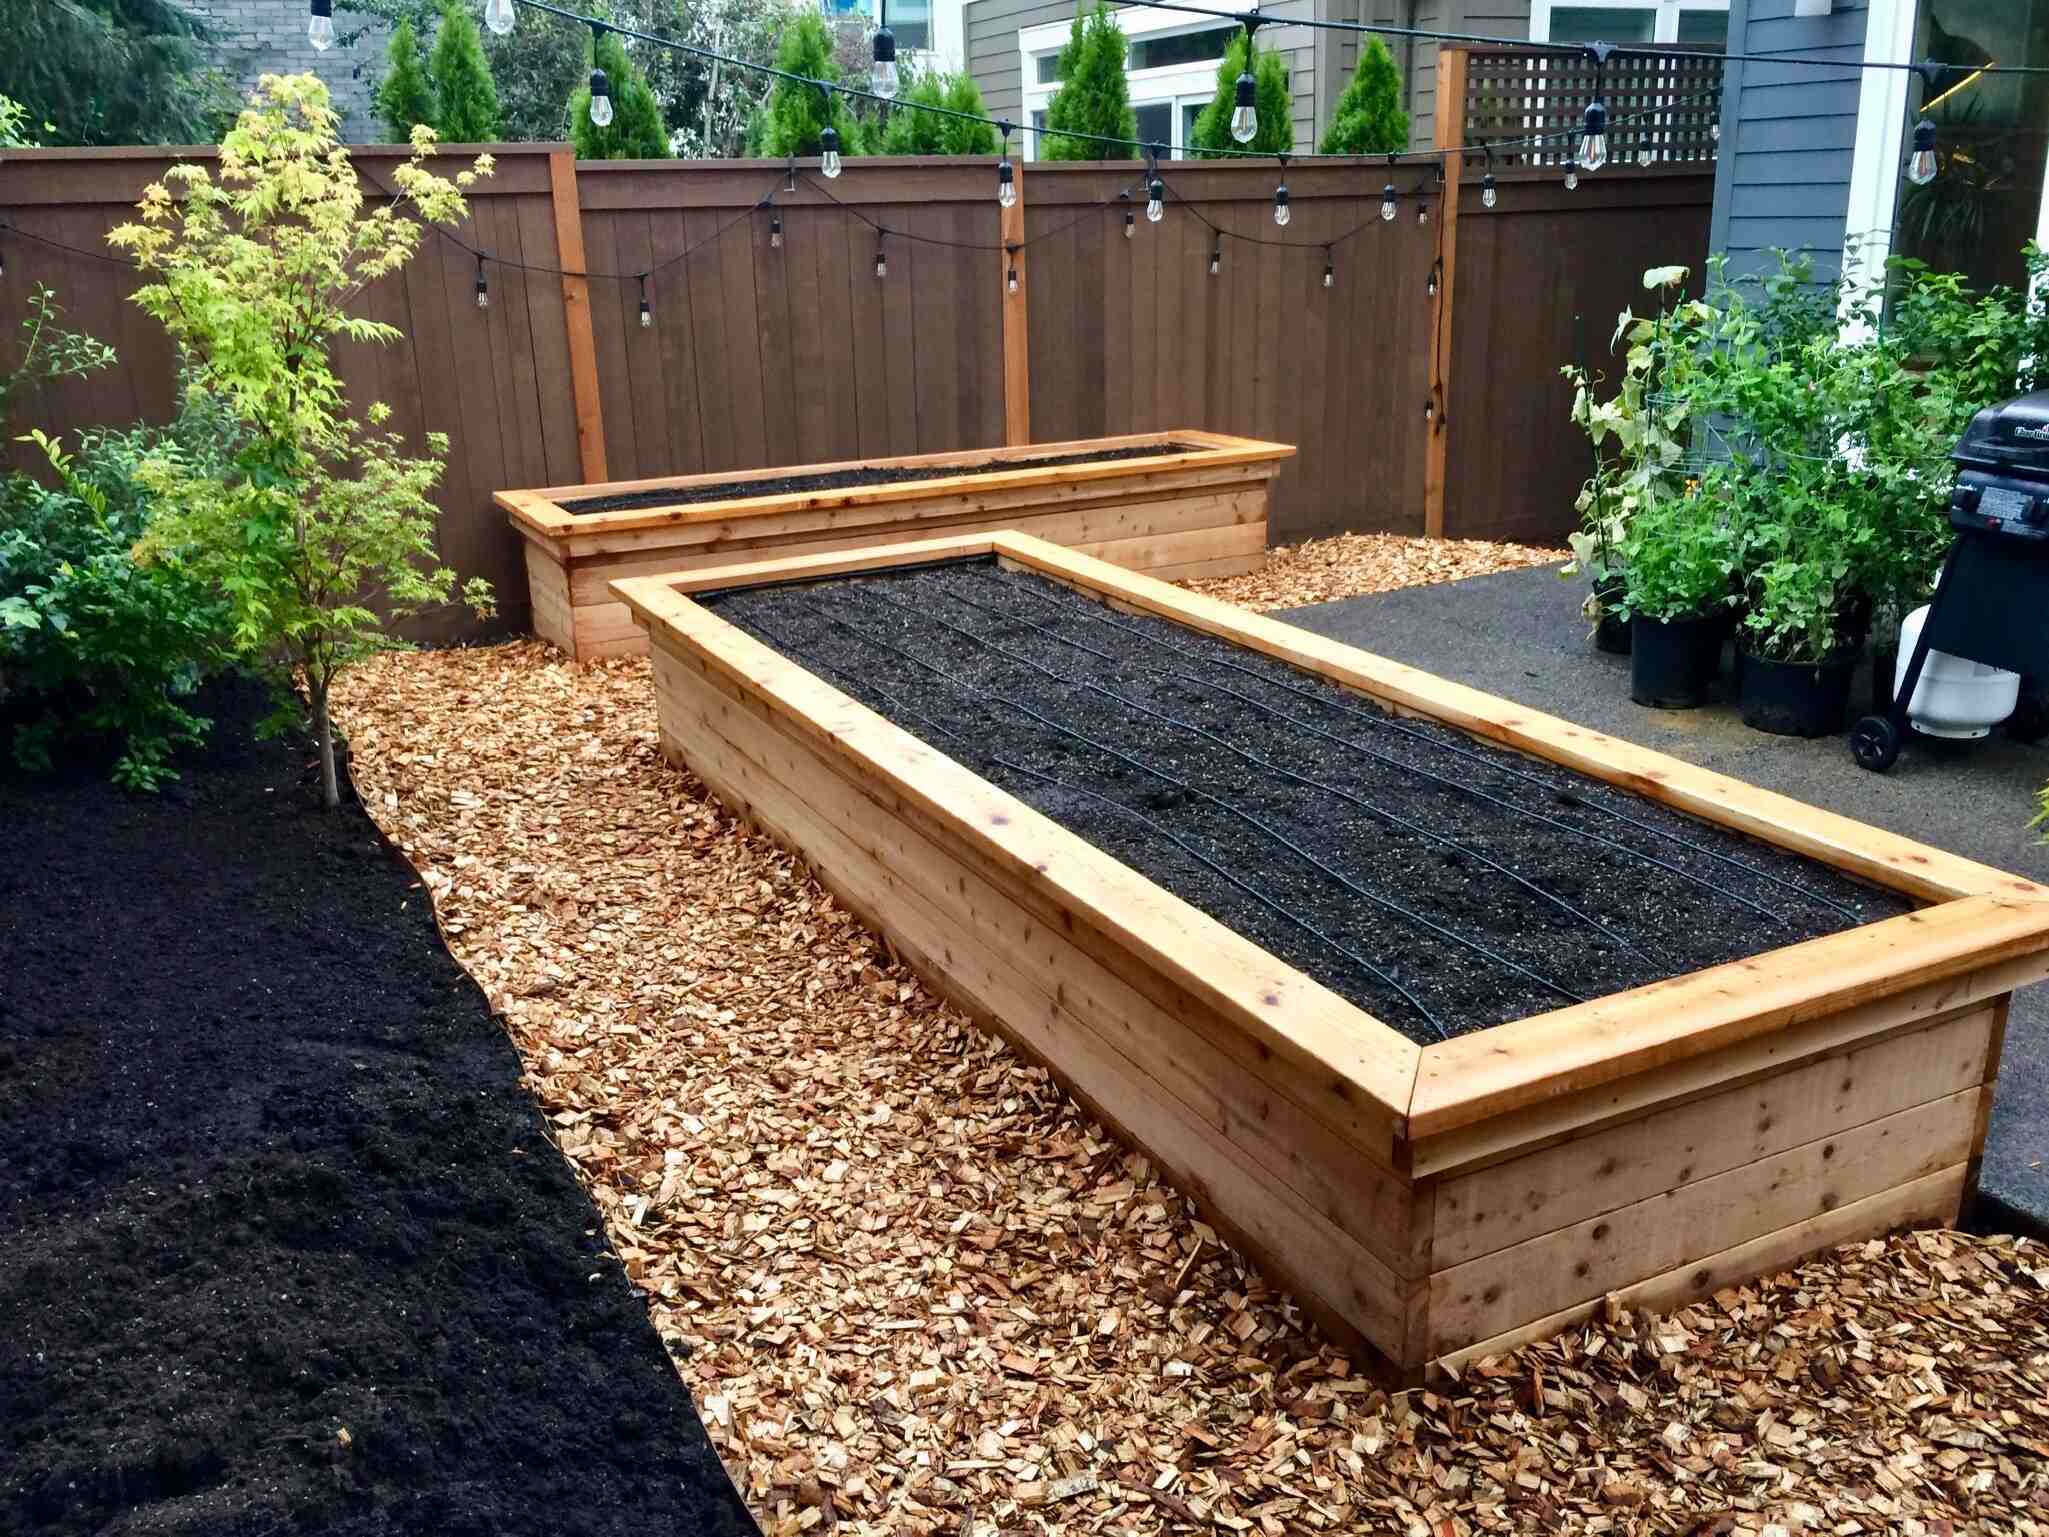
Step 7: Creating Raised Beds (optional)
Creating raised beds is an optional step in preparing a garden bed for planting shrubs. Raised beds offer several advantages, including improved drainage, better soil control, and easier access for planting and maintenance.
If you choose to create raised beds for your shrubs, start by marking the perimeter of the bed using stakes and string or a garden hose. This will give you a visual guide for building the raised structure.
Next, excavate the area within the marked perimeter to a depth of about 6 to 12 inches. This will create a shallow pit for the raised bed. Remove any rocks, debris, or weeds from the pit.
To construct the raised bed, use materials such as wood, stone, or brick. Choose a material that is durable, long-lasting, and visually appealing. Stack the chosen material around the edges of the excavated area, forming a raised border.
Ensure that the border is level and securely held in place. Use screws, nails, or mortar, depending on the chosen material, to stabilize the structure. Consider adding a water-permeable landscape fabric at the bottom of the bed to prevent weed growth from beneath.
Once the raised bed is constructed, fill it with a mixture of topsoil and compost or potting mix. This will provide a nutrient-rich growing medium for your shrubs. Aim for a depth of about 12 to 18 inches to accommodate the root system of your shrubs.
The raised bed offers better drainage than ground-level beds, which can be beneficial for shrubs that do not tolerate waterlogged soil. Additionally, the raised structure provides good soil control, making it easier to maintain the ideal soil conditions for your shrubs.
Raised beds also offer the opportunity for easier access to your shrubs, as you won’t need to bend down as much for planting, pruning, or harvesting. This can be especially advantageous for individuals with limited mobility or for those who prefer working at a more comfortable height.
Creating raised beds for your shrubs is an optional step that offers several benefits. It improves drainage, provides better soil control, and enhances accessibility for planting and maintenance. Consider the specific needs of your shrubs and your gardening preferences before deciding whether to create raised beds.
Step 8: Mulching the Bed
Mulching the bed is a critical step in preparing a garden bed for planting shrubs. Mulch provides numerous benefits, including moisture retention, weed suppression, and temperature regulation.
Start by selecting an appropriate mulch material based on your shrub’s needs and your garden’s aesthetic. Common options include organic materials like wood chips, straw, or shredded leaves, as well as inorganic materials like gravel or rocks.
Spread a layer of mulch around the base of your shrubs, ensuring that it covers the entire bed surface. Aim for a thickness of about 2 to 3 inches, taking care not to pile the mulch directly against the shrub’s stem or trunk. Leave a small gap around the base to prevent moisture buildup and potential rot issues.
Mulch plays a significant role in conserving moisture by reducing evaporation from the soil surface. This is especially crucial during hot and dry periods when maintaining adequate soil moisture levels is essential for your shrubs’ health.
In addition to moisture retention, mulch acts as a natural weed suppressant. The layer of mulch blocks sunlight, preventing weed seeds from germinating and competing with your shrubs for nutrients and space. This reduces the need for frequent weeding, saving you time and effort in maintaining your garden bed.
Another advantage of mulching is its ability to moderate soil temperature. It insulates the soil, keeping it cooler in hot summer months and warmer during colder periods. This temperature regulation helps protect the roots of your shrubs from extreme heat or cold stress.
Furthermore, as the mulch material breaks down over time, it adds organic matter to the soil, enriching its nutrient content. This gradual decomposition of mulch improves the overall soil fertility and promotes a healthy soil ecosystem for your shrubs.
Regularly monitor the mulch layer and replenish it as needed, especially as it decomposes or gets displaced due to wind or heavy rainfall. This helps maintain the benefits of mulching year after year.
By mulching your garden bed, you create an optimal environment for your shrubs. Mulch conserves moisture, suppresses weeds, regulates temperature, and enriches the soil, ultimately supporting the growth and well-being of your shrubs.
Step 9: Watering and Settling the Soil
The final step in preparing a garden bed for planting shrubs is to ensure proper watering and soil settling. Watering your shrubs correctly plays a crucial role in their establishment and initial growth, while settling the soil ensures stability and optimal contact between the roots and the soil.
After planting your shrubs in the prepared bed, it’s important to water them thoroughly. Give each shrub a deep watering, making sure the water reaches the root zone. This helps to establish proper hydration and encourages the roots to grow deep and anchor the plant securely.
Monitor the moisture level of the soil regularly, especially during the early stages of plant establishment. Keep the soil consistently moist, but not waterlogged, to promote healthy root development. Water deeply and less frequently, allowing the soil to dry out slightly between waterings. This encourages the roots to grow deeper in search of moisture and promotes overall plant resilience.
Take note of any specific watering requirements for your shrubs, as different plant species have different water needs. Some shrubs prefer consistently moist soil, while others are more tolerant of dry spells. Research the watering needs of your shrubs to ensure appropriate care.
In addition to watering, it’s important to monitor the soil settling after planting. As the soil settles, it may create pockets or depressions around the shrub’s base. Gently add additional soil if necessary to fill any gaps and ensure proper contact between the roots and the soil. Avoid over-compacting the soil, as this can hinder root growth and drainage.
During the first few weeks after planting, keep a close eye on the newly planted shrubs for any signs of stress or wilting. Adjust your watering routine accordingly to provide the necessary moisture. As the shrubs become established and their roots grow deeper, they will be better equipped to handle varying soil conditions and require less frequent watering.
Proper watering and soil settling promote a strong and healthy start for your shrubs. By providing adequate moisture and ensuring optimal contact between the roots and soil, you are setting the stage for successful growth and long-term vitality.
Conclusion
Preparing a garden bed for planting shrubs is a vital step in creating a thriving and beautiful outdoor space. By following the step-by-step process outlined in this guide, you can ensure that your shrubs have the best possible start and the optimal conditions for healthy growth.
Clearing the area, removing weeds and grass, loosening the soil, adding organic matter, leveling the bed, amending the soil, creating raised beds (if desired), mulching the bed, and properly watering and settling the soil are all essential tasks that contribute to a well-prepared garden bed.
Each step plays a crucial role in creating an environment that supports strong root development, adequate drainage, and optimal nutrient availability for your shrubs. This, in turn, promotes overall plant health, resilience to pests and diseases, and long-term beauty.
While the specific requirements of your shrubs may vary, understanding the importance of these foundational steps will help you tailor the preparation process to meet their unique needs.
Remember to consider factors such as sunlight exposure, spacing requirements, and soil preferences when choosing the appropriate shrubs for your garden. Research the specific care instructions for each shrub variety to ensure their success.
By investing time and effort into properly preparing your garden bed, you are making a long-term investment in the health and beauty of your outdoor space. Your shrubs will thank you with vibrant growth, beautiful blooms, and a stunning landscape for you to enjoy.