Home>Gardening Basics>Understanding Soil>How To Prepare Ground Soil For Planting
Understanding Soil
How To Prepare Ground Soil For Planting
Modified: February 10, 2024
Learn how to prepare ground soil for planting by understanding soil types, composition, and necessary amendments. Improve your gardening success with our expert tips and techniques.
(Many of the links in this article redirect to a specific reviewed product. Your purchase of these products through affiliate links helps to generate commission for Chicagolandgardening.com, at no extra cost. Learn more)
Table of Contents
Introduction
Welcome to this comprehensive guide on how to prepare ground soil for planting. If you’re a gardening enthusiast or a beginner looking to cultivate a successful garden, understanding the importance of soil preparation is crucial. Properly preparing the ground soil sets a solid foundation for healthy plant growth, promotes nutrient absorption, and improves overall plant vigor.
When it comes to gardening, one of the most critical factors that determines the success of your plants is the quality of the soil. Each plant has specific soil requirements, and by taking the time to assess and improve your soil, you can create an ideal environment for your plants to thrive.
This guide will walk you through the essential steps to prepare your ground soil effectively. We will cover everything from assessing the soil’s condition to making necessary amendments and adjustments to optimize its nutrient content and pH levels.
Before diving into the soil preparation process, it’s vital to understand your soil’s current state. By assessing its quality, you can identify any limiting factors that may hinder plant growth. Factors such as soil texture, drainage, pH levels, and nutrient content play key roles in a plant’s ability to establish healthy roots and obtain adequate nourishment.
In the following sections, we will discuss how to assess your soil, remove weeds and debris, loosen compacted soil, add organic matter, improve drainage, adjust pH levels, amend with fertilizers, test and adjust soil nutrients, and finally, complete the essential steps for soil preparation. By following these guidelines, you’ll be well on your way to cultivating a vibrant and productive garden.
So let’s get started and learn how to prepare ground soil for planting!
Assessing Your Soil
Before you start preparing your ground soil for planting, it’s crucial to assess its current condition. This step will help you identify any potential challenges or limitations that may affect your plants’ growth and development.
The first aspect to consider is the soil texture. Soil can be classified as sandy, loamy, or clayey. Sandy soil has larger particles, drains quickly, but may not retain nutrients well. Clayey soil has smaller particles, retains moisture but drains poorly, and is often nutrient-rich. Loamy soil is a balance between sandy and clayey soil, offering good drainage and nutrient retention.
To determine your soil’s texture, you can perform a simple test. Take a small amount of soil from your garden and squeeze it in your hand. Sandy soil will feel gritty, while clayey soil will feel sticky. Loamy soil will feel crumbly and hold its shape without sticking together too much.
Another crucial factor to assess is the soil’s drainage. Poor drainage can lead to water logging, which can drown plant roots and promote the growth of diseases. To check your soil’s drainage, dig a small hole and fill it with water. Observe how quickly the water drains. If it takes more than a couple of hours for the water to fully drain, your soil may have drainage issues.
The pH level of the soil is also important. pH is a measure of how acidic or alkaline your soil is. Most plants prefer slightly acidic to neutral soil, with a pH level between 6 and 7. You can use a soil pH testing kit to determine the pH level of your soil. If your soil is too acidic or alkaline, you may need to make adjustments to bring it to the preferred range for the plants you want to grow.
Lastly, it’s important to test your soil’s nutrient content. The three primary nutrients that plants require are nitrogen, phosphorus, and potassium, often referred to as NPK. A soil test will provide you with information about these nutrient levels in your soil. You can either use a DIY soil test kit or send a soil sample to a laboratory for a more detailed analysis.
By assessing your soil’s texture, drainage, pH level, and nutrient content, you’ll be able to identify any potential issues and take the necessary steps to address them. This knowledge will guide you in making the appropriate amendments to ensure that your soil is in optimal condition for plant growth and development.
Removing Weeds and Debris
Once you have assessed your soil, the next step in preparing the ground for planting is removing weeds and debris. Weeds compete with your plants for valuable nutrients, water, and sunlight, inhibiting their growth. Additionally, debris like rocks, sticks, and dead plant material can hinder proper soil drainage and make it challenging to work with.
Start by manually removing weeds and plant debris from the area where you plan to plant. Use a garden fork or a hand trowel to loosen the soil around the weed’s base, making it easier to pull out the entire root system. Ensure that you remove the weeds before they flower and scatter their seeds, preventing further weed growth.
For larger areas or heavily infested weeds, you may consider using a hoe or a tiller to uproot them. This method can be more efficient in clearing the ground quickly. However, be cautious not to disrupt the soil structure too much, as excessive tilling can lead to soil compaction.
Once you have removed the weeds, be sure to dispose of them properly. Do not compost weeds that have gone to seed or plants that may carry diseases. Instead, dispose of them in your green waste bin or burn them if allowed in your area, ensuring that you do not inadvertently reintroduce the weed seeds into your garden.
In addition to removing weeds, it’s essential to clear any debris that may obstruct the soil’s surface. Rocks, branches, leaves, or any other organic matter should be removed to create a clean bed for planting. Removing debris helps to improve soil aeration and drainage, minimizing potential obstacles for your plants’ root development.
By thoroughly removing weeds and debris, you create a clean canvas for your plants to flourish. This step sets the stage for optimal plant growth by reducing competition for resources and providing a conducive environment for your chosen plants.
Loosening the Soil
After clearing the ground of weeds and debris, the next step in preparing the ground soil for planting is to loosen it. Loosening the soil helps improve its structure, allowing for better root penetration, water absorption, and nutrient uptake by the plants.
The first consideration when loosening the soil is its compaction level. Compacted soil does not allow for proper airflow and root development, making it challenging for plants to grow. If you notice that the soil is compacted, you can use a garden fork or a tiller to break it up. Insert the fork or tiller into the soil and gently rock it back and forth to loosen the compacted layers.
However, be cautious not to overwork the soil or break up the soil aggregates too much. Over-tilling can disturb the natural soil structure and disrupt beneficial organisms. Aim to loosen the soil to a depth of about 8 to 12 inches. This depth provides enough room for plant roots to expand and absorb nutrients efficiently.
In cases where the soil is extremely compacted, you may need to consider aerating it. Aeration involves creating small holes in the soil to improve air circulation and alleviate compaction. You can use a garden fork or a specialized garden aerator tool to accomplish this. Push the fork or aerator into the soil at regular intervals, ensuring that the holes are evenly distributed.
Another method to loosen the soil is by incorporating organic matter. Organic matter such as compost, well-rotted manure, or leaf mold can improve soil structure and promote better drainage. Spread a layer of organic matter over the exposed soil and use a garden fork or a tiller to work it into the top several inches of the soil. This process not only loosens the soil but also enriches it with essential nutrients.
By loosening the soil, you create a friable and well-aerated environment where plant roots can easily penetrate and access nutrients. This step is crucial in ensuring that your plants have the optimal conditions for healthy growth and development.
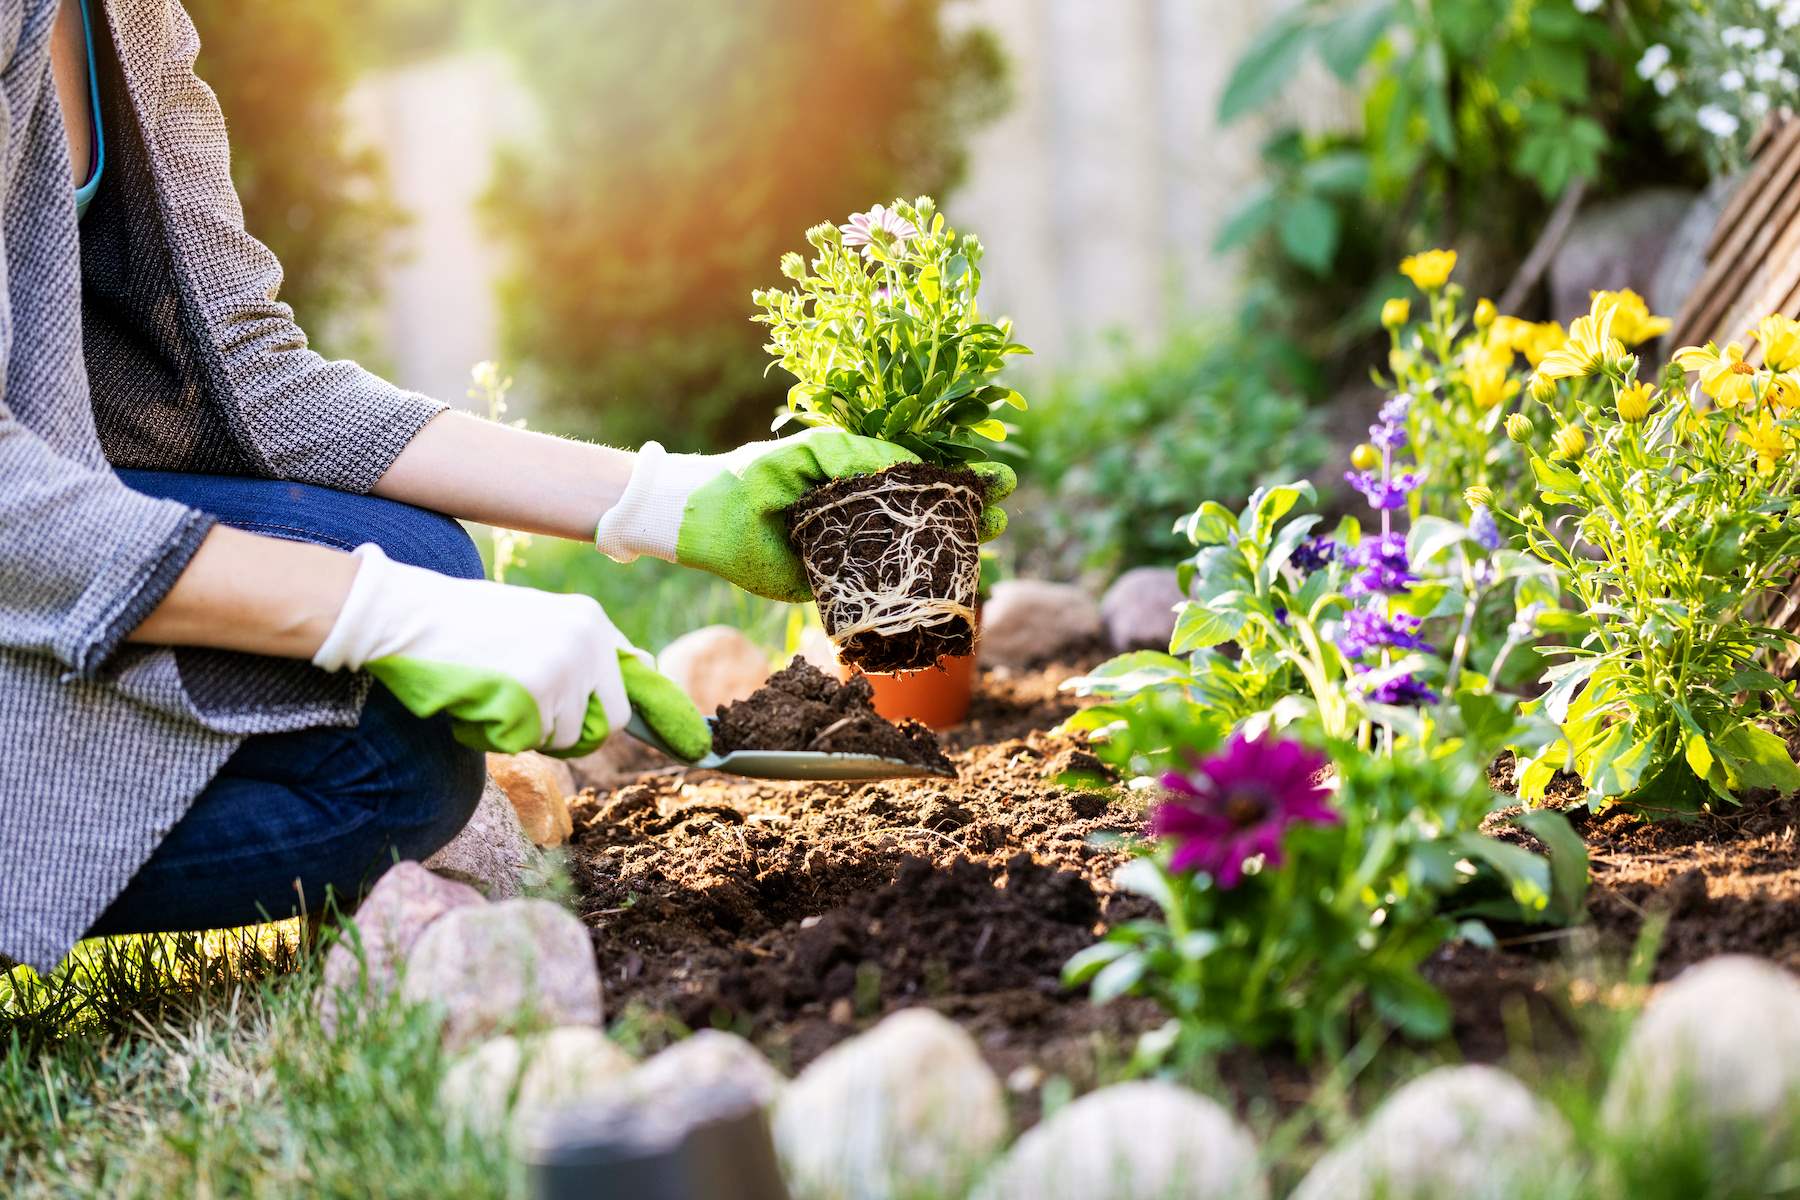
Adding Organic Matter
Adding organic matter to your soil is a crucial step in preparing the ground for planting. Organic matter improves soil structure, enhances nutrient availability, promotes beneficial microbial activity, and increases water retention.
There are several types of organic matter that you can incorporate into your soil, such as compost, well-rotted manure, leaf mold, or shredded organic materials like straw or hay. These materials provide essential nutrients, improve soil texture, and encourage the growth of beneficial soil organisms.
Start by applying a layer of organic matter to the surface of your soil. Aim for a thickness of about 2 to 3 inches. Spread the organic matter evenly across the area where you plan to plant, taking care to avoid piling it against the plant stems or crowns.
Next, use a garden fork or a tiller to work the organic matter into the soil. Incorporate it to a depth of about 6 to 8 inches, ensuring that it is evenly mixed throughout the soil. This helps improve the soil’s structure, allowing for better root penetration and nutrient absorption.
In addition to improving soil structure, organic matter also acts as a reservoir for water and nutrients. It helps retain moisture in the soil, ensuring that plants have access to water during dry periods. Organic matter also serves as a slow-release source of nutrients, gradually breaking down and releasing essential elements for plant growth.
While adding organic matter is beneficial for most soil types, it is especially important for sandy soils. Sandy soils have large particles that drain quickly and have low nutrient and water-holding capacity. By incorporating organic matter into sandy soils, you can increase their water retention and nutrient-holding capabilities.
Keep in mind that the amount of organic matter needed may vary depending on your soil type and the specific needs of your plants. Regularly adding organic matter, such as compost, to your soil over time will continue to improve its fertility and overall health.
By adding organic matter, you enrich your soil with essential nutrients, improve its structure, and create a favorable environment for plant growth. This step is a crucial component of soil preparation, ensuring that your plants have the necessary resources for optimal health and productivity.
Improving Drainage
Good soil drainage is essential for the overall health and success of your plants. Improper drainage can lead to waterlogged soil, which can suffocate plant roots and promote the growth of diseases. By taking steps to improve drainage, you can create an ideal environment for your plants to thrive.
The first step in improving drainage is to assess the current condition of your soil. As mentioned earlier, soil texture plays a significant role in drainage. Sandy soils tend to drain quickly, while clayey soils retain water for longer periods. If you have clayey soil that drains poorly, it can be beneficial to consider soil amendments to improve drainage.
One method to improve drainage is to incorporate organic matter into the soil. As discussed in the previous section, organic matter helps improve soil structure, allowing for better water movement. The addition of compost or well-rotted manure helps loosen compacted soil, creating spaces for water to drain away more effectively.
Another technique to enhance drainage is to create raised beds or mounds for planting. By elevating the planting area, you can prevent water from pooling around the plant roots. Raised beds also allow excess water to drain more efficiently, particularly if the surrounding soil has poor drainage.
If your garden area has consistently poor drainage, you may need to consider installing a drainage system. This can involve constructing French drains, installing perforated pipes, or building ditches to redirect excess water away from the planting area. Consulting with a professional landscaper or drainage expert can help you determine the best approach for your specific situation.
Furthermore, incorporating inorganic materials, such as perlite or sand, into the soil can also improve drainage. These materials help to increase air space in the soil, allowing water to flow more freely. However, it’s important to note that excessive amounts of sand can lead to excessively fast drainage, potentially causing nutrient leaching.
Regularly monitoring and adjusting your watering practices can also contribute to better soil drainage. Avoid overwatering, which can lead to waterlogged soil. Instead, ensure that you water deeply but infrequently, allowing the soil to dry out between watering sessions.
By improving drainage, you create an environment where plant roots can thrive. Adequate drainage prevents water-related issues and allows plants to access the essential oxygen they need for healthy growth. Taking steps to optimize drainage will greatly enhance the success of your garden and minimize the risk of plant diseases and root rot.
Adjusting pH Levels
The pH level of your soil plays a crucial role in determining plant health and nutrient availability. pH is a measure of how acidic or alkaline the soil is, and different plants have specific pH preferences. By adjusting the pH level of your soil to match the requirements of your plants, you can create an optimal growing environment.
To determine the pH level of your soil, you can use a soil testing kit or send a soil sample to a laboratory for analysis. The pH scale ranges from 0 to 14, with 7 being neutral. A pH below 7 indicates acidic soil, while a pH above 7 indicates alkaline soil.
Most plants prefer slightly acidic to neutral soil with a pH range of 6 to 7. However, certain plants, such as blueberries or azaleas, prefer more acidic conditions with a lower pH range of 4.5 to 5.5, while others, like lavender or lilacs, thrive in slightly alkaline soil with a pH range of 7.5 to 8.5.
If your soil pH is outside the desired range for your plants, there are several ways to adjust it. To lower the pH for acidic-loving plants, you can incorporate organic matter, such as composted leaves, pine needles, or elemental sulfur into the soil. These materials will gradually lower the pH level over time. Follow the recommended application rates and guidelines for the specific organic matter you are using.
To raise the pH for plants that prefer alkaline soil, you can incorporate lime or wood ash into the soil. Lime increases the soil’s alkalinity by neutralizing excess acidity. However, it’s essential to follow the recommended application rates and guidelines for the specific type of lime you are using, as over-liming can raise the pH too much.
It’s important to note that adjusting pH levels is not an instant process and may take time. Monitor the pH level regularly and make adjustments as needed each season. Gradual changes are preferable to avoid stressing plants or causing abrupt pH fluctuations.
It’s also important to consider the long-term effects of your adjustments. Some plants may tolerate a slightly different pH than their preferred range, and drastic pH changes can disrupt the soil ecosystem and impact beneficial soil microorganisms. Strive for a balance that meets the needs of your plants while maintaining the overall health of the soil.
By adjusting the pH level of your soil to match the preferences of your plants, you provide them with the optimal conditions for growth. Balanced pH levels promote nutrient availability, enhance root development, and reduce the risk of nutrient deficiencies or toxicities. Take the time to adjust the pH of your soil, and your plants will reward you with vibrant growth and abundant harvests.
Amending with Fertilizer
Amending your soil with fertilizer is an effective way to provide essential nutrients to your plants and ensure their healthy growth. Fertilizers supplement the soil’s nutrient content, replenishing any deficiencies and promoting optimal plant development.
Before applying fertilizers, it’s crucial to identify the specific nutrient requirements of your plants. Different plants have different nutrient needs, and understanding these requirements will help you choose the right fertilizer formulation. Fertilizers typically contain three primary nutrients: nitrogen (N), phosphorus (P), and potassium (K), commonly referred to as NPK.
Nitrogen is essential for promoting vegetative growth, phosphorus supports root development and flowering, while potassium improves overall plant health, disease resistance, and fruit production.
You can determine the nutrient levels in your soil by conducting a soil test, as mentioned earlier. The test results will guide you in selecting the appropriate fertilizer and making informed decisions about nutrient amendments.
When applying fertilizer, it’s important to follow the instructions and recommended rates specified on the package. Applying too much fertilizer can be harmful to plants, leading to burnt roots or leaching of nutrients into water sources. It’s best to err on the side of caution and apply fertilizers in moderation.
There are different types of fertilizers available, including granular, liquid, and slow-release formulations. Granular fertilizers are often applied before planting or as a top dressing around established plants. They release nutrients slowly over time. Liquid fertilizers are applied as a liquid solution, either by foliar spraying or through irrigation systems, providing a quick nutrient boost. Slow-release fertilizers are formulated to release nutrients gradually, providing a continuous supply of nutrients over an extended period.
In addition to synthetic fertilizers, organic alternatives, such as compost or well-rotted manure, can also be used to amend the soil. Organic fertilizers add organic matter to the soil and provide a slow-release source of nutrients as they break down. They are often favored by gardeners seeking to improve soil health and minimize the use of synthetic chemicals.
It’s important to note that fertilizers should be applied at the appropriate times during the growing season. Generally, fertilizers are applied before planting, at the onset of growth, during periods of active growth, and when plants require an extra nutrient boost.
Regularly monitoring your plants for signs of nutrient deficiencies, such as yellowing leaves or stunted growth, can help indicate when additional fertilization is needed. Adjusting the fertilizer application based on your plants’ needs ensures they receive the proper balance of nutrients for optimal growth and productivity.
By amending your soil with the right fertilizers, you provide your plants with the necessary nutrients for vigorous growth, improved disease resistance, abundant blooms, and fruitful harvests. Understanding your plants’ nutritional requirements and applying fertilizers judiciously will contribute to their overall health and vitality.
Testing and Adjusting Soil Nutrients
Testing and adjusting the nutrient levels in your soil is an important aspect of preparing the ground for planting. By understanding the nutrient content of your soil, you can make informed decisions about fertilization and ensure that your plants receive the essential elements they need for optimal growth and productivity.
There are various methods available for testing soil nutrients. One common approach is to use a DIY soil test kit that provides instant results for key nutrients such as nitrogen (N), phosphorus (P), potassium (K), and pH level. These kits are convenient and can be used on-site to give you a general understanding of your soil’s nutrient status.
For a more comprehensive analysis, you can send a soil sample to a laboratory for professional testing. Soil testing laboratories provide detailed reports that include information about nutrient levels, soil pH, organic matter content, and recommendations for specific nutrient amendments.
Once you have the soil test results, you can assess which nutrients are deficient or in excess in your soil. Nutrient deficiencies can lead to stunted growth, yellowing leaves, and poor flowering or fruiting, while excess nutrients can also cause imbalances and result in plant toxicity.
Based on the test results, you can adjust the nutrient levels in your soil by applying specific fertilizers or soil amendments. For example, if your soil lacks nitrogen, you can apply a nitrogen-rich fertilizer to provide the necessary nutrient. Similarly, if phosphorus levels are low, phosphorus-containing fertilizers can be used to improve the availability of this nutrient.
It’s important to consider not only macronutrients like nitrogen, phosphorus, and potassium but also micronutrients such as iron, manganese, and zinc, which are essential for plant growth but required in smaller quantities. Some soil test reports will include micronutrient recommendations, or you can consult with gardening experts to determine the best approach to address any deficiencies.
While the soil test results provide valuable insights, it’s important to approach fertilization and nutrient adjustments with care. Applying too much fertilizer can lead to nutrient imbalances, environmental pollution, and plant stress. Always adhere to the recommended application rates and follow the instructions provided by the fertilizer manufacturer or soil testing laboratory.
Regular monitoring of your plants’ health and growth can also provide indications of nutrient deficiencies or excesses. Look for signs such as leaf discoloration, poor growth, or abnormal flowering, and use this information as a guide for adjusting your soil nutrient levels.
By testing and adjusting soil nutrients, you ensure that your plants have access to the right balance of essential elements. This allows them to develop strong roots, lush foliage, vibrant flowers, and abundant harvests. Understanding your soil’s nutrient content and making informed adjustments will contribute to the overall success of your garden.
Final Soil Preparation Steps
After assessing and addressing the various aspects of soil preparation, there are a few final steps to ensure that your ground soil is fully prepared for planting. These steps will help create an optimal environment for your plants, setting the stage for successful growth and development.
The first final step is to level the soil surface. Smooth out any bumps, lumps, or uneven areas to provide a uniform planting bed. This ensures that water flows evenly and prevents pooling in certain areas. You can use a rake or gardening tool to level the soil, making it even and consistent.
Next, it’s recommended to add a layer of mulch to the soil surface. Mulch acts as a protective barrier, reducing weed growth, conserving moisture, and moderating soil temperatures. Organic mulches, such as wood chips, straw, or shredded leaves, are commonly used. Spread a layer of mulch around your plants, avoiding direct contact with the stems to prevent rot or pest issues.
Watering the soil thoroughly is an important step in soil preparation. Before planting, ensure that the soil is moist and has good moisture penetration. Irrigate the area evenly, allowing the water to reach the root zone. Adequate moisture is essential for seed germination and root establishment.
If you are planning to install an irrigation system, such as drip irrigation or soaker hoses, it is ideal to set up the system before planting. This ensures consistent and efficient watering throughout the growing season, reducing the risk of over or under watering.
Lastly, it’s time to plan and lay out your plantings. Consider the desired spacing between plants to allow for proper airflow and growth. Follow the planting instructions for each specific plant, taking into account their sun exposure requirements, mature size, and any companion planting recommendations.
By carefully following these final soil preparation steps, you ensure that your ground soil is well-prepared and optimized for planting success. Leveling the surface, adding mulch, watering adequately, and planning your plantings contribute to creating a favorable environment for healthy and thriving plants.
Conclusion
Properly preparing the ground soil for planting is a crucial step in ensuring healthy plant growth and a productive garden. By assessing your soil’s condition, removing weeds and debris, improving drainage, adjusting pH levels, adding organic matter, and amending with fertilizers, you can create an optimal environment for your plants.
Assessing your soil provides valuable insights into its texture, drainage, pH levels, and nutrient content. This knowledge allows you to make informed decisions regarding soil amendments and adjustments tailored to meet the specific needs of your plants.
Removing weeds and debris eliminates competition for resources and creates a clean foundation for your plants to thrive. Loosening the soil improves its structure and promotes better root penetration and nutrient absorption. Adding organic matter enriches the soil with essential nutrients, improves its moisture retention, and enhances overall soil health.
Improving drainage ensures that excess water drains away, preventing waterlogging and oxygen deprivation to plant roots. Adjusting pH levels to match your plants’ preferences promotes optimal nutrient availability and uptake.
Amending the soil with the right fertilizers supplements its nutrient content, providing the necessary elements for robust growth and development. Testing and adjusting soil nutrients help to maintain a balanced nutrient profile and prevent deficiencies or toxicities.
Finally, the final soil preparation steps involve leveling the soil surface, adding mulch, watering adequately, and planning your plantings. These steps create a well-prepared and optimal environment for your plants to thrive.
By implementing these soil preparation techniques, you set the stage for a vibrant and successful garden. Your plants will have the best chance of establishing healthy roots, obtaining the nutrients they need, and flourishing throughout the growing season. Remember to regularly monitor your plants, making any necessary adjustments and providing ongoing care to ensure their continued health and vitality.
So, roll up your sleeves, get your gardening tools ready, and embark on the journey of soil preparation. Your efforts will be rewarded with a bountiful and beautiful garden that you can enjoy and take pride in for years to come.