Home>Gardening News and Trends>Latest News>How To Plant Vegetables In Raised Beds
Latest News
How To Plant Vegetables In Raised Beds
Modified: February 8, 2024
Learn the latest news on how to plant vegetables in raised beds. Discover expert tips and techniques for successful gardening in small spaces.
(Many of the links in this article redirect to a specific reviewed product. Your purchase of these products through affiliate links helps to generate commission for Chicagolandgardening.com, at no extra cost. Learn more)
Table of Contents
- Introduction
- Benefits of Raised Bed Gardening
- Choosing the Right Location for Raised Beds
- Selecting the Vegetables to Grow
- Preparing the Soil
- Building and Filling the Raised Beds
- Planting the Vegetables
- Watering and Fertilizing
- Mulching and Weed Control
- Pest and Disease Management
- Harvesting and Maintenance
- Conclusion
Introduction
Welcome to the world of raised bed gardening! If you’re looking to grow your own delicious and nutritious vegetables, but have limited space or poor soil quality, raised bed gardening is the perfect solution. With raised beds, you can create a customized garden area that is elevated and filled with high-quality soil, allowing for optimal plant growth and yield.
Raised bed gardening has gained popularity in recent years due to its numerous benefits. Not only does it provide an efficient use of space, but it also offers better control over soil conditions, improved drainage, and easier access for planting, watering, and harvesting. Whether you’re a beginner or a seasoned gardener, this method is suitable for everyone.
In this article, we will explore the various aspects of planting vegetables in raised beds. From selecting the right location to choosing the vegetables to grow, preparing the soil, building and filling the raised beds, to watering, fertilizing, and pest management, we’ll cover everything you need to know to create a thriving vegetable garden.
By following the tips and techniques provided here, you’ll be able to cultivate your own healthy and sustainable food source, while enjoying the therapeutic benefits of gardening. So, let’s get started and embark on an exciting journey of growing vegetables in raised beds!
Benefits of Raised Bed Gardening
Raised bed gardening offers numerous advantages that make it a popular choice for both experienced gardeners and beginners. Let’s explore some of the key benefits:
1. Optimal Soil Conditions: One of the biggest advantages of raised bed gardening is the ability to control and customize the soil quality. By filling the raised beds with a well-draining, nutrient-rich soil mix, you can create the perfect growing environment for your vegetables. This is especially beneficial if your natural soil is heavy clay or lacks essential nutrients.
2. Improved Drainage: Raised beds offer excellent drainage, preventing water from pooling around the plant roots and causing root rot. This is particularly valuable in areas with heavy rainfall, as excess water can be easily drained away through the raised bed, allowing the plants to thrive.
3. Reduced Weed Growth: Raised beds help to minimize weed growth, as they create a barrier between the garden soil and surrounding areas. With less competition from weeds, the vegetables have a greater chance to flourish and receive the nutrients they need without unnecessary competition.
4. Better Pest Control: Raised beds make it easier to manage pests and diseases. By elevating the garden space, you can create a physical barrier that deters pests such as slugs, snails, and rabbits. Additionally, it is easier to spot and remove any unwanted visitors or signs of disease in a raised bed.
5. Increased Productivity: The improved soil conditions, proper drainage, and controlled environment of raised beds promote healthy plant growth, resulting in higher yields. With raised beds, you can optimize the use of space by planting more plants closer together without the risk of overcrowding, maximizing your vegetable production.
6. Easier Access and Maintenance: The elevated height of raised beds reduces the need for bending or kneeling, making it more accessible and comfortable for people with mobility issues. It also makes tasks such as planting, watering, and harvesting more convenient. Additionally, raised beds are easier to maintain as they require less weeding and have improved soil structure.
7. Extended Growing Season: Raised beds warm up faster in the spring and stay warmer in the fall, allowing for an extended growing season. This is particularly beneficial for cool-season crops or in regions with shorter growing seasons, as it provides more time to enjoy fresh homegrown vegetables.
Overall, raised bed gardening provides excellent control over the growing conditions, enhances productivity, simplifies maintenance, and offers a range of benefits that make it a preferred choice for vegetable gardening. With these advantages, you can create a thriving and bountiful garden, right in your own backyard!
Choosing the Right Location for Raised Beds
Choosing the right location for your raised beds is crucial for the success of your vegetable garden. Here are some factors to consider when selecting the perfect spot:
1. Sunlight: Most vegetables require at least 6-8 hours of direct sunlight each day to grow and produce well. Therefore, choose a location that receives ample sunlight throughout the day. Avoid areas shaded by trees or buildings that can hinder the growth of your plants.
2. Accessibility: Select a location that is easily accessible for planting, watering, and harvesting. Consider the proximity to your water source, as well as your ability to reach all parts of the raised beds comfortably. This is especially important if you have physical limitations or intend to use gardening tools, such as wheelbarrows or carts, to move soil or plants.
3. Soil Drainage: Ensure that the chosen area has good soil drainage. Avoid low-lying areas or places prone to waterlogging, as excess moisture can drown plant roots and lead to fungal diseases. Raised beds can help improve drainage in areas with poor soil conditions.
4. Proximity to Water: It is essential to have easy access to a water source for irrigation. Choose a location that is within reach of your garden hose or irrigation system. This will help ensure that your plants receive adequate water without excessive effort.
5. Protection from Wind: Strong winds can damage plants and dry out the soil quickly. Consider locating your raised beds in an area that is shielded from strong winds. If necessary, you can create windbreaks using fences, hedges, or tall plants to protect your vegetables.
6. Convenience: Consider the proximity of the raised beds to your home. Having your vegetable garden close to your kitchen makes it more convenient to harvest fresh produce for meals and encourages regular maintenance. It also allows you to keep a closer eye on your plants for any signs of pests or diseases.
7. Space Available: Assess the available space in your yard and choose the appropriate size for your raised beds. Consider the dimensions of the area and plan accordingly. Remember to leave enough space between individual beds for easy maneuvering and potential future expansion.
By taking into account these factors, you can select an ideal location for your raised beds. Remember, the success of your vegetable garden depends on the right combination of sunlight, accessibility, drainage, and protection. Once you’ve chosen the location, you can move on to the next steps of preparing the soil and building the raised beds.
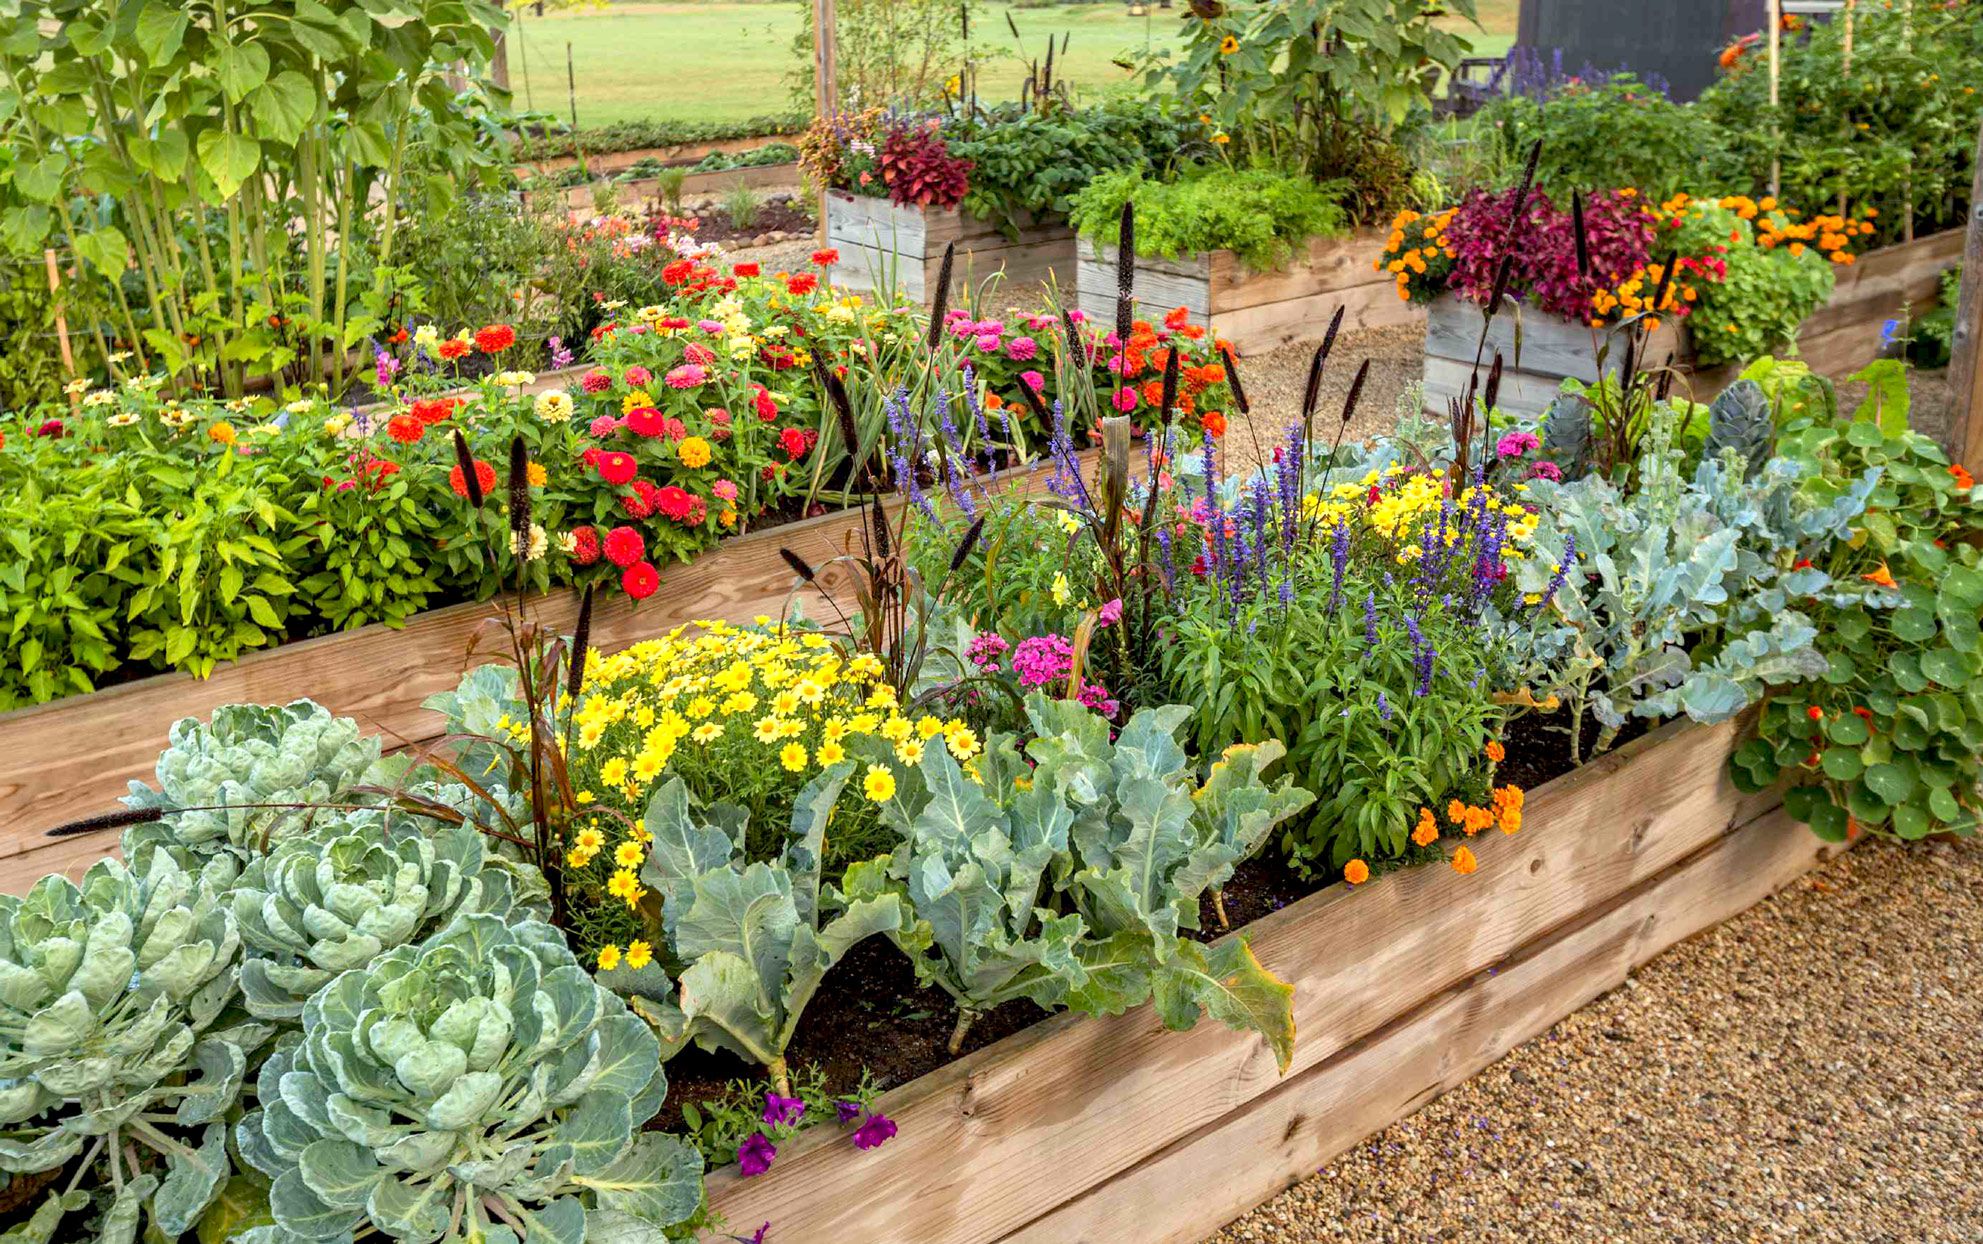
Selecting the Vegetables to Grow
Choosing which vegetables to grow in your raised beds is an exciting and important decision. Consider the following factors to help you select the best vegetables for your garden:
1. Climate: Take into account the climate and growing conditions of your region. Determine whether you have a cool-season or warm-season climate or a combination of both. Select vegetables that are well-suited to your climate, as they will be more likely to thrive and produce a bountiful harvest.
2. Space and Size: Consider the size and space available in your raised beds. Some vegetables, such as lettuce, radishes, and herbs, require less space and can be planted closer together. On the other hand, plants like tomatoes, squash, and cucumbers need more room to grow and spread. Plan accordingly to maximize the use of your raised beds.
3. Family Preferences: Discuss with your family their favorite vegetables and incorporate their input into your selection. Growing vegetables that your family enjoys will make the gardening experience more enjoyable and rewarding.
4. Growing Difficulty: Consider your level of gardening experience and the time you can dedicate to maintenance. Some vegetables, like lettuce and radishes, are easy to grow and have a short maturity time. Others, such as tomatoes and peppers, require more care and attention. Select a mix of vegetables that align with your gardening skills and available time.
5. Succession Planting: Plan for succession planting, which involves planting different vegetables at staggered intervals to prolong the harvest season. This allows you to enjoy a continuous supply of fresh produce. Choose vegetables with varying maturity times to ensure a steady harvest throughout the growing season.
6. Companion Planting: Consider companion planting, where certain plants are grown together to enhance growth and repel pests. For example, planting marigolds alongside tomatoes can help deter pests like aphids and whiteflies. Research companion planting techniques to maximize the benefits and yields of your vegetable garden.
7. Variety: Include a mix of vegetables to add diversity and flavor to your harvest. Choose a variety of leafy greens, root vegetables, vine crops, and fruiting plants to create a well-rounded vegetable garden. Experiment with heirloom varieties for unique flavors and colors.
8. Seasonal Availability: Take into account the seasonal availability of vegetables. Some vegetables, like lettuce and spinach, thrive in cooler temperatures, while others, such as tomatoes and peppers, prefer warmer conditions. Plan your planting schedule accordingly to optimize growth and harvest times.
Remember to read seed packets or plant labels for specific growing requirements and recommendations. Consider your personal preferences, dietary needs, and gardening goals when selecting the vegetables for your raised beds. This hands-on experience is both fun and rewarding, allowing you to savor the taste of homegrown, organic vegetables straight from your own garden!
Preparing the Soil
Preparing the soil is a crucial step in creating a healthy and thriving vegetable garden in your raised beds. Here are some important steps to follow:
1. Remove Weeds: Start by clearing the area of any existing weeds or vegetation to prevent competition for nutrients and space. Pull out weeds by hand or use a garden fork or hoe to loosen and remove them.
2. Loosen the Soil: Use a garden fork or tiller to loosen the soil in the raised beds. This helps improve aeration and drainage. Avoid over-tilling, as it can disrupt the soil structure and beneficial organisms.
3. Amend the Soil: Test the soil pH and fertility levels using a soil testing kit, available at garden centers. Make any necessary adjustments by adding organic matter or soil amendments. Organic matter, such as compost, well-rotted manure, or leaf mold, helps improve soil structure, fertility, and moisture retention.
4. Work in Compost: Incorporate a generous amount of compost into the top few inches of the soil in your raised beds. This helps enrich the soil with essential nutrients and improves its overall quality.
5. Level the Soil: Use a rake or gardening tool to level the soil surface in the raised beds. This ensures even moisture distribution and provides a flat surface for planting.
6. Consider Soil Mulching: Apply a layer of organic mulch, such as straw or wood chips, to help suppress weeds, conserve moisture, and regulate soil temperature. Mulching also provides a slow release of nutrients as it breaks down.
7. Allow the Soil to Settle: Give the amended soil some time to settle before planting. This allows the organic matter to decompose, nutrients to become available, and soil moisture levels to stabilize.
8. Consider Raised Bed Liners: If using wood or other materials that may deteriorate over time, consider lining the raised beds with a geotextile fabric or plastic liner. This can help prevent soil erosion and increase the lifespan of the beds.
Remember, maintaining good soil structure and fertility is an ongoing process. Regularly add organic matter, such as compost, to replenish nutrients and improve soil health. Additionally, practicing crop rotation and cover cropping can further enhance soil fertility and reduce the risk of disease and pest buildup.
By taking the time to prepare the soil properly, you lay the foundation for a productive and thriving vegetable garden in your raised beds. Invest in your soil health, and you’ll reap the rewards with abundant harvests year after year!
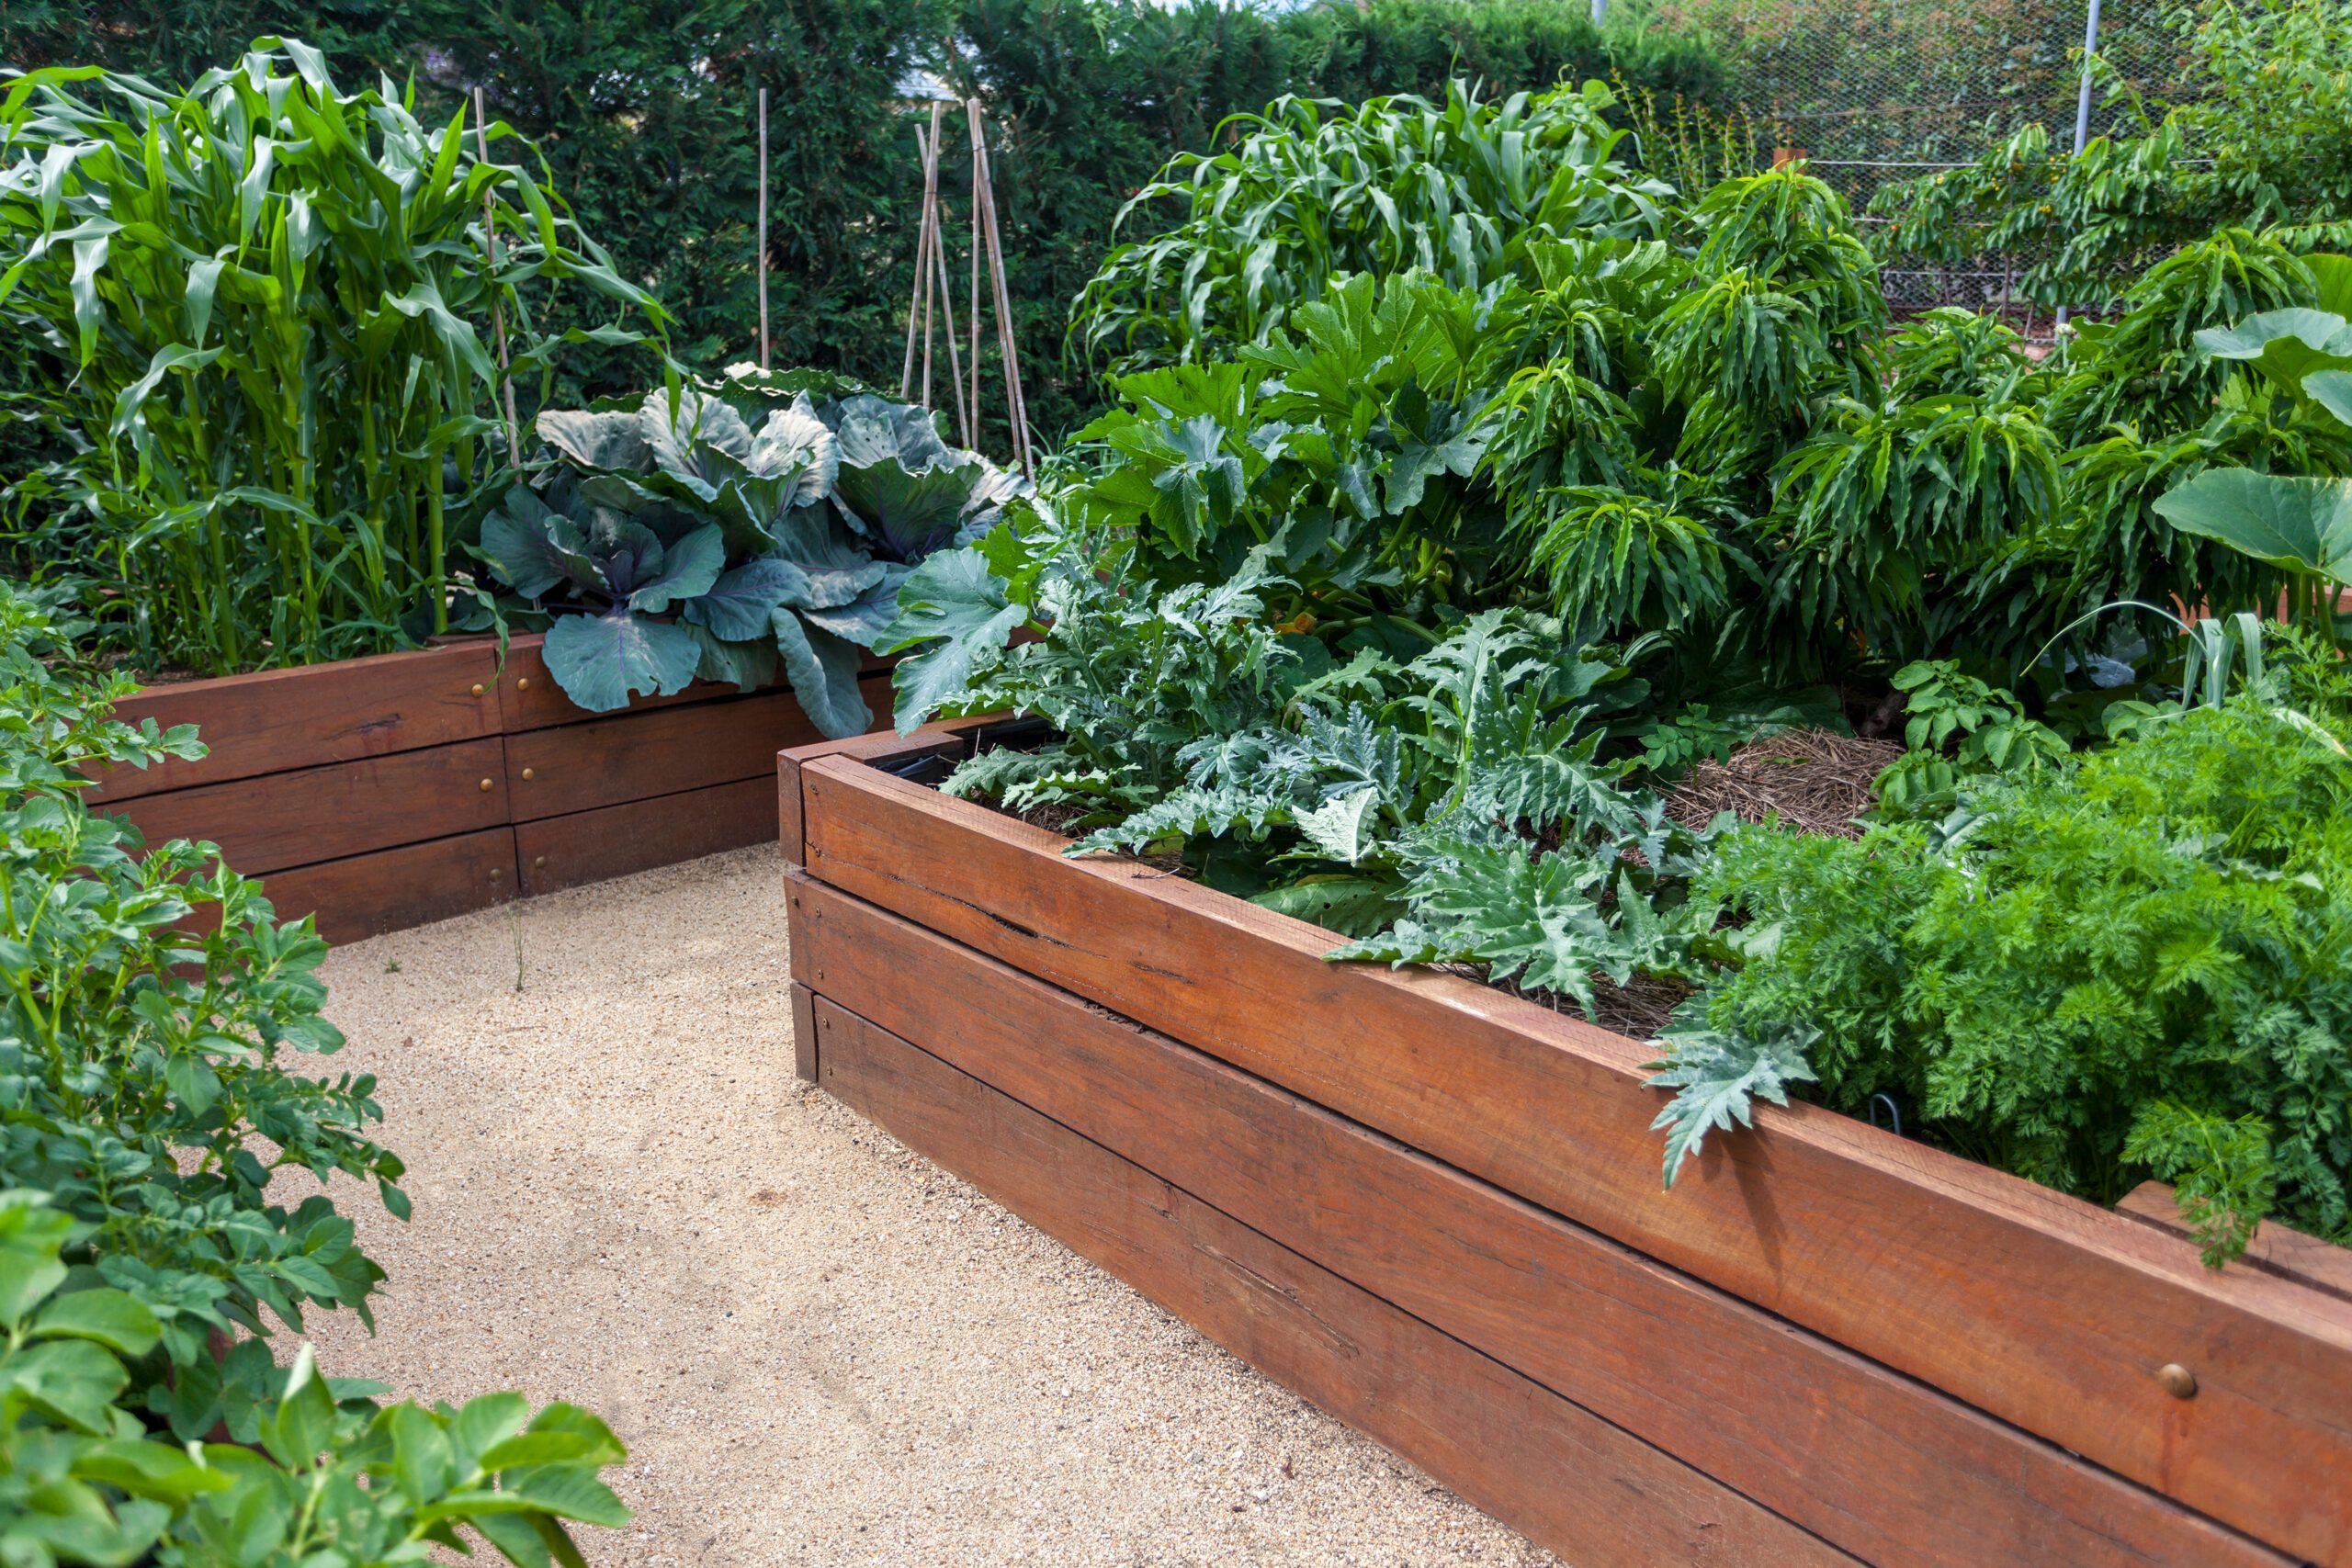
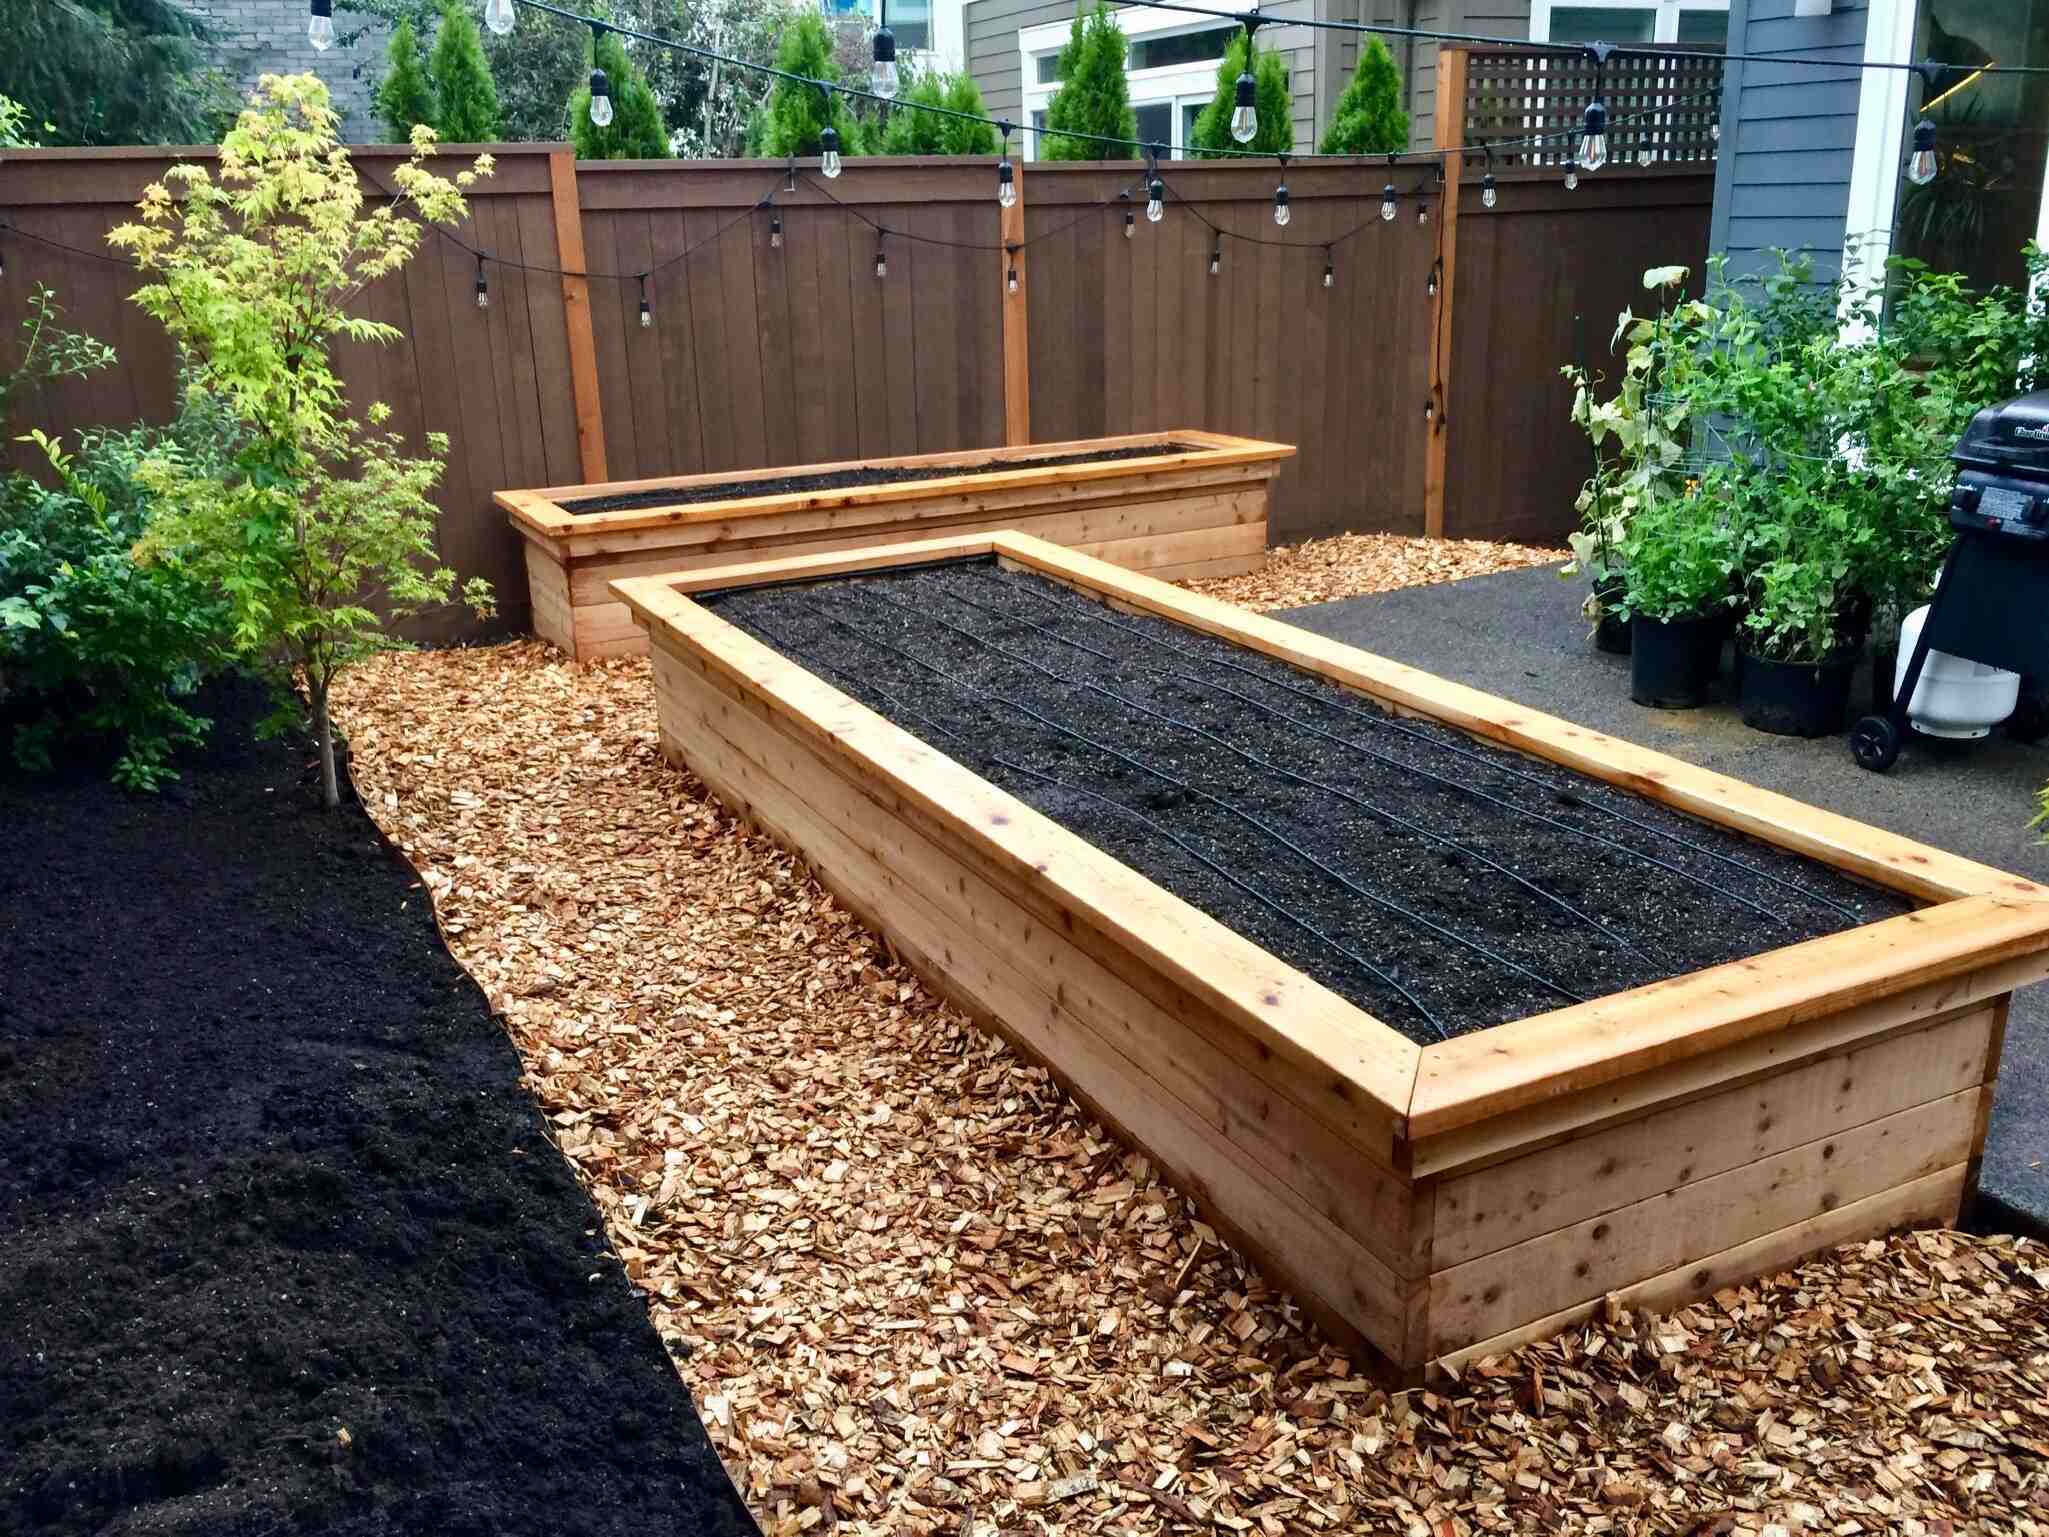
Building and Filling the Raised Beds
Building and filling the raised beds is the next step in creating your vegetable garden. Follow these steps to ensure a sturdy and well-prepared growing space:
1. Choose the Right Material: Select a suitable material for your raised beds, such as wood, cinder blocks, or bricks. Wood is a popular choice due to its affordability and availability. Make sure the material is untreated and safe for growing food.
2. Determine the Size and Height: Decide on the size and height of your raised beds based on your available space and gardening needs. Aim for a width of around 3-4 feet, as this allows easy access to plants from all sides. A height of 12-18 inches is generally sufficient, but it can vary depending on your preferences and physical abilities.
3. Construct the Frame: Assemble the materials to build the raised bed frame. Use durable screws or nails to secure the corners and sides, ensuring stability. If using wood, consider using rot-resistant varieties like cedar or redwood for longevity.
4. Add a Bottom Layer: Depending on your preference, you can add a layer of landscape fabric or cardboard at the bottom of the raised bed to prevent weed growth from underneath. This step is optional but can help minimize weed competition.
5. Fill the Raised Beds: Fill the raised beds with a high-quality soil mix. Use a combination of garden soil, compost, and other organic materials like peat moss or coco coir. This ensures a nutrient-rich and well-draining soil environment that will promote healthy plant growth.
6. Level and Compact the Soil: After filling the raised beds, use a rake or gardening tool to level the soil surface. Lightly compact the soil to eliminate any air pockets and create a stable planting surface.
7. Consider Raised Bed Covers: If you live in an area with harsh weather conditions or frequent pest issues, consider installing raised bed covers. These can be made of materials like netting or plastic, providing protection from pests, extreme temperatures, and heavy rain.
8. Allow the Soil to Settle: Let the soil settle for a few days before planting to allow for any compaction that may occur. Replenish the soil if it settles significantly.
Remember to provide adequate drainage by punching small drainage holes or adding a layer of gravel at the bottom of the raised beds. This helps prevent waterlogging and ensures healthy root development.
Building and filling the raised beds is an exciting and vital step in creating your vegetable garden. By constructing a sturdy and well-filled raised bed, you set the stage for a successful gardening experience, creating an optimal environment for your plants to flourish and thrive.
Planting the Vegetables
Now that you’ve prepared your raised beds, it’s time to start planting your vegetables. Follow these guidelines for successful planting:
1. Plan Your Layout: Before planting, plan your layout by taking into consideration the size, spacing, and growth habits of the vegetables you have chosen. Group plants with similar sun, water, and nutrient requirements together for easier maintenance and efficient use of space.
2. Read Seed Packets or Plant Labels: Refer to the information provided on seed packets or plant labels for specific planting instructions, including recommended planting depth, spacing, and days to maturity. This will ensure proper germination and growth.
3. Start with Transplants or Seeds: Decide whether to start with transplants or sow seeds directly into the raised beds. Transplants are pre-grown plants that offer a head start and can be purchased from nurseries or started indoors. Seeds, on the other hand, offer a wider variety of vegetables to choose from and can be sown directly into the soil.
4. Prepare Planting Holes or Rows: Dig planting holes or create rows for your selected vegetables, following the recommended spacing guidelines. The spacing will vary depending on the specific vegetable, so ensure you have enough room for the plants to grow and receive adequate sunlight and nutrients.
5. Transplant Carefully: If using transplants, gently loosen the roots and place them in the planting holes at the appropriate depth. Fill the holes with soil, firming it around the base of the plant to ensure good root-to-soil contact.
6. Sow Seeds Correctly: If sowing seeds directly, follow the recommended sowing depth and spacing for each vegetable. Cover the seeds with soil and lightly pat them to ensure good soil contact.
7. Water Thoroughly: After planting, thoroughly water the raised beds to settle the soil and provide moisture for the newly planted vegetables. Maintain consistent moisture throughout the germination and initial growth stages.
8. Maintain Care: Care for your vegetables by providing regular watering, appropriate sunlight exposure, and adequate nutrients. Consider using organic fertilizers or compost tea to support healthy growth.
9. Consider Staking or Trellising: Some vegetables, such as tomatoes, peas, and cucumbers, may require staking or trellising for support as they grow. Install stakes or trellises early to avoid damaging the plants later on.
10. Monitor and Adjust: Regularly monitor your plants for signs of pests, diseases, or nutrient deficiencies. Make any necessary adjustments to ensure the health and productivity of your vegetable garden.
Remember that different vegetables have different requirements, so it’s essential to research each specific vegetable’s needs. As the growing season progresses, continue to sow seeds or transplant new vegetables to promote a continuous harvest throughout the year.
By following these planting guidelines, you’ll be on your way to a bountiful and diverse vegetable garden in your raised beds. Enjoy the satisfaction of seeing your plants grow and produce delicious homegrown vegetables!
Watering and Fertilizing
Proper watering and fertilizing are essential for the health and productivity of your vegetables in raised beds. Follow these guidelines to ensure optimal growth and yield:
1. Watering:
– Consistent Moisture: Keep the soil consistently moist, but not waterlogged. Most vegetables prefer regular watering rather than dry spells followed by heavy watering. Use your finger or a moisture meter to check the soil moisture level before watering.
– Deep Watering: Water deeply, ensuring that the water penetrates the root zone. Shallow watering can lead to shallow root growth and weaker plants. Aim to wet the soil to a depth of 6-8 inches.
– Time of Day: Water in the morning to allow excess moisture on the foliage to dry before evening, reducing the risk of fungal diseases. Avoid watering during the hottest part of the day when water can evaporate quickly.
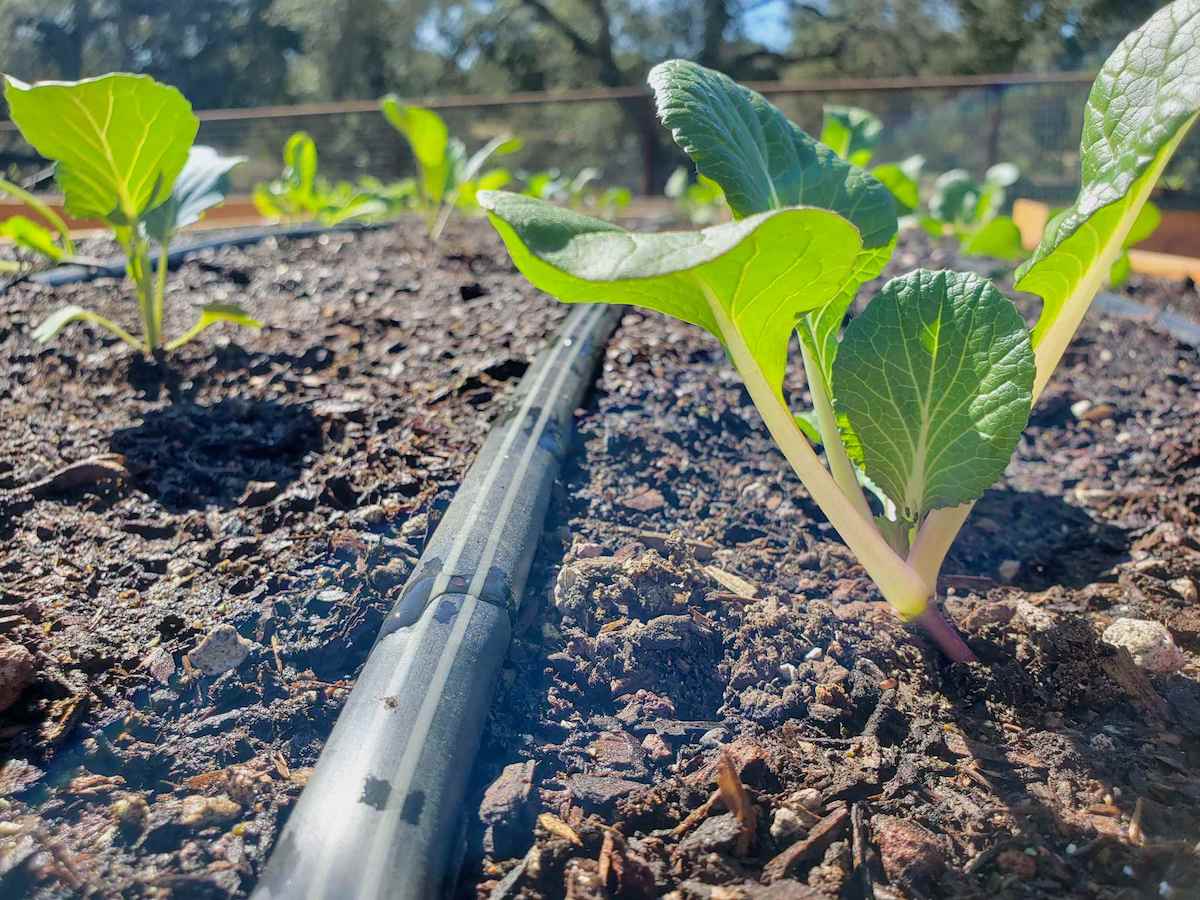
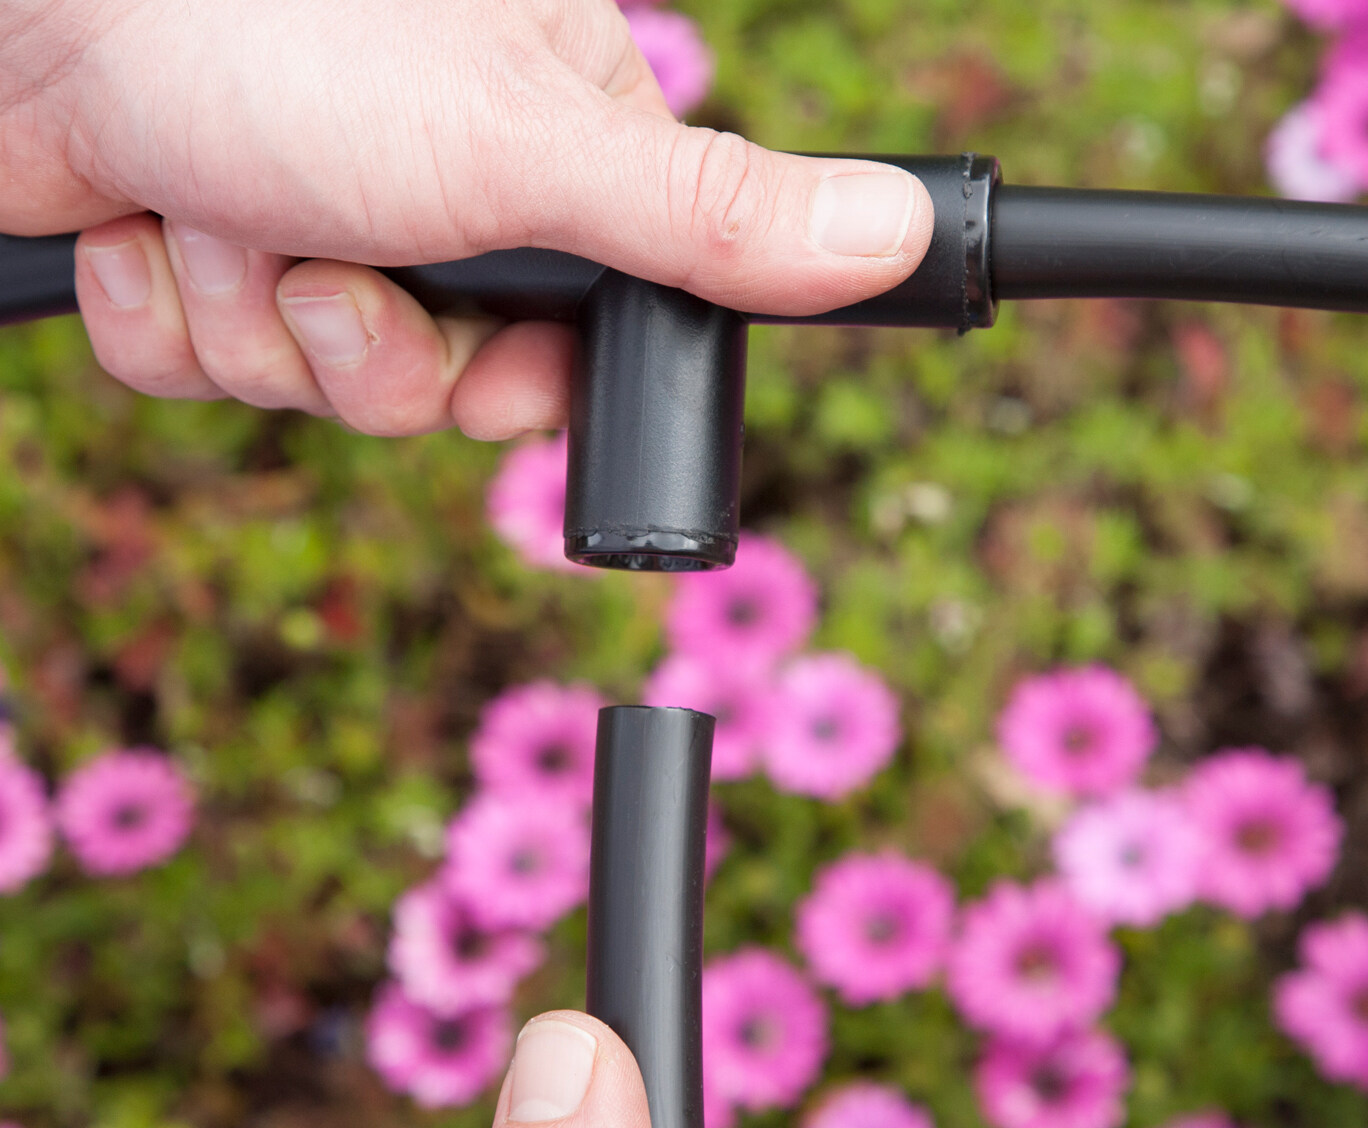
– Drip Irrigation or Soaker Hoses: Consider using drip irrigation or soaker hoses in raised beds for efficient and targeted watering. These methods deliver water directly to the soil, minimizing evaporation and reducing the risk of fungal diseases.
2. Fertilizing:
– Organic Matter: Prioritize incorporating organic matter, such as compost or well-rotted manure, into the soil before planting. This provides a slow release of nutrients over time and promotes soil health.
– Slow-Release Fertilizers: Consider using slow-release organic fertilizers, such as compost tea or granular fertilizers, to provide a steady supply of nutrients to the plants throughout the growing season.
– Avoid Excessive Nitrogen: Avoid over-fertilizing with nitrogen-rich fertilizers, as this can promote excessive foliage growth at the expense of fruit or vegetable production. Follow the recommended application rates for the specific fertilizer you are using.
– Top-Dressing: Apply compost or a balanced organic fertilizer as a top-dressing around the base of the plants mid-season to replenish nutrients and support continued growth.
– Microbial Inoculants: Consider using microbial inoculants, such as mycorrhizal fungi or rhizobium bacteria, to improve nutrient uptake and enhance plant health.
3. Monitor Nutrient Levels:
– Leaf Color and Growth: Monitor the color and growth of your plants’ leaves. Pale green or yellowing leaves may indicate nutrient deficiencies, while excessively dark leaves may signal nutrient imbalances.
– Soil Testing: Periodically test your soil for nutrient levels, pH, and fertility to determine if any adjustments are needed. Soil test kits or professional soil testing services can provide accurate results.
Remember, it’s important to strike a balance with watering and fertilizing. Overwatering or excessive fertilization can lead to nutrient leaching, root rot, and inefficient plant growth. Observe your plants and adjust your watering and fertilizing practices accordingly.
By providing proper moisture and nutrition, your vegetable garden in raised beds will thrive, producing an abundance of healthy and delicious homegrown vegetables.
Mulching and Weed Control
Mulching and weed control are essential practices to maintain a healthy and productive vegetable garden in your raised beds. Here are some guidelines for effective mulching and weed control:
1. Mulching Benefits:
– Weed Suppression: One of the primary benefits of mulching is weed suppression. A layer of mulch inhibits weed growth by blocking sunlight and preventing weed seeds from germinating.
– Moisture Conservation: Mulch helps retain soil moisture by reducing evaporation, keeping the root zone consistently moist.
– Temperature Regulation: Mulch helps regulate soil temperature, keeping it cooler in hot weather and warmer during cooler seasons.
– Soil Erosion Prevention: Mulch acts as a protective layer, preventing soil erosion caused by heavy rain or wind.
– Organic Matter Decomposition: Organic mulch breaks down over time, adding valuable organic matter to the soil and improving its overall fertility.
2. Choosing the Right Mulch:
– Organic Mulch: Use organic mulch, such as straw, wood chips, shredded leaves, or compost, for better soil health and nutrient cycling.
– Avoid Fresh Mulch: Avoid using fresh wood chips or leaves that haven’t decomposed, as they can deplete soil nitrogen levels during the decomposition process.
– Gravel or Inorganic Mulch: Inorganic mulch like gravel or landscape fabric can also be used, especially for walkways between raised beds to prevent weed growth.
3. Applying Mulch:
– Prepare the Soil: Apply mulch after planting and once the soil has warmed up. This allows for easy planting and prevents the mulch from cooling the soil before seeds germinate.
– Thickness: Apply a layer of mulch about 2-4 inches thick around your vegetable plants. Be cautious not to pile mulch against the plant stems, as this can create moisture-related issues and attract pests.
– Leave Space Around Plants: Leave a small space around the stems of your plants to prevent moisture buildup and potential stem rot.
4. Weed Control:
– Remove Weeds Before Mulching: Clear the area of any existing weeds before applying mulch. This ensures that weeds do not grow through the mulch.
– Regular Inspection: Regularly inspect your raised beds for any emerging weeds. Remove them promptly by hand or with a garden fork before they have a chance to spread and compete with your vegetables.
– Hand Pulling: Small weeds can be easily pulled by hand from the mulch layer. Make sure to remove the entire weed, including the roots, to prevent regrowth.
– Avoid Chemical Weed Killers: Minimize the use of chemical weed killers in your raised beds, as they can harm beneficial insects and contaminate your vegetables.
Proper mulching and weed control help create a low-maintenance and productive vegetable garden. Regularly inspect and replenish mulch as needed to maintain its effectiveness. By implementing these practices, you’ll be able to enjoy a weed-free and thriving raised bed garden throughout the growing season.
Pest and Disease Management
Pests and diseases can pose significant challenges to the success of your vegetable garden in raised beds. Implementing proper pest and disease management practices is essential to protect your plants and ensure a bountiful harvest. Here are some guidelines for effective pest and disease management:
1. Monitor Regularly:
– Inspect Your Plants: Regularly inspect your plants for any signs of pest damage, such as holes in leaves, chewed foliage, or discolored spots. Look for symptoms of diseases, including wilting, unusual growth patterns, or spots on leaves or stems.
– Check the Undersides: Pay special attention to the undersides of leaves and the base of the plants, as pests and diseases often hide in these areas.
2. Implement Integrated Pest Management (IPM) Techniques:
– Cultural Controls: Implement cultural control practices, such as crop rotation, companion planting, and planting disease-resistant varieties, to reduce the risk of pests and diseases.
– Biological Controls: Promote beneficial insects, such as ladybugs and lacewings, that feed on pests. Consider introducing nematodes or other biological control agents to target specific pests.
– Mechanical Controls: Handpick pests like slugs, snails, or caterpillars and dispose of them. Use physical barriers like netting or row covers to protect plants from pests.
– Organic Sprays: Utilize organic sprays, such as insecticidal soaps or neem oil, as a last resort for severe pest infestations. Follow the recommended instructions and minimize the impact on beneficial insects.
3. Disease Prevention:
– Proper Plant Spacing: Ensure adequate spacing between plants for good airflow, which reduces the risk of diseases caused by excessive moisture and lack of ventilation.
– Water Management: Avoid overhead watering, as wet foliage can lead to the development and spread of diseases. Water the base of the plants or use drip irrigation to keep leaves dry.
– Sanitation: Regularly remove fallen leaves, debris, and any diseased plant material from the raised beds. Dispose of them away from the garden to prevent disease spread.
– Sterilization: Clean and sterilize your gardening tools, especially after handling diseased plants, to prevent the transmission of diseases.
4. Identify and Take Prompt Action:
– Identify Pests and Diseases: Learn to identify common pests and diseases that affect your specific vegetables. This enables quick action and appropriate treatment.
– Take Prompt Action: If pests or diseases are detected, take immediate action to prevent further damage. Prune affected plant parts, remove infested plants, or treat with appropriate organic solutions.
5. Regularly Rotate Crops:
– Crop Rotation: Practice crop rotation by changing the location of plant families each growing season. This helps break pest and disease cycles and improves the overall health of the raised beds.
Remember, prevention is key when it comes to pest and disease management. By implementing good gardening practices, regularly monitoring your plants, and taking swift action when needed, you can effectively manage pests and diseases in your raised bed vegetable garden. This will ensure the health and productivity of your plants, allowing you to enjoy a thriving and pest-free garden.
Harvesting and Maintenance
Harvesting and maintenance are crucial aspects of maintaining a productive and healthy vegetable garden in your raised beds. Here are some guidelines to help you maximize your harvest and ensure the ongoing care of your garden:
1. Harvesting:
– Timing: Harvest your vegetables at the right time to ensure the best flavor and texture. Refer to seed packets or plant labels for recommended harvest times.
– Regular Harvesting: Harvest vegetables regularly to encourage continuous production. Regularly removing mature vegetables also prevents them from becoming overripe or attracting pests.
– Correct Technique: Use appropriate harvesting techniques for each vegetable. For example, gently twist or cut leafy greens like lettuce and spinach at the base, and use pruners or shears for bushy vegetables like herbs.
2. Maintenance:
– Watering: Continue to provide regular water, especially during hot and dry periods. Adjust watering frequency based on weather conditions and the specific needs of your plants.
– Monitor for Pests and Diseases: Regularly inspect your plants for any signs of pests or diseases. Take immediate action if any issues are detected to prevent further damage.
– Pruning and Trimming: Remove any dead or damaged leaves or stems from your plants. Prune leggy or overcrowded growth to promote airflow and prevent disease.
– Weed Control: Continuously monitor for weeds and remove them promptly to reduce competition for nutrients and water.
– Support Structures: Check that any staked or trellised plants are adequately supported as they grow. Adjust and tie up branches or vines to prevent damage or breakage.
– Fertilization: Replenish nutrients in the soil as needed. Apply organic fertilizers or compost tea according to the specific needs of your plants.
– Monitor Soil Moisture: Regularly check soil moisture levels and adjust your watering accordingly. Raised beds may require more frequent watering compared to traditional garden beds.
– Crop Rotation: Practice crop rotation by changing the location of plant families each year to prevent the buildup of pests and diseases.
3. Learn and Adapt:
– Record Keeping: Keep a gardening journal or notebook to track planting dates, varieties, and any observations or issues you encounter. This will help you learn from your experiences and make informed decisions in future growing seasons.
– Adaptation: Evaluate the performance of your vegetable garden each season and make adjustments based on your successes and challenges. Adapt your gardening practices to optimize the health and productivity of your raised beds.
Remember to enjoy the process of maintaining your vegetable garden. Harvest fresh, homegrown produce, and take pride in the fruits of your labor. Regular maintenance and harvesting will ensure a flourishing garden in your raised beds, providing you with a continuous supply of delicious and nutritious vegetables throughout the growing season.
Conclusion
Congratulations! You have gained a wealth of knowledge on planting vegetables in raised beds. By implementing the tips and techniques discussed in this article, you can create a thriving and productive vegetable garden right in your own backyard. Raised bed gardening offers numerous benefits, including optimal soil conditions, improved drainage, better pest control, increased productivity, and easier access and maintenance.
Remember to carefully choose the location for your raised beds, ensuring sufficient sunlight, accessibility, and proper soil drainage. Select the right vegetables based on your climate, space, and personal preferences. Take the time to adequately prepare the soil and build sturdy raised bed structures. When it’s time to plant, follow proper planting techniques and provide regular watering and fertilization. Take extra care in mulching, managing weeds, and preventing and addressing pests and diseases. Harvest your vegetables at their peak and maintain your garden diligently.
Throughout the process, it’s important to observe, adapt, and learn from your gardening experiences. Each season presents an opportunity for growth and improvement. Keep records, make adjustments, and enjoy the journey of nurturing your own homegrown produce.
Your raised bed vegetable garden will not only provide you with a sustainable food source but also offer relaxation, therapy, and a sense of accomplishment. So roll up your sleeves, put on your gardening gloves, and let the joy of growing your own vegetables in raised beds begin!