Home>Gardening Basics>Getting Started>How Do You Plant Seeds
Getting Started
How Do You Plant Seeds
Modified: February 9, 2024
Learn the basics of getting started with planting seeds. Discover step-by-step techniques for successful seed planting and watch your garden flourish.
(Many of the links in this article redirect to a specific reviewed product. Your purchase of these products through affiliate links helps to generate commission for Chicagolandgardening.com, at no extra cost. Learn more)
Table of Contents
Introduction
Planting seeds is a rewarding and fulfilling experience that allows you to bring life to your garden or indoor space. Whether you’re a seasoned gardener or a novice, learning how to plant seeds properly is essential for successful growth and development of your plants. By following the right steps and providing the necessary care, you can ensure that your seeds germinate, thrive, and eventually blossom into beautiful plants.
Choosing the right seeds is the first crucial step in the planting process. It’s important to select seeds that are suitable for your desired location and the growing conditions you can provide. Different plants have varying requirements, such as sunlight, water, and soil type. Take into consideration these factors and choose seeds that align with your gardening goals.
Once you’ve chosen the seeds, it’s time to select the planting location. This could be an outdoor garden bed, a raised planter, or containers for indoor planting. Consider the space available, the amount of sunlight the area receives, and the accessibility for watering and maintenance. A well-chosen location will contribute to the overall success of your seedlings.
Preparing the soil is another important aspect of successful seed planting. The soil needs to be fertile, well-drained, and free from weeds and debris. Start by removing any existing plants or grass from the area and loosening the soil with a garden fork or tiller. Then, amend the soil with organic matter or compost to enhance its nutrient content. This will provide a conducive environment for the seeds to germinate and establish strong roots.
With the seeds, location, and soil ready, it’s time to plant. Follow the instructions on the seed packet regarding the depth and spacing required for each type of seed. Create furrows or holes where you will place the seeds and gently cover them with soil. Be careful not to bury the seeds too deep, as this may prevent them from sprouting properly.
After planting, it’s essential to provide adequate water to help the seeds germinate and for the plant to establish. Ensure the soil remains moist but not waterlogged. A general rule of thumb is to water the seeds immediately after planting and then regularly as needed, depending on the weather conditions and the moisture needs of the specific plants.
In addition to water, plants also require sufficient sunlight for photosynthesis and healthy growth. Place your seedlings in an area where they can receive the appropriate amount of sunlight. This may vary depending on the type of plant, but most seeds require at least 6-8 hours of direct sunlight each day. If you’re planting indoors, consider using grow lights to supplement natural sunlight.
Regular maintenance is vital to ensure the continued growth and health of your plants. This includes activities such as weeding, fertilizing, pruning, and protecting them from pests and diseases. Regularly monitor the progress of your seedlings and address any issues promptly to prevent them from affecting the overall growth and development of your plants.
As your seeds begin to grow and the seedlings emerge, it’s important to recognize and celebrate their progress. It’s a rewarding experience to see your hard work pay off as your plants establish themselves and thrive. Keep an eye out for signs of healthy growth, such as the appearance of true leaves and the development of strong stems. Celebrate each milestone and continue to provide the necessary care and attention throughout the plant’s life cycle.
By following these steps and providing the proper care, you can enjoy the gratifying experience of watching your seeds grow into beautiful, flourishing plants. Remember to be patient, as the process of germination and growth takes time. With dedication and attention, you can create a vibrant and bountiful garden that will bring joy and satisfaction for years to come.
Choosing the Right Seeds
When it comes to planting seeds, choosing the right ones is crucial for the success of your garden. With so many options available, it’s important to consider several factors before making your selection.
First and foremost, you need to evaluate the growing conditions of your garden or indoor space. Take note of the amount of sunlight, shade, and temperature variations that your chosen location experiences throughout the day. This information will help you determine the types of plants that will thrive in your specific environment.
Another important consideration is the soil type. Some plants prefer well-draining sandy soil, while others thrive in clay or loamy soil. Performing a soil test can give you valuable insights into the composition and pH level of your soil, allowing you to choose seeds that are best suited for its characteristics.
Next, think about the purpose of your garden. Are you looking to grow vegetables, herbs, flowers, or a combination of these? Determining the purpose will help narrow down your options and allow you to prioritize seeds that align with your gardening goals.
Now it’s time to consider your personal preferences and tastes. Do you prefer bright and vibrant flowers or subtle and delicate ones? Are you looking for vegetables with specific flavors or textures? Considering your own preferences will ensure that you enjoy the fruits of your labor and find joy in tending to your plants.
In addition to preferences, it’s important to consider the level of experience you have as a gardener. If you’re a beginner, it’s advisable to start with seeds that are easy to grow and require minimal maintenance. As you gain confidence and experience, you can venture into more challenging plant varieties.
Researching and reading seed catalogs or online resources can provide valuable information about different plant varieties and their specific requirements. Look for seeds that are labeled as “beginner-friendly” or “low-maintenance” if you’re just starting out. Pay attention to the recommended growing zones, as planting seeds that are not suited to your climate can lead to disappointment.
It’s also a good idea to seek advice from local garden centers or experienced gardeners in your area. They can offer guidance and recommendations based on their knowledge and experience with the specific growing conditions in your region.
Finally, don’t forget to consider factors such as the time required for seeds to germinate and mature, as well as their resistance to pests and diseases. Some plants may require longer growing seasons, while others are more prone to common garden pests. Understanding these factors will help you plan and prepare accordingly.
By taking these factors into account, you can make an informed decision and choose seeds that are well-suited to your gardening needs and preferences. Remember, the right seeds will set the foundation for a successful and bountiful garden.
Selecting the Planting Location
When it comes to planting seeds, selecting the right location is key to providing a conducive environment for your plants to grow and thrive. Whether you have a spacious outdoor garden or limited space for indoor planting, choosing the right spot is crucial for the success of your seedlings.
Start by assessing the available space and the specific requirements of the plants you intend to grow. Consider the amount of sunlight the area receives throughout the day. Most plants require at least 6-8 hours of direct sunlight to thrive, so it’s important to choose a location that receives adequate sunlight for the majority of the day.
Observe any areas of your garden that may be shaded by trees, buildings, or other structures. While some plants can tolerate partial shade, others require full sun. Understanding the amount of shade and sunlight your chosen location receives will help you select the appropriate seeds for that particular area.
In addition to sunlight, consider the accessibility of the chosen location. Ensure that it’s easy to reach for regular watering, weeding, and maintenance activities. If you’re planning an indoor garden, choose a spot where you can easily monitor and care for your seedlings, such as a sunny windowsill or a dedicated grow light setup.
Another important consideration is the microclimate of your garden. Certain areas may have variations in temperature, humidity, or wind patterns. Pay attention to any microclimates that could affect the growth of your plants, such as spots that are more exposed to strong winds or areas that tend to retain more moisture. Understanding these microclimates will help you make informed decisions about which seeds to plant in specific areas.
Furthermore, think about the proximity of the planting location to a water source. Adequate hydration is essential for the growth and development of your plants, so it’s important to choose a spot that allows for easy access to water. Consider the convenience of watering and the availability of irrigation systems, if necessary.
Consider the aesthetic aspect as well. If you have a particular vision for your garden, choose a location that will showcase the beauty of your plants and complement the overall design. For example, if you’re planting a flower garden, choose a location that allows the blooms to be prominently displayed and enjoyed.
Lastly, consider any potential obstacles or hazards that may affect the chosen location. Look out for areas with poor drainage, as excessively wet soil can deprive your plants of oxygen and hinder their growth. Avoid planting near invasive plants or areas where pests are known to frequent.
By carefully selecting the planting location, you can create an optimal growing environment for your seeds. Remember to consider factors such as sunlight, accessibility, microclimates, water availability, aesthetics, and potential obstacles. By doing so, you’ll give your seedlings the best possible chance to thrive and flourish.
Preparing the Soil
Preparing the soil is a vital step in the seed planting process as it creates the foundation for healthy plant growth. Properly prepared soil provides the necessary nutrients, moisture retention, and drainage that seeds need to germinate and establish strong roots. Follow these steps to ensure your soil is primed and ready for planting.
The first step is to clear the planting area of any existing plants, weeds, or debris. Use a garden fork or tiller to loosen the soil and remove any large rocks or clumps. Clearing the area allows for better air circulation and prevents competition for nutrients and water.
Next, assess the quality of your soil. Different plants thrive in different types of soil, so it’s important to understand the composition of your soil and make any necessary amendments. Performing a soil test can provide valuable insights into the pH level and nutrient content of your soil.
If your soil is lacking in essential nutrients, you can amend it by adding organic matter such as compost, well-rotted manure, or leaf mold. Organic matter enriches the soil, improves its structure, and provides a steady release of nutrients for plant growth. Incorporate the organic matter into the top layer of soil using a garden fork or tiller.
In addition to adding organic matter, you may also need to adjust the pH level of your soil. Most plants prefer slightly acidic to neutral soil (pH 6.0-7.0). If your soil is too acidic, you can raise the pH by adding lime. If it’s too alkaline, you can lower the pH by adding sulfur. Follow the instructions on the packaging and incorporate the amendments evenly into the soil.
Proper soil drainage is crucial for the health of your plants. Ensure that your soil has good drainage to prevent waterlogging, which can lead to root rot and other plant diseases. If your soil is heavy clay or tends to retain water, consider adding sand, perlite, or vermiculite to improve its drainage capacity.
Once you have amended the soil and ensured proper drainage, rake the surface to create a level and smooth bed for planting. Remove any remaining large clumps or debris that may interfere with seed placement.
It’s also important to consider the moisture content of your soil before planting. The soil should be slightly moist but not soaked or waterlogged. If the soil feels dry, water it gently and allow it to settle before proceeding with seed planting.
Lastly, consider using mulch to cover the soil surface. Mulching helps retain moisture, suppresses weeds, and moderates soil temperature. Use organic mulch such as straw, wood chips, or shredded leaves. Apply a layer of mulch around the seedlings once they have emerged, leaving a small space around the stem to prevent rotting.
By properly preparing the soil, you create an optimal growing environment for your seeds. The amendments, drainage, and moisture retention will support healthy seed germination and root development. Remember to assess the quality of your soil, add organic matter, adjust pH if necessary, ensure proper drainage, create a level planting bed, and consider mulching. With well-prepared soil, your seeds will have a strong start on their journey to becoming flourishing plants.
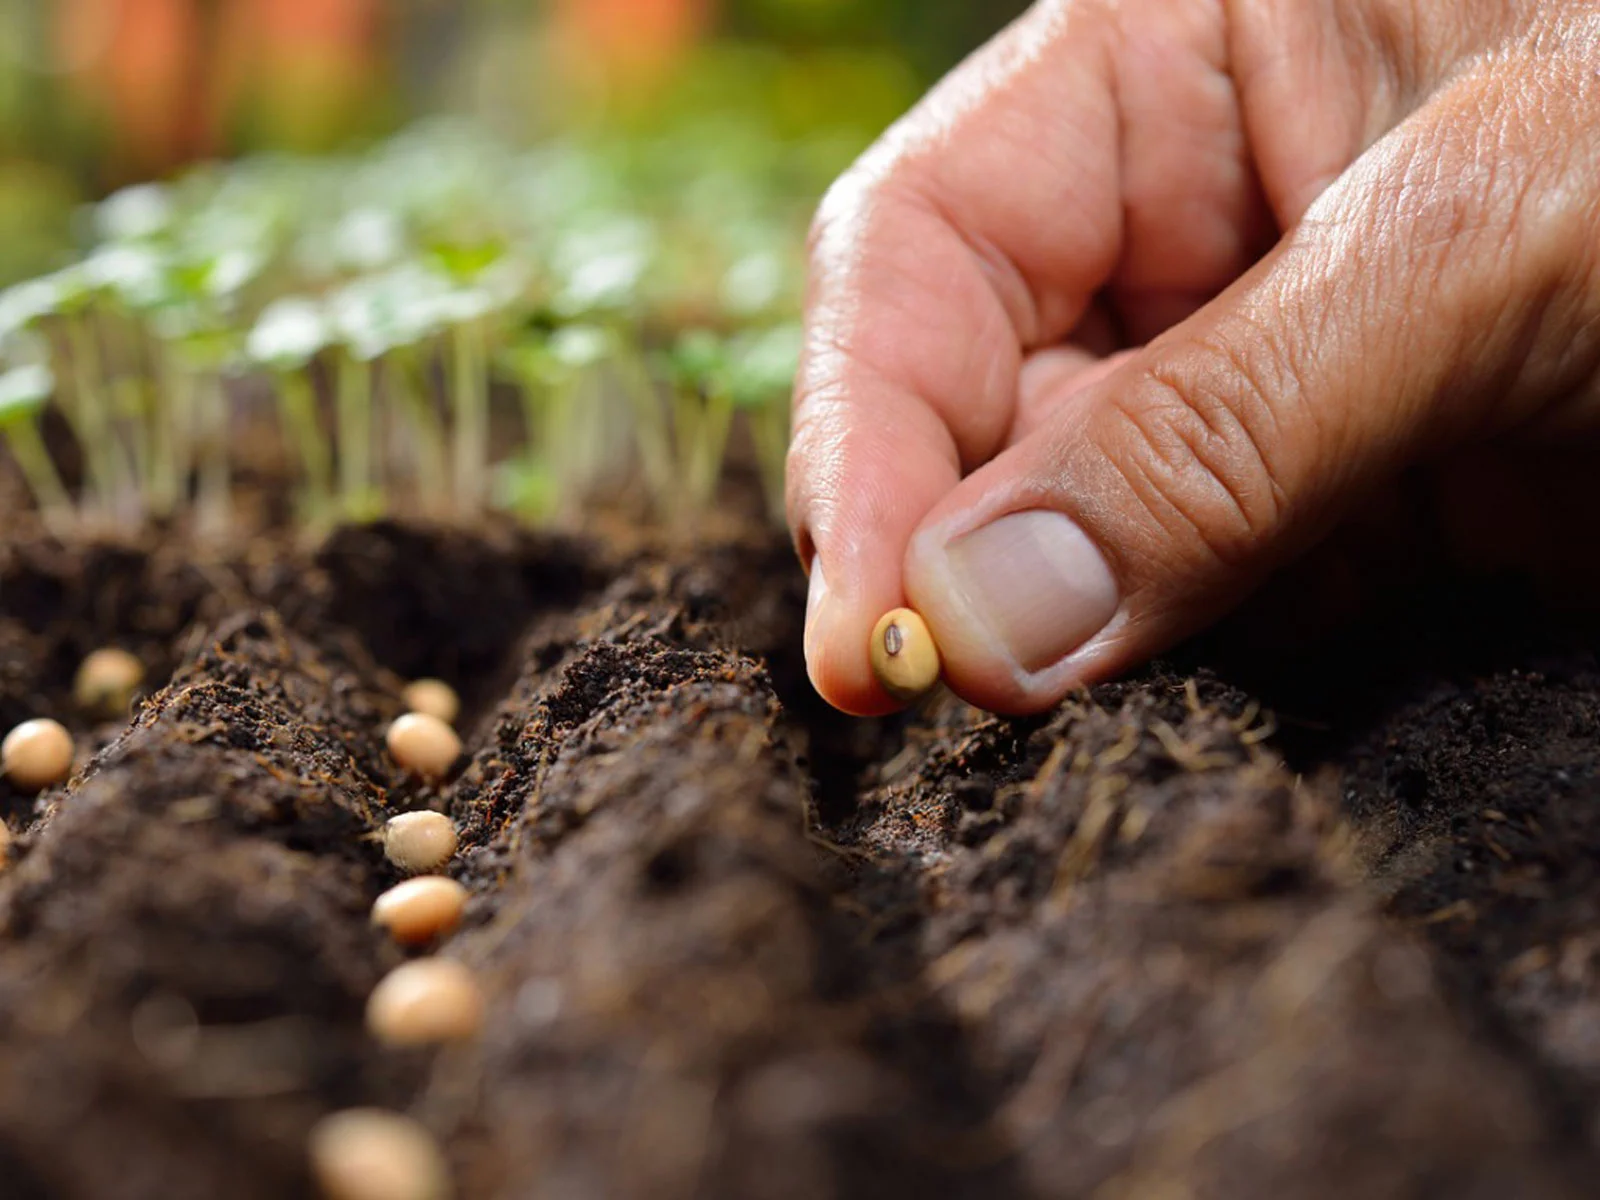
Planting the Seeds
Once you have prepared the soil, it’s time to plant your seeds. Proper seed placement ensures that the seeds have the best chance of germination and successful growth. Follow these steps to plant your seeds effectively.
Start by reading the instructions on the seed packet. Different plants have different requirements regarding seed depth and spacing. Follow these guidelines to ensure that you are planting the seeds at the appropriate depth and distance from each other.
Using your finger or a small garden tool, create furrows or holes in the soil where you will place the seeds. The depth of the furrows or holes should correspond to the recommended depth on the seed packet. Gently loosen the soil at the bottom of the furrows to provide a soft bed for the seeds.
Take care when handling the seeds. They are delicate and should be handled with clean and dry hands to prevent any damage or contamination. If the seeds are very small, you can mix them with a small amount of sand or vermiculite to help distribute them evenly.
Place the seeds in the furrows or holes, following the spacing guidelines on the seed packet. Each seed should be placed at the appropriate distance to allow for proper root development and prevent overcrowding as the plants grow.
Once the seeds are in place, gently cover them with soil. Be careful not to bury them too deep, as this can prevent them from sprouting properly. A rule of thumb is to cover the seeds with a layer of soil that is approximately two to three times the diameter of the seed.
After planting, lightly water the area to provide moisture and help settle the soil. Be careful not to overwater, as excessive water can lead to the seeds being washed away or rotting. Use a gentle spray or a watering can with a fine nozzle to ensure even distribution of water.
Label the area where you have planted the seeds. This will help you keep track of the different types of plants and their locations. You can use plant markers or labels that are resistant to the elements and won’t fade or wash away over time.
Finally, take note of the expected germination time for the specific seeds you have planted. Different plants have varying germination periods, ranging from a few days to a few weeks. Be patient and continue to provide the necessary care and attention as you wait for the seeds to sprout.
By following these steps, you can ensure that your seeds are planted properly and have the best chance of germinating and growing into healthy plants. Remember to read the seed packet instructions, create the appropriate furrows or holes, handle the seeds with care, cover them with soil, and water gently. With proper planting techniques, you are setting the stage for a successful gardening journey.
Providing Adequate Water
Water is essential for the growth and development of your seedlings. Proper watering ensures that the seeds can germinate, the roots can establish themselves, and the plants can thrive. It’s important to provide adequate water while also avoiding overwatering, as both extremes can be detrimental to the health of your plants. Follow these guidelines to provide the right amount of water for your growing seeds.
Start by checking the moisture level of the soil. Before watering, gently touch the soil with your finger or use a moisture meter to assess its dampness. Ideally, the soil should be slightly moist, but not overly saturated or dry. Avoid watering if the soil feels already damp, as overwatering can lead to root rot and other water-related issues.
When it’s time to water your seeds, aim for a slow and gentle watering method that allows the water to seep into the soil gradually. This helps prevent runoff and allows the moisture to reach the roots effectively. Use a watering can, a hose with a gentle spray nozzle, or a drip irrigation system to ensure even distribution of water.
Direct the water around the base of the plants, avoiding wetting the leaves as much as possible. Wet foliage can lead to fungal diseases, especially if the plants remain damp for extended periods. By watering at the base, you minimize the risk of disease and optimize moisture absorption by the roots.
The frequency of watering depends on various factors such as the weather conditions, the type of plants, and the soil type. In general, it’s better to water deeply and less frequently rather than giving the plants shallow and frequent watering. This encourages deeper root growth and makes the plants more resilient to drought conditions.
Monitor the moisture level of the soil regularly to determine when it’s time to water again. Insert your finger approximately one to two inches into the soil to assess its moisture. If it feels dry at that depth, it’s time to water again. Remember that different plants have different water requirements, so it’s important to be aware of the specific needs of the seeds you have planted.
Keep in mind that factors such as the season, temperature, and rainfall can impact the watering needs of your plants. During hotter and drier periods, you may need to water more frequently, while cooler seasons may require less frequent watering. It’s important to adjust your watering routine accordingly based on the specific needs of your plants.
Lastly, consider using mulch to help retain moisture in the soil. Apply a layer of organic mulch, such as straw or shredded leaves, around the seedlings. Mulch not only helps conserve water by reducing evaporation, but it also helps suppress weeds and regulate soil temperature.
By providing adequate water to your growing seeds, you are creating conditions for healthy and strong plant growth. Remember to check the moisture levels, water slowly and evenly, avoid wetting the foliage, water deeply but less frequently, monitor the soil moisture regularly, adjust watering based on seasonal changes, and consider using mulch. With proper watering, you’ll give your seeds the hydration they need for successful growth and development.
Providing Proper Sunlight
Sunlight is a vital factor in the growth and development of plants. It provides the energy needed for photosynthesis, which is essential for the production of food and nutrients. Providing the proper amount of sunlight is crucial to ensuring the health and vitality of your seedlings. Follow these guidelines to ensure your plants receive adequate sunlight for optimal growth.
Start by observing the sunlight patterns in your garden or the area where you have planted your seeds. Take note of how the sun moves throughout the day and which areas receive the most direct sunlight. Most plants require at least 6-8 hours of direct sunlight each day to thrive, so choose a location that offers sufficient exposure.
Select a planting location that provides the right amount of sunlight for the specific plants you are growing. Different plants have varying light requirements. Some prefer full sun, which means they need direct sunlight for the majority of the day. Others may tolerate partial shade, meaning they can thrive in areas that receive a few hours of direct sunlight or dappled sunlight throughout the day.
If you have limited access to direct sunlight, consider growing plants that are specifically suited for shade or partial shade conditions. These plants are typically labeled as such and are better able to thrive in areas with limited sunlight. Examples of shade-tolerant plants include ferns, hostas, and some varieties of impatiens.
If you are planting indoors, position your seedlings near a window that receives ample sunlight. South-facing windows generally provide the most sunlight throughout the day, while east or west-facing windows may provide a few hours of direct morning or afternoon sunlight. If natural sunlight is insufficient, augment it with the use of artificial grow lights. These lights mimic the spectrum of sunlight and can provide the necessary light energy for plant growth.
Keep an eye on the positioning of your plants as they grow. Certain plants may require rotating to ensure even exposure to sunlight. This is especially important if your plants are leaning or stretching towards the light source. Rotating the plants periodically helps stimulate upright growth and prevents them from becoming lopsided or leggy.
It’s important to note that while sunlight is crucial for plant growth, excessive exposure to intense sunlight can also be harmful. Some plants may suffer from leaf burn or wilting if they receive excessive sunlight, especially during the hottest hours of the day. If your plants show signs of stress or sunburn, consider providing them with some shade during the peak sun hours or moving them to a location with more filtered light.
By providing the proper amount of sunlight for your seedlings, you give them the energy they need to grow and thrive. Remember to assess sunlight patterns, choose appropriate plants for the available light, position seedlings in the right location, consider the use of artificial lighting if needed, rotate plants for even sun exposure, and protect plants from excessive sunlight if necessary. With the right balance of sunlight, your seedlings will flourish and reach their full potential.
Regular Maintenance
Regular maintenance is crucial for the health and vitality of your plants. It involves ongoing care and attention to ensure that your seedlings continue to grow and thrive. By incorporating regular maintenance tasks into your gardening routine, you can address potential issues, promote healthy growth, and enjoy the beauty of your plants. Here are some key aspects to consider for maintaining your seedlings:
Weeding: Weeds compete with your seedlings for vital nutrients, water, and sunlight. Regularly inspect the planting area and remove any weeds that have sprouted. Make sure to remove weeds by their roots to prevent them from regrowing.
Watering: Regular watering is essential to keep your plants hydrated and healthy. Check the soil moisture regularly and water when it becomes dry, ensuring a consistent level of soil moisture. Be careful not to overwater, as excessive moisture can lead to root rot and other water-related issues.
Fertilizing: Providing your seedlings with necessary nutrients will promote strong and vigorous growth. Consider applying a balanced, slow-release fertilizer according to the recommended dosage on the packaging. Alternatively, you can use organic fertilizers such as compost or well-rotted manure to naturally enrich the soil.
Pruning: Pruning helps shape and maintain the overall health of your seedlings. Regularly inspect your plants and trim away dead or diseased leaves, stems, or branches. Pruning also stimulates new growth and helps maintain proper airflow, reducing the risk of fungal diseases.
Pest and Disease Management: Regularly monitor your seedlings for any signs of pests or diseases. Common pests include aphids, snails, and caterpillars, while common diseases include powdery mildew and leaf spot. Use organic pest control methods whenever possible, such as handpicking pests or using insecticidal soaps or neem oil.
Support and Staking: Some plants, particularly tall or vining varieties, may require support to ensure upright growth and prevent damage. Consider using stakes, trellises, or cages to provide support to your plants as they grow. Regularly check and adjust the supports as needed to accommodate the growth of your seedlings.
Mulching: Applying a layer of mulch around your seedlings can help conserve moisture, suppress weed growth, and regulate soil temperature. Refresh the mulch layer as needed to maintain its effectiveness and appearance.
Monitor Environmental Conditions: Regularly assess the environmental conditions in your garden or indoor space. Pay attention to factors such as temperature, humidity, and airflow. Adjust watering, shading, or ventilation as necessary to provide a favorable environment for your seedlings.
Observation and Adjustment: Take time to observe the progress of your seedlings regularly. Note any changes in growth, appearance, or behavior. Adjust your care routine accordingly, such as altering watering frequency or providing additional support, based on the specific needs of your plants.
By incorporating regular maintenance tasks into your gardening routine, you ensure the ongoing health and well-being of your seedlings. Weeding, watering, fertilizing, pruning, pest and disease management, support and staking, mulching, monitoring environmental conditions, and observation and adjustment are all crucial elements in maintaining your seedlings and promoting their growth. With consistent care and attention, your plants will flourish and reward you with a beautiful and thriving garden.
Recognizing Seedling Growth
As a gardener, recognizing the growth and progress of your seedlings is an exciting and rewarding experience. It’s important to monitor their development and make necessary adjustments to ensure their continued health and success. By understanding the signs of seedling growth, you can celebrate their progress and provide the appropriate care. Here are some key indicators to look out for:
Emergence of Seedlings: The first sign of growth is the emergence of seedlings from the soil. As the seeds begin to sprout, you will notice small green shoots pushing their way above the surface. This is an exciting milestone that marks the beginning of your plant’s journey.
Development of True Leaves: After the initial emergence, the seedlings will start to develop their true leaves. True leaves are the second set of leaves that appear, and they often look different from the initial baby leaves or cotyledons. This signals that the seedling is establishing its own source of nutrition through photosynthesis.
Formation of Strong Stems: As the seedlings continue to grow, you will notice the development of strong stems. The stems become thicker and sturdier, providing support for the growing leaves and eventually the flowers or fruit of the plant.
Increased Height and Leaf Expansion: As the seedlings continue to mature, they will grow taller, and the leaves will expand in size. You will notice an increase in the number of leaves and their overall size. This growth indicates that the seedlings are absorbing nutrients and energy from the soil and sunlight, fueling their upward growth.
Root Development: While not always visible, the development of a healthy root system is crucial for the overall success of your plants. Well-developed roots anchor the seedlings in the soil and absorb nutrients and water. Gently dig around the base of the seedlings to check for the presence of a strong root system.
Flowering or Fruit Set: Depending on the type of plant you are growing, you may notice the formation of flowers or the setting of fruit as the seedlings mature further. This is an exciting stage that signifies the readiness for pollination and the eventual production of seeds or edible harvest.
Overall Health and Vigor: Healthy seedlings exhibit vibrant, green leaves, with no signs of wilting, yellowing, or disease. They exhibit strong and sturdy growth and are more resistant to environmental stresses. By regularly assessing the overall health and vitality of your seedlings, you can respond to any issues promptly and provide the necessary care and attention.
By recognizing these signs of seedling growth, you can celebrate their progress and adjust your care routine accordingly. Pay attention to the emergence of seedlings, the development of true leaves and strong stems, increased height and leaf expansion, root development, flowering or fruit set, and overall health and vigor. By nurturing and supporting your seedlings through their growth stages, you are setting the stage for a thriving and bountiful garden.
Conclusion
Planting seeds is a fulfilling and rewarding experience that allows you to witness the miracle of life firsthand. By following the essential steps outlined in this guide, you can ensure that your seeds have the best start and give your plants the opportunity to flourish and thrive. From choosing the right seeds to providing proper sunlight, water, and regular maintenance, each aspect plays a crucial role in the success of your seedlings.
Remember to carefully select seeds that are well-suited to your climate and growing conditions. Consider factors such as sunlight requirements, soil type, and your personal preferences and gardening goals. By choosing the right seeds, you set the stage for a successful garden.
Next, carefully select the planting location. Evaluate the amount of sunlight, accessibility, and microclimates in your garden or indoor space. By providing the appropriate environment, your seedlings will have the best chance to establish and grow.
Preparing the soil is another important step. Remove existing plants and weeds, amend the soil with organic matter, and ensure proper drainage. By creating nutrient-rich and well-drained soil, you provide an ideal foundation for seed germination and plant growth.
When it’s time to plant the seeds, follow the instructions on the packet regarding seed depth and spacing. Place the seeds carefully in the furrows or holes, cover them gently with soil, and provide adequate water to kickstart the germination process.
As your seedlings grow, provide them with the right amount of water and sunlight. Monitor the moisture levels of the soil and adjust your watering routine accordingly. Position your seedlings in locations that receive the appropriate amount of sunlight for their specific requirements. Regularly maintain your garden by weeding, fertilizing, pruning, and addressing pests and diseases.
Recognize the signs of seedling growth, such as the emergence of seedlings, development of true leaves, and the formation of strong stems. Celebrate the growth milestones of your plants and adjust your care routine as needed to ensure their continued health and success.
Gardening is a journey that requires patience, dedication, and a deep connection with nature. By nurturing your seedlings and providing them with the care they need, you will be rewarded with a vibrant and bountiful garden. Enjoy the process, learn from the challenges, and celebrate the beauty that comes with watching your seeds grow into flourishing plants.