Home>Gardening Tips and Tricks>Eco-Friendly Gardening>How To Build Hydroponics System
Eco-Friendly Gardening
How To Build Hydroponics System
Modified: January 22, 2024
Learn how to build an eco-friendly hydroponics system and embrace sustainable gardening. Grow your plants without soil and with minimal water usage.
(Many of the links in this article redirect to a specific reviewed product. Your purchase of these products through affiliate links helps to generate commission for Chicagolandgardening.com, at no extra cost. Learn more)
Table of Contents
- Introduction
- Benefits of Hydroponics
- Choosing the Right Hydroponic System
- Components and Materials Needed
- Step 1: Setting up the Reservoir
- Step 2: Building the Grow Tray
- Step 3: Installing the Nutrient Delivery System
- Step 4: Adding Lighting and Ventilation
- Step 5: Testing and Adjusting the pH Levels
- Step 6: Planting and Maintaining Your Hydroponic System
- Troubleshooting Common Issues
- Conclusion
Introduction
Welcome to the exciting world of hydroponics! If you are passionate about gardening and want to explore eco-friendly and innovative gardening methods, hydroponics is the perfect solution for you. With hydroponics, you can grow plants without soil, using mineral nutrient solutions in water.
Unlike traditional gardening methods, hydroponics offers numerous advantages. It allows you to grow plants in small spaces, eliminates the need for weeding, and conserves water by delivering nutrients directly to the plant roots. Additionally, hydroponic gardening reduces the risk of soil-borne diseases and pests, and enables faster plant growth and higher yields.
In this comprehensive guide, we will walk you through the process of building your own hydroponic system. Whether you are a beginner or an experienced gardener, this step-by-step tutorial will help you set up and maintain a successful hydroponic garden.
Before diving into the details, it’s important to understand that hydroponics can be implemented in various ways, such as nutrient film technique (NFT), deep water culture (DWC), and ebb and flow systems (also known as flood and drain). Each system has its own unique features and requirements, so it’s crucial to choose the right one for your needs.
This guide will focus on a basic hydroponic system that can be easily assembled with readily available materials. By following the steps outlined here, you will be able to create a simple and efficient hydroponic setup in no time.
So, if you’re eager to embark on your hydroponic gardening journey and reap the benefits of sustainable gardening, let’s get started on building your very own hydroponic system!
Benefits of Hydroponics
Hydroponics has gained popularity in recent years due to its numerous advantages over traditional soil-based gardening methods. Let’s explore some of the key benefits of hydroponics:
1. Water Efficiency: Hydroponic systems use up to 90% less water compared to traditional soil gardening. This is because the water in a hydroponic system is recirculated and reused, minimizing waste. The nutrients are directly delivered to the plant roots, allowing for efficient absorption and reducing water loss through evaporation.
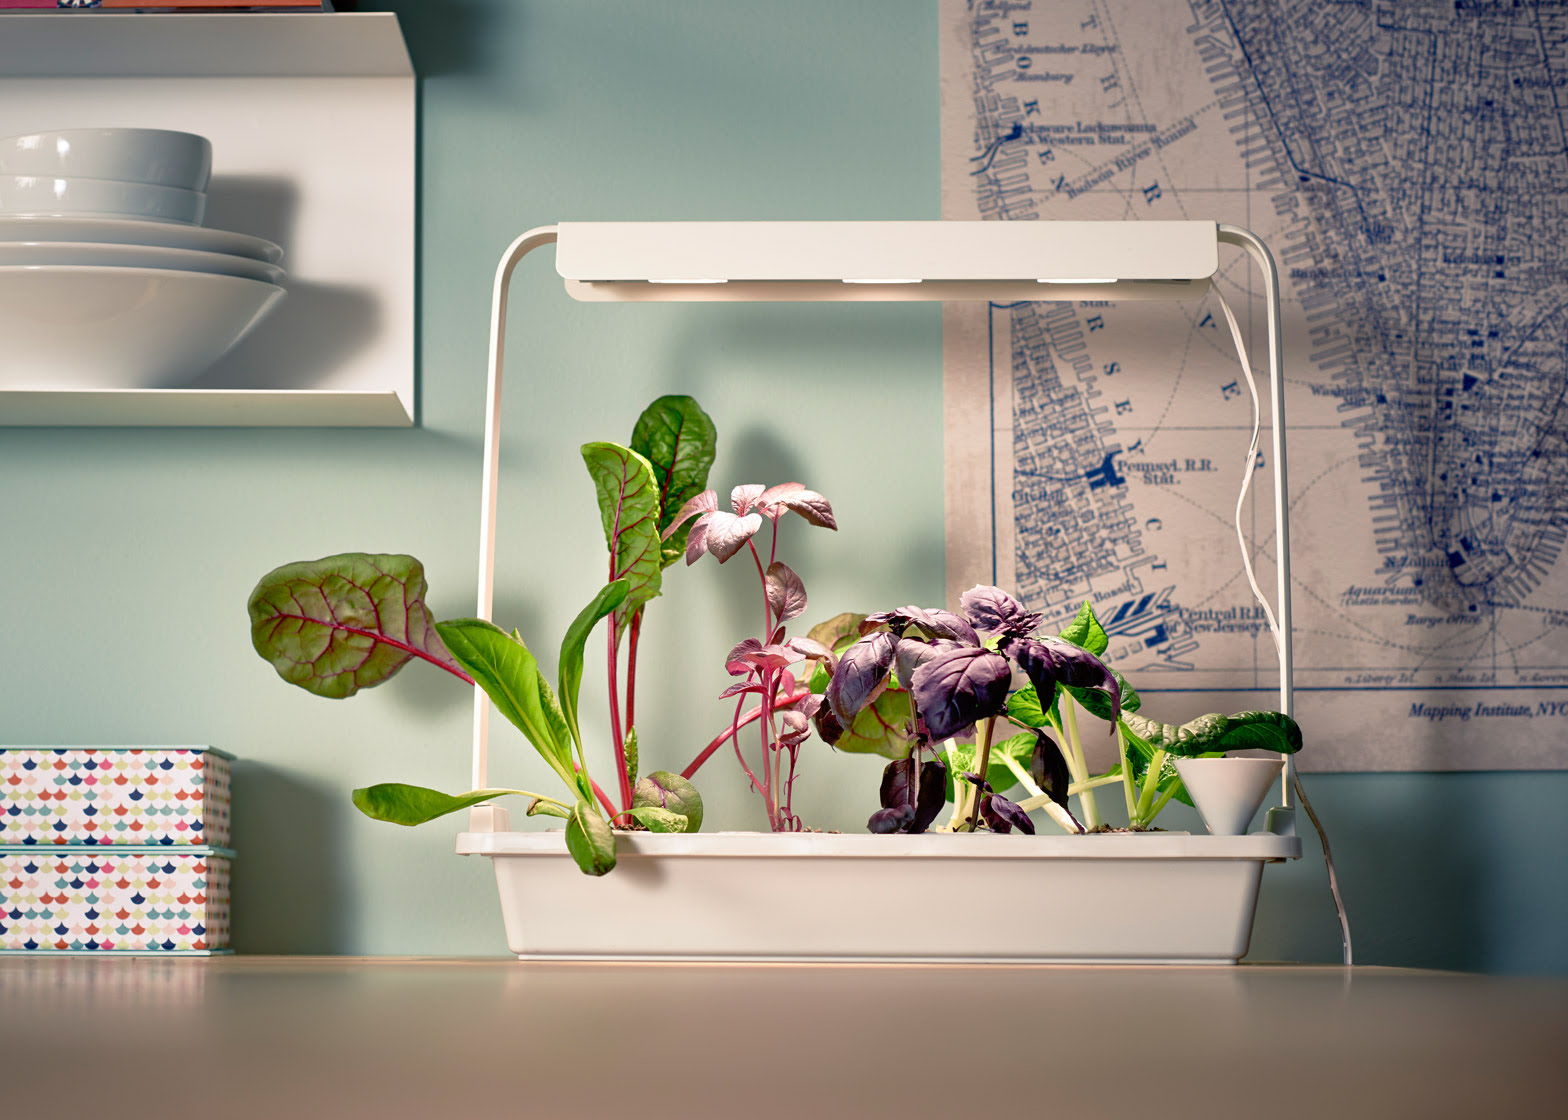
2. Space Optimization: Hydroponic systems are ideal for those with limited space, such as urban dwellers or apartment gardeners. Since plants can be grown vertically or in compact setups, you can maximize your growing area. This makes hydroponics a great solution for small balconies, rooftops, or indoor gardening.
3. Year-round Cultivation: With hydroponics, you can grow plants year-round, regardless of seasonal limitations. By creating an optimal indoor environment with controlled lighting, temperature, and humidity, you can cultivate plants even during the winter months. This allows for a continuous supply of fresh produce and the ability to experiment with different plant varieties.
4. Higher Yields: Plants grown hydroponically tend to grow faster and produce higher yields compared to traditional gardening. The precise control over nutrient delivery and environmental conditions provides plants with optimal conditions for growth, resulting in healthier and more productive plants.
5. No Soil-Borne Diseases: Hydroponic gardening eliminates the risk of soil-borne diseases and pests that can affect plant health in traditional gardening. Since plants are grown in a soilless medium, there is no need to worry about soil pathogens or weed growth, leading to healthier plants and reduced need for pesticides.
6. Reduced Maintenance: Hydroponic systems require less maintenance compared to traditional gardens. There is no weeding required, and the risk of soil erosion is eliminated. Additionally, since the nutrients are delivered directly to the plant roots, the need for fertilizers is minimized.
7. Environmental Sustainability: Hydroponics is an eco-friendly gardening method that promotes sustainability. By conserving water and eliminating the use of pesticides and chemical fertilizers, hydroponic gardening helps reduce the environmental impact associated with traditional agriculture.
These are just a few of the many benefits that hydroponics offers. Whether you are an urban gardener, a sustainability enthusiast, or simply love the idea of growing your own fresh produce, hydroponics provides an innovative and efficient solution for your gardening needs.
Choosing the Right Hydroponic System
When it comes to hydroponics, there are various types of systems to choose from, each with its own set of advantages and considerations. Here are a few factors to consider when selecting the right hydroponic system for your needs:
1. Space: Consider the available space you have for your hydroponic system. If you have limited space, vertical systems like tower gardens or vertical NFT systems may be suitable. If you have more room, you can opt for larger systems like deep water culture (DWC) or ebb and flow systems.
2. Budget: Determine your budget for setting up a hydroponic system. Some systems can be more cost-effective, especially if you are able to build them yourself using readily available materials. Other systems may require a greater investment, particularly if you opt for commercial-grade systems with advanced features.
3. Grow Medium: Consider the type of grow medium you prefer to use. Common grow mediums include Rockwool, coconut coir, perlite, and vermiculite. Each medium has different water-retention properties and rooting characteristics. Some systems may require specific types of grow medium, so make sure to choose a system that aligns with your preferred grow medium.
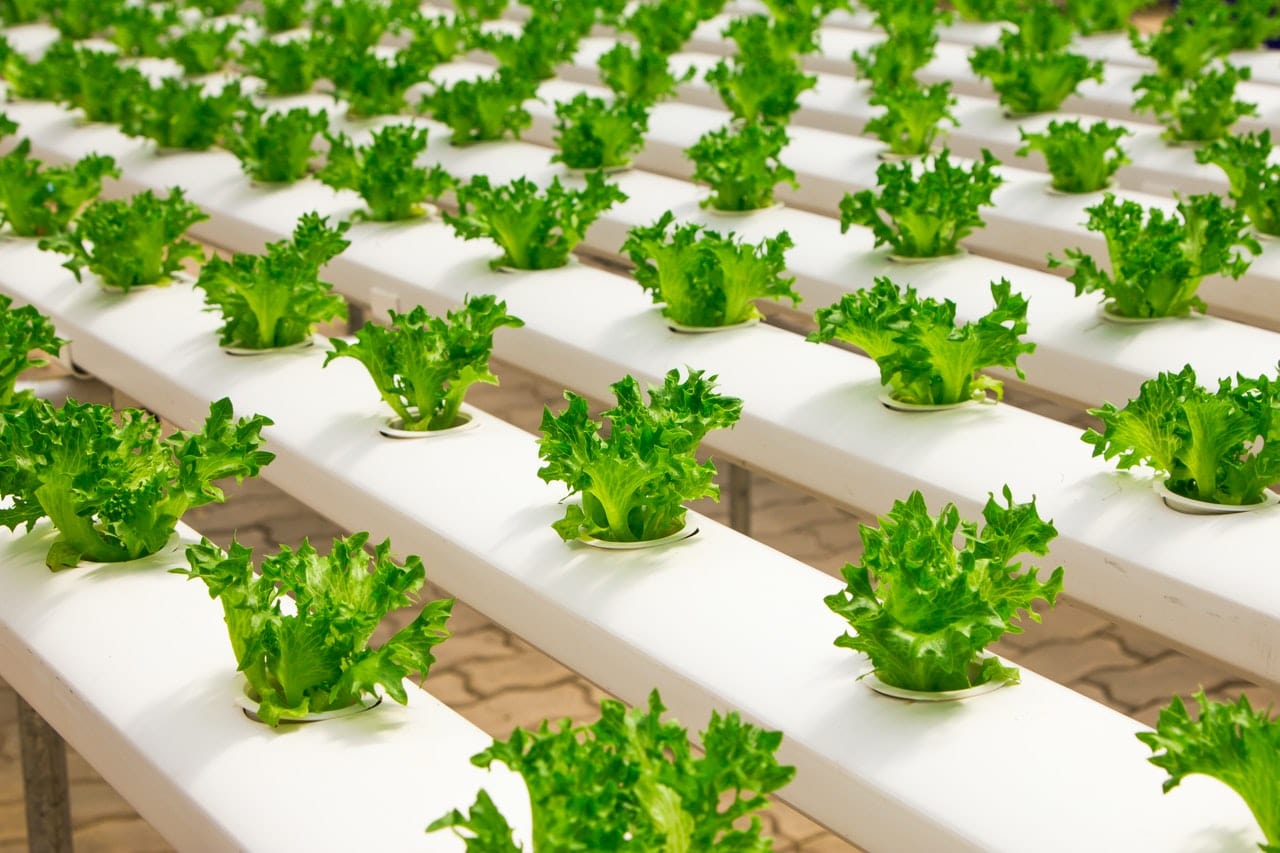
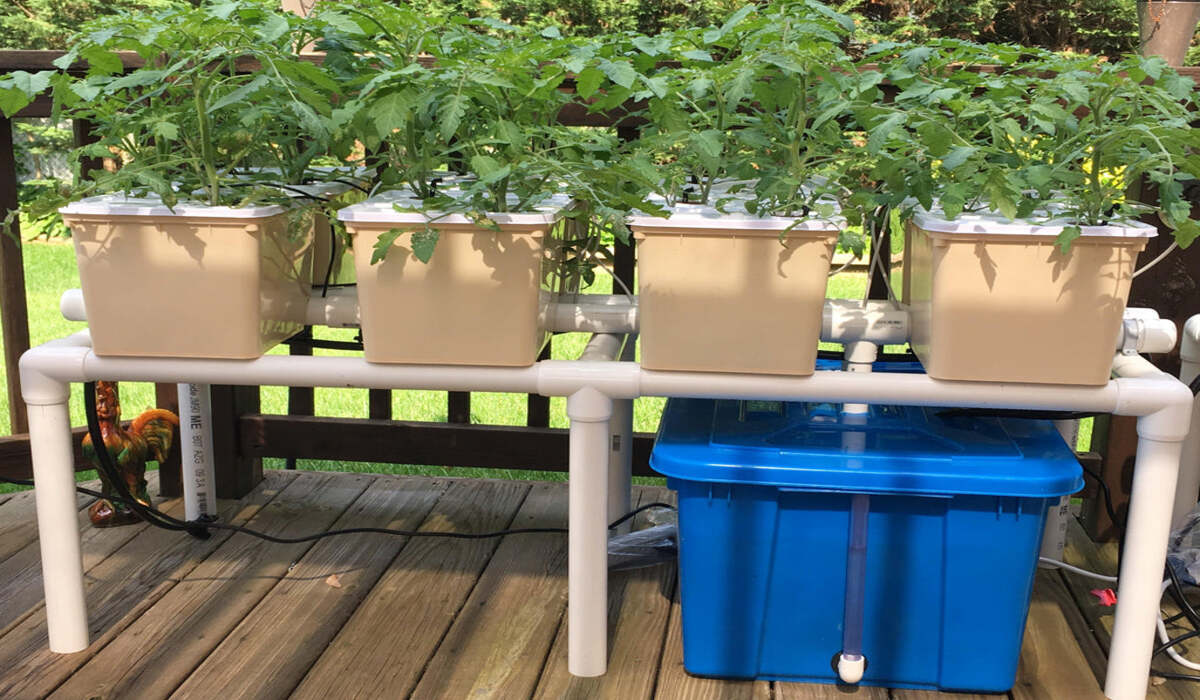
4. Plant Variety: Think about the types of plants you want to grow in your hydroponic system. Certain systems are better suited for specific plants. For example, nutrient film technique (NFT) is well-suited for leafy greens, while deep water culture (DWC) is popular for growing larger plants like tomatoes and cucumbers. Consider the growth habits, root structure, and nutritional requirements of your desired plants when selecting a system.
5. Level of Automation: Determine how much time and effort you are willing to invest in maintaining your hydroponic system. Some systems, such as drip irrigation or ebb and flow, require more manual intervention, while others, like aeroponics or recirculating systems, offer more automation and control over nutrient delivery. Choose a system that aligns with your preferred level of involvement.
6. Experience Level: Consider your level of experience with hydroponics. If you are a beginner, it may be best to start with a simpler system that is easier to set up and maintain. As you become more familiar with the principles of hydroponics, you can explore more complex systems.
By carefully considering these factors, you will be able to choose a hydroponic system that aligns with your space, budget, plant preferences, and level of experience. Remember, the right system will provide a solid foundation for a successful hydroponic gardening journey.
Components and Materials Needed
Before diving into the construction of your hydroponic system, it’s important to familiarize yourself with the essential components and materials you will need. Here is a list of the key items you’ll require to set up your own hydroponic system:
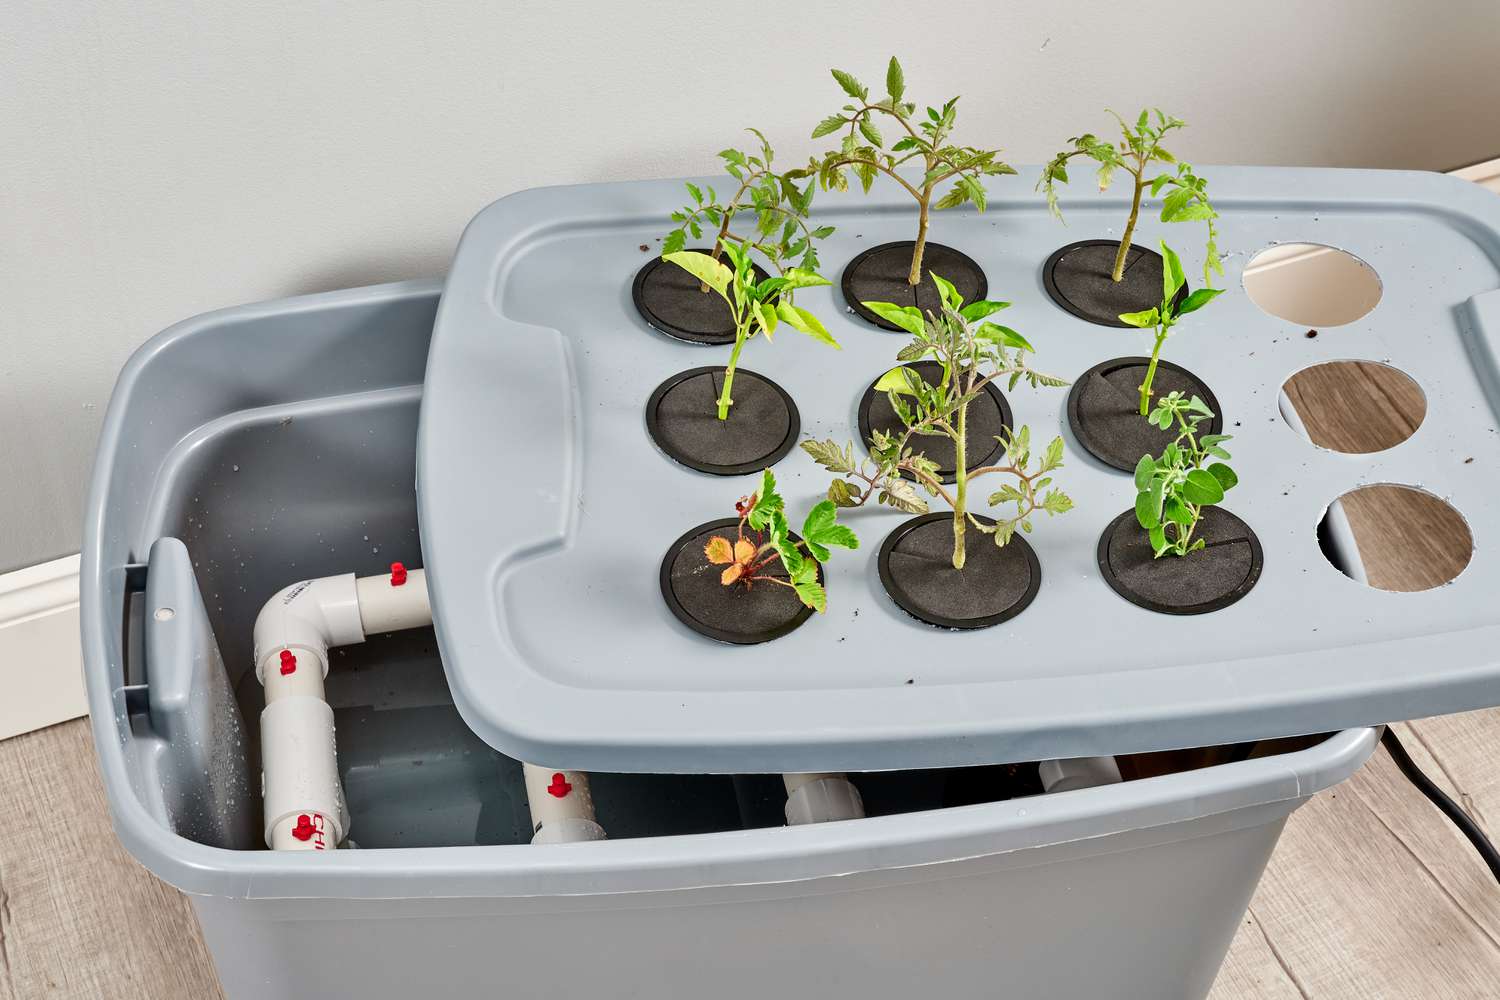
1. Reservoir: This is the container where you will hold the nutrient solution. It can be a plastic tub, a large bucket, or a specialized reservoir designed for hydroponics. Make sure it is lightproof to prevent algae growth.
2. Grow Tray: The grow tray is where the plants will be positioned. It should be large enough to accommodate your chosen plant varieties. A plastic or aluminum tray with drainage holes will work well. You can also consider using a prefabricated or DIY grow tray designed specifically for hydroponic systems.
3. Nutrient Delivery System: This includes a water pump, tubing, and fittings to circulate and deliver the nutrient solution to the plant roots. A submersible water pump is commonly used to push the nutrient solution from the reservoir back to the plants.
4. Grow Lights: Since hydroponic systems are often used indoors or in areas with limited sunlight, you will need artificial grow lights to provide the necessary light energy for plant growth. LED or fluorescent grow lights are popular choices due to their energy efficiency and low heat output.
5. Air Pump and Air Stones: Proper oxygenation is crucial for healthy plant growth. An air pump and air stones will help oxygenate the nutrient solution by creating small bubbles. This promotes better nutrient uptake by the plant roots.
6. pH and EC Meter: These tools will allow you to measure and monitor the pH levels and electrical conductivity (EC) of the nutrient solution. Maintaining the correct pH and nutrient levels is essential for optimal plant growth. Make sure to choose a reliable pH and EC meter for accurate readings.
7. Grow Medium: Depending on your preferred grow medium, you will need materials such as Rockwool cubes, coconut coir, perlite, or vermiculite. The grow medium provides support and helps retain moisture and nutrients around the plant roots.
8. Nutrient Solution: Hydroponic plants rely on a balanced nutrient solution for growth. You can purchase pre-formulated hydroponic nutrients or create your own by combining water-soluble fertilizers with the appropriate ratios of macronutrients (nitrogen, phosphorus, and potassium) and micronutrients (iron, calcium, magnesium, etc.).
These are the basic components and materials you will need to set up a basic hydroponic system. Depending on the specific type of hydroponic system you choose, there may be additional components or specialized equipment required. It’s always important to follow the instructions and recommendations provided by the system manufacturer or reputable sources.
Now that you have an understanding of the necessary components and materials, let’s move on to the step-by-step process of building your hydroponic system!
Step 1: Setting up the Reservoir
The first step in building your hydroponic system is setting up the reservoir. The reservoir is where you will store the nutrient solution that will feed your plants. Follow these steps to properly set up your reservoir:
1. Select a Suitable Container: Choose a container that is large enough to hold an adequate amount of nutrient solution for your plants. It can be a plastic tub, a bucket, or a specialized reservoir designed for hydroponic systems. Make sure it is lightproof to prevent algae growth.
2. Clean the Reservoir: Thoroughly clean and disinfect the reservoir with a mild bleach solution or a commercial hydroponic cleaner. This will remove any potential contaminants and ensure a clean environment for your plants.
3. Add the Nutrient Solution: Fill the reservoir with water, leaving about an inch or two of space from the top. Next, add the appropriate amount of hydroponic nutrient solution according to the instructions on the product label. Mix it well to ensure the nutrients are evenly distributed.
4. Measure pH Levels: Use a pH meter to measure the pH level of the nutrient solution. The recommended pH range for most hydroponic plants is between 5.5 and 6.5. Adjust the pH level by adding pH-up or pH-down solutions, following the instructions provided. Continuously monitor and adjust the pH as needed throughout the growth cycle.
5. Install an Air Pump and Air Stone: To oxygenate the nutrient solution, install an air pump and air stone in the reservoir. Connect the air pump to the air stone using airline tubing and place the air stone at the bottom of the reservoir. This will ensure a constant flow of oxygen to the roots of your plants.
6. Set Up a Timer (Optional): If you want to automate the nutrient solution delivery, you can install a timer to control the water pump. This will allow you to set specific intervals for pumping the nutrient solution into the grow tray. This step is optional but can be beneficial for maintaining a regular feeding schedule.
7. Monitor and Maintain the Reservoir: Regularly check the nutrient solution levels in the reservoir and top it up as needed. It is essential to regularly monitor and adjust the pH and nutrient levels to ensure the optimal growing conditions for your plants. Keep the reservoir covered to prevent evaporation and maintain a consistent nutrient concentration.
By following these steps, you will have successfully set up your hydroponic system’s reservoir. The reservoir acts as the foundation for nutrient delivery to your plants, providing them with the essential elements they need for healthy growth. Now, it’s time to move on to the next step: building the grow tray!
Step 2: Building the Grow Tray
After setting up the reservoir, the next step in building your hydroponic system is constructing the grow tray. The grow tray serves as the platform where your plants will be positioned and where the nutrient solution will flow through. Follow these steps to build your grow tray:
1. Select a Suitable Grow Tray: Choose a grow tray that is spacious enough to accommodate your chosen plant varieties. It should be made of durable and water-resistant material, such as plastic or aluminum. Ensure that the tray has drainage holes to allow excess water to flow out.
2. Measure and Mark the Drainage Holes: Using a waterproof marker, measure and mark the locations where you want to create the drainage holes on the bottom of the grow tray. These holes will allow the nutrient solution to drain out and prevent waterlogging. Space the holes evenly to ensure proper drainage.
3. Drill the Drainage Holes: Use a drill and an appropriately sized bit to drill the marked holes on the bottom of the grow tray. Take care to drill straight and maintain a consistent size for all the holes. After drilling, clean up any debris or rough edges to ensure smooth drainage.
4. Add Drainage Fittings (Optional): If desired, you can install drainage fittings to improve the flow and control of the nutrient solution. Attach the fittings to the drainage holes, following the instructions provided with the fittings. This step is optional but can enhance the efficiency of the system.
5. Mount the Grow Tray: Place the grow tray on a stable surface or support structure, such as a table or stand. Ensure that the tray is level to facilitate even nutrient distribution and prevent stagnant water pooling in one area. Use leveling tools, such as a spirit level, to check and adjust the tray’s position.
6. Connect the Reservoir to the Grow Tray: Position the grow tray in a way that allows easy connection to the reservoir. Attach a suitable-sized hose or tubing from the reservoir outlet to the inlet of the grow tray. Secure the connections tightly to prevent any leaks.
7. Test the Drainage: Fill the grow tray with water and observe how it drains through the holes. Ensure that the drainage is sufficient, and there are no blockages or slow drainage areas. Adjust the positioning or size of the holes if necessary to achieve optimal drainage.
By following these steps, you will have successfully built your grow tray, a vital component of your hydroponic system. The grow tray provides a stable platform for your plants and allows the nutrient solution to flow through, providing them with the necessary nutrients for growth. Now, let’s move on to the next step: installing the nutrient delivery system!
Step 3: Installing the Nutrient Delivery System
Once you have set up the reservoir and built the grow tray, the next step in building your hydroponic system is installing the nutrient delivery system. This system is responsible for circulating and delivering the nutrient solution from the reservoir to the plant roots. Follow these steps to properly install the nutrient delivery system:
1. Position the Water Pump: Place the water pump inside the reservoir, ensuring it is fully submersed in the nutrient solution. Attach the appropriate-sized tubing to the pump outlet. The tubing will carry the nutrient solution to the plants.
2. Route the Tubing: Determine the most efficient path for the tubing to travel from the reservoir to the grow tray. Keep the tubing as straight and free from kinks as possible to ensure smooth nutrient flow. If necessary, use zip ties or clips to secure the tubing in place, preventing any sagging or movement.
3. Attach the Spray Nozzles or Drip Emitters: Depending on your chosen hydroponic system, you will either attach spray nozzles or drip emitters to the tubing. Spray nozzles are commonly used in aeroponic or fogponic systems, while drip emitters are often used in drip irrigation systems. Follow the manufacturer’s instructions to properly attach these components.
4. Place the Spray Nozzles or Drip Emitters: Position the spray nozzles or drip emitters above the grow tray or directly into the grow medium. Ensure they are evenly spaced to provide uniform nutrient distribution across all plants. Consider the growth habit of your plants and adjust the positioning if needed.
5. Connect the Tubing to the Spray Nozzles or Drip Emitters: Attach the tubing to the spray nozzles or drip emitters, making sure the connections are secure. Double-check for any leaks or loose connections. It’s essential to have a tight and sealed connection to prevent nutrient solution wastage.
6. Turn on the Water Pump: Plug in the water pump and turn it on to initiate the flow of the nutrient solution through the tubing. Observe the spray or drip pattern to ensure it is evenly distributed across all plants. Adjust the flow rate if necessary.
7. Test the Nutrient Delivery: Monitor the nutrient delivery system for a sufficient flow of the nutrient solution to the plants. Ensure that all plants receive an adequate amount of nutrients without any clogging or malfunctioning spray nozzles or drip emitters. Make adjustments as needed to ensure optimal nutrient delivery.
By following these steps, you will have successfully installed the nutrient delivery system for your hydroponic system. This system ensures that your plants receive the necessary nutrients for healthy growth. Now that the nutrient delivery system is in place, let’s move on to the next step: adding lighting and ventilation!
Step 4: Adding Lighting and Ventilation
After setting up the reservoir, constructing the grow tray, and installing the nutrient delivery system, the next step in building your hydroponic system is adding lighting and ventilation. Adequate lighting and proper airflow are crucial for plant growth and overall system health. Follow these steps to effectively incorporate lighting and ventilation into your hydroponic setup:
1. Select the Right Grow Lights: Choose appropriate grow lights based on the specific needs of your plants. LED grow lights are popular due to their energy efficiency, customizable spectrums, and low heat output. Place the lights at an optimal height above the plants to ensure even light distribution.
2. Set Up a Lighting Schedule: Determine the appropriate lighting duration and schedule for your plants. Most plants need around 12-16 hours of light per day, but specific requirements may vary. Use a timer to automate the lighting schedule and maintain consistency.
3. Ensure Proper Ventilation: Install a fan or ventilation system to ensure an adequate exchange of fresh air within the growing environment. Proper airflow helps prevent the build-up of humidity, temperature fluctuations, and the growth of molds or mildew. Place the fan strategically to create gentle airflow without directly blowing on the plants.
4. Monitor Temperature and Humidity: Regularly monitor the temperature and humidity levels in your hydroponic system. Ideally, the temperature should be within the range suitable for your plants, typically between 70-85°F (21-29°C). The humidity level should be adjusted based on the growth stage of the plants.
5. Control Odors: Use charcoal filters or air purifiers to minimize any odors that may arise from the hydroponic system. This is particularly beneficial if you are growing plants with strong aromas.
6. Check Electrical Safety: Ensure that all electrical connections, especially those related to lighting and ventilation, are secure and in compliance with safety standards. Avoid any exposed wires or electrical hazards that could jeopardize the safety of your hydroponic system.
7. Regular Maintenance: Conduct regular maintenance of the lighting and ventilation components. Clean the grow lights periodically to remove dust or debris that may obstruct light penetration. Clean or replace ventilation filters as needed to maintain proper airflow.
By following these steps, you will have successfully added lighting and ventilation to your hydroponic system. These elements are crucial for promoting healthy plant growth, optimizing photosynthesis, and maintaining an optimal growing environment. With lighting and ventilation in place, your hydroponic system will be well-equipped to support the growth and development of your plants. Now, let’s move on to the next step: testing and adjusting the pH levels!
Step 5: Testing and Adjusting the pH Levels
Once you have set up the reservoir, built the grow tray, installed the nutrient delivery system, and added lighting and ventilation, the next step in building your hydroponic system is testing and adjusting the pH levels of the nutrient solution. Maintaining the proper pH range is vital for optimal nutrient uptake and overall plant health. Follow these steps to effectively test and adjust the pH levels:
1. Acquire a pH Testing Kit: Purchase a reliable pH testing kit that includes pH test strips or a pH meter. These tools will help you accurately measure the pH level of your nutrient solution.
2. Calibrate Your pH Meter (if applicable): If you are using a pH meter, follow the manufacturer’s instructions to calibrate it before use. Calibration ensures accurate pH readings.
3. Collect a Sample of the Nutrient Solution: Use a clean container to collect a sample of the nutrient solution from the reservoir. It’s important to take the sample from multiple areas to obtain an accurate representation of the solution’s pH.
4. Test the pH of the Sample: Using the pH test strips or pH meter, test the pH level of the nutrient solution sample. Compare the color of the test strip or the reading on the pH meter to the provided pH range chart to determine the pH level.
5. Adjust the pH Level: If the pH level is outside of the recommended range for your plants (typically 5.5-6.5), you will need to adjust it. To raise the pH, add a pH-up solution following the manufacturer’s instructions. To lower the pH, add a pH-down solution. Mix the solution well and retest the pH until it falls within the appropriate range.
6. Monitor and Adjust Regularly: Keep track of the pH levels over time and make adjustments as necessary. pH levels can fluctuate due to plant uptake, nutrient usage, or changes in water quality. Regularly check and adjust the pH to maintain a stable and optimal range for your plants.
7. Consider a pH Stabilizer: If you find it challenging to maintain stable pH levels, you may want to use a pH stabilizer product. These solutions help buffer and stabilize the pH, making it easier to maintain within the desired range.
By following these steps, you will be able to effectively test and adjust the pH levels of your hydroponic system. Remember to regularly monitor and adjust the pH as needed to ensure optimal nutrient uptake and plant growth. Now, let’s move on to the next step: planting and maintaining your hydroponic system!
Step 6: Planting and Maintaining Your Hydroponic System
After completing the previous steps of setting up the reservoir, constructing the grow tray, installing the nutrient delivery system, adding lighting and ventilation, and testing and adjusting the pH levels, you’re now ready for the exciting step of planting and maintaining your hydroponic system. Follow these guidelines to ensure successful plant growth and long-term maintenance:
1. Select Suitable Plants: Choose plants that are well-suited for hydroponic cultivation. Leafy greens like lettuce, spinach, and kale, as well as herbs like basil and parsley, are popular choices for beginners. Consider the space requirements, growth habits, and nutrient needs of the plants you select.
2. Prepare the Grow Medium and Plant Containers: If you’re using a grow medium like Rockwool cubes or coconut coir, soak them in water to rehydrate them before planting. For larger plants, use net pots or containers that allow the roots to sit in the nutrient solution while providing support.
3. Plant the Seedlings or Seeds: Carefully place the seedlings into the grow medium or sow the seeds according to their specific depth requirements. Ensure the roots are in contact with the nutrient solution or placed in the grow medium, depending on your system. Gently firm the growing medium around the roots for stability.
4. Monitor Plant Health: Regularly check your plants for any signs of nutrient deficiencies, pests, or diseases. Keep a close eye on leaf color, growth rates, and overall plant vigor. Adjust nutrient levels and perform any necessary maintenance or treatment to ensure healthy plant growth.
5. Maintain Nutrient Solution Levels: Monitor the nutrient solution levels in the reservoir and top up as needed to maintain the desired level. Observe the plants’ water uptake patterns to determine if any adjustments are required. Aim for consistent nutrient availability and avoid allowing the reservoir to run dry.
6. Monitor and Adjust Lighting and Ventilation: Continuously assess the lighting duration, intensity, and placement to ensure optimal plant growth. Adjust the distance between the grow lights and the plants as they grow. Monitor ventilation to maintain proper air circulation and prevent temperature and humidity issues.
7. Implement a Pest and Disease Management Plan: Take preventive measures to protect your plants from pests and diseases. Regularly inspect the plants, maintain cleanliness in the grow area, and promptly address any issues that arise. Consider implementing natural pest deterrents or organic pest control methods.
8. Harvest and Replace: Harvest mature plants at the appropriate stage and replenish the system with new seedlings or seeds. This continuous cycle of harvesting and replanting ensures a steady supply of fresh produce.
Remember, maintaining a hydroponic system requires ongoing care and attention. Regularly monitor and adjust pH levels, nutrient concentrations, and environmental conditions based on the needs of your plants. With proper maintenance, your hydroponic system will provide you with a thriving and bountiful garden in any season.
Troubleshooting Common Issues
When working with a hydroponic system, it’s important to be aware of potential issues that may arise. Here are some common problems you may encounter and solutions for troubleshooting them:
1. Nutrient Deficiencies: If you notice yellowing, stunted growth, or leaf discoloration, it could indicate nutrient deficiencies. Adjust the nutrient solution by adding the appropriate nutrients to restore a balanced concentration.
2. Algae Growth: Algae can thrive in the nutrient solution or grow tray due to excess light exposure. Maintain a lightproof reservoir and ensure proper lighting duration to minimize algae growth. If algae are present, clean the grow tray, cover it, and consider using an algaecide or hydrogen peroxide solution.
3. pH Imbalances: Fluctuations in pH levels can negatively affect nutrient uptake. Continuously monitor the pH and adjust as needed to maintain the desired range. Use pH-up or pH-down solutions to raise or lower the pH accordingly.
4. Damaged or Wilting Plants: Wilting or weak plants can be caused by various factors, including overwatering, underwatering, inadequate lighting, or pests. Assess the specific issue and make the necessary adjustments, such as adjusting watering frequency, improving lighting, or implementing pest control measures.
5. Pest Infestation: Common pests in hydroponics include aphids, spider mites, and fungus gnats. Regularly inspect the plants for signs of pests and implement appropriate pest management techniques such as using insecticidal soaps, neem oil, or introducing beneficial insects to control pest populations.
6. Root Rot: Root rot is typically caused by overwatering or poorly oxygenated root zones. Ensure proper oxygenation by using air stones and maintaining adequate airflow. Adjust watering frequency and consider using a beneficial microbial product to promote a healthy root environment.
7. Temperature and Humidity Issues: Extreme temperatures or humidity levels can affect plant growth and nutrient uptake. Use fans or ventilation systems to regulate temperature and humidity levels. Provide adequate air circulation and ventilation to prevent condensation and mold growth.
8. Inadequate Light Levels: Insufficient lighting can lead to leggy or weak plants. Ensure that the grow lights provide sufficient intensity and coverage for the plants. Adjust the placement and height of the lights to optimize light distribution across the entire plant canopy.
Remember, troubleshooting common issues in a hydroponic system requires observation, attentiveness, and prompt action. Regular monitoring, maintaining optimal growing conditions, and addressing issues as they arise will help you achieve successful and thriving plant growth in your hydroponic garden.
Conclusion
Congratulations on building your own hydroponic system! You’ve taken a significant step towards eco-friendly gardening and enjoying the benefits of sustainable, year-round cultivation. By following the steps outlined in this guide, you have gained the knowledge and skills to set up and maintain a successful hydroponic garden.
Hydroponics offers numerous advantages, including water efficiency, space optimization, higher yields, and reduced maintenance. With the right system, you can grow a wide variety of plants in smaller spaces, free from soil-borne diseases and pests. By closely monitoring pH levels, nutrient concentrations, and environmental conditions, you can provide your plants with optimal growing conditions and ensure healthy growth.
Remember to regularly check and adjust the pH levels, maintain the nutrient solution, and monitor the overall health of your plants. Implement preventive measures to address common issues like nutrient deficiencies, pests, and imbalances. With proper care and attention, your hydroponic system will yield delicious and nutritious crops throughout the year.
As you continue your hydroponic gardening journey, feel free to experiment with different plant varieties, nutrient solutions, and growing techniques. Explore advanced systems, such as vertical farming or aquaponics, to expand your knowledge and skills in sustainable gardening.
Enjoy the satisfaction of growing your own fresh produce, cultivating a deeper connection with nature, and minimizing your environmental impact. Embrace the possibilities that hydroponics offers and uncover the joys of eco-friendly gardening!