Home>Gardening Techniques>DIY Projects>How To Build A Backyard Water Feature
DIY Projects
How To Build A Backyard Water Feature
Modified: January 22, 2024
Learn how to create a stunning backyard water feature with our step-by-step DIY projects. Transform your outdoor space into a serene oasis.
(Many of the links in this article redirect to a specific reviewed product. Your purchase of these products through affiliate links helps to generate commission for Chicagolandgardening.com, at no extra cost. Learn more)
Table of Contents
- Introduction
- Choosing the Right Location
- Selecting the Water Feature Design
- Gathering the Necessary Materials and Tools
- Preparing the Site
- Digging the Pond or Excavating the Area
- Installing the Water Pump
- Building the Waterfall or Fountain
- Adding Decorative Elements
- Connecting the Electrical Components
- Filling and Testing the Water Feature
- Maintaining and Troubleshooting the Water Feature
- Conclusion
Introduction
Welcome to the world of DIY backyard projects! If you’re looking to add a touch of serenity and beauty to your outdoor space, building a backyard water feature is the perfect project for you. Whether you dream of a tranquil pond with lilies floating gracefully or a charming fountain that creates a soothing sound, the possibilities are endless.
Not only can a backyard water feature enhance the aesthetics of your outdoor area, but it can also create a relaxing ambiance and serve as a focal point for gatherings with family and friends. Plus, tackling this project on your own allows you to personalize every aspect of the design and save some money in the process.
Before you get started, it’s essential to have a clear plan in place. In this guide, we’ll walk you through the step-by-step process of building a backyard water feature that will leave all your neighbors envious. We’ll cover everything from selecting the right location to troubleshooting common issues, ensuring that you have all the knowledge you need to bring your water feature to life.
But first, let’s address the importance of choosing the right location for your backyard water feature. The location will determine not only the visual impact of your water feature but also its functionality and overall success.
Choosing the Right Location
When it comes to building a backyard water feature, selecting the right location is crucial. The location will not only determine the visual impact of your water feature but also its functionality and overall success. Here are some factors to consider when choosing the perfect spot:
- Sunlight and Shade: Take note of the sunlight and shade patterns in your backyard throughout the day. Most water plants require a minimum of six hours of direct sunlight per day. So, it’s important to choose a location that receives adequate sunlight to support the growth of aquatic plants.
- Proximity to Power Source: Since most water features require a pump to circulate the water, it’s essential to choose a location that is close to a power source. However, if your dream water feature is far from an electrical outlet, you can explore options like solar-powered pumps or hiring an electrician to install an outlet nearby.
- Accessibility: Consider how easily accessible the water feature will be for maintenance and upkeep. You’ll want to ensure that you can easily reach the water feature for cleaning, adding chemicals, and performing any necessary repairs or adjustments.
- Aesthetics: Think about how the water feature will fit into the overall aesthetic of your backyard. Consider the surrounding landscape, existing plants, and structures. You want the water feature to blend harmoniously with the natural elements and complement the overall design scheme.
- Noise Level: Keep in mind the noise level of the water feature. If you’re aiming for a peaceful and relaxing ambiance, you might want to avoid placing the water feature too close to seating areas or bedrooms. On the other hand, if you want to mask noise from nearby traffic or neighbors, placing the water feature strategically can help create a more tranquil environment.
Once you’ve considered these factors, take the time to walk around your backyard and visualize different locations. Take note of the pros and cons of each spot, and trust your instincts. Choose a location that resonates with you and aligns with your vision for the water feature.
Now that you’ve selected the perfect location, it’s time to move on to the next step: selecting the design of your backyard water feature.
Selecting the Water Feature Design
Choosing the design for your backyard water feature is an exciting step in the process. The design will greatly impact the overall look and feel of your outdoor space. Here are some popular water feature designs to consider:
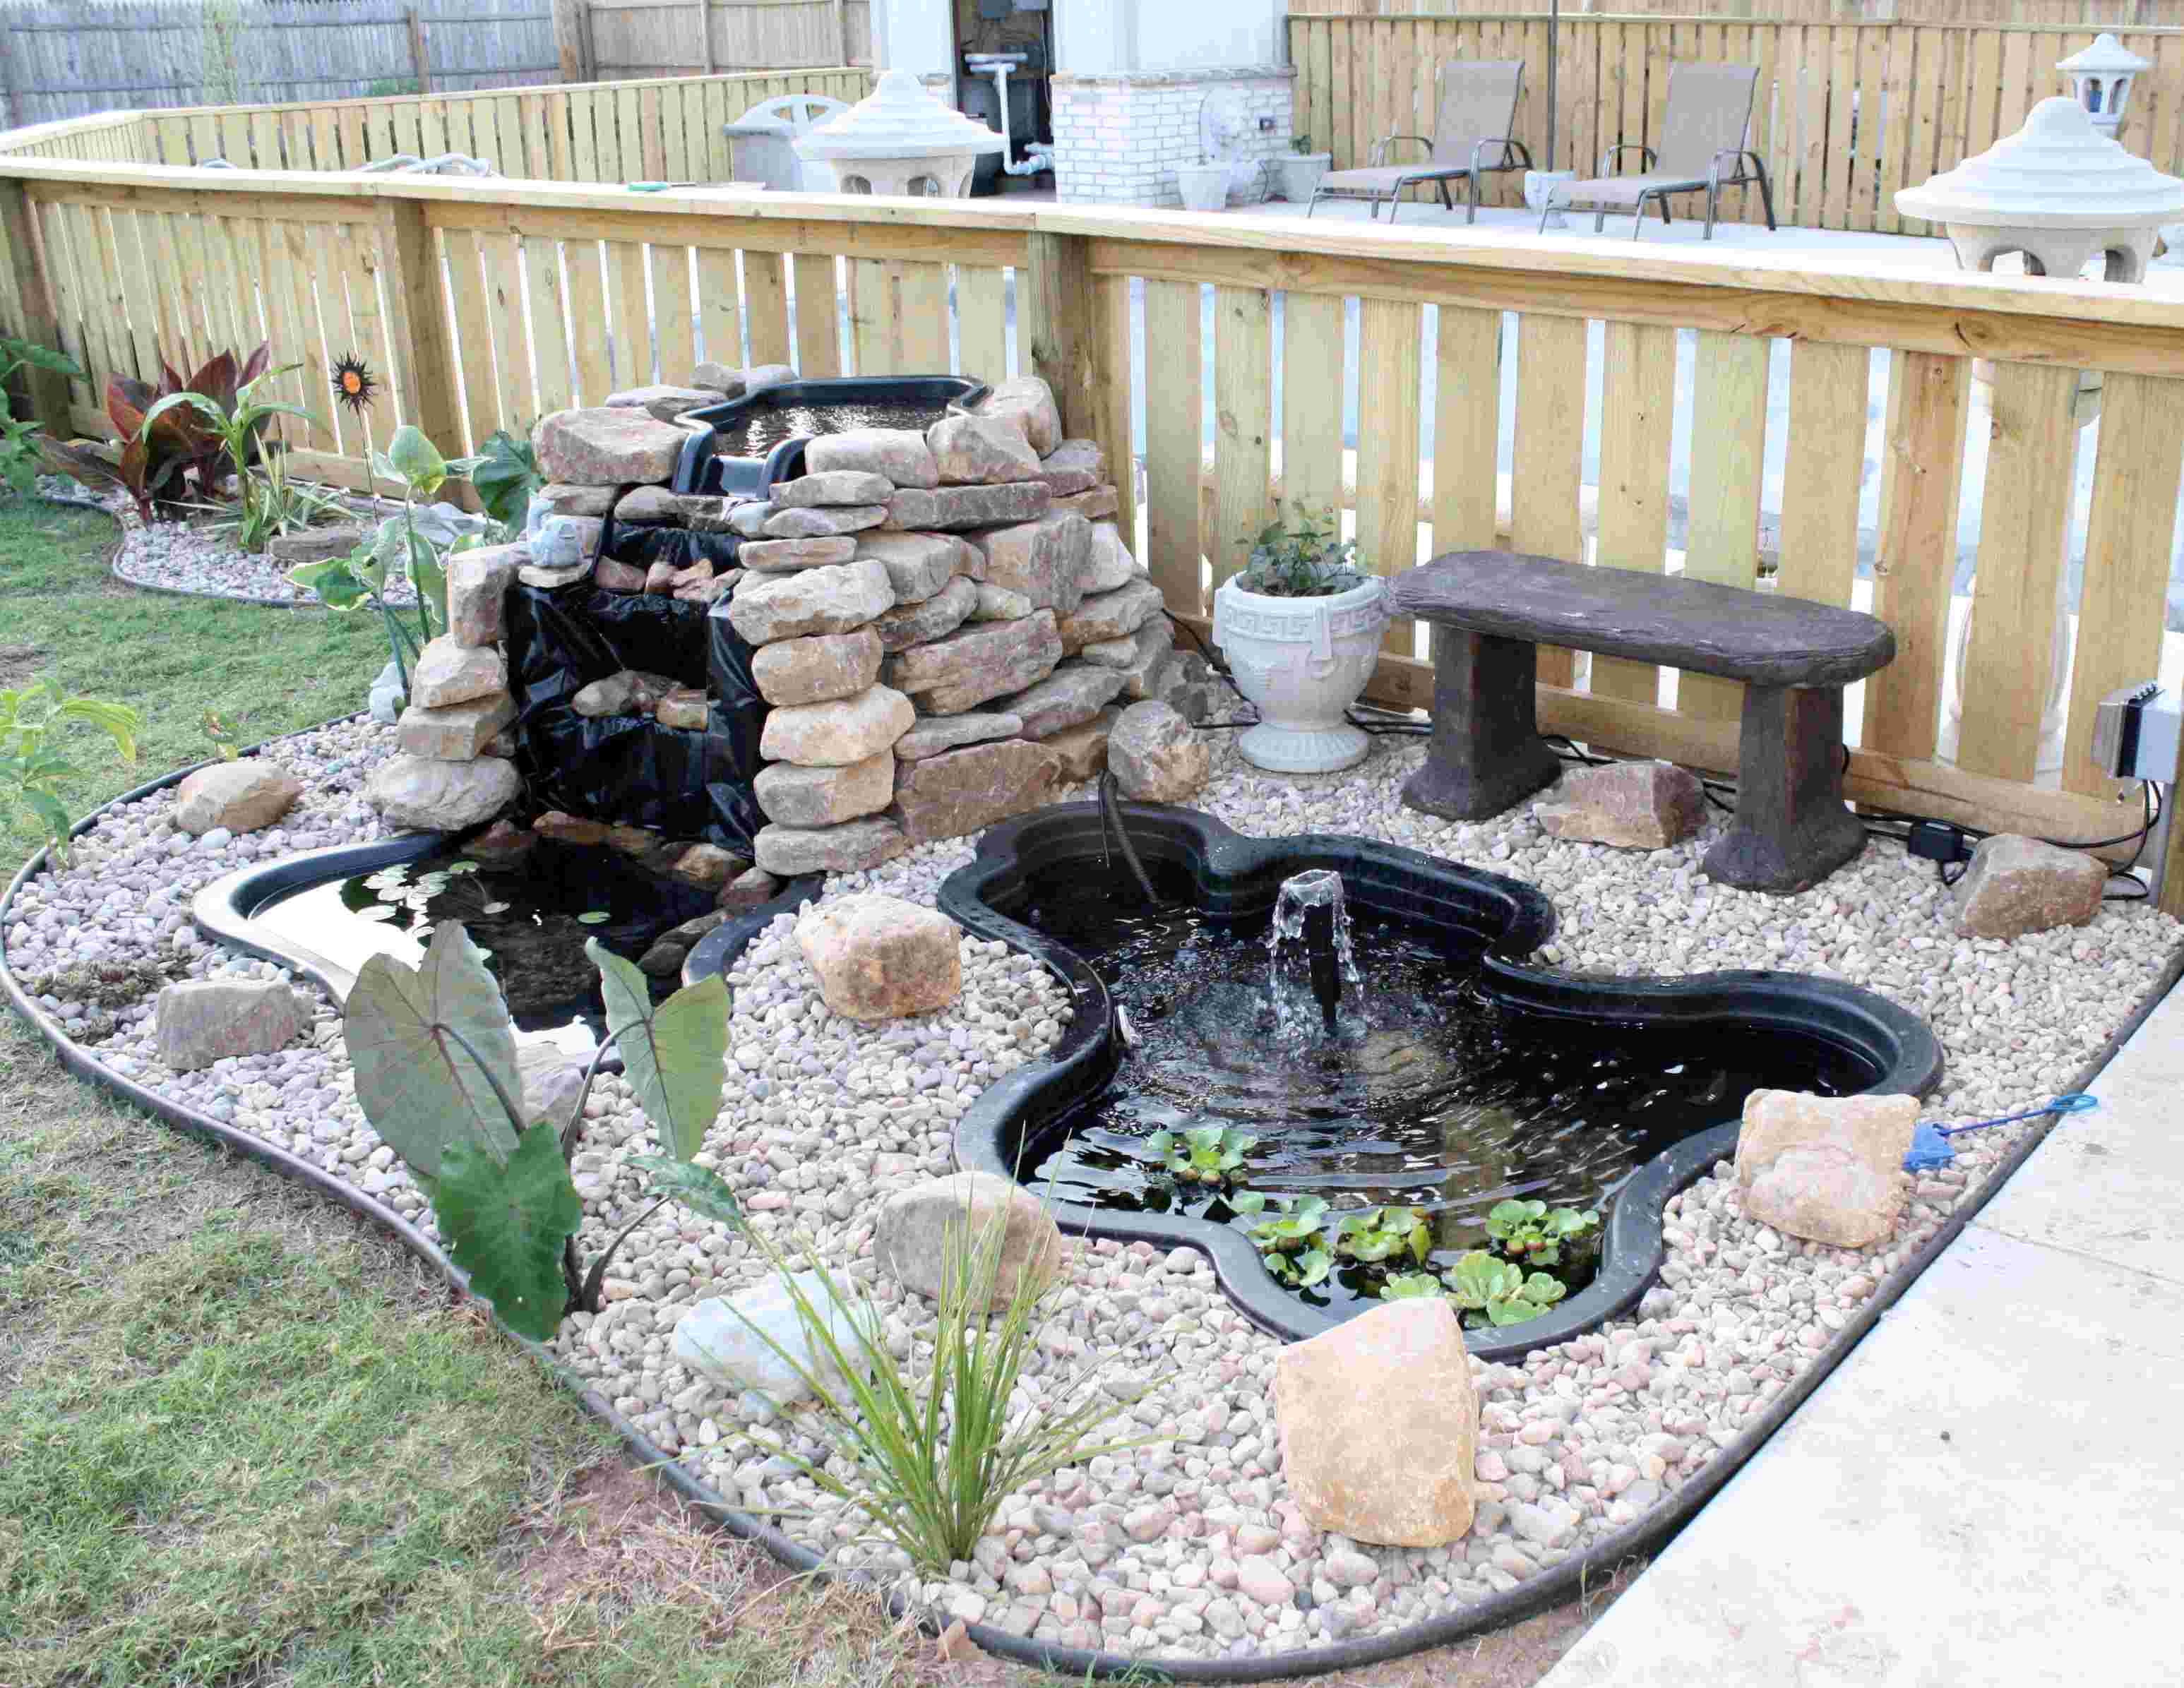
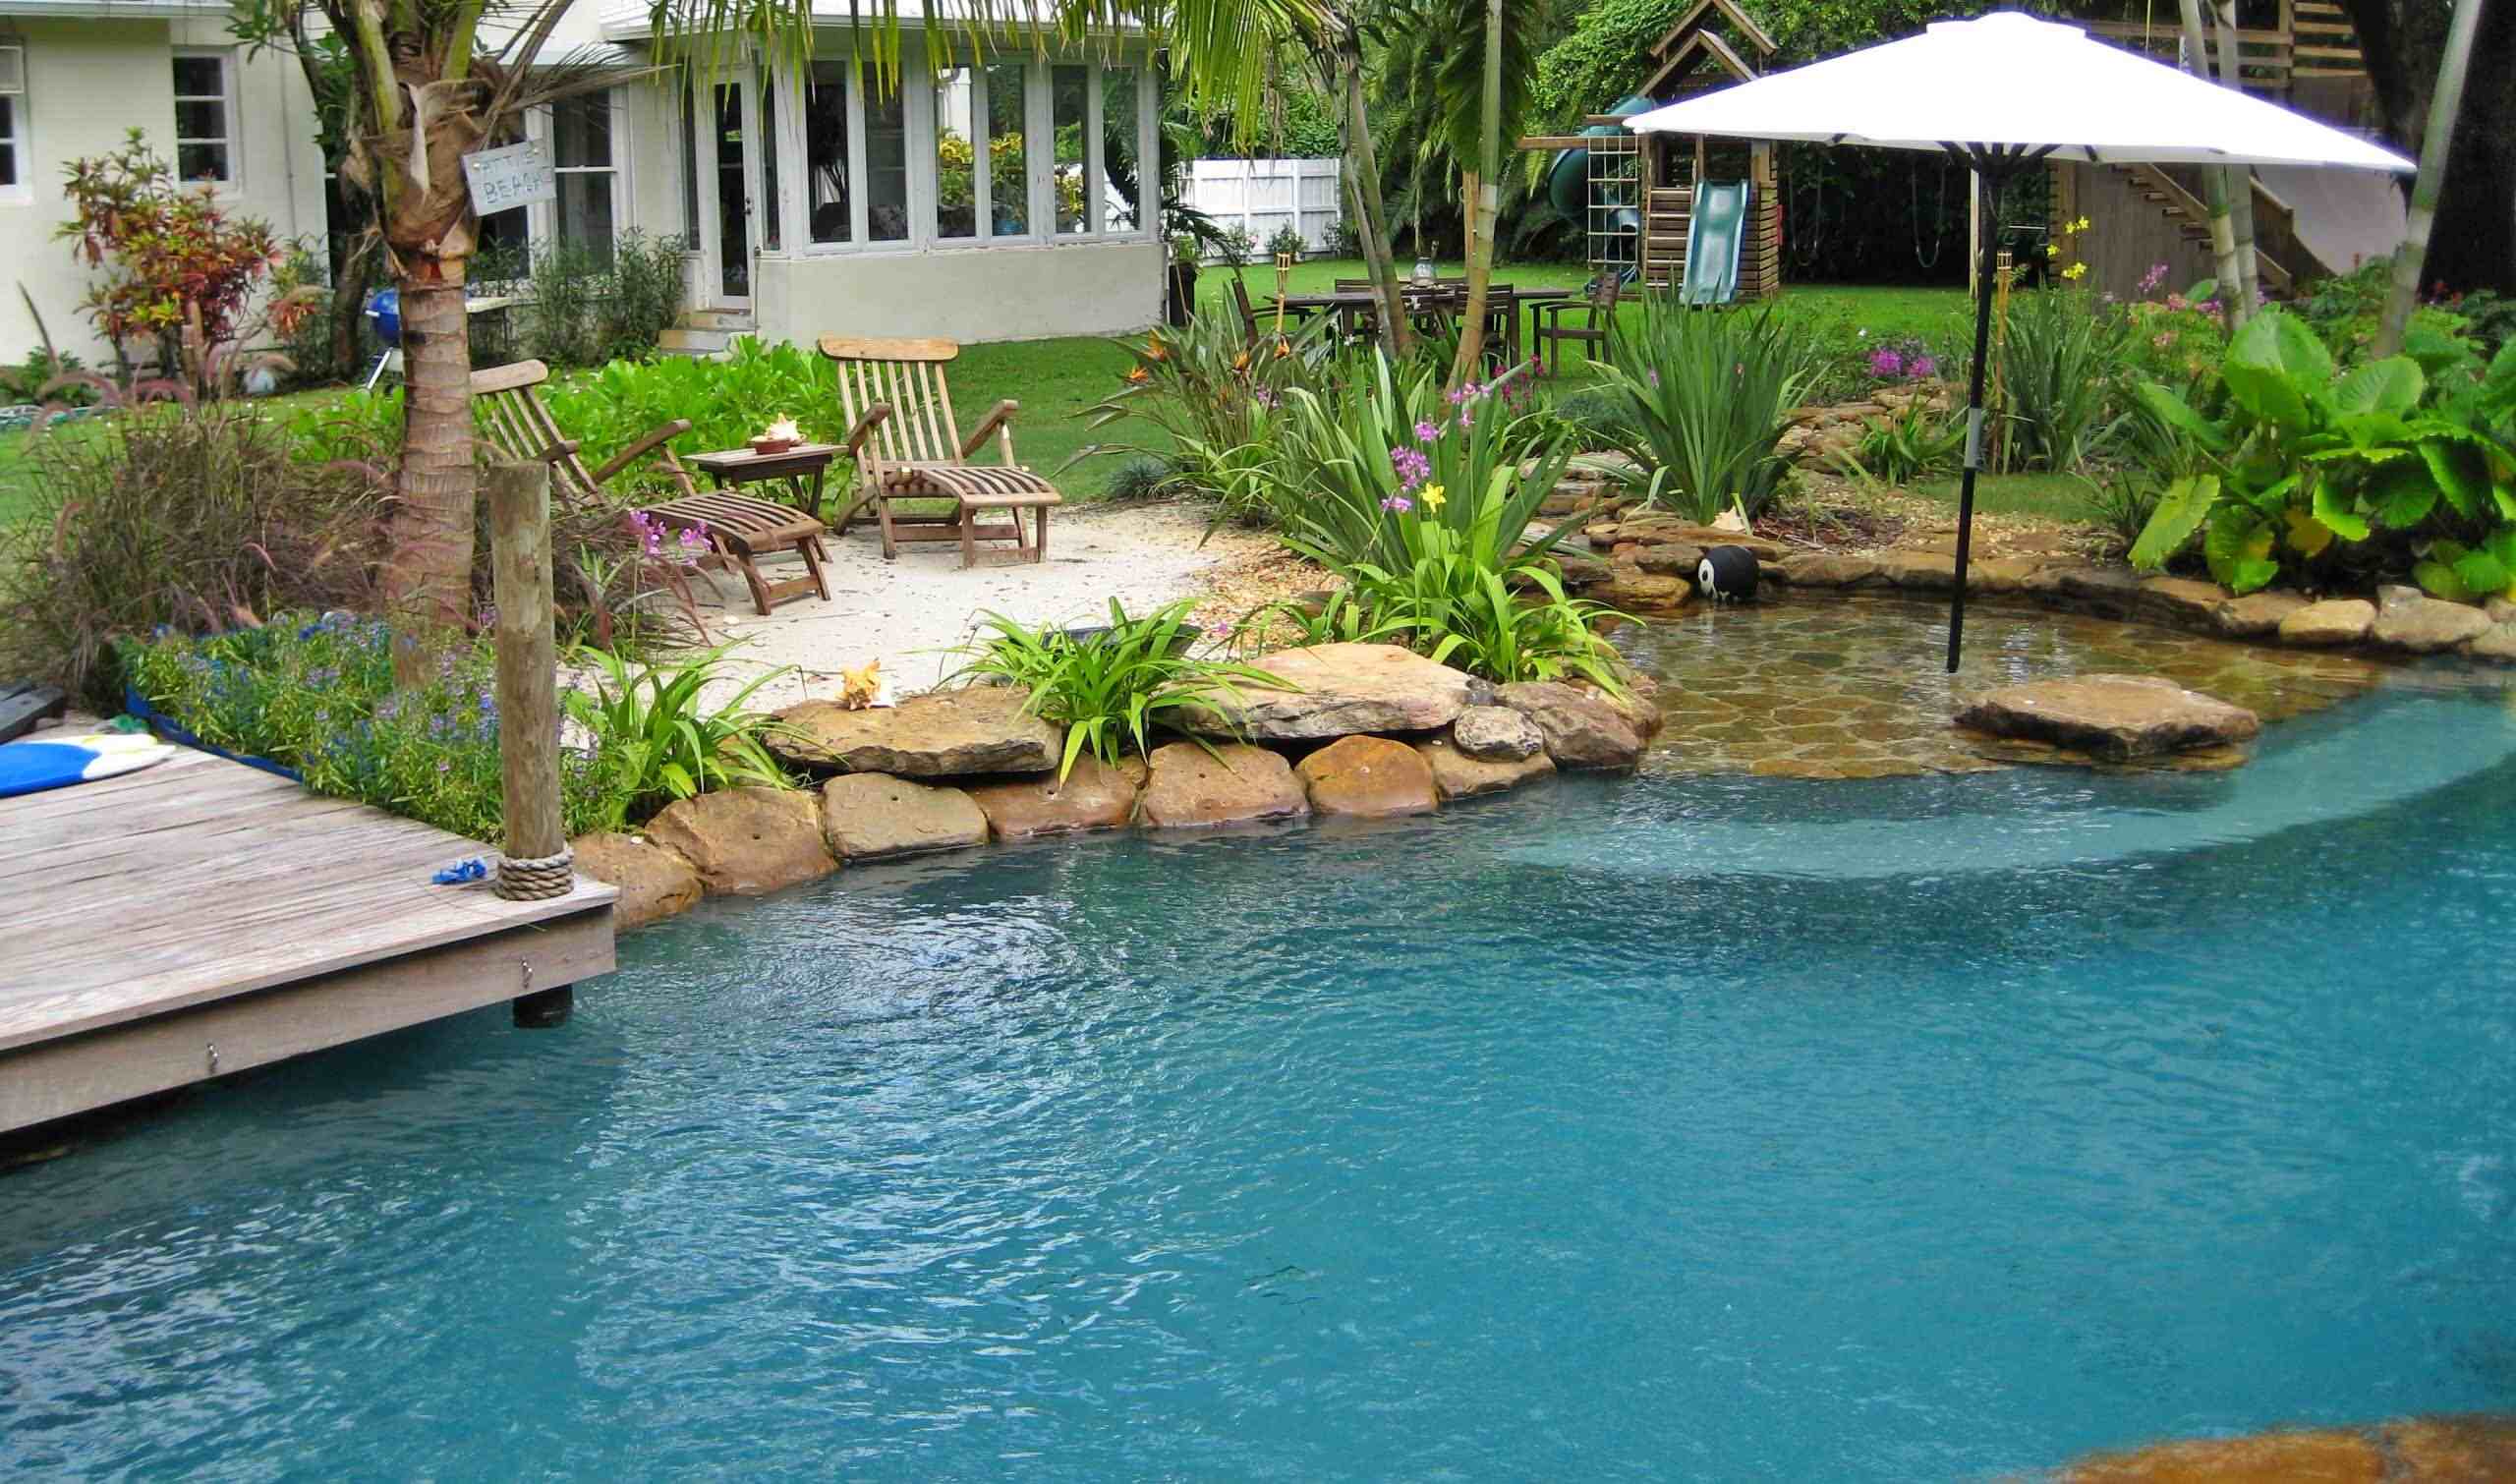
- Pond: A pond is a classic and versatile option for a backyard water feature. It can range in size from a small, serene oasis to a larger, more elaborate ecosystem. Ponds are perfect for those who want to incorporate fish and aquatic plants into their water feature. They provide a habitat for wildlife and create a natural, serene atmosphere.
- Fountain: A fountain is a timeless choice that adds elegance and charm to any backyard. Fountains come in various styles, including tiered, wall-mounted, and free-standing. They offer the soothing sound of flowing water and can be a striking focal point for your outdoor space. Fountains are generally easier to maintain compared to ponds and can be a great option for smaller yards.
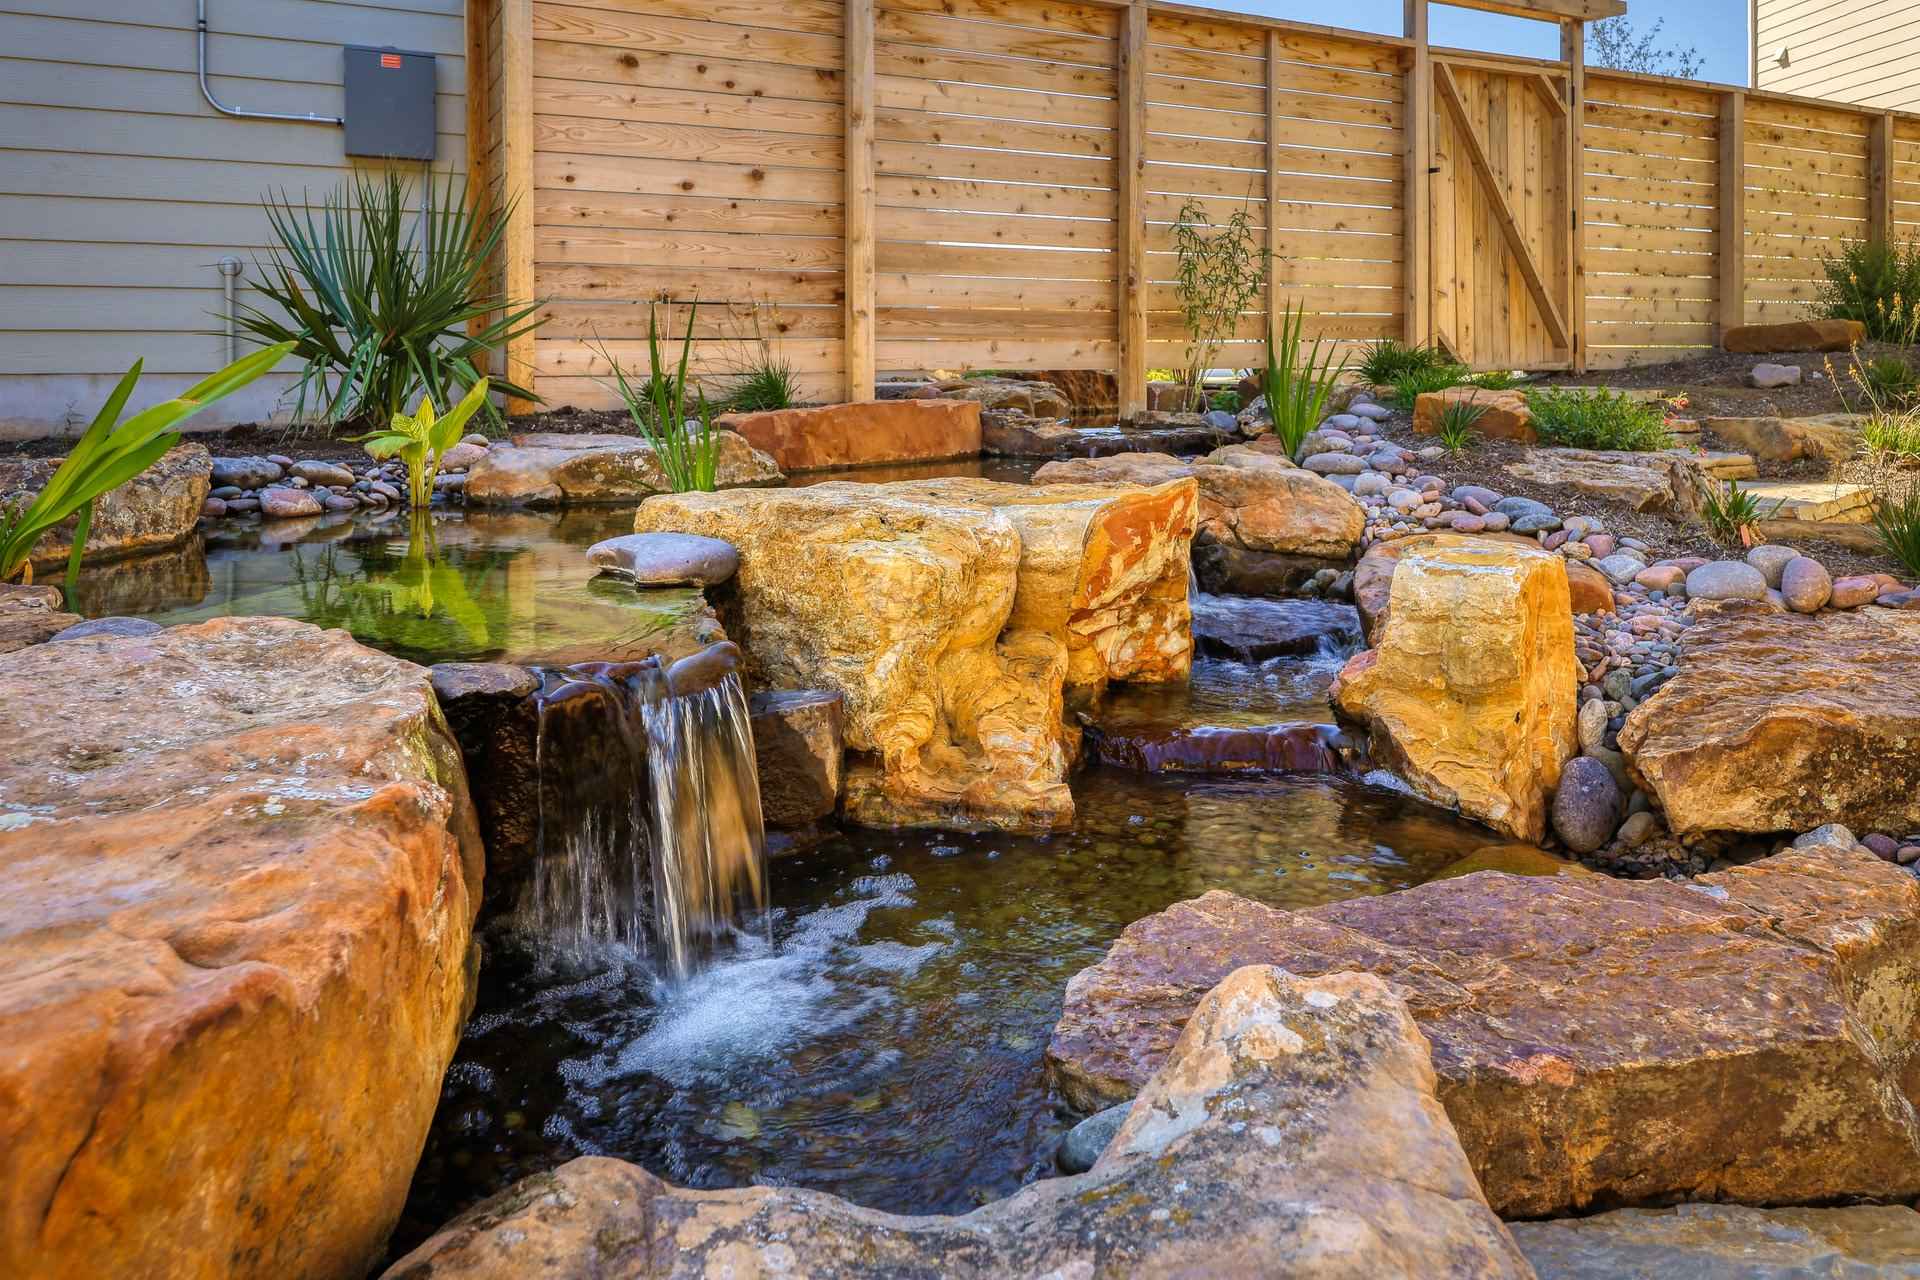
- Waterfall: If you want to create a dramatic and visually impactful water feature, a waterfall is an excellent choice. Waterfalls can be integrated into a pond or designed as stand-alone features. They add movement and sound to your outdoor space, creating a soothing and captivating atmosphere. Waterfalls can be customized to fit the size and style of your yard, making them a versatile option.
- Stream: A stream is a unique and dynamic water feature that adds a touch of nature to your backyard. It mimics the flow of a natural river or creek, meandering through rocks and plants. Streams can be combined with ponds or waterfalls to create a more complex and cohesive design. They offer a serene and tranquil environment and provide a cooling effect during hot summer days.
- Container Water Garden: For those with limited space or who prefer a portable option, a container water garden is a fantastic choice. It involves using containers such as large pots, barrels, or even repurposed items to create a miniature water feature. Container gardens can be placed on a patio, deck, or balcony, making them ideal for urban or smaller spaces. They offer the same beauty and serenity as larger water features but in a more compact size.
Consider your space, budget, and personal preferences when selecting the water feature design. Take into account the size of your yard, the existing landscaping, and the overall theme of your outdoor area. It’s important to choose a design that complements your style and meets your practical needs.
Once you have chosen the water feature design, it’s time to gather the necessary materials and tools to bring your vision to life.
Gathering the Necessary Materials and Tools
Now that you have chosen the design for your backyard water feature, it’s time to gather the necessary materials and tools to bring your vision to life. Here is a list of the essential items you will need:
Materials:
- Waterproof liner or pre-formed pond
- Pond pump
- Tubing and fittings
- Rocks and stones for decoration
- Aquatic plants
- Fountain nozzle (if applicable)
- Electrical cables and connectors (if required)
- Water treatment chemicals
- Decorative elements such as sculptures or lighting (optional)
Tools:
- Shovel or excavator
- Rake
- Level
- Trowel
- Utility knife
- Spray paint or chalk (for marking the outline of the water feature)
- Measuring tape
- Garden hose
- Wire cutters
- Duct tape or sealant
Be sure to check the specific requirements for your chosen water feature design, as additional materials and tools may be needed. Consider the size of your water feature and the unique characteristics of your backyard when determining the quantity of materials required.
It is also important to invest in high-quality materials and tools to ensure the longevity and functionality of your water feature. Quality liner or pre-formed ponds, reliable pumps, and sturdy fittings will help prevent leaks and ensure efficient water circulation.
Before you start gathering materials, it’s a good idea to create a checklist and do some research on reputable suppliers or local garden centers. This will help you compare prices and find the best deals on the materials you need.
Once you have gathered all the necessary materials and tools, you are ready to move on to the next step: preparing the site for your water feature.
Preparing the Site
Before you start digging or installing your backyard water feature, it’s important to properly prepare the site. This will ensure a stable foundation and make the installation process easier. Here are the steps to follow when preparing the site:
- Clear the Area: Remove any existing vegetation, rocks, or debris from the site where you plan to install your water feature. This includes grass, weeds, and tree roots. Use a shovel, rake, or other appropriate tools to clear the area completely.
- Mark the Outline: Use spray paint or chalk to mark the outline of your water feature. This will give you a clear visual of where you will be excavating or placing the pre-formed pond. Ensure that the marked area corresponds to the size and shape of your water feature design.
- Check for Level: Use a level to ensure that the site is relatively level. A slight slope can be beneficial for water circulation and drainage. However, major slopes or uneven ground may require additional excavation or leveling to create a stable foundation.
- Consider Underground Utilities: Before digging, it is crucial to check for any underground utilities such as gas, water, or electrical lines. Contact your local utility companies to mark the locations of these lines to avoid any accidents or damages.
- Measure and Stake Out: Use a measuring tape to determine the dimensions of your water feature and stake out the corners. This step will help you visualize the final size and shape of your water feature before excavation or installation.
- Prepare the Water Source and Drainage: If your water feature requires a direct water source or drainage system, make the necessary connections before proceeding with the installation. This may involve connecting to a hose or directing the water flow into a designated drainage area.
- Remove Excess Soil: If you are excavating for a pond or stream, use a shovel or excavator to remove excess soil within the marked area. Dig to the desired depth, accounting for the depth of the pond liner or pre-formed pond. Keep the excavated soil for later use, such as building up planting areas or creating natural contours.
By properly preparing the site, you are setting the foundation for a successful water feature installation. Taking the time to clear the area, mark the outline, level the ground, and consider underground utilities will ensure a smooth and safe process moving forward.
Once the site is prepared, you are ready to move on to the next step: excavating the pond or area for your water feature.
Digging the Pond or Excavating the Area
Now comes the exciting part of building your backyard water feature—digging the pond or excavating the area. This step is crucial for creating the foundation and shape of your water feature. Follow these guidelines to ensure a successful excavation:
- Start Digging: Begin by digging around the perimeter of the marked outline. Use a shovel or excavator to remove the soil gradually. Work your way towards the center, loosening the soil and breaking up any large clumps or rocks as you go.
- Depth and Shape: Dig to the desired depth that suits your water feature design. Be mindful of any specific depth requirements for plants or fish if you plan to incorporate them into your pond. As you dig, periodically check the depth with a measuring tape or depth gauge to ensure consistency.
- Sloping and Shelves: Consider the shape of your pond or water feature and create any desired slopes or shelves. Slopes allow for easier access for wildlife and maintenance, while shelves provide spaces for marginal or aquatic plants. Use a level to ensure that the slopes and shelves are even and properly aligned.
- Smooth Edges: Pay attention to the edges of the pond or water feature, ensuring that they are smooth and free from any sharp or uneven surfaces. Smooth edges will make it easier to install the liner or pre-formed pond and prevent punctures or tears.
- Retain Soil: Keep in mind that you may need to retain some of the excavated soil to create planting areas or natural contours around the water feature. Set aside the soil in a designated area for later use, and cover it to prevent erosion or displacement.
- Remove Debris: As you dig, be sure to remove any debris, roots, or large rocks that may hinder the installation process or cause damage to the liner or pump. Clear the area thoroughly to create a clean working space for the next steps.
Take your time with the excavation process, ensuring precision and attention to detail. Step back periodically to assess the shape and depth of the pond and make adjustments as needed. Remember, a well-dug pond or excavated area will lay the foundation for a visually appealing and functional water feature.
Once you have finished the excavation, you can proceed to the next step of installing the water pump and creating the waterfall or fountain for your backyard oasis.
Installing the Water Pump
The water pump is a crucial component of your backyard water feature as it ensures proper circulation and movement of the water. Installing the water pump correctly is essential for the overall functionality and performance of your water feature. Follow these steps to install the water pump:
- Choose the Right Size: Select a water pump that is suitable for the size and flow requirements of your water feature. Consider factors such as the volume of water, the desired water flow rate, and the height the water needs to be pumped to.
- Place the Pump: Position the water pump in the deepest part of the water feature, whether it’s a pond, stream, or container. This placement will ensure that the pump can access an adequate amount of water without running dry.
- Connect the Tubing: Attach one end of the tubing to the outlet or connector of the water pump. Make sure the tubing fits securely and is the appropriate size for the pump’s outlet. The other end of the tubing will be connected to the water feature, such as the fountain nozzle or the waterfall.
- Secure the Pump: Use bricks, rocks, or other stable materials to secure the water pump in place. This will prevent the pump from shifting or floating when the water is flowing through it.
- Check for Leaks: Before turning on the water, inspect all connections to ensure they are tight and secure. Check for any leaks or drips and make the necessary adjustments or repairs.
- Prime the Pump: If your water pump requires priming, follow the manufacturer’s instructions to ensure proper priming. Priming involves filling the pump with water to create a vacuum and initiate water flow.
- Connect to Power: Connect the water pump to a GFCI (Ground Fault Circuit Interrupter) outlet to ensure electrical safety. If needed, use waterproof connectors or extension cords specifically designed for outdoor use.
- Test the Pump: Turn on the power and test the water pump. Observe the flow of water and make any necessary adjustments to achieve the desired water flow rate and direction.
Be sure to regularly inspect the water pump for any debris, such as leaves or twigs, that may interfere with its performance. Keep the pump clean and maintain it according to the manufacturer’s recommendations to ensure its longevity and efficiency.
Now that the water pump is installed and functioning, it’s time to move on to the next step of building the water feature—the construction of the waterfall or fountain.
Building the Waterfall or Fountain
Building the waterfall or fountain is an exciting and visually striking step in creating your backyard water feature. The design and construction of the waterfall or fountain will add a unique element of beauty and sound to your outdoor space. Follow these steps to build the waterfall or fountain:
- Plan the Design: Visualize and plan the desired design and shape of your waterfall or fountain. Take into consideration the size of your water feature, the available space, and the overall aesthetics you want to achieve. Sketch out the design on paper or use a digital design tool to map out the specifics.
- Choose the Waterfall or Fountain Style: Decide on the style and type of waterfall or fountain that complements your water feature design. There are various options, such as cascading waterfalls, layered water walls, or intricate fountain jets. Consider the flow rate, height, and sound of the water to achieve your desired effect.
- Create the Structure: Using rocks, stones, bricks, or other materials, start building the structure for your waterfall or fountain. Begin at the bottom, gradually stacking and arranging the materials to create a sturdy and visually appealing structure. Ensure that the structure is stable and level to prevent any shifting or collapsing.
- Install the Waterfall or Fountain Components: Depending on the design, install the necessary components such as spillways, water jets, or fountain heads. Follow the manufacturer’s instructions for proper installation and placement to achieve the desired water flow and cascading effect.
- Connect the Water Pump: Attach the tubing from the water pump to the waterfall or fountain components. Ensure that the connections are secure and watertight to prevent any leaks or disruptions in the water flow. Adjust the flow rate or direction as needed to achieve the desired effect.
- Add Decorative Elements: Enhance the visual appeal of your waterfall or fountain by adding decorative elements such as rocks, stones, plants, or lighting. Arrange these elements around the structure and along the water flow to create a natural and harmonious look.
- Test the Water Feature: Turn on the water pump and test the water flow and effect of the waterfall or fountain. Observe the sound, movement, and overall aesthetics to make any necessary adjustments or refinements to achieve your desired outcome.
- Make Safety Considerations: If you have children or pets, take precautions to ensure the safety of your water feature. Adding a protective cover or fence around the water feature can help prevent accidents and unnecessary risks.
Building the waterfall or fountain requires creativity and attention to detail. Take your time with the construction, ensuring that each component is securely in place and functioning as desired. The result will be a stunning and captivating water feature that adds a touch of elegance and tranquility to your outdoor space.
Now that your waterfall or fountain is complete, it’s time to add the finishing touches and decorative elements to enhance the overall visual impact of your water feature.
Adding Decorative Elements
Adding decorative elements to your backyard water feature is an opportunity to personalize and enhance its visual appeal. These elements can help create a harmonious and captivating environment that complements your overall outdoor aesthetic. Consider the following decorative elements to elevate the beauty of your water feature:
- Landscaping: Incorporate landscaping elements around the water feature to create a seamless blend with the surrounding environment. Use a variety of plants, such as aquatic, marginal, or ornamental grasses, to soften the edges and add color and texture to the area. Opt for plants that thrive in wet conditions and complement the overall design of your water feature.
- Rocks and Stones: Strategically place rocks and stones along the edges of the water feature or within the waterfall or fountain structure. Choose rocks of varying sizes and textures to create a natural and visually appealing look. The rocks can add depth, provide seating areas, and create natural ledges for plants or decorative elements.
- Lighting: Illuminate your water feature with outdoor lighting to create a magical ambiance, especially at night. Use underwater or submersible LED lights to highlight the flowing water, enhance the colors of plants, or create dramatic effects. Additionally, consider adding pathway or landscape lighting to guide visitors and enhance the overall aesthetics of your outdoor space.
- Sculptures or Statues: Incorporate sculptures or statues that reflect your personal taste and style into the design of your water feature. Choose pieces that are waterproof and resistant to outdoor conditions. These decorative elements can serve as focal points, add a sense of artistry, and infuse character into the overall environment.
- Floating Ornaments: Add a touch of whimsy to your water feature by placing floating ornaments such as floating flowers, decorative balls, or floating candles. These elements can add a delicate and enchanting touch to the water, creating a tranquil and relaxing atmosphere.
- Water Feature Edging: Consider using edging materials, such as bricks, stones, or tiles, to create a defined border around the water feature. This will not only provide a finished look but also help prevent erosion, contain the water, and create a clear distinction between the water feature and surrounding areas.
When adding decorative elements, remember to maintain a sense of balance and harmony. Avoid overcrowding the space, as it may detract from the overall beauty and serenity of the water feature. Strive for a cohesive and visually pleasing composition that complements the natural elements of your outdoor environment.
With the addition of these decorative elements, your water feature will become a captivating and enchanting focal point in your backyard. It’s time to move on to the next step: connecting the electrical components for your water feature’s functionality.
Connecting the Electrical Components
Connecting the electrical components of your water feature is an essential step to ensure its proper functioning and safety. This includes wiring the water pump, lighting, and any other electrical elements you may have incorporated. Follow these guidelines to connect the electrical components:
- Plan the Electrical Layout: Determine the placement of your electrical components, such as the water pump, lights, and any additional features like timers or controllers. Consider the proximity to power sources and ensure that the wiring can reach each component.
- Hire a Licensed Electrician (if necessary): If you are not experienced or knowledgeable in electrical work, it is advisable to hire a licensed electrician to handle the electrical connections. This ensures that the installation is done safely and in compliance with local electrical codes.
- Understand Electrical Safety: Familiarize yourself with electrical safety precautions, such as shutting off the power before working with any electrical connections, using appropriate electrical cables and connectors rated for outdoor use, and ensuring all connections are sealed and water-resistant.
- Connect the Water Pump: Follow the manufacturer’s instructions to properly connect the water pump to the electrical supply. This may involve attaching the power cable to the pump and connecting it to a ground fault circuit interrupter (GFCI) outlet or a dedicated circuit.
- Install Lighting: If you have incorporated lighting in your water feature, carefully install the fixtures according to the manufacturer’s instructions. Connect the lighting components to the electrical supply, ensuring that all connections are secure and properly grounded.
- Use Waterproof Connectors: Utilize waterproof connectors and junction boxes to protect the connections from water damage. These waterproof fittings help maintain the integrity of the electrical connections, even when exposed to moisture.
- Test the Electrical Components: Once all the electrical connections have been made, carefully turn on the power and test each component. Check that the water pump is running smoothly, and the lighting fixtures are properly illuminated. Pay attention to any signs of malfunction or electrical issues and address them promptly.
- Consult an Electrician for Troubleshooting: If you experience any electrical issues or are unsure about the safety or functionality of your electrical connections, consult with a licensed electrician for troubleshooting and repair.
It’s crucial to prioritize safety and ensure that all electrical connections are done correctly. If you are not confident in your electrical abilities, it’s best to seek professional assistance to ensure a safe and code-compliant installation. Following these steps will help ensure the longevity and reliability of your water feature’s electrical components.
Now that the electrical components are properly connected, it’s time to move on to the next step: filling and testing your water feature.
Filling and Testing the Water Feature
After completing all the necessary preparations and installations, it’s time to fill and test your water feature. This step is crucial to ensure that everything is functioning properly and to make any necessary adjustments before enjoying the full beauty of your creation. Follow these steps to fill and test your water feature:
- Inspect for Debris: Before filling the water feature, carefully inspect the surface for any remaining debris, leaves, or dirt that may have accumulated during the construction process. Use a net or a skimmer to remove any unwanted materials.
- Start Filling: Begin filling your water feature with water, using a garden hose or other water source. Slowly add the water to avoid displacing any decorative elements or disturbing the surrounding landscaping.
- Add Water Treatment Chemicals: Depending on the type of water feature you have built, you may need to add water treatment chemicals to establish a healthy and balanced environment for plants, fish, or other aquatic life. Follow the instructions on the product labels for the appropriate dosages.
- Test the Water Quality: Use water testing kits to check the quality of the water in your feature. This step is particularly important if you plan to introduce fish or plants into the water. Test for pH levels, ammonia, nitrate, and chlorine to ensure a safe and suitable environment.
- Adjust Water Level: As the feature fills, periodically check and adjust the water level to achieve the desired result. Follow the recommended water level for your specific water feature design. Be mindful of evaporation and rainfall to maintain the appropriate water level over time.
- Check for Leaks: Once the water feature is filled to the desired level, carefully inspect the entire structure for any signs of leaks. Look for any water escaping from the liner, cracks in the fountain, or any other areas that may need additional sealing or repairs.
- Test Pump and Water Flow: Turn on the water pump and observe the flow of water. Ensure that the water is circulating properly and the desired waterfall or fountain effect is achieved. Monitor the pump for any noise, vibrations, or unusual behavior that may require adjustments or maintenance.
- Make Adjustments: If necessary, make any adjustments to the water flow, positioning of rocks, or lighting to enhance the visual and auditory aspects of your water feature. This is your opportunity to fine-tune and perfect the overall aesthetics.
Once you have filled and tested your water feature, take a moment to appreciate the beauty and serenity it brings to your outdoor space. Continue to monitor the water quality, cleanliness, and functionality of your water feature regularly to ensure long-term enjoyment and preserve the health of any aquatic life or plants.
With the water feature tested and ready, it’s time to move on to the next step: maintaining and troubleshooting your water feature to keep it in optimal condition for years to come.
Maintaining and Troubleshooting the Water Feature
Maintaining and troubleshooting your water feature is an important part of ensuring its longevity and performance. Regular upkeep will help keep your water feature looking its best and prevent any potential issues. Here are some tips for maintaining and troubleshooting your water feature:
- Clean the Water Feature: Regularly clean the water feature to remove debris, such as fallen leaves, dirt, or algae. Use a net or skimmer to skim the surface and remove any floating debris. Consider using a pond vacuum or a brush to remove buildup from rocks or fountain components.
- Monitor Water Quality: Test the water quality regularly to ensure it remains balanced and healthy for any aquatic life or plants. Check pH levels, ammonia, nitrate, and chlorine levels. Make any necessary adjustments to maintain proper water chemistry. It is also essential to remove any accumulated debris or fallen leaves that may affect water quality.
- Inspect and Clean Pump: Regularly inspect the water pump for any debris or clogs that may affect its performance. Clean the pump and remove any built-up sediment or algae. This will help maintain proper water circulation and prevent any issues with the pump.
- Check for Leaks: Periodically inspect all components of the water feature, including the liner, plumbing, and connections, for any signs of leaks. If you notice any leaks, promptly repair or seal them to prevent further damage or water loss.
- Trim and Maintain Plants: If you have aquatic or marginal plants in your water feature, regularly trim and maintain them to prevent overgrowth or obstruction of water flow. Remove any dead leaves or decaying plant material to keep the water clean and prevent nutrient buildup.
- Winterize (if applicable): If you live in an area with cold winters, it’s important to winterize your water feature to prevent damage. This may involve draining and storing the pump indoors, removing any delicate plants, and protecting the water feature with a cover or insulating materials. Follow the appropriate winterization procedures for your specific water feature.
- Troubleshoot Common Issues: If you encounter any issues with your water feature, such as low water flow, unusual noises, or algae growth, conduct troubleshooting to identify and resolve the problem. Consult online forums, water feature experts, or your local garden center for guidance and solutions to common issues.
- Seek Professional Help (if necessary): If you encounter complex issues or are unsure about how to address a problem, it’s best to seek professional help. A water feature specialist or a professional landscaper can provide expert advice and assistance in troubleshooting and resolving any ongoing or persistent issues.
By following these maintenance tips and promptly addressing any problems that arise, you can enjoy a beautiful and functional water feature year-round. Regular upkeep will not only keep your water feature in optimal condition but also prolong its lifespan, allowing you to continue to enjoy its beauty and tranquility for years to come.
Now that you have a thorough understanding of maintaining and troubleshooting your water feature, you can confidently enjoy your peaceful and captivating backyard oasis.
Conclusion
Congratulations on successfully building your backyard water feature! With careful planning, proper execution, and regular maintenance, you have created a stunning addition to your outdoor space that brings beauty, tranquility, and a touch of nature to your home.
Throughout this journey, we discussed the importance of choosing the right location for your water feature, selecting the appropriate design, gathering the necessary materials and tools, preparing the site, and digging or excavating the area. We also covered installing the water pump, building the waterfall or fountain, adding decorative elements, connecting the electrical components, and filling and testing the water feature. Finally, we explored maintaining and troubleshooting your water feature to keep it in optimal condition.
Remember, a well-maintained water feature can provide years of enjoyment. Regular cleaning, water quality monitoring, pump maintenance, and troubleshooting are essential to ensure that your water feature remains a source of relaxation and beauty. Also, don’t forget to follow any specific guidelines for winterizing your water feature if you live in colder regions.
As you continue to care for your water feature, take time to appreciate the serenity it brings to your outdoor space. Sit back and enjoy the soothing sound of flowing water, the vibrancy of aquatic plants, and the mesmerizing visual effects created by your unique design and decorative elements.
Feel free to experiment and make small adjustments along the way to further personalize and enhance your water feature. Whether it’s adding different plants, adjusting the water flow, or incorporating new decorative elements, let your creativity and imagination guide you.
Lastly, we hope that this guide has empowered you to embark on your DIY water feature journey and inspired you to explore other DIY projects to enhance your outdoor space. With the right knowledge and a hands-on approach, the possibilities for transforming your backyard into your personal oasis are endless.
Now, it’s time to sit back, relax, and enjoy the calming ambiance of your beautiful water feature. Cheers to a job well done!