Home>Gardening Techniques>DIY Projects>How To Build A Backyard Stream
DIY Projects
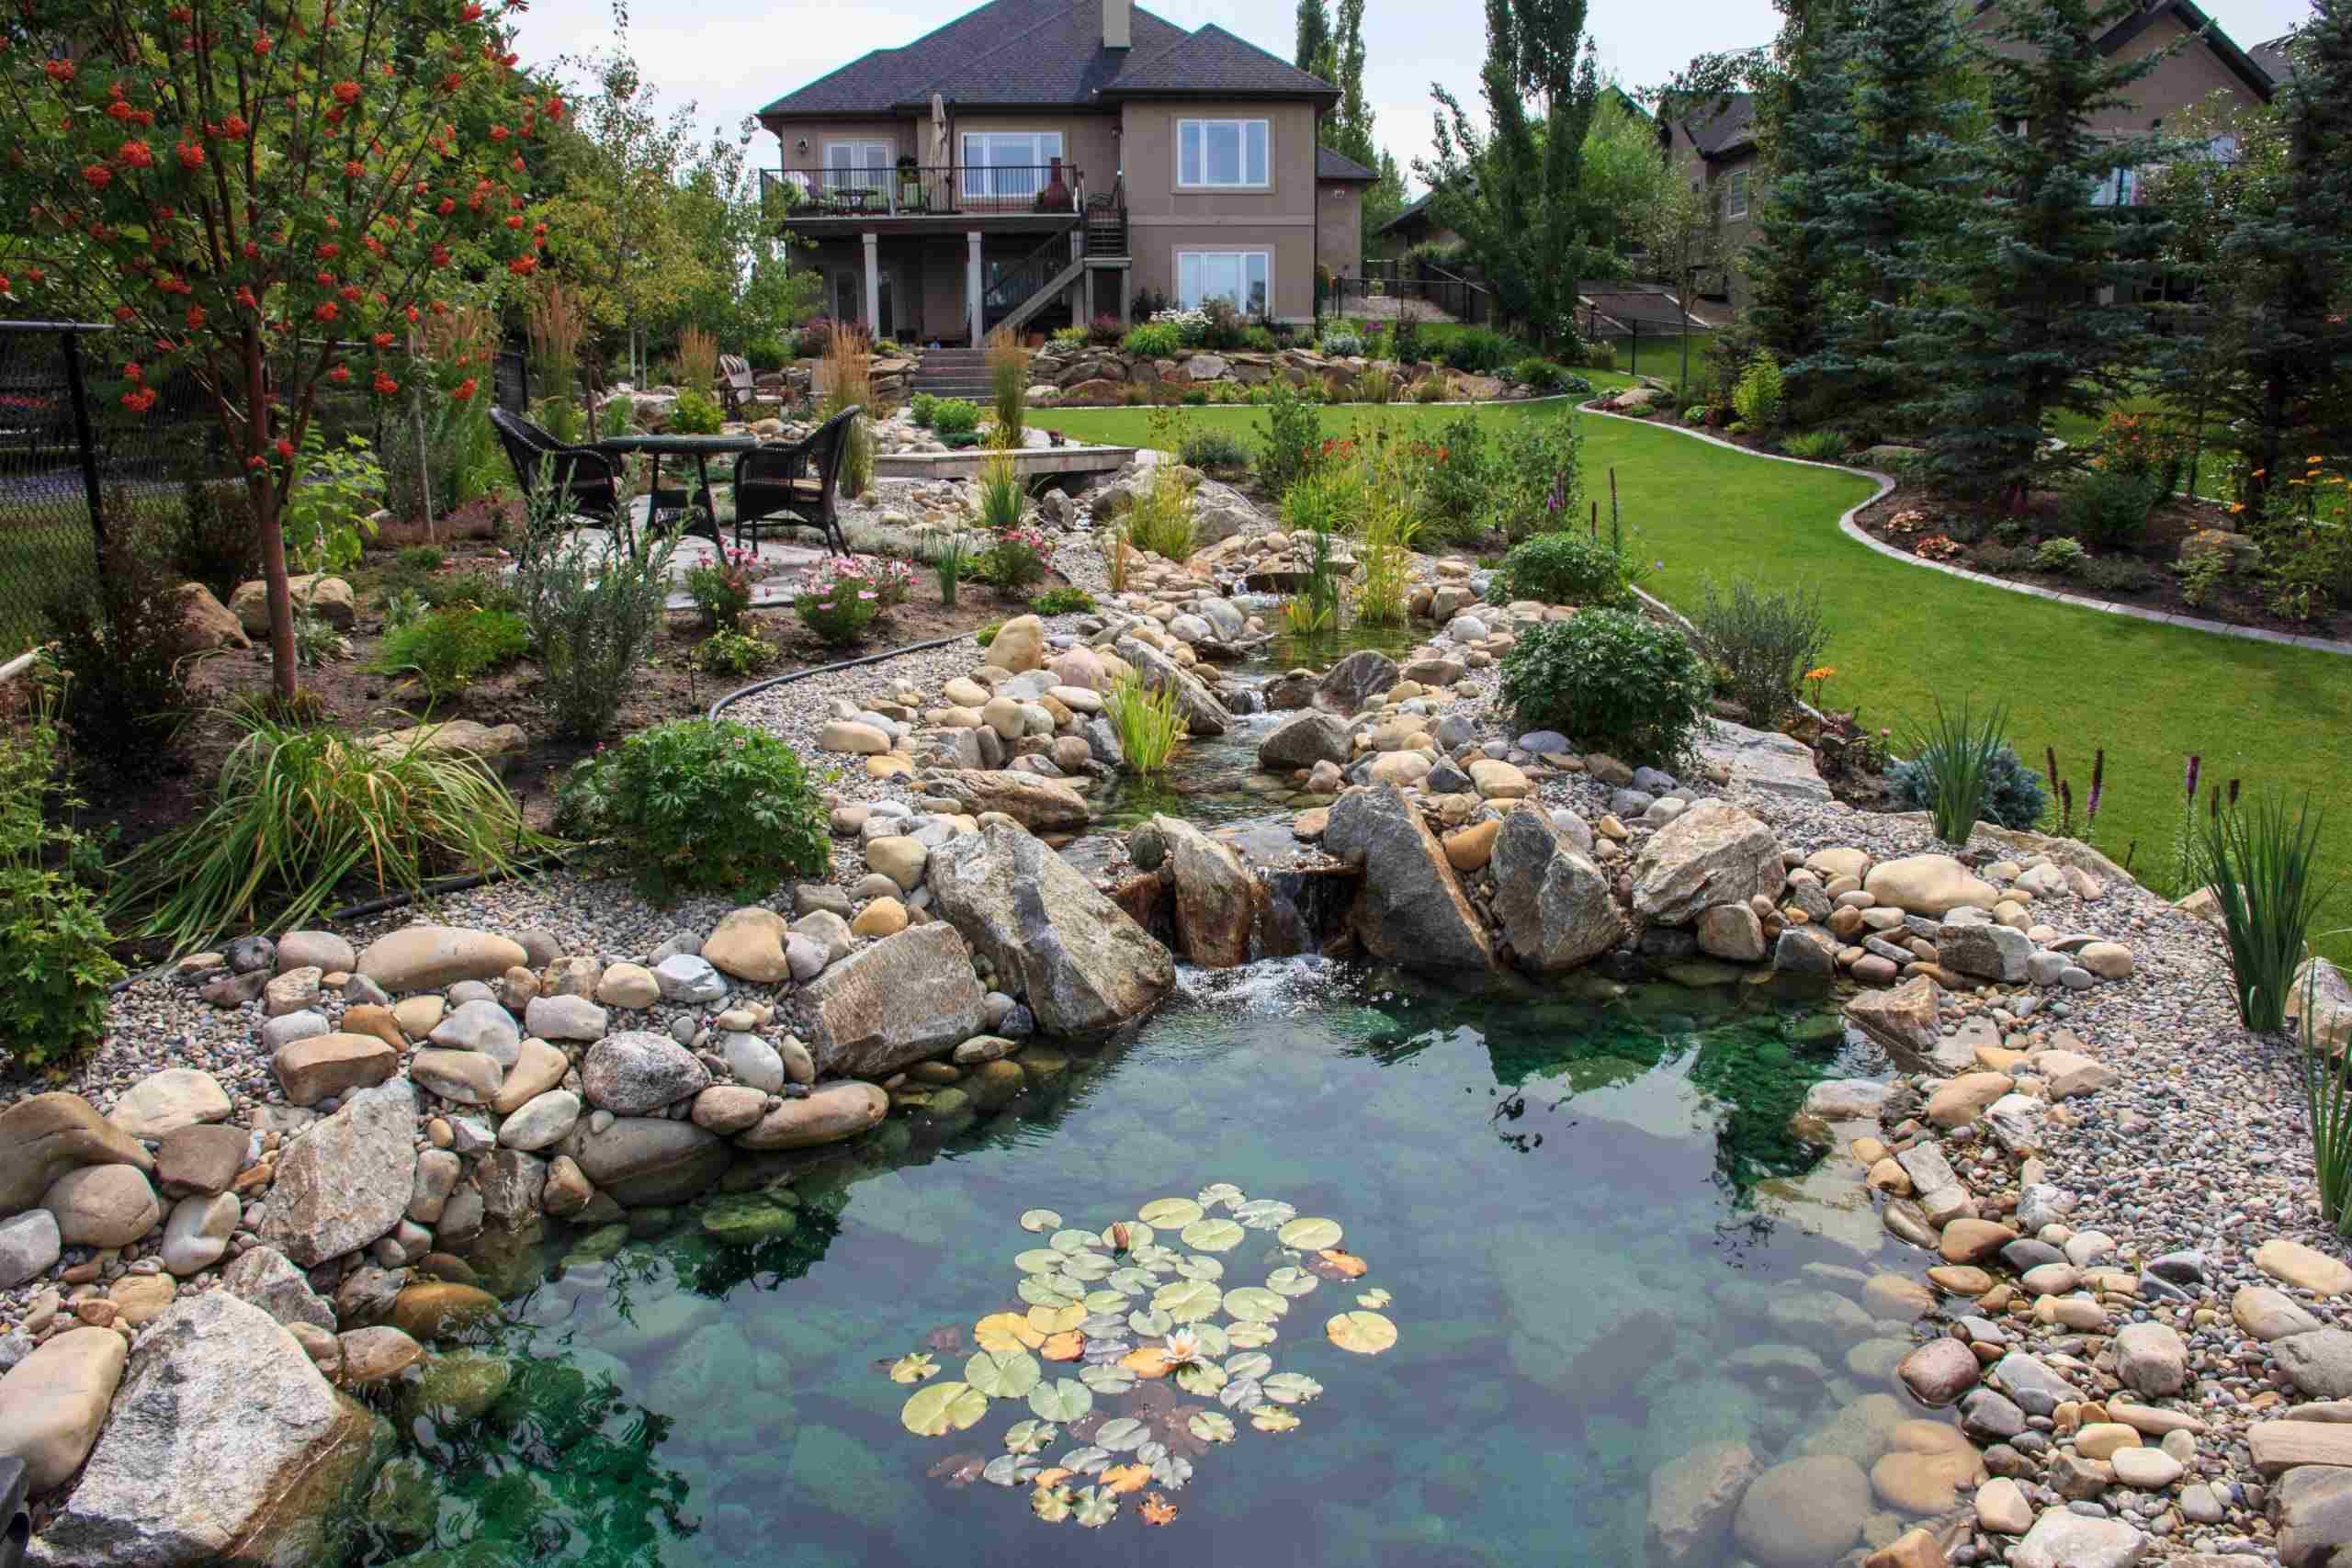
How To Build A Backyard Stream
Modified: January 22, 2024
Learn how to create a stunning DIY backyard stream with our step-by-step guide. Enhance your outdoor space with this fun and easy DIY project.
(Many of the links in this article redirect to a specific reviewed product. Your purchase of these products through affiliate links helps to generate commission for Chicagolandgardening.com, at no extra cost. Learn more)
Table of Contents
Introduction
Welcome to the world of DIY projects! If you’ve ever dreamed of turning your backyard into a tranquil oasis, complete with the soothing sound of running water, then building a backyard stream is the perfect project for you. Not only will it enhance the aesthetic appeal of your outdoor space, but it will also create a peaceful and relaxing environment for you to enjoy.
Building a backyard stream may seem like a daunting task, but with the right guidance and a little bit of creativity, it can become a rewarding and fulfilling project. In this article, we will take you through the step-by-step process of building your very own backyard stream.
Whether you’re an experienced DIY enthusiast or a beginner looking to take on a challenging project, this article will provide you with all the information you need to get started. From choosing the perfect location to installing a pump, we’ll cover everything you need to know to create a stunning backyard stream that will be the envy of all your neighbors.
So, put on your DIY hat, grab your tools, and let’s dive into the world of building a backyard stream!
Step 1: Choose the Location
The first step in building a backyard stream is to choose the perfect location. Consider factors such as the size and shape of your yard, the existing landscape, and any potential obstacles or obstructions.
Look for an area with a gentle slope that will allow the water to flow naturally. Ideally, you want a location that is visible from your outdoor living space, such as a patio or deck, so you can enjoy the sight and sound of the stream. It’s also important to choose a spot that receives the right amount of sunlight and shade to maintain a healthy ecosystem for your stream.
Take some time to visualize the placement of the stream in your yard. Consider how it will fit in with existing features, such as trees, shrubs, and flower beds. You may want to incorporate the stream into your overall landscaping design to create a cohesive and harmonious look.
Once you’ve selected the location, mark the area using stakes or spray paint to outline the stream’s path. This will give you a clear visual guide as you move forward with the project.
Remember, the location you choose will impact the overall look and feel of your backyard stream, so take the time to choose wisely. Consider your personal preferences, the size of your yard, and the surrounding landscape to create a stream that will be a beautiful addition to your outdoor space.
Step 2: Gather Supplies
Now that you have chosen the location for your backyard stream, it’s time to gather all the necessary supplies. Having all the materials on hand before you begin will ensure a smooth and efficient construction process.
Here are the supplies you will need:
1. Pond liner: This is the most critical supply for building a backyard stream. Choose a high-quality, durable pond liner that is large enough to cover the entire streambed area. Measure the length and width of the streambed and add a few extra feet for overlap and securing the liner in place.
2. Rocks and stones: Collect an assortment of rocks and stones of various sizes and shapes. These will be used to create the streambed, waterfalls, and edging. Look for natural-looking rocks that will blend well with your yard’s existing landscape.
3. Shovels and excavation tools: You’ll need shovels, rakes, and other excavation tools to dig and shape the streambed. Consider renting heavy-duty equipment like a mini excavator if you have a large area to excavate.
4. Water pump and tubing: A water pump will be used to circulate the water in your stream. Choose a pump that is suitable for the size of your stream, ensuring adequate water flow. You’ll also need tubing to connect the pump to the water source and distribute water throughout the stream.
5. Filter and skimmer: To maintain clean and clear water, incorporate a filter and skimmer system into your stream. These will help remove debris and prevent clogging.
6. Landscaping fabric: This fabric is placed beneath the liner to prevent roots and weeds from penetrating the streambed. It also acts as a protective layer, increasing the longevity of your stream.
7. Other tools and accessories: Include items like a level, tape measure, landscape fabric staples, and a utility knife for cutting the liner.
Before starting the project, make a checklist of all the supplies you need and double-check that you have everything. This will save you time and frustration during construction.
Gathering all the necessary supplies upfront will ensure a smoother construction process and allow you to focus on the creative aspects of building your backyard stream.
Step 3: Plan the Layout
With the supplies in hand, it’s time to start planning the layout of your backyard stream. This step is crucial for creating a visually appealing and functional stream that seamlessly integrates into your landscape.
Start by referring to the marked location from Step 1. Use a garden hose or ropes to outline the shape and path of the stream. Play around with different curves, twists, and turns to create a natural-looking stream that mimics the flow of a real river.
Consider incorporating features like waterfalls or cascades to add depth and interest to your stream. Place larger rocks strategically to create small drops or rapids in the water flow. Experiment with different arrangements until you find a design that suits your preferences.
While planning the layout, keep in mind the scale and proportion of your yard. Ensure that the size of the stream is balanced with the surrounding landscape and doesn’t overwhelm the space. Additionally, consider the accessibility of the stream for maintenance purposes.
Take into account the natural topography of your yard and work with it to create a harmonious flow. If there are existing slopes or natural features, incorporate them into the design to make your stream look more organic and integrated.
During the planning stage, it’s helpful to take photographs or draw sketches of your ideas. This will give you a visual reference as you proceed with the construction process.
Remember, the layout of your backyard stream sets the foundation for the overall design, so take your time and experiment with different possibilities. By planning the layout in advance, you’ll have a clear vision of how your stream will look and flow, resulting in a stunning final product.
Step 4: Excavate the Area
Now that you have planned the layout of your backyard stream, it’s time to start excavating the area. Excavation is a critical step that involves removing the topsoil and creating the desired shape and depth for your stream.
Start by marking the outline of your streambed using the garden hose or ropes as a guide. Use a shovel, spade, or a rented mini excavator to carefully remove the top layer of soil within the marked boundaries. Excavate to a depth of around 6-8 inches, ensuring a consistent slope for the water to flow naturally.
As you excavate, pay attention to the graded slope of the stream. The ideal slope will vary depending on the design and desired water flow, but a gentle slope of around 2-3% is generally recommended. This slope will allow the water to flow smoothly and create a natural-looking stream.
When excavating, remember to consider the surrounding landscape and any existing features. Blend the streambed seamlessly with the surrounding terrain to create a cohesive look. If necessary, make adjustments to the excavation depth and shape to accommodate rocks, waterfalls, or other elements you plan to incorporate.
Once the excavation is complete, use a level and a long board or a string to check the smoothness and uniformity of the streambed. If you notice any uneven areas, adjust the soil accordingly to ensure a consistent slope and level surface.
It’s important to dispose of the excavated soil properly. If you have a large amount of soil, you may need to rent a dumpster or arrange for its removal. Alternatively, consider repurposing the soil for other areas of your yard or offering it to neighbors who may be in need of fill dirt.
Excavating the area for your backyard stream requires careful attention to detail and precision. Take your time during this step to ensure that the streambed is shaped correctly and ready for the next phase of construction.
Step 5: Create a Base Layer
With the excavation complete, it’s time to create a sturdy base layer for your backyard stream. The base layer serves as a foundation for the stream, providing stability and preventing the liner from punctures or tears.
Start by removing any rocks, roots, or debris from the excavated area. Smooth out the soil to create an even surface. Next, lay down a layer of landscaping fabric over the entire streambed. This fabric will act as a barrier, preventing weeds and roots from growing through the liner.
Once the landscaping fabric is in place, you’ll need to add a layer of sand or fine gravel. This layer helps to further level the streambed and provides a cushioning effect, protecting the liner. Spread the sand or gravel evenly across the streambed, ensuring a smooth and consistent thickness of around 1-2 inches.
Use a rake or a flat board to carefully level and smooth the sand or gravel. Pay attention to the sloping of the streambed, ensuring that it follows the planned layout. Double-check the levelness with a long board or a string, making any necessary adjustments as needed.
After the base layer is complete, walk along the streambed to ensure that it feels firm and stable beneath your feet. If you notice any soft or uneven areas, add extra sand or gravel to reinforce those spots.
Creating a solid base layer is essential for the longevity and durability of your backyard stream. It provides a stable surface for the liner and helps maintain the integrity of the overall structure.
Once the base layer is finished, take a moment to appreciate the progress you’ve made so far. You’re one step closer to having a beautiful and functional backyard stream!
Step 6: Install the Liner
The next step in building your backyard stream is installing the liner. The liner is a crucial component as it holds and contains the water, creating the actual streambed. It’s important to choose a high-quality liner that is durable and resistant to UV rays and punctures.
Start by carefully unrolling the liner and placing it over the prepared streambed. Make sure it extends beyond the edges of the excavation area by a few feet. This will allow you to secure the edges later and prevent any water from seeping underneath.
Smooth out the liner, removing any wrinkles or folds. Gently press it into the shape of the streambed, following the planned layout. Be mindful of any rocks or waterfalls you have incorporated into the design, ensuring that the liner conforms to the contours of the stream.
As you position the liner, use rocks or bricks to temporarily hold it in place along the edges. This will prevent it from shifting as you continue with the installation process.
Now, it’s time to secure the edges of the liner. Start by folding over the excess liner along the edges of the stream. Use landscape fabric staples or heavy-duty landscaping pins to secure the folded-over liner to the soil. Space the staples or pins about 2-3 feet apart, ensuring a tight and secure attachment.
If necessary, trim any excess liner using a utility knife, making clean and straight cuts. Be cautious not to cut too much, as you’ll need the liner to extend beyond the edges to create a watertight seal.
Carefully inspect the entire liner to ensure there are no visible gaps or loose sections. Smooth out any wrinkles or folds as you go along.
Installing the liner requires patience and precision. Take your time to ensure the liner is properly positioned and secured. This will result in a water-tight and visually appealing streambed.
With the liner in place, you can now visualize the stream coming to life. The next steps will help you add the natural elements that will truly transform your backyard into a tranquil oasis.
Step 7: Place Rocks and Stones
Placing rocks and stones is where your backyard stream starts to take shape and come to life. These natural elements will add texture, visual interest, and create the illusion of a natural streambed.
Start by selecting a variety of rocks and stones in different shapes, sizes, and colors. Look for rocks that will complement the surrounding landscape and create a harmonious flow with the stream. Consider using larger rocks for the edges and borders, and smaller ones for filling in gaps and adding detail.
Begin placing the rocks along the edges of the stream, securing them in place with the soil and liner behind. This will create a natural border and contain the water within the streambed.
Continue arranging the rocks inside the stream, layering them according to your desired design. Use larger rocks to create focal points or waterfalls, ensuring they are securely positioned to withstand the flow of water. Place smaller rocks strategically to create texture and variation in the stream.
Take a step back frequently to assess the placement of the rocks. Aim for a natural and organic look, mimicking how rocks would naturally occur in a stream. Vary the size, shape, and orientation of the rocks to add visual interest and give a sense of authenticity to your backyard stream.
As you add the rocks, consider the flow of the water. Ensure that there are no obstructions or tight spaces that may impede the water’s movement. The rocks should help guide the water smoothly through the stream, creating a soothing and natural flow.
Take your time with this step, experimenting with different arrangements and repositioning rocks as needed. It’s important to find the right balance between aesthetics and functionality, creating a stream that is both visually appealing and allows for optimal water circulation.
Placing the rocks and stones is where your creativity can truly shine. Enjoy the process of designing and arranging the elements that will make your backyard stream a masterpiece.
Next, we will move on to the practical aspects of creating the water source for your stream.
Step 8: Create the Water Source
A crucial step in building your backyard stream is creating the water source. This is what will bring life to your stream, providing the continuous flow of water that gives it that soothing and tranquil sound.
There are a few options for creating the water source:
1. Garden Hose: One of the simplest and most accessible options is to connect a garden hose to a nearby outdoor faucet. This is a convenient solution if you have a water source close to your stream location. Ensure that the hose is long enough to reach the stream and that it is properly connected and free of leaks.
2. Rainwater Collection: If you want a more eco-friendly option, consider using rainwater collection as your water source. Install a rain barrel or a dedicated rainwater harvesting system to collect rainwater from your roof or gutters. This sustainable approach will not only reduce your water consumption but also provide untreated water that can benefit the plants and wildlife in your stream.
3. Recirculating Pump: Another popular option is to use a recirculating pump. This involves capturing and recycling the water from the stream using a pump that continuously moves the water back to the top of the waterfall or the start of the stream. This creates a self-contained system that requires minimal water usage and provides a continuous and controlled flow.
Consider the size of your stream and the desired water flow when selecting the appropriate water source option. You’ll also need to ensure there is a power source nearby if you choose to use an electric pump.
Once you have determined the water source, connect the hose or pump to the stream. Ensure that the connection is secure and leak-free. Test the water flow and make any necessary adjustments to achieve your desired water movement and sound.
Creating the water source is an exciting step, as it is what brings your backyard stream to life. Enjoy the calming sound of flowing water as you move forward with the installation process.
In the next step, we will discuss how to install a pump to further enhance the water circulation in your backyard stream.
Step 9: Install a Pump
Installing a pump in your backyard stream is essential for creating a consistent and controlled water flow. The pump will circulate the water, ensuring it continuously moves through the stream and maintains a soothing and lively atmosphere.
Here’s how to install a pump:
1. Select the right pump: Choose a pump that is suitable for the size and flow requirements of your stream. Consider factors such as the stream length and width, the desired water flow rate, and any additional features like waterfalls or cascades. Consult with a professional or refer to the manufacturer’s guidelines to ensure you choose the correct pump.
2. Position the pump: Decide where you want to position the pump. It should be placed near the water source and easily accessible for maintenance purposes. Ensure that the pump is on a stable and level surface to prevent vibrations and potential damage.
3. Connect the tubing: Attach the tubing to the pump, making sure it fits snugly and securely. The tubing should be long enough to reach from the pump to the starting point of the stream. If necessary, use secure fittings or clamps to ensure a tight connection.
4. Secure the tubing: Lay the tubing along the streambed, ensuring it follows the planned layout. Use clips or stakes to secure the tubing in place and prevent it from shifting or becoming dislodged. Keep the tubing hidden beneath the rocks or foliage to maintain a natural look.
5. Test the pump: Once the pump and tubing are connected, plug in the pump and turn it on. Check that the water is flowing smoothly through the tubing and into the stream. Verify that the pump is working properly and adjust the water flow rate as desired.
6. Conceal the pump: If necessary, conceal the pump with rocks or landscaping materials to create a more natural and seamless look. Remember to leave access to the pump for future maintenance or adjustments.
Installing a pump will significantly enhance the beauty and functionality of your backyard stream. The continuous circulation of water will provide a soothing ambiance and maintain a healthy ecosystem for plants and wildlife.
With the pump installed, your backyard stream is almost complete. Stay tuned for the final step!
Step 10: Test the Stream
After putting in all the hard work to build your backyard stream, it’s time for the final step: testing the stream. This step ensures that everything is functioning as intended and allows you to make any necessary adjustments before fully enjoying your stream.
Here’s how to test your backyard stream:
1. Check for leaks: Carefully inspect the entire stream and water connections for any signs of leakage. Ensure that the liner is securely in place and that there are no visible gaps or tears. Address any leaks immediately to prevent water loss or damage.
2. Adjust the water flow: Test the water flow from the pump and observe how it flows through the stream. Make adjustments to the pump settings if necessary to achieve your desired water movement and sound. You may need to increase or decrease the water flow rate to achieve the desired effect.
3. Evaluate the aesthetics: Step back and assess the overall look of your backyard stream. Make any adjustments to the positioning of rocks, stones, or water features to enhance the visual appeal. Consider the flow of the stream, the placement of rocks, and any cascades or waterfalls, ensuring they create a natural and pleasing effect.
4. Check for obstructions: Observe how the water flows through the stream and check for any potential obstructions or areas where water may be pooling or not flowing smoothly. Make any necessary adjustments by rearranging rocks or adjusting the streambed to ensure a continuous and unobstructed flow.
5. Test the sound: Listen to the stream and pay attention to the sound it produces. If the flow is too loud or too quiet, make adjustments to the water flow or the positioning of rocks to achieve the desired soothing and relaxing sound.
6. Monitor water clarity: Keep an eye on the clarity of the water in your stream. If you notice any cloudiness or debris, consider adding a filter or skimmer to improve water quality. Regular maintenance, such as cleaning debris or adding necessary treatments, will help keep the water clear and healthy.
By thoroughly testing your stream, you can ensure that it meets your expectations and functions properly. Use this opportunity to make any necessary tweaks and adjustments to create the perfect backyard oasis for relaxation and enjoyment.
Congratulations! You have successfully built your own backyard stream. Sit back, relax, and enjoy the tranquil beauty of nature in your very own outdoor sanctuary.
Conclusion
Building a backyard stream is a fulfilling DIY project that can transform your outdoor space into a serene and captivating oasis. By following the step-by-step process outlined in this article, you can create a beautiful and functional stream that brings the soothing sound of running water right to your doorstep.
From choosing the perfect location to installing a pump, each step plays a crucial role in the construction of your backyard stream. By taking the time to plan the layout, gather the necessary supplies, and create a solid base layer, you set the foundation for a successful project.
With the liner installed, rocks and stones carefully placed, and a water source and pump established, your stream begins to take shape. Testing the stream allows you to fine-tune the aesthetics and functionality, ensuring that it meets your expectations and creates a harmonious and relaxing environment.
Remember to maintain your backyard stream regularly by cleaning debris, checking for leaks, and adjusting the water flow as needed. This will help keep your stream looking and functioning at its best for years to come.
So, embark on this DIY adventure and create a backyard stream that will be a source of pride and joy. Let the sound of flowing water, the natural beauty of rocks, and the serenity of your outdoor space transport you into a world of tranquility and peace.
Now it’s time to grab your tools, gather your supplies, and start building your own backyard stream. Enjoy the journey and the beautiful oasis you’ll create right in your own backyard!