Home>Gardening Techniques>DIY Projects>How To Build A Small Backyard Pond
DIY Projects
How To Build A Small Backyard Pond
Modified: January 22, 2024
Discover the step-by-step guide for creating a stunning small backyard pond with our DIY project tips. Enhance your outdoor space and indulge in the beauty of nature.
(Many of the links in this article redirect to a specific reviewed product. Your purchase of these products through affiliate links helps to generate commission for Chicagolandgardening.com, at no extra cost. Learn more)
Table of Contents
- Introduction
- Step 1: Planning and Designing Your Pond
- Step 2: Choosing the Right Location
- Step 3: Preparing the Ground
- Step 4: Digging the Pond Hole
- Step 5: Installing the Pond Liner
- Step 6: Adding a Pump and Filtration System
- Step 7: Filling the Pond with Water
- Step 8: Landscaping and Beautifying Your Pond
- Step 9: Adding Fish and Plants
- Step 10: Pond Maintenance Tips
- Conclusion
Introduction
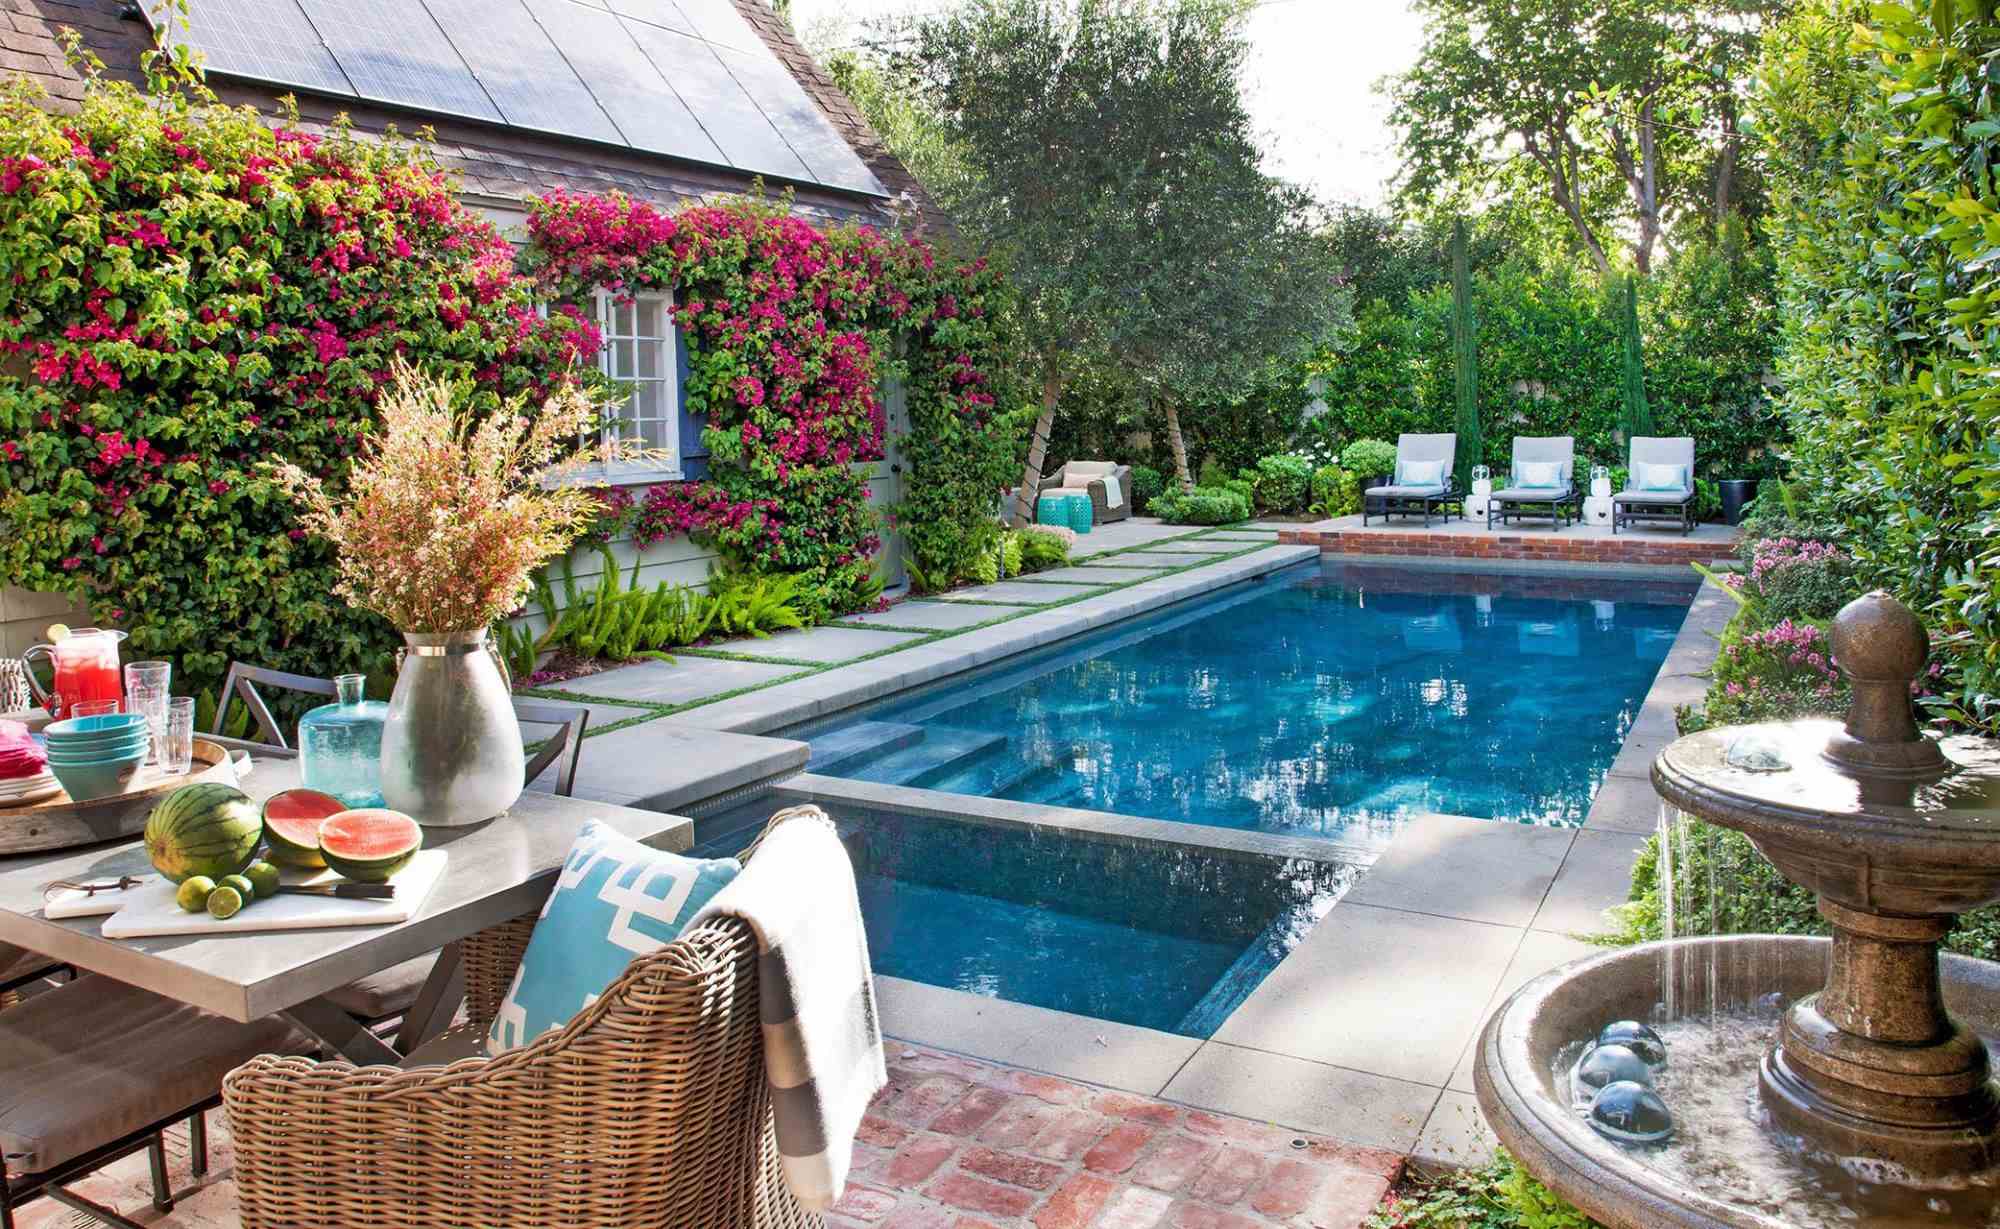
Welcome to the world of DIY projects! If you’re looking to add a touch of nature and tranquility to your backyard, building a small pond can be a rewarding and fulfilling endeavor. Not only will it enhance the aesthetics of your outdoor space, but it will also create a habitat for various aquatic life forms and provide you with a peaceful retreat right in your own backyard.
In this comprehensive guide, we will take you through the step-by-step process of planning, designing, and building your own small backyard pond. Whether you’re a seasoned DIY enthusiast or a beginner, you’ll find all the information and tips you need to create a stunning water feature that will be the envy of your neighbors.
Before we dive in (excuse the pun), it’s important to understand that building a pond requires careful planning and preparation. There are several factors to consider, such as the size and shape of the pond, the location, the materials needed, and the maintenance required to keep your pond thriving. But fear not! We will guide you through each stage, providing you with expert advice and recommendations to ensure a successful project.
So, grab your shovel, put on your DIY hat, and let’s get started on creating your very own small backyard pond that will bring joy, serenity, and a touch of nature to your outdoor space.
Step 1: Planning and Designing Your Pond
The first and most crucial step in building a small backyard pond is planning and designing. This will ensure that you have a clear vision of what you want to achieve and will help you avoid any potential pitfalls along the way.
1.1 Assess Your Space: Start by evaluating the available space in your backyard. Consider the size and shape of the area where you want to build your pond. Take note of any existing features or obstacles, such as trees or utility lines, which may impact the layout and design of your pond.
1.2 Determine the Purpose: Next, think about the purpose of your pond. Do you want it primarily for aesthetics, or do you also want to keep fish and plants? This will help determine the size, depth, and overall design of your pond.
1.3 Decide on the Style: Consider the overall style and theme of your backyard. Do you prefer a formal, symmetrical pond or a more natural, organic design? Look for inspiration in magazines, online resources, and even nearby ponds to gather ideas for the look and feel you want to achieve.
1.4 Set a Budget: Before getting carried away with your pond design, it’s important to set a budget. Consider the cost of materials, equipment, and any professional help you may need. This will help you stay on track and avoid overspending.
1.5 Sketch Your Design: Once you have a clear understanding of your space, purpose, style, and budget, it’s time to sketch your pond design. Start by outlining the shape and size of the pond on paper. Include any additional features you want to incorporate, such as waterfalls, rocks, or aquatic plants.
1.6 Gather Materials and Tools: Based on your design, make a list of the materials and tools you’ll need for the project. This may include pond liners, pumps, filters, rocks, gravel, and plants. Research different suppliers and compare prices to get the best deals.
Remember, proper planning and designing are essential to ensure a successful pond-building project. Take your time to think through each step, and don’t be afraid to make revisions to your design if needed. With a well-thought-out plan in place, you’ll be ready to move on to the next exciting step: choosing the right location for your pond.
Step 2: Choosing the Right Location
Now that you have your pond design in hand, it’s time to find the perfect spot in your backyard to bring your vision to life. Selecting the right location for your pond is crucial, as it will determine its overall functionality and aesthetic appeal.
2.1 Sunlight Exposure: One of the key factors to consider when choosing the location for your pond is the amount of sunlight it will receive. Most aquatic plants require at least 6 hours of direct sunlight daily to thrive. Avoid placing your pond in areas that are heavily shaded by trees or structures, as this will limit the growth of plants and may result in poor water quality.
2.2 Proximity to Trees: While it’s important to have some shade around your pond to control water temperature and prevent excessive algae growth, be cautious about placing it too close to trees. Falling leaves can create a maintenance hassle and cause water quality issues. Additionally, tree roots can grow into your pond and disrupt the liner or create imbalances in the water ecosystem.
2.3 Accessibility: Consider how easily accessible your pond will be. You’ll want to be able to enjoy and maintain your pond without difficulty. Avoid placing it too far away from your home or areas where you frequently spend time. Also, make sure there is enough space for pathways or stepping stones to allow convenient access around the pond.
2.4 Proximity to Utilities: Before digging or installing any equipment, make sure to check for underground utilities in the proposed location. Contact your local utility companies to locate and mark any buried cables, pipes, or wires. This will help you avoid any accidents or costly damages during the construction process.
2.5 Views and Noise: Consider the views and noise factor when choosing the pond’s location. You may want to position it in an area where you can enjoy the sight and sound of the water feature from your patio, deck, or favorite outdoor seating area. Think about how the pond will integrate with the existing landscape and enhance the overall ambiance of your backyard.
2.6 Water Drainage: Ensure that the selected location has proper water drainage. Ideally, it should be on higher ground or gently slope away, preventing water from accumulating or flooding the surrounding areas. Proper water drainage will help maintain the health of your pond and prevent any potential damage caused by excess water.
Taking the time to carefully choose the right location for your pond will set the foundation for a successful project. Once you’ve identified the perfect spot, you can move on to the next steps of preparing the ground and digging the pond hole. Stay tuned!
Step 3: Preparing the Ground
With the location of your pond selected, it’s time to roll up your sleeves and prepare the ground for the construction of your small backyard pond. Proper preparation is crucial to ensure a stable foundation and prevent any issues down the line.
3.1 Clear the Area: Start by clearing the area where your pond will be located. Remove any grass, vegetation, or debris from the site. Use a shovel or a sod cutter to cut out the turf, making sure to remove the grass and its roots completely. This will provide a clean surface for the next steps.
3.2 Mark the Pond Shape: Use stakes and string or a garden hose to mark the shape and size of your pond on the ground. This will give you a clear visual outline to follow as you start the excavation process.
3.3 Excavate the Pond Area: Begin digging the pond hole, following the marked outline. The depth of the pond will depend on your design and the type of fish or plants you plan to have. Dig the hole about 1 to 2 feet deeper than the desired final depth to account for the layers of liner, underlayment, and rocks.
3.4 Slope the Sides: While excavating, remember to slope the sides of the pond. This will create a gradual transition from land to water and provide stability for the pond walls. Aim for a slope of approximately 45 degrees or as specified in your design.
3.5 Remove Sharp Objects: As you dig, be on the lookout for any sharp objects, rocks, or tree roots that could puncture the pond liner. Remove them carefully to create a smooth and level surface for the liner installation.
3.6 Level the Bottom: Once the pond hole is excavated, use a level and a long straight edge, like a board, to ensure that the bottom of the pond is level. This will help with the proper installation of the pond liner.
3.7 Compact the Soil: Finally, compact the soil on the bottom of the pond to create a firm base. You can use a tamper or the backside of a shovel to do this. Compacting the soil will help prevent settling and ensure a stable foundation for the liner and other pond components.
By taking the time to properly prepare the ground, you’re setting the stage for a successful pond construction. With the ground ready, you can now move on to the exciting steps of installing the pond liner and bringing your small backyard pond to life. Stay tuned for the next section.
Step 4: Digging the Pond Hole
Now that the ground has been prepared, it’s time to dig the pond hole and bring your small backyard pond one step closer to reality. Digging the pond hole requires careful attention to detail to ensure the proper shape, size, and depth of your pond.
4.1 Begin Excavation: Start by carefully digging along the marked outline of your pond shape. Use a shovel or a spade to remove the soil, working from the outside edges towards the center of the pond. Take your time and be mindful of the depth and slope.
4.2 Follow the Design: As you dig, refer to your pond design and measurements to ensure that you stay within the desired dimensions. Double-check the depth and make any necessary adjustments along the way.
4.3 Create Shelf or Planting Areas: If your design includes shelves or planting areas within the pond, now is the time to dig them. These shelves will provide a space for potted plants or aquatic vegetation. Carefully dig the shelves to the desired depth and width, making sure they are level and well-defined.
4.4 Remove Excess Soil: As you continue excavating, you may encounter excess soil that needs to be removed from the pond hole. Keep a wheelbarrow or a tarp nearby to collect and transport the soil to another location.
4.5 Check the Level: Throughout the excavation process, use a level to ensure that the bottom of the pond is even and level. This will help with proper water retention and the installation of the pond liner.
4.6 Smooth the Sides: Once the majority of the hole has been dug, take some time to smooth the sides of the pond. Use the back of a shovel or a tamper to compress any loose soil and create a smooth, compacted surface. This will provide stability for the pond walls and prevent future collapses.
4.7 Remove Debris: As you dig, be on the lookout for any rocks, roots, or debris that may have been missed during the ground preparation process. Remove them from the pond hole to ensure a clean surface for the next step.
Remember, the key to digging the pond hole is patience and attention to detail. Take your time to follow your design and measurements, and make adjustments as necessary. Once the pond hole is complete, you’re ready to move on to the next exciting step of installing the pond liner. Stay tuned for the upcoming section.
Step 5: Installing the Pond Liner
With the pond hole dug to perfection, it’s time to move on to one of the most critical steps in building your small backyard pond: installing the pond liner. The pond liner acts as a waterproof barrier, preventing water leakage and ensuring the longevity of your pond.
5.1 Measure and Cut the Liner: Start by measuring the dimensions of your pond hole. Leave a generous amount of excess liner on all sides to allow for proper coverage. Take into account any shelves or planting areas and make cuts accordingly. Use a sharp utility knife or scissors to cut the liner to the desired size.
5.2 Lay the Underlayment: Before placing the pond liner, it’s important to lay down an underlayment. The underlayment acts as a protective layer, minimizing the risk of punctures from rocks or roots. Unroll the underlayment and position it in the pond hole, making sure it covers the entire bottom and sides.
5.3 Position and Secure the Liner: Carefully position the pond liner on top of the underlayment, ensuring that it covers the entire pond hole with excess liner spilling over the edges. Smooth out any wrinkles or folds in the liner to create a neat and even surface. Use rocks or bricks around the edges to temporarily hold the liner in place.
5.4 Adjust and Fine-Tune: Take a step back and assess the positioning of the liner. Make any necessary adjustments to ensure that it fits snugly and conforms to the shape of the pond hole. Take your time to get it just right before moving on.
5.5 Fill the Pond: Once you’re satisfied with the liner placement, it’s time to start filling the pond with water. Begin slowly, allowing the water to gently flow into the pond. This will minimize the pressure on the liner and avoid any potential damage. As the water level rises, continue adjusting the liner to maintain a neat appearance.
5.6 Trim the Excess Liner: Once the pond is full, and the liner is properly positioned, you can trim off the excess liner using sharp scissors or a utility knife. Leave a few inches of liner around the edges to account for any settling or adjustments that may be needed later on.
5.7 Test for Leaks: After the pond is filled, monitor it for several hours to ensure there are no leaks. Keep an eye on the water level and check the surrounding area for any signs of water escaping. If you notice any leaks, pinpoint the source and make necessary repairs, such as adding additional liner or sealing any gaps.
By carefully installing the pond liner, you’re creating a watertight barrier that will hold the beauty and tranquility of your small backyard pond. With the liner in place, you can now proceed to the next steps of setting up the pump, filtration system, and adding the finishing touches to your pond. Stay tuned for the upcoming section.
Step 6: Adding a Pump and Filtration System
Now that your pond liner is securely in place, it’s time to introduce some essential components to maintain the health and clarity of the water: a pump and filtration system. These elements will help circulate the water, remove debris, and provide oxygenation, creating a balanced and thriving aquatic environment.
6.1 Choose the Right Pump: Start by selecting a pump that is appropriate for the size of your pond. Consider factors such as the volume of water, desired flow rate, and any additional features you may want, like adjustable flow settings or energy efficiency.
6.2 Position the Pump: Place the pump at the bottom of the pond, ensuring that it is positioned securely and level. Use bricks or rocks to stabilize the pump if necessary. Connect the pump to an electrical source following the manufacturer’s instructions and safety guidelines.
6.3 Install the Filtration System: Depending on the size and complexity of your pond, you may choose to incorporate a filtration system. This can include biological filters, mechanical filters, or UV clarifiers. Follow the manufacturer’s instructions to properly install and connect the filtration components.
6.4 Connect the Water Return: Attach a flexible hose or pipe to the outlet of the pump and direct it to the desired water return location. This can be a waterfall feature, a stream, or a simple fountain. Take care to hide or disguise the hose using rocks or landscaping materials for a more natural and aesthetically pleasing look.
6.5 Test and Adjust: Once the pump and filtration system are properly connected, turn on the pump and observe the water flow and circulation. Adjust the flow rate if necessary to achieve the desired effect. Monitor the water clarity and make any necessary adjustments to ensure optimal filtration and oxygenation.
6.6 Regular Maintenance: To keep your pump and filtration system functioning smoothly, establish a regular maintenance routine. This can include cleaning or replacing the filter media, checking for debris or clogs, and inspecting the pump for any signs of damage or wear. Follow the manufacturer’s recommendations for cleaning and maintenance intervals.
With the pump and filtration system in place, your small backyard pond will benefit from efficient water circulation, effective filtration, and improved water quality. This ensures a healthier environment for fish, plants, and other aquatic life. Now, it’s time to focus on the fun part: adding water, landscaping, and bringing your pond to life. Stay tuned for the next section.
Step 7: Filling the Pond with Water
With the essential components in place, it’s time to bring your small backyard pond to life by filling it with water. This exciting step will transform your pond into a beautiful feature that will soothe the senses and create a haven for aquatic life.
7.1 Preparing the Water: Before filling the pond, it’s important to ensure that the water you use is suitable for aquatic life. If you plan to have fish or plants in your pond, consider using dechlorinated water. You can either treat tap water with a dechlorinator or use rainwater, well water, or pond water from a trusted source.
7.2 Start Filling: Begin by slowly adding water to the pond, allowing it to gently flow in. This will prevent any disruption to the pond’s features and avoid disturbing the bottom or sides. Use a hose or a bucket to control the flow and avoid splashing or excess turbulence.
7.3 Monitor the Water Level: As the pond fills, closely monitor the water level to ensure it is evenly distributed. Adjust the flow rate if needed to maintain a balance between the inflow and outflow of water. Aim for a water level that aligns with the desired depth of your pond design.
7.4 Observe and Adjust: Take the time to observe the water as it fills the pond. Notice how it flows, settles, and interacts with the landscape and features. Make any necessary adjustments to ensure the water is distributed evenly and that it complements the overall design of your pond.
7.5 Top-Up as Needed: Once the initial filling is complete, you may notice that the water level decreases slightly due to absorption, evaporation, or water displacement. Top-up the pond as needed to maintain the desired water level. Always use dechlorinated water to avoid any harm to fish or plants.
7.6 Patience is Key: Keep in mind that filling a pond may take time, especially for larger ponds. Be patient and allow the water to settle naturally. This will give the pond time to acclimate and stabilize before adding fish or plants.
By filling your pond with water, you’ll witness a beautiful transformation as it comes to life. The sight and sound of the flowing water will create a serene atmosphere and provide the perfect backdrop for the next step: landscaping and beautifying your small backyard pond. Stay tuned for the upcoming section.
Step 8: Landscaping and Beautifying Your Pond
Now that your small backyard pond is filled with water, it’s time to transform the surrounding area into a picturesque landscape that complements and enhances the beauty of your pond. Landscaping not only adds visual appeal but also provides a natural habitat for plants, animals, and beneficial insects.
8.1 Add Rocks and Stones: Start by strategically placing rocks and stones around the edge of your pond. Use a mix of sizes and shapes to create a natural and organic look. Position them in a way that mimics a natural shoreline, providing both visual interest and functional benefits, such as habitat for aquatic life.
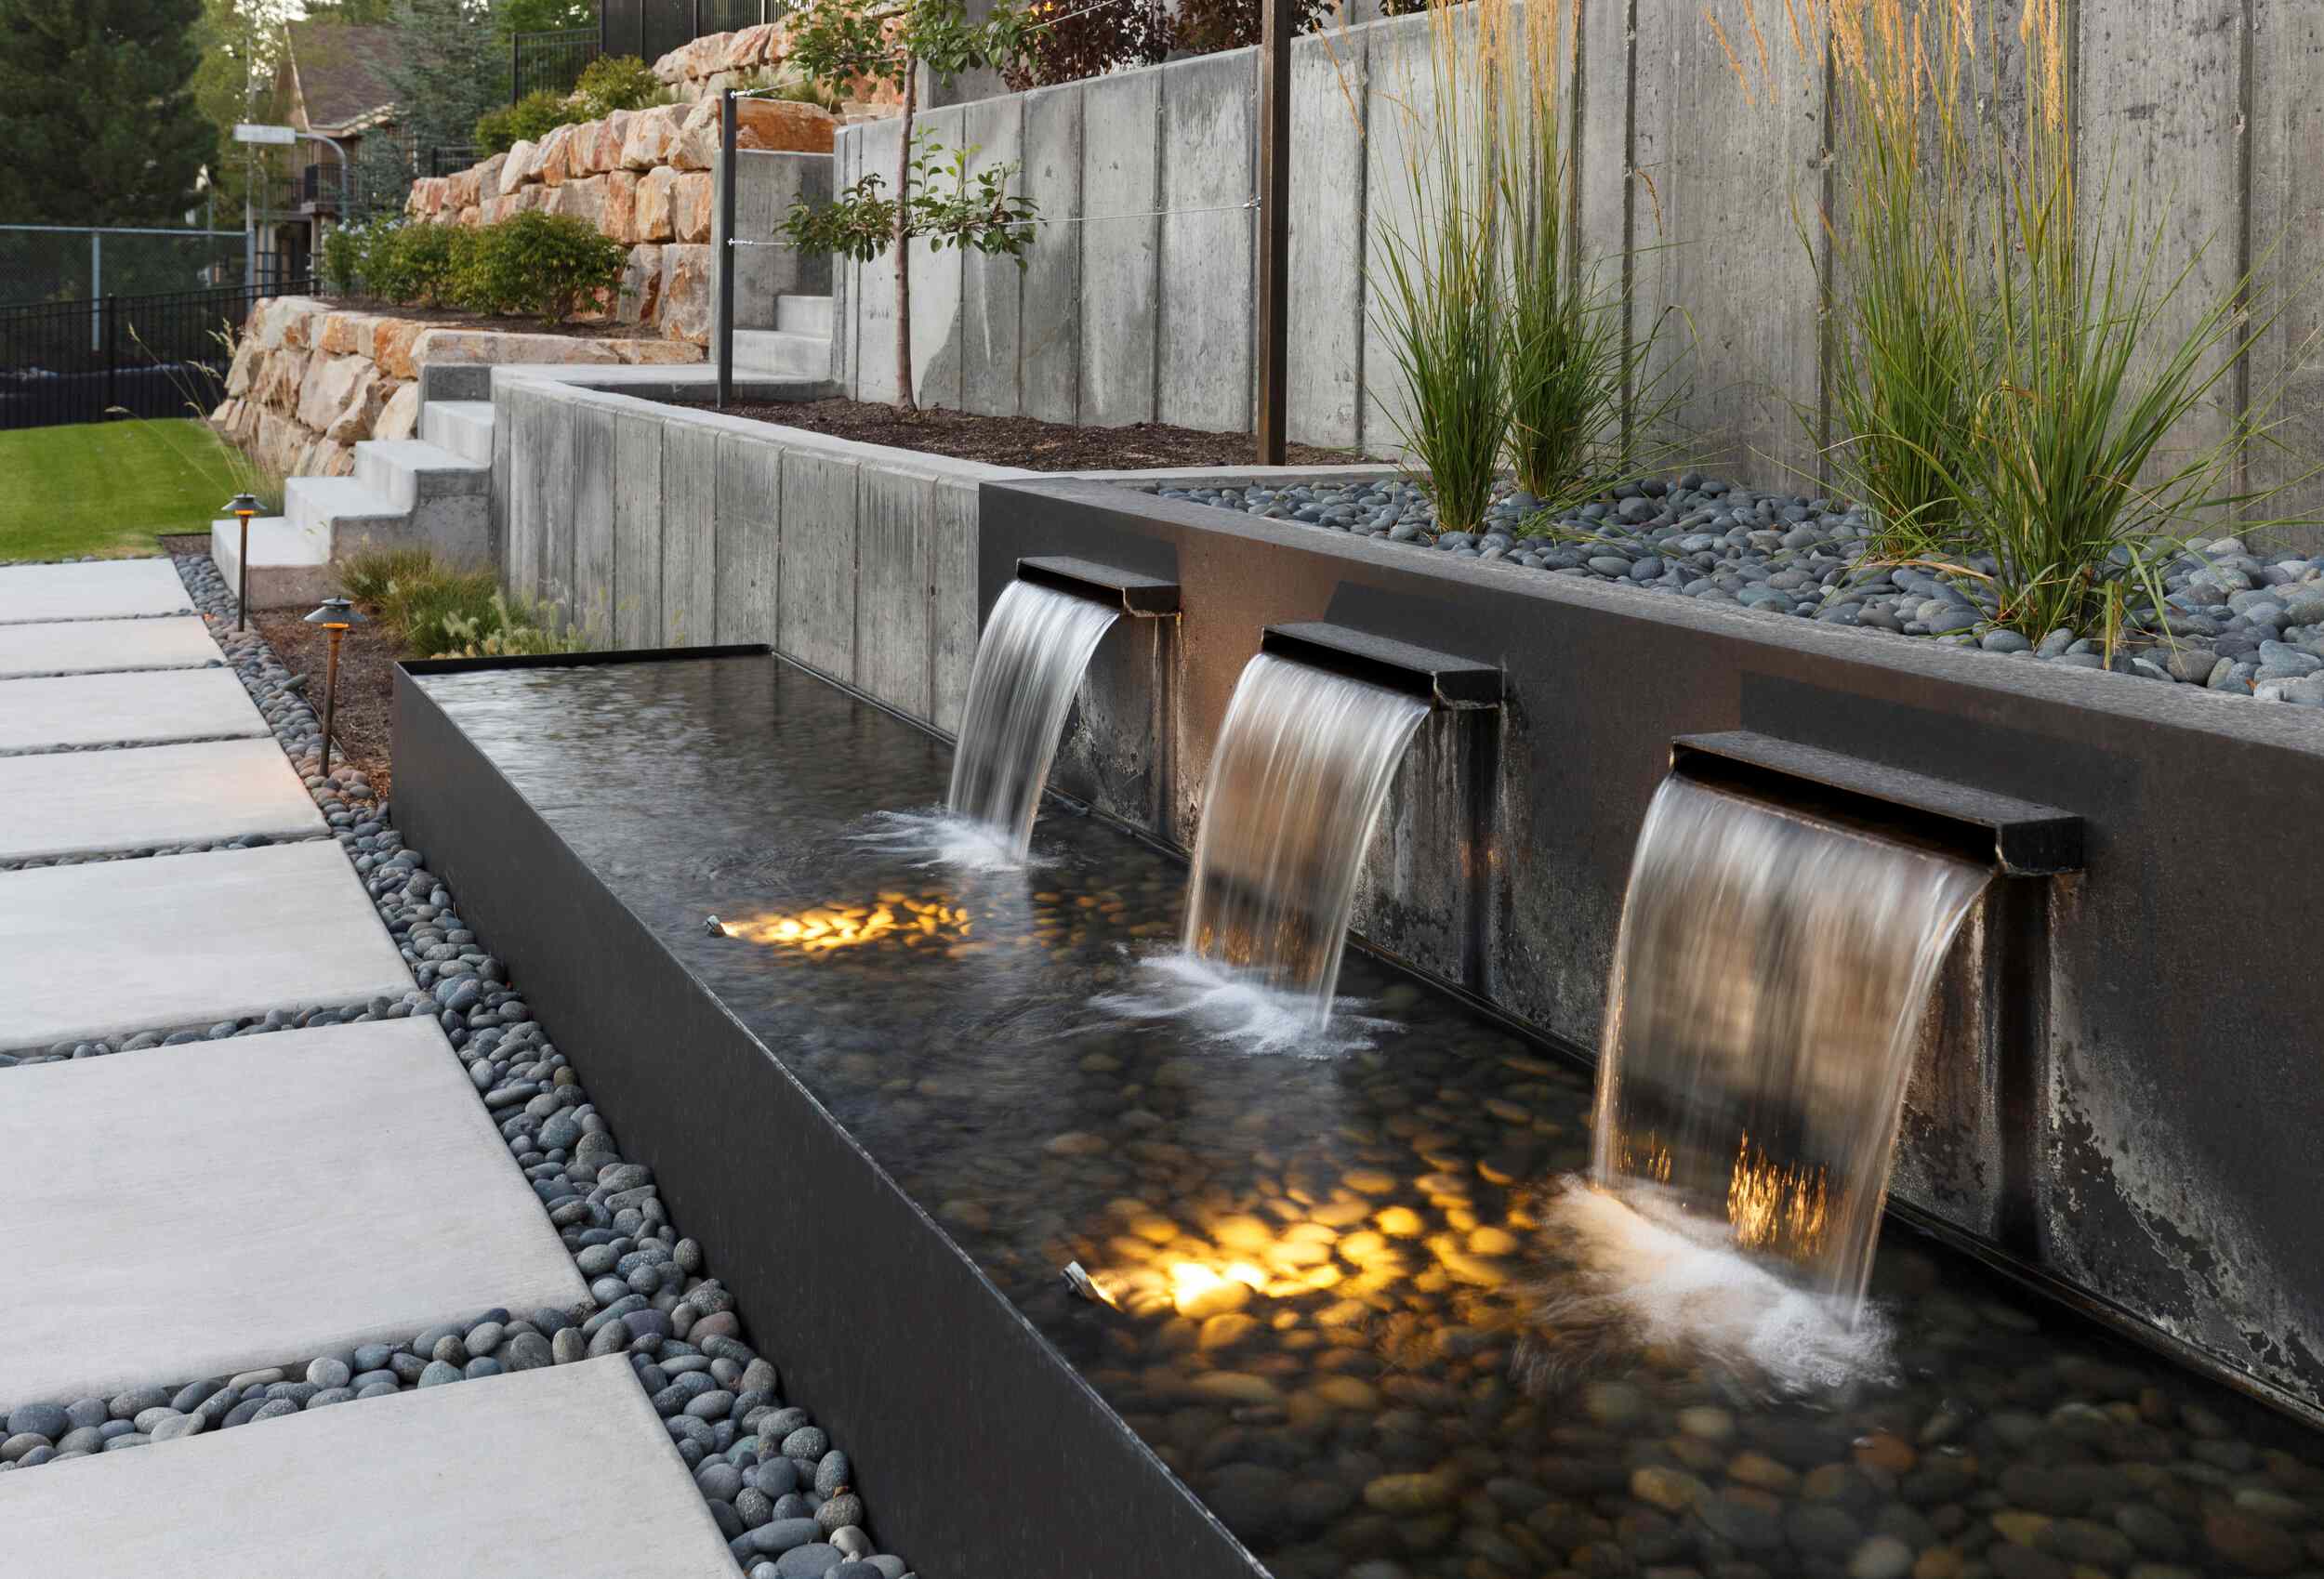
8.2 Create a Waterfall or Stream: If you desire the soothing sound of running water, consider adding a waterfall or a stream to your pond. Using rocks and a pump, create a cascading effect or a gentle flow of water from one area of the pond to another. Ensure that the water flow is directed back into the pond to maintain its proper circulation.
8.3 Plant Aquatic Vegetation: Introduce a variety of aquatic plants to your pond for both aesthetic appeal and ecological benefits. Choose plants that are suitable for your pond size, depth, and sun exposure. Include a mix of submerged plants, floating plants, and emergent plants to enhance oxygen levels, provide shade, and create a balanced ecosystem.
8.4 Surround with Landscaping Plants: Extend your landscaping beyond the immediate pond area by incorporating plants and flowers around the pond edge. Choose plants that thrive in your climate and provide a pleasing backdrop, adding color and texture to your pond. Consider using a mix of perennials and annuals for year-round interest.
8.5 Use Mulch and Gravel: Apply a layer of mulch or gravel around your pond to help conserve moisture, suppress weed growth, and create a neat and finished look. Mulch also provides insulation for plant roots and helps maintain a stable temperature in the soil.
8.6 Provide Shelter for Wildlife: Consider adding features to your pond that provide shelter for wildlife. This can include rocks or logs partially submerged in the water, creating hiding spots for fish or frogs. Birdhouses, bird feeders, or butterfly-friendly plants can attract avian and insect visitors, adding life and charm to your pond area.
8.7 Add Lighting: Illuminate your pond area with carefully placed outdoor lighting. Use underwater lights to highlight the beauty of plants and rocks within the pond. Install soft, ambient lighting around the pond’s perimeter to create a magical atmosphere, especially during nighttime enjoyment.
By incorporating thoughtful landscaping elements, your small backyard pond will become a captivating focal point in your outdoor space. The combination of rocks, plants, and other features will enhance its beauty and provide a welcoming habitat for a variety of creatures. Now that your pond is visually appealing, it’s time to move on to the next step: adding fish and plants to bring your pond to life. Stay tuned!
Step 9: Adding Fish and Plants
With your small backyard pond beautifully landscaped, it’s time to introduce some living inhabitants that will bring it to life. Adding fish and plants to your pond will enhance its ecological balance, create a dynamic and vibrant ecosystem, and provide enjoyment for years to come.
9.1 Choose Fish Wisely: When selecting fish for your pond, research the species that are suitable for your specific pond conditions. Consider factors such as water temperature, depth, and the compatibility of different fish species. Common pond fish include koi, goldfish, and native species like mosquito fish or minnows.
9.2 Introduce Plants: Introduce a variety of aquatic plants to your pond to not only beautify it, but also provide important benefits. Submerged plants help oxygenate the water, while floating plants offer shade and refuge for fish. Emergent plants, like water lilies or cattails, add visual interest and create a natural habitat for wildlife.
9.3 Acclimate Fish and Plants: Before releasing fish into your pond, let the sealed bag float in the water for about 15-30 minutes. This helps the fish adjust to the water temperature. When adding plants, gently rinse the roots to remove excess soil and place them in the designated areas of your pond, ensuring they are properly anchored.
9.4 Monitor Water Quality: After introducing fish and plants, monitor the water quality regularly. Test the pH, ammonia, nitrate, and phosphate levels using a pond water test kit. Maintain appropriate levels by performing water changes, using pond additives if necessary, and ensuring proper filtration and aeration.
9.5 Feed Fish Properly: Feed your fish a high-quality pond fish food that is appropriate for their species. Follow the recommended feeding guidelines and avoid overfeeding, as excess food can lead to poor water quality. Monitor the fish and adjust the feeding amount as needed. Consider adding floating fish food to minimize waste accumulation.
9.6 Maintain a Balanced Ecosystem: Regularly maintain the balance of your pond ecosystem by removing excess vegetation, managing algae growth, and keeping debris out of the water. Prune and thin aquatic plants as needed to promote healthy growth and prevent overcrowding.
9.7 Protect Your Pond: To protect your fish and plants from predators, consider adding netting or other deterrents. This will help keep birds, raccoons, and other animals from harming your pond inhabitants. Ensure that there are hiding spots, such as rocks or plants, where fish can seek shelter when needed.
By adding fish and plants, your pond will come alive with the vibrant colors and graceful movements of aquatic life. The interactions between fish, plants, and the overall ecosystem will create a harmonious and captivating scene. As you enjoy the beauty of your thriving pond, don’t forget the important responsibility of maintaining its health and balance.
Step 10: Pond Maintenance Tips
Your small backyard pond is now a stunning focal point that brings joy and tranquility to your outdoor space. To ensure its continued beauty and longevity, regular maintenance is essential. Here are some key tips to help you maintain a healthy and thriving pond.
10.1 Regular Cleaning: Remove debris, fallen leaves, and any other organic matter that accumulates in and around the pond. Use a skimmer net or a pond vacuum to clean the surface and the bottom of the pond. Dispose of the collected debris away from the pond to prevent it from decomposing and affecting water quality.
10.2 Water Quality Testing: Regularly monitor the water quality parameters of your pond, such as pH, ammonia, nitrate, and phosphate levels. Test the water using a pond test kit and make any necessary adjustments to maintain a balanced ecosystem. Perform regular water changes if needed to improve water quality.
10.3 Algae Control: Keep algae growth under control by using natural methods like adding floating plants or installing UV clarifiers. Avoid overfeeding fish, as excess fish waste can contribute to algae growth. If necessary, use an algae control product specifically designed for ponds, following the manufacturer’s instructions.
10.4 Prune and Trim Plants: Regularly trim and prune aquatic plants to prevent overgrowth and maintain a balanced ecosystem. Remove dead or decaying plant material to prevent it from affecting water quality. Thin out submerged and floating plants if they cover too much of the pond surface, allowing sunlight to reach the submerged plants and maintaining oxygen levels.
10.5 Clean and Maintain Equipment: Regularly inspect and clean the pump, filter, and any other pond equipment. Follow the manufacturer’s guidelines for maintenance and replace any worn-out or malfunctioning parts. Keep electrical components dry and ensure proper functioning of all mechanisms.
10.6 Prevent Unwanted Pest Invasion: Take measures to prevent unwanted pests like herons or raccoons from disturbing your pond and harming fish. Use netting, floating decoys, or motion-activated devices to deter these animals. Ensure that the pond’s perimeter is secure and there are no entry points for potential predators.
10.7 Winter Care: Prepare your pond for the winter months by removing excess debris, trimming plants, and reducing feeding as fish become less active. If you live in a cold climate, consider using a pond heater or aerator to prevent the pond from freezing completely.
By following these maintenance tips, you can ensure the long-term health and beauty of your small backyard pond. Regular care and attention will create an inviting and thriving ecosystem that brings joy to both you and the wildlife that calls your pond home. Enjoy the serenity and beauty of your pond as you revel in the fulfillment of your DIY project!
Conclusion
Congratulations on successfully building your own small backyard pond! Through careful planning, diligent work, and attention to detail, you have created a beautiful and tranquil space that will bring joy and serenity to your outdoor surroundings.
From the initial planning and designing stages to the final touches of landscaping and adding fish and plants, you have embarked on a DIY project that has transformed your backyard into a captivating oasis. The result is not just a visually appealing water feature, but also a thriving ecosystem that supports aquatic life and adds a touch of nature to your life.
Remember, the journey doesn’t end with the completion of your pond. Regular maintenance, upkeep, and monitoring of water quality will ensure the long-term health and beauty of your pond. By following the maintenance tips provided, you can preserve the balance of the ecosystem and continue to enjoy the benefits of your creation for years to come.
As you sit by your pond, listening to the gentle trickle of water and admiring the colorful plants and graceful fish, take a moment to appreciate the effort and dedication you put into bringing this DIY project to life. Your small backyard pond is not just a physical addition to your home, but a reflection of your creativity, passion, and craftsmanship.
So, bask in the satisfaction of a job well done, and take the time to relax and enjoy the tranquility that your pond provides. Whether it’s a peaceful retreat, a gathering place for friends and family, or a source of inspiration and reflection, your small backyard pond is a testament to your DIY skills and the beauty of nature.
Now, go out there and continue exploring the world of DIY projects, sharing your knowledge, and inspiring others to create their own backyard havens. Happy pond keeping!