Home>Gardening Techniques>DIY Projects>How To Build Backyard Greenhouse
DIY Projects
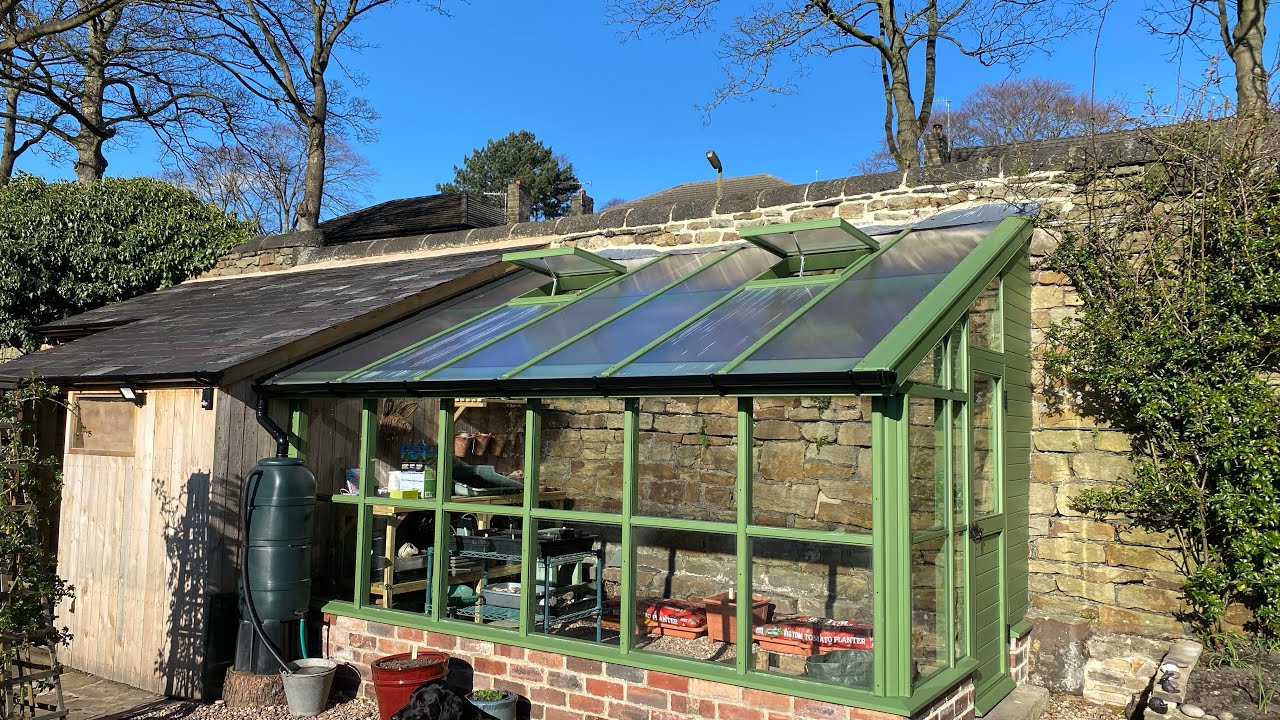
How To Build Backyard Greenhouse
Modified: January 22, 2024
Learn how to build a DIY backyard greenhouse with our step-by-step guide. Start your own DIY project and create a sustainable environment for your plants.
(Many of the links in this article redirect to a specific reviewed product. Your purchase of these products through affiliate links helps to generate commission for Chicagolandgardening.com, at no extra cost. Learn more)
Table of Contents
- Introduction
- Step 1: Choosing the Right Location
- Step 2: Selecting the Greenhouse Design
- Step 3: Preparing the Ground
- Step 4: Building the Foundation
- Step 5: Constructing the Frame
- Step 6: Installing the Covering
- Step 7: Adding Ventilation
- Step 8: Setting up Irrigation System
- Step 9: Incorporating Shelves and Benches
- Step 10: Insulating the Greenhouse
- Step 11: Organizing the Interior
- Step 12: Monitoring and Maintaining the Greenhouse
- Conclusion
Introduction
Welcome to the world of DIY greenhouse projects! If you have a green thumb and a desire to extend your growing season, building a backyard greenhouse is the perfect project for you. A greenhouse provides a controlled environment for plants, shielding them from harsh weather conditions and allowing you to grow a variety of plants year-round. Whether you’re a seasoned gardener or just starting out, constructing your own greenhouse can be a rewarding and fulfilling experience.
Not only does a greenhouse extend your gardening season, but it also offers a space for experimentation and exploration. With a greenhouse, you can grow delicate plants that would otherwise struggle in your region’s climate, start seeds early for a head start on the growing season, and even have fresh vegetables and herbs during the winter months. Plus, having a greenhouse in your backyard adds a beautiful focal point and enhances the overall aesthetic appeal of your outdoor space.
In this comprehensive guide, we’ll take you through the step-by-step process of building your very own backyard greenhouse. From selecting the perfect location to putting on the finishing touches, we’ll cover all the essential elements and provide you with practical tips and advice along the way. Whether you prefer a small hoop-style greenhouse or a larger structure, we’ve got you covered.
Ready to get your hands dirty and create a haven for plants? Let’s dive right into the exciting world of DIY greenhouse projects!
Step 1: Choosing the Right Location
When it comes to building a backyard greenhouse, selecting the right location is crucial for the success of your plants. Here are some factors to consider when choosing the perfect spot:
- Sunlight: Look for an area that receives ample sunlight throughout the day. Ideally, your greenhouse should be exposed to at least 6 hours of direct sunlight daily. Observe the sunlight patterns in your yard to determine the best location.
- Level Ground: Ensure that the ground where you plan to build your greenhouse is relatively level. This will make the construction process easier and provide stability for your greenhouse structure.
- Accessibility: Consider how easily you can access your greenhouse from your house or other outdoor areas. It’s convenient to have your greenhouse located near a water source, electricity, and a storage area for tools and supplies.
- Protection from Elements: Avoid areas with strong winds or exposure to extreme weather conditions, as this can damage your greenhouse and affect plant health. Look for a location that is sheltered from harsh elements, such as trees or other structures that provide natural windbreaks.
- Drainage: Ensure proper drainage in the chosen location to prevent water buildup and potential damage to your greenhouse. Avoid areas prone to flooding or where water tends to pool.
Once you’ve identified a potential location, spend some time observing it throughout the day to see how sunlight moves across the area and if there are any potential obstructions. This will help you determine if it’s the right spot for your greenhouse.
Remember, the location you choose will have a significant impact on the overall performance and productivity of your greenhouse. So take your time, consider all the factors, and choose a location that offers the best conditions for your plants to thrive.
Step 2: Selecting the Greenhouse Design
Once you have chosen the location for your backyard greenhouse, the next step is to select the right design. The design you choose will depend on factors such as your budget, the amount of space available, and your personal preferences. Here are a few popular greenhouse designs to consider:
- Hoop House: Also known as a tunnel greenhouse, a hoop house is a cost-effective and easy-to-build option. It consists of a series of hoops made from inexpensive materials like PVC pipes or metal conduit, covered with greenhouse plastic or polyethylene. Hoop houses are great for small gardens or beginner gardeners.
- Lean-to Greenhouse: This design is attached to an existing structure, such as a house or garage. It utilizes one wall for support and is a good option if you have limited space or want to take advantage of an existing structure’s warmth and stability.
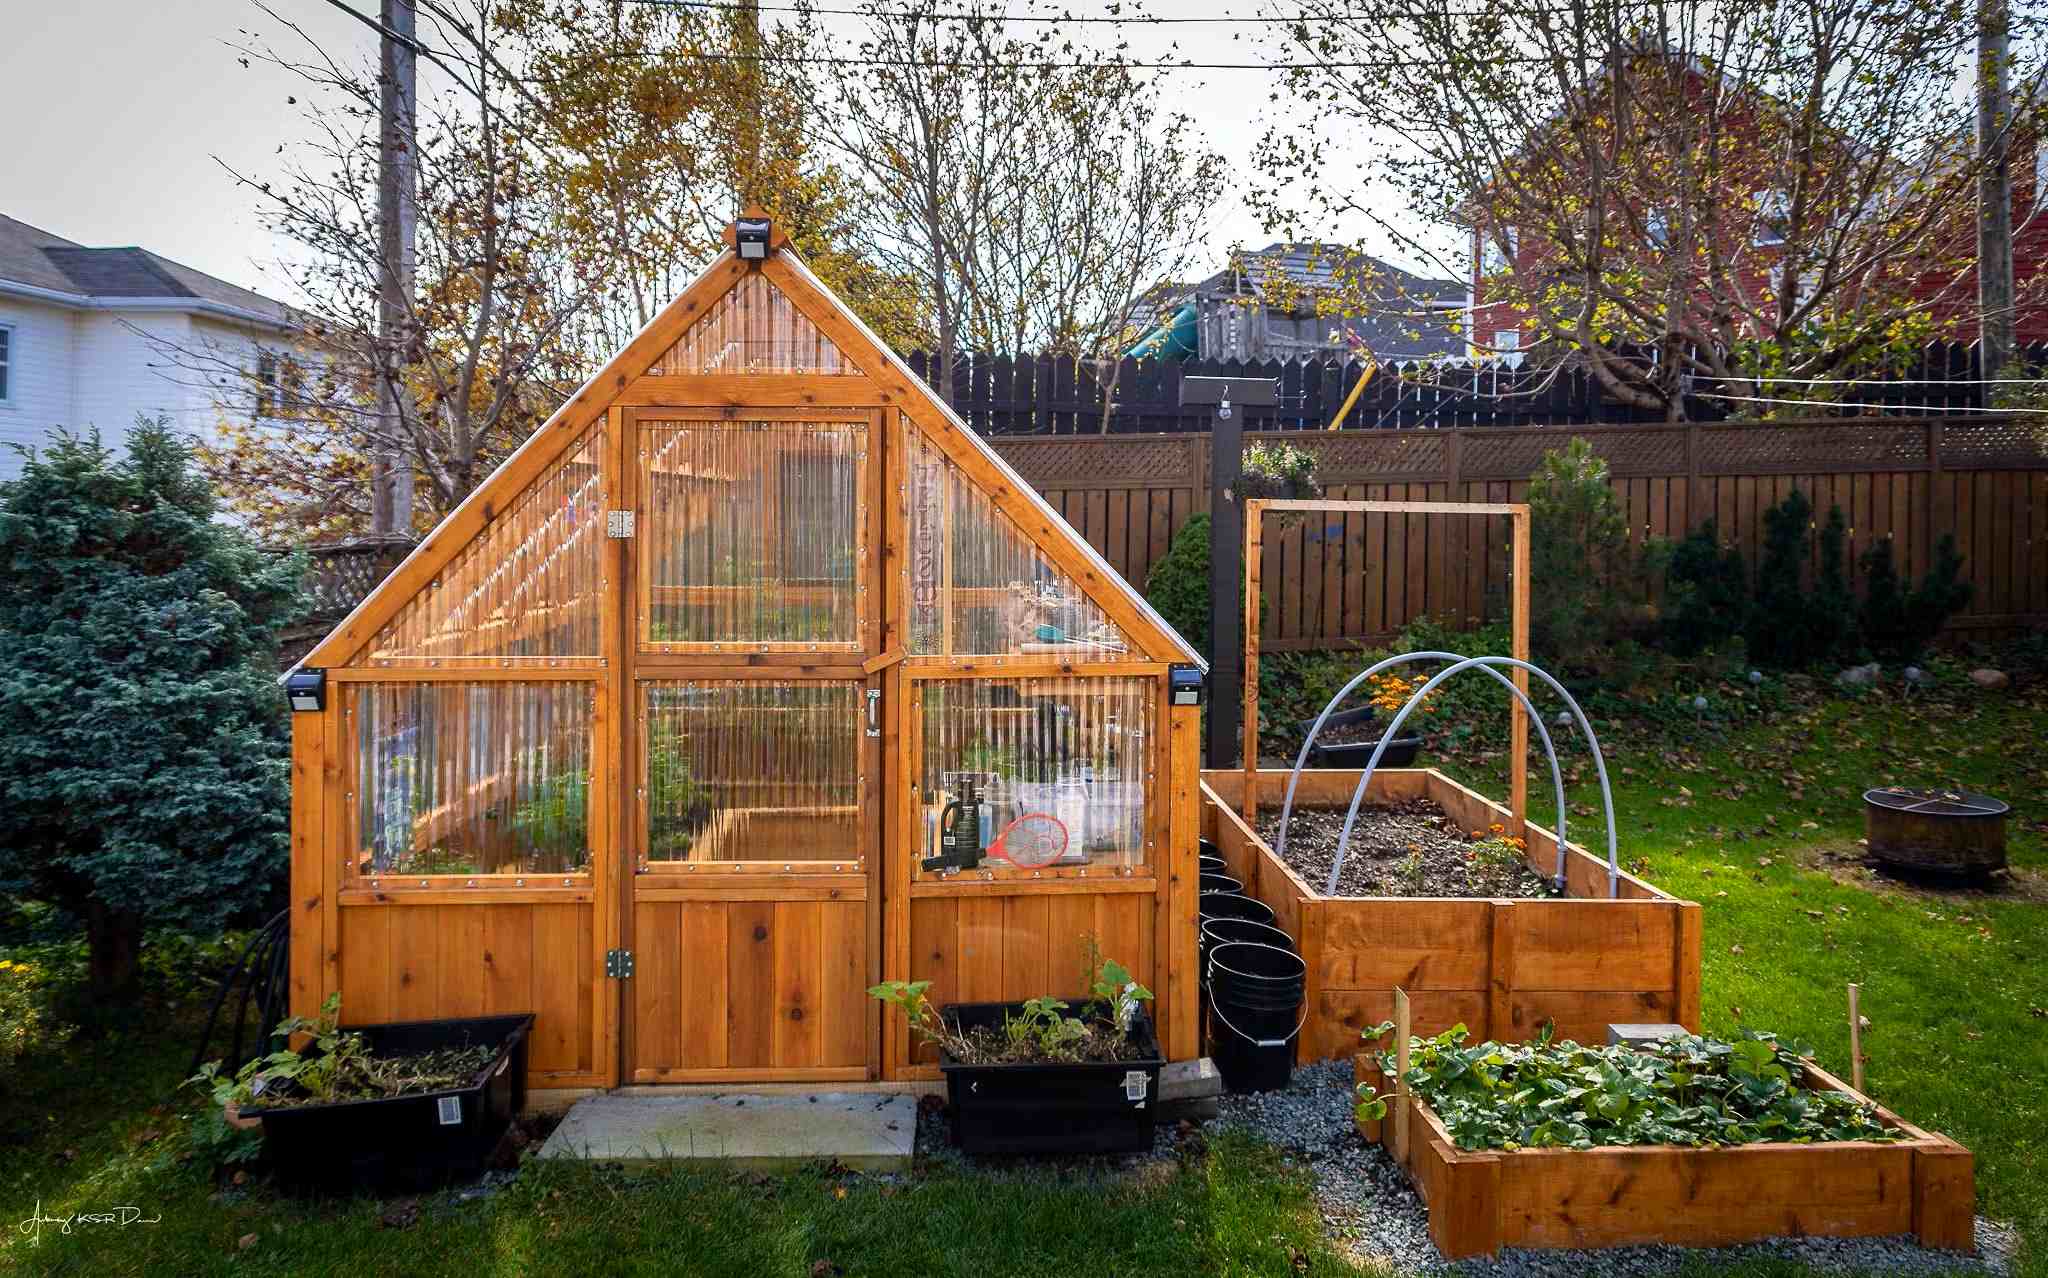
- Gable Greenhouse: A gable greenhouse is a freestanding structure with a peaked roof, resembling a house. It provides ample headroom and vertical space for larger plants. Gable greenhouses are often made from wood or aluminum and offer a traditional and elegant look.
- Quonset Greenhouse: This design features a rounded or half-circle shape and is made from metal or PVC pipes. Quonset greenhouses are known for their structural stability and are suitable for regions with heavy snowfall or strong winds.
- Glass Greenhouse: For a classic and high-end look, consider a glass greenhouse. Glass provides excellent light transmission and insulation, creating a controlled environment for plants. However, glass greenhouses tend to be more expensive and require regular maintenance.
When selecting a greenhouse design, also consider your local climate and the plants you plan to grow. If you live in a colder region, you may want to choose a design that allows for better insulation or incorporate features like double-layered coverings or insulated panels.
Ultimately, the design you choose should align with your needs, budget, and aesthetic preferences. Take the time to research different designs, consult with experts if needed, and select a greenhouse design that will help you achieve your gardening goals.
Step 3: Preparing the Ground
Before you start the construction of your backyard greenhouse, it’s important to properly prepare the ground where it will be located. Here are the key steps to take when preparing the ground:
- Clear the Area: Remove any vegetation, rocks, or debris from the chosen location. Clearing the area will provide a clean slate for building your greenhouse and prevent any potential obstructions.
- Level the Ground: Ensure that the ground is level and even. Use a shovel or a rake to level the area and remove any high spots or depressions.
- Add Drainage: Assess the drainage of the site and make any necessary adjustments. If the ground is not naturally well-draining, consider adding drainage systems like French drains or gravel beds to prevent water accumulation.
- Soil Testing: Conduct a soil test to assess its quality and composition. This will help you understand the fertility and pH level of the soil, allowing you to make any necessary amendments to create an optimal growing environment for your plants.
- Amend the Soil: Based on the soil test results, you may need to amend the soil with organic matter, compost, or other soil enhancers to improve its structure, fertility, and drainage.
Preparing the ground beforehand ensures that you have a solid foundation for your greenhouse and creates favorable growing conditions for your plants. Additionally, removing any obstacles and leveling the ground will make the construction process smoother and more efficient.
Remember to take into account the specific requirements of the plants you intend to grow in your greenhouse. Some plants may prefer certain soil conditions or benefit from additional amendments, so tailor your preparations accordingly.
By properly preparing the ground, you set the stage for a successful greenhouse construction and create an optimal growing environment for your plants to thrive.
Step 4: Building the Foundation
The foundation of your greenhouse serves as the base and support for the entire structure. Building a solid foundation is essential for stability and durability. Here are the steps to follow when constructing the foundation:
- Determine the Foundation Type: There are several options for greenhouse foundations, including concrete slabs, raised beds, or even anchoring the greenhouse directly into the ground. Consider factors such as your budget, soil conditions, and local building regulations when deciding on the foundation type.
- Clear the Area: If you haven’t done so already, clear any remaining debris, rocks, or vegetation from the site to prepare for the foundation construction.
- Mark the Foundation Layout: Use stakes and string to mark the layout of your greenhouse foundation. Make sure the dimensions are accurate and align with the size of your chosen greenhouse design.
- Excavate and Level the Ground: Dig the foundation area, ensuring that it is level and even. Remove any excess soil or rocks to create a smooth surface.
- Prepare the Base Material: Depending on the foundation type, you may need to prepare a base material such as crushed stone or gravel. This helps with drainage and stability.
- Construct the Foundation: Follow the specific instructions for your chosen foundation type. If using a concrete slab, pour the concrete into the excavated area and level it using a screed or trowel. For raised beds, build the frame using treated lumber or bricks and fill it with a suitable growing medium.
- Cure and Settle: If using a concrete foundation, allow for proper curing and settling time as per the manufacturer’s instructions before proceeding with the greenhouse construction.
Remember to consult any local building codes or regulations to ensure compliance when constructing the foundation. It’s important to build a solid and stable foundation to ensure the longevity and structural integrity of your greenhouse.
By taking the time to properly build the foundation, you’re laying a strong groundwork that will support your greenhouse for years to come.
Step 5: Constructing the Frame
After completing the foundation, it’s time to start building the frame of your backyard greenhouse. The frame provides the structure and support for the greenhouse covering. Here are the steps to follow when constructing the frame:
- Gather Materials: Collect all the necessary materials for constructing the frame, including the frame members (such as wood, PVC pipes, or metal conduit), connectors, screws, and any additional reinforcement materials.
- Measure and Cut: Measure and mark the frame members according to the desired dimensions of your greenhouse. Use a circular saw, miter saw, or appropriate cutting tool to cut the frame members to the required lengths.
- Assemble the Base: Start by assembling the base of the frame. This usually involves connecting the frame members at the corners using connectors or brackets. Ensure that the base frame is square and level before moving on to the next step.
- Erect the Vertical Frame: Attach the vertical frame members to the base frame, following the design plan or instructions specific to your chosen greenhouse design. Make sure the vertical frame members are securely fastened and plumb.
- Add Cross Bracing: Install cross bracing or additional supports between the vertical frame members to increase the stability and strength of the greenhouse frame.
- Attach Ridge Poles: Install the ridge poles along the top of the frame, connecting the vertical frame members and providing support for the greenhouse covering.
- Follow the Design Plan: Depending on your chosen greenhouse design, follow the specific instructions and design plan to complete the frame construction. This may involve adding additional frame members, installing doors and windows, or incorporating any unique features specific to your design.
Ensure that all frame members are securely fastened using appropriate connectors or screws. Double-check for any loose or weak connections and make necessary adjustments.
Throughout the frame construction process, refer to any design plans or instructions provided by the greenhouse kit or design resource you are using. If building a custom greenhouse, consult reputable resources or seek guidance from professionals to ensure structural integrity.
Constructing a sturdy and well-built frame is crucial as it provides the foundation for the rest of the greenhouse structure and ensures the stability and longevity of your greenhouse.
Step 6: Installing the Covering
With the frame of your backyard greenhouse complete, it’s time to install the greenhouse covering. The covering plays a vital role in creating a controlled and protected environment for your plants. Here’s how to properly install the greenhouse covering:
- Select the Covering Material: Choose the appropriate covering material that suits your needs and budget. Options include greenhouse plastic, polycarbonate panels, or greenhouse glass. Consider factors such as insulation properties, light transmission, durability, and cost.
- Prepare the Covering: Measure and cut the covering material to the required size, ensuring that it adequately covers the entire greenhouse frame. Leave a bit of extra material to securely attach and fasten it to the frame.
- Secure the Covering: Start by attaching the covering material to one end of the greenhouse frame. Fasten it using greenhouse clips, staples, or specialized fasteners designed for your chosen covering material. Gradually work your way along the frame, pulling the covering tight and smoothly as you go.
- Seal and Reinforce: Depending on the covering material, you may need to seal the edges or overlapping seams to prevent air and moisture from entering the greenhouse. Use appropriate sealing materials, such as greenhouse tape, silicone caulk, or specialized sealing strips.
- Install Additional Components: Depending on your greenhouse design, now is the time to install any necessary components such as doors, windows, vents, or shading systems. Follow the manufacturer’s instructions for proper installation and ensure they are securely attached to the greenhouse frame.
While installing the covering, ensure that it is taut and free from wrinkles or sagging. This will not only improve the appearance of your greenhouse but also enhance its performance.
Remember to consider the specific needs of your plants and the climate in your area. Certain greenhouse coverings offer better insulation or UV protection, which may be beneficial for your plants’ growth and well-being.
By properly installing the covering, you create a climate-controlled environment that protects your plants from harsh weather conditions while allowing for optimal growth and development.
Step 7: Adding Ventilation
Proper ventilation is essential for maintaining a healthy and thriving greenhouse environment. It helps regulate temperature, humidity, and air circulation, ensuring optimal conditions for plant growth. Here’s how to add ventilation to your backyard greenhouse:
- Natural Ventilation: Utilize natural ventilation methods by incorporating windows, vents, or louvers into your greenhouse design. These can be manually operated or equipped with automatic openers that respond to temperature changes. Natural ventilation allows for the exchange of fresh air, reducing the risk of heat buildup and humidity-related issues.
- Hinged Roof or Side Vents: Consider installing a hinged roof or side vents that can be opened or closed as needed. This allows for controlled airflow and temperature regulation inside the greenhouse. You can use simple hinges or automatic vent openers, depending on your budget and preference.
- Ridge Vents: Ridge vents are another effective way to provide ventilation in a greenhouse. They are installed at the highest point of the greenhouse roof and allow hot air to escape while drawing cooler air in from the sides.
- Circulation Fans: Install circulation fans inside the greenhouse to promote air movement and prevent stagnant air. This helps distribute heat, control humidity levels, and prevent the development of mold or mildew.
- Shade Cloth: Use shade cloth or blinds to block excessive sunlight during the hottest parts of the day. This helps reduce temperatures inside the greenhouse, minimizing the need for excessive ventilation.
Remember to consider the specific needs of the plants you are growing when implementing ventilation. Different plants may have varying temperature and humidity preferences, so adjust your ventilation strategy accordingly.
Regularly monitor and adjust the ventilation settings based on the temperature and humidity levels both inside and outside the greenhouse. This will ensure a balanced and optimal growing environment for your plants.
Proper ventilation not only promotes plant growth but also helps prevent plant diseases, mold, and pests. By adding ventilation to your greenhouse, you create a controlled and healthy environment that supports plant health and productivity.
Step 8: Setting up Irrigation System
An efficient irrigation system is vital for providing your plants with the water they need for optimal growth and health. Here’s how to set up an effective irrigation system in your backyard greenhouse:
- Determine Water Source: Identify the water source for your greenhouse irrigation system. This can be a nearby outdoor faucet, rainwater collection system, or even a well if available.
- Choose the Irrigation Method: There are several irrigation methods to consider, such as drip irrigation, soaker hoses, or misting systems. Select the method that best suits your plants’ watering requirements and your greenhouse’s design.
- Calculate Watering Needs: Determine the watering needs of your plants by considering factors such as plant type, stage of growth, and environmental conditions. This will help you determine the appropriate irrigation schedule and duration.
- Install Water Lines: Lay out and install the necessary water lines for your chosen irrigation system. This may involve connecting pipes, hoses, or drip tape throughout the greenhouse, ensuring proper placement and coverage for all your plants. Consider using plastic mulch or landscape fabric to suppress weed growth and conserve moisture.
- Install Emitters or Sprayers: Attach emitters or sprayers to the water lines, ensuring that they are properly spaced to deliver water evenly to the plants. Adjust the flow rate or spray pattern as needed.
- Add Timers or Controllers: Incorporate timers or controllers into your irrigation system to automate the watering process. This allows for consistent and efficient watering, even when you’re not physically present.
- Test and Adjust: Test the irrigation system to ensure proper functionality and coverage. Make necessary adjustments to the water flow, emitter positioning, or timing to achieve optimal watering for your plants.
Regularly monitor the moisture levels of your greenhouse soil to ensure that your irrigation system is providing adequate water. Adjust the irrigation schedule as needed, considering factors like seasonal changes and plant water requirements.
Remember, overwatering can be detrimental to plant health, so finding the right balance is important. Observe your plants and make adjustments to the irrigation system as necessary.
By setting up an efficient irrigation system, you provide your greenhouse plants with consistent and precise watering, promoting healthy growth and maximizing their potential.
Step 9: Incorporating Shelves and Benches
Incorporating shelves and benches into your greenhouse provides additional space for organizing and displaying your plants. It maximizes the vertical space and allows for efficient use of the greenhouse area. Here’s how to incorporate shelves and benches into your backyard greenhouse:
- Assess the Space: Evaluate the available space in your greenhouse to determine the optimal placement for shelves and benches. Consider factors such as the height of the greenhouse, access to natural light, and ease of movement within the space.
- Choose the Materials: Select materials that are suitable for the greenhouse environment, such as treated lumber, wire mesh, or rust-resistant metal. Ensure the chosen materials can withstand humidity, watering, and potential exposure to soil or plant debris.
- Design the Layout: Plan the layout of the shelves and benches based on the types of plants you will be growing and their growth habits. Consider the height and spacing between shelves to accommodate plants of various sizes.
- Build or Purchase: Depending on your DIY skills and preference, you can build the shelves and benches yourself using appropriate materials and tools. Alternatively, there are pre-made options available for purchase that can be easily assembled within the greenhouse.
- Secure Shelves and Benches: Ensure that the shelves and benches are securely installed or anchored to the greenhouse framework to prevent any accidents or collapses. This is especially important if you plan on storing heavy pots or plant-related equipment.
- Consider Lighting Needs: If you have shelves or benches positioned in areas with limited natural light, consider implementing supplemental lighting such as grow lights to ensure proper light distribution and promote healthy plant growth.
- Organize and Decorate: Arrange your plants on the shelves and benches in an organized and aesthetically pleasing manner. Consider grouping plants with similar watering and light requirements together for easier maintenance.
Shelves and benches provide not only additional space for plants but also an opportunity to create a visually appealing display. Take advantage of this by adding decorative elements such as plant labels, small pots, or plant stands to enhance the overall look and atmosphere of your greenhouse.
By incorporating shelves and benches into your greenhouse, you optimize the available space and create a functional and organized area for your plants, making it easier for you to care for and enjoy your garden oasis.
Step 10: Insulating the Greenhouse
Insulating your greenhouse is crucial for maintaining a stable and favorable climate for your plants, especially during colder seasons. Proper insulation helps retain heat, prevents temperature fluctuations, and conserves energy. Here’s how to effectively insulate your greenhouse:
- Choose Insulation Materials: Select suitable insulation materials based on your climate, budget, and greenhouse design. Common options include bubble wrap, greenhouse insulation panels, or double-walled polycarbonate sheets.
- Insulate the Walls: Apply the chosen insulation material to the walls of your greenhouse, covering as much surface area as possible. Secure it in place using clips, tape, or adhesive specifically designed for your insulation material.
- Insulate the Roof: Insulate the roof of your greenhouse using the same or a different insulation material depending on your preference. Ensure that the insulation layer is properly secured and covers any gaps or openings that could compromise heat retention.
- Pay Attention to Doors and Windows: Insulate doors and windows with weatherstripping or caulking to prevent drafts and heat loss. Consider using insulated curtains or blinds to provide an additional barrier against temperature fluctuations.
- Use Thermal Mass: Introduce materials with high thermal mass, such as water containers or heat-absorbing stones, inside your greenhouse. These materials can help absorb and release heat, stabilizing the temperature within the greenhouse.
- Monitor and Adjust: Regularly monitor the temperature inside your greenhouse to identify any areas where insulation may need improvement. Adjust the insulation materials or placement as needed to maintain optimal conditions for your plants.
Remember that insulation requirements may vary depending on your specific climate and seasonal changes. Pay attention to the needs of your plants and make necessary adjustments to the insulation accordingly.
Properly insulating your greenhouse helps create a more energy-efficient and controlled environment, allowing your plants to thrive even in colder weather conditions.
Step 11: Organizing the Interior
Organizing the interior of your greenhouse is essential for creating an efficient and functional space. A well-organized greenhouse allows for easy access, proper plant placement, and effective maintenance. Here’s how to organize the interior of your greenhouse:
- Group Plants by Similar Needs: Arrange your plants based on their water, light, and temperature requirements. Grouping plants with similar needs together simplifies watering, maintenance, and monitoring.
- Create Pathways: Establish clear pathways throughout your greenhouse to allow for easy movement and access to all plants. Consider the space needed for you to comfortably navigate and perform gardening tasks.
- Utilize Shelving and Benches: Make use of the shelves and benches previously installed to maximize vertical space. Arrange plants based on their height, placing taller plants at the back and shorter ones towards the front.
- Label Plants: Use plant labels or markers to identify each plant species. This helps with organization, tracking plant care information, and distinguishing similar-looking plants.
- Designate Areas: Set aside specific areas for different purposes, such as a workspace for potting and repotting, a storage area for tools and supplies, or a section for seed starting and propagation.
- Consider Plant Growth: Account for the growth of your plants when organizing the interior. Leave enough space between plants to accommodate their projected size as they grow.
- Optimize Light Distribution: Ensure that all plants receive adequate light by properly positioning them in relation to windows, vents, or supplemental lighting sources. Avoid shading smaller plants with larger ones.
- Utilize Vertical Space: Take advantage of hanging baskets or vertical gardening systems to further maximize space and add visual interest to your greenhouse.
- Keep Maintenance Tools Handy: Store gardening tools, watering cans, and other essentials in designated areas within the greenhouse for easy access and efficient maintenance.
Regularly assess the organization of your greenhouse and make adjustments as needed. As plants grow and seasons change, you may need to rearrange the interior to accommodate new additions or adapt to different growing needs.
By keeping a well-organized interior, you create a functional and visually appealing greenhouse that enhances your gardening experience and allows your plants to thrive.
Step 12: Monitoring and Maintaining the Greenhouse
Monitoring and maintaining your greenhouse is crucial for the long-term health and success of your plants. Regular upkeep ensures that your greenhouse continues to provide an optimal growing environment. Here are the key steps for monitoring and maintaining your greenhouse:
- Temperature and Humidity: Regularly monitor the temperature and humidity levels inside your greenhouse. Invest in a thermometer and hygrometer to accurately measure these factors. Adjust ventilation and insulation as needed to maintain the desired conditions for your plants.
- Watering: Pay close attention to the watering needs of your plants. Check the moisture levels of the soil regularly and adjust the irrigation system or watering schedule accordingly. Avoid over or under-watering, as this can lead to plant stress or disease.
- Pest and Disease Control: Keep a watchful eye for any signs of pests, such as aphids or spider mites, and promptly address any infestations. Implement preventative measures, such as regularly inspecting plants and practicing good hygiene within the greenhouse.
- Weeding and Cleaning: Regularly remove any weeds, fallen leaves, or other debris from the greenhouse. This helps prevent pest and disease problems and keeps the environment clean and tidy for your plants.
- Pruning and Training: Prune and train your plants as needed to control their growth, promote proper airflow, and maintain shape. Remove dead or yellowing leaves and stems to encourage healthy growth.
- Fertilization: Monitor the nutritional needs of your plants and provide appropriate fertilization. Choose fertilizers that are specifically formulated for greenhouse plants and follow the instructions for application rates and timing.
- Monitor Light Levels: Regularly assess the light levels inside your greenhouse to ensure that your plants are receiving adequate sunlight. Clean the greenhouse coverings as needed to maximize light transmission.
- Inspect for Damage: Regularly inspect the greenhouse structure for any signs of damage, such as leaks, cracks, or loose connections. Address these issues promptly to maintain the integrity and functionality of your greenhouse.
- Record Keeping: Keep a record of your gardening activities, including pest treatments, fertilization schedules, and any specific observations about your plants. This information can help you track progress, make adjustments, and troubleshoot any issues that may arise.
- Continual Learning: Stay informed about new gardening practices, techniques, and advancements in greenhouse management. Continuously educate yourself to improve your skills and knowledge in maintaining an efficient and healthy greenhouse environment.
Maintaining a regular schedule for monitoring and caring for your greenhouse will contribute to the long-term success of your plants and ensure that your greenhouse remains a thriving and productive space.
Conclusion
Congratulations! By following the steps outlined in this guide, you have learned how to build and maintain your own backyard greenhouse. From choosing the right location to monitoring and maintaining the greenhouse, you have gained the knowledge and skills needed to create an optimal growing environment for your plants.
A backyard greenhouse offers numerous benefits, allowing you to extend your growing season, protect delicate plants, and explore a wide range of gardening possibilities. It provides you with a space to experiment, learn, and enjoy the rewards of your gardening efforts.
Remember to regularly monitor the temperature, humidity, and other environmental factors inside your greenhouse to ensure the optimal conditions for your plants. Continuously assess and adjust your watering, ventilation, and insulation practices to promote healthy growth and prevent plant stress or disease.
In addition to the practical aspects, don’t forget to enjoy the process and have fun in your greenhouse. Experiment with different plant varieties, explore new gardening techniques, and take the time to appreciate the beauty and tranquility of your green oasis.
Whether you are a seasoned gardener or just starting out, building a backyard greenhouse is a rewarding endeavor. It allows you to connect with nature, nurture your love for plants, and enjoy fresh produce all year round.
So, roll up your sleeves, gather your tools, and get ready to embark on an exciting journey of creating your own backyard greenhouse. Happy gardening!