Home>Gardening Techniques>DIY Projects>How To Build A Backyard Deck

DIY Projects
How To Build A Backyard Deck
Modified: January 22, 2024
Learn how to build a stunning backyard deck with our DIY projects. Transform your outdoor space with our step-by-step guide and expert tips.
(Many of the links in this article redirect to a specific reviewed product. Your purchase of these products through affiliate links helps to generate commission for Chicagolandgardening.com, at no extra cost. Learn more)
Table of Contents
- Introduction
- Step 1: Planning and Designing
- Step 2: Gathering Materials and Tools
- Step 3: Preparing the Ground
- Step 4: Building the Foundation
- Step 5: Installing the Posts and Beams
- Step 6: Attaching the Joists
- Step 7: Installing the Decking Boards
- Step 8: Adding Handrails and Balusters
- Step 9: Applying Finishing Touches
- Conclusion
Introduction
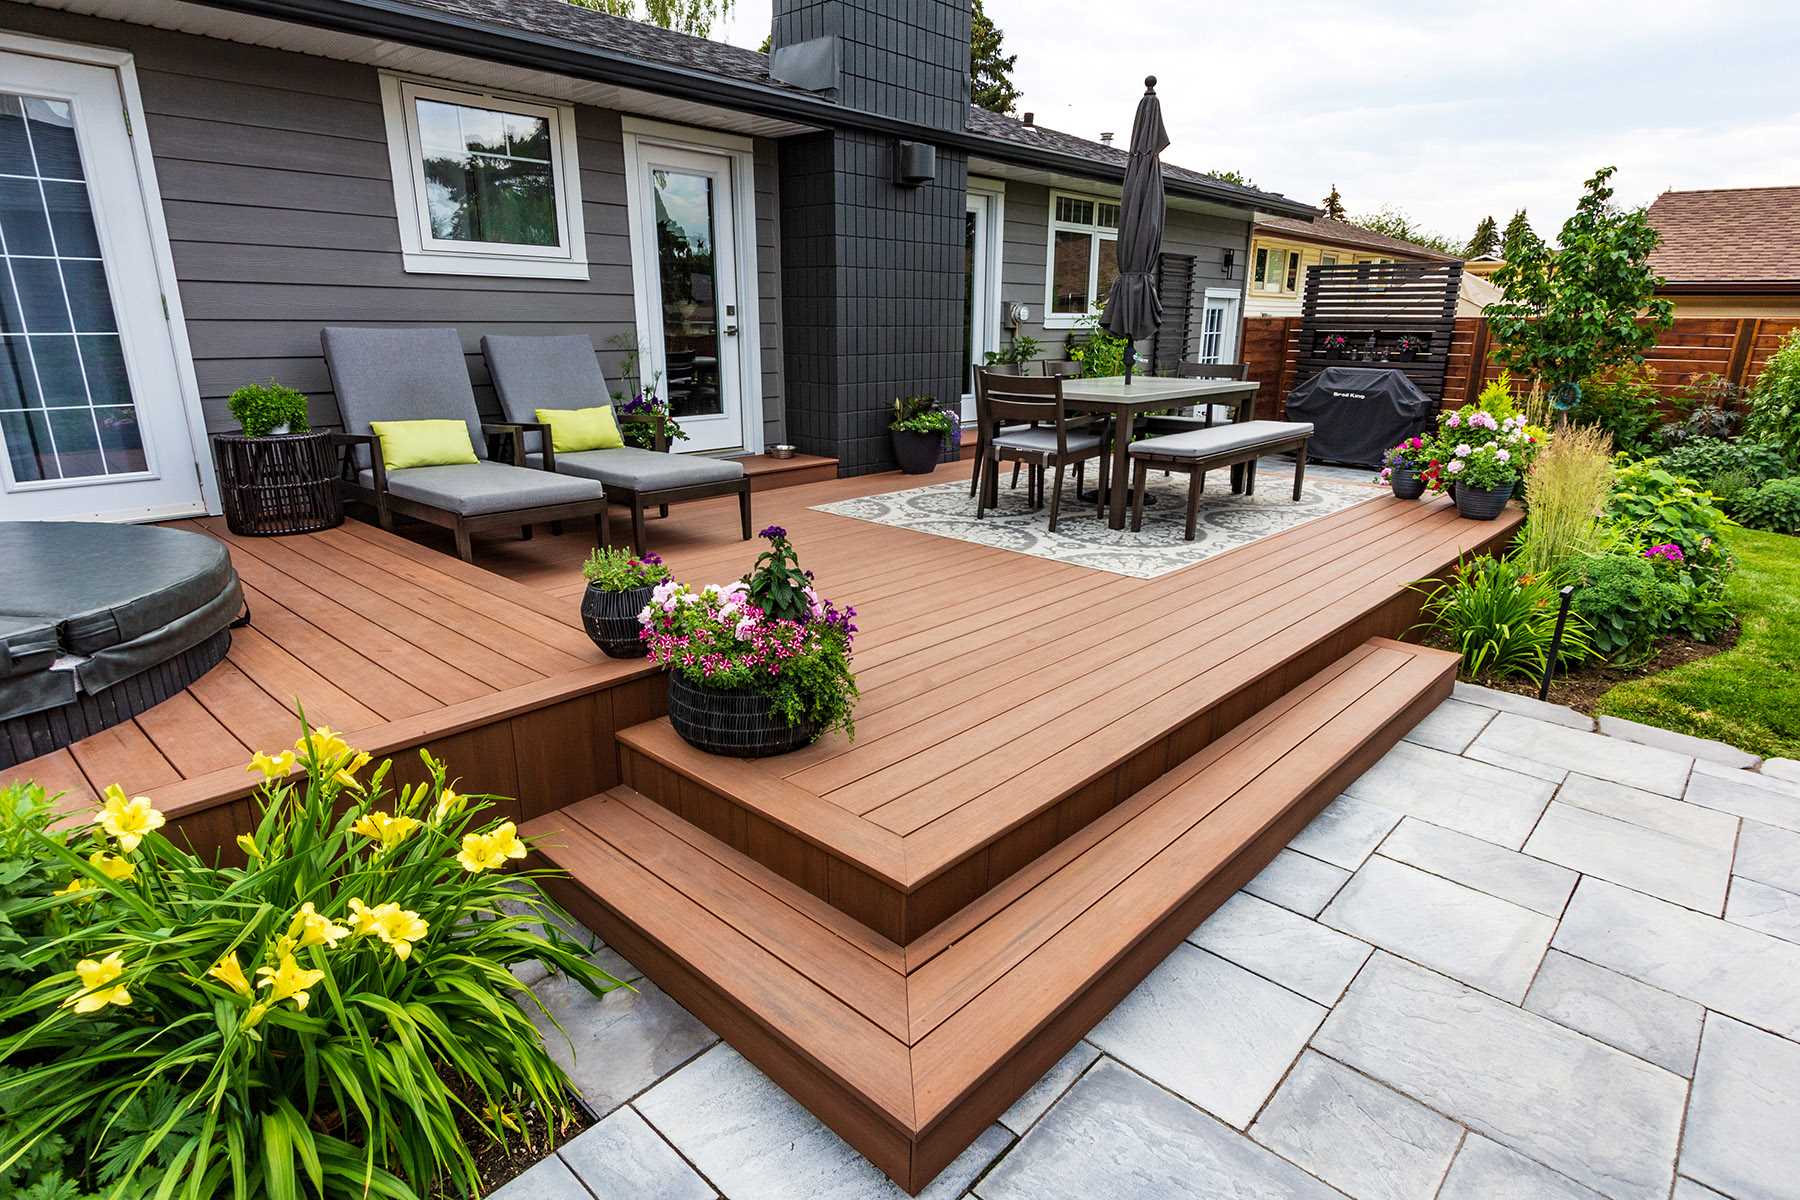
Building a backyard deck is a fantastic DIY project that can enhance your outdoor living space and add value to your home. Whether you’re planning to enjoy leisurely evenings on your deck, host outdoor gatherings, or simply have a place to relax and unwind, a well-designed and sturdy deck can provide the perfect solution.
In this comprehensive guide, we will walk you through the step-by-step process of building a backyard deck from start to finish. You don’t need to be a professional carpenter or have extensive construction experience to tackle this project. With careful planning, attention to detail, and some basic tools, you can create a beautiful and functional deck that meets your specific needs.
Before jumping into the project, it’s essential to have a clear vision of what you want to achieve with your deck. Consider factors such as the size and shape of your yard, the intended use of the deck, and any unique features you would like to incorporate. Planning and designing your deck beforehand will help you determine the materials and tools you’ll need, as well as create a blueprint for construction.
Gathering the necessary materials and tools is the next step in the process. This includes items such as pressure-treated lumber for the frame, decking boards, screws, nails, and various hardware and accessories. Having all the required materials on hand before you begin construction will save you time and ensure a smooth workflow.
Once you have all your supplies ready, it’s time to prepare the ground where your deck will be built. This involves clearing the area, leveling the ground, and potentially installing a weed barrier or gravel base. Properly preparing the ground will provide a stable foundation for your deck and prevent future issues.
The foundation is the backbone of your deck, and it’s crucial to get it right. This involves digging and pouring concrete footings or installing concrete deck blocks. The foundation will provide the necessary support for your deck and ensure its stability.
With the foundation in place, you can move on to installing the posts and beams, which will support the weight of the deck. The number and placement of these structural elements will depend on the size and design of your deck. It’s important to follow local building codes and guidelines to ensure safety and structural integrity.
The next step is attaching the joists, which will create the framework for your deck’s surface. These horizontal beams are essential for distributing the weight of the deck evenly and providing stability. Precision and accuracy during this step are crucial for a level and sturdy finished deck.
Once the frame is complete, the fun part begins – installing the decking boards. These are the visible surface of your deck and come in various materials, such as wood or composite. Careful attention to detail during installation will ensure a uniform and professional-looking finish.
Adding handrails and balusters is the next step, which not only enhances safety but also adds aesthetic appeal to your deck. There are numerous designs and materials to choose from, allowing you to customize your deck to match your personal style.
Finally, applying finishing touches such as staining or sealing the deck, adding lighting or landscaping, and furnishing the space can bring your backyard deck project to completion. These final touches will transform your deck into a welcoming and inviting outdoor oasis.
By following these step-by-step instructions, you can confidently embark on building your own backyard deck. Whether you’re a seasoned DIY enthusiast or a novice, with patience and perseverance, you’ll be able to create a deck that you’ll enjoy for years to come.
Step 1: Planning and Designing
Before you start building your backyard deck, it’s essential to spend time planning and designing the layout. This step will help you determine the size, shape, and style of your deck, as well as identify specific features you want to incorporate. Here are some key considerations:
- Size and Shape: Assess the available space in your backyard and determine the optimal size and shape for your deck. Consider factors such as the purpose of the deck, the number of people it should accommodate, and how it will fit within the overall landscape.
- Functionality: Determine how you plan to use the deck. Will it be primarily for outdoor dining and entertaining, lounging and relaxation, or a combination of activities? Knowing its primary purpose will help you decide on the layout and features.
- Access Points: Consider the existing entry points to your backyard, such as doors or pathways, and how the deck will connect to them. Determine the best location for stairs or ramps to ensure easy access to and from the deck.
- Materials: Research and choose the right materials for your deck, taking into account durability, maintenance requirements, and aesthetics. Popular options include pressure-treated lumber, cedar, composite decking, or tropical hardwoods.
- Safety: Ensure that your deck design adheres to local building codes and safety regulations. Consider features such as handrails, balusters, and lighting to enhance safety on your deck.
- Budget: Determine your budget for the project, including the cost of materials, tools, and any additional features you desire. Create a detailed plan that outlines your expenses to avoid any surprises along the way.
During the planning and designing stage, it can be helpful to consult with a professional or use deck design software to visualize your ideas. These tools can provide 3D renderings and assist in accurate measurements, ensuring that your deck will meet your expectations.
Once you have a clear vision of your deck design, create a detailed blueprint or sketch. Include measurements, the placement of posts and supports, and any additional features such as built-in seating, planters, or shade structures. This plan will serve as your guide throughout the construction process.
Remember, the planning and designing stage is crucial for a successful deck-building project. Take your time to consider all aspects and make any necessary adjustments before moving on to the next steps.
Step 2: Gathering Materials and Tools
With your deck design figured out, it’s time to gather all the materials and tools necessary for the construction process. Having everything you need in advance will help streamline the project and prevent unnecessary delays. Here’s a checklist of the materials and tools you’ll likely require:
- Materials: The main materials for your deck will be the deck boards, framing lumber, and concrete footing materials. Choose high-quality pressure-treated lumber for the frame, as it is sturdy, durable, and resistant to decay and insects. Select decking boards made of wood, composite, or other suitable materials, depending on your design preference and budget.
- Fasteners: You will need various types of fasteners, including nails, screws, and bolts, to assemble your deck. Opt for galvanized or stainless steel fasteners to prevent corrosion and ensure long-lasting stability.
- Hardware and Accessories: Depending on your deck design, you may require additional hardware and accessories, such as post anchors, joist hangers, railing brackets, and deck screws.
- Tools: Ensure you have the necessary tools to complete the project. This may include a circular saw or miter saw for cutting the lumber, a drill for pilot holes and driving screws, a level for ensuring a level surface, a tape measure, a square, a string line for layout, and a shovel or post hole digger for excavation.
- Safety Gear: Prioritize your safety by acquiring suitable personal protective equipment (PPE), such as safety goggles, work gloves, and ear protection.
- Cleaning and Finishing Products: If you plan to stain or seal your deck, gather the necessary cleaning and finishing products. This may include deck cleaners, brighteners, and stain or sealer applicators.
- Additional Features: Consider any additional features or accessories you want to include on your deck, such as lighting fixtures, seating, or planter boxes. Take note of the required materials for these elements as well.
When selecting materials, ensure that they are suitable for outdoor use and can withstand the elements in your location. It’s also a good idea to factor in any local building codes or regulations related to deck construction.
Take your time to gather all the necessary materials and tools before you start building. This will prevent unnecessary trips to the hardware store and will allow for a smoother and more efficient construction process.
Step 3: Preparing the Ground
Before you can start constructing your backyard deck, it’s important to properly prepare the ground where the deck will be built. This step ensures that the deck has a stable and level foundation and helps prevent issues such as sinking or shifting in the future. Follow these steps to prepare the ground:
- Clear the Area: Start by removing any vegetation, rocks, or debris from the area where your deck will be located. Ensure the area is clear and level, providing a clean canvas for construction.
- Mark the Layout: Use stakes and string to mark the layout and boundaries of your deck. This will give you a visual guide for where the deck will be positioned and help ensure accuracy during the construction process. Consider factors such as the proximity to your house and any existing structures in your yard.
- Level the Ground: Use a shovel or a leveling tool to ensure the ground is even across the entire deck area. Remove any high spots and fill in any low areas to achieve a level surface. This step is crucial for the stability and longevity of your deck.
- Install a Weed Barrier: To prevent weed growth and unwanted vegetation under your deck, consider installing a weed barrier or landscape fabric. This will help maintain a clean and low-maintenance area beneath your deck.
- Add a Gravel Base: Depending on your soil type and drainage conditions, you may need to add a gravel base to enhance stability and drainage. Spread a layer of compacted gravel evenly across the deck area to create a solid foundation.
- Consider Drainage: If your deck is close to your house or other structures, ensure that the ground slopes away from these areas to prevent water from pooling or causing damage. Incorporate drainage solutions such as French drains or swales if necessary.
It’s important to invest time and effort into preparing the ground properly. This step sets the stage for a well-built and stable deck that will last for years to come. Take your time to ensure the ground is level, free from debris, and adequately prepared for construction.
Remember to check local building codes and regulations related to deck construction. Some jurisdictions may have specific requirements for ground preparation and drainage.
Step 4: Building the Foundation
The foundation is a crucial element of your backyard deck, as it provides the necessary support and stability. Building a solid foundation will ensure that your deck withstands the test of time and is safe for use. Follow these steps to construct the foundation:
- Mark the Locations: Use the string lines from the previous step to mark the locations for the footings or deck blocks. These marks will indicate where the support posts will be placed.
- Excavate for Footings or Blocks: Depending on your local building codes and soil conditions, you may need to dig holes for concrete footings or prepare flat areas for deck blocks. Follow the specific guidelines provided by your local building authority or consult with a professional.
- Install Footings: If your deck requires concrete footings, follow the recommended guidelines for size and depth. Pour concrete into the excavated holes, inserting post anchors into the wet concrete for attaching the support posts. Allow the concrete to cure according to the manufacturer’s instructions.
- Place Deck Blocks: If you’re using deck blocks instead of footings, ensure that they are placed on level ground. Use a level and adjust the blocks as needed to achieve a level surface.
- Attach Support Posts: Once the footings or deck blocks are in place, attach the support posts to the anchors or rest them on the blocks. Use galvanized hardware to securely fasten the posts to the footings or blocks. Ensure that the posts are plumb and level using a level and adjust as necessary.
Building a solid foundation is essential for the structural integrity of your deck. Take the time to follow the guidelines provided by your local building authority and ensure that the footings or blocks are properly installed and the support posts are securely attached.
Remember, safety is paramount during the construction process. Use appropriate protective gear such as gloves and safety goggles, and follow recommended construction practices to ensure a sturdy and secure foundation for your deck.
Step 5: Installing the Posts and Beams
Once the foundation of your deck is in place, it’s time to install the posts and beams. These elements provide the primary structural support for your deck and serve as the framework for the rest of the construction process. Here’s how to install the posts and beams:
- Position the Posts: Mark the locations of your deck posts, ensuring they align with the support points on your footings or deck blocks. Make sure the posts are plumb by using a level, and adjust as necessary.
- Attach Bracing: To ensure stability during installation, attach temporary braces to the posts. These will keep them in place as you continue with the construction process and prevent any movement or shifting.
- Install Beams: Measure and cut your beams to the appropriate length, taking into consideration any overhang or design specifications. Position the beams on top of the posts and use appropriate hardware, such as carriage bolts or metal connectors, to secure them in place. Ensure that the beams are level and aligned with the string lines you marked earlier.
- Attach Bracing and Stabilize: Once the beams are in place, add additional bracing to provide extra stability. This is especially important if your deck is elevated or larger in size. The bracing can be temporary and will be removed later in the construction process.
When attaching the posts and beams, it’s essential to follow local building codes and guidelines for proper installation techniques and hardware requirements. This ensures the structural integrity of your deck and guarantees its safety.
Take your time during this step to ensure that the posts are plumb and the beams are level and secure. Proper alignment and stability are key factors in creating a sturdy framework for your deck.
Once the posts and beams are installed, you will be ready to move on to the next steps of attaching the joists and proceeding with the construction of your deck.
Step 6: Attaching the Joists
With the posts and beams securely in place, it’s time to move on to attaching the joists. Joists are horizontal structural elements that create the framework for your deck’s surface. Follow these steps to properly attach the joists:
- Measure and Cut: Measure the distance between the beams to determine the length of your joists. Use a saw to cut the joists to the appropriate size, ensuring a precise fit.
- Position the Joists: Place the joists on top of the beams, perpendicular to them. Leave a small gap between each joist to allow for proper water drainage and air circulation.
- Secure the Joists: Attach the joists to the beams using joist hangers or nails. Joist hangers provide extra support and help prevent the deck from sagging over time. Use appropriate fasteners according to the manufacturer’s instructions, making sure they are resistant to corrosion.
- Space the Joists: Ensure that the joists are spaced at regular intervals to provide sufficient support for your deck’s surface. The spacing will depend on the type of decking material you are using and any local building code requirements.
- Check for Level: Use a level to confirm that the joists are level both from side to side and in relation to the beams. Make any necessary adjustments by adding shims or making slight modifications to the joists.
During the process of attaching the joists, it is important to maintain accurate measurements and ensure that they are securely fastened to the beams. This will provide a strong and stable foundation for your deck’s surface.
Remember to periodically check the level of the joists as you progress, as an uneven surface can affect the stability and appearance of your deck.
Once the joists are properly attached, you are ready to move on to the next step of your deck construction, which involves installing the decking boards.
Step 7: Installing the Decking Boards
Now that the framework of your deck is in place, it’s time to move on to installing the decking boards. This step will give your deck its final appearance and transform it into a usable outdoor living space. Follow these steps to properly install the decking boards:
- Choose Decking Material: Select the type of decking material that best suits your needs and personal preferences. Popular options include traditional wood, composite decking, or PVC decking. Consider factors such as durability, maintenance requirements, and aesthetic appeal.
- Starting Point: Determine the starting point for your decking boards. It’s usually recommended to start from the outer edge of the deck and work your way towards the house. This will create a clean and uniform finish.
- Orientation: Decide on the orientation of your deck boards, such as horizontal or diagonal. This can affect the appearance of your deck and may require additional cutting or framing.
- Spacing: Leave a small gap between each decking board to allow for expansion and contraction due to changes in temperature and humidity. Use spacers or specific deck fasteners to ensure consistent spacing throughout the deck.
- Secure the Boards: Attach each decking board to the joists using appropriate screws or nails. Follow the manufacturer’s guidelines for the specific type of decking material you are using. Ensure that each board is securely fastened but avoid over-tightening, which can cause warping or splitting.
- Cutting and Finishing: Measure and cut any necessary boards to fit the edges or angles of your deck. Use a circular saw or miter saw to ensure clean and precise cuts. Sand any rough edges and apply a protective finish if desired.
During the installation of the decking boards, pay attention to the alignment and spacing to achieve a professional and polished look. Take your time to ensure that each board is securely fastened and that there are no visible gaps or unevenness.
Remember to follow the manufacturer’s recommendations for maintenance and care to ensure the longevity and beauty of your decking material.
Once your decking boards are installed, your deck will be ready for the next step of adding handrails and balusters.
Step 8: Adding Handrails and Balusters
Adding handrails and balusters to your deck not only enhances the safety of your outdoor space but also adds a touch of style and visual appeal. Follow these steps to properly install handrails and balusters:
- Determine Code Requirements: Check your local building codes and regulations to determine the specific requirements for handrail height, spacing between balusters, and other safety considerations.
- Select Handrail Materials: Choose the appropriate handrail material, such as wood, metal, or composite, that complements your deck design and matches your personal style.
- Measure and Cut Handrails: Measure and cut the handrails to the desired length using a saw. Ensure that the handrails fit securely and are level along the entire length of the deck.
- Install Handrail Posts: Attach the handrail posts to the deck’s structural elements using appropriate hardware. Ensure that the posts are securely anchored and aligned according to the code requirements.
- Attach Handrails: Install the handrail sections by attaching them to the handrail posts. Follow the manufacturer’s instructions for proper installation, ensuring that the handrails are firmly attached and level.
- Install Balusters: Measure and cut the balusters to the appropriate height, ensuring compliance with local building codes. Install the balusters between the handrail and the bottom rail, spacing them evenly according to code requirements.
- Secure Balusters: Use appropriate fasteners or connectors to secure the balusters. Ensure they are firmly attached, providing the necessary support and stability.
- Finish: Sand and finish the handrails and balusters to protect them from the elements. Apply a stain or paint of your choice, coordinating with the overall design of your deck.
When installing handrails and balusters, take care to ensure that they are sturdy and that there are no gaps or loose connections. Regularly inspect and maintain the handrails and balusters to ensure they remain in good condition and continue to provide safety on your deck.
Remember, handrails and balusters not only contribute to the safety of your deck but can also serve as decorative elements that enhance the overall aesthetics of your outdoor space.
Once handrails and balusters are in place, your deck is almost complete. The final step involves applying finishing touches to perfect the look and functionality of your backyard oasis.
Step 9: Applying Finishing Touches
Congratulations! You’re in the final step of building your backyard deck. Applying the finishing touches will add the extra elements that elevate your deck’s functionality, aesthetics, and overall appeal. Follow these steps to complete your deck:
- Stain or Seal: Consider applying a stain or sealant to protect your deck from weathering, UV damage, and moisture. Choose a product that is specifically designed for the type of decking material you have used. Follow the manufacturer’s instructions for proper application and drying time.
- Lighting: Enhance the ambiance and usability of your deck by installing outdoor lighting. Consider options like deck post lights, string lights, or recessed lighting to create a warm and inviting atmosphere during evenings and nights.
- Landscaping: Add greenery and visual interest around your deck by incorporating landscaping elements. Plant flowers, shrubs, or container gardens to create a pleasant and inviting environment.
- Furnishing: Select appropriate outdoor furniture and accessories to make your deck comfortable and functional. Consider factors such as seating capacity, durability, and weather resistance when choosing your furniture pieces.
- Accessories: Personalize your deck with accessories that reflect your style and needs. Install amenities such as a built-in grill or a fire pit for outdoor cooking and cozy gatherings. Add features like outdoor speakers, a pergola, or an awning to enhance the comfort and entertainment value of your deck.
- Regular Maintenance: To ensure the longevity and beauty of your deck, establish a regular maintenance routine. This includes routine cleaning, removing debris, inspecting for any damages or wear, and making any necessary repairs promptly.
By applying these finishing touches, you can create a deck that truly meets your vision and enhances your outdoor living experience. Remember to strike a balance between aesthetics and functionality, creating a space where you can relax and enjoy the beauty of your surroundings.
Keep in mind that outdoor spaces require ongoing maintenance and care. Regularly clean and inspect your deck, address any issues promptly, and follow the manufacturer’s recommendations for maintaining the longevity and appearance of your materials.
With the finishing touches complete, take a moment to admire your hard work and enjoy the fruits of your labor. Your backyard deck is now ready for you, your family, and your friends to enjoy for many years to come.
Conclusion
Building a backyard deck is a rewarding DIY project that can enhance your outdoor living space and provide years of enjoyment. By following the step-by-step process outlined in this guide, you can confidently tackle the construction of your deck, even if you have limited experience in carpentry or construction.
From the initial planning and designing stage to the final finishing touches, each step is crucial for creating a beautiful, functional, and safe deck. Take the time to carefully consider the size, shape, and materials of your deck, ensuring that it meets your specific needs and preferences.
Gathering the necessary materials and tools in advance will save you time and ensure a smoother construction process. Preparing the ground properly and building a solid foundation are essential for the stability and longevity of your deck.
As you progress through the construction process, pay attention to accuracy, alignment, and levelness to create a professional and sturdy deck. Installing the decking boards, adding handrails and balusters, and applying the finishing touches will add the final touches that transform your deck into a welcoming outdoor oasis.
Remember to prioritize safety throughout the project by using appropriate personal protective equipment and following local building codes and regulations. Regular maintenance and care will help preserve the beauty and functionality of your deck for years to come.
Now that you have all the knowledge and guidance, it’s time to grab your tools and get started on building your very own backyard deck. Create a space where you can relax, entertain, and make lasting memories with your loved ones. Enjoy the process and the outcome of your hard work!
