Home>Gardening Techniques>DIY Projects>How To Compost In Your Backyard
DIY Projects
How To Compost In Your Backyard
Modified: January 22, 2024
Learn how to compost in your backyard with these easy DIY projects. Start reducing waste and creating nutrient-rich soil for your garden today.
(Many of the links in this article redirect to a specific reviewed product. Your purchase of these products through affiliate links helps to generate commission for Chicagolandgardening.com, at no extra cost. Learn more)
Table of Contents
Introduction
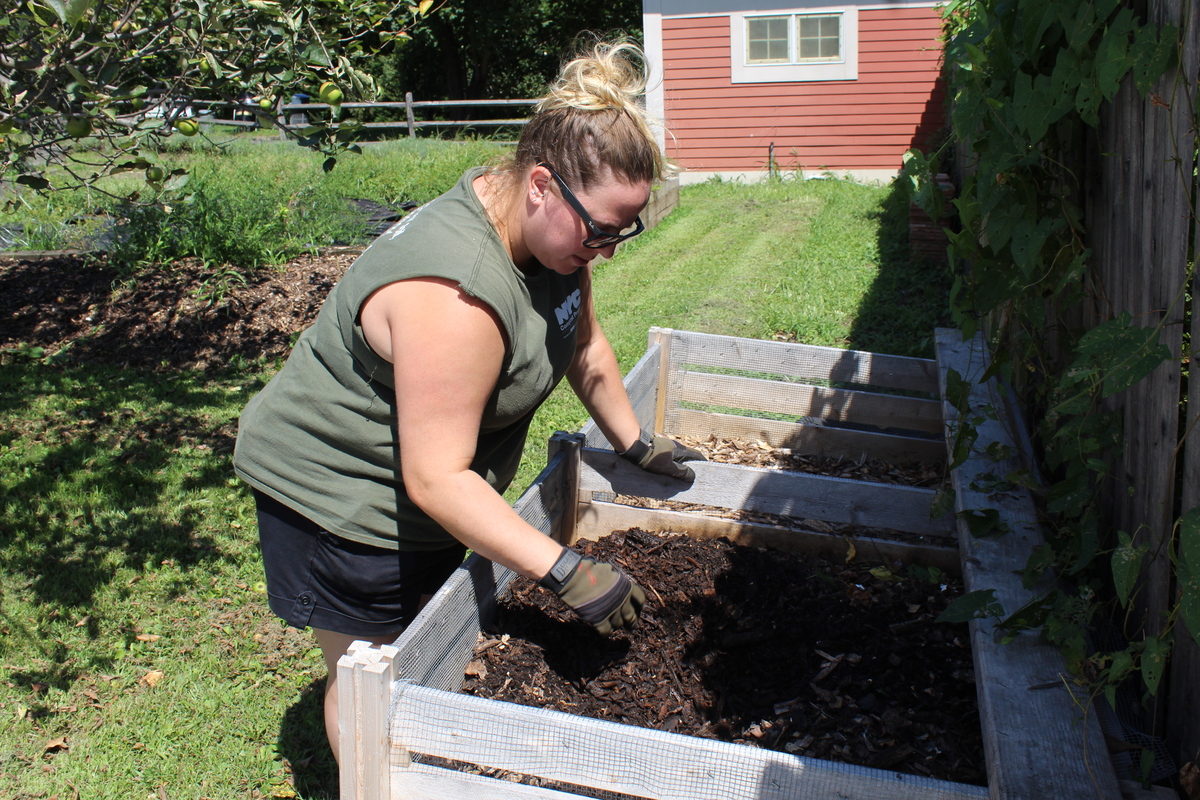
Welcome to the world of backyard composting! If you’re looking to reduce waste, improve your garden’s soil quality, and do your part for the environment, composting is an excellent choice. Composting is the process of breaking down organic materials into a nutrient-rich soil amendment known as compost. It’s a simple and natural way to recycle kitchen scraps, yard waste, and other organic materials, turning them into a valuable resource for your garden.
Composting has numerous benefits, both for your garden and the planet. Not only does it help reduce the amount of waste that ends up in landfills, but it also reduces greenhouse gas emissions. Composting enriches the soil, improving its structure, water-holding capacity, and nutrient content. By adding compost to your garden, you create a healthy environment for plants to grow, reducing the need for chemical fertilizers and pesticides.
In this comprehensive guide, we will explore the different composting methods, help you select the right composting bin, provide tips on managing and troubleshooting your compost pile, and guide you through the process of harvesting and using compost in your garden. Whether you’re a seasoned gardener or just starting out, this guide will equip you with the knowledge and skills you need to become a successful backyard composter.
Before we dive into the details, it’s important to note that composting is a natural process that requires time and patience. While there is no one-size-fits-all approach to composting, understanding the basics and following some key guidelines will set you on the path to success. So let’s get started and learn how to turn your kitchen and yard waste into “black gold” for your garden!
Benefits of Composting
Composting offers a wide range of benefits for both the environment and your garden. Here are some of the key advantages of embracing the practice of backyard composting:
- Reduction of landfill waste: By composting organic materials such as kitchen scraps and yard waste, you can significantly reduce the amount of waste that goes into landfills. This, in turn, helps alleviate the strain on landfill capacity and reduces greenhouse gas emissions.
- Nutrient-rich soil amendment: Compost is a rich source of organic matter and essential nutrients that benefit your plants. When added to soil, compost improves its structure, promotes better moisture retention, and enhances nutrient availability. This, in turn, leads to healthier plants, increased yield, and better overall soil health.
- Improved soil structure: Compost acts as a natural soil conditioner, improving its texture and structure. It helps to break up clay soils, allowing for better water drainage and root penetration. On the other hand, it enhances the water-holding capacity of sandy soils. This means that compost can help you achieve the ideal soil conditions for growing a variety of plants.
- Reduction of chemical fertilizer use: By adding compost to your garden soil, you can reduce the need for synthetic fertilizers. Compost releases nutrients slowly and in a balanced way, avoiding nutrient imbalances or leaching, which can occur with chemical fertilizers. This not only saves you money but also reduces the risk of water pollution associated with excessive fertilizer use.
- Increase in beneficial microbial activity: Compost is teeming with beneficial microorganisms that promote soil health and fertility. These microorganisms help break down organic matter, making nutrients more available to plants. They also contribute to disease suppression, improve soil structure, and enhance the overall biological activity in the soil.
- Enhanced plant disease resistance: When you add compost to your soil, you are introducing a diverse range of microorganisms that can suppress certain plant diseases. These microorganisms compete with and prevent harmful pathogens from establishing themselves in the soil, thereby reducing the risk of plant diseases and the need for chemical interventions.
As you can see, composting offers a multitude of benefits for both the environment and your garden. By repurposing organic waste and creating nutrient-rich compost, you can make a positive impact on the planet while enjoying healthier plants and bountiful harvests. So, let’s explore the different composting methods and find the one that suits your needs!
Types of Composting Methods
There are several different composting methods you can choose from, depending on your available space, the amount of organic waste you generate, and your desired level of involvement. Here are some popular composting methods:
- Backyard Pile: This is the most traditional and straightforward method of composting. It involves creating a compost pile directly on the ground in a designated area of your backyard. The pile consists of alternating layers of green (nitrogen-rich) and brown (carbon-rich) organic materials. This method requires minimal maintenance but may take longer to produce finished compost.
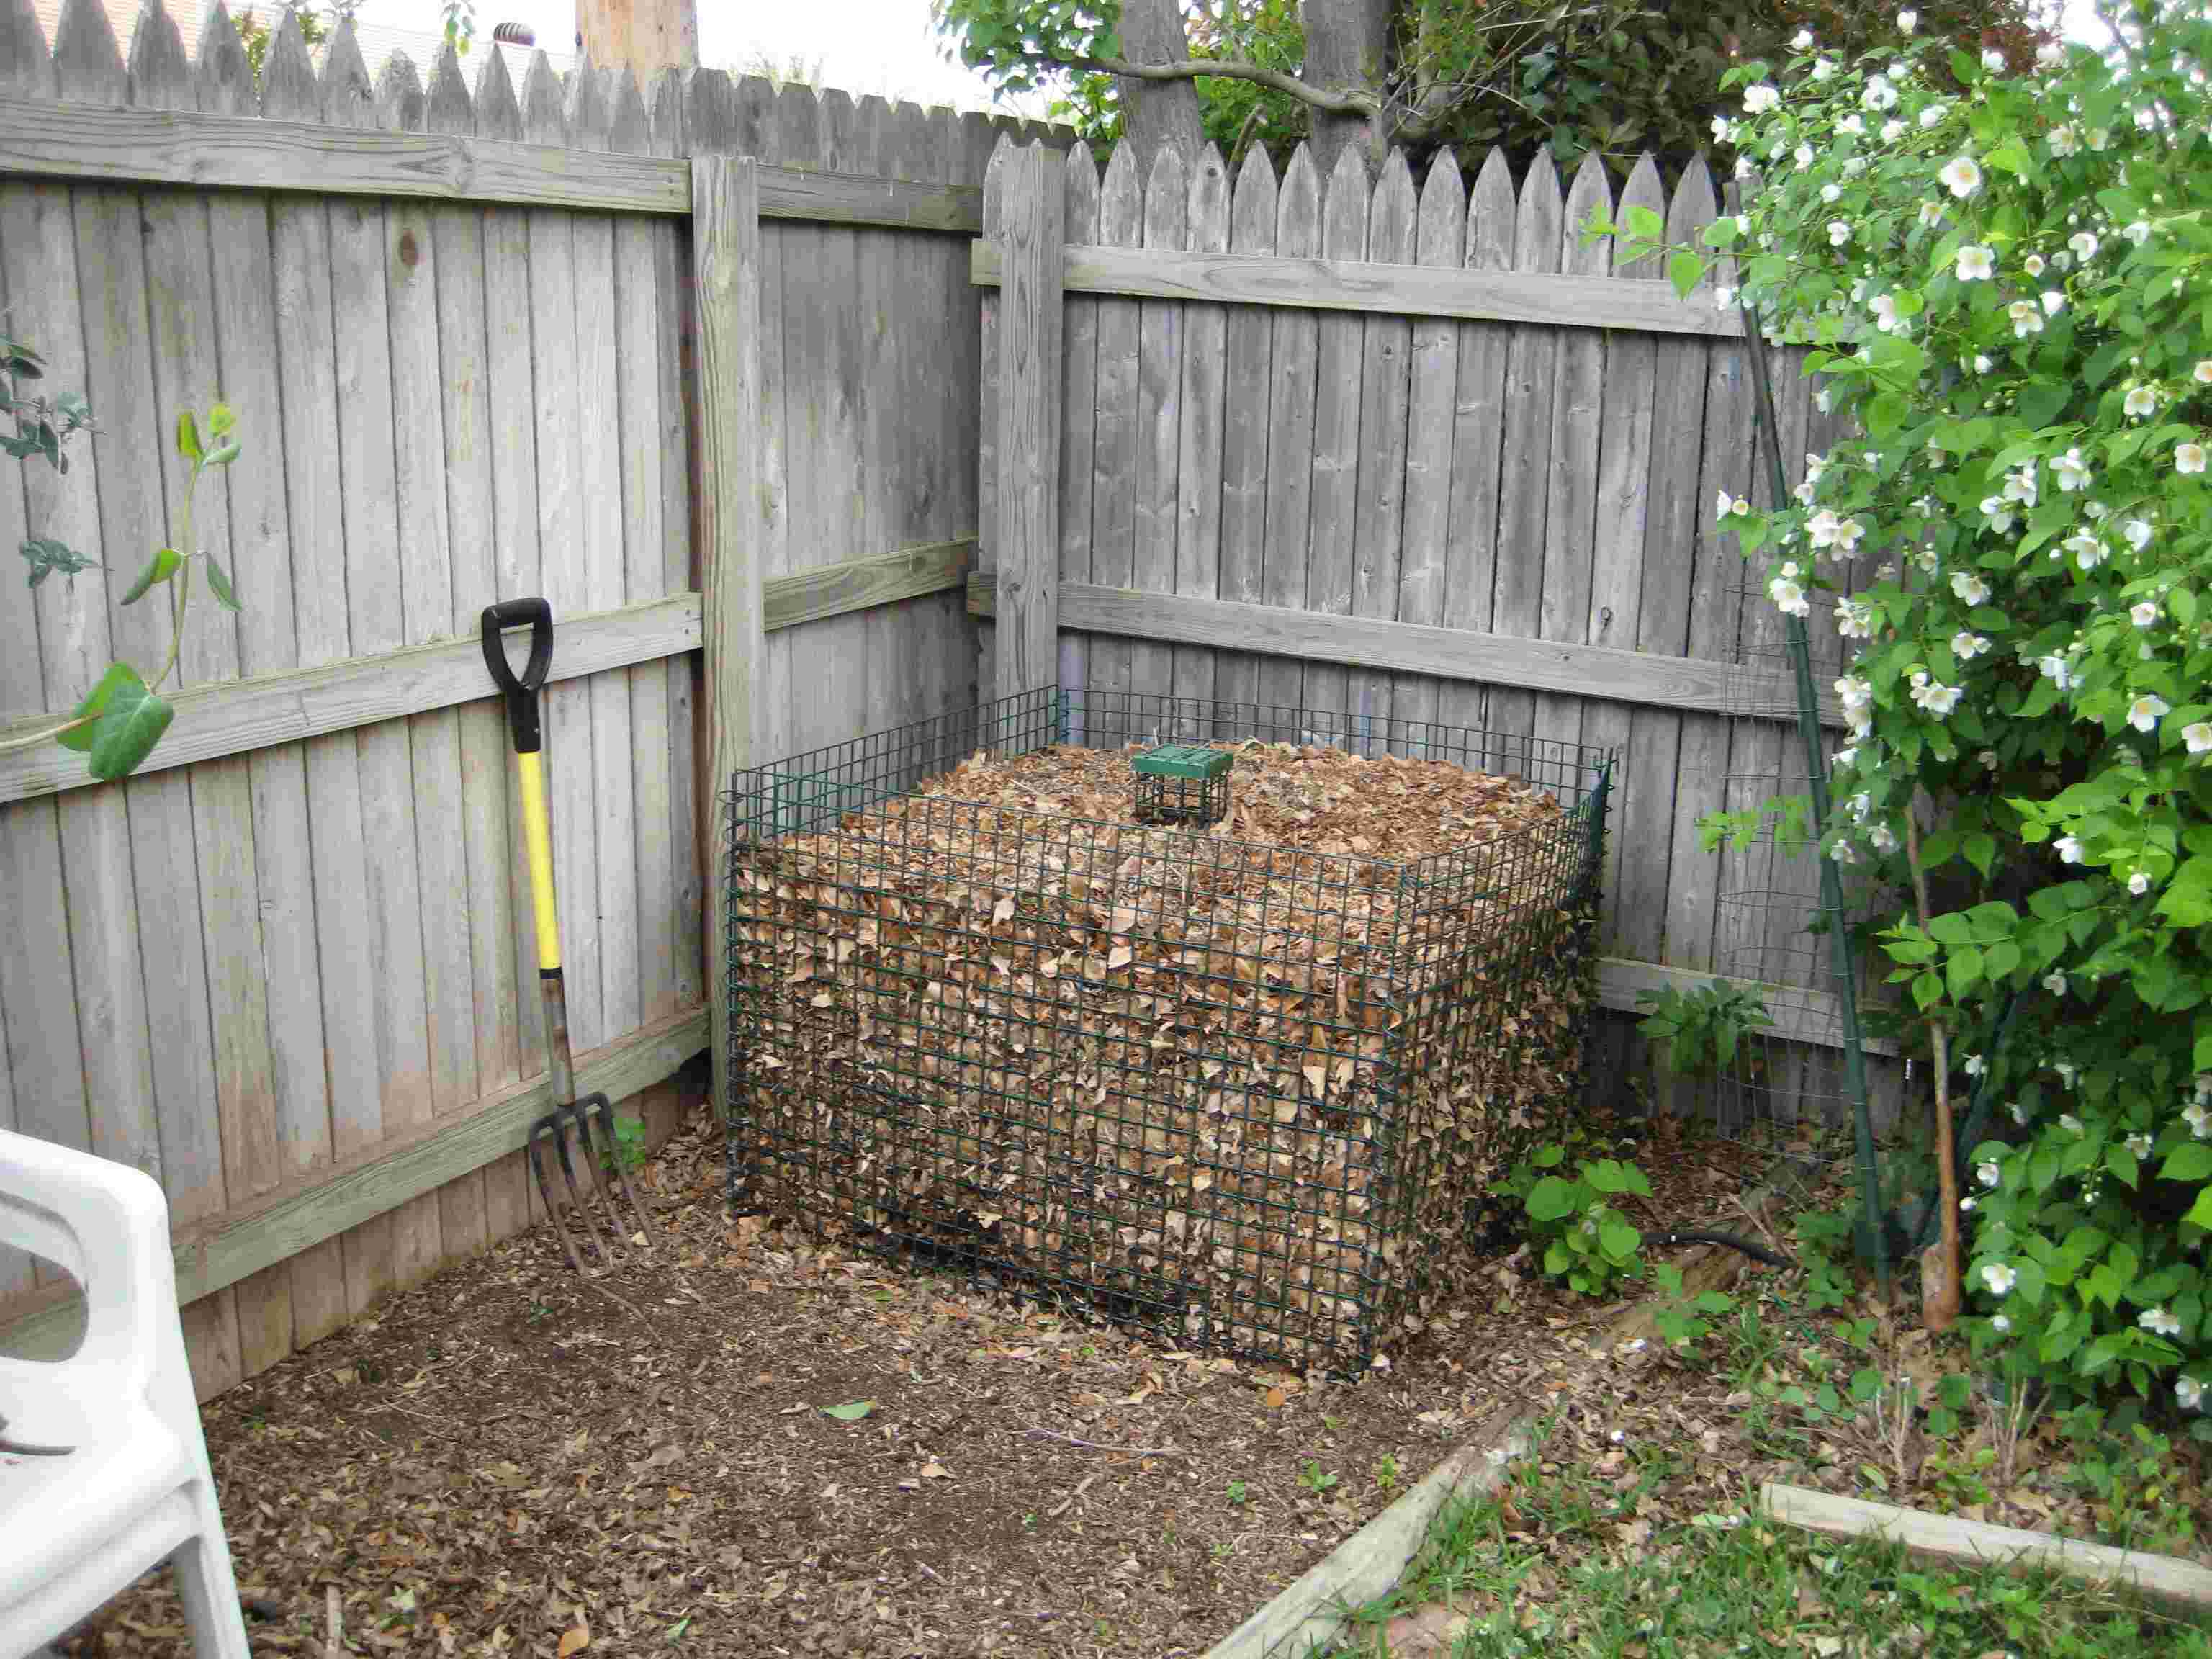
- Bin Composting: Bin composting involves using a compost bin or container to hold and contain the composting materials. Bins can be made from various materials such as plastic, wood, or wire mesh. They help contain the compost pile, promote better heat retention, and prevent animals from accessing the pile. Bin composting is a popular choice for households with limited space or aesthetic considerations.
- Tumbler Composting: Tumbler composting is a more convenient and efficient method that involves using a compost tumbler. These containers are designed to be rotated, allowing for easy mixing and aeration of the composting materials. Tumblers are ideal for those who want to speed up the composting process and have limited time or physical ability to turn a traditional compost pile.
- Vermicomposting: Vermicomposting utilizes worms to break down organic waste into compost. Redworms (Eisenia fetida) or composting worms are placed in a bin with bedding material and food scraps. The worms eat the organic matter and excrete nutrient-rich castings, which become the compost. Vermicomposting is suitable for those who generate primarily kitchen scraps and have limited outdoor space or live in an apartment.
- Bokashi Composting: Bokashi composting is a fermentation process that uses a specialized system and microorganisms to break down organic waste. It involves layering food scraps with a mixture of beneficial microbes, known as bokashi bran, in an airtight container. The waste undergoes anaerobic fermentation, producing a fermented pre-compost that can be buried in a trench or added to an existing compost pile for further decomposition.
Each composting method has its advantages and considerations, so choose one that aligns with your preferences and circumstances. Now that you’re familiar with the different composting methods, it’s time to explore the next step: selecting the right composting bin. Let’s dive in!
Selecting a Composting Bin
Choosing the right composting bin is an important step in the composting process. It will depend on factors such as your available space, the amount of organic waste you generate, and your personal preferences. Here are some factors to consider when selecting a composting bin:
- Size: Consider the size of the bin in relation to the amount of organic waste you produce. If you have a large household or generate a substantial amount of yard waste, a bigger bin will be necessary. However, if you have limited space or generate minimal waste, a smaller bin or even a compact vermicomposting system might be more suitable.
- Material: Composting bins come in various materials, including plastic, wood, wire mesh, and even recycled materials. Plastic bins are lightweight, durable, and easy to move, while wooden bins blend well with natural surroundings. Wire mesh bins offer excellent airflow but may not be as aesthetically pleasing. Consider the durability, maintenance requirements, and aesthetic appeal of different materials before making a decision.
- Aeration: Proper airflow is crucial for successful composting. Some composting bins have built-in ventilation systems or openings that allow for sufficient airflow, while others may require regular turning or mixing to provide aeration. Consider how much time and effort you’re willing to invest in turning the compost and choose a bin that suits your abilities and preferences.
- Moisture control: Compost needs the right amount of moisture to decompose effectively. Some composting bins have features that help regulate moisture, such as drainage holes or moisture-retaining materials. Consider your local climate and the level of control you want over moisture levels when selecting a bin.
- Pest and odor control: If you’re concerned about pests or odors, look for compost bins with features that deter animals, such as secure lids or designs that prevent access. Additionally, bins with proper ventilation and moisture control can help minimize odors. Vermicomposting systems, like worm bins, are typically less likely to attract pests if managed properly.
- Accessibility: Consider how easily you can access and manage the composting bin. Some bins have removable doors or panels that allow for easy turning and harvesting of the compost. Accessibility is especially important if you have physical limitations or prefer a more user-friendly design.
Take the time to research and explore different composting bin options before making a purchase. Consider your specific needs and preferences, as well as any local regulations or restrictions that may apply. The right composting bin will not only make the composting process more efficient but also enhance your overall composting experience. With your bin selected, it’s time to find the perfect location for your compost pile. Let’s move on to the next section!
Choosing the Right Location
When it comes to composting, choosing the right location for your compost pile or bin can significantly impact its success. Here are some factors to consider when selecting the ideal spot:
- Sunlight: Place your composting bin or pile in an area that receives ample sunlight. Sunlight helps to warm up the compost, which speeds up the decomposition process. Aim for a location that receives at least a few hours of direct sunlight each day.
- Accessibility: Choose a location that is easily accessible, both for adding materials and for turning or harvesting the compost. This will make the composting process more convenient and enjoyable. Avoid placing your compost pile too far from your kitchen or garden, as this can discourage regular maintenance.
- Drainage: Good drainage is essential to prevent waterlogging in your compost. Avoid placing your compost pile in low-lying areas or near areas prone to water accumulation. If necessary, consider elevating the compost pile or providing drainage channels to ensure excess water can escape easily.
- Proximity to neighbors: While composting is a sustainable practice, it can occasionally generate odors or attract insects. To be considerate of your neighbors, avoid placing your compost pile too close to their property or areas where people frequently gather.
- Avoiding overexposure: While sunlight is important, extreme exposure to heat can dry out your compost pile. Avoid placing it directly under intense sunlight for prolonged periods. Instead, consider partially shading the pile, especially during hot summer months, to help maintain the optimal moisture levels.
- Shielding from wind: Wind can accelerate moisture loss and potentially scatter lightweight materials from your compost pile. Position your compost pile near a windbreak, such as a fence or shrubs, to minimize the impact of strong winds. However, ensure that the location still allows for sufficient airflow to prevent the pile from becoming stagnant.
Keep these factors in mind to find the best location for your compost pile or bin. Every yard is different, so assess your space and select a spot that suits your specific circumstances. Once you’ve chosen the ideal location, it’s time to start collecting and adding compost materials. In the next section, we’ll dive into the essential steps of gathering organic waste for composting. Let’s get started!
Collecting and Adding Compost Materials
Building a successful compost pile begins with collecting and adding the right materials. Composting is all about finding the perfect balance between two types of organic matter: carbon-rich materials (often referred to as “browns”) and nitrogen-rich materials (known as “greens”). Here’s how to collect and add compost materials:
- Browns: Carbon-rich materials provide the energy source for the decomposer organisms in your compost pile. Collecting browns involves gathering items such as dried leaves, straw, shredded paper, cardboard, and wood chips. Avoid using materials treated with chemicals, glossy paper, or large branches that take longer to break down. Shred or chop larger materials into smaller pieces to speed up decomposition.
- Greens: Nitrogen-rich materials provide the necessary nutrients for the decomposer organisms. Collect greens such as kitchen scraps (fruit and vegetable peels, coffee grounds, etc.), fresh grass clippings, plant trimmings, and green leaves. Avoid adding meat, dairy products, oily foods, or diseased plants, as they can attract pests or introduce pathogens to your compost pile.
- Proportions: Aim for a balance of roughly 2 parts browns to 1 part greens by volume. This balance ensures that there is enough carbon to provide energy and structure, while the nitrogen fuels the microbial activity. Avoid adding too much of one material, as this can result in a slow or smelly compost pile. Adjust the ratio as needed to maintain optimal decomposition.
- Layering: To promote even decomposition, alternate layers of browns and greens as you add materials to your compost pile. Begin with a layer of browns at the bottom, then add a layer of greens, and continue to alternate until you have added all the materials. This layering technique optimizes aeration and prevents the pile from compacting, allowing for better moisture and airflow.
- Moisture: Your compost pile should be moist but not soggy. As you add materials, lightly moisten each layer with water to ensure proper decomposition. Monitor the moisture level regularly and adjust as necessary. If the pile becomes too dry, water it gently, and if it becomes too wet, add dry browns to absorb excess moisture.
- Additional compost additives: To enhance the decomposition process and accelerate composting, you can add additional ingredients such as garden soil, finished compost, or compost activators. These additives introduce beneficial microorganisms and increase the nutrient content of your compost.
Remember to continue adding materials over time as you collect them to maintain a steady supply of organic matter. As you progress in your composting journey, you’ll develop a better understanding of the balance between browns and greens and how the different materials contribute to the decomposition process. Next, we’ll explore the important task of managing your compost pile. Let’s keep composting!
Managing the Compost Pile
Proper management is essential for a healthy and productive compost pile. Regular monitoring and maintenance will help accelerate the decomposition process and ensure optimal conditions for microorganisms. Here are some key steps for managing your compost pile:
- Turning the pile: Periodically turning or mixing the compost pile helps aerate the materials and accelerate decomposition. Use a garden fork or compost turner to gently stir the pile, bringing the outer materials to the center and vice versa. Aim to turn the pile every few weeks or when the internal temperature drops or becomes stagnant.
- Monitoring moisture: Check the moisture content of your compost pile regularly. It should feel damp, like a wrung-out sponge. If the pile becomes too dry, add water and mix it in. If it is too wet, add dry browns to absorb the excess moisture. Maintaining the right moisture level ensures optimal decomposition and prevents the pile from becoming anaerobic or forming unpleasant odors.
- Managing temperature: A well-maintained compost pile undergoes a natural heating process as microorganisms break down the organic matter. Use a compost thermometer to monitor the temperature inside your pile. The temperature should ideally range between 120°F and 150°F (49°C and 66°C). If the temperature is too low, it may indicate a lack of nitrogen-rich materials, while a very high temperature may suggest an excess of nitrogen or inadequate aeration.
- Adding materials: Continue to add organic materials to your compost pile as you collect them. Aim for a balance of browns and greens, and try to maintain an even distribution of materials throughout the pile. Layering new materials on top and incorporating them into the existing compost helps maintain a consistent decomposition process and prevents odors or pest issues.
- Patience and time: Composting is a natural process that takes time. It can take anywhere from a few months to a year for the materials to fully decompose into nutrient-rich compost. Be patient and let nature do its work. Avoid the temptation to rush the process by adding excessive amounts of materials or improper ratios, as this can hinder rather than aid decomposition.
- Documenting observations: Keeping a record of your composting activities can provide valuable insights and help fine-tune your composting process. Note the types and quantities of materials you add, the temperature changes, any issues or challenges you encounter, and the final product’s quality. This documentation will allow you to learn from your experiences and make adjustments for future composting endeavors.
By following these management practices, you’ll maintain an active and productive compost pile. It’s important to remember that composting is an ongoing process that requires attention and regular maintenance. With proper management, you’ll soon have a nutrient-rich compost ready to be harvested and used in your garden. In the next section, we’ll explore how to monitor and troubleshoot your compost pile to ensure its success. Let’s continue composting!
Monitoring and Troubleshooting
Monitoring your compost pile is crucial to ensure its success and identify any issues that may arise. By regularly checking the pile’s temperature, moisture level, and appearance, you can address potential problems and maintain optimal conditions for decomposition. Here are some key aspects to monitor and how to troubleshoot common composting issues:
- Temperature: Measure the temperature of your compost pile regularly using a compost thermometer. The temperature should generally range between 120°F and 150°F (49°C and 66°C) during the active decomposition stage. If your compost pile is not heating up, it may indicate a lack of nitrogen-rich materials. Add more greens and turn the pile to increase aeration.
- Moisture: Check the moisture level of your compost pile by squeezing a handful of the materials. It should feel moist, like a wrung-out sponge. If the pile is too dry, add water to moisten it. If it is too wet, add dry browns to absorb excess moisture and improve airflow. Adjusting the moisture level helps maintain the ideal conditions for microbial activity.
- Aeration: Insufficient airflow can lead to a stagnant compost pile. If you notice a foul odor or slow decomposition, it may indicate a lack of oxygen. Turn the pile or loosen it with a garden fork to improve aeration. Consider adding bulking agents like wood chips or straw to create air channels within the pile.
- Pest and odor control: Keep an eye out for pest activity, such as rodents or flies, and promptly address any issues. Avoid adding meat, dairy, or oily foods that attract pests. If odors become unpleasant, it may indicate a lack of aeration or excessive moisture. Turn the pile and add dry browns to improve airflow and absorb moisture.
- Slow decomposition: If your compost pile is taking longer to decompose than expected, it may be due to improper ratios or insufficient microbial activity. Ensure you have a good balance of browns and greens, adding more nitrogen-rich materials if needed. Consider adding finished compost or compost activators to introduce beneficial microorganisms and speed up decomposition.
- Foreign materials: Occasionally, non-compostable items may find their way into your pile, such as plastic or large branches. Remove any visible non-compostable materials to maintain the integrity of your compost. It’s also vital to be mindful of weeds with seeds or invasive plant parts that may survive the composting process. Properly manage these materials to prevent spreading unwanted plants in your garden.
Regular monitoring and timely troubleshooting will help you maintain a healthy and productive compost pile. Remember that composting is a dynamic process, and adjustments may be needed along the way. By addressing any issues promptly, you can maximize the effectiveness of your composting efforts. In the next section, we’ll explore the final stages of the composting process: harvesting and using the finished compost. Let’s continue our composting journey!
Harvesting and Using Compost
After the composting process is complete, it’s time to harvest the finished compost and put it to use in your garden. Harvesting compost involves separating the fully decomposed material from any remaining organic matter. Here’s how to harvest and effectively use your compost:
- Identification of finished compost: Look for signs that indicate your compost is ready for harvesting. The compost should have a dark, crumbly texture, resembling soil. The original materials should be unrecognizable, and there should be an earthy, pleasant smell. Generally, compost takes anywhere from a few months to a year to fully decompose, depending on various factors such as the composting method used and the materials added.
- Separating the compost: The easiest way to harvest compost is through a process called “screening.” Use a compost screen or mesh to sift out any remaining large materials or unfinished compost. The finer compost that passes through the screen is ready to be used, while the larger materials can be returned to the compost pile for further decomposition.
- Applying compost to your garden: Incorporate the harvested compost into your garden soil to improve its fertility and structure. Spread a layer of compost (about 1-2 inches) on top of the soil and gently work it in using a garden fork or tiller. This will help distribute the compost and allow it to integrate with the existing soil. Compost can also be used as a top dressing around established plants or mixed into potting soil for container gardening.
- Using compost as mulch: Compost can also be used as a mulch to help retain moisture, control weed growth, and regulate soil temperature. Apply a layer of compost (approximately 2-4 inches) around plants, leaving a small space around the plant stem to prevent moisture-related issues.
- Compost tea: Another way to utilize your compost is by making compost tea. Compost tea is created by steeping a bag of compost in water for a few days, allowing the nutrients to leach into the water. Dilute the compost tea with water and use it as a nutrient-rich liquid fertilizer for your plants.
- Continued composting: As you harvest compost, remember to leave some of the finished compost behind to serve as a starter for your next composting cycle. This ensures the presence of beneficial microorganisms, which will aid in the decomposition process and help maintain the overall health of your compost pile.
With your compost harvested, you can enjoy the benefits of improved soil fertility, water retention, and overall plant health. Remember, compost is a valuable resource that should be managed wisely. Continually adding organic materials and maintaining your compost pile ensures a constant supply of nutrient-rich compost for your garden. It’s time to put your compost to use and witness the positive impact it has on your plants and the environment!
Conclusion
Congratulations on completing this comprehensive guide to backyard composting! You now have the knowledge and tools to successfully turn your kitchen and yard waste into nutrient-rich compost for your garden. Composting is not only an effective way to reduce waste and lower your environmental footprint, but it also brings numerous benefits to your garden.
By composting, you contribute to the reduction of landfill waste and greenhouse gas emissions. You also create a sustainable and closed-loop system in your own backyard, where organic materials are recycled and transformed into a valuable resource. The resulting compost improves soil structure, enhances nutrient availability, and fosters a healthy and vibrant garden.
Remember that composting is a natural and ongoing process that requires attention, patience, and experimentation. It may take time to find the right balance of materials and to fine-tune your composting methods. Embrace the learning process and don’t be discouraged by any challenges that may arise along the way.
Continue to monitor your compost pile, adjust as needed, and enjoy the progress and transformation that takes place. As you harvest and use your compost, you’ll witness firsthand the benefits it brings to your plants, garden, and overall sustainability efforts.
With this guide as your reference, you’ll be able to confidently select a composting method, choose the right composting bin, collect and add compost materials, manage and troubleshoot your compost pile, and effectively use the finished compost in your garden.
Thank you for taking the time to learn about composting, a powerful DIY project that allows you to make a positive impact on both your immediate surroundings and the planet as a whole. Start composting today and enjoy the rewards of healthier plants, reduced waste, and a greener, more sustainable future!