Home>Gardening Techniques>DIY Projects>How To Install A Backyard Putting Green
DIY Projects
How To Install A Backyard Putting Green
Modified: January 22, 2024
Learn how to easily install a backyard putting green with our step-by-step guide. Perfect for DIY projects and golf enthusiasts!
(Many of the links in this article redirect to a specific reviewed product. Your purchase of these products through affiliate links helps to generate commission for Chicagolandgardening.com, at no extra cost. Learn more)
Table of Contents
Introduction
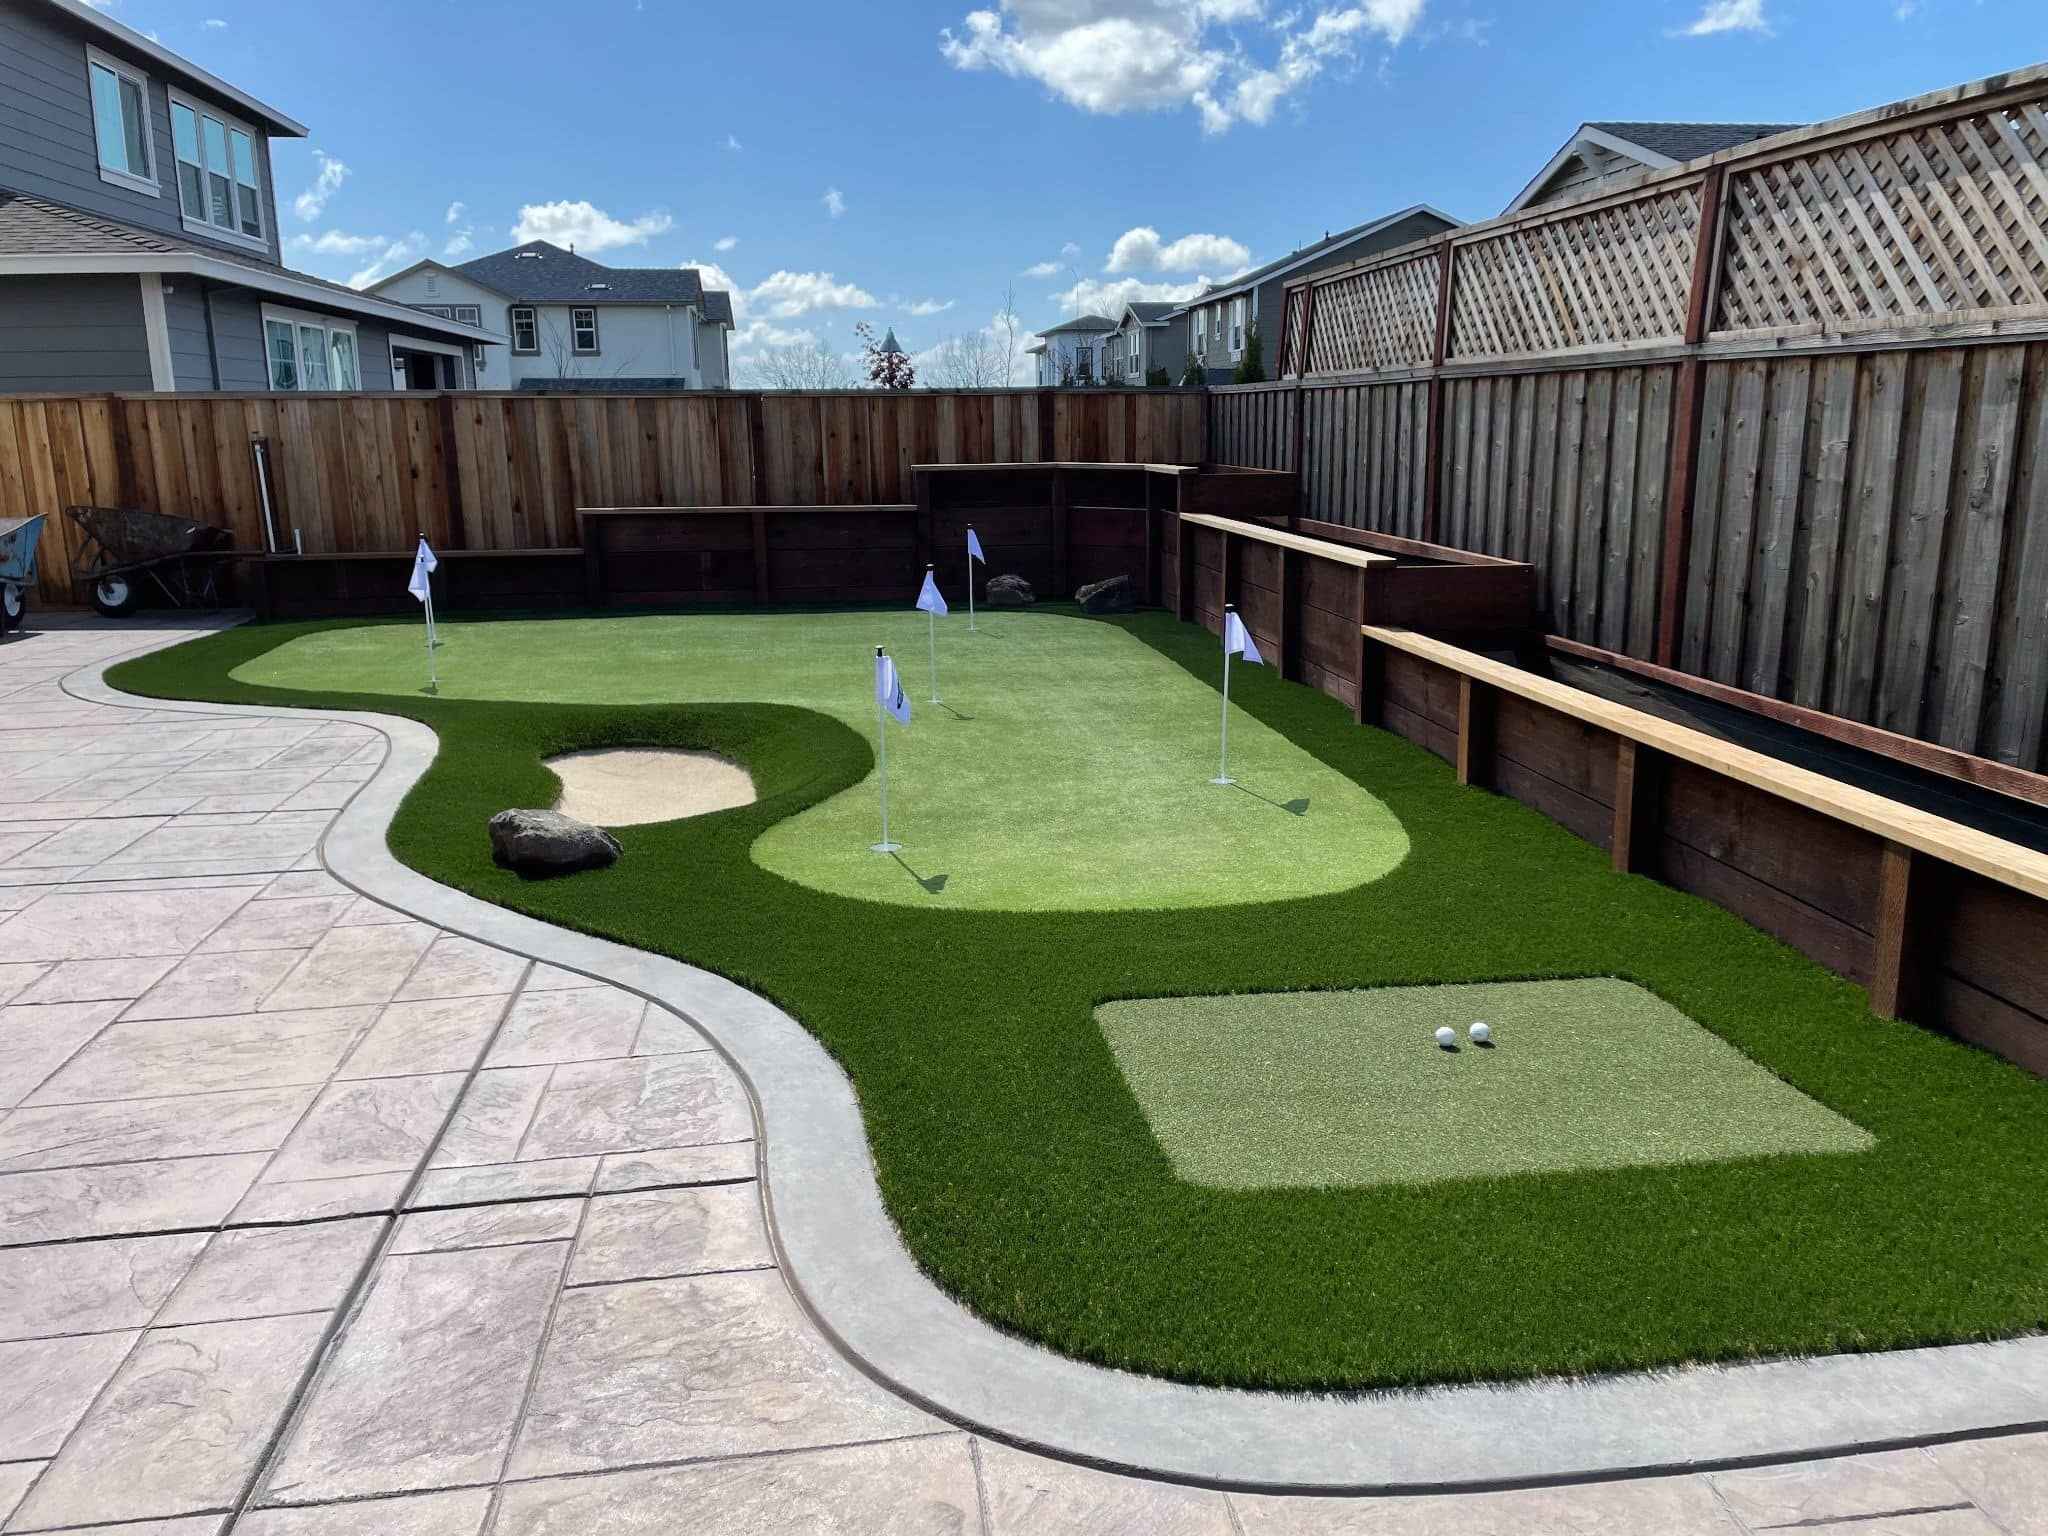
Welcome to the world of DIY projects! If you’ve ever dreamed of having a backyard putting green where you can practice your golf skills, you’re in the right place. Installing a backyard putting green is a fantastic way to improve your game, enjoy some outdoor recreation, and create a space for family and friends to gather and have fun.
In this comprehensive guide, we will take you through the step-by-step process of installing a backyard putting green. Whether you’re a seasoned golfer or just starting out, creating your very own green will provide endless hours of enjoyment and help you refine your skills.
Creating a backyard putting green may seem daunting at first, but with the right planning, materials, and tools, it’s a project that you can tackle on your own. Not only will you save money by doing it yourself, but you’ll also have the satisfaction of knowing that you built something with your own hands.
Throughout this guide, we’ll provide tips and tricks to make the process smoother and more efficient. From planning the layout of your green to installing the artificial turf, we’ve got you covered. So, grab your putter and let’s get started on creating your very own backyard putting green!
Step 1: Planning your backyard putting green
The first step in building a backyard putting green is careful planning. Taking the time to properly plan your project will ensure that you end up with a green that meets your needs and fits seamlessly into your outdoor space.
Start by measuring the area where you want to install the putting green. Consider the size of your yard and how much space you want to dedicate to the green. Keep in mind any other features or obstacles in your yard, such as trees or patio areas, that may impact the layout of your green.
Next, think about the design and shape of your putting green. Do you want a traditional rectangular green or something more unique? Consider incorporating curves or different levels to add visual interest and challenge to your green.
Once you have an idea of the size and shape of your green, it’s time to think about the materials you’ll need. Research different types of artificial turf that are specifically designed for putting greens. Look for turf with a high stitch count and a dense pile height for optimal performance.
You’ll also need materials for the base of your putting green, such as drainage gravel and compacted base rock. These materials will provide a stable foundation for the turf and ensure proper drainage.
In addition to the materials, consider any additional features you may want to include, such as a sand trap or chipping area. These features can add excitement and variety to your practice sessions.
Finally, create a budget for your project. Determine how much you’re willing to spend on materials and any professional help you may need. Keep in mind that building a backyard putting green can be a significant investment but will provide long-term enjoyment and improve your golf game.
By carefully planning your backyard putting green, you’ll set yourself up for success and ensure that the final result exceeds your expectations. So grab a pen and paper and start sketching out your dream green!
Step 2: Gathering the materials and tools
Once you have a clear plan in place for your backyard putting green, it’s time to gather all the necessary materials and tools. Having everything you need on hand before you start the installation process will save you time and make the project run smoothly.
Here are some of the key materials and tools you’ll need:
- Artificial turf: Choose a high-quality turf specifically designed for putting greens. Look for one with a realistic look and feel, as well as good durability.
- Dumpster bags or wheelbarrow: These will be useful for removing any existing grass or debris from the area.
- Shovel or excavator: Depending on the size of your project, you may need either a shovel or an excavator to dig up the area.
- Landscape fabric or weed barrier: This will help prevent weeds from growing through the turf.
- Drainage gravel: This is essential for ensuring proper drainage around your putting green.
- Compacted base rock: This will provide a solid foundation for the synthetic turf.
- Stakes or landscape pins: These will be used to secure the turf in place.
- Seaming tape and adhesive: These are necessary for joining the different sections of turf together.
- Cup cutter: This tool will help you create a hole for the cup.
- Putt cups and flags: These are the finishing touches that will complete your backyard putting green.
Make sure to gather all the necessary materials and tools before you begin the installation process. This will save you from any unnecessary delays or trips to the store.
Keep in mind that the specific materials and tools needed may vary based on the size and complexity of your project, so adjust accordingly. Additionally, if you’re unsure about any of the materials or tools required, consult with a professional or use online resources to ensure you have the correct items.
Now that you have everything you need, you’re ready to move on to the next step: preparing the area for your backyard putting green.
Step 3: Preparing the area
Now that you have gathered all the necessary materials and tools, it’s time to prepare the area where you will be installing your backyard putting green. Proper preparation is crucial for ensuring a smooth and long-lasting installation.
Start by clearing the area of any existing vegetation or debris. Use a shovel or an excavator to remove the grass, weeds, and roots. You can dispose of the removed materials in dumpster bags or a wheelbarrow.
Once the area is cleared, it’s important to create a solid and level base for your putting green. Begin by compacting the soil using a plate compactor or hand tamper. This will provide a stable foundation for the next layers.
Next, lay down a layer of landscape fabric or weed barrier over the compacted soil. This will help prevent weeds from growing through the artificial turf and ensure a clean and maintenance-free surface.
After installing the weed barrier, it’s time to add a layer of drainage gravel. This will aid in proper water drainage, preventing any potential water pooling on your putting green. Spread the gravel evenly and compact it to create a level surface.
Once the drainage gravel is properly installed, it’s time to add the compacted base rock. This layer will provide additional stability and ensure a solid surface for the turf. Spread the base rock evenly and compact it using a plate compactor or hand tamper.
Throughout the preparation process, make sure to regularly check the level of the area using a spirit level. This will ensure that your putting green has a consistent and even surface.
With the area properly prepared, you’re one step closer to having your very own backyard putting green. The next steps involve installing the turf and adding the finishing touches to create the perfect playing surface.
Remember, taking the time to properly prepare the area will result in a professional-grade putting green that you can enjoy for years to come.
Step 4: Installing the base
With the area properly prepared, it’s time to move on to the next step: installing the base for your backyard putting green. The base provides stability and support for the artificial turf and is essential for creating a smooth and even playing surface.
Begin by unrolling the artificial turf over the prepared area. Make sure the turf covers the entire space with a slight overhang around the edges.
Using a utility knife, cut away any excess turf, ensuring a clean and precise edge. Take care not to cut too much, as the turf should fit snugly against the perimeter.
Next, it’s time to secure the turf in place. Starting at one end, gradually roll back the turf while applying a layer of landscape adhesive or turf tape along the edges of the base. Press the turf down firmly, making sure it is tightly adhered to the base.
Continue this process, working your way across the entire area of the putting green. Take care to align the seams of the turf, ensuring a seamless and professional appearance.
Once the turf is fully secured, it’s time to add infill. Infill is typically made of sand or a combination of sand and rubber granules. It helps to weigh down the turf, prevents matting, and provides a realistic ball roll.
Using a drop spreader, evenly distribute the infill across the entire surface of the putting green. Use a broom or brush to work the infill into the turf fibers, ensuring complete coverage.
After applying the infill, use a leaf blower or a stiff brush to remove any excess debris from the turf. This will help create a clean and polished appearance.
With the base installed and the infill added, take a step back and admire your progress. Your backyard putting green is well on its way to becoming a reality.
Stay tuned for the next steps, where we’ll add the cup and flag, and put the finishing touches on your backyard putting green.
Step 5: Adding the artificial turf
Now that the base is installed, it’s time to add the artificial turf to your backyard putting green. This step will bring your vision to life and transform the space into a functional and beautiful area for practicing your golf skills.
Begin by unrolling the artificial turf over the prepared base, ensuring that it covers the entire surface area. Take care to align the seams and edges of the turf for a seamless appearance.
Once the turf is in place, secure it using landscape pins or stakes. Insert the pins or stakes along the edges of the turf, spacing them out evenly to ensure a secure fit. This will prevent the turf from shifting or moving during use.
As you secure the turf, be sure to pull it snugly to eliminate any wrinkles or creases. Smooth out the turf as you go along to create a flat and even surface.
Next, use a utility knife to trim off any excess turf, ensuring a clean and precise edge. Take your time during this step to achieve a professional finish. Double-check the measurements and make small, deliberate cuts to avoid any mistakes.
After trimming the turf, it’s time to complete the installation by seaming the different sections together. Use seaming tape and adhesive to join the edges of the turf. Place the seaming tape under the edges of the turf, making sure it overlaps each section by a few inches. Apply the adhesive to the tape, and then press the edges of the turf firmly together.
Once the sections are seamed together, use a heavy object or a roller to apply pressure to the seams. This will ensure a strong bond between the sections and create a seamless surface for optimal play.
Finally, brush the artificial turf with a power broom to lift the turf fibers and create a natural appearance. This step will also help evenly distribute the infill throughout the turf.
With the artificial turf installed, your backyard putting green is taking shape. In the next steps, we’ll add the cup and flag and put the finishing touches on your homemade golf oasis.
Step 6: Securing the edges
With the artificial turf in place, it’s important to secure the edges to ensure a clean and professional finish for your backyard putting green. Properly securing the edges will not only enhance the aesthetics but also prevent any movement or lifting of the turf over time.
Start by carefully inspecting the edges of the turf. If there are any areas where the turf is not securely anchored, use landscape pins or stakes to secure it to the ground. Insert the pins or stakes along the perimeter of the turf, spacing them out evenly to provide sufficient support.
For an extra layer of security, you can also utilize landscape adhesive. Apply a small amount of adhesive along the edges of the turf, using a caulking gun or a similar tool. Press down firmly on the turf to ensure that it adheres to the ground and remains in place.
In addition to securing the edges, consider using edge trim or bender board to create a clean and defined border around your putting green. This will not only add a polished look but also help prevent any potential tripping hazards.
Measure and cut the trim or bender board to fit the desired length along the edges of your putting green. Install it by inserting it into the ground, ensuring that it is straight and level. Secure it in place using landscape stakes or nails, making sure it is firmly anchored.
Once the edges are secure and properly trimmed, take a moment to walk around your backyard putting green and inspect the entire perimeter. Make any necessary adjustments or additional securing as needed.
By properly securing the edges of your putting green, you’ll ensure that the turf remains in place and maintains its pristine condition. Your backyard oasis is almost complete, but there are still a few more steps to take to make it truly impressive.
Step 7: Adding the cup and flag
Now that your backyard putting green is taking shape, it’s time to add the final touches that will elevate it to the next level – the cup and flag. The cup and flag will not only complete the visual appeal, but they will also provide you with a target for practicing your putting skills.
Start by determining the desired location for the cup on your putting green. Using a cup cutter, carefully cut a hole into the turf where you want to place the cup. The hole should be the same diameter as the cup, typically around 4-6 inches.
After cutting the hole, insert the cup into the opening and press it down firmly to ensure a snug fit. Make sure the cup is level with the surface of the turf, so the ball rolls smoothly into the hole.
Once the cup is secured, it’s time to insert the flag. The flag adds visibility and adds to the authentic look of a real golf green. Attach the flag to the top of the pole and insert it into the cup. The flag should stand tall and allow for easy spotting from a distance.
Consider adding multiple cups and flags to your putting green to create a variety of hole placements. This will add versatility and enjoyment to your practice sessions.
With the cup and flag installed, take a moment to step back and admire your backyard putting green. It’s now ready for you to fine-tune your putting skills and enjoy countless hours of enjoyment.
Remember, proper maintenance and care of your putting green will ensure its longevity and optimal performance. Regularly inspect the cup and flag for any damage or wear and make any necessary repairs or replacements.
Now that you have completed the installation of the cup and flag, it’s time for the final step – adding the finishing touches and sharing some maintenance tips to help you preserve your backyard putting green for years to come.
Step 8: Finishing touches and maintenance tips
Congratulations on completing your backyard putting green! As you put the final finishing touches on your project, it’s important to know how to maintain and care for your new space to ensure its longevity and optimal performance.
Here are some important finishing touches and maintenance tips:
1. Brush the turf regularly: Use a stiff-bristled broom or a power brush to brush the turf in different directions. This will help keep the turf fibers upright and prevent matting.
2. Remove debris: Regularly sweep or use a leaf blower to remove leaves, twigs, or any other debris that may accumulate on the putting green. This will help maintain its clean and tidy appearance.
3. Clean spills or stains: If any spills or stains occur on the turf, promptly clean them with water and a mild soap. Avoid using harsh chemicals or abrasive cleaners to prevent damage to the turf fibers.
4. Keep pets off the green: To preserve the quality of the artificial turf, it’s best to keep pets off the putting green. Pet waste can be harmful to the turf and may require additional cleaning and maintenance.
5. Rotate the cup placement: To prevent excessive wear in one area, periodically rotate the cup placement on your green. This will distribute the traffic evenly and extend the life of the turf.
6. Inspect the infill: Regularly check the infill level on your turf. If it becomes compacted or worn, add more infill as needed to maintain a consistent ball roll and texture.
7. Protect the putting green during extreme weather: During extreme weather conditions such as heavy rain, snow, or strong winds, it’s advisable to cover or protect the putting green to prevent any potential damage.
By following these maintenance tips, you’ll keep your backyard putting green in excellent condition and ensure that it remains a focal point of enjoyment for years to come.
Now that you have completed all the steps and added the final finishing touches, it’s time to grab your putter and start practicing your golf skills in your very own backyard oasis. Enjoy your new putting green and the countless hours of fun and improvement it will bring!
Conclusion
Congratulations on successfully completing the installation of your backyard putting green! You’ve transformed your outdoor space into a functional and enjoyable area where you can practice your golf skills and have fun with family and friends.
Through careful planning, gathering the necessary materials and tools, preparing the area, installing the base, adding the artificial turf, securing the edges, and adding the cup and flag, you’ve created a professional-grade putting green that will provide endless hours of entertainment and skill development.
Remember to regularly maintain and care for your putting green by brushing the turf, removing debris, cleaning spills, and occasionally adding infill. By following these maintenance tips, you’ll ensure the longevity and optimal performance of your backyard oasis.
Now, it’s time to enjoy your newfound golf haven. Practice your putting skills, challenge your friends to a friendly competition, or simply relax and unwind in the serene surroundings of your own backyard.
Feel proud of your DIY achievement and the value it has added to your property. Not only have you created a space for yourself, but you’ve also created lasting memories and opportunities for improvement in your golf game.
So, grab your putter, step onto your freshly installed turf, and start honing your skills. You have a one-of-a-kind backyard putting green that will provide countless moments of joy and improvement in the game you love.
Enjoy your new haven and happy putting!