Home>Gardening Techniques>DIY Projects>How To Put Gravel In Backyard
DIY Projects
How To Put Gravel In Backyard
Published: August 5, 2023
Discover step-by-step instructions on how to execute DIY projects like putting gravel in your backyard. Achieve a stunning outdoor transformation with these helpful tips and techniques.
(Many of the links in this article redirect to a specific reviewed product. Your purchase of these products through affiliate links helps to generate commission for Chicagolandgardening.com, at no extra cost. Learn more)
Table of Contents
- Introduction
- Assessing Your Backyard
- Choosing the Right Type of Gravel
- Measuring and Ordering Gravel
- Preparing the Backyard
- Clearing the Area
- Marking the Boundaries
- Preparing the Soil
- Installing Weed Barrier
- Spreading the Gravel
- Leveling the Surface
- Compacting the Gravel
- Edging the Gravel Area
- Maintaining the Gravel Surface
- Conclusion
Introduction
Welcome to the world of DIY projects! If you’re looking to transform your backyard into a functional and visually appealing space, then adding gravel is a fantastic option. Gravel can be used for various purposes, from creating pathways and driveways to defining garden beds and adding texture to your outdoor area. Not only is it affordable and easy to install, but it also offers a wide range of design possibilities.
In this article, we will guide you through the process of putting gravel in your backyard. Whether you’re a seasoned DIY enthusiast or a beginner looking to take on your first project, we’ve got you covered. We’ll cover everything from assessing your backyard and choosing the right type of gravel to preparing the area and maintaining the gravel surface once it’s installed.
Before we dive into the details, it’s important to note that each backyard is unique, and the steps required to install gravel may vary based on factors such as the size of your yard, existing landscaping, and your specific design goals. So, while we’ll provide you with a general framework to follow, be sure to adapt these steps to suit your individual needs.
So, whether you’re planning to create a cozy seating area, a winding pathway, or a sleek modern driveway, let’s get started on your gravel project and transform your backyard into a stunning oasis of your own creation.
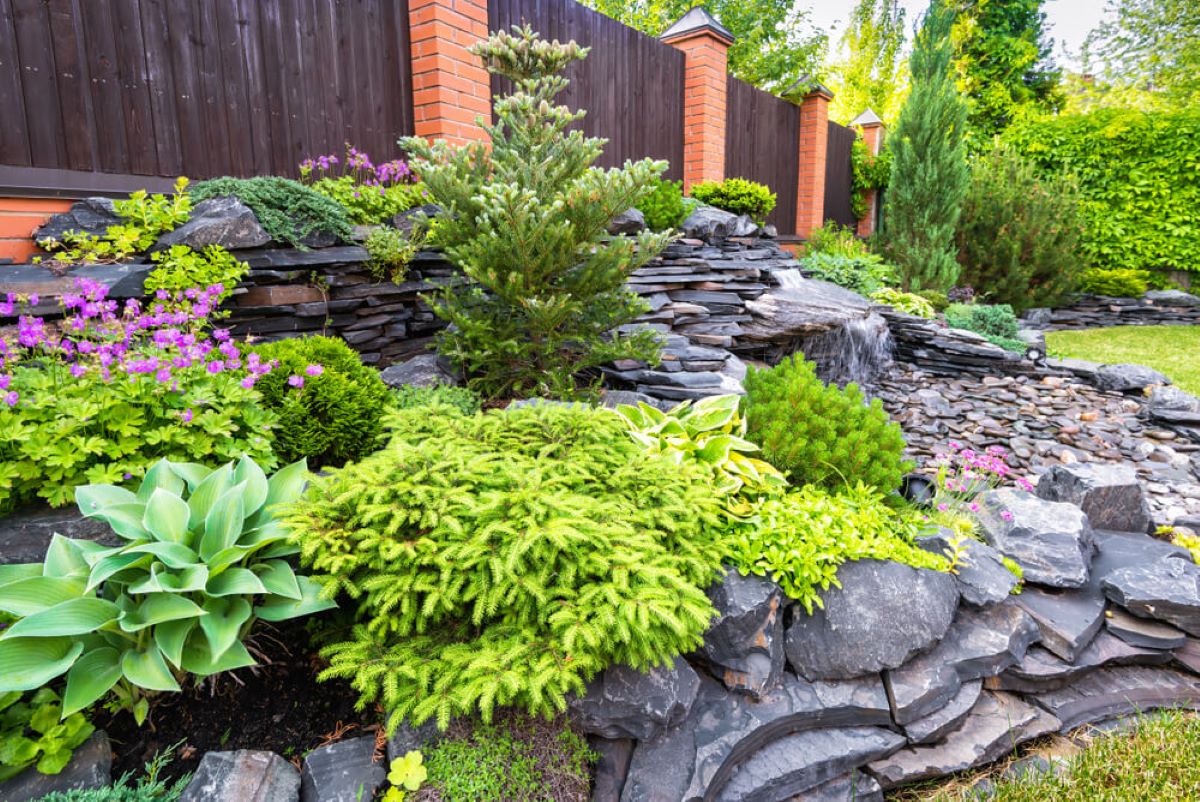
Assessing Your Backyard
Before you begin the process of putting gravel in your backyard, it’s essential to assess the space and take certain factors into consideration. This step will help you determine the amount of gravel needed and plan the layout effectively.
First, take a walk around your backyard and identify the areas where you want to add gravel. Consider the purpose of the gravel – whether it’s for creating pathways, defining garden beds, or adding a decorative element. This will help you establish the scope of your project.
Next, evaluate the existing conditions of your backyard. Take note of any slopes, uneven terrain, or drainage issues. These will affect the installation process and may require additional preparation, such as grading or adding drainage systems.
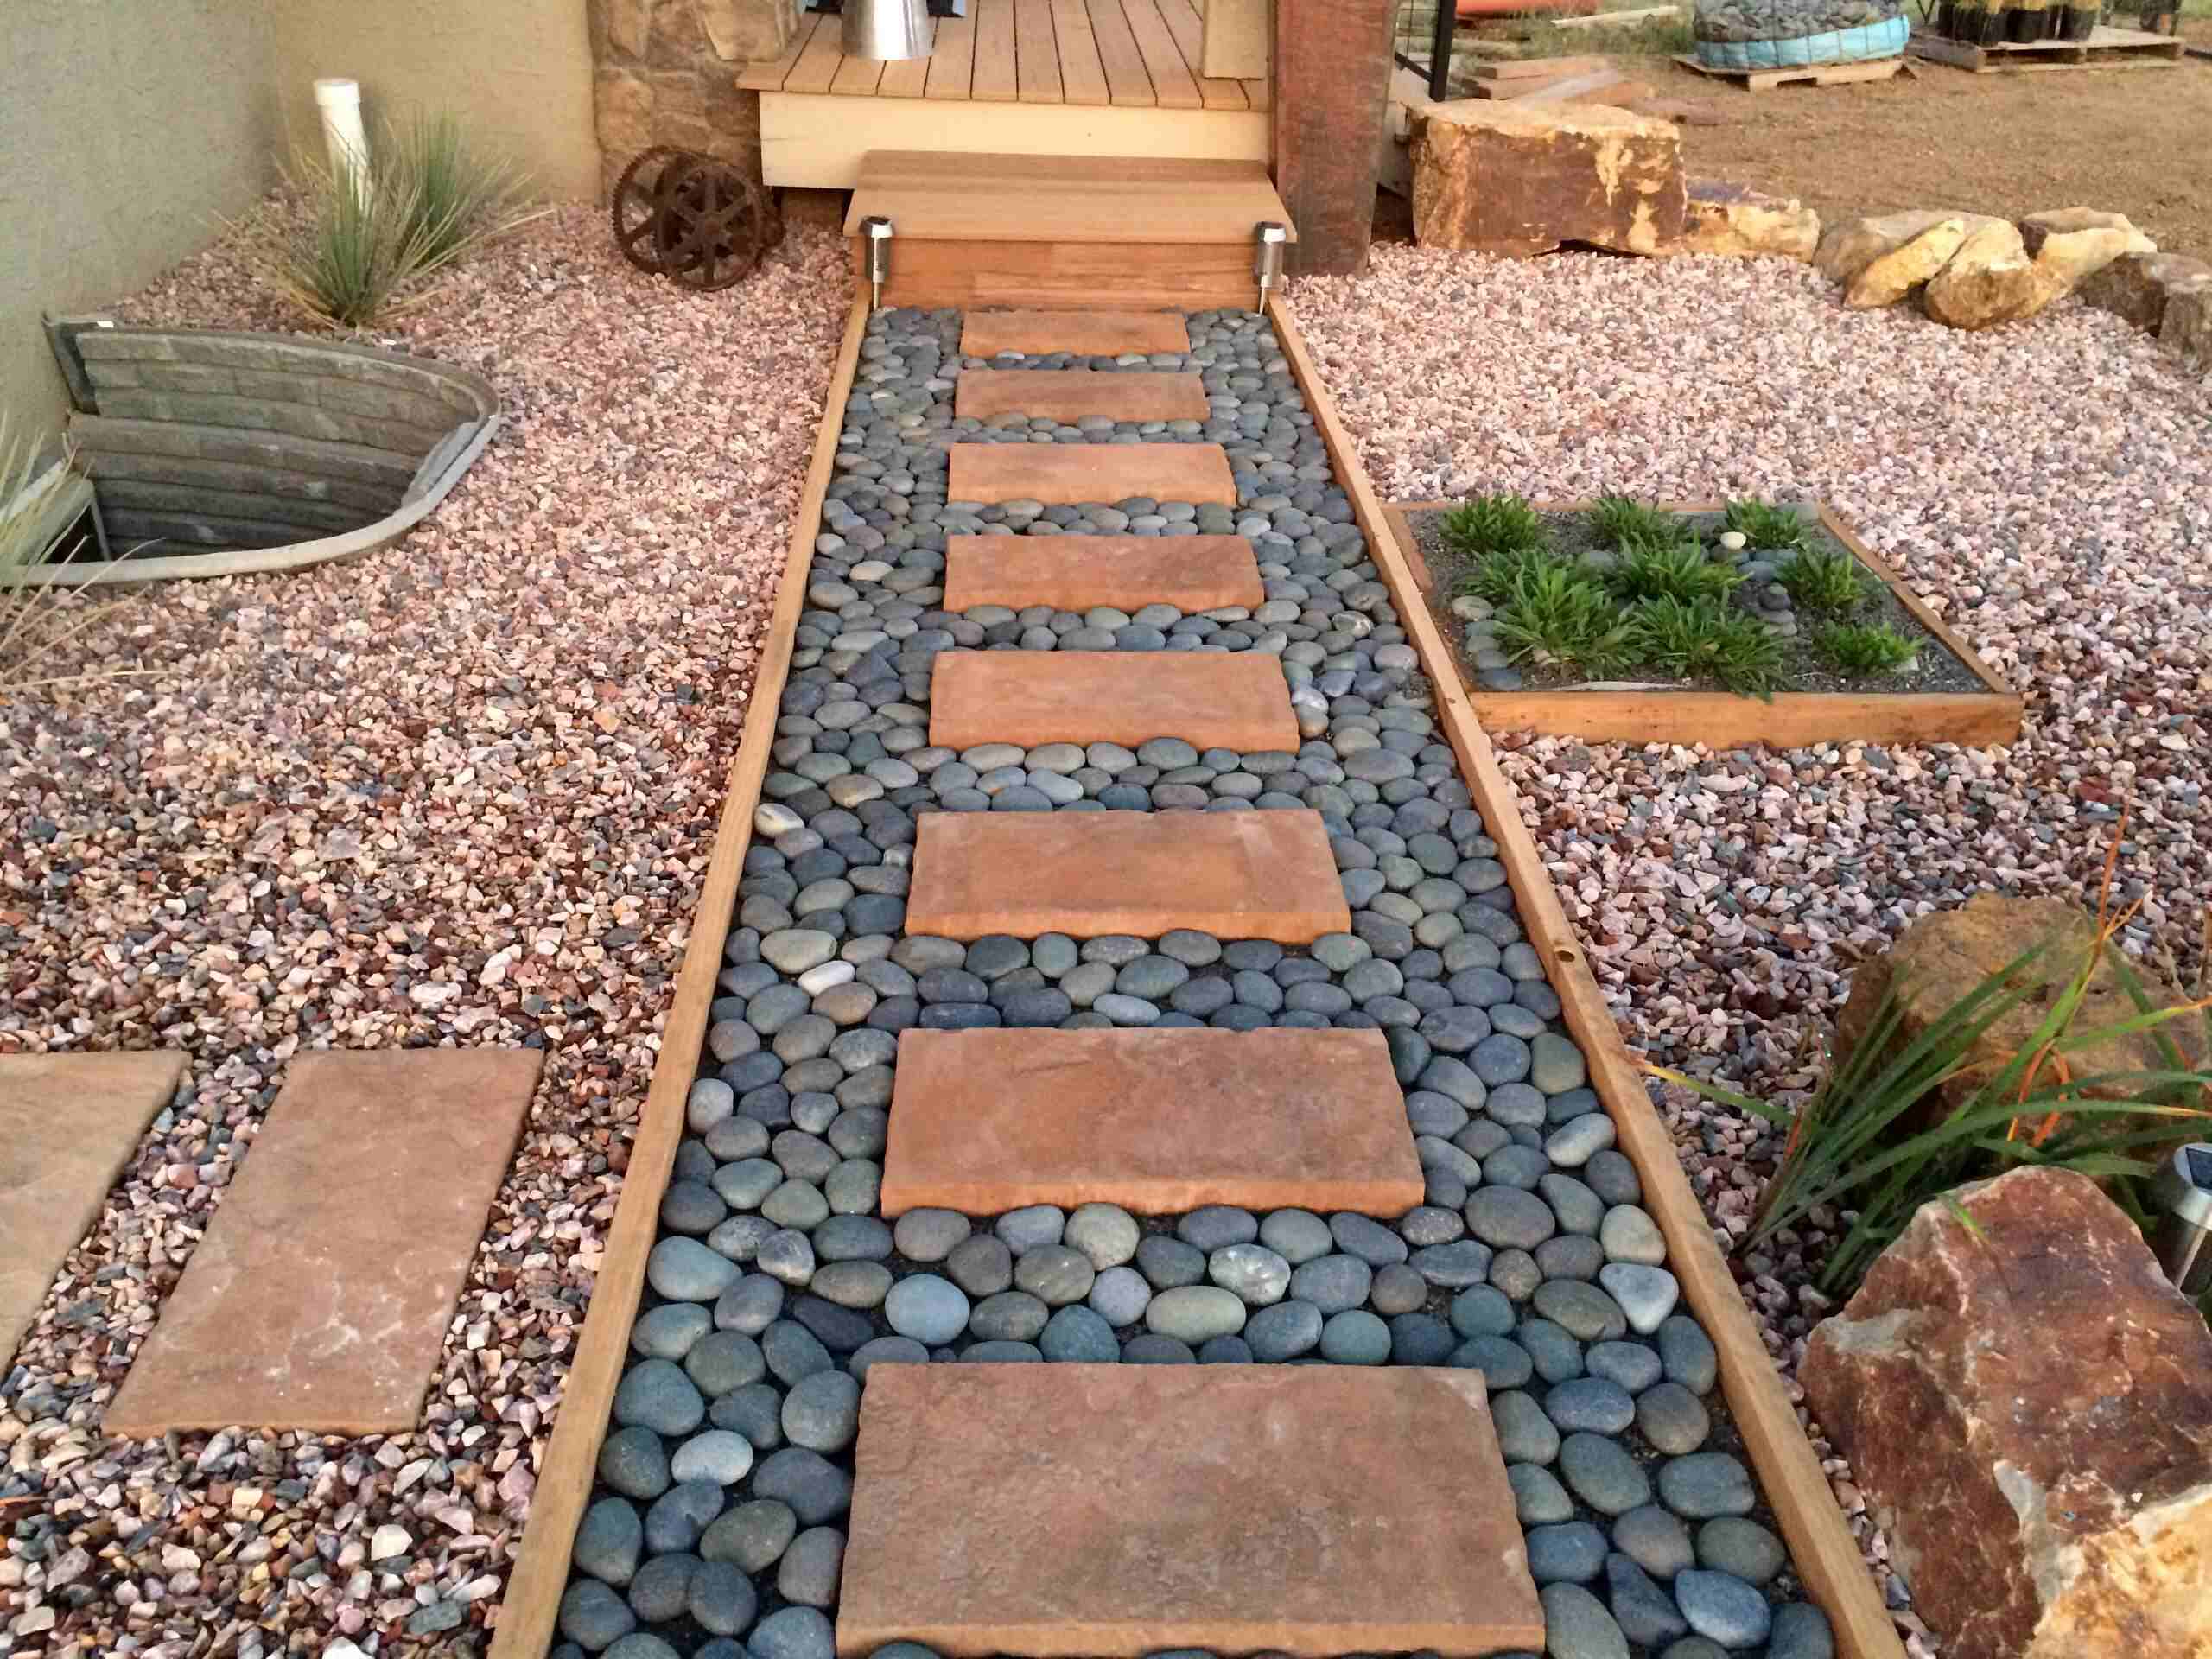
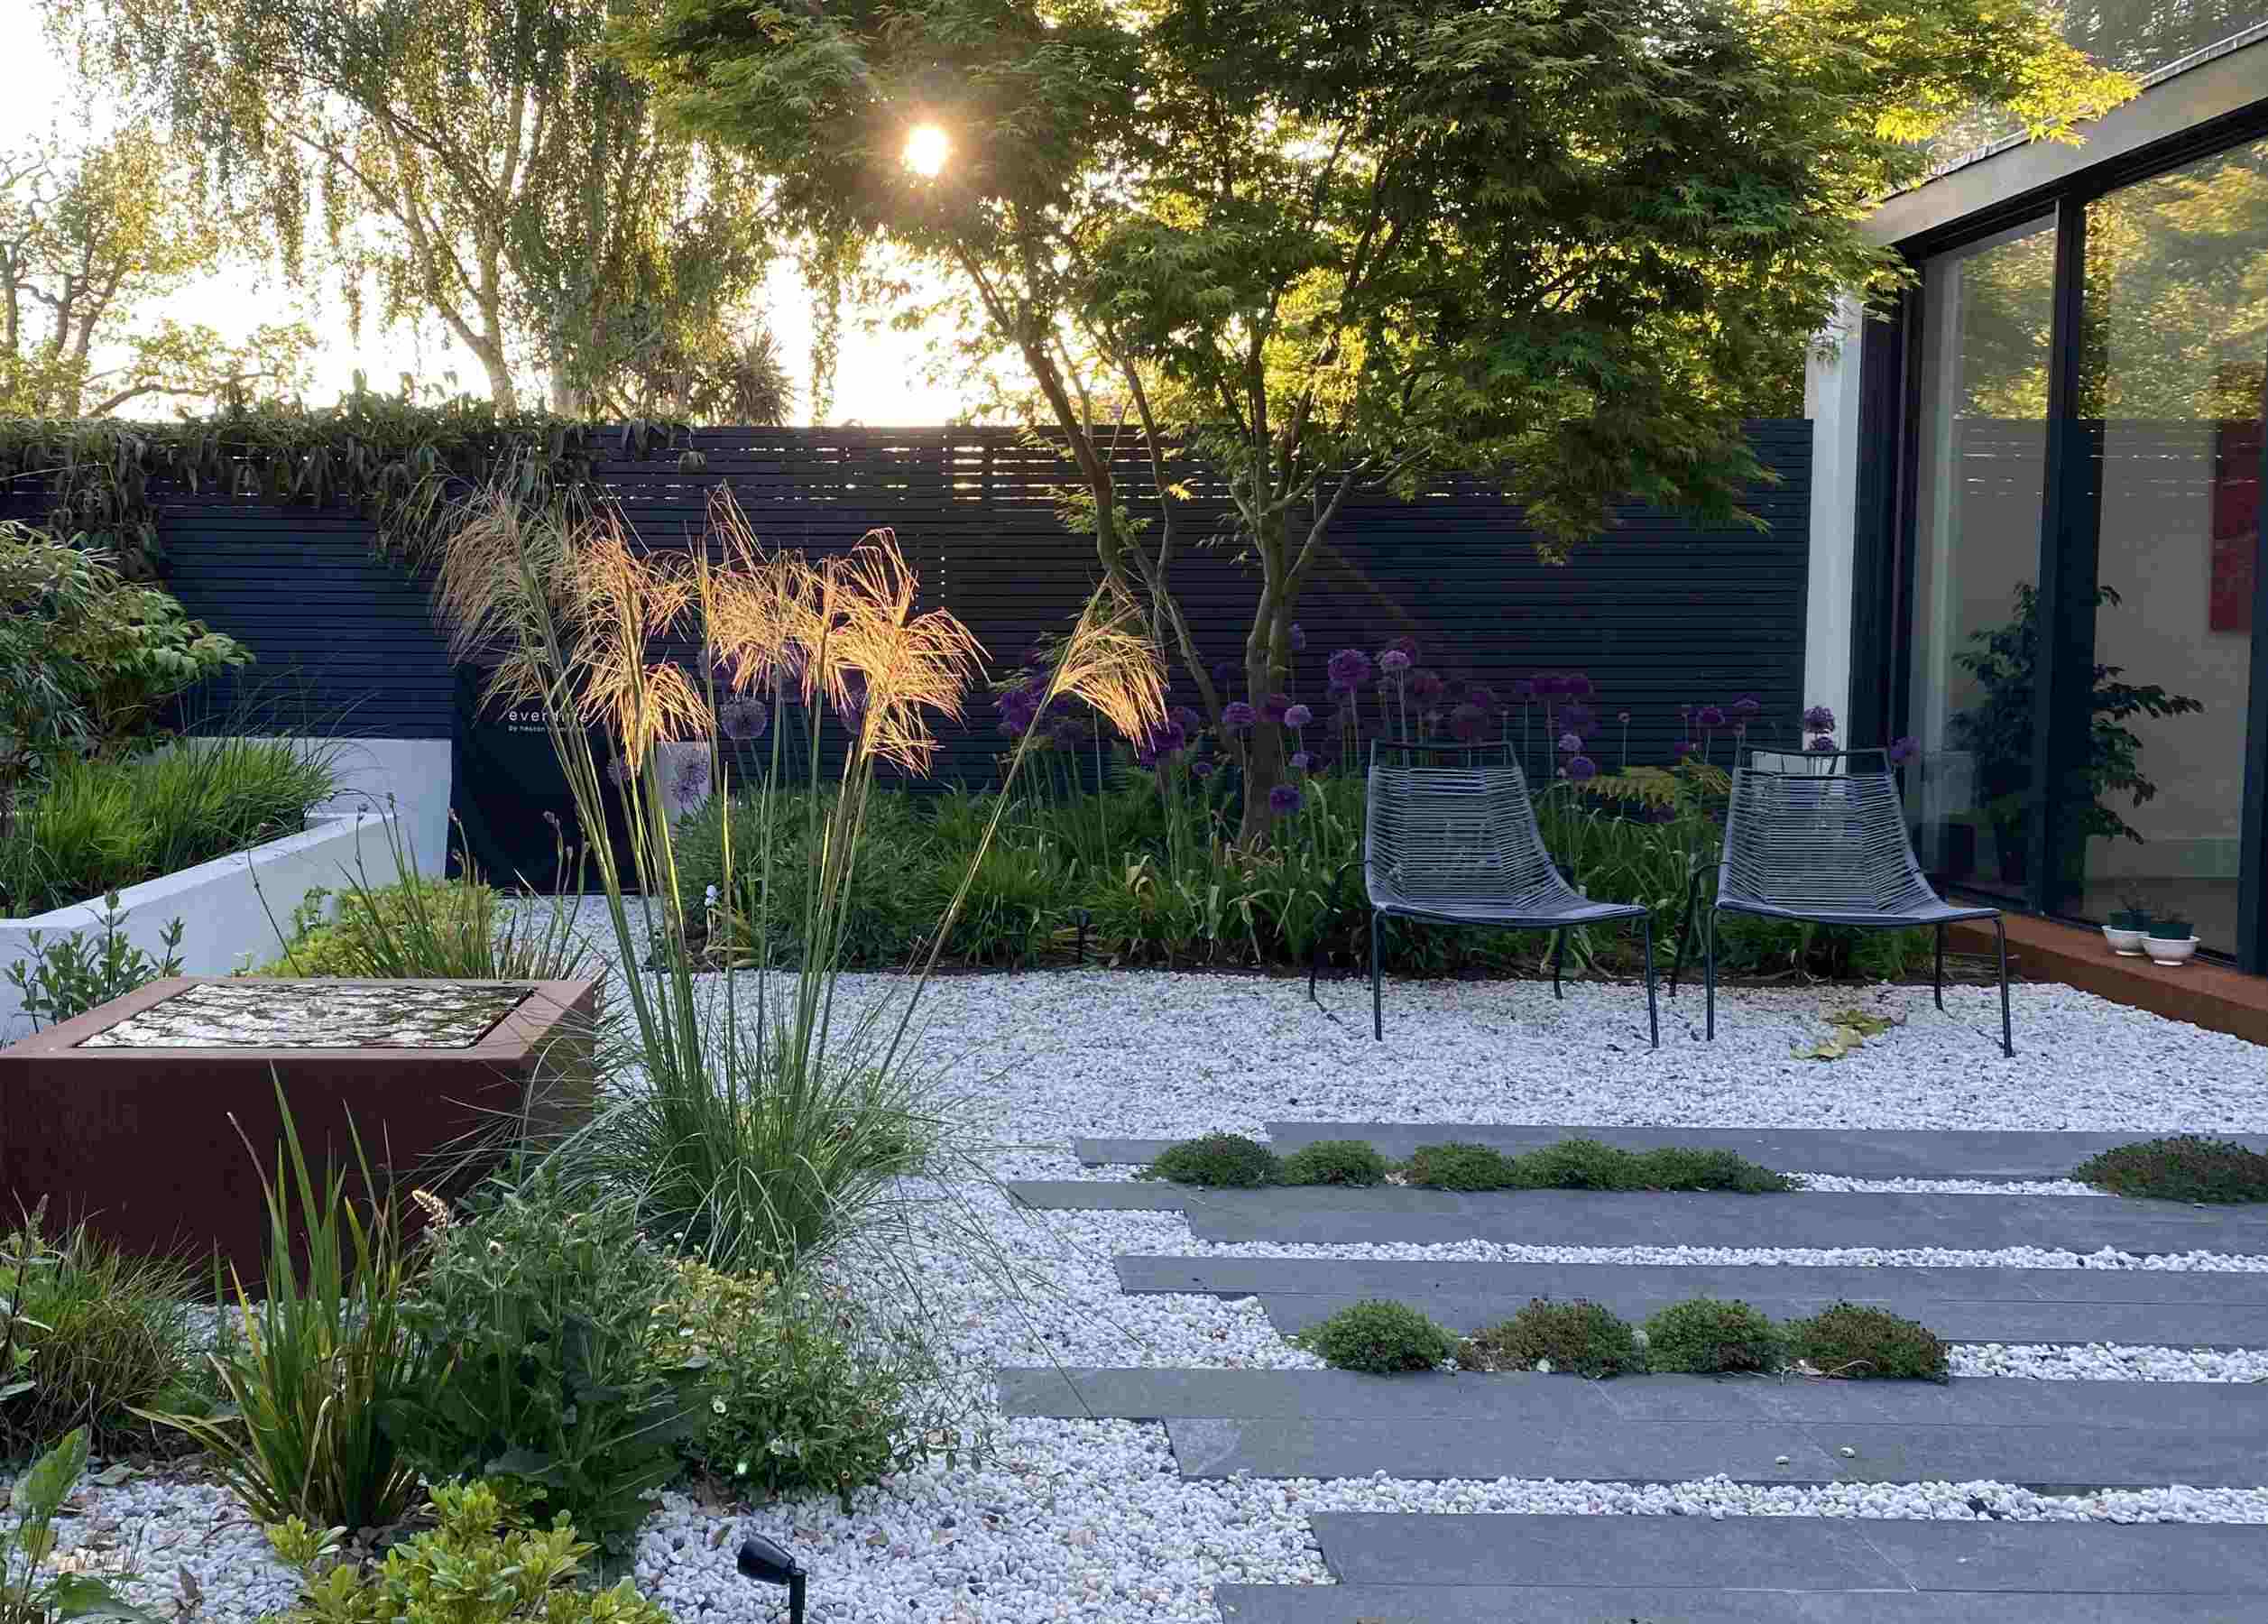
Consider the overall aesthetics of your backyard and how the addition of gravel will complement the existing elements. Think about the color and texture of the gravel that would best suit your desired look. You can choose from a variety of options, such as crushed stone, pea gravel, or river rock, each offering a unique appearance.
Additionally, think about the practicality of the gravel installation. Will it be easy to access and maintain? Will it harmonize with the surrounding landscape and neighboring properties? These factors are crucial for a successful and cohesive backyard transformation.
Once you have a clear understanding of the purpose, scope, and aesthetics of your gravel project, it’s time to move on to the next step: choosing the right type of gravel.
Choosing the Right Type of Gravel
Choosing the right type of gravel for your backyard project is important to ensure both functionality and aesthetics. There are several factors to consider when making your selection, including the purpose of the gravel, your desired look and feel, and the practicality of maintenance.
First, determine the purpose of the gravel. If you’re creating pathways or driveways, you’ll need a more compact and durable option. Crushed stone or angular gravel is a great choice for these areas as it provides stability and allows for easy walking or driving. If you’re using gravel for decorative purposes, such as in garden beds or around outdoor features, you can opt for a more decorative option like pea gravel or river rock.
Next, consider the desired look and feel of your gravel project. Different types of gravel come in various colors, sizes, and textures. If you want a more natural look, river rock or gravel with earth tones can create a rustic feel. On the other hand, if you prefer a sleek and modern aesthetic, crushed stone in a uniform size and color can achieve that desired look.
It’s also crucial to consider the practicality of maintenance. Some types of gravel, such as pea gravel, tend to shift and scatter easily, requiring more frequent maintenance to keep the area neat and tidy. If you prefer low-maintenance options, consider choosing angular gravel or crushed stone that will stay in place better.
Lastly, take into account any local regulations or restrictions regarding the type of gravel you can use. Some areas might have specific requirements for the size or composition of gravel used for driveways or other outdoor projects. Check with your local municipality or homeowner’s association to ensure compliance.
By carefully considering the purpose, desired aesthetics, practicality of maintenance, and any local regulations, you’ll be able to choose the right type of gravel that will enhance the functionality and beauty of your backyard.
Measuring and Ordering Gravel
Accurately measuring and ordering the right amount of gravel is crucial to ensure a smooth installation process and avoid any unnecessary delays or expenses. Follow these steps to determine the quantity of gravel you’ll need for your backyard project:
- Measure the area: Begin by measuring the length and width of the space where you plan to install the gravel. For irregularly shaped areas, break it down into smaller sections and measure them individually. Note down the measurements in square feet.
- Determine the depth: Decide on the desired depth of the gravel layer. The recommended depth is typically around 2-4 inches for pathways and 6-8 inches for driveways. However, this can vary depending on the intended use and the type of gravel you’re using.
- Calculate the volume: Multiply the area by the depth to calculate the volume of gravel needed. For example, if you have a 10 ft by 5 ft area and want a 2-inch deep gravel layer, the calculation would be as follows: 10 ft x 5 ft x (2/12) ft = 8.33 cubic feet.
- Convert to cubic yards: Since gravel is typically sold by the cubic yard, you’ll need to convert the volume into cubic yards. Divide the volume by 27 (since there are 27 cubic feet in a cubic yard) to get the quantity in cubic yards. Using the example above, the calculation would be: 8.33 cubic feet / 27 = 0.308 cubic yards.
- Add extra for compaction and uneven terrain: It’s advisable to order slightly more gravel than calculated to account for compaction during installation and any uneven terrain in your yard. Adding an extra 10-20% to the calculated quantity should be sufficient.
- Order the gravel: Contact your local landscaping supplier or gravel provider and place your order. Provide them with the measurements and let them know the type of gravel you wish to purchase. They will guide you on the appropriate quantity and delivery options.
By accurately measuring the area and following these steps, you can confidently order the right amount of gravel for your backyard project. Remember, it’s always better to have a little extra than to run out midway through the installation process.
Preparing the Backyard
Before you start laying the gravel, it’s important to properly prepare your backyard to ensure a stable and long-lasting surface. The preparation process involves clearing the area, marking the boundaries, preparing the soil, and installing a weed barrier.
- Clearing the area: Begin by removing any existing vegetation, rocks, or debris from the area where you plan to lay the gravel. This includes grass, weeds, and tree roots. Use a shovel, rake, or a power tool, such as a sod cutter, to clear the surface completely. Ensure the area is free from any obstructions that may interfere with the installation or compromise the stability of the gravel layer.
- Marking the boundaries: Use string, stakes, or spray paint to mark the boundaries of the gravel area. This will help guide you during the installation process and ensure a clean and defined edge.
- Preparing the soil: It’s essential to prepare the soil to create a stable base for the gravel. Remove the top layer of soil, at least 3-4 inches deep, to eliminate any soft or loose soil. Use a shovel or a rototiller to loosen the soil underneath. This will improve drainage and prevent the gravel from sinking into the ground over time.
- Installing a weed barrier: To prevent weed growth and keep the gravel surface clean, lay a weed barrier over the prepared soil. This can be a landscape fabric or a geotextile fabric. Roll out the fabric over the entire area and cut it to fit accordingly. Ensure there are no gaps or overlaps by securing the edges with landscape staples or pins.
By thoroughly preparing the backyard, you’ll create a solid foundation for the gravel installation. This will help prevent weed growth, promote proper drainage, and ensure the longevity of your gravel surface. Once the preparation is complete, you’re ready to move on to the next steps of installing the gravel and creating your desired outdoor space.
Clearing the Area
Before you can begin the process of installing gravel in your backyard, it’s important to clear the area of any vegetation, rocks, or debris. This step is crucial to create a clean and even surface for the gravel installation.
Here are the steps to effectively clear the area:
- Remove vegetation: Begin by removing any grass, weeds, or other unwanted vegetation from the area. Use a shovel, rake, or a power tool, such as a sod cutter, to cut through the vegetation and remove it from the ground. Make sure to remove the root systems as well, to prevent regrowth.
- Eliminate rocks and debris: Once the vegetation is removed, scan the area for any rocks, stones, or debris. These can create unevenness or discomfort underfoot once the gravel is installed. Use a wheelbarrow or a bucket to collect and remove the rocks and debris from the area.
- Smooth the surface: After clearing the vegetation, rocks, and debris, use a rake or a garden fork to smooth the surface of the area. This will help create an even base for the gravel and ensure a uniform distribution of the material.
It’s important to note that if you’re planning to install gravel on a larger scale or in an area with heavy vegetation or tough ground cover, you may need to consider more extensive methods of clearing. This can include using herbicides to kill off weeds, hiring professional land clearing services, or using heavy machinery like a skid-steer loader to remove large amounts of vegetation or debris.
By carefully clearing the area, you’ll create a clean and level surface for the gravel installation. This will not only enhance the visual appeal of your backyard but also ensure a stable and comfortable surface for walking, driving, or any other activities you have planned for the area.
Marking the Boundaries
Marking the boundaries of the gravel area is an essential step in the preparation process. This step ensures that you have a clear visual guide for the installation and helps create a clean and defined edge for your gravel surface. Here’s how you can effectively mark the boundaries:
- Gather the necessary materials: You’ll need string, stakes, or spray paint to mark the boundaries. Choose the method that works best for you based on the size of the area and your personal preference.
- Determine the shape and dimensions: Decide on the desired shape and dimensions of the gravel area. This will depend on the layout and design of your backyard. For example, if you’re creating a pathway, you may want a straight or curved line. If you’re defining a garden bed, you might outline a specific shape.
- Use stakes and string: If you choose to use stakes and string, start by placing the stakes at the corners or key points of the area. Connect the stakes with string, pulling it tightly for a clear line. Check for alignment and adjust as needed. This will help you visualize the boundaries and guide you during the installation process.
- Use spray paint: If you prefer a more temporary marking method, spray paint can be an effective option. Simply follow the desired path or shape, spraying a line or area along the ground. Make sure to use a color that stands out and is visible against the backdrop of your backyard.
Whichever method you choose, ensure that the boundaries are clearly marked and easily visible. This will help you maintain the desired shape and prevent any stray gravel from spilling onto adjacent areas.
Take your time during this step to make sure the boundaries are accurate and aligned with your vision. The marked boundaries will serve as a visual guide throughout the installation process and help create a clean and professional-looking gravel area in your backyard.
Preparing the Soil
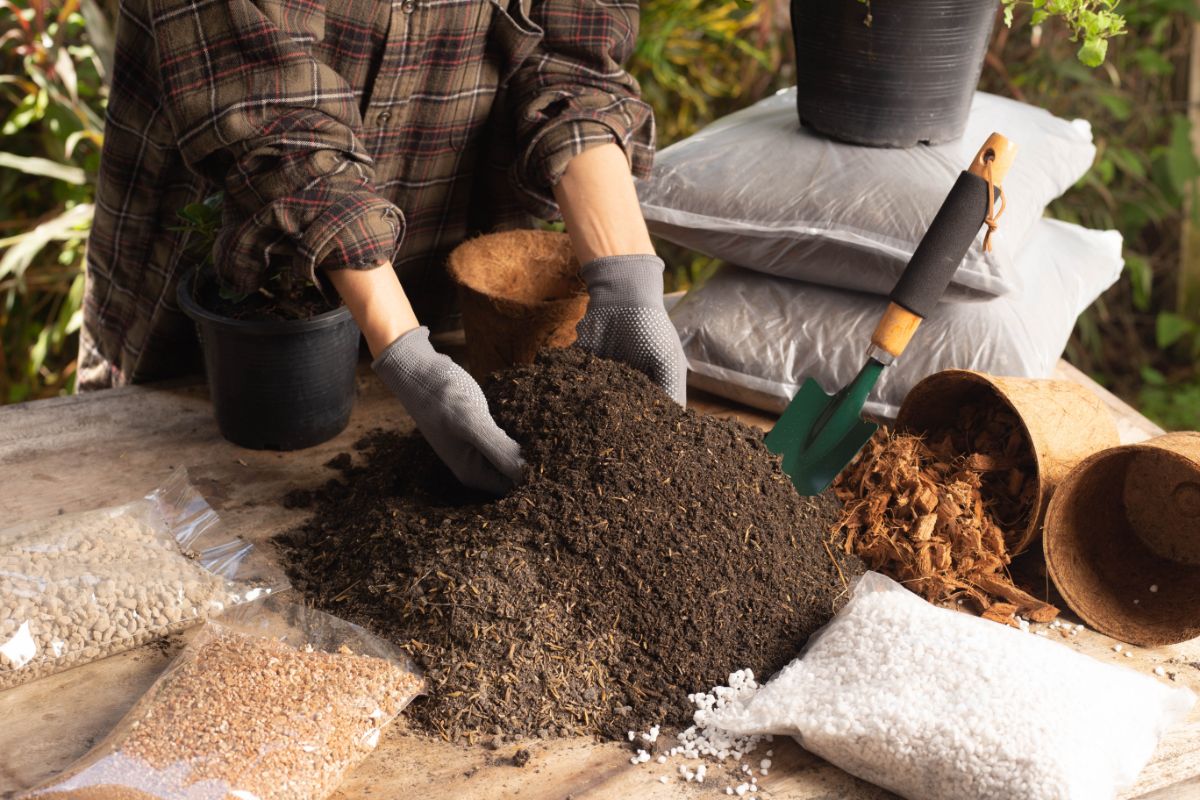
Preparing the soil is a crucial step in the process of putting gravel in your backyard. It ensures a stable and well-draining base for the gravel, promoting longevity and preventing issues such as sinking or shifting. Here’s how you can effectively prepare the soil:
- Clear the area: Before preparing the soil, make sure the area is cleared of any vegetation, rocks, or debris. Follow the steps outlined in the previous section to ensure a clean surface.
- Loosen the soil: Use a garden fork, shovel, or a tiller to loosen the soil. Break up any compacted areas and remove any large clumps or rocks. This step is especially important if your soil is compacted or heavy, as it allows for better drainage and prevents water from pooling on the gravel surface.
- Level the surface: Once the soil is loosened, use a rake or a leveling tool to even out the surface. Smooth out any bumps or uneven areas to create a flat and consistent base for the gravel. Pay attention to the slope of the area, ensuring proper drainage by angling the surface away from any structures or low-lying areas.
- Address drainage issues: If your yard tends to have poor drainage or areas prone to water accumulation, consider incorporating drainage solutions. This may include installing French drains, adding gravel trenches, or regrading the area to redirect water flow. Proper drainage is essential to prevent water from pooling on the gravel surface and causing erosion or instability.
By taking the time to properly prepare the soil, you’ll create a solid foundation for your gravel installation. This not only promotes proper drainage and prevents sinking but also ensures a more aesthetically pleasing and functional backyard space.
Keep in mind that the specific soil preparation steps may vary depending on the condition of your soil and the size or complexity of your project. It’s always a good idea to consult with a professional landscaper or gardening expert if you’re unsure about the best approach for your specific situation.
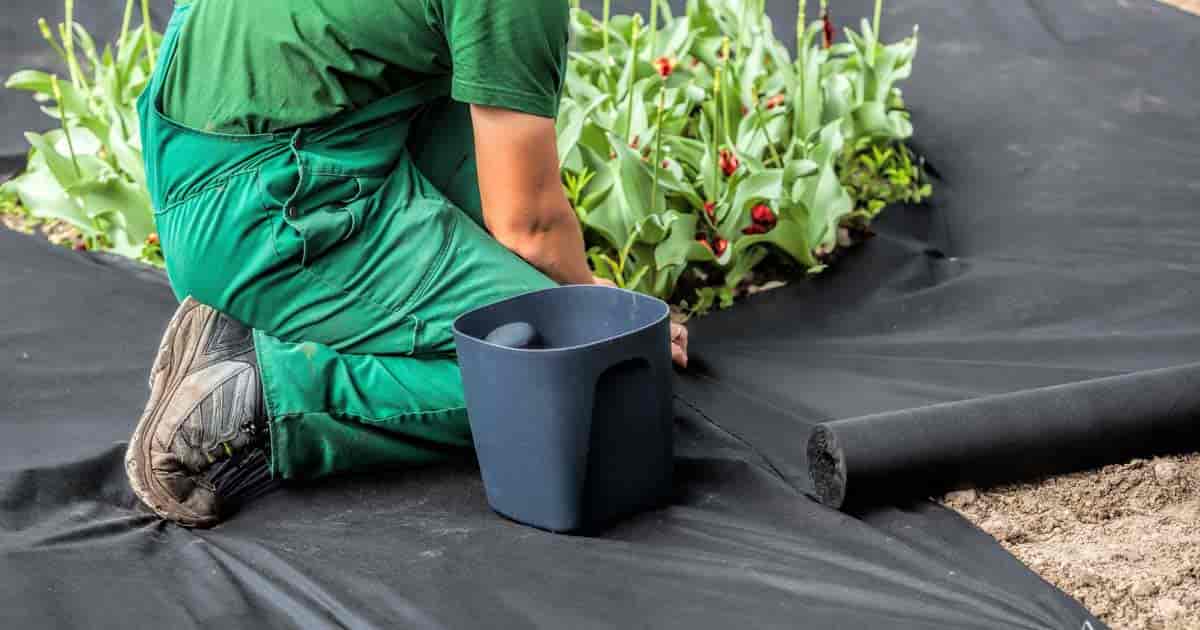
Installing Weed Barrier
Installing a weed barrier is an important step in the process of putting gravel in your backyard. A weed barrier helps prevent weed growth, keeps the surface clean, and minimizes maintenance in the long run. Follow these steps to effectively install a weed barrier:
- Select the right weed barrier: There are various options for weed barriers, including landscape fabric and geotextile fabric. Choose a barrier that is durable, permeable to water, and appropriate for your specific project.
- Cut the weed barrier to size: Measure the area where you’ll be installing the gravel and cut the weed barrier to fit. It’s best to have overlapping edges, ensuring complete coverage without gaps for weed growth.
- Prepare the surface: Before laying the weed barrier, ensure that the area is clear of any rocks, debris, or vegetation. Smooth out the soil and remove any sharp objects that may puncture the barrier.
- Lay the weed barrier: Roll out the weed barrier over the prepared soil. Make sure it covers the entire area evenly, extending beyond the boundaries of the gravel space. If necessary, use landscape staples or pins to secure the edges of the barrier to the ground for added stability.
- Overlap and secure the seams: If you need to use multiple sections of weed barrier to cover a larger area, overlap the edges by a few inches. Secure the overlapped sections together using landscape staples or pins to prevent them from shifting or separating over time.
- Cut holes for plants: If you have existing plants or plan to add them after installing the weed barrier, cut holes in the barrier to accommodate them. Be precise and cut slightly smaller holes to ensure a snug fit around the plant stems.
Installing a weed barrier before laying the gravel will significantly reduce the amount of time and effort spent on weed maintenance in the future. It creates a barrier that prevents weed seeds from reaching the soil and germinating, ensuring a cleaner and more hassle-free gravel surface.
Keep in mind that while a weed barrier helps control weed growth, it does not guarantee total weed elimination. Weed seeds can still find their way onto the surface of the gravel through wind or other means. Regularly inspect and remove any weeds that manage to grow on top of the gravel to maintain a pristine appearance.
Spreading the Gravel
Now that you’ve prepared the area and installed the weed barrier, it’s time to start spreading the gravel in your backyard. This step involves carefully distributing the gravel over the designated area to create an even layer. Follow these steps to effectively spread the gravel:
- Start at one end: Begin spreading the gravel from one end of the area. This will help you maintain a consistent direction and ensure an even distribution.
- Use a shovel or a wheelbarrow: Depending on the size of the area, use a shovel or a wheelbarrow to transport the gravel from the delivery point to the installation site. This will make the process more efficient and save you time and effort.
- Spread the gravel evenly: Pour the gravel onto the prepared area and use a rake or a garden hoe to spread it evenly. Work in small sections, making sure to distribute the gravel to the desired depth. Aim for a uniform layer, following the slope and contours of the area.
- Adjust the thickness: Depending on the intended use and the type of gravel, adjust the thickness of the layer. For pathways, a compact 2-4 inch layer is usually sufficient, while driveways may require a deeper layer of 6-8 inches to ensure durability and stability.
- Take breaks and step back: As you work, periodically take breaks and step back to assess the evenness of the gravel layer. This will help you identify any spots that may require additional gravel or leveling.
Remember, it’s important to take your time during this step to ensure a proper and even distribution of the gravel. Pay attention to any slopes or drainage areas, as these may require adjustments to maintain proper water flow.
Continue spreading the gravel until the entire area is covered, working systematically from one end to the other. Take pride in creating a visually appealing and functional gravel surface that enhances the overall aesthetic of your backyard.
Leveling the Surface
After spreading the gravel in your backyard, the next step is to level the surface. Leveling ensures an even and smooth gravel layer, enhancing both the visual appeal and functionality of the area. Follow these steps to effectively level the surface:
- Use a rake: Start by using a rake to spread the gravel evenly across the area. Use the rake to distribute the gravel and fill in any low spots or uneven areas. Work in a back-and-forth motion, smoothing out any bumps or ridges that may have formed during the spreading process.
- Check for evenness: Periodically check the surface for evenness as you rake. Step back and view the area from different angles to identify any areas that may need additional attention. This will help you achieve a uniform appearance throughout the gravel surface.
- Consider a screed board: For larger areas or driveways, you may consider using a screed board to achieve a more precise leveling. A screed board is a long, straight board that helps to create a flat and even surface. Place the board on top of the gravel and use a side-to-side motion to level the gravel accurately.
- Fill in low spots: If you notice any low spots or depressions in the gravel surface, add additional gravel to fill them in. Use a shovel or a rake to distribute the gravel evenly and level it with the rest of the surface. Pay attention to any areas where water may accumulate or flow unevenly and make the necessary adjustments.
- Smooth and compact: Once the surface is leveled, use a compactor or a tamper to lightly compact the gravel. This helps provide stability and reduce the chances of gravel displacement. Follow the manufacturer’s instructions and work in overlapping passes to ensure thorough compaction.
By taking the time to level the surface, you’ll create a visually appealing and functional gravel area in your backyard. A level surface not only improves the overall aesthetics but also provides a stable and comfortable area for walking, driving, or any other activities you have planned for the space.
Remember, the leveling process may require periodic adjustments over time, as the gravel settles or changes due to usage or weather conditions. Regularly inspect and make necessary adjustments to maintain the desired levelness of the surface.
Compacting the Gravel
Once the gravel is spread and the surface is leveled, the next crucial step is to compact the gravel. Compacting the gravel helps to create a stable and durable surface by reducing the risk of shifting, settling, and erosion. Follow these steps to effectively compact the gravel:
- Choose the right compactor: Select a compactor suitable for the size and type of gravel you’re working with. Plate compactors, also known as vibrating plate compactors, are commonly used for compacting gravel. They exert a strong vibrating force to pack the gravel particles tightly together.
- Start in one corner: Begin compacting the gravel from one corner of the area. Ensure that you’re standing on a solid and stable surface as you operate the compactor.
- Work in overlapping passes: Move the compactor in slow and steady motions, working in overlapping passes across the entire surface. This ensures that the compaction is evenly distributed and avoids creating uneven or compacted areas.
- Pay attention to edges and corners: Give extra attention to the edges and corners of the gravel area, as these areas are more prone to settling and displacement. Use the compactor to firmly pack the gravel particles and ensure a consistent level throughout the entire surface.
- Check for uniformity: Periodically step back and visually inspect the surface for any inconsistencies or areas that may require additional compaction. Look for any loose or unstable sections and focus on compacting them thoroughly.
Keep in mind that over-compacting the gravel can lead to a hard and rigid surface, which may not be desired for certain applications such as walkways or play areas. It’s important to strike a balance between achieving adequate compaction and maintaining a comfortable and functional surface.
By effectively compacting the gravel, you ensure a stable and durable surface that resists erosion, minimizes settling, and provides long-term usage benefits. Regular maintenance and periodic re-compaction may be necessary over time, depending on the usage and environmental factors that affect your gravel area.
Edging the Gravel Area
Edging the gravel area is a critical step to define the boundaries, enhance the aesthetics, and maintain the integrity of the gravel surface. Edging helps prevent the spreading of the gravel beyond the designated area, keeps weeds and grass from encroaching, and adds a finishing touch to your backyard project. Follow these steps to effectively edge the gravel area:
- Select the edging material: Choose an edging material that suits your style and the overall design of your backyard. Common options include plastic or metal landscape edging, stone or brick pavers, or even natural elements like boulders or logs. Consider both the functional and visual aspects when making your selection.
- Prepare the area: Clean the perimeter of the gravel area, removing any loose gravel or debris. Trim any grass or vegetation that may be encroaching on the edges. Ensure that the soil is even and ready for installation.
- Install the edging material: Begin by laying the edging material along the outer edge of the gravel area. Follow the manufacturer’s instructions for the specific edging material you’ve chosen. Depending on the type of edging, this may involve hammering in stakes, positioning the pieces tightly together, or stacking and mortaring stones or bricks.
- Secure the edging: Depending on the edging material, secure it in place using appropriate methods such as stakes or adhesive. This will ensure that the edging remains stable and prevents the gravel from spreading or shifting beyond the designated area.
- Fine-tune the gravel alignment: Use a rake or a garden hoe to fine-tune the alignment and distribution of the gravel along the edges. Ensure that the gravel is neatly contained within the boundaries set by the edging, creating a clean and defined transition from the gravel area to the surrounding landscape.
By edging the gravel area, you create a polished and professional look for your backyard. The edging not only enhances the visual appeal but also helps maintain the integrity and functionality of the gravel surface. Regularly inspect the edging and make any necessary adjustments or repairs to keep it in optimal condition.
Remember to consider the style and overall theme of your backyard when choosing the edging material. The right edging can complement your landscaping and create a cohesive look throughout your outdoor space.
Maintaining the Gravel Surface
Maintaining the gravel surface in your backyard is essential to keep it looking clean, neat, and functional. With regular care and attention, you can preserve the beauty and integrity of your gravel area. Here are some maintenance tasks to consider:
- Keep it clean: Regularly remove debris, fallen leaves, and any other organic matter from the surface of the gravel. Use a rake or a broom to sweep away these materials, preventing them from accumulating and potentially promoting weed growth or blocking proper drainage.
- Address weed growth: Despite the weed barrier, some weed seeds may find their way onto the gravel surface. Regularly inspect the area for any signs of weed growth and promptly remove them by hand or with a weed tool. Taking care of weeds early on will prevent them from spreading and becoming more difficult to remove.
- Address erosion: Over time, rainwater or foot traffic may cause some erosion in the gravel surface. If you notice any low spots or areas where the gravel has shifted, simply add more gravel and level the surface to maintain an even appearance.
- Replenish the gravel: Depending on usage and environmental factors, the gravel surface may naturally compact or wear down over time. Periodically replenish the gravel to maintain the desired thickness and look. Adding a fresh layer of gravel can rejuvenate the appearance and restore the functionality of the surface.
- Maintain proper drainage: Check that water flows freely through the gravel, without any pooling or stagnant areas. If you notice any issues with drainage, inspect the area for potential blockages or uneven spots, and address them accordingly. Maintaining proper drainage will prevent water from causing erosion or compromising the stability of the gravel.
- Inspect edging and make repairs: Regularly inspect the edging material around the gravel area. Look for any signs of damage or shifting, and make any necessary repairs or adjustments to ensure the edging remains secure and effective in containing the gravel.
By incorporating these maintenance tasks into your routine, you can preserve the appearance and functionality of the gravel surface in your backyard. Regular care and attention will extend the lifespan of the gravel, reduce the chances of weed growth, and ensure a visually appealing and comfortable outdoor space for years to come.
Conclusion
Congratulations on completing your gravel project in your backyard! By following the steps outlined in this guide, you’ve transformed your outdoor space into a functional and visually appealing area. Whether you’ve created pathways, defined garden beds, or added a decorative element, your gravel installation will provide years of enjoyment.
Remember, the key to a successful gravel project is thorough preparation, from assessing your backyard and choosing the right type of gravel to properly measuring and ordering the materials. Clearing the area, marking the boundaries, and preparing the soil are crucial steps to ensure a stable foundation for your gravel surface. Installing a weed barrier helps minimize weed growth and keeps your gravel area looking pristine.
Don’t forget to carefully spread the gravel, leveling the surface for a smooth and even appearance. Compact the gravel to enhance durability and minimize shifting. Edging the gravel area provides a finished look and helps maintain boundaries. Lastly, regularly maintain the surface by keeping it clean, addressing weed growth, and replenishing the gravel as needed.
Enjoy your newly transformed backyard space and make the most of your gravel installation. Whether you’re relaxing, entertaining, or engaging in outdoor activities, your gravel surface will add functionality and charm to your outdoor environment.
Remember to adapt these steps to fit your specific project and backyard needs. Each backyard is unique, and you have the creative freedom to customize your gravel installation according to your preferences and style.
So go ahead, sit back, and take pride in your DIY gravel project. You’ve created a beautiful and inviting space in your own backyard that you can enjoy for years to come.