Home>Gardening Techniques>DIY Projects>How To Install Gravel Landscaping

DIY Projects
How To Install Gravel Landscaping
Published: August 19, 2023
Looking to tackle DIY gravel landscaping projects? Discover step-by-step instructions and expert tips on how to install gravel for a beautiful outdoor space.
(Many of the links in this article redirect to a specific reviewed product. Your purchase of these products through affiliate links helps to generate commission for Chicagolandgardening.com, at no extra cost. Learn more)
Table of Contents
- Introduction
- Tools and Materials
- Step 1: Planning and Preparation
- Step 2: Clearing the Area
- Step 3: Creating a Base Layer
- Step 4: Installing Landscape Fabric
- Step 5: Spreading the Gravel
- Step 6: Leveling and Compact the Gravel
- Step 7: Edging the Gravel Area
- Step 8: Maintaining Your Gravel Landscape
- Conclusion
Introduction
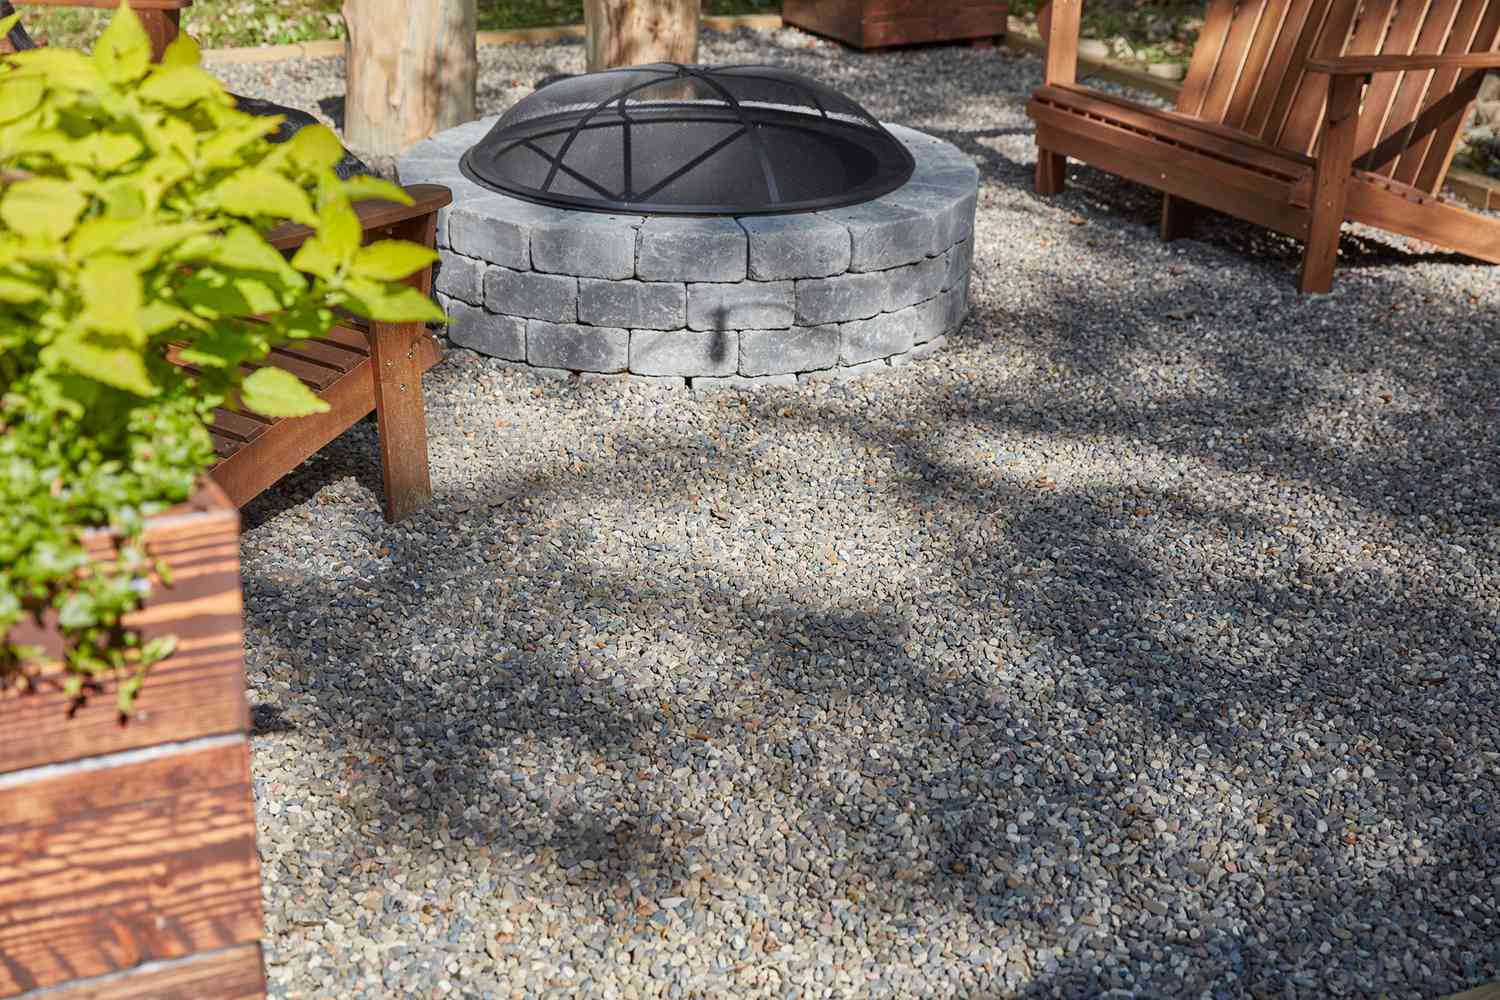
Welcome to the world of DIY projects! If you’re looking to transform your outdoor space, gravel landscaping can be a perfect choice. Whether you want to create a charming pathway, define a patio area, or add texture to your garden, gravel allows for endless possibilities. Plus, installing gravel is a relatively simple and cost-effective project that can be completed in just a few steps.
In this article, we will guide you through the process of installing gravel landscaping from start to finish. We’ll discuss the tools and materials you’ll need, as well as the step-by-step instructions to ensure a successful project.
Before we dive in, it’s important to note that gravel comes in a variety of sizes and types. You can choose between pea gravel, crushed stone, or river rock, depending on your desired aesthetic and project needs. Additionally, it’s crucial to consider the area’s drainage requirements and any potential weed problems when selecting your gravel.
Now, let’s gather our tools and get started on creating a beautiful gravel landscape that will enhance your outdoor living space!
Tools and Materials
Before you begin your gravel landscaping project, it’s essential to gather all the necessary tools and materials. Having everything on hand will ensure a smoother and more efficient installation process. Here is a list of what you’ll need:
- Shovel: A sturdy shovel will be your go-to tool for digging and moving gravel.
- Rake: A rake is necessary for leveling the gravel and creating a smooth surface.
- Landscape Fabric: This fabric will help prevent weed growth and maintain the integrity of your gravel landscape.
- Wheelbarrow: A wheelbarrow will assist you in transporting and distributing the gravel.
- Measuring Tape: You’ll need a measuring tape to accurately calculate the dimensions of your project area.
- String: String will be used to mark the boundaries and shape of your gravel landscape.
- Stakes: Stakes are necessary for securing the string and marking the perimeter of the area.
- Edging Material: Depending on your preference, you may want to include edging material to keep the gravel contained.
- Gloves and Safety Glasses: It’s important to protect your hands and eyes during the installation process.
- Gravel: Choose a type and size of gravel that suits your desired aesthetic and project requirements.
By ensuring you have all the necessary tools and materials beforehand, you’ll be well-prepared to tackle your gravel landscaping project with ease.
Step 1: Planning and Preparation
Before you start installing gravel landscaping, it’s crucial to plan and prepare the area to ensure a successful and long-lasting project. Follow these steps to begin:
- Measure and mark the area: Use a measuring tape to determine the dimensions of the space where you want to install gravel. Mark the boundaries with stakes and string to define the area clearly.
- Clear the area: Remove any existing plants, rocks, or debris from the area. This will provide a clean and smooth foundation for your gravel landscape.
- Consider drainage: Assess the slope and natural drainage of the area. It’s important to ensure water runoff doesn’t accumulate in the gravel area. If necessary, make adjustments such as adding a slope or incorporating drainage solutions.
- Decide on the gravel depth: Determine the desired depth of your gravel landscape. For pathways or decorative areas, a depth of 2-3 inches may be sufficient. However, for areas with heavier foot traffic or vehicles, aim for a depth of 4-6 inches to ensure durability.
- Take weed prevention measures: To minimize weed growth, consider laying landscape fabric over the prepared area. The fabric acts as a barrier, preventing weeds from penetrating the gravel surface.
- Plan for edging: Decide whether you want to incorporate edging materials to contain the gravel. Options such as plastic, metal, or stone edging can help maintain neat and defined edges on your gravel landscape.
By taking the time to plan and prepare the area properly, you’ll set the foundation for a successful gravel landscaping project. This step is essential in ensuring that your installation stays intact and provides a visually appealing outdoor space.
Step 2: Clearing the Area
Once you have planned and prepared the area, the next step in installing gravel landscaping is clearing the space. Here’s how to effectively clear the area:
- Remove plants and vegetation: Start by removing any plants, shrubs, grass, or weeds present in the designated area. Use a shovel or gardening tools to dig them out and discard them properly. Consider transplanting any plants you want to keep to a different location.
- Get rid of rocks and debris: Clear the area of any rocks, stones, or debris that may interfere with the installation process. Use a rake or shovel to gather and dispose of these materials. The smoother the ground, the better the final result will be.
- Level the ground: Use the backside of a rake or a shovel to level the ground. Remove any high spots and fill in any low areas to ensure an even surface. This step is crucial for achieving a visually pleasing and functional gravel landscape.
By thoroughly clearing the area, you create a clean and level foundation for your gravel landscape. This step is essential for a professional-looking end result and prevents any unwanted growth or obstacles from hindering your installation.
Step 3: Creating a Base Layer
With the area cleared, it’s time to create a sturdy base layer for your gravel landscaping. A solid base will provide stability and longevity to your gravel installation. Follow these steps to create the base layer:
- Determine the type of base: Depending on your project and soil conditions, you can choose between two types of base layers: compacted soil or crushed stone. Compacted soil works well for areas with stable soil composition, while crushed stone is ideal for areas with poor drainage or softer soil.
- For compacted soil:
- Remove the top layer: Dig out the top layer of soil, about 4-6 inches deep, to make room for the base layer.
- Compact the soil: Use a compactor or tamper to compact the soil in the area thoroughly. Compact in layers, ensuring a solid and even base.
- For crushed stone:
- Add the stone: Spread a layer of crushed stone, typically around 4 inches deep, over the cleared area. This layer will enhance drainage and provide stability.
- Compact the stone: Use a compactor or tamper to compact the crushed stone layer. Ensure that it is evenly distributed and firmly packed.
- Check for levelness: After creating the base layer, use a level to ensure the surface is even and properly sloped for proper water drainage. Make any necessary adjustments to achieve a level base.
By creating a solid base layer, you lay the groundwork for a durable and long-lasting gravel landscape. This step is essential for maintaining the integrity and stability of your installation, allowing you to enjoy it for years to come.
Step 4: Installing Landscape Fabric
Once you have a solid base layer in place, the next step in installing gravel landscaping is to lay landscape fabric. This fabric acts as a barrier, preventing weed growth and maintaining the integrity of your gravel installation. Follow these steps to install landscape fabric:
- Measure and cut the fabric: Measure the dimensions of your project area and cut landscape fabric to fit accordingly. Be sure to leave a few extra inches on each side to ensure full coverage.
- Clear the gravel area: If there are any remaining debris or loose soil on the base layer, clear them away before laying the fabric. This will create a clean surface for the fabric to be placed on.
- Unroll the fabric: Begin by unrolling the landscape fabric over the cleared area. Make sure it covers the entire project area and overlaps at the edges.
- Secure the fabric: Use landscape fabric pins or staples to secure the fabric in place. Place them every few feet along the edges and in the center of the fabric to prevent shifting or movement.
- Overlap the fabric: If the fabric is not wide enough to cover the entire area, overlap the edges by a few inches. This prevents any gaps where weeds might penetrate.
- Trim excess fabric: Once the fabric is secured, use scissors or a utility knife to trim any excess fabric along the edges. This will give your project a clean and professional appearance.
By installing landscape fabric, you create a barrier that helps prevent weeds from growing through the gravel. This step reduces maintenance and ensures that your gravel landscape remains pristine and weed-free.
Step 5: Spreading the Gravel
With the landscape fabric in place, it’s time to start spreading the gravel. This step brings your gravel landscaping project to life and adds the finishing touch to your outdoor space. Follow these steps to properly spread the gravel:
- Choose the right gravel: Select the type and size of gravel that suits your project and desired aesthetic. Consider factors such as color, texture, and the purpose of your gravel area.
- Start at one corner: Begin spreading the gravel from one corner of the area. This allows for a systematic and even distribution of the gravel throughout the project.
- Use a shovel or wheelbarrow: Depending on the size and accessibility of your project area, use a shovel or wheelbarrow to transport and distribute the gravel. Work in small sections to ensure an even application.
- Spread the gravel evenly: Use a rake or shovel to evenly spread the gravel over the landscape fabric. Gradually fill the area with the desired gravel depth, ensuring it reaches the desired level and covers the entire project area.
- Smooth and level the surface: Once the gravel is spread, use a rake or shovel to smooth and level the surface. This step helps create a visually appealing and functional gravel landscape.
- Take breaks as needed: Spreading gravel can be physically demanding, so it’s important to take breaks and pace yourself throughout the process. Stay hydrated and listen to your body to avoid overexertion.
By following these steps, you’ll effectively spread the gravel and achieve a uniform and visually pleasing gravel landscape. Take your time, and enjoy the process of transforming your outdoor space into an inviting oasis.
Step 6: Leveling and Compact the Gravel
Once the gravel is spread, the next step in installing gravel landscaping is to level and compact the gravel. This process ensures a stable surface and enhances the overall durability and appearance of your project. Follow these steps to properly level and compact the gravel:
- Use a rake: Begin by using a rake to evenly distribute the gravel and create a smooth surface. This helps eliminate any noticeable bumps or uneven areas.
- Check for levelness: Use a level or straight board to check the overall levelness of the gravel surface. Make adjustments as needed by adding or removing gravel to achieve an even level.
- Compact the gravel: To ensure a stable and solid surface, use a plate compactor or hand tamper to compact the gravel. This step helps eliminate any potential shifting or settling of the gravel over time.
- Compact in layers: For larger gravel depths, compact the gravel in layers. Add a few inches of gravel at a time, compact it, then repeat the process until you reach the desired depth.
- Pay attention to edges: Be sure to also compact the gravel along the edges and corners to ensure uniform stability across the entire area.
- Inspect the surface: After compacting, inspect the surface for any uneven spots or low areas. Use a rake or shovel to level and fill in those areas with additional gravel.
By leveling and compacting the gravel, you establish a solid and durable surface for your gravel landscaping project. This step not only improves the aesthetics but also contributes to the longevity and functionality of your outdoor space.
Step 7: Edging the Gravel Area
Edging is an important step in the installation of gravel landscaping, as it provides a clean and defined border for your project. Edging helps to contain the gravel within the designated area, preventing it from spreading onto surrounding surfaces. Follow these steps to properly edge your gravel area:
- Choose the right edging material: There are various options for edging materials, including plastic, metal, or stone. Consider your desired aesthetic, budget, and the size of your project when selecting the appropriate edging material.
- Prepare the area: Clear any excess gravel or debris from the edges of your gravel area. This will ensure a clean and smooth surface for the edging material to be installed.
- Place the edging material: Position the edging material along the perimeter of your gravel area. Ensure that it is securely in place and aligns with the desired shape and size of your project.
- Secure the edging material: Depending on the type of edging chosen, secure it in place using stakes, screws, or connectors. Follow the manufacturer’s instructions for proper installation and stability.
- Adjust and level: Make any necessary adjustments to the edging material to create a uniform and even border. Ensure that it is level and properly aligned throughout the entire perimeter.
- Backfill: Carefully backfill the area behind the edging material with soil or gravel to provide additional support and stability.
- Trim excess material: If necessary, trim any excess edging material that extends beyond the desired border. This will give your gravel area a clean and finished appearance.
By properly edging your gravel area, you not only enhance the visual appeal but also prevent the gravel from spreading into unwanted areas. Edging creates a clear boundary, defining the space and adding a professional touch to your gravel landscaping project.
Step 8: Maintaining Your Gravel Landscape
Once you have completed the installation of your gravel landscape, it’s important to implement regular maintenance to keep it looking its best. With proper care, your gravel area can remain attractive and functional for years to come. Follow these steps to maintain your gravel landscape:
- Rake regularly: Regularly rake the gravel to remove leaves, debris, and any displaced stones. This helps maintain a clean and even surface.
- Watch for weeds: Despite the landscape fabric, weeds may occasionally find their way through. Pull them out by hand or use a garden hoe to remove any unwanted vegetation.
- Check for erosion: Over time, heavy rainfall or foot traffic may cause the gravel to shift and erode. Inspect the area regularly and redistribute gravel as needed to maintain an even surface.
- Address drainage issues: If you notice areas where water may be pooling or not draining properly, make adjustments to improve drainage. This may involve adding drainage channels or adjusting the slope of the area.
- Repair damaged edging: Inspect the edging material periodically and repair any damage or displacement. This will ensure the gravel remains contained within the designated area.
- Add additional gravel if necessary: Over time, the gravel may settle or be displaced, causing the depth to decrease. Add more gravel as needed to maintain the desired depth and appearance.
- Periodically reapply landscape fabric: Over the years, the landscape fabric may degrade or become exposed. If necessary, replace or reinstall landscape fabric to continue preventing weed growth.
- Consider occasional weed control: In addition to the landscape fabric, periodic application of weed control products can help minimize weed growth and keep your gravel landscape looking pristine.
By following these maintenance steps, you can keep your gravel landscaping in top shape. Regular care and attention will ensure that your gravel area continues to be an inviting and low-maintenance feature of your outdoor space.
Conclusion
Congratulations! You have successfully completed the installation of your gravel landscaping. By following the step-by-step process outlined in this guide, you have transformed your outdoor space into a visually appealing and functional area. Whether you’ve created a pathway, patio, or garden perimeter, your gravel landscape is sure to enhance the overall aesthetics of your property.
Remember, proper planning and preparation are key to a successful gravel landscaping project. Take the time to measure and mark your desired area, clear the space, and create a solid base. Installing landscape fabric and spreading the gravel evenly are important steps to prevent weed growth and achieve a uniform appearance.
Don’t forget about the importance of leveling and compacting the gravel to ensure stability and durability. Edging the gravel area adds a finishing touch and prevents the gravel from spreading beyond its boundaries. Regular maintenance, including raking, weed control, and addressing drainage issues, will keep your gravel landscape looking its best for the long term.
With your new gravel landscape, you have created a low-maintenance outdoor feature that adds beauty and functionality to your home. Sit back, relax, and enjoy the fruits of your labor, knowing that you have created a space that is not only visually pleasing but also cost-effective and easy to maintain.
Now, grab a chair, a book, or perhaps a cup of coffee, and enjoy the serene and inviting atmosphere of your newly installed gravel landscape.
