Home>Gardening Techniques>DIY Projects>How To Install Drip Irrigation System
DIY Projects
How To Install Drip Irrigation System
Modified: January 22, 2024
Learn how to install a DIY drip irrigation system with our step-by-step guide. Save water and keep your plants healthy with this easy project.
(Many of the links in this article redirect to a specific reviewed product. Your purchase of these products through affiliate links helps to generate commission for Chicagolandgardening.com, at no extra cost. Learn more)
Table of Contents
- Introduction
- Benefits of Drip Irrigation
- Tools and Materials Needed
- Step 1: Planning and Designing Your Drip Irrigation System
- Step 2: Gathering and Assembling the Necessary Components
- Step 3: Preparing the Area for Installation
- Step 4: Installing the Mainline
- Step 5: Installing the Sub-Mainline
- Step 6: Installing Drip Emitters or Sprinklers
- Step 7: Installing the Timer and Backflow Preventer
- Step 8: Flushing and Testing the System
- Step 9: Adjusting and Fine-Tuning the System
- Conclusion
Introduction
Welcome to the world of DIY projects! If you are looking to improve the efficiency and effectiveness of your garden irrigation system, then a drip irrigation system is the perfect solution for you. Drip irrigation is a method that delivers water directly to the roots of plants, minimizing water loss and maximizing plant health.
In this comprehensive guide, we will walk you through the step-by-step process of installing a drip irrigation system in your garden. Whether you are a seasoned gardener or a beginner with a green thumb, this guide is designed to help you successfully set up your own drip irrigation system and reap the benefits.
With a drip irrigation system, you can say goodbye to the hassles of dragging hoses around your garden and manually watering each plant. Instead, you will have a system that efficiently delivers water to your plants at the right time, in the right amount.
Not only does a drip irrigation system save you time and effort, but it also has several other benefits. By delivering water directly to the roots, it minimizes water evaporation and runoff, resulting in significant water savings compared to traditional sprinkler systems. Additionally, it helps prevent weed growth, reduces the risk of plant diseases, and promotes healthy root development.
Before we dive into the installation process, let’s take a look at the tools and materials you will need for this project. Having everything ready will ensure a smooth and efficient installation process.
Benefits of Drip Irrigation
Drip irrigation offers numerous benefits for both the garden and the gardener. Let’s explore some of the key advantages:
- Water Efficiency: Drip irrigation is highly efficient in using water. Unlike traditional sprinkler systems, it delivers water directly to the plant’s root zone, minimizing water loss through evaporation or runoff. This targeted approach ensures that plants receive the right amount of water they need, resulting in water savings of up to 50% compared to other irrigation methods.
- Reduced Weed Growth: By providing water only to the plants and not the surrounding soil, drip irrigation helps suppress weed growth. With traditional sprinklers, overhead watering can inadvertently promote weed germination and growth. Drip irrigation helps keep your garden beds cleaner and reduces the need for manual weeding.
- Improved Plant Health: By delivering water directly to the roots, drip irrigation promotes healthier plants. Consistent moisture at the root zone helps prevent under- or over-watering, reducing the risk of stress-related ailments. Plants grown with drip irrigation systems tend to have stronger roots, better uptake of nutrients, and increased resistance to diseases and pests.
- Flexibility & Customization: Drip irrigation allows for precise control over water distribution. You can easily adjust the flow rate and duration of watering to meet the specific needs of different plant types in your garden. This flexibility enables you to create optimal growing conditions for various plants, ensuring their overall health and vitality.
- Time & Labor Saving: Once installed, drip irrigation systems automate the watering process, freeing up your time and reducing manual labor. You no longer need to spend hours dragging hoses or standing around with a handheld sprinkler. With a timer and controller in place, your plants will receive consistent, efficient watering without the need for constant supervision.
- Eco-Friendly Approach: Drip irrigation is an eco-friendly irrigation method. By reducing water usage, it helps conserve this precious resource. Additionally, the localized water delivery minimizes the potential for fertilizer and pesticide runoff into water sources, making it an environmentally responsible choice.
Now that you’re aware of the numerous benefits of drip irrigation, it’s time to gather the necessary tools and materials for your project. Let’s move on to the next section to find out what you’ll need.
Tools and Materials Needed
Before you begin the installation process, it’s essential to gather all the necessary tools and materials. Having everything ready will ensure a smooth and uninterrupted workflow. Here’s a list of what you’ll need:
- Drip Irrigation Kit: You can purchase a pre-packaged drip irrigation kit that includes all the essential components such as tubing, emitters, fittings, and stakes. These kits are available at gardening supply stores or online.
- PVC Pipe: Depending on your specific design, you may need PVC pipes of various sizes to act as the mainline and sub-mainline for your drip irrigation system.
- Tubing Cutter or Hacksaw: These tools will come in handy for cutting the PVC pipes to the desired lengths.
- Pipe Cutter or Scissors: You’ll need a pipe cutter or a pair of scissors to cut the drip tubing to the appropriate lengths.
- Pipe Punch: A pipe punch is used to create holes in the mainline for installing the drip emitters.
- Drip Emitters or Sprinklers: Depending on the water needs of your plants, you may choose to use drip emitters or sprinklers. Drip emitters provide a slow, steady flow of water, while sprinklers deliver water in a spray pattern.
- Spray Stakes or Drip Stakes: These stakes hold the drip emitters or sprinklers in place and ensure they stay above ground, delivering water directly to the plants.
- Timer: A timer is a crucial component of any drip irrigation system, as it allows you to automate the watering schedule. Choose a timer with multiple programmable settings to accommodate different plant watering needs.
- Backflow Preventer: A backflow preventer is essential to prevent water contamination and ensure the safety of your drinking water supply. It prevents the irrigation system’s water from flowing back into the main water supply.
- Teflon Tape: Teflon tape is used to create watertight seals between threaded connections, preventing any leaks.
- Shovel or Trenching Tool: You might need a shovel or a trenching tool to dig trenches for burying the mainline and sub-mainline, if applicable.
- Wire or Zip Ties: These can be used to secure the tubing and emitters to stakes or other fixtures.
- Measuring Tape or Ruler: A measuring tape or ruler will help you accurately measure distances and lengths of pipes and tubing.
Make sure to gather all these tools and materials before you begin your drip irrigation system installation. With everything on hand, you’ll be able to progress smoothly through the installation process. Now that you’re well-equipped let’s move on to the next step, planning and designing your drip irrigation system.
Step 1: Planning and Designing Your Drip Irrigation System
Before you start physically installing your drip irrigation system, it’s crucial to spend some time planning and designing it. By carefully considering the layout and water requirements of your garden, you can ensure that your system is efficient and effective. Here’s how:
- Assess Your Garden: Take a thorough look at your garden and identify the areas that require irrigation. Consider the type of plants, their water requirements, and the layout of your garden beds. This will help you determine the number of zones you’ll need and the placement of your irrigation lines.
- Create a Zone Layout: Divide your garden into zones based on the plants’ water needs. Group together plants with similar water requirements to ensure that they receive the appropriate amount of water. Different zones can have different irrigation schedules and flow rates to meet the specific needs of each zone.
- Measure Your Water Pressure: Use a water pressure gauge to measure the existing water pressure at your outdoor faucet. This will help you determine the appropriate flow rate and choose the right components for your system.
- Sketch Your Garden Layout: Create a rough sketch of your garden, including the location of each zone, the mainline route, and any existing obstacles such as trees or structures. This will serve as a visual guide during the installation process.
- Determine Water Source: Identify the water source for your drip irrigation system. It can be an outdoor faucet, a rain barrel, or a well. Make sure that the water source is easily accessible and has adequate flow rate and pressure to meet the demands of your system.
- Calculate Watering Time: Determine the amount of time required to water each zone based on the water needs of the plants. Consider factors such as soil type, plant size, and weather conditions. Multiply the irrigation duration by the number of times per week you want to water each zone to find the total weekly watering time.
- Choose the Right Components: Based on your zone layout and other factors, select the appropriate components for your system, including tubing, emitters, fittings, and valves. Ensure that the components are compatible and able to deliver the desired flow rate for each zone.
- Consider Slope and Drainage: If your garden has slopes or areas prone to pooling water, plan your system accordingly. Slopes may require additional emitters or pressure regulators to ensure even water distribution, while proper drainage should be considered to prevent waterlogging.
By following these planning and design steps, you’ll have a clear vision of how your drip irrigation system will be laid out and function. This thoughtful approach will save you time and prevent any costly mistakes during the installation process. Now that you have a solid plan, let’s move on to gathering and assembling the necessary components for your system.
Step 2: Gathering and Assembling the Necessary Components
Now that you have planned and designed your drip irrigation system, it’s time to gather all the necessary components and assemble them. Here’s a step-by-step guide to help you:
- Refer to Your Design Plan: Start by referring to your design plan to ensure you have all the required components. This includes tubing, emitters, fittings, valves, and any other specific parts you need based on your garden layout.
- Prepare the Tubing: If your drip irrigation system uses polyethylene tubing, unroll the tubing and cut it to the desired lengths using a pipe cutter or scissors. Make sure to leave some extra length for connecting the tubing to fittings and emitters.
- Attach Fittings: Slide the appropriate fittings onto the tubing as per your design plan. This may include tees, elbows, connectors, or couplings. Ensure they are securely attached to prevent any leakage.
- Insert Emitters or Sprinklers: If you’re using drip emitters or sprinklers, insert them into the tubing at the desired locations according to your design plan. Push them gently but firmly to ensure they are securely attached.
- Connect Sub-Mainline to Mainline: If your system includes a sub-mainline, connect it to the mainline using the appropriate coupling or connector. Ensure a tight fit to prevent any water leakage.
- Install Valves and Filters: If you have included valves and filters in your design, install them at appropriate junctions to control the water flow and remove any debris from the water supply. Follow the manufacturer’s instructions for proper installation.
- Check for Leaks: Once all the components are assembled, perform a quick check to ensure there are no leaks. Turn on the water supply and inspect all the connections and fittings. If you notice any leaks, tighten the fittings or replace any faulty components.
- Secure the Tubing: Use wire or zip ties to secure the tubing and emitters to stakes or other fixtures. This will prevent them from moving or getting damaged during operation.
By following these steps, you will have successfully gathered and assembled all the necessary components for your drip irrigation system. Now that your system is ready, it’s time to move on to the next step: preparing the area for installation.
Step 3: Preparing the Area for Installation
Before you install your drip irrigation system, it’s important to properly prepare the area to ensure a smooth and effective installation process. Here are the steps to follow:
- Clear the Area: Begin by clearing the area where you plan to install the system. Remove any weeds, rocks, or debris that may interfere with the installation or affect the performance of the system.
- Mark the Layout: Use your design plan to mark the layout of the mainline and sub-mainline. Use flags or stakes to indicate the path of the tubing and emitters. This will serve as a visual guide during the installation process.
- Prepare the Soil: Ensure the soil is loosened and free of any lumps or clumps. This will make it easier to dig trenches, bury the tubing, and ensure proper water distribution to the plants.
- Check for Obstacles: Identify any obstacles in the area, such as tree roots, underground utilities, or structures. Avoid installing the tubing near these obstacles to prevent damage or interference with the system.
- Plan for Water Source: If you are connecting your system to an outdoor faucet, ensure that the faucet is easily accessible. If using a rain barrel or well, position it in an ideal location near the system to minimize tubing length and maximize water pressure.
- Dig Trenches (if applicable): If your design plan includes burying the mainline or sub-mainline, use a shovel or a trenching tool to dig trenches of appropriate depth and width. Ensure the trenches are straight and level for optimal water flow.
- Consider Mulching: If you plan to use mulch in your garden, apply it before installing the drip irrigation system. This will help conserve moisture, reduce weed growth, and protect the tubing and emitters from direct sunlight.
- Ensure Proper Drainage: If your garden has areas prone to water pooling or flooding, take steps to ensure proper drainage. This may include creating small slopes or installing drainage systems to prevent waterlogged soil and potential damage to your plants.
By following these steps, you will have effectively prepared the area for installing your drip irrigation system. Taking the time to properly prepare the area will contribute to the overall success and efficiency of your system. With the area ready, you are now ready to move on to the next step: installing the mainline.
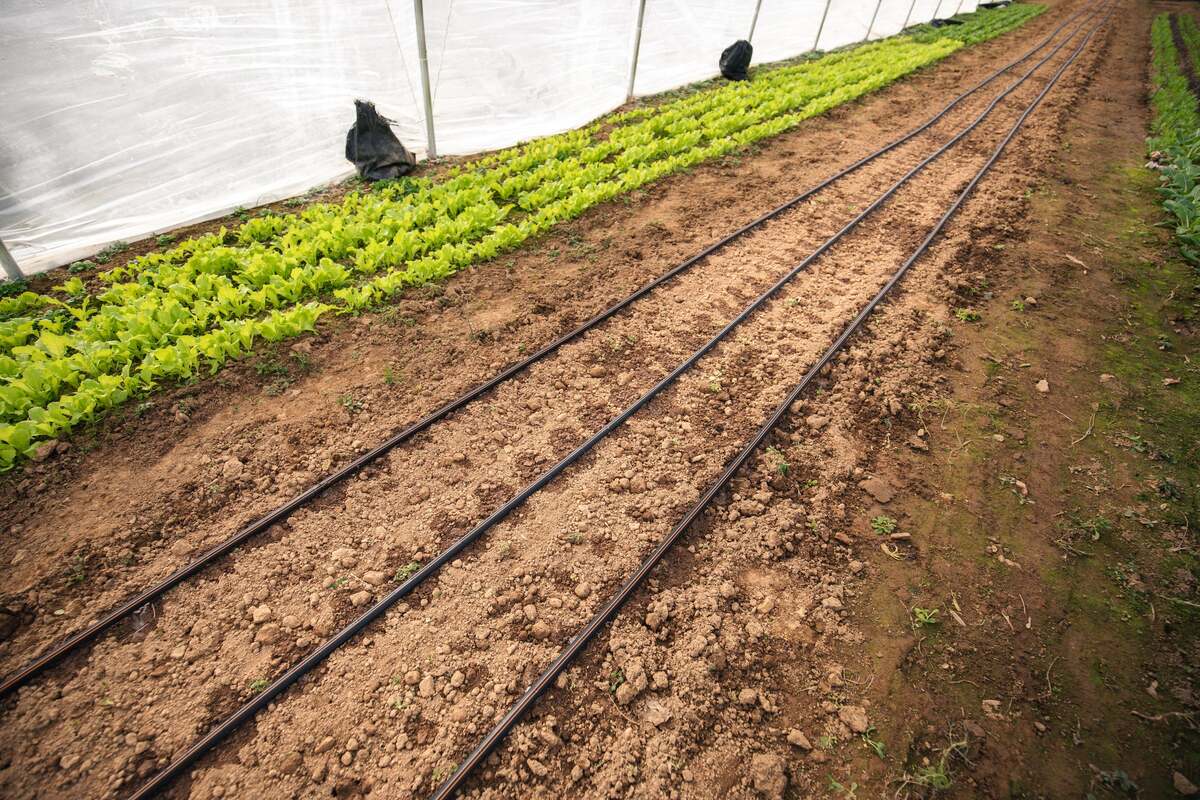
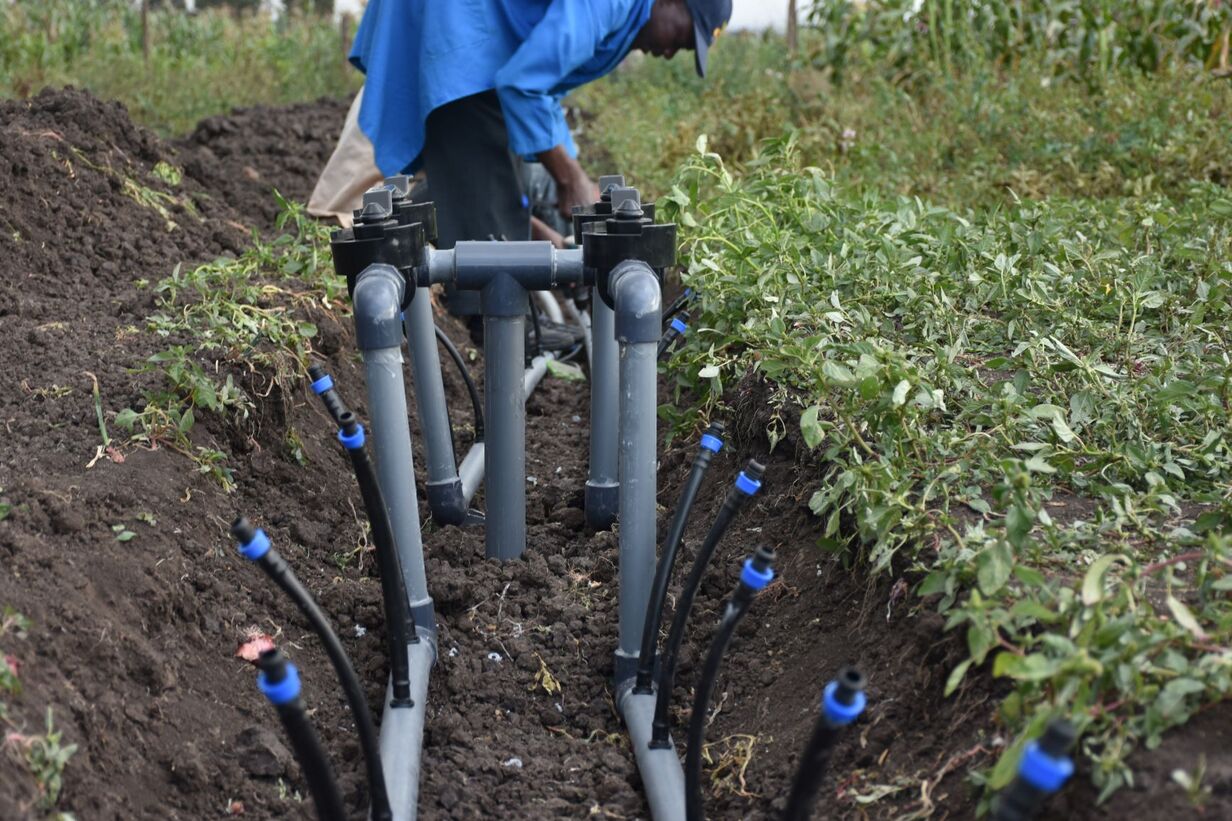
Step 4: Installing the Mainline
Now that you have prepared the area, it’s time to install the mainline of your drip irrigation system. The mainline is responsible for delivering water from the water source to the different zones of your garden. Follow these steps to ensure a successful installation:
- Begin at the Water Source: Start at the water source, whether it’s an outdoor faucet, rain barrel, or well. Attach the appropriate connector or adapter to connect the mainline tubing to the water source.
- Layout the Mainline Tubing: Lay out the mainline tubing along the marked path, following the layout indicated in your design plan. Use the trench (if applicable) or secure the tubing to the ground using stakes or wire to keep it in place.
- Cut and Connect Tubing: If needed, cut the mainline tubing to the desired length using a pipe cutter or scissors. Attach the tubing to the connectors or adapters using appropriate fittings. Ensure a secure and watertight connection.
- Install Valves and Filters: If your design plan includes valves and filters, install them along the mainline at the appropriate locations. Valves will allow you to control the water flow to different zones, while filters ensure the removal of debris from the water supply.
- Cover or Bury the Tubing (optional): Depending on your preference and aesthetic considerations, you may choose to cover or bury the mainline tubing. This can be done using mulch, gravel, or by backfilling the trench with soil (if applicable).
- Perform a Pressure Test: With the mainline installed, turn on the water supply and perform a pressure test to check for any leaks. Inspect all connections, fittings, and valves for signs of water leakage. Tighten any loose fittings or replace any faulty components as necessary.
Following these steps will ensure the successful installation of the mainline for your drip irrigation system. Once you have completed this step, you are ready to move on to installing the sub-mainline and connecting the emitters or sprinklers. This will be covered in the next step.
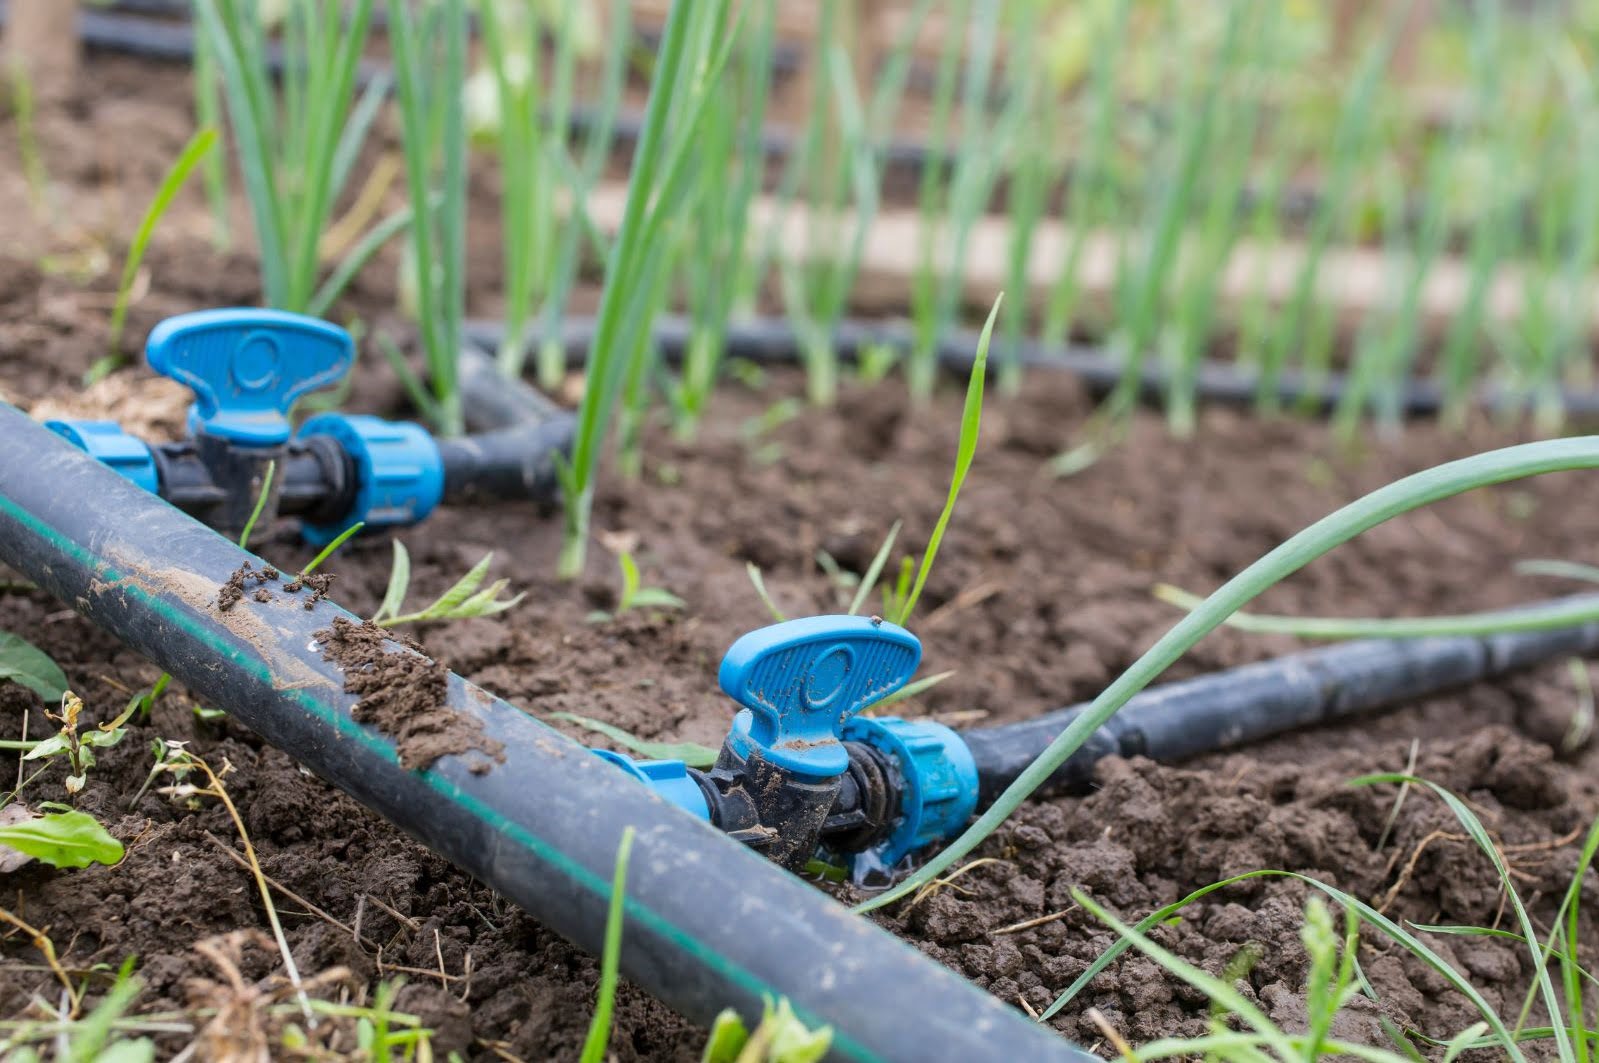
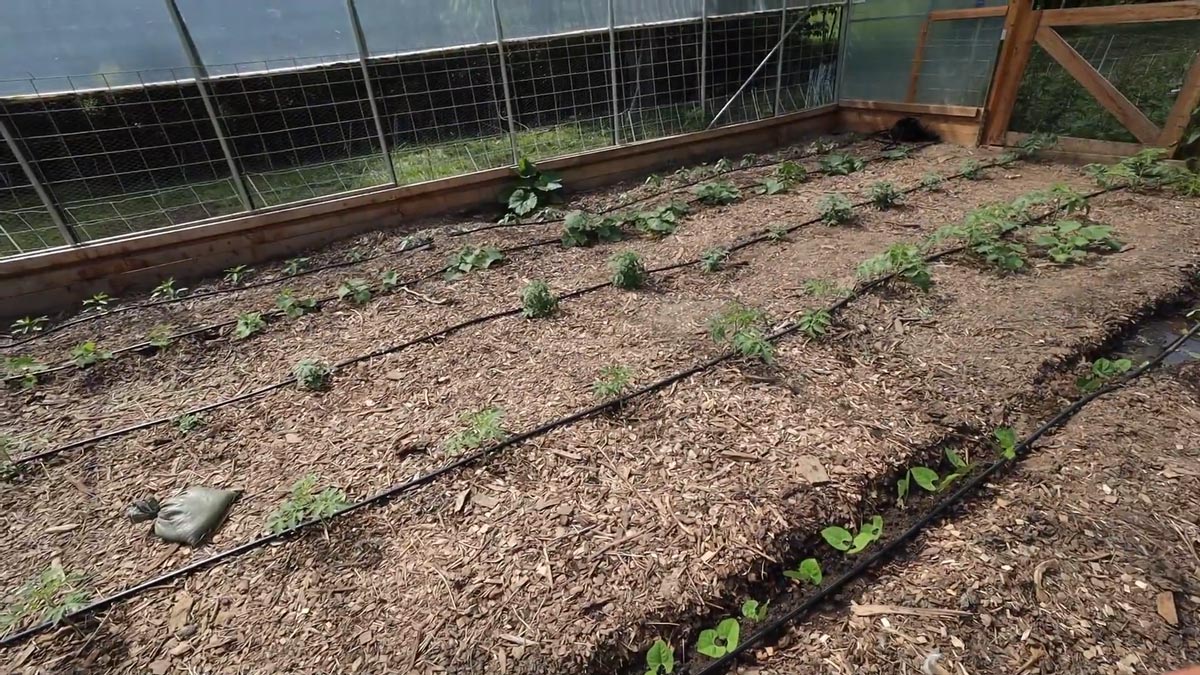
Step 5: Installing the Sub-Mainline
With the mainline of your drip irrigation system installed, it’s time to move on to installing the sub-mainline. The sub-mainline delivers water from the mainline to the different zones or areas within your garden. Follow these steps to effectively install the sub-mainline:
- Identify Zone Divisions: Refer to your design plan to determine the locations where the sub-mainline will branch off from the mainline to serve different zones or areas of your garden.
- Measure and Cut Tubing: Measure the required length of sub-mainline tubing for each zone, keeping in mind the distance from the mainline to the plants in that zone. Cut the tubing to the appropriate lengths using a pipe cutter or scissors.
- Connect Tubing to Mainline: Attach the sub-mainline tubing to the mainline using appropriate fittings, such as tees or elbows. Ensure a snug and watertight connection to prevent any leakage.
- Lay Out and Secure the Tubing: Lay out the sub-mainline tubing along the designated path for each zone. Secure the tubing to the ground using stakes or wire to ensure it remains in place.
- Install Valves (if applicable): If you have planned for individual zone control, consider installing valves along the sub-mainline for each zone. Valves will allow you to control the water flow to specific areas as needed.
- Cover or Bury the Tubing (optional): Depending on your preference and aesthetic considerations, you may choose to cover or bury the sub-mainline tubing. This can be done using mulch, gravel, or by backfilling the trench with soil (if applicable).
- Perform a Pressure Test: Once the sub-mainline is installed, turn on the water supply and perform a pressure test. Check for any leaks and ensure that all connections, fittings, and valves are secure. Make any necessary adjustments or replacements as needed.
By following these steps, you will effectively install the sub-mainline of your drip irrigation system. With the sub-mainline in place, you are now ready to move on to the next step: installing the drip emitters or sprinklers.
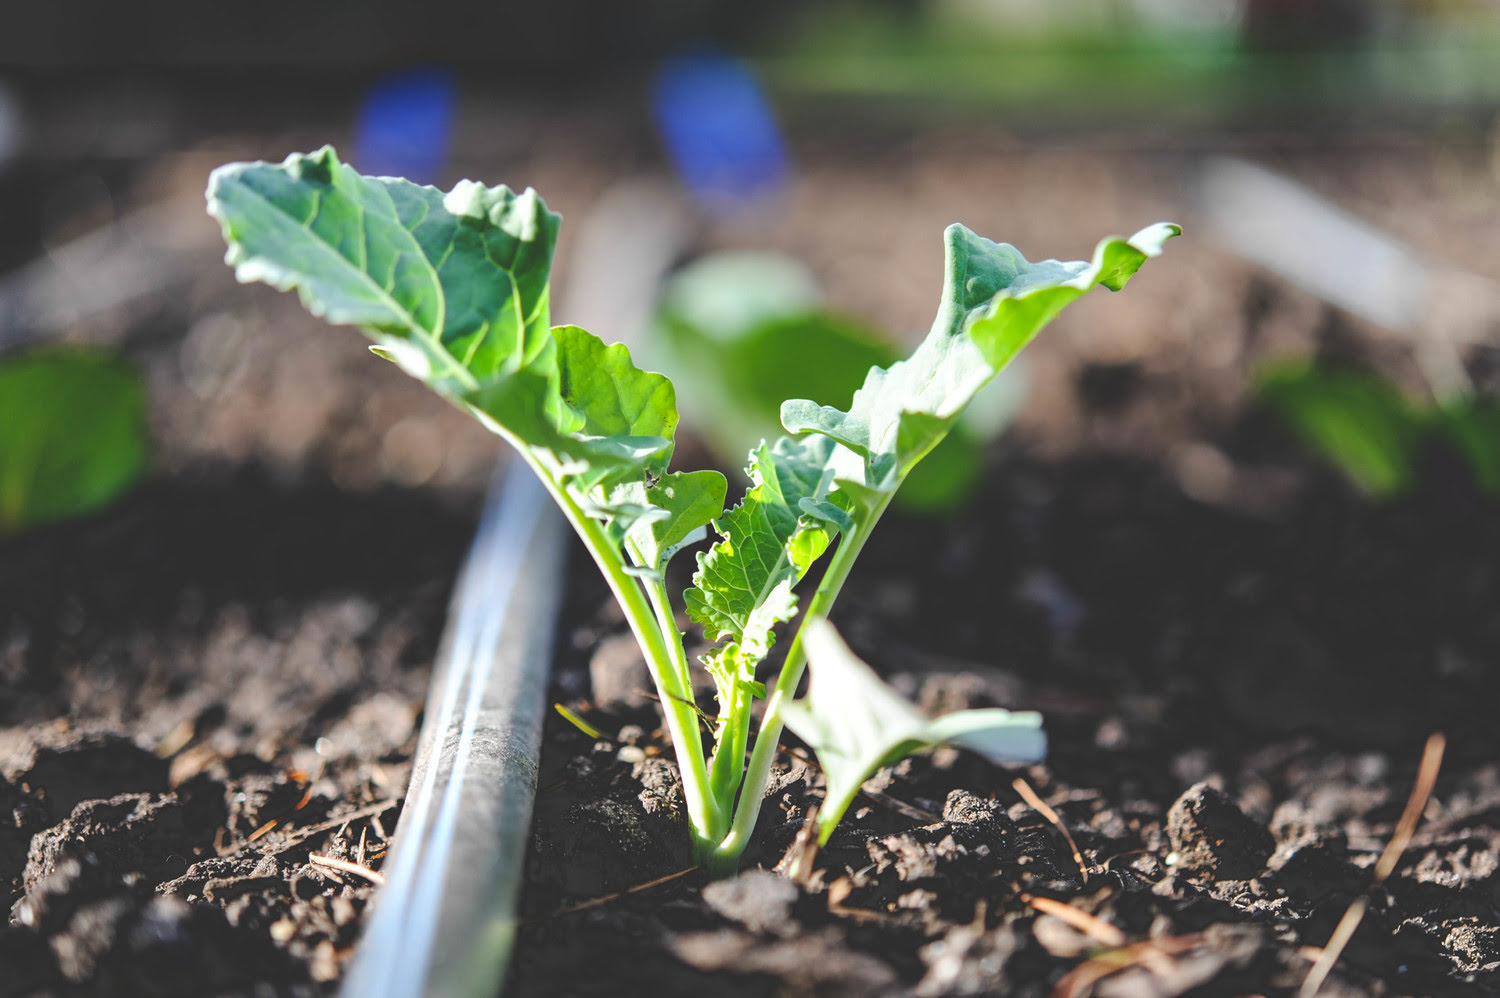
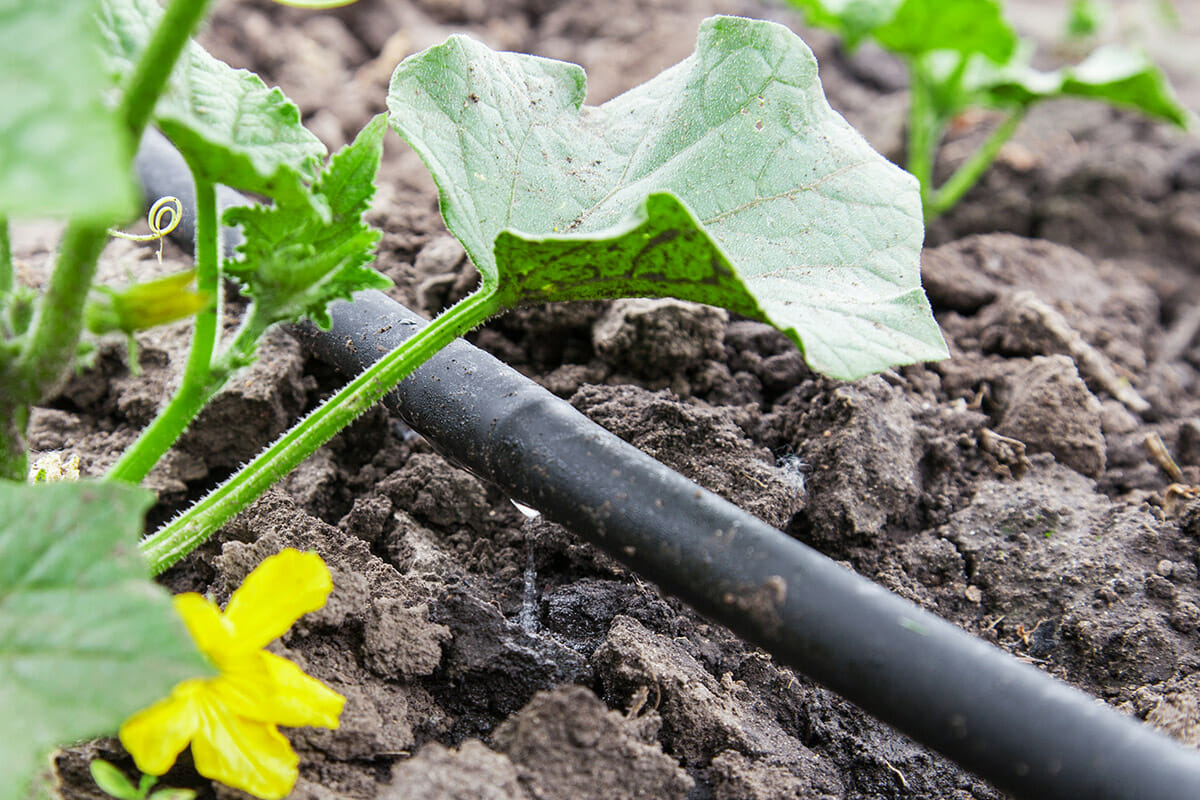
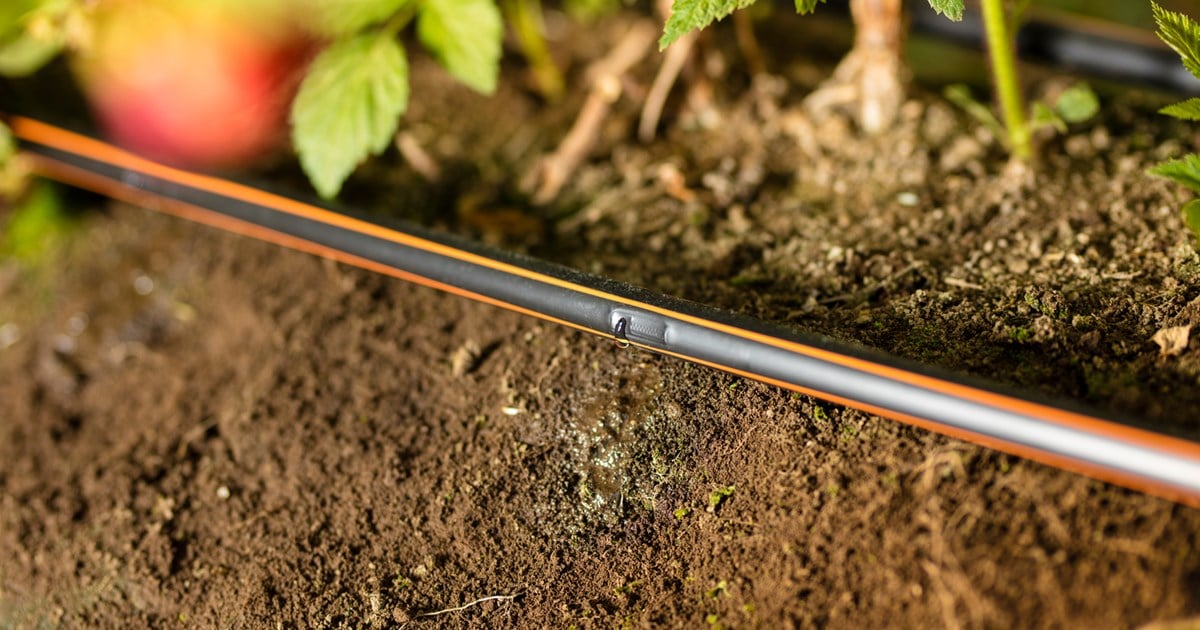
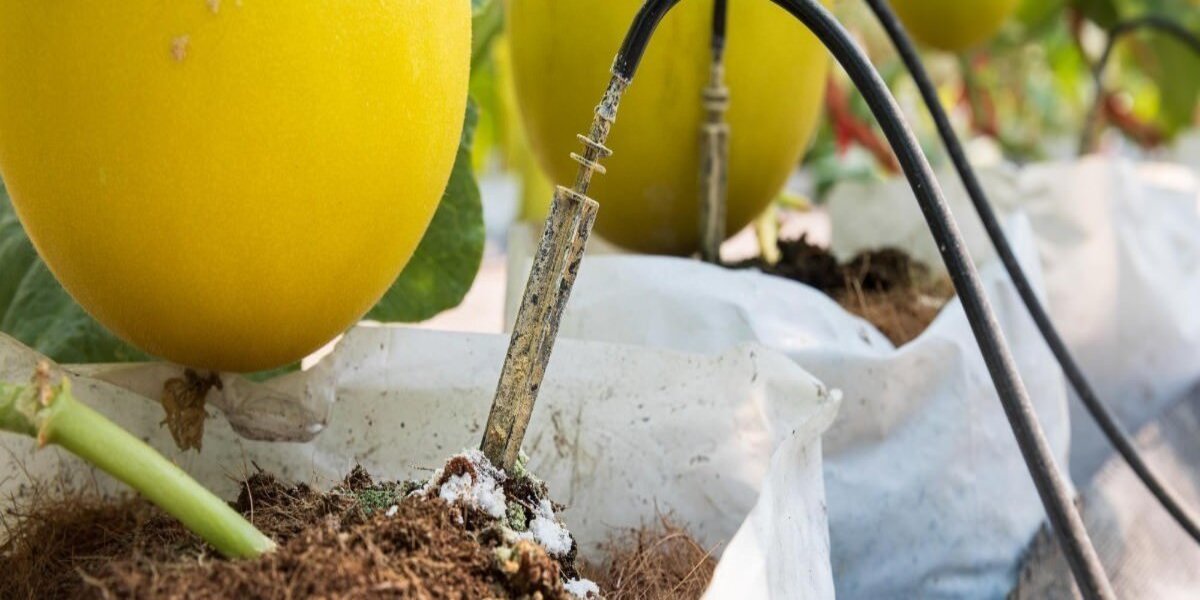
Step 6: Installing Drip Emitters or Sprinklers
Now that you have the mainline and sub-mainline installed, the next step is to install the drip emitters or sprinklers. These components deliver water directly to the plants in each zone of your garden. Follow these steps for a successful installation:
- Determine Emitter Placement: Refer to your design plan to determine the ideal placement of drip emitters or sprinklers within each zone. Consider the water needs of different plants and their spacing requirements.
- Prepare the Tubing: If using drip emitters, create holes in the mainline or sub-mainline tubing at the marked locations using a pipe punch. For sprinklers, attach the sprinkler heads to the tubing using appropriate fittings.
- Install Drip Emitters: Insert the drip emitters into the holes you made in the tubing. Ensure a secure fit and that the emitter is positioned upright and facing the plants. For sprinklers, make sure they are placed at the appropriate distance and angle for optimal coverage.
- Secure the Emitters or Sprinklers: Use stakes or other fixtures to secure the drip emitters or sprinklers in place. This will prevent them from moving or becoming dislodged during operation.
- Connect Tubing to Emitters: If using drip emitters, attach the tubing to each emitter using appropriate connectors or barbed fittings. For sprinklers, connect the tubing to the sprinkler heads using the necessary fittings.
- Flush the System: Turn on the water supply to flush out any debris or dirt that may have entered the system during installation. Allow the water to run for a few minutes until the water runs clear from all emitters or sprinkler heads.
- Check for Proper Operation: Observe the flow and distribution of water from each emitter or sprinkler. Ensure that the water is reaching the desired plants and that there are no leaks or blockages. Make any necessary adjustments or replacements as needed.
Following these steps will ensure the proper installation of drip emitters or sprinklers for your drip irrigation system. Once you have completed this step, you are now ready to move on to the next step: installing the timer and backflow preventer.
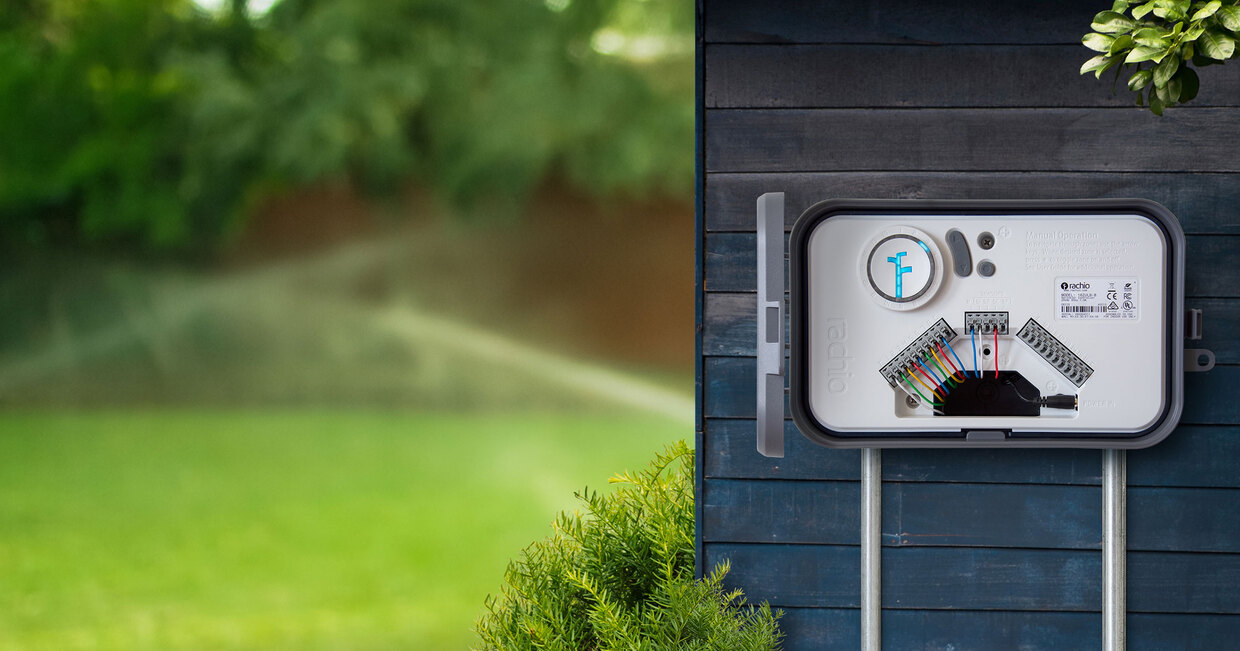
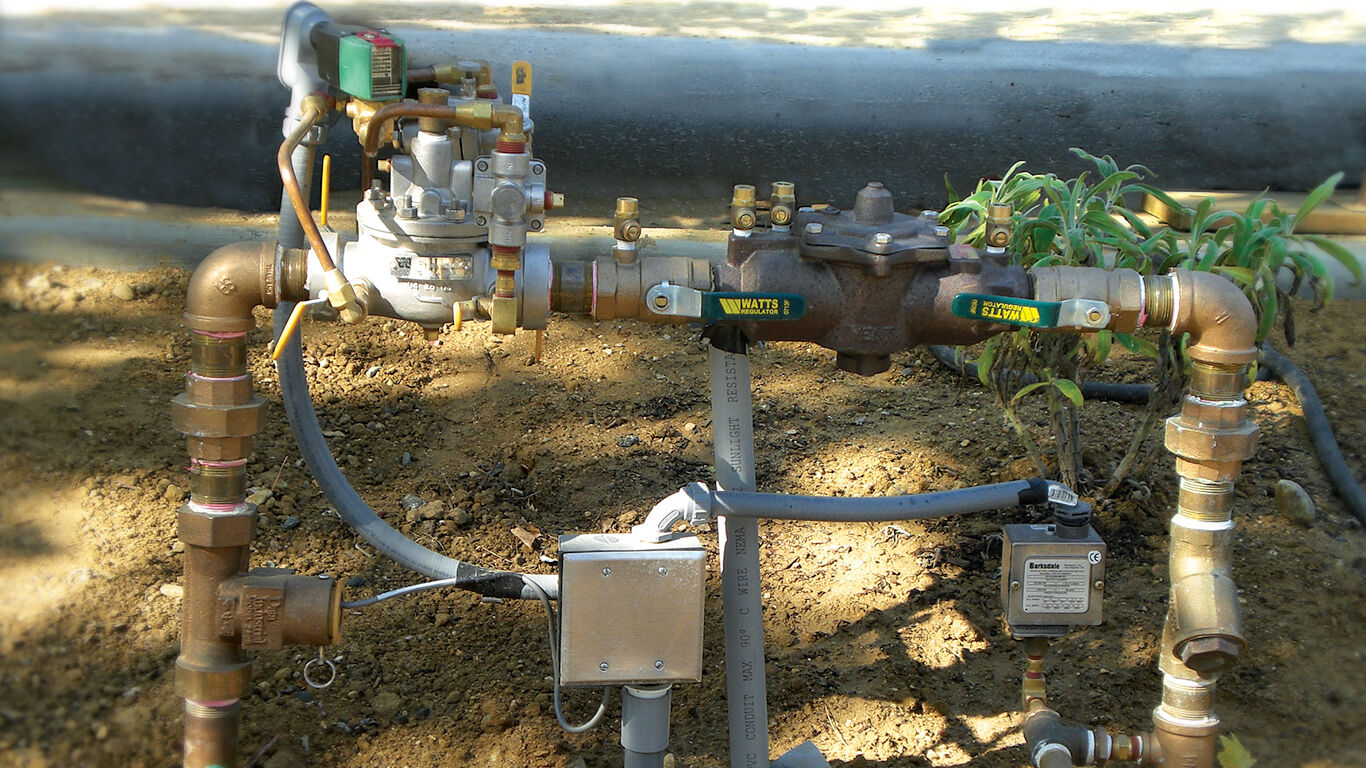
Step 7: Installing the Timer and Backflow Preventer
Installing a timer and backflow preventer is an important step in setting up your drip irrigation system. The timer allows you to automate the watering schedule, while the backflow preventer ensures the safety of your water supply. Follow these steps to install them effectively:
- Choose a Suitable Location: Select a suitable location for the timer and backflow preventer, preferably near the water source or mainline connection. Ensure the area is easily accessible and protected from the elements.
- Attach the Backflow Preventer: Install the backflow preventer onto the mainline or directly onto the outdoor faucet, following the manufacturer’s instructions. This device will prevent any contamination of the water supply by ensuring that water only flows in one direction.
- Connect the Timer: Attach the timer to the backflow preventer or the mainline, depending on the setup of your drip irrigation system. Follow the manufacturer’s instructions to properly connect and mount the timer.
- Program the Timer: Set the timer according to your watering schedule and the needs of your plants. Some timers offer multiple programming options, allowing you to set different watering durations and frequencies for different zones.
- Connect Power Source (if applicable): If your timer requires a power source, such as batteries or an electrical outlet, make the necessary connections. Ensure the timer is powered and functioning correctly.
- Perform a Test Run: Run a test watering cycle using the timer to ensure that it functions as intended. Verify that water is being dispensed through the emitters or sprinklers, and that the timer accurately controls the duration and frequency of watering.
- Make Adjustments if Needed: If the timer settings or watering schedule need adjustments, make the necessary changes based on your observation during the test run. This will help ensure that your plants receive adequate water without any wastage.
Following these steps will ensure the proper installation of the timer and backflow preventer for your drip irrigation system. Once you have completed this step, you are now ready for the next step: flushing and testing the system.
Step 8: Flushing and Testing the System
After installing all the components of your drip irrigation system, it’s important to flush and test the system to ensure proper operation and optimal performance. Follow these steps to effectively flush and test your system:
- Turn on the Water Supply: Start by turning on the water supply to allow water to flow through the system.
- Flush the System: Open each valve or zone one at a time to allow water to flush through the tubing and emitters. This will help remove any debris or dirt that might have accumulated during the installation process.
- Check for Proper Operation: Observe each zone to ensure that water is being distributed evenly to all the plants. Make sure there are no leaks, clogged emitters, or uneven water flow. Adjust or replace any components as needed.
- Check the Timer: Verify that the timer is functioning correctly and initiating watering cycles according to your programmed settings. Ensure that the timer turns on and off as intended.
- Inspect for Leaks: Carefully inspect all connections, fittings, and valves for any signs of leaks. Tighten any loose fittings or replace any faulty components to prevent water wastage and potential damage to your system.
- Adjust Watering Schedule: Evaluate the watering schedule and make any necessary adjustments based on the needs of your plants and the climate conditions. Monitor how the plants respond to the irrigation and if any changes are required.
By following these steps, you will ensure that your drip irrigation system is functioning properly and delivering water effectively to your plants. Regularly monitor and maintain the system to address any issues that may arise and optimize its performance.
Now that you have flushed and tested your system, you’re almost done. The final step is to adjust and fine-tune the system to ensure optimal water distribution and plant health.
Step 9: Adjusting and Fine-Tuning the System
After flushing and testing your drip irrigation system, it’s important to make any necessary adjustments and fine-tune the system to ensure optimal water distribution and plant health. Follow these steps to effectively adjust and fine-tune your system:
- Observe Plant Response: Monitor how your plants are responding to the irrigation. Look for signs of over or under-watering, such as wilting or excessive runoff. Adjust the watering duration and frequency accordingly to meet the specific needs of each plant.
- Check Water Coverage: Ensure that all plants within each zone are receiving adequate water coverage. Make sure there are no dry spots or areas where water is pooling. Adjust the placement of emitters or sprinklers if necessary to achieve consistent water distribution.
- Monitor Soil Moisture: Regularly check the moisture level of the soil in different zones. Use a moisture meter or simply dig a small hole to determine if more or less water is needed. Adjust the watering schedule to maintain balanced soil moisture levels.
- Inspect and Clean Emitters: Regularly inspect the drip emitters to ensure they are not clogged or emitting water unevenly. If necessary, clean or replace any clogged emitters to maintain optimal water flow and distribution.
- Consider Seasonal Adjustments: Adjust the watering schedule and duration based on the changing seasons and weather conditions. Plants may require more water during hot and dry periods and less during cooler and wetter seasons.
- Monitor the Timer: Regularly check the timer to ensure it is functioning correctly. Verify that it is accurately maintaining the programmed watering schedule and making any necessary adjustments as needed.
- Maintain the System: Routinely inspect the system for any signs of wear or damage. Replace any worn-out components, repair any leaks, and clean or unclog emitters as necessary. Proper maintenance will help keep your system running smoothly.
- Monitor Water Usage: Keep track of your water consumption to ensure you are using water efficiently and not wasting it. Adjust the watering schedule and system settings to minimize water usage while still meeting the needs of your plants.
By following these steps and regularly fine-tuning your drip irrigation system, you can ensure that your plants receive the right amount of water at the right time. The adjustments and fine-tuning process will help optimize water efficiency, promote healthy plant growth, and save both time and resources.
Congratulations! You have successfully completed the installation, testing, and adjustment of your drip irrigation system. Enjoy the benefits of a well-irrigated garden and the convenience of an automated watering system!
Conclusion
Congratulations on successfully installing your drip irrigation system! By following the step-by-step process outlined in this guide, you have now set up a system that will efficiently deliver water to your plants, promoting their health and saving you time and resources.
Drip irrigation offers numerous benefits, including water efficiency, reduced weed growth, improved plant health, flexibility, time and labor savings, and an eco-friendly approach. With its targeted water delivery system, you can ensure that your plants receive the right amount of water they need, minimizing wastage and maximizing growth.
Remember to regularly monitor and adjust your system to meet the specific needs of your plants and changing environmental conditions. Fine-tuning your drip irrigation system will help ensure optimal water distribution, prevent issues such as over or under-watering, and promote the health and vitality of your garden.
It’s essential to perform routine maintenance, such as checking for leaks, cleaning or replacing emitters, and monitoring your water usage. By doing so, you can keep your system running efficiently and prolong its lifespan.
Installing a drip irrigation system is a worthwhile investment that will not only improve the health and appearance of your garden but also contribute to water conservation efforts. With proper usage and maintenance, your garden will thrive while minimizing water waste.
Now that you have completed the installation and setup of your drip irrigation system, step back and admire the beautiful impact it will have on your garden. Sit back, relax, and enjoy the benefits of efficient and effective plant irrigation!