Home>Gardening Techniques>DIY Projects>How To Install A Drip Irrigation System For Trees

DIY Projects
How To Install A Drip Irrigation System For Trees
Modified: January 22, 2024
Learn how to easily install a drip irrigation system for your trees with our step-by-step DIY guide. Save water and keep your trees healthy!
(Many of the links in this article redirect to a specific reviewed product. Your purchase of these products through affiliate links helps to generate commission for Chicagolandgardening.com, at no extra cost. Learn more)
Table of Contents
- Introduction
- Benefits of Drip Irrigation for Trees
- Tools and Materials Needed
- Step 1: Planning the System
- Step 2: Gathering Water Supply
- Step 3: Assembling the Drip Irrigation Kit
- Step 4: Installing the Mainline
- Step 5: Installing the Submain
- Step 6: Placement of Emitters
- Step 7: Adding a Pressure Regulator
- Step 8: Flushing the System
- Step 9: Testing the System
- Step 10: Mulching and Maintenance
- Conclusion
Introduction
Are your trees not getting enough water? Are you tired of spending hours manually watering them? If so, it’s time to consider installing a drip irrigation system for your trees. Drip irrigation is a highly efficient watering method that delivers water directly to the roots of the plants, minimizing water wastage and ensuring better plant health. In this article, we will guide you through the process of installing a drip irrigation system specifically designed for trees.
Drip irrigation offers several benefits over traditional watering methods. First and foremost, it conserves water by delivering it directly to the root zone, reducing evaporation and runoff. This water-saving technique is particularly important in areas with water restrictions or dry climates. Additionally, drip irrigation helps prevent water-related diseases and pest infestations, as the foliage remains dry. Furthermore, it saves you time and effort by automating the watering process, allowing you to focus on other garden tasks.
To install a drip irrigation system for your trees, you will need a few necessary tools and materials. These include a drip irrigation kit, which typically consists of tubes, emitters, connectors, and stakes. You will also need a water source, such as a garden hose or a nearby water supply. Other required tools include a hole puncher, wire cutters, and a shovel for digging holes.
In the following sections, we will walk you through the step-by-step process of installing a drip irrigation system for your trees. From planning the system to testing and maintenance, we’ve got you covered. So, grab your tools and let’s get started on creating a more efficient and effective watering solution for your trees.
Benefits of Drip Irrigation for Trees
Drip irrigation offers numerous advantages when it comes to watering trees. Let’s explore some of the key benefits of using this method:
- Water Efficiency: Drip irrigation is highly efficient in delivering water directly to the root zone of trees. Unlike traditional overhead sprinklers, which can result in significant water loss due to evaporation and runoff, drip irrigation minimizes water wastage. This efficient water delivery system ensures that trees receive the necessary moisture without excessive water use.
- Plant Health: By providing water directly to the roots, drip irrigation promotes healthier tree growth. The controlled and consistent delivery of water helps prevent overwatering, which can lead to root rot and other water-related diseases. Additionally, drip irrigation keeps the foliage dry, reducing the risk of fungal diseases and pest infestations.
- Time and Effort Savings: Installing a drip irrigation system for your trees can save you considerable time and effort. Once the system is set up, it eliminates the need for manual watering. Instead, the system can be automated, allowing you to focus on other garden tasks while ensuring that your trees receive the appropriate amount of water.
- Flexibility: Drip irrigation systems offer flexibility in terms of water delivery and customization. With adjustable emitters, you can control the flow rate of water to individual trees, ensuring that different species or sizes of trees receive the appropriate amount of water. This level of control allows you to optimize water usage and tailor the irrigation system to the specific needs of your trees.
- Conservation and Sustainability: Water conservation is an important aspect of gardening, especially in regions with water scarcity or restrictions. Drip irrigation is a sustainable watering method that helps conserve water. By minimizing water runoff and evaporation, it reduces water consumption and supports environmental conservation efforts.
By harnessing the benefits of drip irrigation for your trees, you can promote healthy growth, conserve water, and save time and effort. Now that you understand the advantages of this watering technique, let’s move on to the next section, where we will discuss the necessary tools and materials needed for installing a drip irrigation system for your trees.
Tools and Materials Needed
To install a drip irrigation system for your trees, you will need the following tools and materials:
- Drip Irrigation Kit: Purchase a drip irrigation kit specifically designed for trees. These kits typically include tubing, emitters, connectors, stakes, and other necessary components for setting up the system. Ensure that the kit has enough length to reach all your trees and includes a variety of emitter types to accommodate different water requirements.
- Garden Hose: You will need a garden hose to connect your drip irrigation system to the water source. Make sure the hose is long enough to reach from the water supply to your trees.
- Water Source: Identify a water source near your trees, such as an outdoor faucet or an accessible water supply. Ensure that the water source has a steady flow and can be easily connected to the drip irrigation system.
- Hole Puncher: A hole puncher is necessary for making holes in the drip irrigation tubing. This tool allows you to insert emitters into the tubing to deliver water to the trees.
- Wire Cutters: Wire cutters are useful for cutting the drip irrigation tubing to the desired lengths. Make sure your wire cutters are sharp and capable of cutting through the tubing material easily.
- Shovel: A shovel will be required for digging small holes in the ground to bury the drip irrigation tubing and secure it in place. Opt for a sturdy shovel that can withstand digging through soil or any obstacles in the way.
- Tape Measure: Use a tape measure to measure distances accurately and ensure proper spacing between the emitters and trees. This will help distribute the water evenly and efficiently across all your trees.
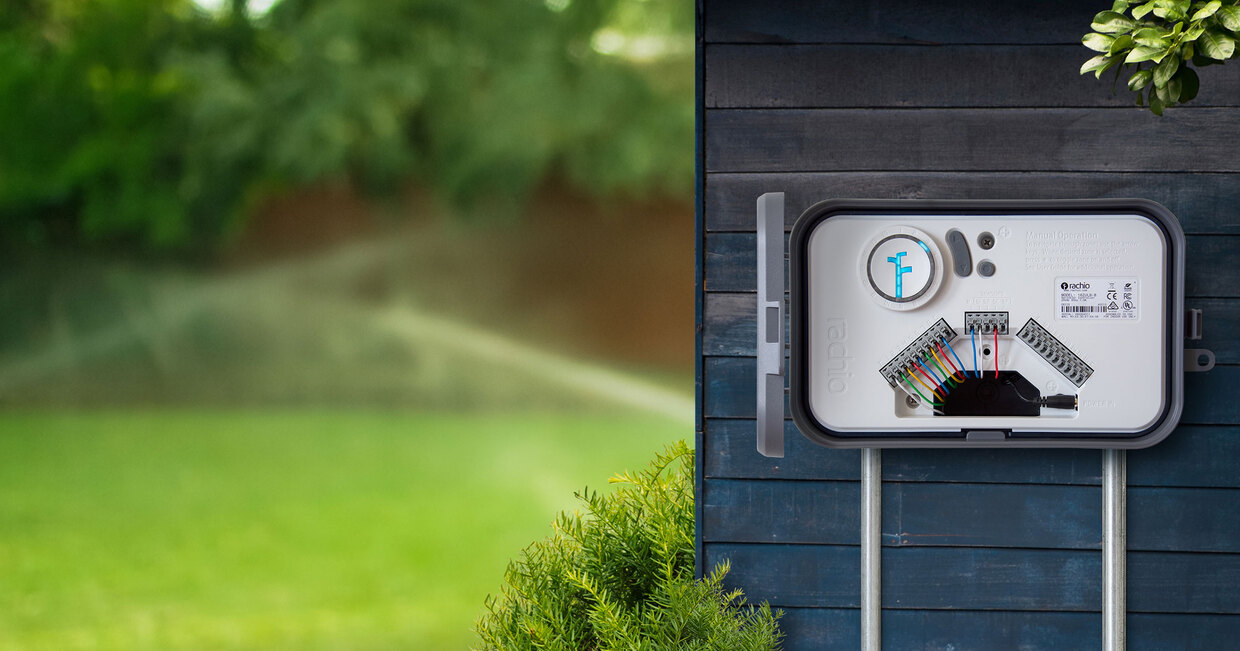
- Timer/Controller: Consider investing in a timer or controller for your drip irrigation system. This will allow you to automate the watering schedule and ensure consistent and efficient water delivery to your trees.
Having these tools and materials ready before you start the installation process will help streamline the process and ensure that you have everything you need to set up a successful drip irrigation system for your trees.
Step 1: Planning the System
Before you begin installing your drip irrigation system for trees, it’s essential to plan and design the layout of the system. This will ensure that you optimize water distribution and meet the specific needs of your trees. Follow these steps to effectively plan your system:
- Evaluate your tree’s water requirements: Different tree species have varying water requirements. Research the specific watering needs of your trees to determine the appropriate amount of water they need. Consider factors such as tree size, age, and local climate conditions. This information will help you determine the number and type of emitters to use for each tree.
- Measure the area: Measure the distance between your trees to determine the amount of tubing and connectors you will need for your drip irrigation system. Ensure that you have accurate measurements to avoid any wastage or shortages of materials.
- Map out your system: Create a rough sketch or map of your garden area, indicating the locations of your trees and the water source. Use this map to plan the layout of your drip irrigation system, considering factors such as the length of tubing, the position of the mainline, and the placement of the emitters.
- Consider the water source: Evaluate the proximity of your water source to the trees. Determine if you will need additional hoses or connectors to reach all the trees in your garden. Ensure that the connecting hose is long enough and can provide adequate water pressure to sustain the drip irrigation system efficiently.
- Calculate water flow: Determine the flow rate of your water source. This will help you select the appropriate drip irrigation kit that can handle the available water flow. Consider any potential restrictions or limitations in your water supply to ensure effective water delivery.
- Plan for future growth: Anticipate the growth of your trees and their root systems. Leave room for expansion and future additions to your drip irrigation system. Consider the spacing between trees and make adjustments to your layout accordingly.
Taking the time to plan the layout of your drip irrigation system will save you effort and resources in the long run. It will ensure that you have a well-designed system that meets the specific watering requirements of your trees. Once you have completed the planning phase, you are ready to move on to the next step: gathering water supply.
Step 2: Gathering Water Supply
Before you can start installing your drip irrigation system for trees, you need to ensure a reliable water supply. Follow these steps to gather the necessary water supply for your system:
- Locate the water source: Identify a suitable water source near your trees, such as an outdoor faucet, a rain barrel, or a nearby water tank. Ensure that the water source is easily accessible and can provide a steady flow of water.
- Check water pressure: Determine the water pressure of your water source. You can use a pressure gauge, which is available at most hardware stores, to measure the pressure. Ideally, the water pressure should be between 10 and 40 pounds per square inch (psi) for a drip irrigation system to function optimally.
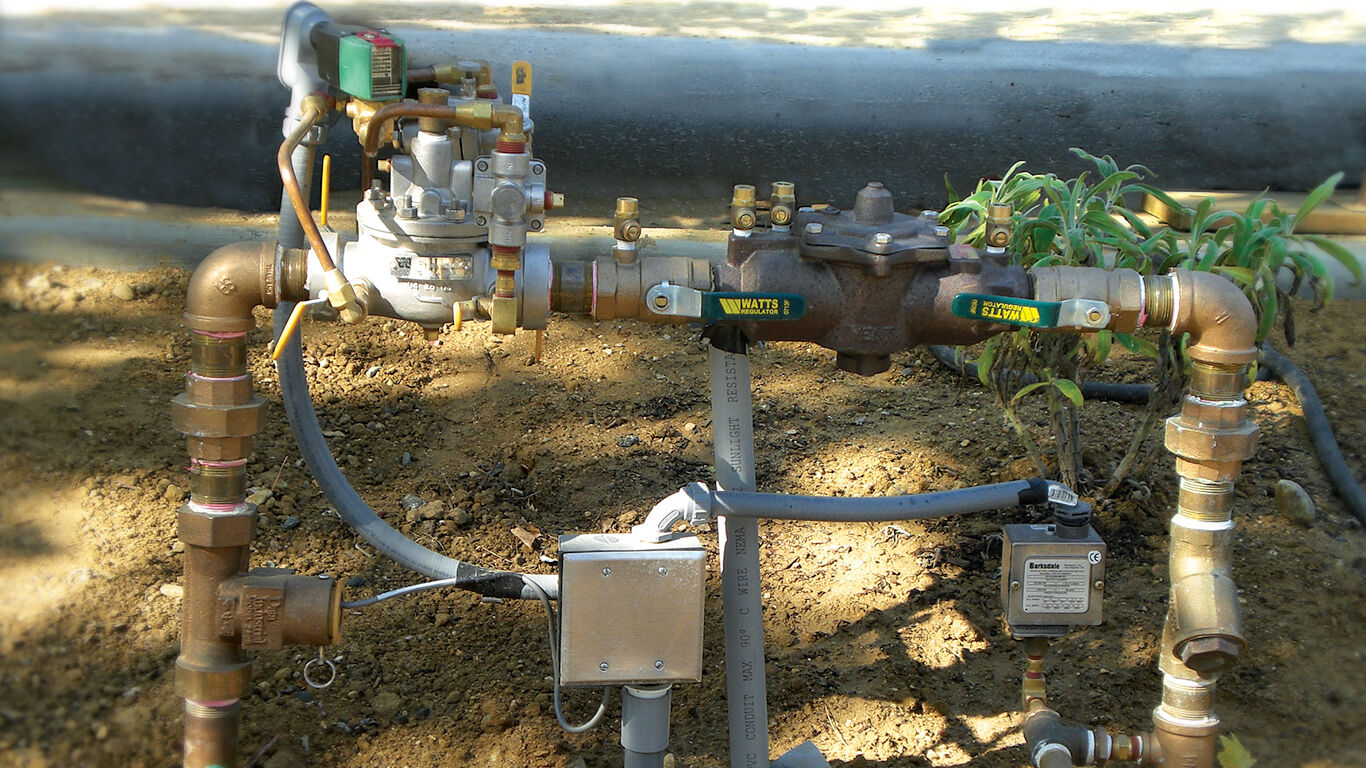
- Add a backflow preventer: Install a backflow preventer or a check valve to prevent the water in your irrigation system from flowing back into the main water supply. This helps to maintain the cleanliness and prevent contamination of the water source.
- Connect the hose: Connect your garden hose to the water source. Use a hose connector or adapter if needed to ensure a secure and leak-free connection. Make sure the hose is long enough to reach all the trees in your garden.
- Test the water flow: Turn on the water supply and check the flow of water from the hose. Ensure that the water flow is sufficient to meet the requirements of your drip irrigation system. If the flow is too low, you may need to consider using a larger diameter hose or adding a booster pump to increase the water pressure.
- Remove any debris: Check the water for any debris, such as leaves, twigs, or sediment. Remove any obstructions that could clog the drip irrigation system. Installing a filter at the water source can help prevent debris from entering the system.
By gathering a reliable water supply, you ensure that your drip irrigation system for trees will have the necessary resources to provide adequate water to your plants. With a secure water source in place, you can move on to the next step: assembling the drip irrigation kit.
Step 3: Assembling the Drip Irrigation Kit
Now that you have gathered the necessary tools and materials, it’s time to assemble your drip irrigation kit. Follow these steps to ensure a proper setup:
- Read the instructions: Carefully read the instructions provided with your drip irrigation kit. Familiarize yourself with the different components, including the tubes, emitters, connectors, stakes, and any other included accessories.
- Cut the mainline tubing: Measure and cut the mainline tubing according to the layout you planned in step 1. Use your wire cutters to make clean, straight cuts.
- Connect the fittings: Attach the connectors to the ends of the mainline tubing. These connectors will allow you to connect additional lengths of tubing as needed to reach your trees.
- Lay out the tubing: Position the mainline tubing along the planned path, making sure it reaches each tree in your system. Use stakes or wire clips to secure the tubing and prevent it from shifting or moving.
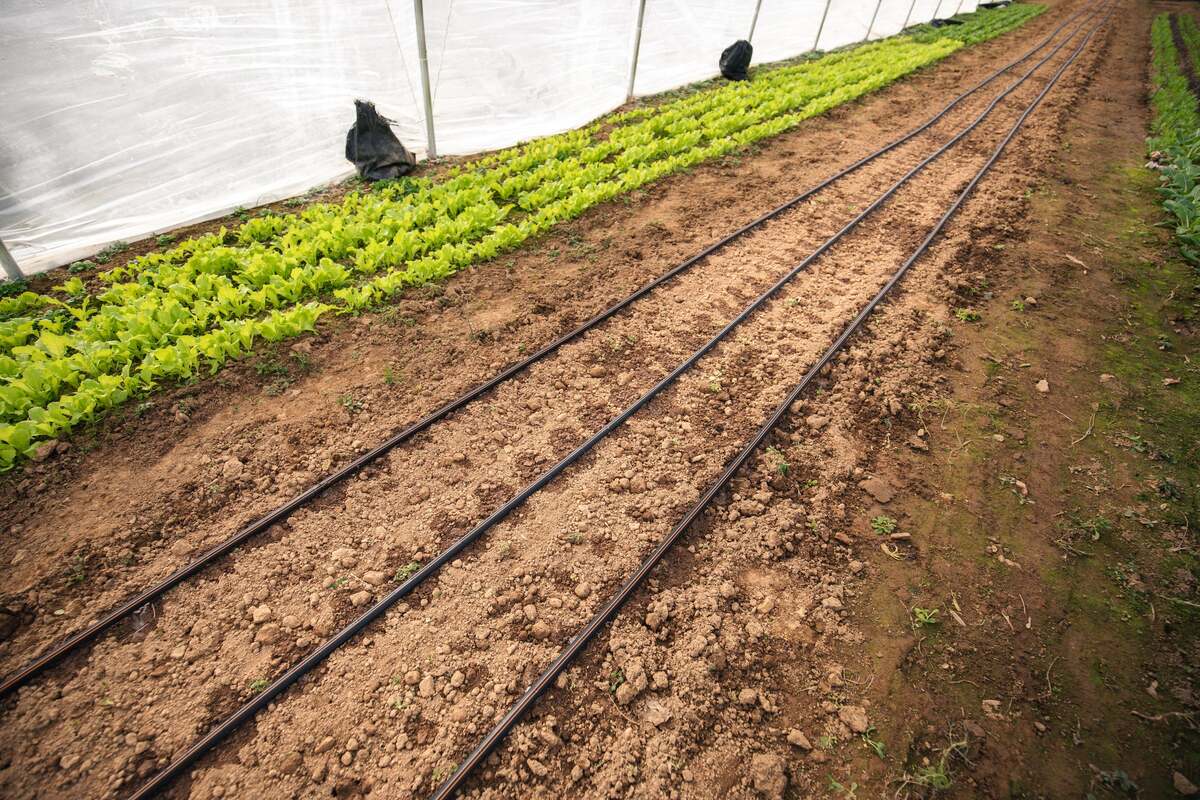
- Install the submain tubing: If your system requires submain tubing (thicker tubing that distributes water to individual trees or zones), connect it to the mainline tubing and lay it out along the desired route.
- Insert emitters: Use a hole puncher to make small holes in the tubing where you want to install emitters. Insert emitters directly into these holes, ensuring a secure fit. The number and spacing of emitters will depend on the individual water requirements of your trees.
- Secure the emitters: Use stakes or clips to secure the emitters in place and prevent them from moving or detaching.
- Check for leaks: After assembling the drip irrigation system, turn on the water supply and check for any leaks or drips. Make any necessary adjustments or repairs before proceeding.
Assembling the drip irrigation kit is an important step to ensure proper water distribution to your trees. Take your time and follow the instructions carefully to achieve an efficient and effective setup. Once you have completed this step, you can move on to the next section: installing the mainline tubing.
Step 4: Installing the Mainline
With the drip irrigation kit assembled, it’s time to move on to installing the mainline tubing. The mainline is the primary tubing that connects the water source to the rest of the system. Follow these steps to ensure a proper installation:
- Position the mainline: Lay out the mainline tubing along the planned path, ensuring it reaches each tree in your system. Keep in mind the spacing and distance between trees to ensure adequate coverage.
- Attach the mainline to the water source: Connect one end of the mainline tubing to the water source, using the appropriate connector or adapter. Ensure a secure fit to avoid leaks.
- Bury the mainline: If desired, you can bury the mainline tubing to protect it and enhance the aesthetics of your garden. Use a shovel to dig a shallow trench along the mainline’s path, making sure it’s deep enough to accommodate the tubing.
- Secure the mainline: Use stakes or wire clips to secure the mainline tubing in place. This will prevent it from shifting or moving over time. Place the stakes or clips at regular intervals, ensuring stability along the entire length of the tubing.
- Test the water flow: After installing the mainline, turn on the water supply and check the flow of water through the tubing. Inspect for any leaks or irregularities in the water distribution. Make any necessary adjustments or repairs.
Remember, the mainline is the backbone of your drip irrigation system, carrying water from the source to the rest of the system. Therefore, it’s important to install it correctly to ensure proper water flow and distribution to your trees. Once the mainline is in place, you can proceed to the next step: installing the submain tubing (if required) and placing the emitters.
Step 5: Installing the Submain
In this step, we will focus on installing the submain tubing, if required, and placing the emitters along the mainline. Follow these steps to ensure proper installation:
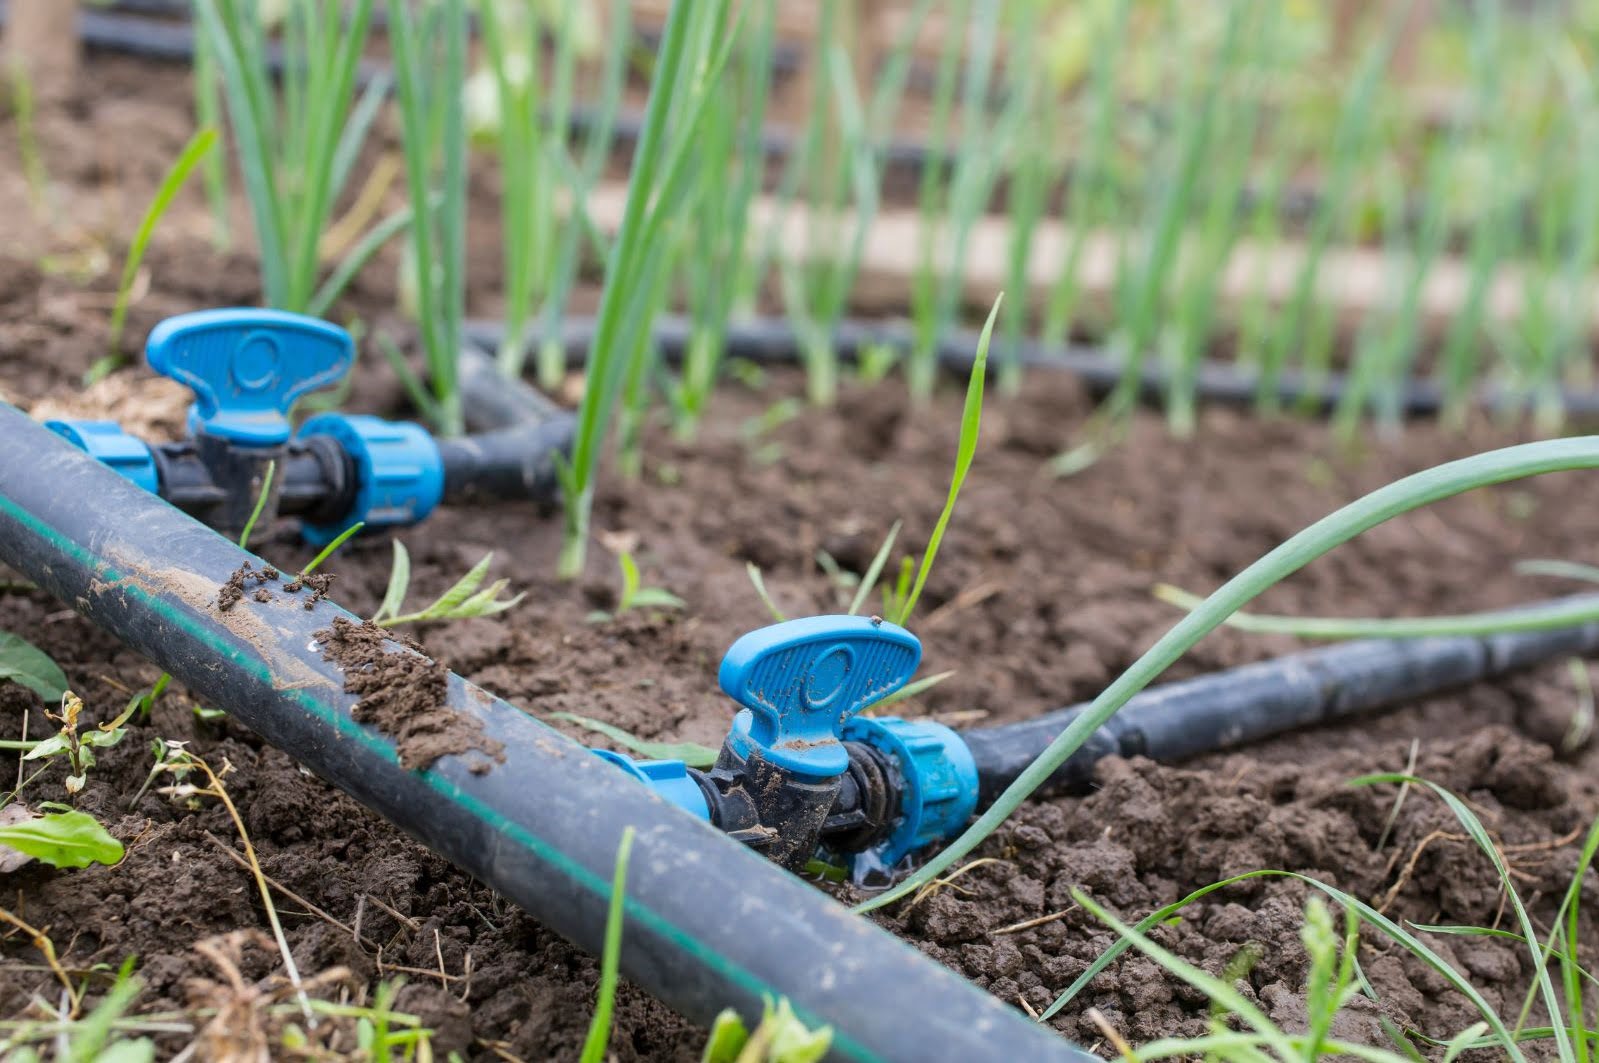
- Connect the submain tubing: If your drip irrigation system requires a submain tubing, such as when you have multiple zones or sections of trees, connect it to the mainline tubing using the appropriate connectors. Make sure the connections are secure to avoid any leaks.
- Lay out the submain tubing: Position the submain tubing along the desired route, ensuring it reaches all the trees in the specific zone. Keep in mind the spacing and distance between trees for optimal water distribution.
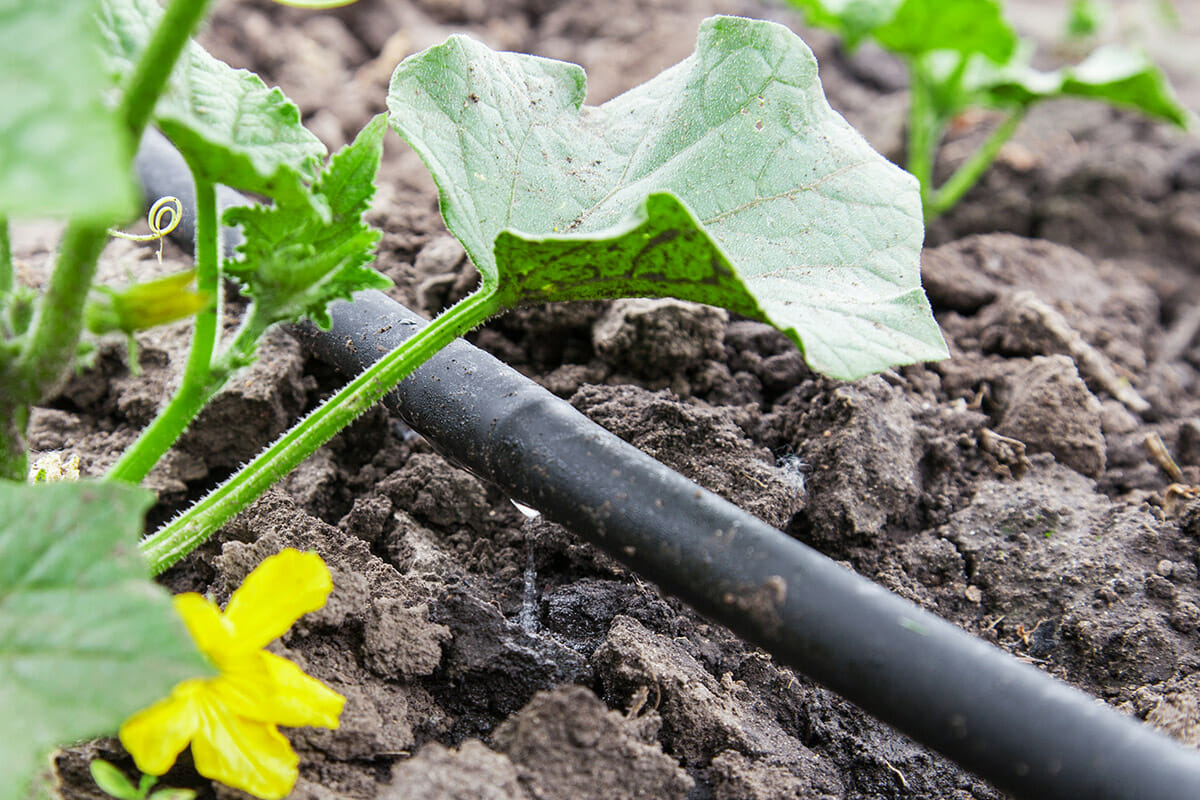
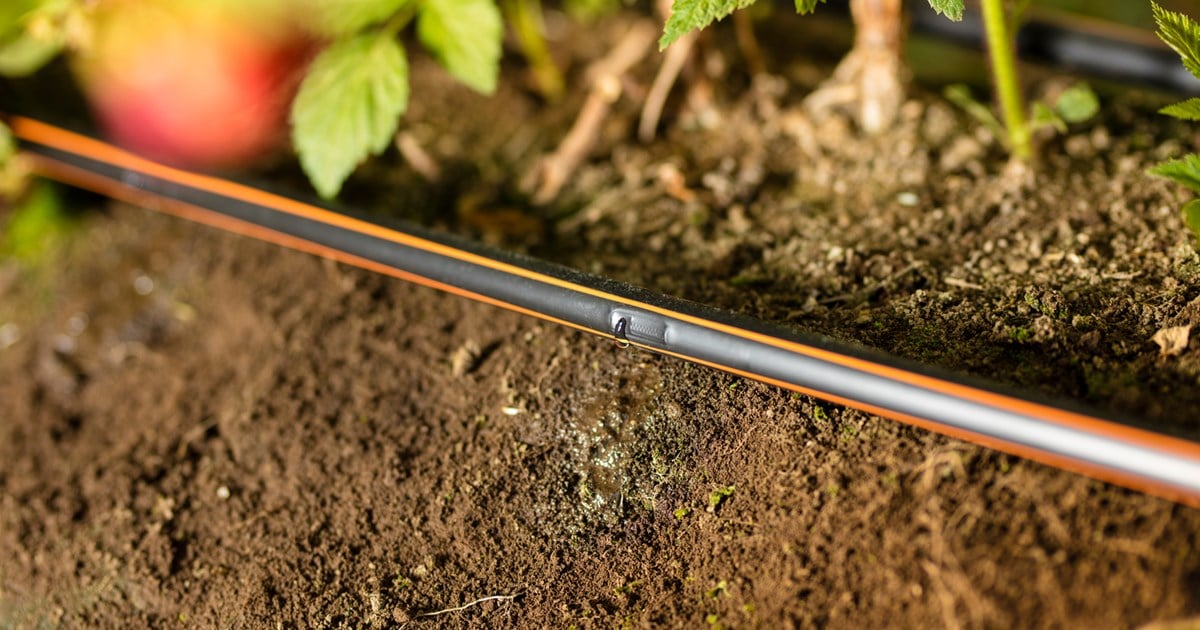
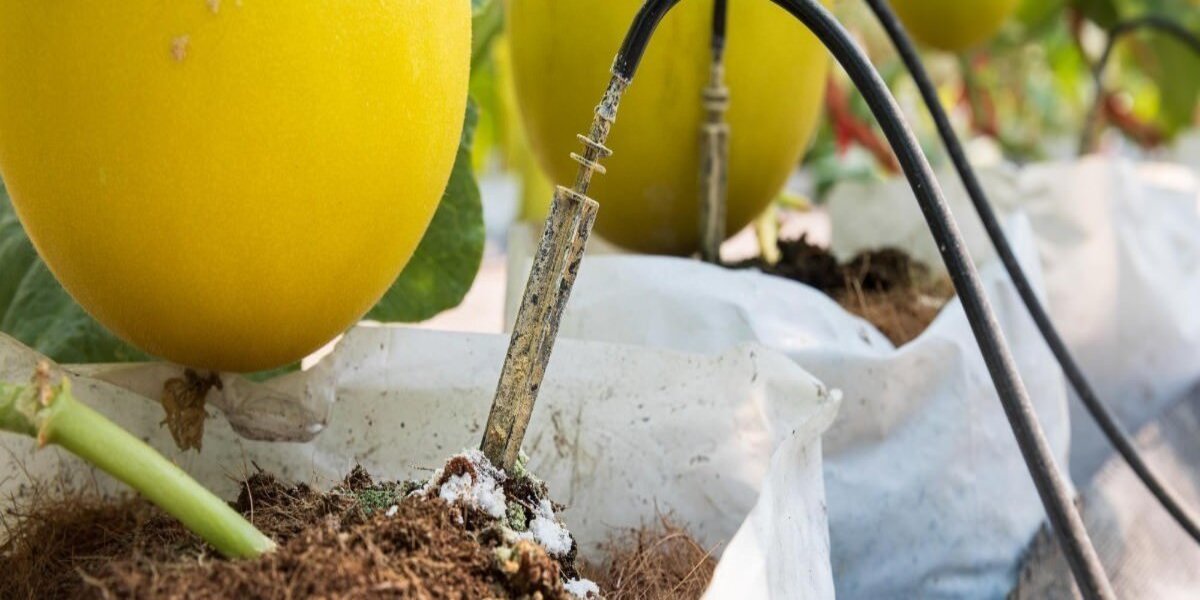
- Attach emitters: Using a hole puncher, make small holes in the submain tubing where you want to place the emitters. Insert the emitters into these holes, ensuring a snug fit. The number and spacing of emitters will depend on the watering needs of the individual trees.
- Secure the emitters: Use stakes or clips to secure the emitters in place, preventing them from shifting or detaching. This will ensure that water is delivered directly to the root zones of the trees.
- Flush the system: Before proceeding further, flush the drip irrigation system to remove any debris or blockages that may have accumulated during the installation process. Open the end of the submain tubing and allow water to flow freely, clearing out any obstructions.
- Test the water flow: Turn on the water supply and check the flow of water through the submain tubing and emitters. Ensure that the water is evenly distributed and that all emitters are functioning properly. If necessary, adjust the water flow or reposition the emitters for optimal coverage.
Installing the submain tubing and placing the emitters is crucial to effectively deliver water to your trees. Take your time to ensure proper positioning and attachment of the emitters, as this will directly impact the health and growth of your trees. With the submain tubing and emitters in place, you can now move on to the next step: adding a pressure regulator (if necessary) and completing the system installation.
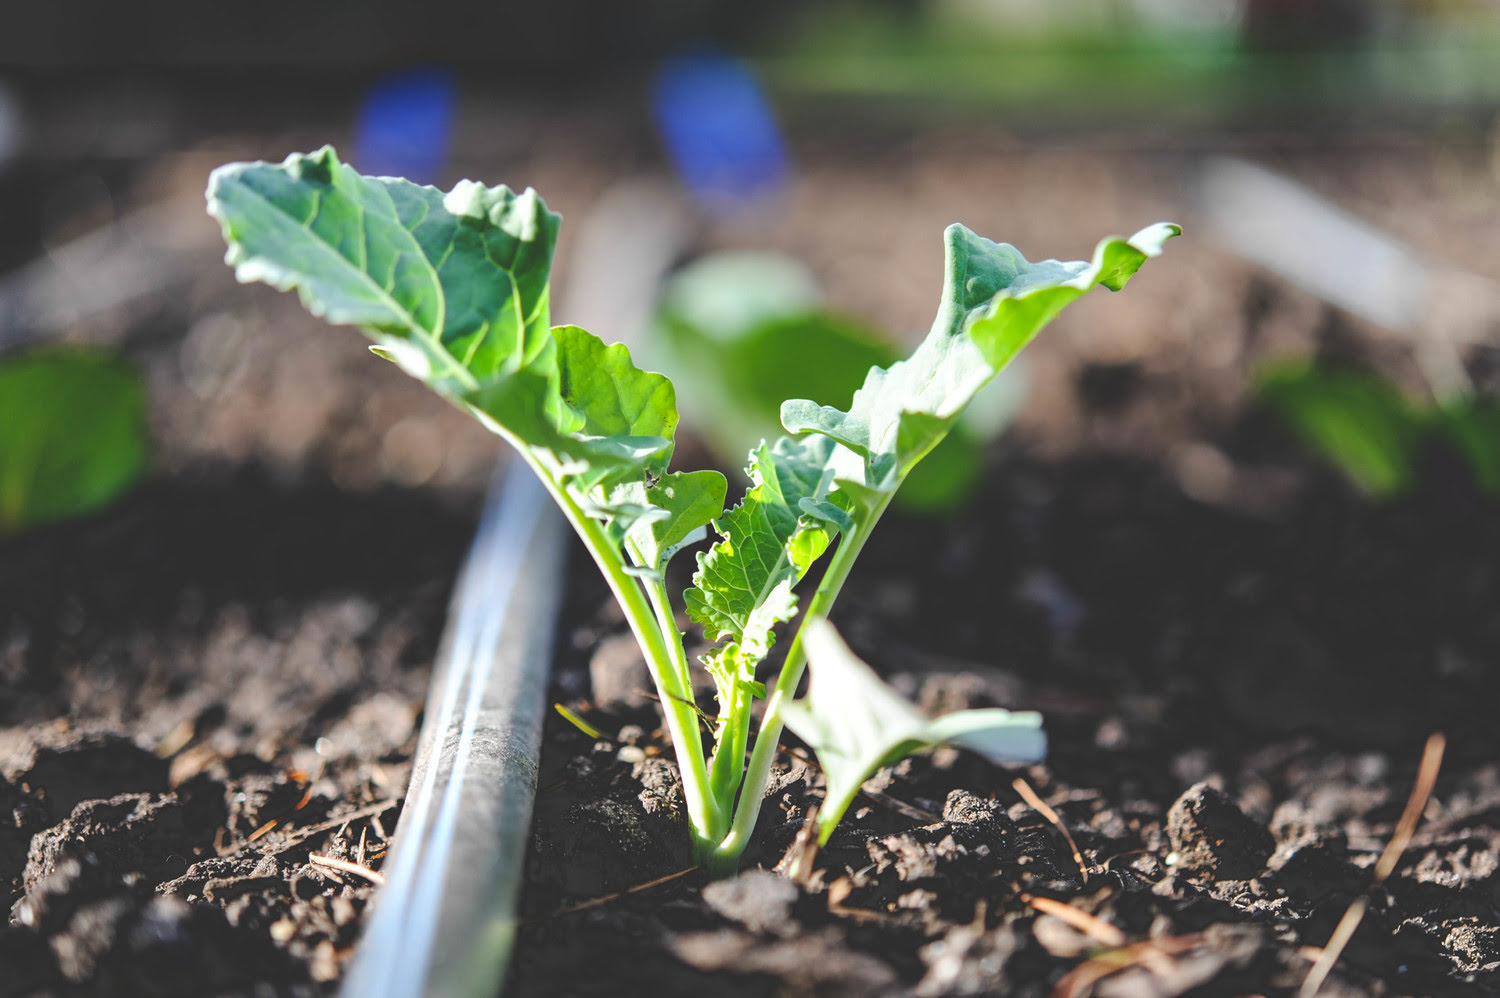
Step 6: Placement of Emitters
In this step, we will focus on the precise placement of emitters along the mainline and submain tubing to ensure proper water distribution to your trees. Follow these steps for optimal emitter placement:
- Consider the water needs of each tree: Evaluate the specific water requirements of each tree in your garden. Some trees may need more water than others, depending on their size, age, and species. This information will help you determine the number and type of emitters to install for each tree.
- Measure the distance between trees: Measure the distance between each tree and plan the spacing of the emitters accordingly. Generally, emitters should be placed around the drip line of the tree, where the canopy extends to ensure water reaches the root zone effectively.
- Use adjustable emitters: Consider using adjustable emitters that allow you to control the flow and distance of water. This will accommodate the varying water needs of your trees and ensure efficient water distribution.
- Install emitters at the base of the trees: Insert the emitters into the mainline and submain tubing at the appropriate locations near the base of each tree. Ensure a snug fit to avoid any leaks or dislodgment of the emitters.
- Monitor water flow: Turn on the water supply and observe the flow of water from each emitter. Ensure that the flow is consistent and that the water is reaching the root zones of the trees effectively. Adjust the flow or reposition the emitters if necessary to achieve optimal coverage.
- Consider mulch placement: If you plan to apply mulch around the base of your trees, ensure that the emitters are placed at a suitable distance from the trunk to prevent interference with the mulch layer. This will ensure that water is delivered directly to the root zone without being absorbed by the mulch.
Proper placement of emitters is crucial for delivering water to the root zones of your trees effectively. Take into account the specific needs of each tree and ensure adequate spacing and coverage with the emitters. With the emitters in place, you are one step closer to enjoying the benefits of a well-functioning drip irrigation system for your trees.
Step 7: Adding a Pressure Regulator
In this step, we will focus on adding a pressure regulator to your drip irrigation system. A pressure regulator is crucial for maintaining a consistent and optimal water flow, ensuring the longevity and efficiency of your system. Follow these steps to properly install a pressure regulator:
- Choose the right pressure regulator: Select a pressure regulator that is compatible with your water supply and suitable for the flow rate of your system. It is important to choose a pressure regulator that matches the specific needs of your trees and their watering requirements.
- Identify the optimal location: Locate a suitable spot in your drip irrigation system to install the pressure regulator. This is typically after the mainline and before the submain or branch lines.
- Shut off the water supply: Before installing the pressure regulator, make sure to shut off the water supply to the system to avoid any water waste or leakage.
- Connect the pressure regulator: Attach the pressure regulator to the mainline tubing, using the appropriate fittings or connectors. Ensure a secure and leak-free connection.
- Adjust the pressure: Follow the manufacturer’s instructions to adjust the pressure regulator to the desired setting. This will depend on the specific water requirements of your trees and the flow rate of your system.
- Turn on the water supply: Once the pressure regulator is properly installed and adjusted, turn on the water supply and observe the flow of water through the system. Ensure that the pressure regulator is effectively maintaining the desired pressure level.
- Check for leaks: Inspect the connections and the pressure regulator for any signs of leakage. Make sure all fittings and connections are tightened properly to prevent any water loss.
Adding a pressure regulator to your drip irrigation system is essential for ensuring a consistent and optimal water flow. It helps protect the system components from excessive pressure and extends the lifespan of your system. With the pressure regulator in place, you can move on to the next step: flushing the system to remove any debris.
Step 8: Flushing the System
Flushing the system is an important step in ensuring the cleanliness and proper functioning of your drip irrigation system. Flushing removes any debris, sediment, or air bubbles that may have accumulated during the installation process. Follow these steps to effectively flush the system:
- Close all emitters: Before flushing the system, make sure to close all emitters by turning them off or plugging them temporarily. This will prevent water from flowing through the emitters during the flushing process.
- Open the end of the system: Locate the end of the mainline or submain tubing, and open it to allow water to flow freely. You can use a hose, bucket, or any other suitable container to catch the flushed water.
- Turn on the water supply: With the end of the system open, turn on the water supply to allow water to flow through the tubing. Let the water run for a few minutes to flush out any debris or sediment that may be present in the system.
- Check for debris: Monitor the flow of water and check for any debris that may come out during the flushing process. If you notice any large debris or particles, manually remove them from the system to prevent clogging.
- Watch for air bubbles: During the flushing process, observe the flow of water for any air bubbles. Air bubbles can indicate air pockets in the system that can obstruct the flow of water. Gently tap or massage the tubing to release any trapped air.
- Check for leaks: While the system is flushing, inspect all connections and fittings for any signs of leakage. Tighten any loose connections to ensure a snug fit and prevent any water loss.
Flushing the system at the beginning and periodically throughout the watering season helps maintain the integrity and efficiency of your drip irrigation system. It removes any potential obstructions and ensures a clean and uninterrupted flow of water to your trees. With the system properly flushed, you can proceed to the next step: testing the system to ensure proper functioning and coverage.
Step 9: Testing the System
Testing your drip irrigation system is a crucial step to ensure that it is functioning properly and delivering water efficiently to your trees. Follow these steps to test your system and make any necessary adjustments:
- Turn on the water supply: Start by turning on the water supply to the drip irrigation system. Allow water to flow through the tubing and emitters.
- Inspect for leaks: Observe the connections and emitters for any signs of leakage. Check all fittings and connections, tightening them if needed to prevent any water loss.
- Check the water flow from each emitter: Examine the flow of water from each emitter. Ensure that it is consistent and reaching the root zones of the trees. Adjust the flow if necessary by using emitters with different flow rates or adjusting the existing ones.
- Observe the coverage: Evaluate the coverage of your system by checking if the water is reaching all the trees in your garden. Make adjustments to the positioning of emitters or add additional emitters, if needed, to ensure adequate coverage.
- Test the run time: Determine the optimal run time for your system by observing the moisture level around your trees. Keep in mind the specific watering needs of your trees and adjust the run time accordingly.
- Check for dry spots or overwatering: Look for any dry spots or areas where water may be pooling excessively. Adjust the positioning of emitters and the run time to address any uneven watering patterns.
- Inspect for clogged emitters: Regularly check the emitters for any signs of clogging. Clean or replace any clogged emitters to ensure a steady flow of water.
- Monitor the system: Periodically monitor the system throughout the watering season. Make any necessary adjustments to maintain optimal water flow and coverage as the trees and their water requirements change.
Testing your drip irrigation system allows you to identify any issues and make necessary adjustments to ensure optimal water distribution to your trees. Regular monitoring and maintenance will help keep your system in good working order and ensure the health and growth of your trees. With the system tested and optimized, you are ready to move on to the final step: mulching and ongoing maintenance.
Step 10: Mulching and Maintenance
Mulching and regular maintenance are essential steps to ensure the long-term success of your drip irrigation system and the health of your trees. Follow these steps to effectively mulch and maintain your system:
- Mulch around the base of the trees: Apply a layer of organic mulch, such as wood chips or straw, around the base of your trees. Mulching helps retain moisture, suppress weed growth, regulate soil temperature, and enhance the overall health of your trees.
- Avoid mulch contact with the emitters: Ensure that the mulch layer does not come into direct contact with the emitters. This will prevent any interference with water flow and potential clogging of the emitters.
- Monitor soil moisture: Regularly check the soil moisture levels around your trees to ensure they are receiving adequate water. Adjust the run time of your system if necessary to maintain optimal moisture levels.
- Inspect for leaks and damage: Periodically inspect your drip irrigation system for any leaks, damage, or blockages. Check the connections, tubing, and emitters, and make any necessary repairs or replacements to ensure a consistent water flow.
- Clean the system: Clean the emitters and flush the system periodically to remove any debris, sediment, or mineral buildup that may affect the efficiency of your system. This will help maintain optimal water distribution to your trees.
- Adjust the system as needed: Make adjustments to your system as your trees grow and their water requirements change. Consider adding or relocating emitters to ensure even water distribution and coverage.
- Regularly monitor for pests and diseases: Keep an eye out for any signs of pests or diseases in your trees. Regularly inspect the foliage and take appropriate measures to prevent or treat any issues that may arise.
- Winterize the system: Before the onset of winter, make sure to winterize your drip irrigation system. This involves draining the water and protecting the system from freezing temperatures to prevent damage.
Regular maintenance and proper mulching will help promote the health and longevity of your trees and drip irrigation system. By monitoring and caring for your system, you can ensure continued water efficiency and successful tree growth. With these maintenance practices in place, you have completed all the necessary steps to install and maintain a functional drip irrigation system for your trees.
Conclusion
Congratulations! By following the ten-step process outlined in this article, you have successfully installed a drip irrigation system for your trees. This efficient watering method delivers water directly to the root zone of your trees, promoting healthy growth, conserving water, and saving you time and effort in the long run. Here’s a summary of the steps you have taken:
- Planned the system, considering the specific water requirements of your trees.
- Gathered a reliable water supply to ensure consistent water delivery.
- Assembled the drip irrigation kit, connecting the necessary components.
- Installed the mainline tubing to connect the water source to the system.
- Installed the submain tubing and placed the emitters to deliver water to individual trees.
- Added a pressure regulator to maintain optimal water flow.
- Flushed the system to remove any debris or blockages.
- Tested the system to ensure proper functioning and coverage.
- Adjusted the system and addressed any issues that arose during testing.
- Mulched and implemented regular maintenance to promote system health and tree growth.
Remember to monitor your drip irrigation system regularly and make any necessary adjustments as your trees grow and their water requirements change. With proper maintenance, your trees will thrive, and your drip irrigation system will continue to provide efficient and effective water delivery for years to come.
Enjoy the benefits of having a well-maintained drip irrigation system for your trees. Not only will your trees flourish, but you will also contribute to water conservation efforts and save time and effort in your gardening routine. Embrace the convenience and effectiveness of drip irrigation, and watch your trees flourish in their optimal growing conditions.