Home>Gardening Techniques>DIY Projects>How To Make A Drip Irrigation System
DIY Projects
How To Make A Drip Irrigation System
Modified: January 22, 2024
Learn how to make your own DIY drip irrigation system with this step-by-step guide. Perfect for any gardening project, save time and water with this efficient and cost-effective solution.
(Many of the links in this article redirect to a specific reviewed product. Your purchase of these products through affiliate links helps to generate commission for Chicagolandgardening.com, at no extra cost. Learn more)
Table of Contents
- Introduction
- Benefits of Drip Irrigation Systems
- Components Required for a Drip Irrigation System
- Step 1: Designing Your Drip Irrigation System
- Step 2: Gathering Materials
- Step 3: Installing a Water Source
- Step 4: Laying Out the Main Line
- Step 5: Installing the Emitters
- Step 6: Adding a Pressure Regulator
- Step 7: Installing a Filter
- Step 8: Connecting the Drip Tubing
- Step 9: Flushing and Testing the System
- Step 10: Adjusting Water Flow and Pressure
- Step 11: Mulching around Plants
- Step 12: Regular Maintenance and Troubleshooting
- Conclusion
Introduction
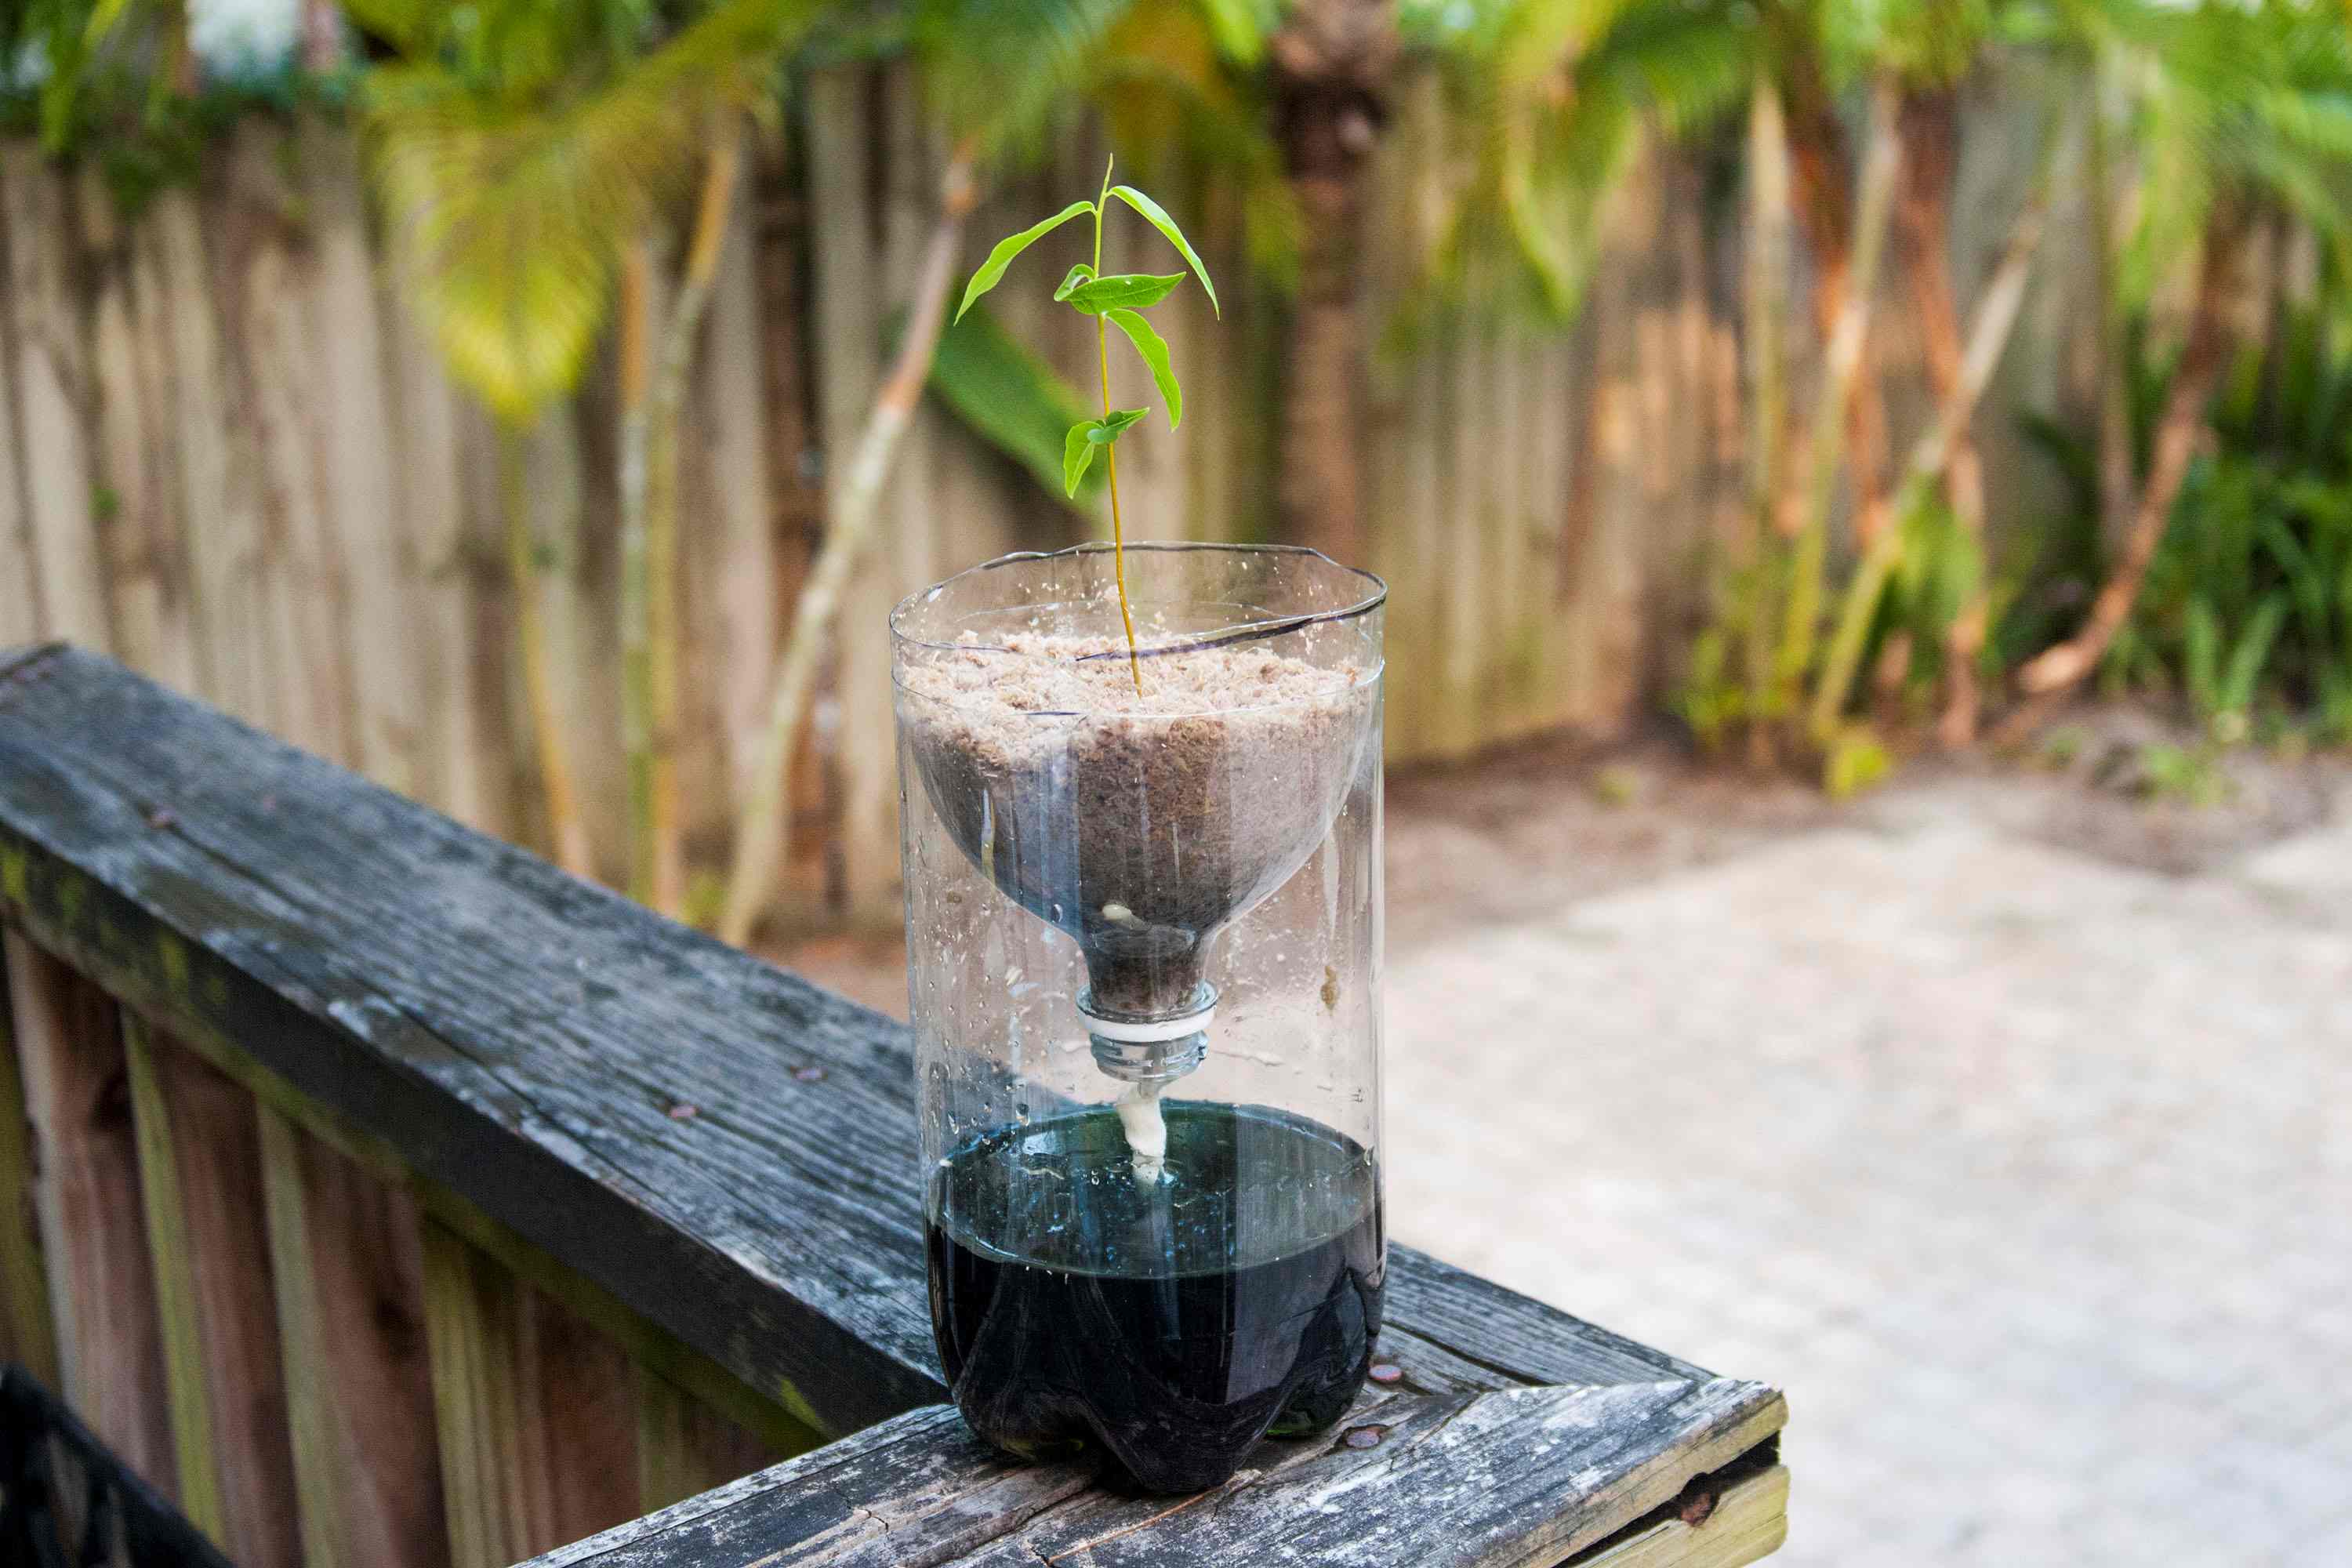
Welcome to the world of DIY projects! If you’re an avid gardener or someone who loves to tinker around in your backyard, then you’ve come to the right place. In this article, we will explore the fascinating world of drip irrigation systems and how you can create your own system from scratch.
Drip irrigation systems are a fantastic way to ensure that your plants receive regular and precise watering. Unlike traditional sprinkler systems that can waste water through evaporation and runoff, drip irrigation systems deliver water directly to the roots of your plants, minimizing water waste and maximizing efficiency. Not only do they save water, but they also promote healthier plant growth by providing consistent moisture to the root zone.
Whether you have a small vegetable garden or a sprawling landscape, a drip irrigation system can be customized to meet your specific needs. And the best part? You can easily build it yourself without breaking the bank. By following a few simple steps and gathering the necessary components, you’ll have your plants happily hydrated in no time.
In this comprehensive guide, we’ll walk you through the entire process of designing, installing, and maintaining a drip irrigation system. We’ll cover everything from the initial planning stages to troubleshooting common issues. So, grab your gardening gloves and get ready to embark on this exciting DIY project!
Benefits of Drip Irrigation Systems
Drip irrigation systems offer numerous advantages over traditional watering methods, making them a popular choice among gardeners and landscapers. Let’s explore some of the key benefits:
- Water Efficiency: Drip irrigation systems are incredibly efficient when it comes to water usage. Unlike sprinkler systems that spray water in the air, drip systems deliver water directly to the root zone of plants, minimizing evaporation and runoff. This targeted approach ensures that every drop of water is used effectively, saving you both water and money in the long run.
- Consistent Moisture: With drip irrigation, plants receive a slow and consistent supply of water, which is essential for healthy growth. By delivering water directly to the root zone, you avoid wetting the foliage, reducing the risk of diseases that thrive in damp conditions. Additionally, the even distribution of water prevents overwatering in some areas and underwatering in others.
- Flexibility and Customization: Drip irrigation systems are highly customizable to suit your specific needs. Whether you have different types of plants with varying water requirements or irregularly shaped garden beds, you can easily adjust the layout and flow rates of emitters to ensure each plant receives the right amount of water.
- Time-Saving: Once installed, drip irrigation systems require minimal maintenance and effort. Unlike manual watering or traditional sprinkler systems that need constant monitoring, a properly designed drip system will take care of watering your plants on a regular basis. This frees up your time so you can focus on other gardening tasks or simply enjoy your lush, thriving garden.
- Weed Control and Soil Health: Drip irrigation systems target the root zone of plants, delivering water directly to their roots. By avoiding unnecessary wetting of the surrounding soil, you can significantly reduce weed growth. Additionally, drip systems promote healthier soil by preventing soil erosion and nutrient leaching.
These are just a few of the many benefits of using a drip irrigation system. By implementing this efficient watering technique, you’ll not only conserve water but also enjoy healthier plants and a more productive garden. Now that you know why drip irrigation systems are worth considering, let’s move on to the next step: designing your system.
Components Required for a Drip Irrigation System
Before you start designing and installing your drip irrigation system, it’s important to familiarize yourself with the different components that make up the system. Understanding each component’s function and role will help you plan effectively and ensure a successful installation. Here are the essential components you’ll need:
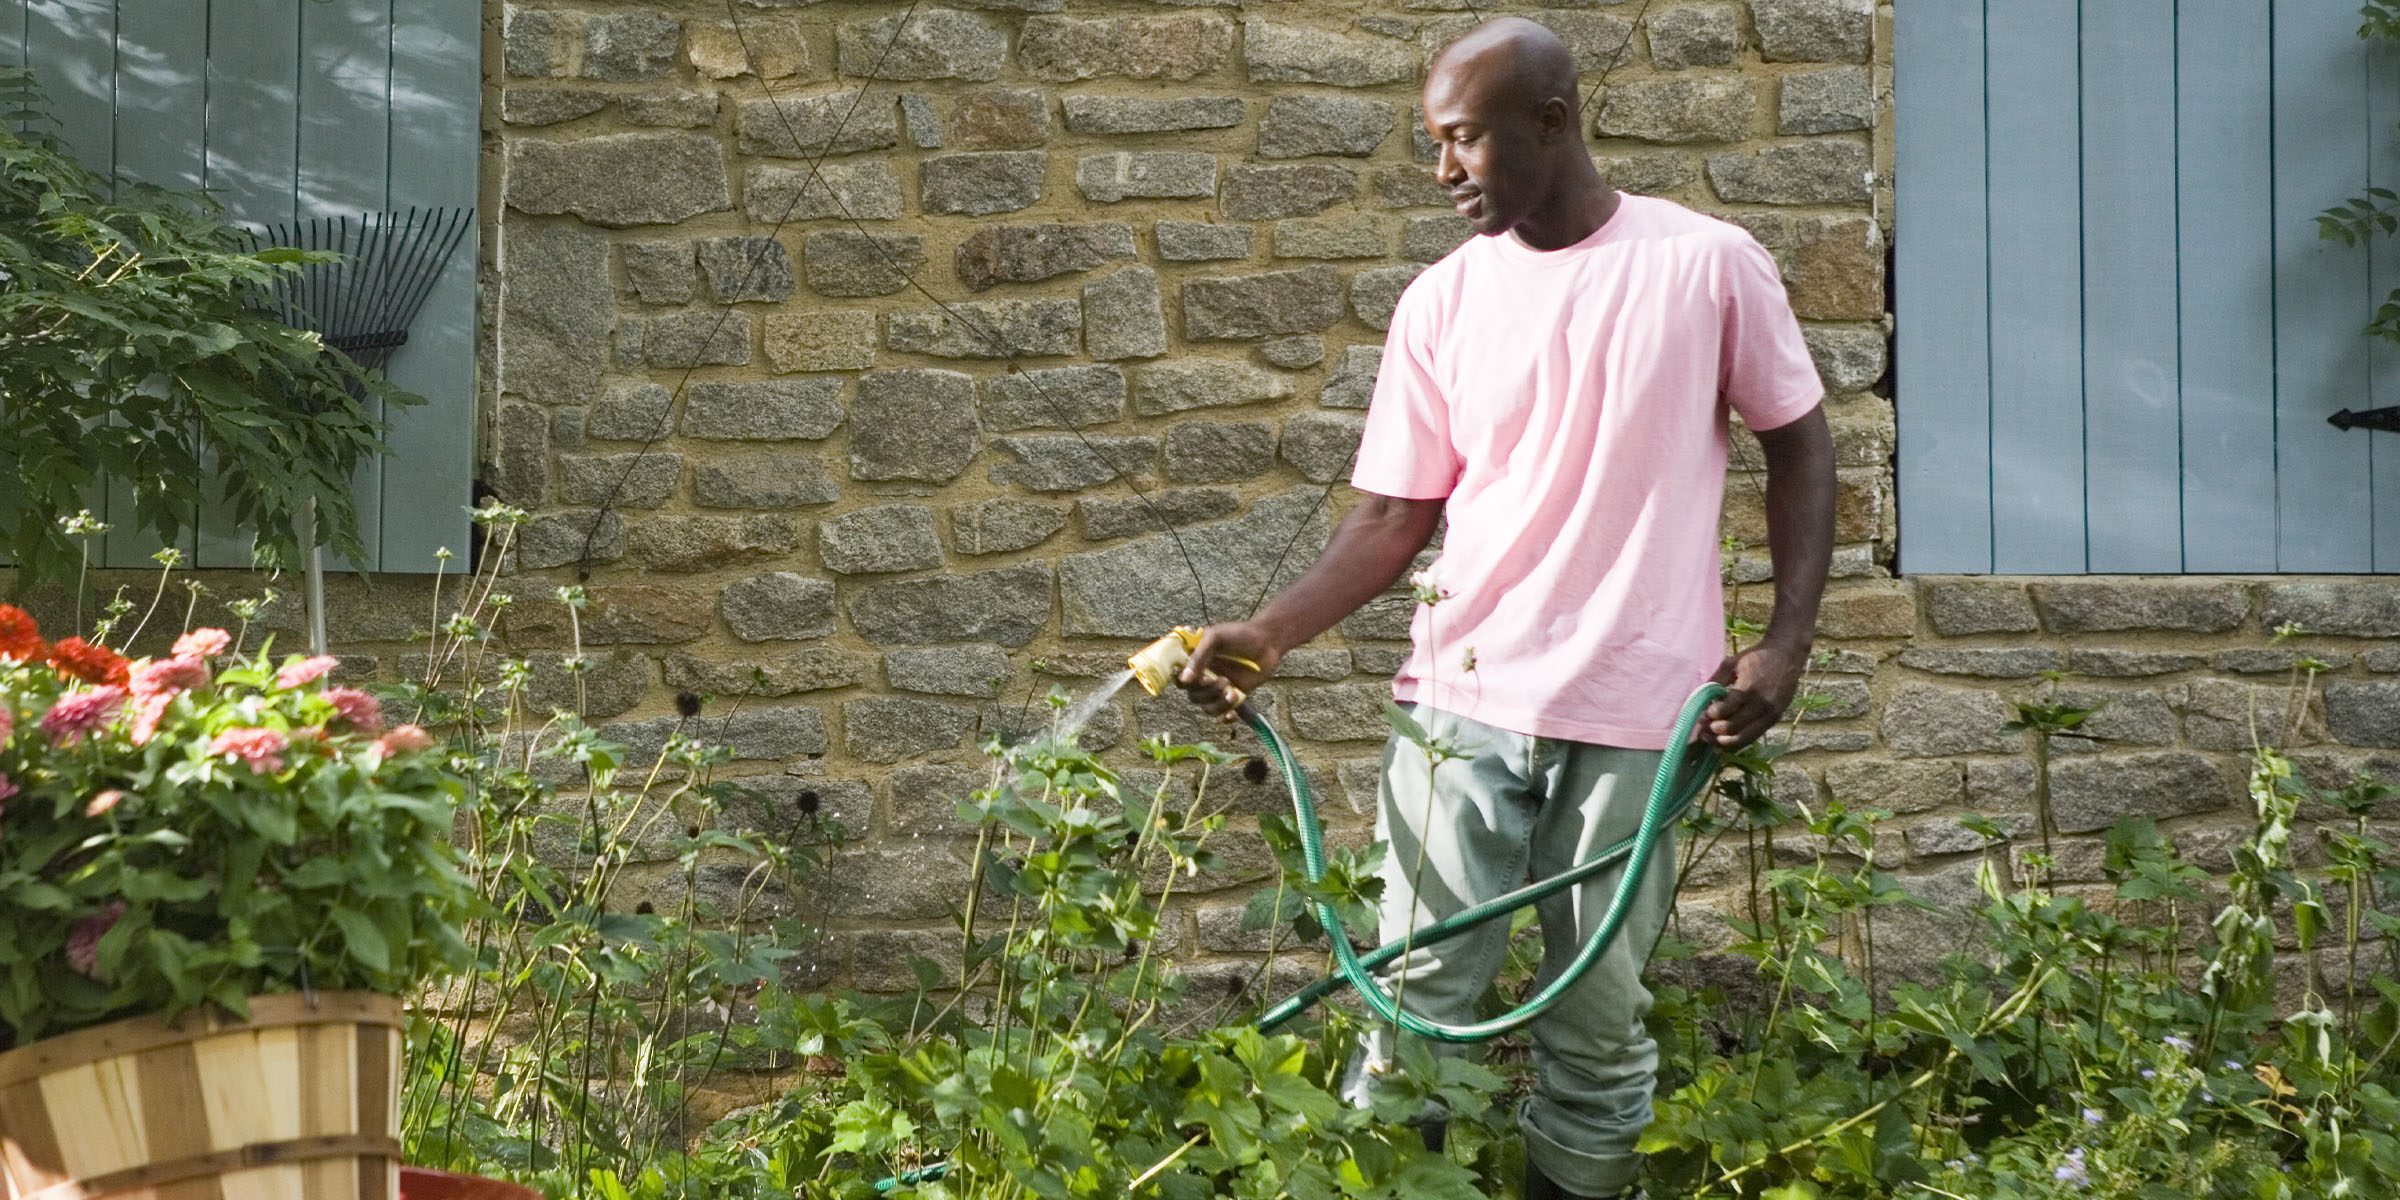
- Water Source: The water source is where you will draw water from to supply your irrigation system. This can be a standard outdoor faucet, a rainwater harvesting system, or a water storage tank. Make sure you have a convenient and reliable water source near your garden area.
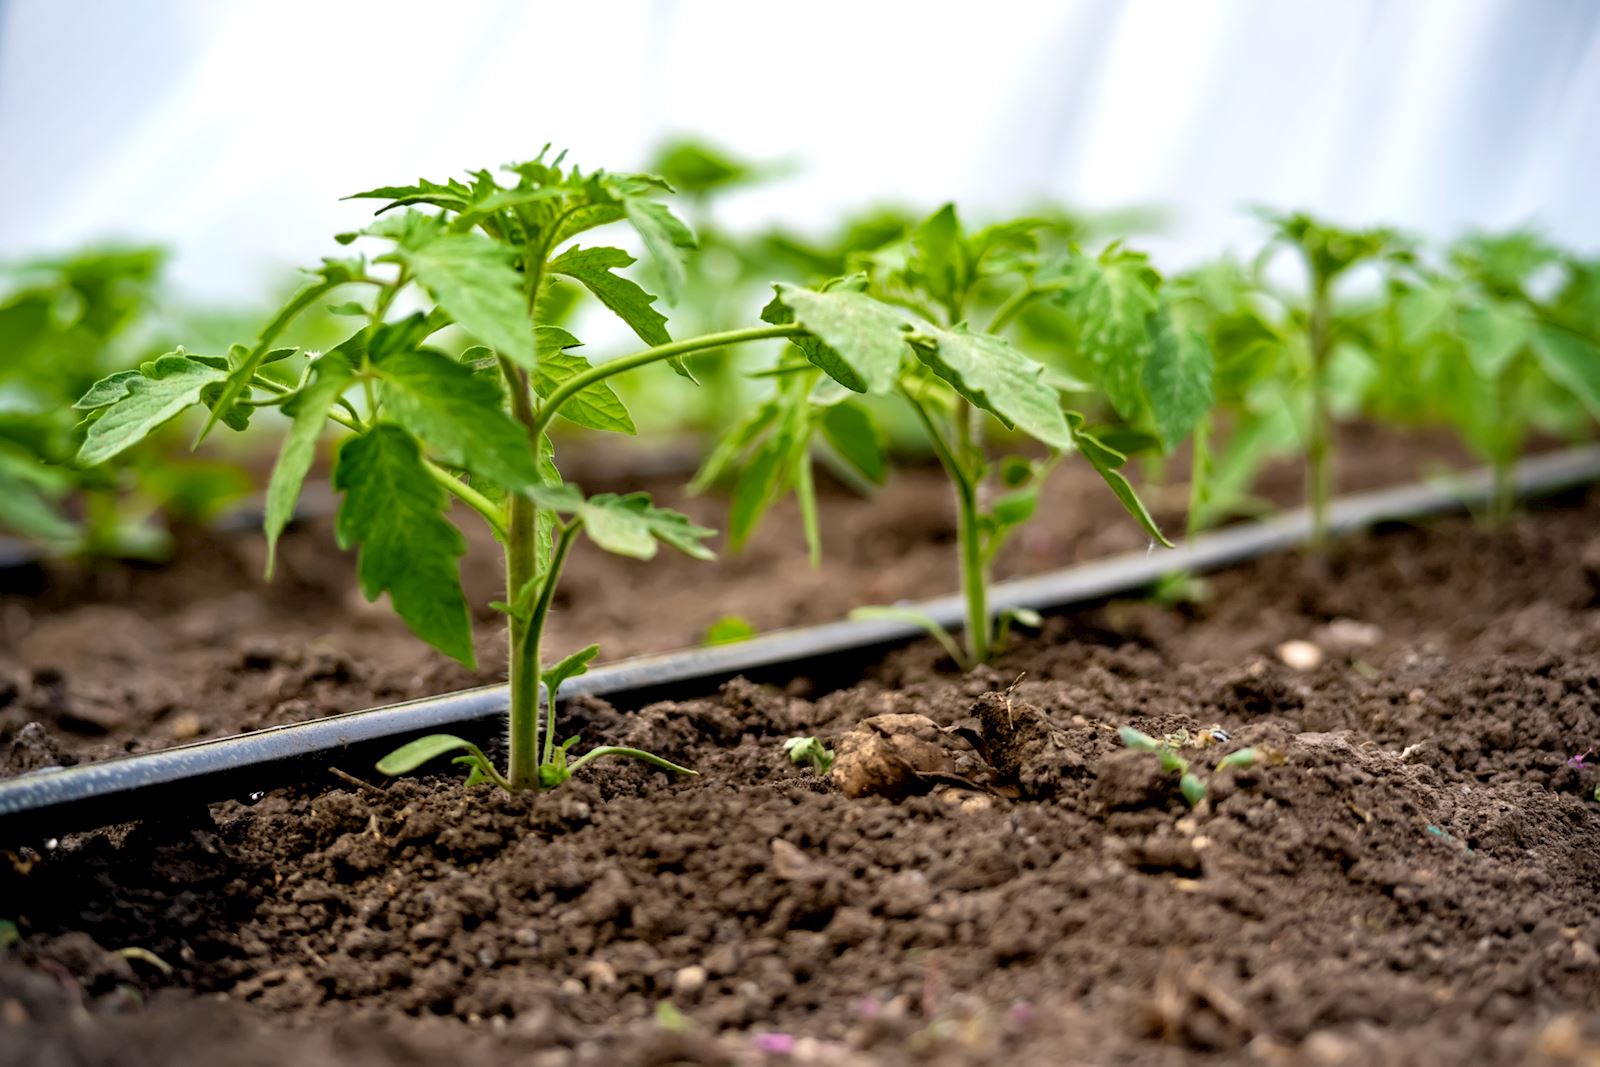
- Main Line Tubing: This is the main distribution line that carries water from the water source to the various parts of your garden. The main line tubing is typically made of PVC, polyethylene, or polypropylene. It should be durable, UV-resistant, and able to withstand water pressure.
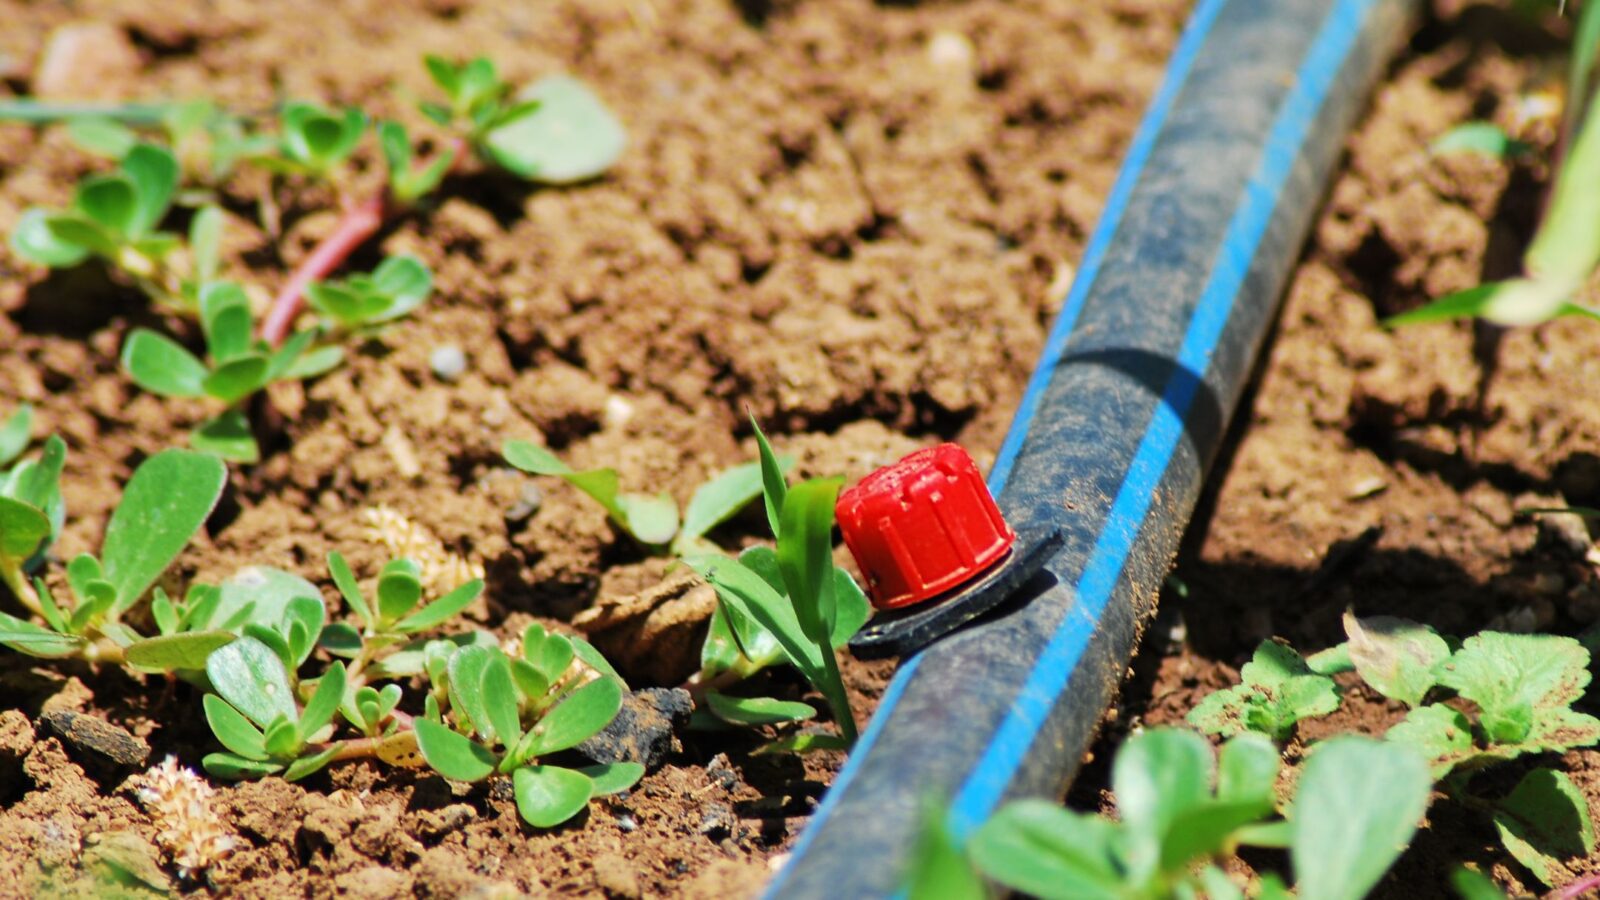
- Emitters: Emitters are responsible for delivering water directly to the root zone of the plants. They can be in the form of drippers, micro-sprayers, or soaker hoses. Choose emitters that are appropriate for the water needs of your plants and the layout of your garden.
- Pressure Regulator: A pressure regulator helps control and maintain a consistent water pressure throughout the system. This prevents emitters from becoming clogged or damaged due to excessive pressure. Make sure to select a pressure regulator that matches the recommended pressure range for your emitters.
- Filter: Installing a filter in your drip system is crucial to prevent debris, sediment, and other particles from clogging the emitters. Filters can be in the form of screen filters, disc filters, or sand filters. The type and size of the filter will depend on the water quality and the level of filtration required.
- Drip Tubing: Drip tubing, also known as lateral tubing or distribution line, carries water from the main line to individual plants or groups of plants. It is typically made of flexible polyethylene and has built-in emitters spaced at specific intervals. Drip tubing allows for easy customization and adaptability to various garden layouts.
- Fittings and Connectors: Various fittings and connectors are used to join and secure different components of the system. These include couplings, tees, elbows, valves, and end caps. Select fittings that are compatible with your chosen tubing and ensure a watertight connection to avoid leaks.
- Timer or Controller: While optional, a timer or controller adds convenience and automation to your drip irrigation system. It allows you to schedule specific watering times, ensuring your plants receive water even when you’re not available. Choose a timer or controller that suits your needs and offers features like multiple programs, duration settings, and rain delay options.
These are the core components required for a basic drip irrigation system. Depending on your specific needs and the complexity of your garden layout, you may also require additional components like valves for zone control, stakes for securing tubing, or moisture sensors for smart irrigation. Now that you have a good understanding of the components, let’s move on to the next step: designing your drip irrigation system.
Step 1: Designing Your Drip Irrigation System
Designing your drip irrigation system is the crucial first step in creating an efficient and effective setup for your garden. Proper planning and design will ensure that each plant receives the right amount of water, and the system works seamlessly. Here are the key factors to consider when designing your drip irrigation system:
- Garden Layout: Take some time to assess the layout of your garden, including the shape, size, and arrangement of your plants. Consider any obstacles, such as trees, structures, or uneven terrain, which may affect your irrigation system’s layout. This will help you determine the optimal placement of your main line tubing and emitters.
- Water Requirements: Different plants have different water requirements. Some may need more water than others, while some may prefer drier soil. Research the water needs of the plants in your garden and group them accordingly. This grouping will allow you to provide targeted irrigation to each group, ensuring each plant receives the appropriate amount of water.
- Flow Rate and Water Pressure: The flow rate and water pressure of your system will influence the performance and efficiency of your drip irrigation. Calculate the total flow rate required to adequately water all your plants, and then consider the water pressure available from your water source. This will help determine the appropriate emitters and components to use.
- Spacing and Coverage: Determine the spacing between plants and the coverage area needed for each plant. This will guide you in selecting the appropriate emitter type and its spacing along the drip tubing or main line. Make sure that the chosen emitter can cover the desired area effectively.
- Zone Control: If you have plants with different water requirements or areas with different sun exposure, you may want to divide your garden into different irrigation zones. This allows you to control the water output to each zone separately, giving you better control over water distribution and efficiency.
- Accessibility and Maintenance: Consider access points for maintenance and potential future expansions. Ensure that your main line tubing and emitters are easily accessible for inspection, cleaning, and repairs. Additionally, think about how you can easily expand or modify your system in the future if you add new plants or change your garden layout.
Once you have considered these factors, sketch out a plan of your garden and the desired layout of your drip irrigation system. Mark the location of the main line tubing, emitters, and other components. This visual representation will serve as a guide during the installation process.
Remember, designing your drip irrigation system properly is crucial for its long-term success. Take your time with this step to ensure that you create an efficient system tailored to the specific needs of your garden. With the design in place, you’re now ready to move on to the next step: gathering the necessary materials for your drip irrigation system.
Step 2: Gathering Materials
Now that you have completed the design phase of your drip irrigation system, it’s time to gather the necessary materials and equipment for the installation process. Having all the required materials on hand will streamline the installation and ensure that you can complete the project smoothly. Here are the essential materials you’ll need:
- Main Line Tubing: Based on your design plan, calculate the length of main line tubing needed to connect your water source to the farthest point in your garden. Measure the distance accurately, and buy enough main line tubing to cover it. Keep in mind that it’s usually better to have extra tubing on hand in case of any unexpected changes or repairs.
- Emitters: Select the appropriate type and quantity of emitters needed for your plants. Consider the recommended flow rate and coverage area for each plant group in your garden. Ensure that you have enough emitters to cover all your plants, with some spares for future use or replacements.
- Pressure Regulator: Choose a pressure regulator that matches the water pressure from your water source and is compatible with the flow rate requirements of your emitters. Check the specifications of the pressure regulator to ensure it is suitable for the size and type of your main line tubing.
- Filter: Pick a filter that suits the filtration requirements of your water source. Consider the level of filtration needed to prevent clogging of the emitters. If you have particularly poor water quality, a more robust filter system might be necessary to ensure the longevity of your drip irrigation system.
- Drip Tubing: Determine the length of drip tubing required to reach each plant group in your garden based on your design plan. Measure accurately and buy enough drip tubing to cover the distance. Remember to factor in any bends or curves in your garden that may increase the required length.
- Fittings and Connectors: Purchase a variety of fittings and connectors that are compatible with your main line tubing, drip tubing, emitters, and other components. This may include couplings, tees, elbows, valves, and end caps. Having a collection of fittings will ensure that you can create secure connections as you assemble your irrigation system.
- Timer or Controller: If you decide to automate your drip irrigation system, choose a timer or controller that meets your desired specifications. Consider factors such as multiple programs, duration settings, rain delay options, and ease of use. Ensure that the timer or controller is compatible with your water source and can accommodate the size of your system.
- Other Tools and Accessories: Gather other tools and accessories that you may need during the installation process. This may include a utility knife for cutting tubing, a hole punch for inserting emitters, stakes or clips for securing tubing, and a measuring tape or ruler to ensure accurate measurements.
Make a checklist of all the materials you need and double-check it before making any purchases, ensuring that you have everything necessary to complete the installation. Gathering all the materials before starting the installation process will save you time and minimize any potential delays or interruptions.
With your materials organized and ready to go, you’re now prepared to move on to the next step: installing a water source for your drip irrigation system.
Step 3: Installing a Water Source
Installing a water source is a crucial step in setting up your drip irrigation system. The water source will supply the necessary water to your system, ensuring that your plants receive the hydration they need. Here’s how to go about installing a water source for your drip irrigation system:
- Select an Outdoor Faucet: If you have an outdoor faucet conveniently located near your garden, it can serve as your water source. Ensure that the faucet is in good working condition and can provide a steady supply of water. If you don’t have an existing outdoor faucet, you may need to install one by tapping into your home’s water line. Consult a professional if you’re not familiar with the process.
- Install a Backflow Prevention Device: Backflow prevention is essential to ensure that contaminated water doesn’t flow back into your main water supply. Install a backflow prevention device, such as a hose bib vacuum breaker or an atmospheric vacuum breaker, between the outdoor faucet and your drip irrigation system to safeguard your water quality.
- Connect the Outdoor Faucet to the Main Line: Use a garden hose or appropriate connectors to connect the outdoor faucet to the main line tubing of your drip irrigation system. Ensure a secure connection to prevent any leaks.
- Consider a Pressure Regulator: If the water pressure from your outdoor faucet is too high for your drip irrigation system, install a pressure regulator near the water source. The pressure regulator will help reduce the water pressure to a level suitable for your system, preventing potential damage to the emitters and other components.
- Check for Leaks: Once the water source is connected to the main line, turn on the water supply and check for any leaks or drips. Tighten any loose connections and make sure the system is watertight.
- Consider Alternative Water Sources: If you’re looking for more sustainable options, consider alternative water sources such as rainwater harvesting or using a designated water storage tank. These options can help reduce your reliance on the main water supply and conserve water.
Ensure that your water source is easily accessible, ideally located near the main line tubing connection point. If necessary, protect the water source and any exposed connections from extreme weather conditions by installing a protective cover.
Before proceeding to the next step, it’s essential to ensure that you have a reliable water source that can provide sufficient water to your drip irrigation system. With the water source installed and connected, you’re now ready to move on to the next step: laying out the main line tubing.
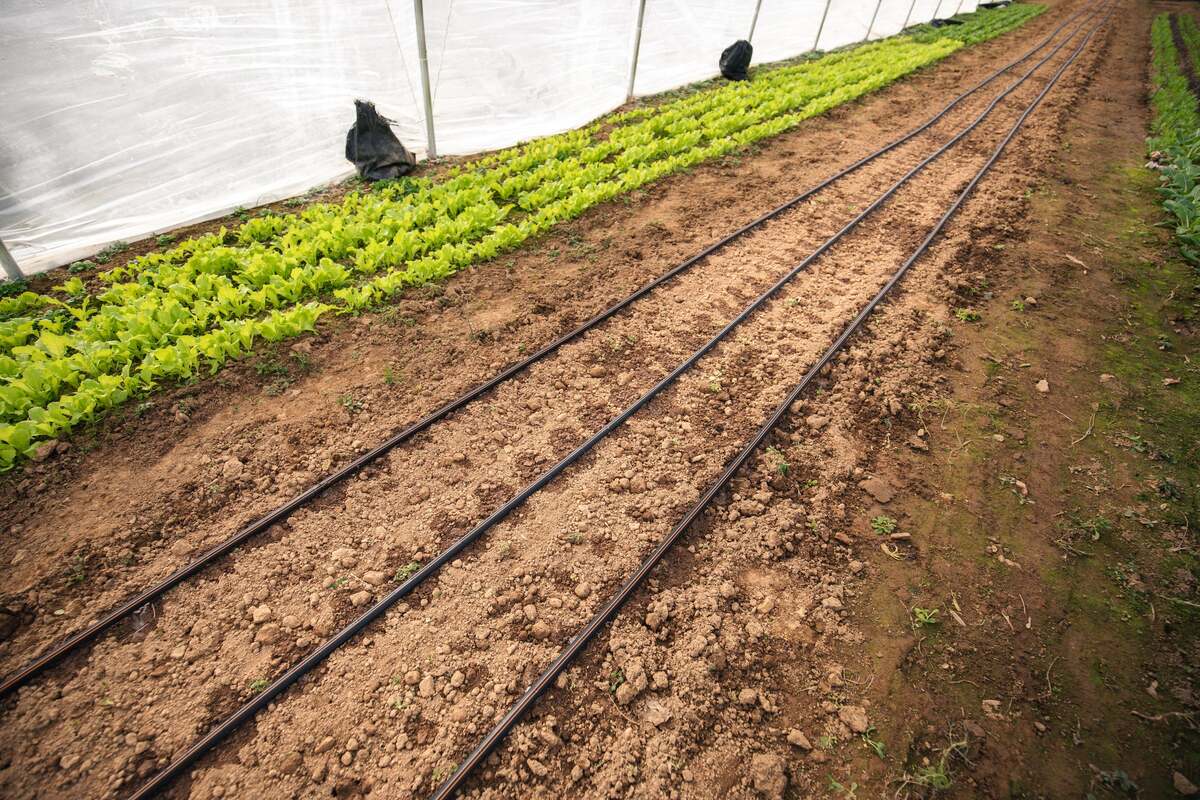
Step 4: Laying Out the Main Line
With your water source in place, it’s time to lay out the main line tubing for your drip irrigation system. This step involves connecting the main line tubing to the water source and planning the route that the tubing will take through your garden. Properly laying out the main line is essential for ensuring efficient water distribution. Here’s how to do it:
- Measure and Cut the Main Line Tubing: Using a measuring tape, determine the length of main line tubing needed to reach the farthest point of your garden from the water source. Cut the tubing to the appropriate length, ensuring a clean and straight cut.
- Connect the Main Line to the Water Source: Attach one end of the main line tubing to the connector or adapter that connects it to the water source. Use appropriate fittings and ensure a secure connection to avoid any leaks.
- Plan the Route: Carefully plan the route that the main line tubing will take through your garden. Consider the layout of your plants, any obstacles such as trees or structures, and the most efficient path to reach all areas of your garden. Avoid sharp bends or kinks in the tubing, as they can restrict water flow. If needed, use corner fittings or elbows to navigate around corners or obstacles.
- Lay the Tubing: Begin laying the main line tubing along the planned route, securing it to the ground using stakes or clips at regular intervals. Ensure that the tubing stays on the surface or slightly buried, and avoid placing it in areas where it may be prone to damage, such as foot traffic areas.
- Extend the Tubing: If the length of the main line tubing is not enough to reach all areas of your garden, use appropriate connectors and additional lengths of tubing to extend it. Attach the connectors securely and check for any leaks or loose connections.
- Inspect the Route: Once the main line tubing is laid out, inspect the entire route to ensure it is free of any obstructions, twists, or stretches. Double-check the connection points and fittings to ensure they are secure.
When laying out the main line tubing, consider potential expansion or modifications in the future. Leave some extra tubing length at the end of the main line, as it can be used to add new emitters or extend your system if needed.
By carefully planning and laying out the main line tubing, you’ll ensure that water is efficiently distributed to all areas of your garden. With the main line tubing in place, you’re now ready to move on to the next step: installing the emitters.
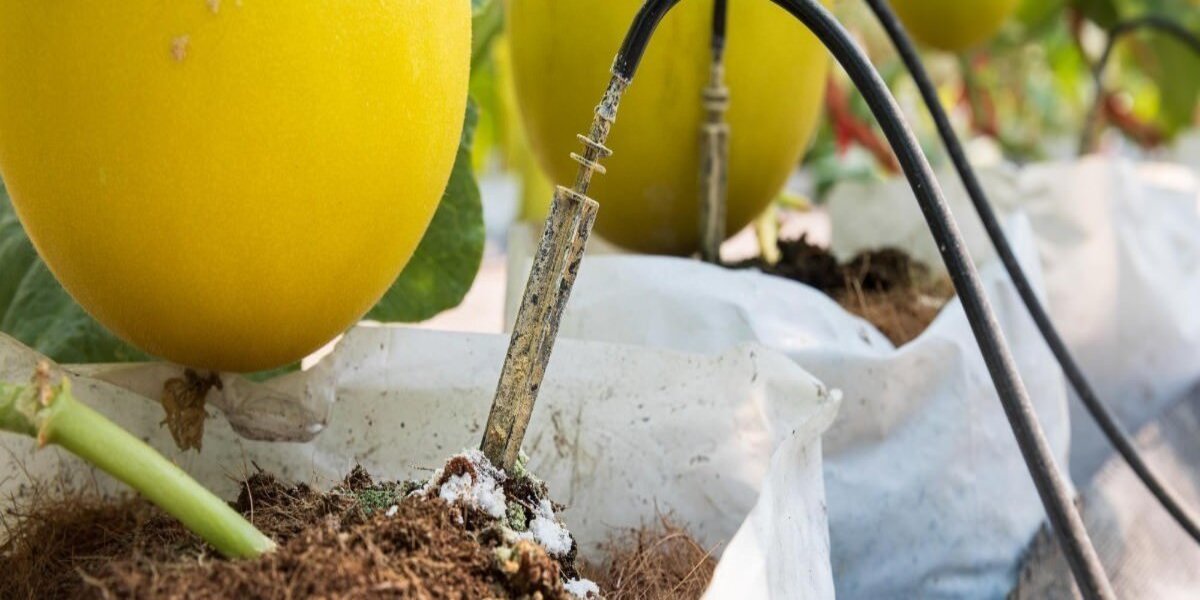
Step 5: Installing the Emitters
Now that you have laid out the main line tubing, it’s time to install the emitters that will deliver water directly to your plants. The emitters are responsible for precise and targeted irrigation, ensuring that each plant receives the right amount of water. Here’s how to install the emitters:
- Plan the Position of Emitters: Refer to your design plan and determine the spacing and placement of emitters for each plant group. Consider the water requirements of different plants and ensure that the emitters are positioned near the root zone of each plant.
- Insert the Emitters: Using a hole punch or appropriate tool, create small holes in the main line tubing at the designated spots for each emitter. Insert the emitters into the holes, making sure they fit securely without any leaks.
- Keep the Emitters Upright: Ensure that the emitters are positioned upright and facing the plants. This allows for optimal water distribution and prevents any blockage or obstruction in the flow of water.
- Adjust the Flow Rate: Each emitter has a specific flow rate, which determines the amount of water it delivers over a given time. Depending on the water requirements of your plants, adjust the flow rate of the emitters by turning the flow control dial, if available on your specific emitter type.
- Monitor the Emitters: Once the emitters are installed, monitor them periodically to ensure they are functioning properly. Check for any signs of clogging or blockages, and clean or replace the emitters as needed to maintain efficient water flow.
- Optimize Coverage: Observe the water coverage area of each emitter and adjust the spacing if necessary. Sometimes, you may need to add or relocate emitters to ensure that every plant receives adequate water.
As you install the emitters, take into account any future changes or additions you may make to your garden. Leave some extra tubing length at the end of the main line or near large plant groups to allow for easy emitter installations or modifications later on.
Properly installed emitters ensure that water is delivered precisely to the root zone of your plants, promoting healthy growth and efficient water usage. With the emitters in place, you’re now ready to move on to the next step: adding a pressure regulator to your system.
Step 6: Adding a Pressure Regulator
Adding a pressure regulator to your drip irrigation system is crucial to maintain optimal water pressure and protect the emitters from damage. A pressure regulator helps ensure that the water pressure in your system remains within the recommended range for efficient operation. Here’s how to add a pressure regulator:
- Locate the Ideal Position: Identify a suitable location in your system to install the pressure regulator. This is typically near the water source or immediately after the connection to the main line tubing.
- Turn off the Water Supply: Before installing the pressure regulator, ensure that the water supply to your drip irrigation system is turned off. This will prevent any accidental water flow during the installation process.
- Prepare the Tubing: Cut the main line tubing at the desired location where you will install the pressure regulator. Use a pipe cutter or sharp utility knife to make a clean and straight cut.
- Attach the Pressure Regulator: Connect one end of the pressure regulator to the main line tubing by inserting it into the cut end and securing it with appropriate fittings. Ensure a tight and secure connection to prevent any leaks or water pressure fluctuations.
- Connect the Emitters: Attach the other end of the pressure regulator to the continuation of the main line tubing, ensuring a secure connection. This will allow the regulated water to flow to the emitters.
- Test the System: Turn on the water supply to your drip irrigation system and observe the pressure regulator in action. Ensure that the regulated water pressure remains within the desired range, preventing any excessive pressure that could damage the emitters.
- Make Adjustments if Needed: If the water pressure is not within the recommended range, adjust the pressure regulator accordingly using any included control or adjustment features. This will help you fine-tune the water pressure to the optimal level for your specific system.
Remember to check the pressure regulator periodically to ensure it remains in good working condition. Replace or repair the pressure regulator if you notice any signs of damage or malfunction.
By installing a pressure regulator, you can maintain proper water pressure throughout your drip irrigation system, ensuring optimal performance and longevity of the emitters. With the pressure regulator in place, you’re now ready to move on to the next step: installing a filter for your system.
Step 7: Installing a Filter
Installing a filter is an important step in setting up your drip irrigation system as it helps prevent clogging of the emitters and ensures the longevity of your system. A filter traps debris, sediment, and other particles present in the water, preventing them from entering the emitters and causing blockages. Here’s how to install a filter in your drip irrigation system:
- Determine the Type of Filter: Based on the water quality and the level of filtration required, choose the appropriate type of filter for your system. Screen filters, disc filters, and sand filters are commonly used in drip irrigation systems.
- Locate the Ideal Position: Identify a suitable location in your system to install the filter. This is typically after the water source or immediately before the main line tubing connection.
- Turn off the Water Supply: Before installing the filter, ensure that the water supply to your drip irrigation system is turned off. This will prevent any accidental water flow during the installation process.
- Prepare the Tubing: Cut the main line tubing at the desired location where you will install the filter. Use a pipe cutter or sharp utility knife to make a clean and straight cut.
- Attach the Filter: Connect one end of the filter to the main line tubing by inserting it into the cut end and securing it with appropriate fittings. Ensure a tight and secure connection to prevent any leaks or water pressure fluctuations.
- Connect the Emitters: Attach the other end of the filter to the continuation of the main line tubing, ensuring a secure connection. This will allow the filtered water to flow to the emitters.
- Flush the System: Once the filter is installed, turn on the water supply and flush the system for a few minutes. This helps remove any debris or loose particles that may have been trapped in the filter during installation.
- Monitor and Clean the Filter: Regularly monitor the filter for any signs of clogging or reduced water flow. Clean the filter as needed according to the manufacturer’s instructions to maintain optimal filtration and prevent any adverse effects on your drip irrigation system.
Remember to periodically check and clean the filter to ensure its effectiveness. Replace the filter or filter elements if they become clogged beyond cleaning or if the filtration efficiency decreases significantly.
By installing a filter in your drip irrigation system, you can prevent clogging of the emitters and ensure the efficient and uninterrupted flow of water to your plants. With the filter in place, you’re now ready to move on to the next step: connecting the drip tubing to your system.
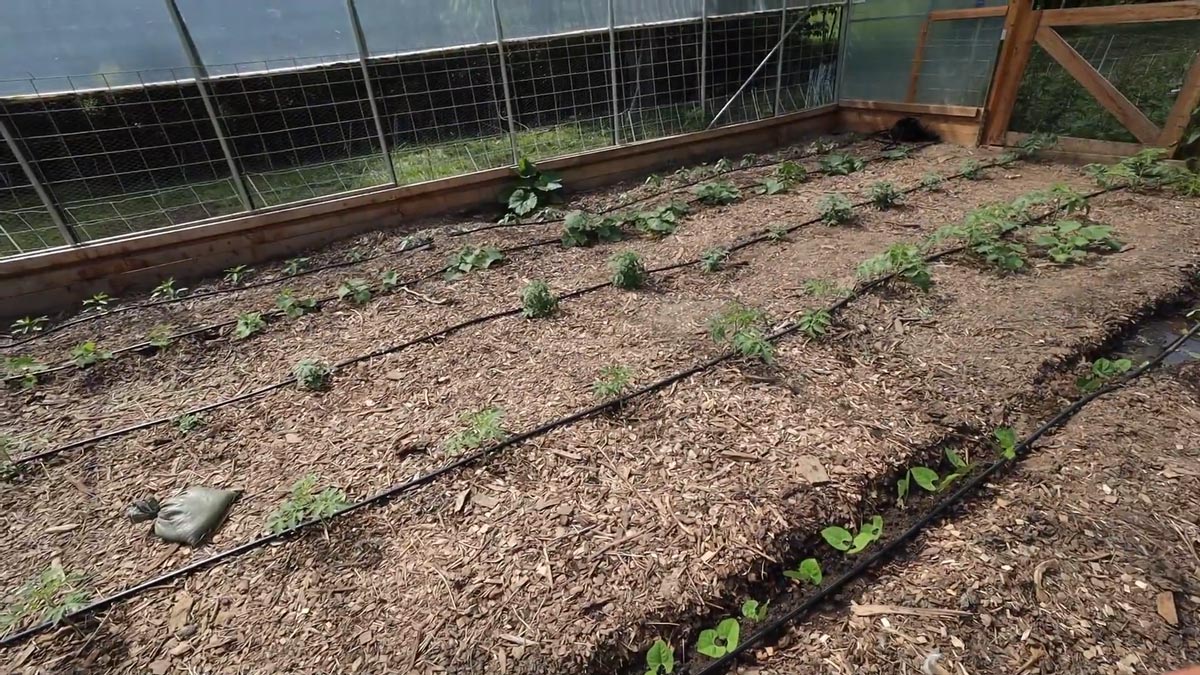
Step 8: Connecting the Drip Tubing
Connecting the drip tubing is a crucial step in completing your drip irrigation system setup. The drip tubing carries water from the main line to the individual plants or groups of plants, delivering precise and targeted water directly to their root zones. Here’s how to connect the drip tubing:
- Plan the Layout: Refer to your design plan and identify the areas where you need to connect the drip tubing. Determine the required length and layout of the tubing for each plant group.
- Prepare the Tubing: Cut the drip tubing to the appropriate lengths based on your design plan. Use a sharp utility knife or scissors to make clean and straight cuts.
- Insert Barbed Fittings: Attach a barbed fitting to one end of each length of drip tubing. To do this, slide the fitting into the tubing and push it until it is securely in place. Ensure a tight fit to prevent any leaks.
- Connect the Drip Tubing: Connect the other end of the drip tubing to the main line tubing or previously installed drip tubing. Insert the barbed fitting into the corresponding hole or opening, ensuring a snug and secure connection.
- Secure the Connection: Use hose clamps or metal stakes to secure the connection between the drip tubing and the main line tubing. This will help keep the connection in place and minimize any movement or potential leaks.
- Repeat for Each Plant Group: Follow the same steps to connect the drip tubing for each plant group in your garden. Ensure that the tubing is laid out in the designated areas and that each connection is secure.
- Inspect and Adjust: Thoroughly inspect all the connections to ensure they are secure and watertight. Adjust any misaligned fittings or tubing as necessary to optimize water flow and coverage.
- Flush the System: Before turning on the water supply, flush the system to remove any debris or particles that may have entered during the connection process. This will help ensure clean and efficient water flow.
As you connect the drip tubing, it’s essential to check for proper water flow and coverage in each plant group. Make any necessary adjustments to the tubing or emitters to ensure that every plant receives adequate water.
By connecting the drip tubing, you’re completing the final link in your drip irrigation system. With the connections in place, you’re now ready to move on to the next step: flushing and testing the system.
Step 9: Flushing and Testing the System
Flushing and testing the system is a crucial step in ensuring that your drip irrigation system functions properly and efficiently. This step involves removing any debris or particles that may have accumulated during the installation process and verifying that all components are working correctly. Here’s how to flush and test your system:
- Turn on the Water Supply: Open the water supply to your drip irrigation system. Start with a low flow to prevent any water hammering or sudden pressure surges.
- Flush the System: Allow the water to flow through the system for a few minutes to flush out any debris or particles that may have entered during the installation process. This will help ensure clean and unobstructed water flow to the emitters.
- Inspect for Leaks: While the system is flushing, carefully inspect all connections, emitters, and other components for any signs of leaks. Take note of any areas that require tightening or adjustment to prevent water wastage.
- Observe Water Flow: Observe the water flow from the emitters to ensure that each plant is receiving adequate water. Check for any clogged or malfunctioning emitters and clean or replace them as necessary.
- Verify Water Coverage: Ensure that all plants receive sufficient water coverage. Adjust the spacing or positioning of emitters, if needed, to optimize water distribution across your garden.
- Check for Uniformity: Verify that the water flow and distribution are consistent throughout the system. Look for areas that may be receiving too much water or where there are dry spots that need additional emitters.
- Measure Water Pressure: Use a pressure gauge to measure the water pressure in your system. Ensure that it falls within the recommended range for the specific emitters and components you are using.
- Make Adjustments: Based on your observations and measurements, make any necessary adjustments to optimize the system’s performance. This may include adjusting the flow rate, repositioning emitters, or adding additional components.
- Continuously Monitor: Periodically monitor your drip irrigation system to ensure that it continues to operate efficiently. Regularly check for leaks, clogged emitters, and any changes in water flow to address issues promptly.
By flushing and testing your system, you ensure that it is functioning properly and delivering water effectively to your plants. Addressing any issues early on will help maintain the longevity and efficiency of your drip irrigation system.
With the system flushed and tested, you’re now ready to move on to the next step: adjusting water flow and pressure to optimize your system’s performance.
Step 10: Adjusting Water Flow and Pressure
Adjusting the water flow and pressure in your drip irrigation system is essential for optimum performance and efficient water usage. This step allows you to fine-tune the system to meet the specific needs of your plants and ensure uniform water distribution. Here’s how to adjust the water flow and pressure:
- Measure Water Flow and Pressure: Use a flow meter and pressure gauge to measure the water flow rate and pressure in your system. This will help you understand the current settings and identify any adjustments needed.
- Adjust the Pressure Regulator: If the measured water pressure is higher than the recommended range for your emitters, adjust the pressure regulator accordingly. This can usually be done by using a screwdriver to turn the adjustment screw on the regulator.
- Monitor Flow Rate: Observe the flow rate of the emitters. If the flow rate seems too high or too low for any particular plant group, adjust the individual flow control on the emitters to achieve the desired flow.
- Inspect Water Coverage: Check the water coverage area of each emitter. Ensure that all plants within the designated zones receive proper water distribution. Adjust the positioning or spacing of emitters, if needed, to improve coverage.
- Consider Adding or Removing Emitters: If certain plants require more or less water than originally anticipated, consider adding or removing emitters to adjust the overall water flow. This will help you tailor the system to the specific water requirements of each plant group.
- Observe Plant Response: Monitor the plants’ response to the water application. This includes signs of overwatering, such as wilting or yellowing leaves, as well as signs of underwatering, such as drooping or stressed-looking plants. Make further adjustments accordingly.
- Continuously Fine-Tune: As your plants grow and their water requirements change, continue to monitor and adjust the water flow and pressure as needed. Regularly check for any changes in the system’s performance and address them promptly.
By adjusting the water flow and pressure in your drip irrigation system, you can ensure that each plant receives the appropriate amount of water and prevent wastage. Fine-tuning the system will help promote healthy plant growth and efficient water usage, resulting in a thriving and sustainable garden.
With the water flow and pressure adjusted, you’re now ready to move on to the next step: mulching around your plants to further enhance the effectiveness of your system.
Step 11: Mulching around Plants
Mulching around your plants is an important step in optimizing the effectiveness of your drip irrigation system. Mulch helps conserve moisture in the soil, reduce weed growth, and regulate soil temperature. It acts as a protective layer, preserving water and promoting healthy plant growth. Here’s how to mulch around your plants:
- Select the Right Mulch: Choose a suitable type of mulch for your garden. Organic mulches, such as compost, bark chips, straw, or shredded leaves, enrich the soil as they break down. Inorganic mulches, such as gravel or plastic mulch, provide longer-lasting weed control and moisture retention.
- Prepare the Soil: Clear the area around the plants of any weeds or debris. Loosen the soil gently with a garden fork or cultivator to ensure good water infiltration and root growth.
- Apply the Mulch: Spread a layer of mulch around the base of each plant, extending it a few inches beyond the drip line. The mulch layer should be around 2-4 inches thick for optimal moisture retention and weed suppression.
- Avoid Mulch Contact with Plant Stems: Keep the mulch a few inches away from the stems of your plants to prevent rot or disease. Leave a small gap around the stem to allow for proper air circulation.
- Replenish and Maintain: Regularly check the mulch layer and replenish it as needed, especially as it decomposes or gets displaced. Maintaining an adequate mulch layer helps retain moisture in the soil and reduce weed competition.
- Monitor Soil Moisture: Periodically check the soil moisture levels beneath the mulch layer. While mulch helps conserve moisture, it’s essential to ensure that the soil is adequately hydrated. Adjust the watering schedule of your drip irrigation system accordingly.
- Observe Plant Health: Monitor the overall health of your plants with mulch in place. Mulching helps retain moisture, moderates soil temperature, and suppresses weeds, which can lead to healthier and more resilient plants.
Mulching is a simple yet effective practice that complements your drip irrigation system. It conserves water, reduces weed growth, and provides a protective layer for your plants. Remember to maintain the mulch layer and make adjustments as needed to ensure optimal plant growth and water efficiency.
With the mulch around your plants, you’re now ready for the final step: regular maintenance and troubleshooting to maintain the performance of your drip irrigation system.
Step 12: Regular Maintenance and Troubleshooting
Regular maintenance and troubleshooting are vital for the ongoing performance and longevity of your drip irrigation system. By conducting routine checks and addressing any issues promptly, you can ensure optimal water delivery and the health of your plants. Here’s how to maintain and troubleshoot your system:
- Inspect the System: Regularly examine the drip irrigation system for any signs of leaks, clogs, or damage. Check the connections, emitters, and tubing for secure fittings, and repair or replace any damaged components.
- Clean the Emitters: Remove and clean the emitters periodically to prevent clogging caused by sediment or debris. Soak the emitters in a vinegar solution or use a small brush to remove any buildup. Rinse them thoroughly before reinstallation.
- Check for Clogs: If you notice low water flow or uneven irrigation, check for clogged emitters or blocked tubing. Flush the system or use a small tool to clear any obstructions and ensure proper water distribution.
- Monitor Water Pressure: Continuously check the water pressure in your system using a pressure gauge. If the pressure is fluctuating significantly or outside the recommended range, investigate the cause and address it accordingly.
- Adjust Watering Schedule: Regularly review and adjust your watering schedule based on the specific water needs of your plants, changing weather conditions, and seasonal changes. Ensure that your plants receive adequate hydration without overwatering.
- Inspect for Leaks: Monitor for any signs of leaks, such as wet spots or pooling water around the connections or tubing. Repair any leaks immediately to prevent water wastage and potential damage to your system.
- Trim and Manage Plant Growth: Regularly trim and prune your plants to prevent them from interfering with or blocking the emitters and tubing. Clear any overgrown foliage and ensure unobstructed water flow.
- Check for Debris: Periodically remove any debris or dirt that may accumulate on the surface of the mulch or block the emitters. Keep the area around the plants clean to avoid potential clogs and water flow disruptions.
- Seek Professional Help if Needed: If you encounter persistent issues or are unsure how to resolve a problem with your drip irrigation system, don’t hesitate to seek guidance from a professional or an experienced landscaper.
By performing regular maintenance and promptly addressing any issues, you can keep your drip irrigation system functioning optimally and ensure thriving plants. Remember to monitor, clean, and adjust the system as needed to achieve efficient water usage and maintain a healthy garden.
With regular maintenance and troubleshooting practices in place, you have successfully completed the final step of maintaining your drip irrigation system. Congratulations on creating an efficient and sustainable solution for watering your plants!
Conclusion
Congratulations! You have now learned how to design, install, and maintain a drip irrigation system for your garden. By following these steps, you have created an efficient and precise watering system that will provide your plants with the water they need while minimizing water waste. Let’s recap the key points:
First, we discussed the benefits of drip irrigation systems, including water efficiency, consistent moisture delivery, flexibility, time-saving, and improved soil health. These benefits demonstrate the effectiveness and sustainability of drip irrigation compared to traditional watering methods.
We then explored the essential components needed for a drip irrigation system, including the water source, main line tubing, emitters, pressure regulator, filter, fittings, connectors, and timer or controller. Understanding these components is crucial for the successful installation and operation of your system.
The step-by-step process provided guidance on designing your system, gathering materials, installing a water source, laying out the main line tubing, installing the emitters, adding a pressure regulator and filter, connecting the drip tubing, flushing and testing the system, adjusting water flow and pressure, mulching around plants, and regular maintenance and troubleshooting.
Throughout the installation process, we emphasized the importance of customization, monitoring, and making adjustments to meet the specific needs of your plants. By observing plant response, adjusting water flow and pressure, and implementing regular maintenance practices, you can ensure your system operates efficiently and your plants thrive.
Remember, a well-designed and properly maintained drip irrigation system conserves water, promotes healthier plants, minimizes weed growth, and saves you time and effort in the long run. Enjoy the benefits of a lush and vibrant garden while making a positive impact on the environment.
Now, armed with the knowledge and skills you’ve acquired, it’s time to put them into practice. So, roll up your sleeves, get your hands dirty, and let your creativity flourish as you embark on your own drip irrigation system project. Happy gardening!