Home>Gardening Techniques>DIY Projects>How To Use Drip Irrigation System
DIY Projects
How To Use Drip Irrigation System
Modified: January 22, 2024
Learn how to use a drip irrigation system for your DIY projects and save water and effort in your gardening endeavors.
(Many of the links in this article redirect to a specific reviewed product. Your purchase of these products through affiliate links helps to generate commission for Chicagolandgardening.com, at no extra cost. Learn more)
Table of Contents
- Introduction
- Understanding Drip Irrigation Systems
- Benefits of Using Drip Irrigation
- Components of a Drip Irrigation System
- Types of Drip Irrigation Systems
- Planning and Designing Your Drip System
- Installing a Drip Irrigation System
- Maintaining and Troubleshooting Your Drip System
- Tips for Maximizing Efficiency and Water Conservation
- Conclusion
Introduction
Welcome to the world of DIY projects! Whether you’re an avid gardener, a homeowner looking to improve your outdoor space, or simply someone who enjoys getting their hands dirty, learning about drip irrigation systems can take your DIY game to the next level.
Drip irrigation is a method of watering plants that delivers a slow and steady stream of water directly to the plant’s root zone. Unlike traditional sprinkler systems that spray water into the air, drip irrigation systems minimize water waste by delivering water exactly where it’s needed. This not only conserves water but also promotes healthier plant growth by reducing the likelihood of overwatering or underwatering.
But why should you consider using a drip irrigation system for your DIY projects? Well, let me tell you about the benefits. First and foremost, drip irrigation is incredibly efficient. By delivering water directly to the roots, it minimizes evaporation and runoff, ensuring that every drop of water is fully utilized. This not only saves water but also saves you money on your water bill.
Another major benefit of drip irrigation is its versatility. Whether you have a small garden plot, a large backyard, or even container plants on a balcony, drip irrigation systems can be easily tailored to fit your specific needs. With the ability to customize the layout and adjust the water flow for each individual plant, you have full control over the water distribution in your DIY projects.
Furthermore, drip irrigation systems are relatively easy to install and require minimal maintenance. With just a few basic tools and components, you can set up your own system in no time. And once it’s installed, the system will provide a consistent and reliable water supply, allowing you to sit back and enjoy the fruits of your labor without the constant hassle of manual watering.
Whether you’re growing a vegetable garden, creating a vibrant flower bed, or even nurturing potted plants, incorporating a drip irrigation system into your DIY projects can greatly simplify your watering routine and promote healthy, thriving plants. In the following sections, we’ll dive deeper into the various components of a drip irrigation system, explore different types of systems, and guide you through the planning, installation, and maintenance processes. So, let’s get started and unleash the full potential of your DIY projects with the power of drip irrigation!
Understanding Drip Irrigation Systems
Before diving into the world of drip irrigation, it’s important to understand how these systems work and why they are so effective. Drip irrigation systems operate on a simple yet ingenious principle: delivering water directly to the plant’s root zone through a network of tubes and emitters.
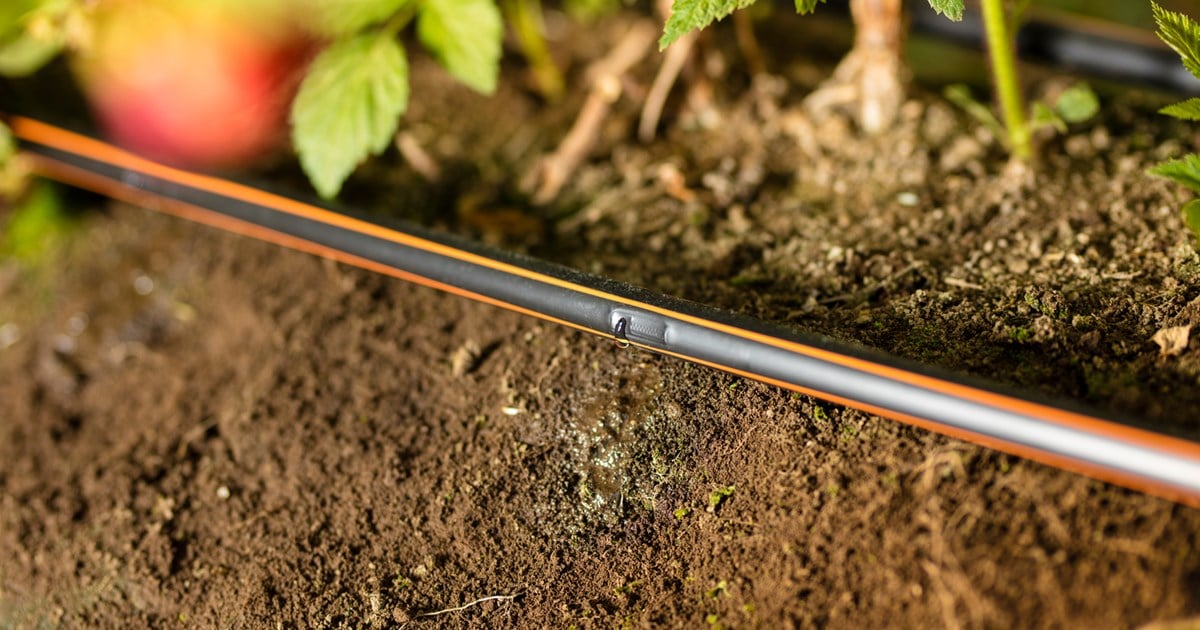
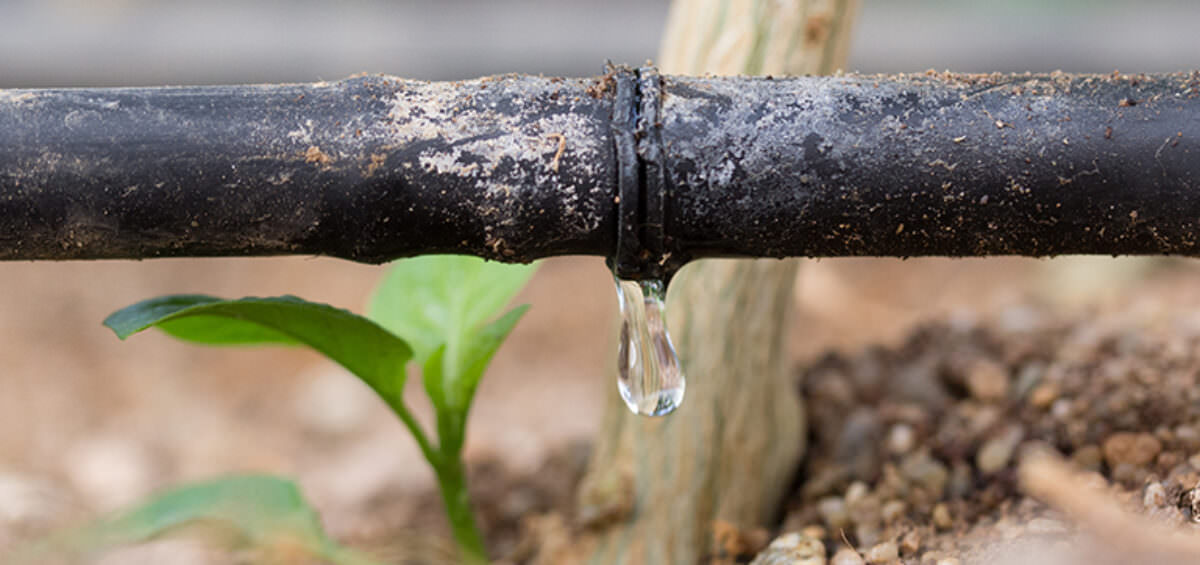
The heart of a drip irrigation system is the emitter. These small devices, often referred to as drippers or micro-sprinklers, regulate the flow of water and distribute it evenly to the plants. The water is released in a slow and controlled manner, allowing it to slowly seep into the soil and reach the plant’s roots. This targeted approach ensures that water is not wasted on areas where it is not needed, such as walkways or between plants.
Another important component of a drip irrigation system is the tubing. These flexible tubes transport water from the water source to the emitters. The tubing comes in various sizes and materials, with common options being polyethylene and PVC. Choosing the right type and size of tubing depends on factors such as the water pressure, length of the system, and number of plants being irrigated.
One of the key advantages of drip irrigation systems is their ability to provide precise and uniform watering. This means that each plant receives the same amount of water, eliminating the risk of overwatering or underwatering. By keeping the soil consistently moist, drip irrigation systems create an optimal growing environment for plants, promoting healthier growth and reducing the risk of diseases caused by excessive moisture.
Another benefit of drip irrigation is its water conservation capabilities. Compared to traditional sprinkler systems, which can lose significant amounts of water to evaporation and wind drift, drip irrigation significantly minimizes water loss. By delivering water directly to the roots, drip systems can reduce water usage by up to 50%, making them an environmentally friendly choice.
In addition to efficient watering, drip irrigation systems can also be used for fertilizing plants. Some emitters are designed to incorporate fertilizer directly into the water supply, allowing for precise and targeted application. This not only saves time and effort but also ensures that nutrients are delivered directly to the plant’s roots, maximizing their absorption and effectiveness.
Overall, understanding how drip irrigation systems work and the benefits they offer is crucial for successful DIY projects. With their ability to deliver water precisely, conserve water, and support healthy plant growth, drip irrigation systems are a game-changer in the world of gardening and landscaping. In the following sections, we will explore the various components of a drip irrigation system in more detail and guide you through the process of planning, installing, and maintaining your own system.
Benefits of Using Drip Irrigation
Using a drip irrigation system offers a wide range of benefits that make it a popular choice for DIY projects. Let’s explore some of the key advantages of using drip irrigation:
1. Water Efficiency: Drip irrigation is one of the most efficient methods of watering plants. By delivering water directly to the root zone, it minimizes water evaporation and runoff. This targeted approach ensures that every drop of water is utilized, resulting in significant water savings compared to traditional watering methods.
2. Precise Watering: With drip irrigation, you have complete control over the amount of water each plant receives. By adjusting the flow rate of individual emitters, you can provide the right amount of water for different types of plants, ensuring optimal growing conditions. This precision eliminates the risk of over or underwatering, promoting healthier plant growth.
3. Reduced Weed Growth: Traditional overhead watering methods can inadvertently promote weed growth by wetting the entire surface of the soil. Drip irrigation delivers water directly to the plant’s root zone, keeping the soil surface dry and minimizing weed germination. This saves you time and effort in weed control.
4. Time and Labor Savings: Once installed, drip irrigation systems require minimal maintenance. Unlike traditional watering methods that require manual watering or time-consuming sprinkler adjustments, drip systems provide a consistent and automated water supply. This frees up your time for other gardening tasks or simply to enjoy your outdoor space.
5. Disease Prevention: Overhead watering methods, such as sprinklers, can contribute to the spread of plant diseases. The moisture on the leaves and foliage creates an ideal environment for fungal diseases to thrive. Drip irrigation eliminates this risk by delivering water directly to the roots, reducing leaf wetness and minimizing the spread of diseases.
6. Enhanced Plant Growth and Yield: Drip irrigation promotes healthier plant growth and higher crop yields. By providing a consistent water supply at the root zone, plants can absorb water and nutrients more efficiently. This results in stronger root development, increased nutrient uptake, and improved overall plant health.
7. Environmentally Friendly: Drip irrigation is an eco-friendly choice for watering. Its water-efficient design reduces water consumption, minimizing the strain on local water resources. Additionally, by preventing overwatering and runoff, drip irrigation helps protect water quality by reducing the amount of fertilizers and pesticides entering local water sources.
With their water efficiency, precision watering, time savings, and environmental benefits, drip irrigation systems are a valuable addition to any DIY project. Whether you’re growing vegetables, flowers, or maintaining a beautiful landscape, drip irrigation can help you achieve your gardening goals while conserving water and promoting healthy plant growth.
Components of a Drip Irrigation System
A drip irrigation system consists of several key components working together to deliver water efficiently and effectively to your plants. Understanding these components is essential for designing, installing, and maintaining your own drip system. Let’s take a closer look at each component:
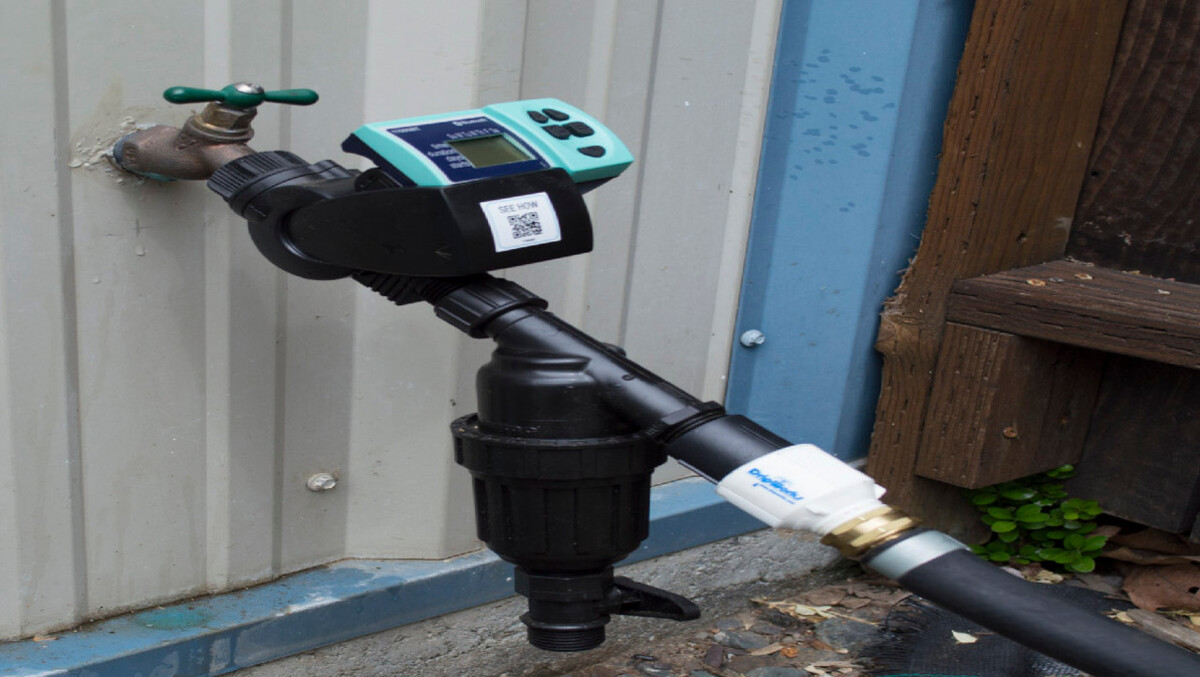
1. Water Source: The water source is where your drip irrigation system gets its water supply. It can be a tap, a rainwater harvesting system, or a well. Make sure the water source is easily accessible and provides enough water pressure to operate the system.
2. Backflow Preventer: A backflow preventer is an essential safety device that prevents contaminated water from flowing back into the main water supply. It protects both your drip system and the potable water supply.
3. Pressure Regulator: A pressure regulator controls the water pressure within the system. It reduces high pressure from the water source to a level that is suitable for drip irrigation. This ensures that the emitters deliver water at a consistent flow rate and prevents damage to the system.
4. Water Filter: A water filter is used to remove sediment, debris, and other particles from the water before it enters the drip system. It prevents clogging of the emitters and ensures that clean water is delivered to your plants.
5. Main Line Tubing: The main line tubing carries water from the water source to the different areas of your garden. It is typically made of durable and UV-resistant materials like polyethylene or PVC. The main line tubing should be sized appropriately based on the flow rate and length of your system.
6. Distribution Tubing: Distribution tubing, also known as lateral tubing, is connected to the main line and carries water to individual plants or groups of plants. It is usually smaller in diameter and made of flexible materials for easy installation and flexibility around plants.
7. Emitters: Emitters, also called drippers or micro-sprinklers, are the devices that deliver water directly to the plants. They are typically installed at the base of each plant and come in various flow rates to match different water requirements. Emitters can be pressure-compensating, meaning they deliver a consistent flow regardless of the water pressure variations.
8. Connectors and Fittings: Connectors and fittings are used to join the different tubing sections, create loops, and make turns in the system. They ensure a secure and watertight connection between components.
9. Valves: Valves allow you to control the flow of water in different zones or sections of your drip system. They are typically used for dividing the system into manageable sections or to shut off water supply to specific areas during maintenance.
10. Timer or Controller: A timer or controller automates the watering schedule of your drip irrigation system. It allows you to set specific watering times and durations, ensuring consistent and efficient irrigation without manual intervention.
These are the key components that make up a typical drip irrigation system. The specific setup and components required may vary depending on the size of your project and the plants being irrigated. Taking the time to understand each component will help you plan and design a drip irrigation system that meets your specific needs and ensures optimal water delivery to your plants.
Types of Drip Irrigation Systems
When it comes to drip irrigation systems, there are several different types to choose from based on your specific needs and preferences. Let’s explore some of the most common types:
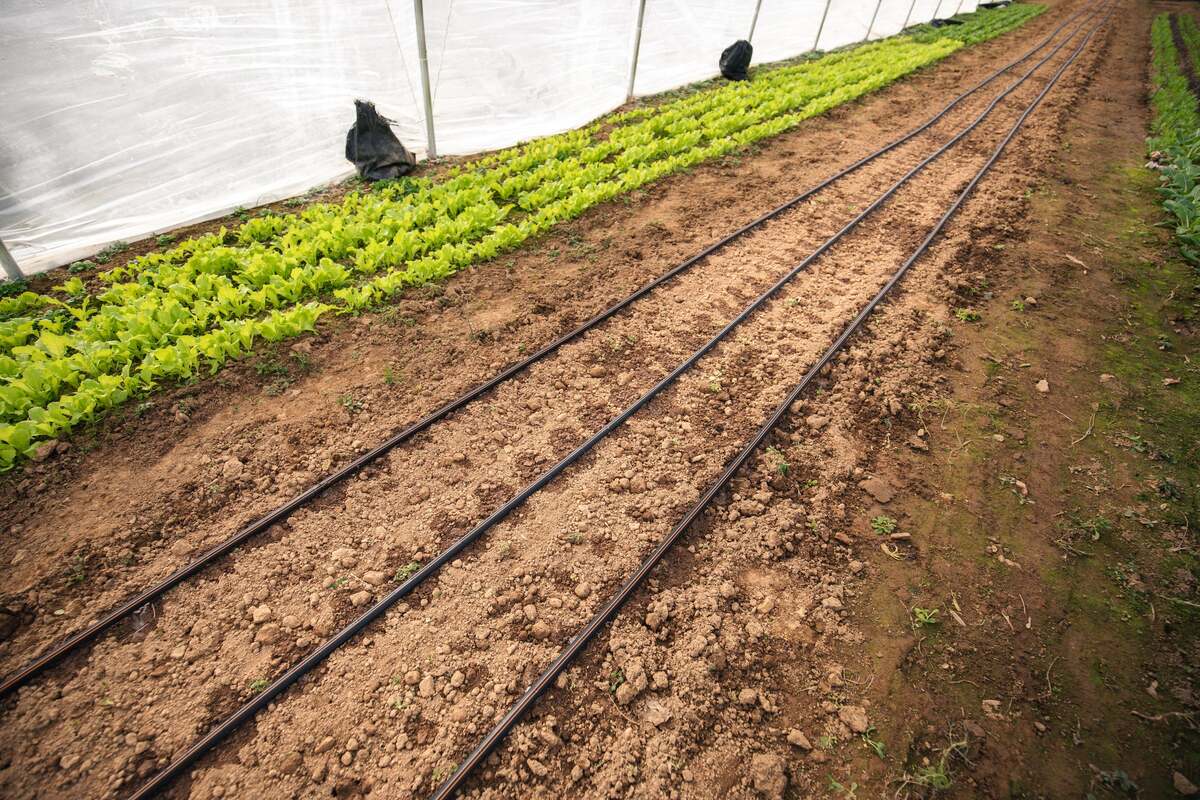
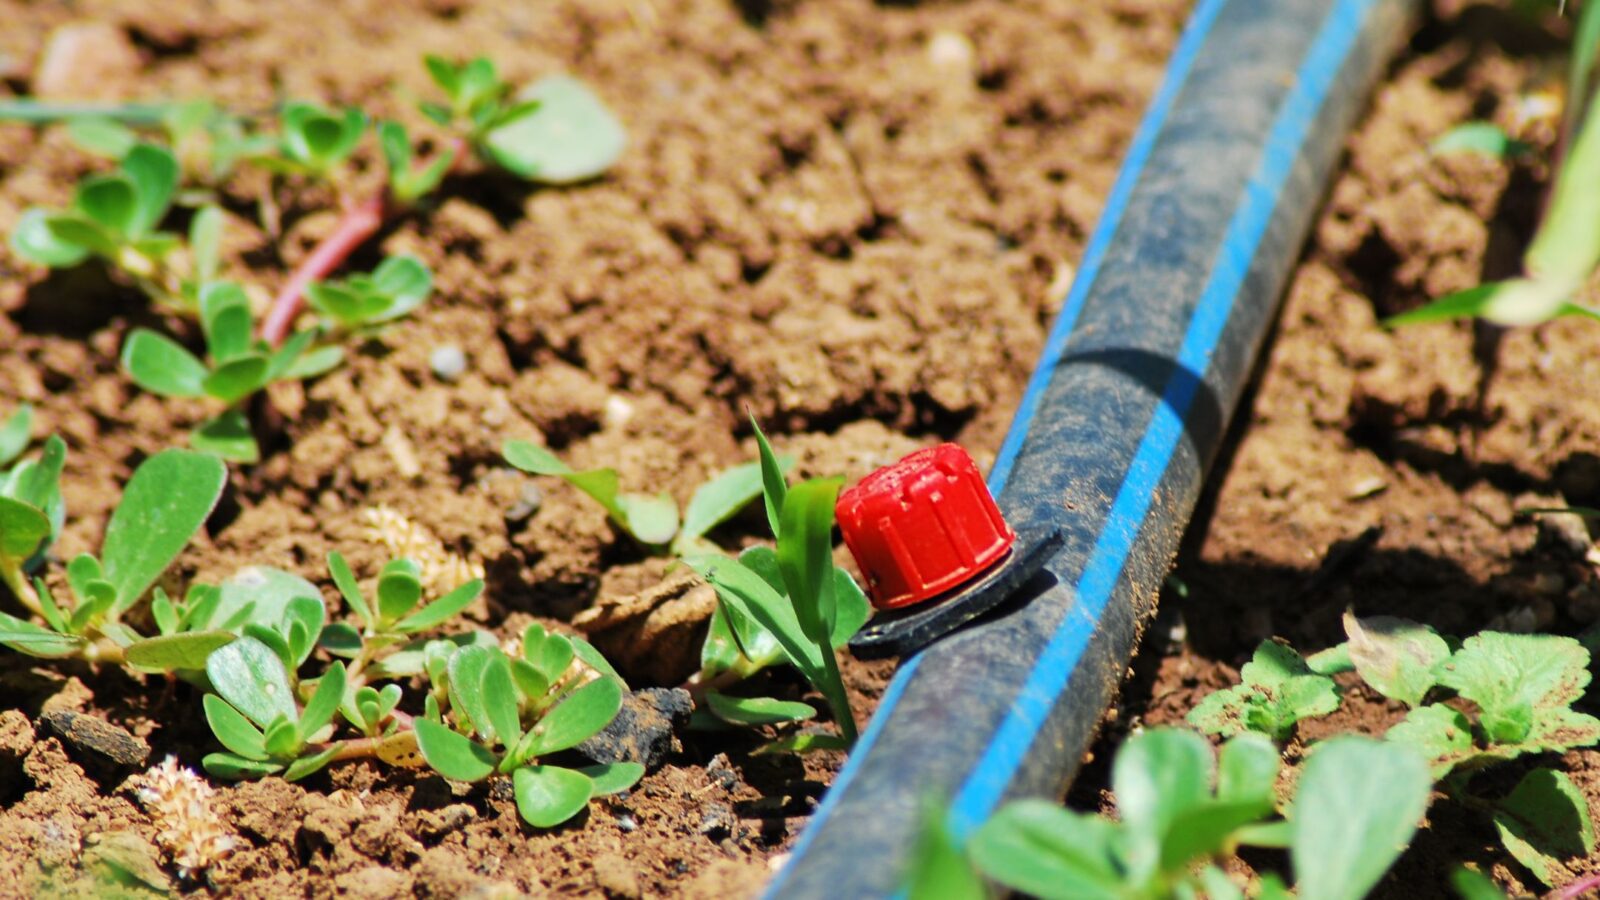
1. Surface Drip Irrigation: Surface drip irrigation is the most traditional and widely used type of drip system. In this setup, the drip emitters are placed on the soil surface near the base of the plants. The water is then delivered directly to the root zone through the emitters. Surface drip irrigation is suitable for a variety of crops, including row crops, orchards, and vineyards.
2. Subsurface Drip Irrigation: Subsurface drip irrigation involves burying the drip lines below the soil surface. This type of system is particularly useful for conserving water and reducing evaporation. The emitters release water underground, directly into the root zone of the plants. Subsurface drip irrigation is commonly used in landscapes, gardens, and areas with high water demand.
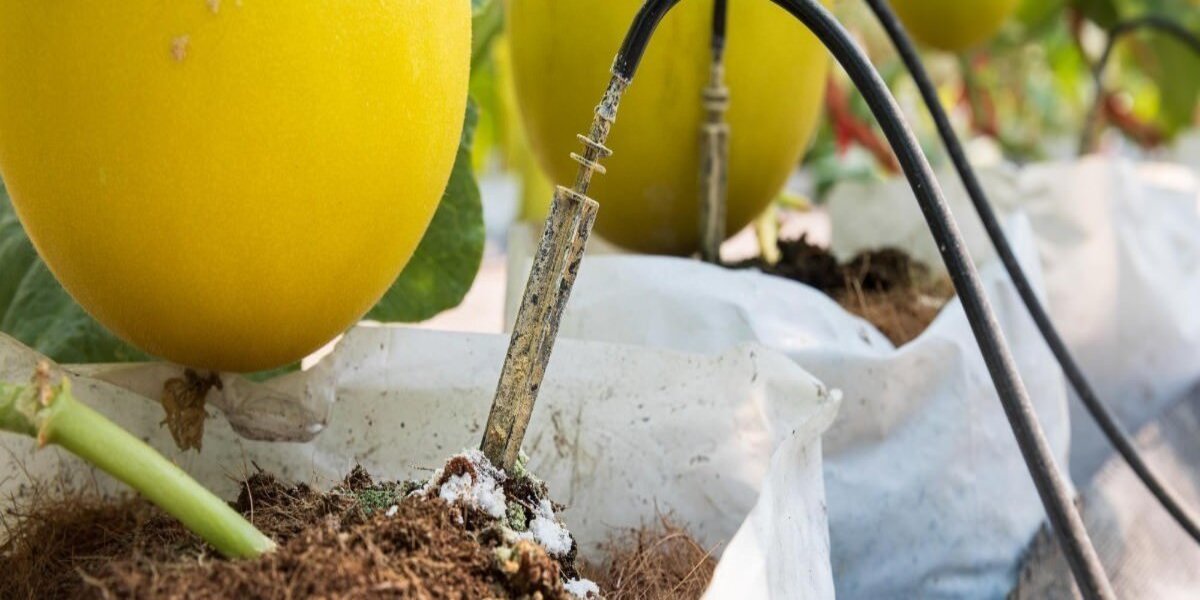
3. Container Drip Irrigation: Container drip irrigation is specifically designed for potted plants or container gardens. It utilizes small, low-volume emitters placed directly on or near the soil surface of the containers. Container drip systems ensure precise watering for individual plants, preventing over or underwatering in confined spaces.
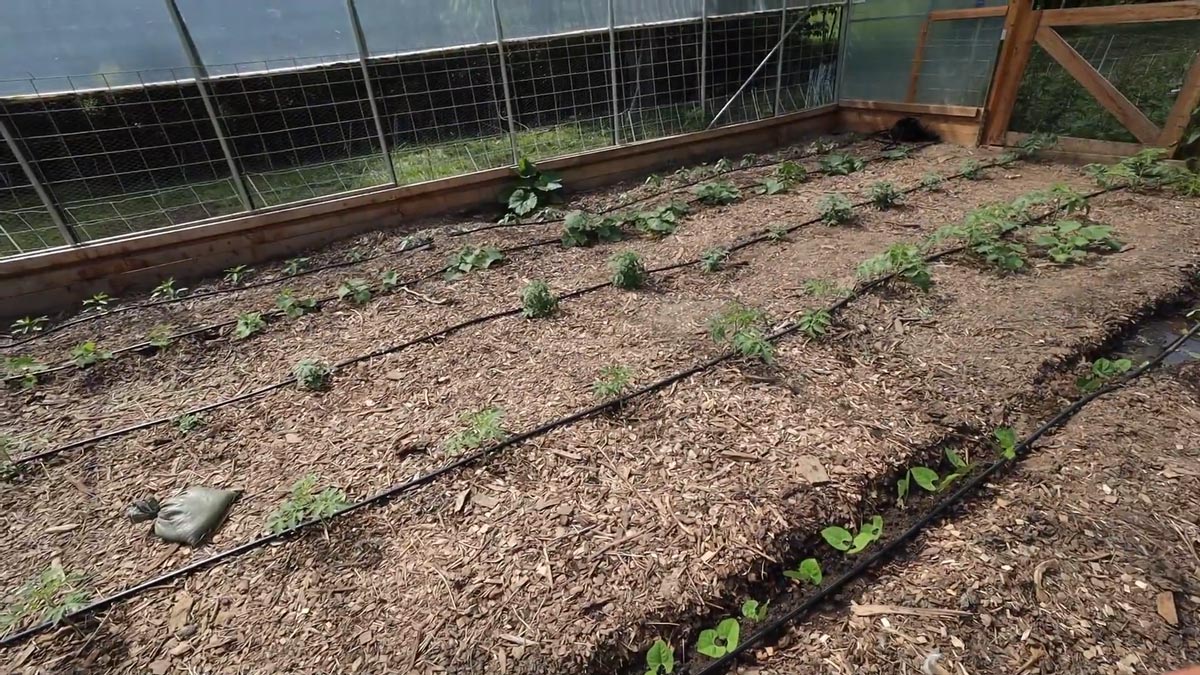
4. Garden Drip Irrigation: Garden drip irrigation systems are ideal for small to medium-sized garden beds and vegetable gardens. They consist of a network of drip lines or micro-sprinklers that are strategically placed along rows or around plants. Garden drip systems provide even water distribution and can be adjusted to accommodate different plant spacing and water requirements.
5. Greenhouse Drip Irrigation: Greenhouse drip irrigation is specifically designed for the unique environment inside a greenhouse. It allows for precise control of water delivery to potted plants or raised beds. Drip lines or individual drippers are installed either above or below the growing media, delivering water directly to the plants’ root zones.
6. Hanging Basket Drip Irrigation: Hanging basket drip irrigation systems are designed to water plants in hanging baskets and vertical gardens. They typically use individual drippers or micro-sprinklers attached to a main line that runs overhead. Hanging basket drip systems ensure targeted watering for plants suspended in the air.
7. Landscape Drip Irrigation: Landscape drip irrigation systems cater to large-scale outdoor landscapes, such as parks, commercial properties, and residential yards. These systems may incorporate a combination of drip lines, micro-sprinklers, and bubblers to provide efficient water distribution across various plants, shrubs, and trees.
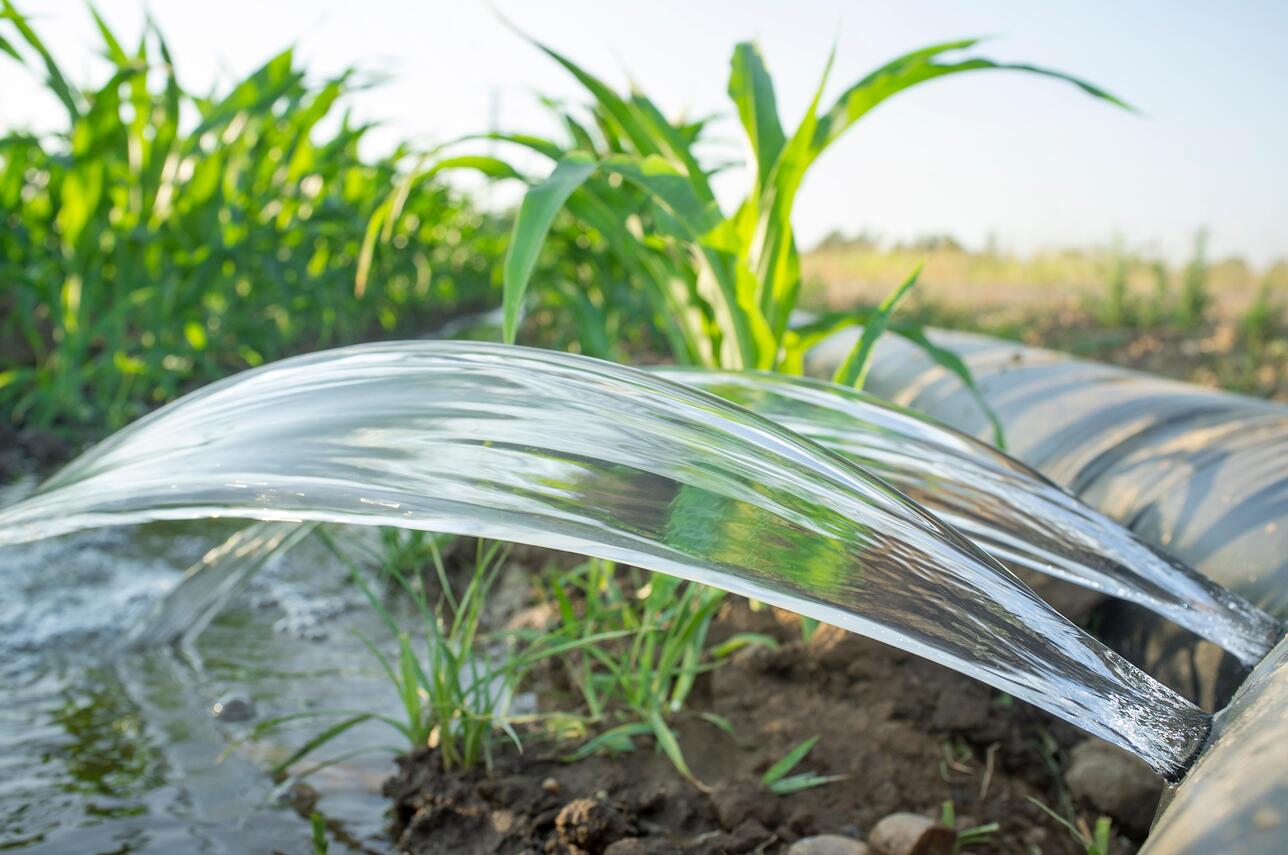
8. Farm Drip Irrigation: Farm drip irrigation systems are designed for large-scale agricultural applications. They are commonly used in row crops, orchards, and vineyards to deliver water directly to the plant roots. Farm drip systems offer precise water distribution, minimize evaporation and runoff, and enhance overall crop productivity.
Each type of drip irrigation system has its own advantages and is suitable for specific applications. Understanding the different types will help you choose the most appropriate system for your DIY project, whether it be a small garden, a commercial landscape, or a large agricultural operation.
Planning and Designing Your Drip System
Proper planning and designing are crucial steps in setting up an efficient and effective drip irrigation system. By taking the time to plan and design your system, you can ensure that your plants receive the right amount of water and maximize the efficiency of your DIY project. Here are some key considerations for planning and designing your drip system:
1. Evaluate Your Water Source: Assess the availability and quality of your water source. Determine the water pressure and flow rate to ensure it meets the requirements of your drip system. If the pressure is too high, you may need to install a pressure regulator to reduce it to the optimal level for your system.
2. Measure Your Garden or Landscape: Take accurate measurements of your garden or landscape to determine the area that needs irrigation. Identify the different zones or areas that have similar water requirements. This will help you determine the number of emitters and tubing lengths needed for each zone.
3. Determine Your Plant’s Water Needs: Understand the water requirements of the plants you will be irrigating. Different plants have different watering needs, so it’s important to consider factors such as their size, growth stage, and root depth when designing your system. This will help you choose the appropriate emitters and water distribution for each plant.
4. Create a Layout Plan: Sketch a layout plan of your garden or landscape, including the plant locations and the desired placement of your drip lines. Consider factors such as the plant spacing, the proximity to existing structures, and any potential obstacles or terrain variations. This plan will serve as a guide during the installation phase.
5. Select the Right Components: Choose the appropriate tubing, emitters, connectors, and fittings based on your system’s requirements. Consider the flow rate, pressure rating, and durability of the components. Ensure that they are compatible and will provide proper water distribution throughout your system.
6. Plan for Water Conservation: Incorporate water conservation techniques into your design. Consider using mulch to retain moisture, installing rain sensors or moisture sensors to avoid overwatering, and grouping plants with similar water needs together to optimize water usage. These practices will not only conserve water but also promote healthier plant growth.
7. Consider Automation: If desired, include an automation system in your design. A timer or controller can be added to the system to automate watering schedules. This ensures consistent and efficient irrigation, even when you’re not available to manually control the system.
8. Monitor and Adjust: Once your drip system is installed, regularly monitor and evaluate its performance. Check for any leaks, clogs, or uneven water distribution. Adjust the flow rates and emitter placements as needed to ensure optimal watering for your plants.
By carefully planning and designing your drip irrigation system, you can create a customized setup that meets the specific needs of your DIY project. Taking these steps will help you make the most of your resources, save time and water, and ultimately, achieve successful and thriving plants.
Installing a Drip Irrigation System
Installing a drip irrigation system is a rewarding and straightforward process that can transform the way you water your plants. Whether you’re a seasoned DIY enthusiast or new to irrigation systems, following these steps will help you install your own drip system effectively:
1. Gather Your Materials: Collect all the necessary components for your drip system, including tubing, emitters, connectors, fittings, and any additional tools required for installation. Double-check that you have everything you need before getting started.
2. Prepare the Area: Clear the area where you will be installing the drip system. Remove any weeds, debris, or obstacles that may interfere with the installation process. Make sure the soil is adequately prepared to provide a stable base for your tubing.
3. Lay Out the Main Line Tubing: Start by laying out the main line tubing along the desired path. Cut the tubing to the required length, allowing for extra slack around corners and obstacles. Secure the tubing using stakes or clips to keep it in place.
4. Connect the Components: As you lay out the tubing, connect the various components such as connectors, fittings, and valves. Ensure that each connection is secure and watertight. Test the connections by running water through the system to check for any leaks or issues.
5. Install the Distribution Tubing: Install the distribution tubing, also known as lateral lines or sub-main lines. Cut the tubing according to the required lengths and connect it to the main line using appropriate fittings. Lay the distribution tubing along the rows or areas where you want to water your plants.
6. Install the Emitters: Install the appropriate emitters for each plant, considering their water needs and spacing requirements. Attach the emitters to the distribution tubing by punching holes or using barbed connectors. Ensure that the emitters are securely connected and positioned at the base of the plants.
7. Add Additional Components: Depending on your system design and specific needs, add any additional components such as micro-sprinklers, bubblers, or misters. These can be useful for watering larger areas or specific plant types that require different water distribution methods.
8. Test the System: Turn on the water supply and test the entire system for proper functioning. Check for any leaks, clogs, or uneven water distribution. Make any necessary adjustments or repairs before proceeding.
9. Cover the Tubing: Once the system is tested and functioning well, cover the tubing with a layer of mulch or soil to protect it from direct sunlight and potential damage. This will help retain moisture and maintain a more aesthetically pleasing appearance for your garden or landscape.
10. Periodically Maintain and Adjust: Regularly inspect and maintain your drip system. Clear any clogs, adjust emitter flow rates, and make necessary repairs as needed. Periodically check the water pressure and adjust the system to accommodate changes in plant growth or specific watering requirements.
By following these installation steps and maintaining your drip irrigation system, you can ensure optimal water distribution and healthy plant growth. Remember that each installation is unique, so be prepared to make adjustments based on the specific needs of your DIY project.
Maintaining and Troubleshooting Your Drip System
Maintaining and troubleshooting your drip irrigation system is essential to keep it functioning optimally and prevent any issues that may arise over time. By performing regular maintenance tasks and addressing problems promptly, you can ensure that your DIY project continues to thrive. Here are some tips for maintaining and troubleshooting your drip system:
1. Regular Inspections: Conduct regular inspections of your drip system to check for any leaks, clogs, or damaged components. Inspect the main and distribution lines, emitters, connectors, and valves for signs of wear or blockage. Detecting issues early on allows you to address them before they cause further damage.
2. Clear Clogs: Clogs in the emitters or tubing can hinder water flow and affect the performance of your system. If you notice reduced or uneven watering, remove the clogged emitters and clean them with water or use a small tool to clear any debris. Flush the tubing to remove any potential blockages.
3. Adjust Emitters: Over time, plants may grow and their water requirements may change. Regularly check the alignment and placement of the emitters to make sure they are watering the intended plants. Adjust the flow rates or reposition the emitters to provide adequate water distribution.
4. Monitor Water Pressure: Keep an eye on the water pressure in your system. Low pressure may lead to inadequate water distribution, while high pressure can cause damage to the emitters or fittings. Use a pressure gauge to measure and adjust the pressure if needed, ensuring it falls within the recommended range for your system.
5. Check Valves and Fittings: Inspect the valves and fittings for any leaks or loose connections. Tighten any loose fittings and replace any damaged components. Ensure that the valves are opening and closing properly to control water flow to different zones or sections of your drip system.
6. Protect Against Damage: Take precautions to protect your system from potential damage. Avoid mowing or trimming near the tubing to prevent accidental cuts or breaks. Keep an eye out for pests that may chew or damage the tubing. Install protective barriers, such as mulch, to shield the tubing from direct sunlight or extreme weather conditions.
7. Adjust for Seasonal Changes: As the seasons change, adjust your watering schedule and system settings accordingly. During rainy periods, reduce or suspend irrigation to prevent overwatering. In hotter, drier periods, you may need to increase the frequency or duration of watering to meet the plant’s needs.
8. Maintain Water Source: Keep the water source clean and free from debris that may clog the system. Regularly inspect and clean filters or screens to ensure a steady flow of clean water. If using a well or rainwater harvesting system, check for any issues or contamination that may impact the water quality.
9. Document and Track: Keep a record of your maintenance activities, including any adjustments made or issues resolved. This will help you track the performance of your system over time and identify patterns or recurring problems that may require further attention.
10. Seek Professional Help if Needed: If you encounter complex issues or are unable to resolve a problem, don’t hesitate to seek professional assistance. A licensed irrigation specialist can diagnose and address more challenging problems to ensure the long-term success of your drip system.
By following these maintenance and troubleshooting tips, you can keep your drip irrigation system running smoothly and enjoy the many benefits it provides for your DIY project. Regular vigilance and addressing issues promptly will help you achieve efficient water distribution, promote healthy plant growth, and extend the lifespan of your system.
Tips for Maximizing Efficiency and Water Conservation
Efficiency and water conservation are key considerations when it comes to using a drip irrigation system. By implementing these tips, you can maximize the effectiveness of your DIY project while minimizing water usage. Here are some helpful tips to achieve optimum efficiency and water conservation:
1. Group Plants with Similar Water Needs: When designing your irrigation zones, group plants with similar water requirements together. This allows you to customize watering schedules and ensure that each plant receives the appropriate amount of water, preventing overwatering or underwatering.
2. Utilize Mulch: Apply a layer of organic mulch such as wood chips, straw, or compost around your plants. Mulch helps retain moisture in the soil, reducing evaporation and maintaining consistent soil temperature. This allows for better water absorption and minimizes the need for frequent watering.
3. Water During the Optimal Time: Water your plants early in the morning or late in the evening when temperatures are cooler and evaporation rates are lower. This enables the plants to absorb the water more effectively, minimizing water loss due to evaporation.
4. Adjust Watering Frequency: Regularly assess your plants’ water needs and adjust the watering frequency accordingly. Factors such as weather conditions, plant growth stage, and soil moisture levels should be considered. Avoid overwatering by monitoring the soil moisture and adjusting the irrigation schedule as needed.
5. Perform Regular System Maintenance: Regularly inspect your drip system for leaks, clogs, or damaged components. Clear any clogged emitters or tubing, and replace worn-out or broken parts. This ensures efficient water flow and prevents wasted water due to leaks or blockages.
6. Use Pressure Regulators: Install pressure regulators in your system to maintain consistent water pressure. This helps avoid excessive water flow and reduces the risk of emitter blowouts or unnecessary water usage. Adjust the pressure according to the needs of your specific plants.
7. Install Rain Sensors or Moisture Sensors: Invest in rain sensors or moisture sensors that can automatically adjust your watering schedule based on actual weather or soil moisture conditions. These sensors help prevent unnecessary watering during periods of rain or when the soil already has sufficient moisture.
8. Practice Regular Weeding: Keep the area around your plants free from weeds. Weeds compete for water with your desired plants, leading to higher water requirements. Regularly remove weeds to avoid wasting water on unwanted vegetation.
9. Consider Drip Tape Systems: Drip tape systems are an efficient option for larger areas or row crops. Drip tapes have evenly spaced emitters along the length of a flat, thin tape, optimizing water distribution and minimizing water waste.
10. Educate Yourself: Stay informed about water-wise gardening practices, local water restrictions, and the specific needs of your plants. Continuously educate yourself on efficient irrigation techniques to ensure you make the most of your drip system while conserving water.
By implementing these tips, you’ll not only maximize the efficiency of your drip irrigation system but also conserve water in your DIY projects. Consistent monitoring, proper system maintenance, and mindful watering practices will not only benefit your plants but also contribute to sustainable water usage and a healthier environment.
Conclusion
Congratulations! You’ve reached the end of our comprehensive guide to drip irrigation systems for DIY projects. By now, you should have a solid understanding of how drip irrigation works and the numerous benefits it offers. From water efficiency and precise watering to flexibility and ease of installation, drip irrigation systems are a game-changer for any gardener or DIY enthusiast.
Throughout this article, we’ve explored the various components of a drip system, discussed different types of systems, and provided tips for planning, installing, maintaining, and troubleshooting your system. We’ve also shared valuable tips for maximizing efficiency and water conservation in your DIY projects.
Remember, successful implementation of a drip irrigation system requires careful planning, proper design, regular maintenance, and monitoring. By following the guidelines outlined, you can enjoy healthier plants, water conservation, and greater control over your watering routine.
So, whether you’re tending to a small garden, creating a vibrant landscape, or growing crops on a larger scale, incorporating drip irrigation into your DIY projects is a surefire way to enhance efficiency, promote healthy plant growth, and conserve water resources.
Now it’s time to put your newfound knowledge into action. Plan your drip system, gather your materials, and embark on your watering journey. With the power of drip irrigation on your side, your plants will thrive, and your DIY projects will flourish.
Happy gardening and happy DIY-ing!