Home>Gardening Techniques>DIY Projects>How To Install An Irrigation System In Your Yard
DIY Projects
How To Install An Irrigation System In Your Yard
Modified: January 22, 2024
Learn how to install an irrigation system in your yard with this step-by-step DIY guide. Create a lush and green landscape with efficient water distribution.
(Many of the links in this article redirect to a specific reviewed product. Your purchase of these products through affiliate links helps to generate commission for Chicagolandgardening.com, at no extra cost. Learn more)
Table of Contents
Introduction
Welcome to the world of DIY projects! If you’re a homeowner looking to create a lush and thriving yard, installing an irrigation system is one of the best investments you can make. Not only does it save you time and effort in watering your plants, but it also ensures that they receive the right amount of water at the right time.
Installing an irrigation system may seem like a daunting task, but with a little planning and the right tools, you can easily transform your yard into an oasis. In this article, we’ll guide you through the step-by-step process of installing an irrigation system in your yard.
Before we dive into the details, it’s important to understand why an irrigation system is beneficial. Watering your yard manually can be time-consuming and inefficient, especially if you have a large area to cover. An irrigation system automates the process, delivering water directly to your plants’ roots, providing them with a consistent and controlled water supply.
Moreover, an irrigation system helps to conserve water by preventing overwatering and reducing evaporation. It allows you to customize the watering schedule based on your plants’ needs, ensuring that they thrive while minimizing water waste.
Assessing your yard is the first step in the installation process. Take a walk around your property and identify any specific needs or challenges. Consider the size and layout of your yard, the types of plants you have, and any existing water sources. This assessment will help you determine the best irrigation system for your needs.
Once you’ve assessed your yard, gather all the necessary materials and tools. These may include irrigation pipes, sprinkler heads, valves, fittings, a trenching tool, a pipe cutter, and a control box. It’s important to have everything you need before you start, as it will save you time and ensure a smooth installation process.
In the next section, we’ll explore the planning process, where you’ll design the layout and determine the placement of sprinkler heads and pipes. This step is crucial in ensuring that your irrigation system effectively covers your entire yard and delivers water where it’s needed.
Stay tuned as we guide you through each stage of the installation process, from digging trenches and installing pipes to connecting to the water source and testing the system. By the end, you’ll have a fully functional irrigation system that will keep your yard looking green and healthy year-round.
Assessing Your Yard
Before you begin installing an irrigation system in your yard, it’s essential to assess the area and understand its unique characteristics. This step will help you determine the best approach for designing and installing your system.
Start by taking a walk around your yard and observing its layout and features. Consider the size and shape of your yard, the types of plants you have, and any existing landscaping elements such as flower beds, trees, and shrubs. Take note of any areas that may require special attention, such as slopes or areas with poor drainage.
Next, assess the water sources available to you. Depending on your property, you may have access to a municipal water supply, a private well, or even a rainwater harvesting system. Understanding where your water will come from will help you determine the best irrigation system for your needs and the available water pressure.
Take into account the types of plants you have in your yard. Different plants have different water requirements, so it’s important to consider their specific needs when designing your irrigation system. For example, lawns typically require more water than flower beds, while certain plants like succulents have low water needs.
Consider the climate and weather patterns of your area. If you live in a region with hot summers or frequent droughts, you’ll want to ensure that your irrigation system is capable of providing sufficient water during these periods. Similarly, if you experience heavy rainfall, you may want to incorporate rain sensors or smart controllers into your system to prevent overwatering.
Lastly, think about any future plans you may have for your yard. If you’re considering adding new plants or expanding your landscaping in the future, it’s wise to account for these possibilities in your irrigation system design. Planning for future growth can save you time and money down the line.
By thoroughly assessing your yard, you’ll be equipped with the necessary information to design an irrigation system that meets your specific needs. Understanding the layout, water sources, plant types, climate, and future plans will ensure that your installation is successful and provides optimal results for your yard’s irrigation needs.
Gathering Materials and Tools
Now that you’ve assessed your yard and have a clear understanding of your irrigation needs, it’s time to gather all the materials and tools necessary for the installation process. Having everything you need on hand will save you time and ensure a smooth installation.
The specific materials and tools you’ll need will depend on the type of irrigation system you’ve chosen and the layout of your yard. However, here are some common items you’ll likely need:
- Irrigation pipes: These pipes will carry water from the source to the sprinkler heads. Depending on your yard’s size and layout, choose pipes of the appropriate diameter and length.
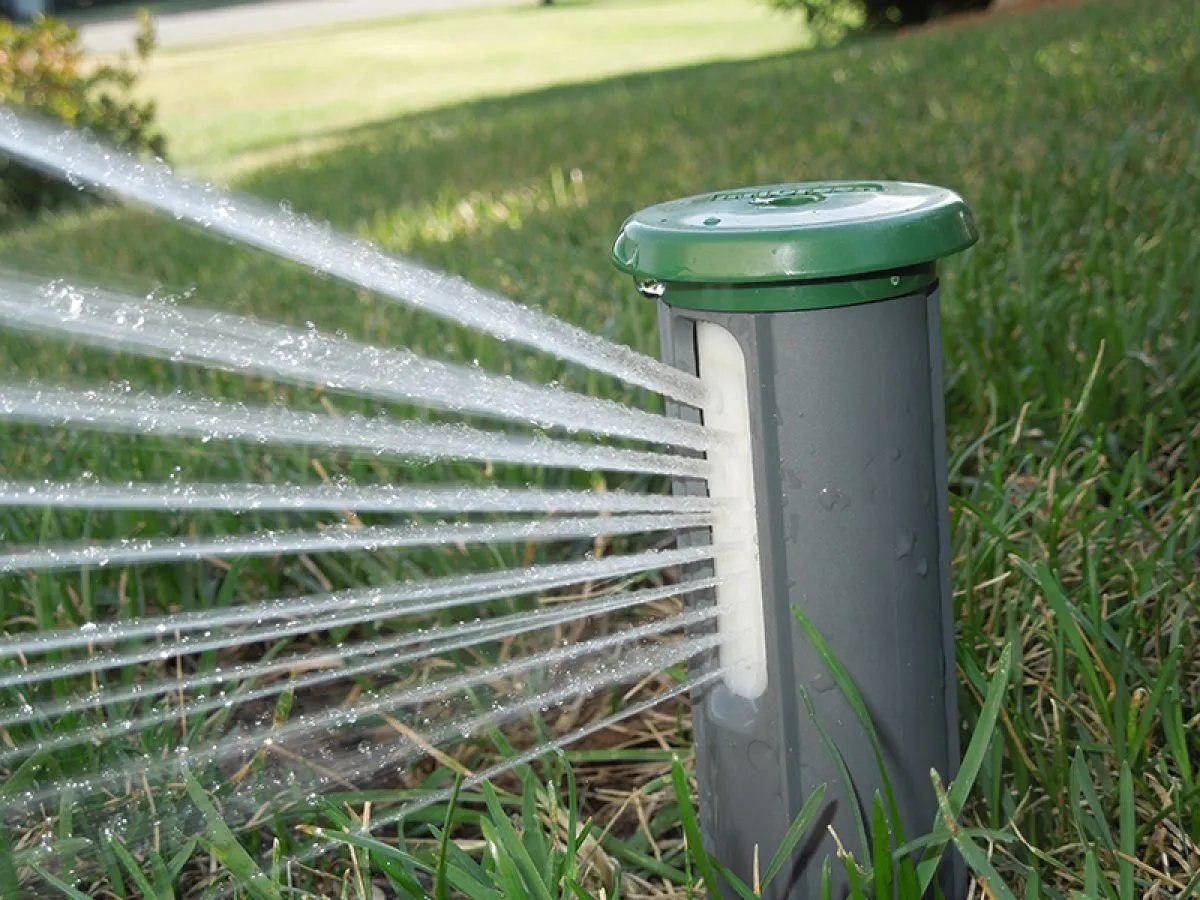
- Sprinkler heads: There are various types of sprinkler heads available, including pop-up heads, rotor heads, and drip emitters. Select the type that best suits your yard’s needs and water requirements.
- Valves and fittings: Valves control the flow of water through your irrigation system, while fittings connect the pipes and components together. Make sure to have an assortment of valves and fittings to accommodate your system’s design.
- Trenching tool: This tool is essential for digging trenches to lay the irrigation pipes. Choose a trenching tool based on the size of your yard and the depth of the trenches required.
- Pipe cutter: A pipe cutter will be needed to cut the irrigation pipes to the appropriate length. Invest in a quality pipe cutter to ensure clean and accurate cuts.
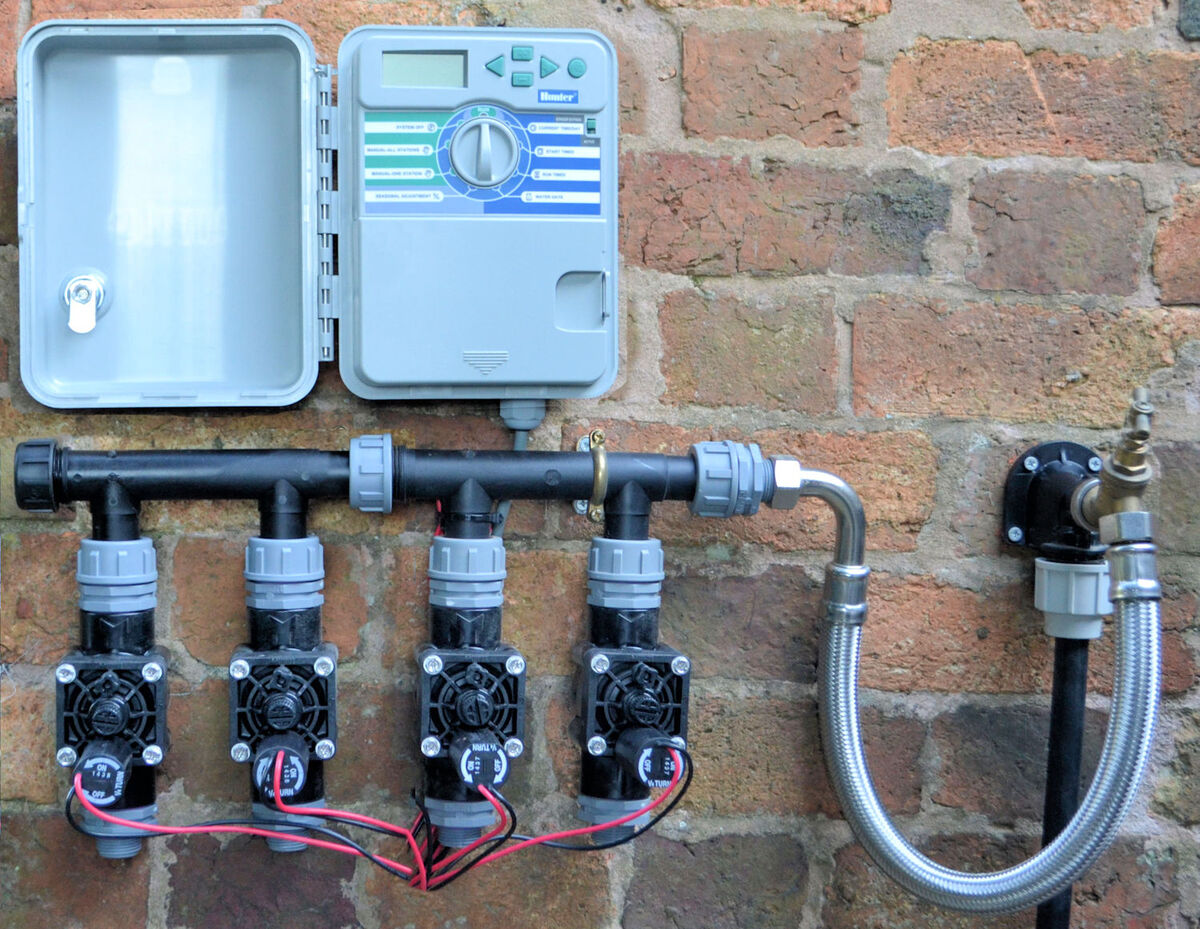
- Control box: If you opt for an automated irrigation system, you’ll need a control box to program and schedule watering times. Ensure the control box is compatible with your chosen system and has the necessary features.
In addition to these materials, it’s also a good idea to have some protective gear, such as gloves and safety goggles, to ensure your safety during the installation process.
Before making a trip to the store, create a comprehensive list of all the materials and tools you’ll need based on your specific irrigation system design. This will help you stay organized and prevent any delays or last-minute trips to the store during the installation process.
Once you have all the necessary materials and tools ready, you’re one step closer to installing your irrigation system. In the next section, we’ll delve into the planning process, where you’ll design the layout of your system and determine the placement of sprinkler heads and pipes.
Planning the Layout
Designing the layout of your irrigation system is a crucial step that will determine its effectiveness in providing water to your entire yard. By carefully planning the placement of sprinkler heads and pipes, you’ll ensure that every plant receives the right amount of water.
Start by creating a detailed map of your yard on graph paper or using a digital design tool. Mark the boundaries of your yard and any existing landscaping features, such as flower beds or trees. This will serve as the foundation for planning the layout of your irrigation system.
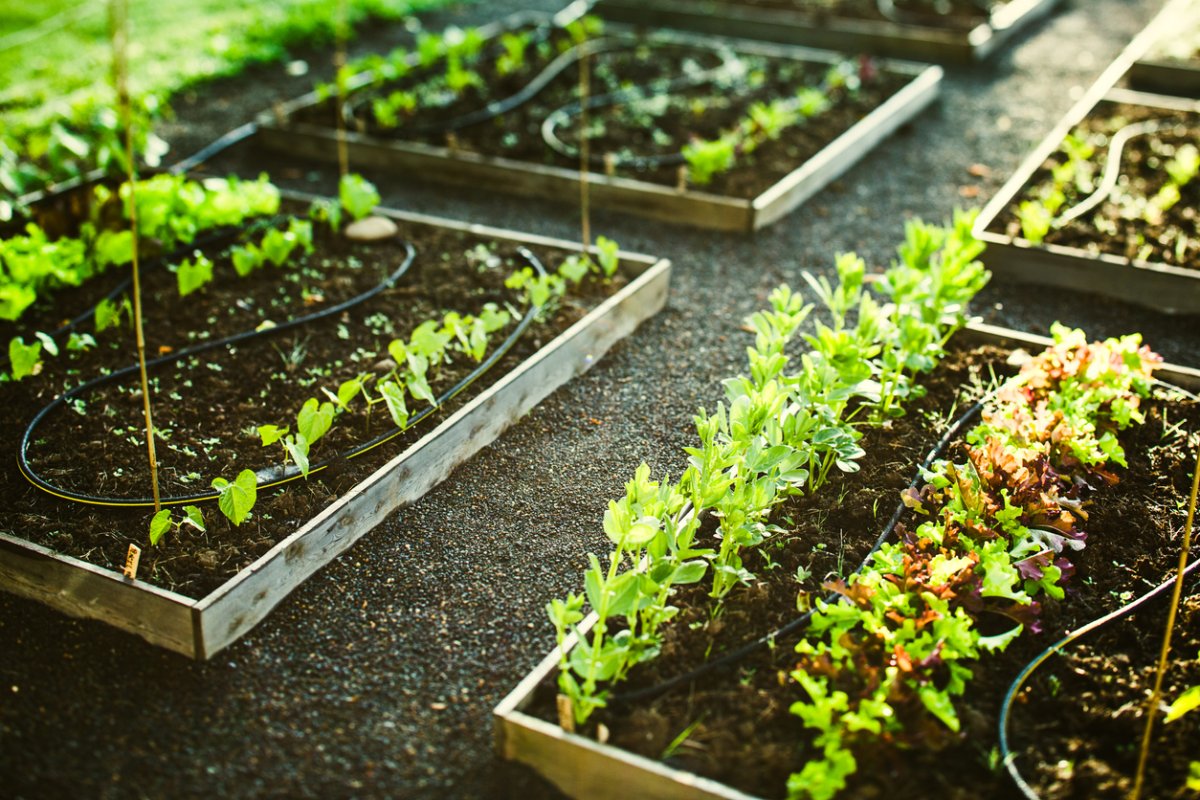
Next, consider the water requirements of different areas in your yard. Divide your yard into zones based on plant water needs. For example, lawns generally require more water than flower beds. By grouping plants with similar water requirements together, you can create efficient watering zones.
Determine the placement of your sprinkler heads based on the coverage area and the pattern they provide. Some sprinkler heads may have a 360-degree coverage area, while others may have a narrower range. Ensure that the sprinkler heads are strategically placed to cover the entire zone without overlapping or leaving any dry spots.
Incorporate the natural slope and elevation of your yard into your irrigation system design. If you have areas with poor drainage or slopes, adjust the layout to ensure proper water distribution. Consider using drip irrigation for plants on slopes to prevent water runoff.
As you plan the layout, take into account any obstacles that may hinder the installation, such as underground utilities or existing structures. Make the necessary adjustments to avoid damaging these elements and to ensure that your irrigation system operates smoothly.
Once you have a tentative layout, consider the flow and pressure of water in your system. Ensure that the water pressure is sufficient for the sprinkler heads to operate effectively and that the flow rate of the system can provide adequate water to all areas.
Finally, double-check your layout to make sure that it covers your entire yard and provides water to all the necessary zones. Make any necessary adjustments before proceeding to the next step of the installation process.
By carefully planning the layout of your irrigation system, you’ll maximize its efficiency and effectiveness in watering your yard. Taking the time to design a well-thought-out layout will save you time and resources and ensure that your plants receive optimal water coverage.
Digging Trenches
Once you’ve finalized the layout of your irrigation system, it’s time to start digging trenches to lay the irrigation pipes. Properly dug trenches ensure that the pipes are securely in place and provide efficient water delivery to your plants.
Start by marking the locations of the trenches according to your layout plan. Use spray paint or marking flags to indicate the path of the trenches. This will serve as a guide during the digging process.
Before digging, it’s important to check for any underground utilities or cables to avoid causing damage. Call your local utility company to mark the locations of these utilities. It’s crucial to dig safely and avoid any potential hazards.
Choose an appropriate trenching tool based on the size and depth of the trenches. A trenching shovel, trenching machine, or trencher can be used depending on the scope of your project. Follow the manufacturer’s instructions on how to properly operate the tool.
Begin digging the trenches along the marked paths. The trenches should be deep enough to accommodate the irrigation pipes, usually between 6 to 12 inches deep. The width of the trenches will depend on the size of the pipes and fittings you’re using.
As you dig, keep the trenches straight and uniform in depth. Use a level or a string as a guide to ensure that the trenches are even. Straight and level trenches make it easier to lay the pipes later on and provide better water flow through the system.
Consider the slope of your yard as you dig the trenches. If you have areas with a significant slope, create a slight incline in the trenches to allow water to flow downhill. This will help prevent water pooling and ensure proper drainage.
Once the trenches are dug, remove any excess dirt or debris from the trenches to create a clean workspace. Inspect the trenches to ensure that they are free from any rocks, roots, or other obstacles that may interfere with the installation process.
Now that your trenches are prepared, you’re ready to move on to the next step—installing the irrigation pipes and sprinkler heads. We’ll cover this process in detail in the next section.
By taking the time to dig trenches carefully and accurately, you’ll create a solid foundation for your irrigation system. Straight and level trenches will make the installation process smoother and ensure that water flows efficiently through your system, delivering the much-needed hydration to your plants.
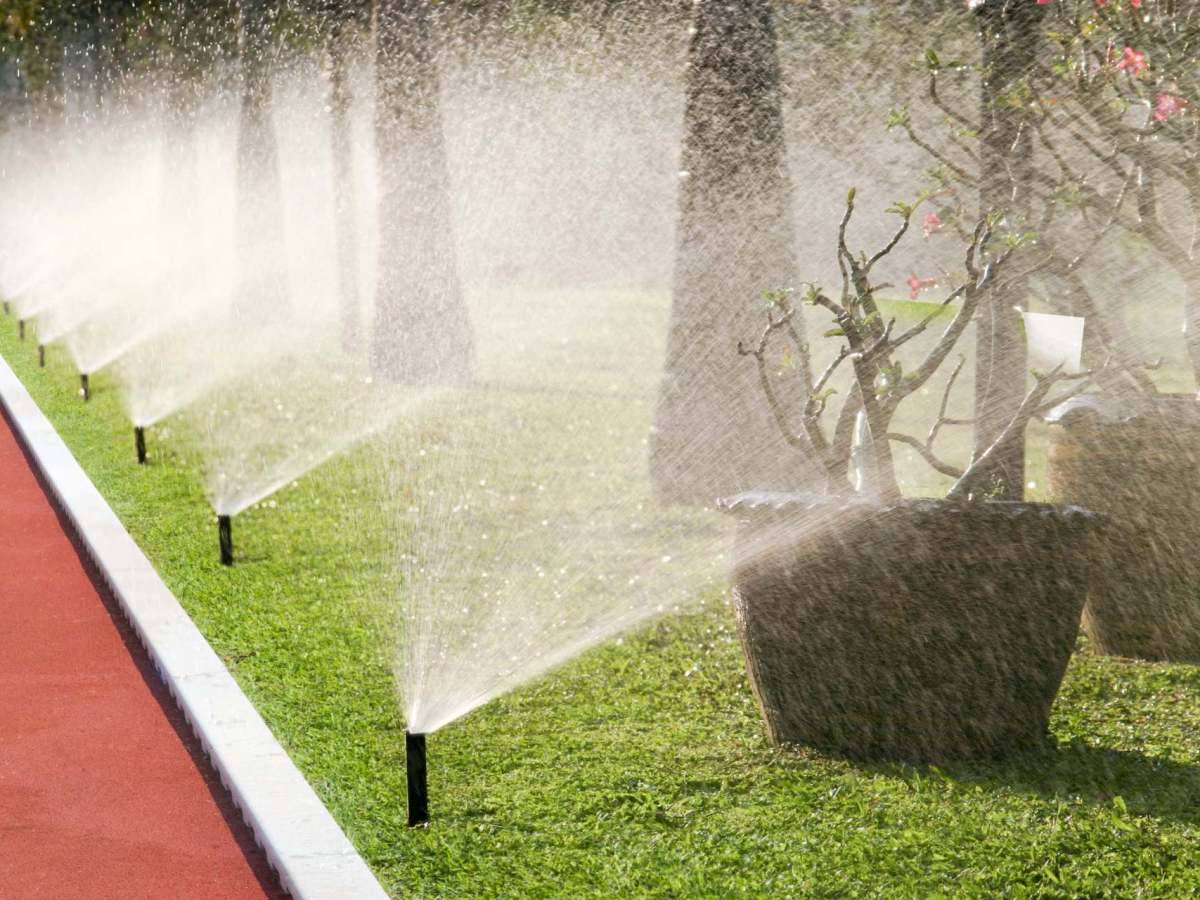
Installing Irrigation Pipes and Sprinkler Heads
With the trenches properly dug, it’s time to install the irrigation pipes and sprinkler heads, connecting them to create a functional system that will deliver water to your plants. This step requires careful attention to detail to ensure that all components are properly aligned and connected.
Start by laying the irrigation pipes in the trenches, following the layout plan you created earlier. Begin at one end of the trench and unroll the pipe, making sure it reaches the desired location of the sprinkler head. Cut the pipe to the appropriate length using a pipe cutter.
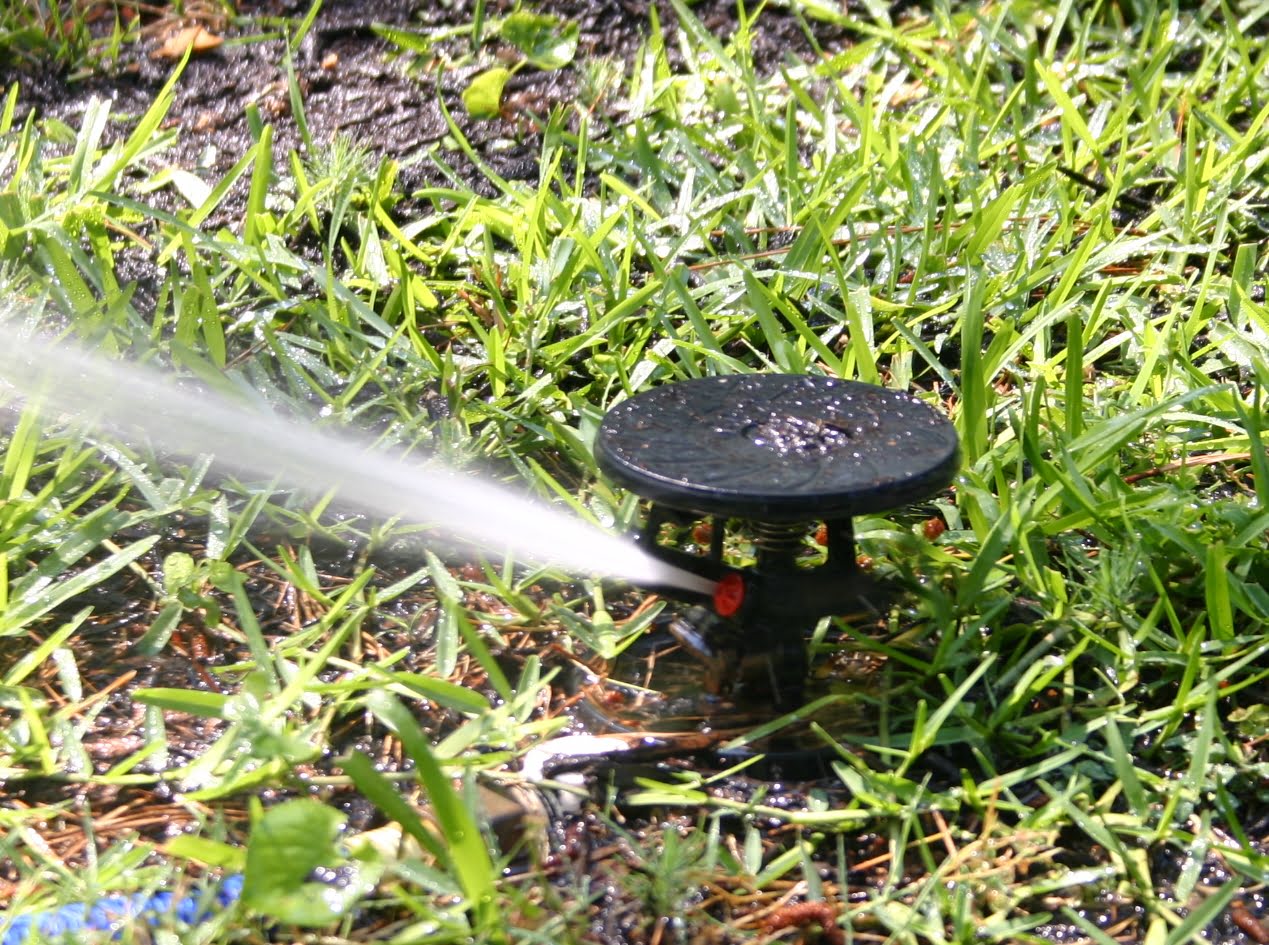
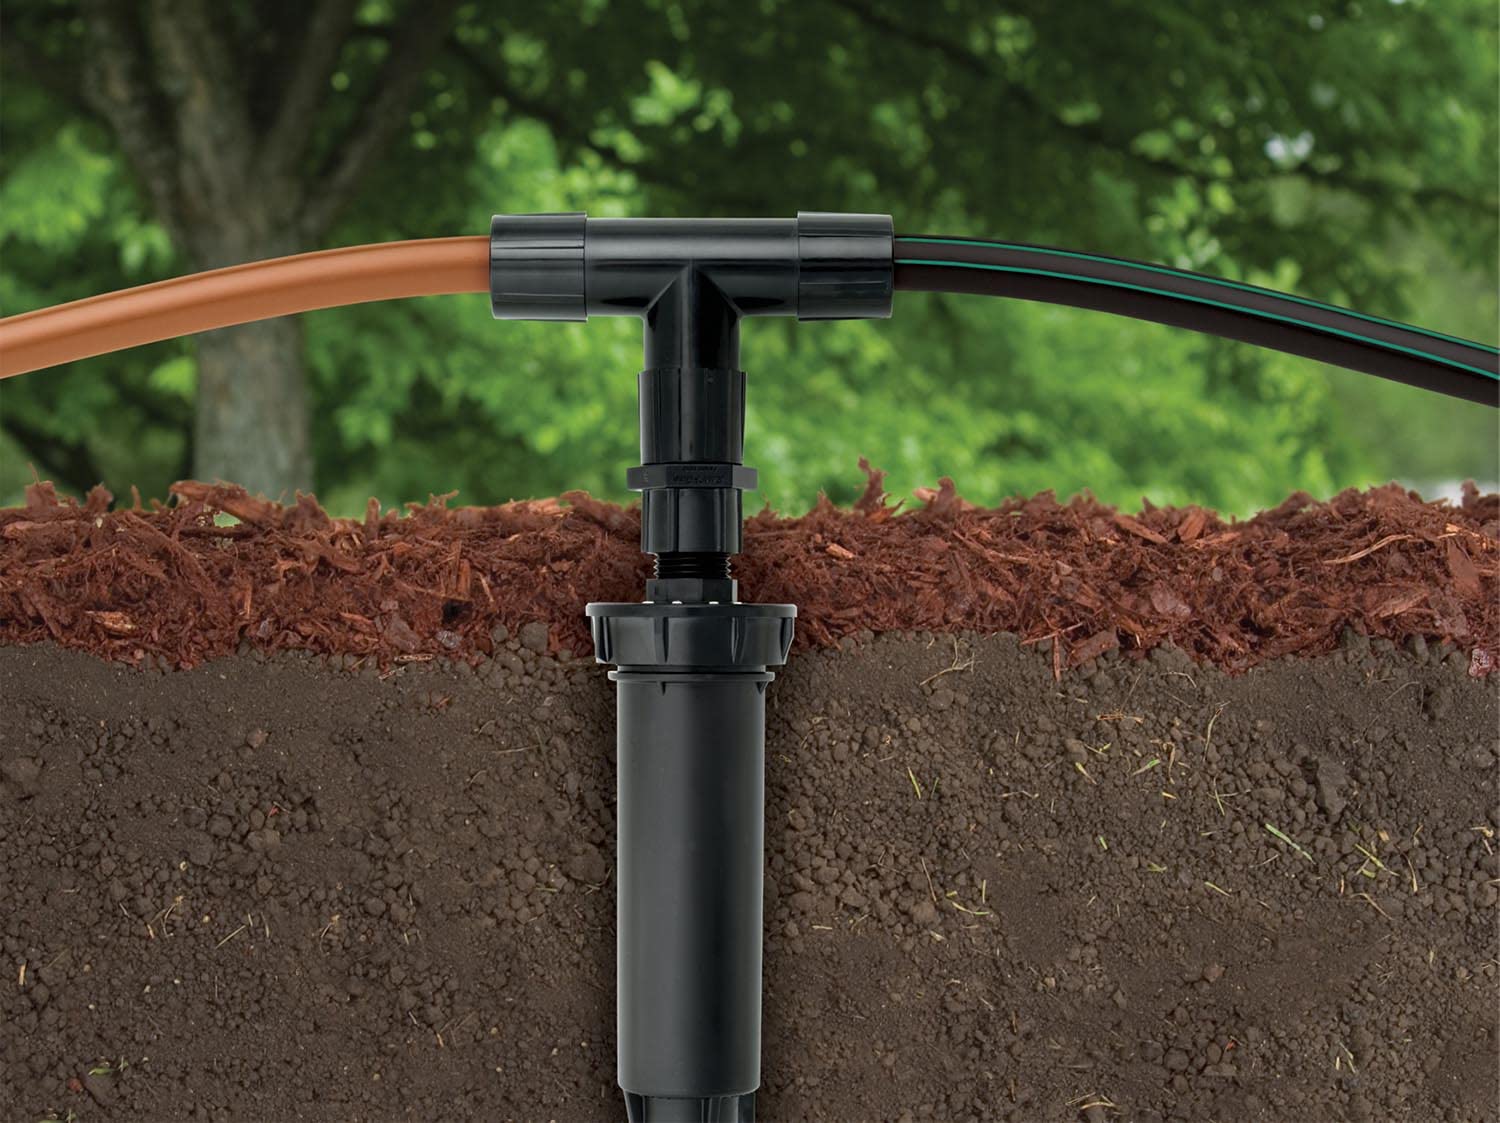
Attach the sprinkler heads to the pipes. Depending on the type of sprinkler heads you’ve chosen, this may involve screwing or inserting them into the pipe. Ensure that the sprinkler heads are firmly attached and aligned according to your layout plan.
Use fittings and connectors to secure the pipes together and form a tight seal. Insert the fittings into the ends of the pipes and tighten them securely. Make sure there are no leaks or loose connections that may compromise the water flow in your system.
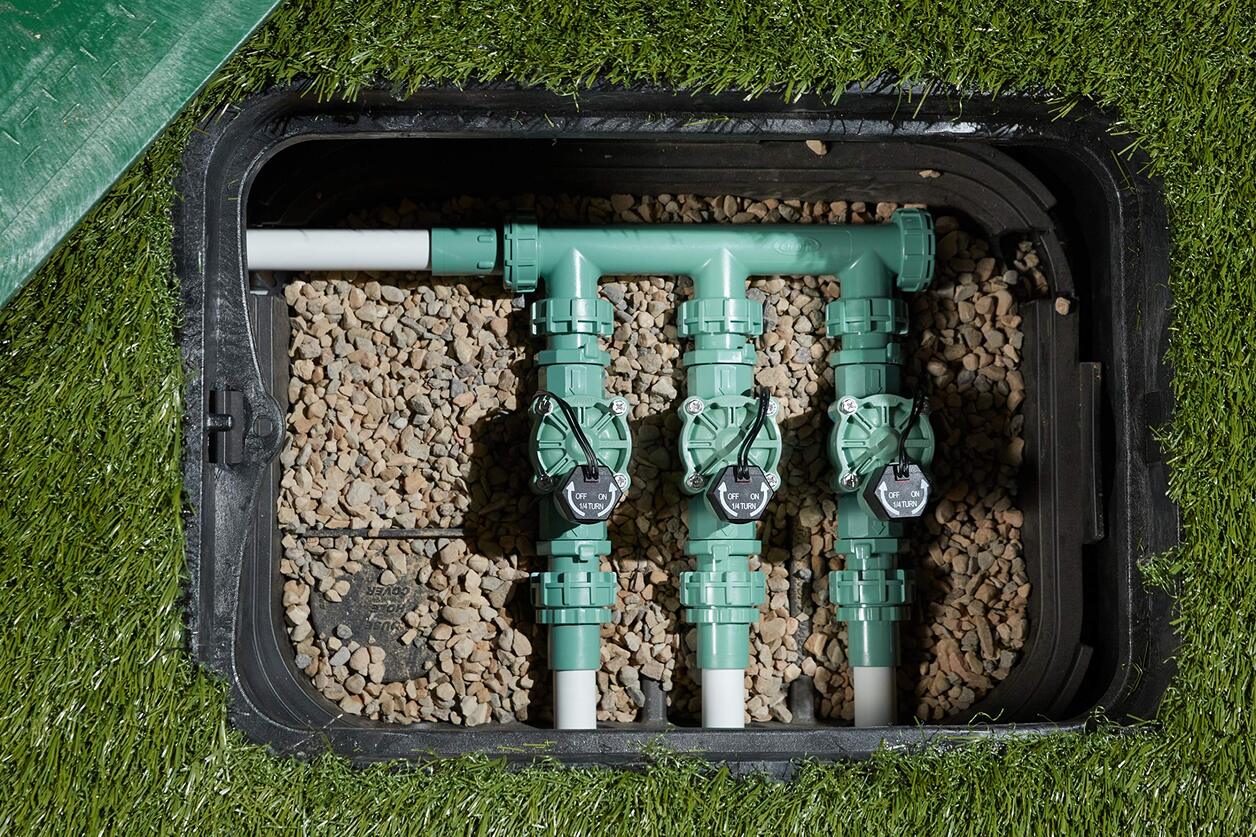
If you have zones with different water requirements, such as a lawn that needs more water and flower beds that need less, consider installing valves in the irrigation pipes. Valves allow you to control the water flow to different zones, ensuring that each area receives the appropriate amount of water.
As you install the pipes and sprinkler heads, periodically test the system to ensure that water is flowing effectively. Turn on the water supply and check for any leaks or irregularities in the flow. Make any necessary adjustments or repairs before proceeding.
Once all the pipes and sprinkler heads are installed, backfill the trenches with soil, gently compacting it as you go. Ensure that the pipes are properly covered and protected to prevent damage from external elements or shifting soil.
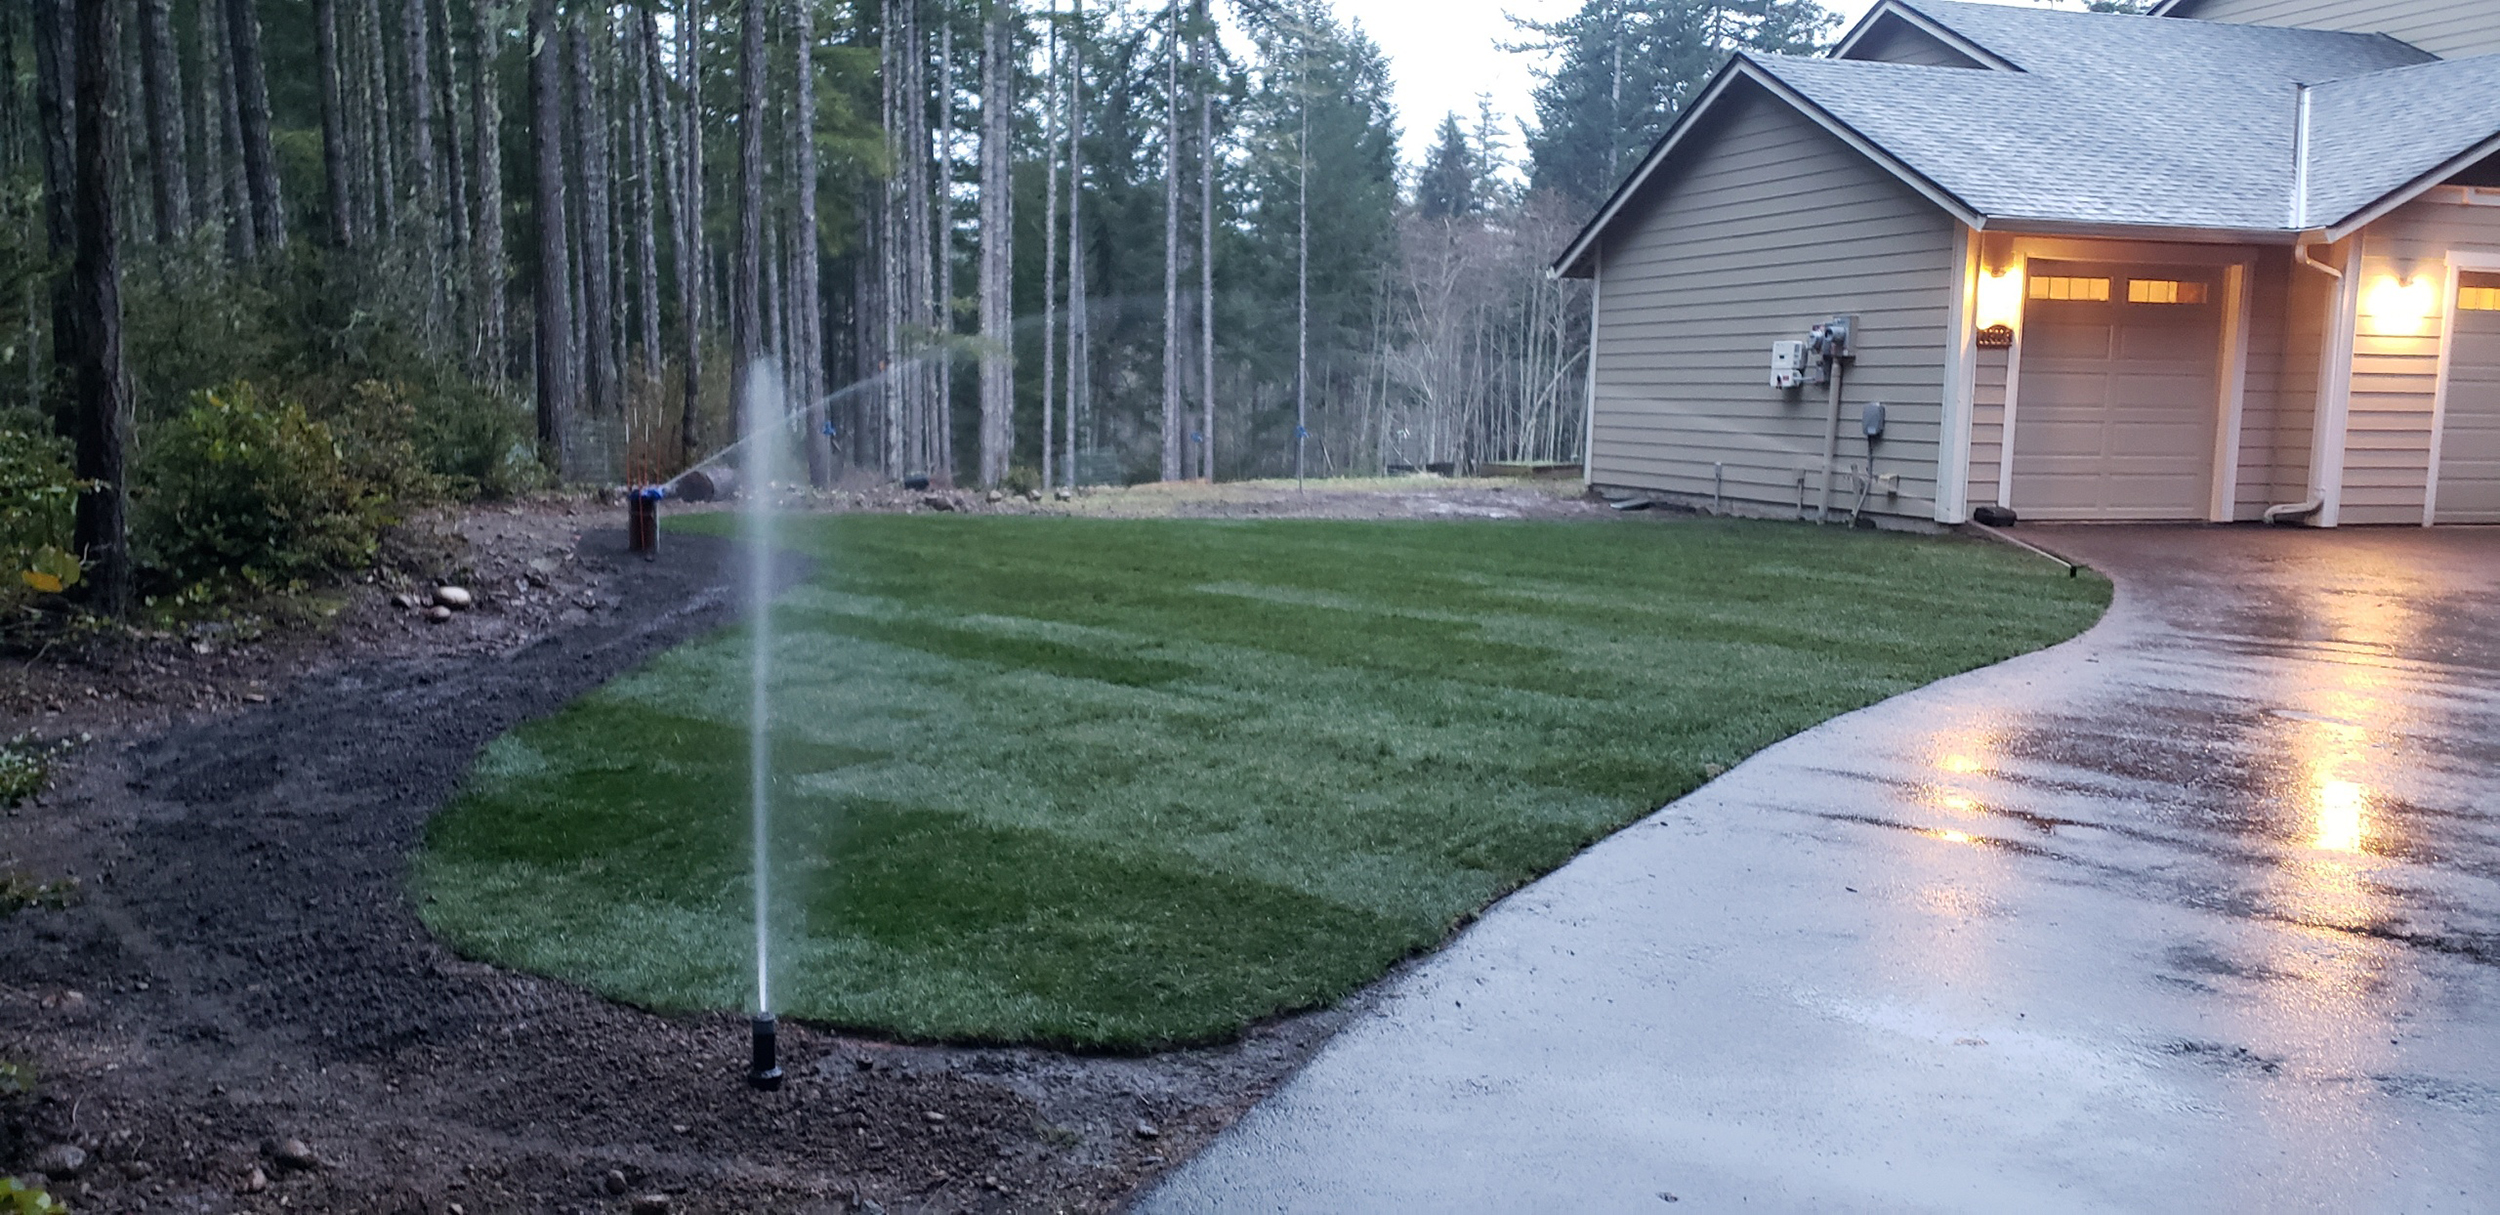
Make sure all the sprinkler heads are level with the ground surface or slightly above it. Adjust their height as needed to ensure that they will provide adequate water coverage once the system is operational.
Finally, test the entire system again to ensure that each sprinkler head is functioning properly and covering the intended area. Check for any uneven or insufficient coverage and make adjustments as necessary.
By carefully installing the irrigation pipes and sprinkler heads, you’ll create a well-functioning system that delivers water precisely where it’s needed. Proper alignment, secure connections, and thorough testing will ensure that your plants receive the optimal amount of water for their health and growth.
Connecting to the Water Source
Now that you’ve installed the irrigation pipes and sprinkler heads, it’s time to connect your system to a water source. Properly connecting your irrigation system ensures that water flows smoothly and efficiently through the pipes, delivering the necessary hydration to your plants.
Before connecting to the water source, it’s important to shut off the main water supply to your property. This will prevent any unintentional water flow while you make the necessary connections.
Identify the location of your water source. It can be an outdoor faucet, a dedicated irrigation line, or a main water line connected to your home. If you’re unsure, consult a professional plumber or the building plans to locate the water source.
If your irrigation system is connected to an outdoor faucet or a dedicated irrigation line, use a hose to connect the faucet or line to the main pipe of your irrigation system. Ensure a secure connection by using hose clamps or connectors.
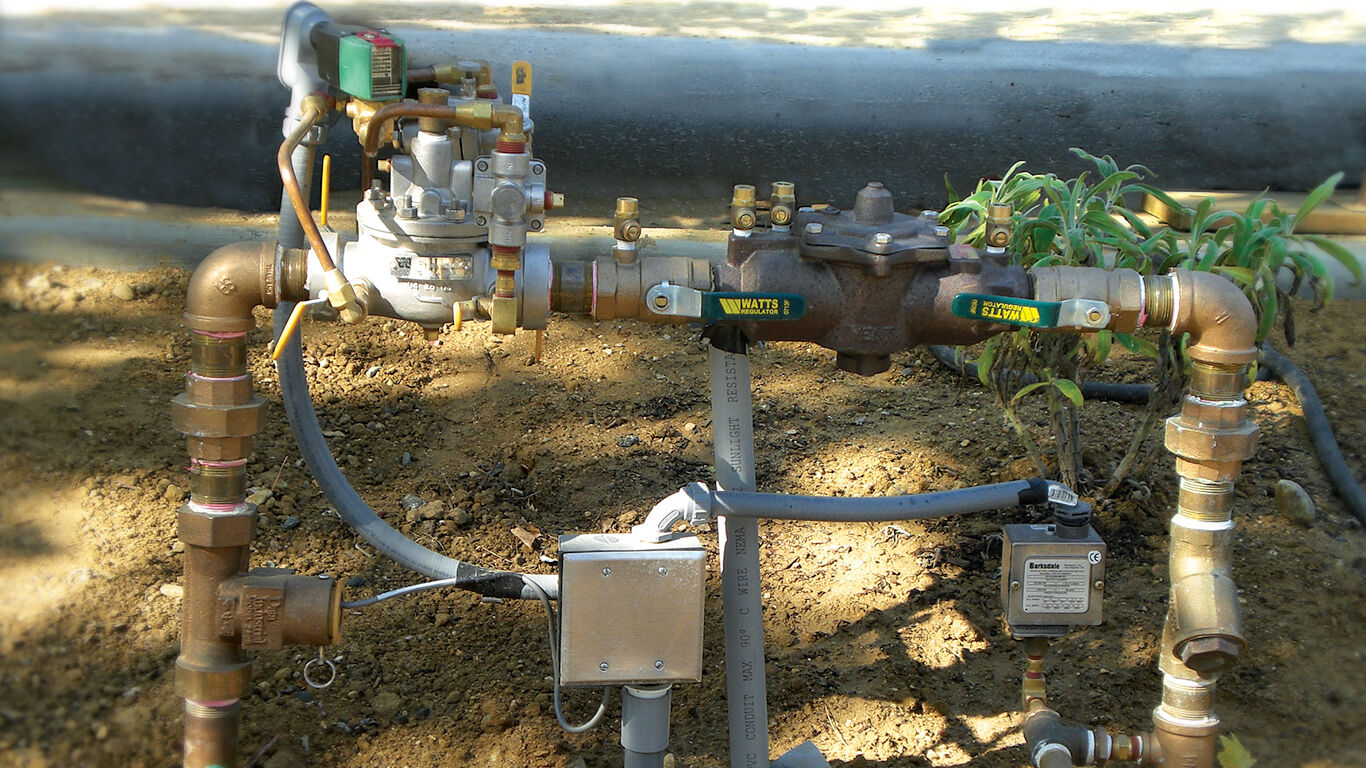
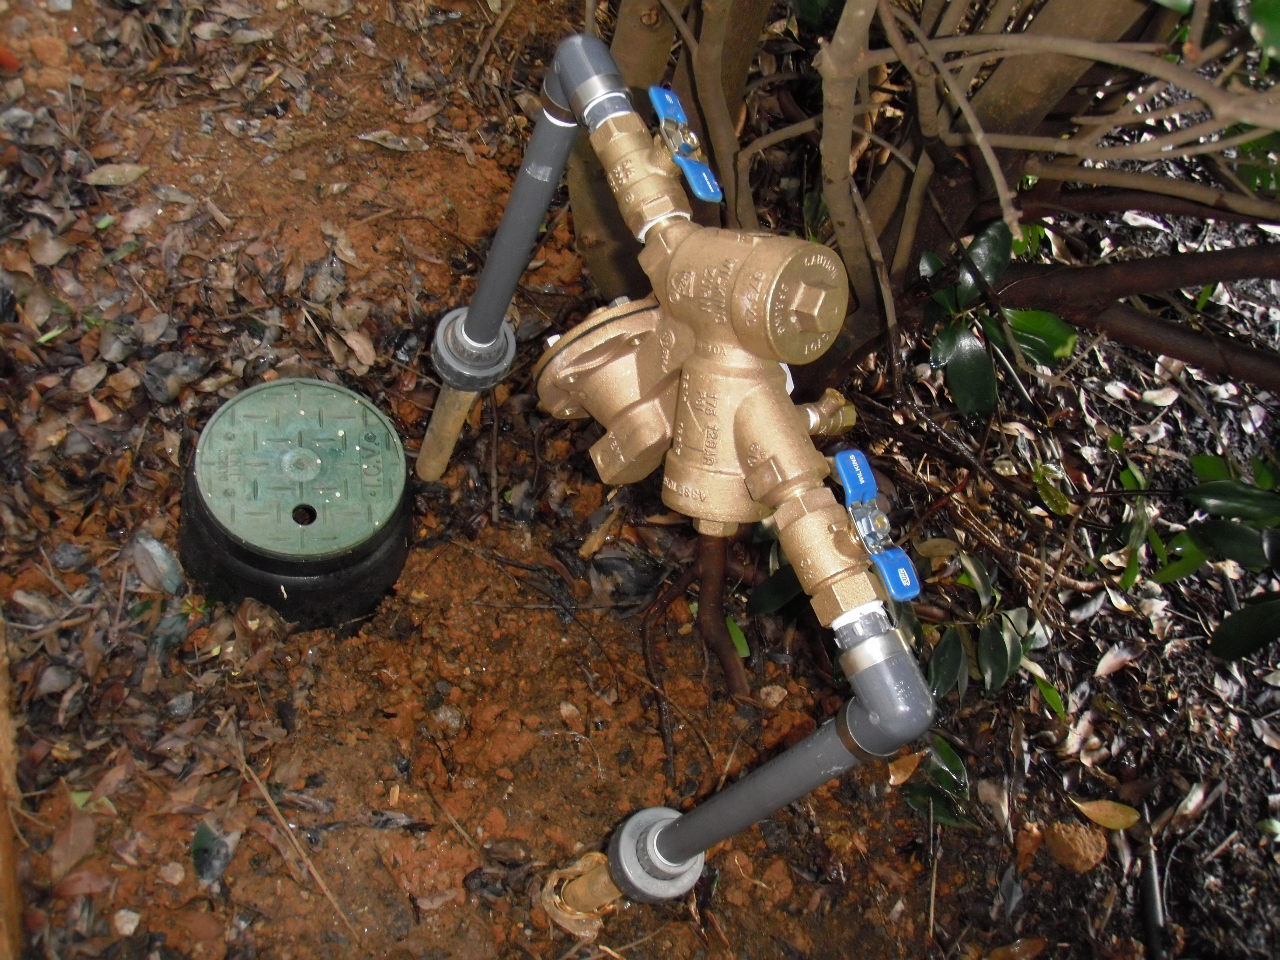
For a system connected to a main water line, you may need to install a backflow prevention device. This device prevents any contaminated water from flowing back into your main water supply. Consult your local plumbing codes to determine if a backflow prevention device is required and how to properly install it.
Once the connections are made, open the main water valve slowly and allow the water to flow into your irrigation system. Check for any leaks or irregularities in the water flow. If you notice any leaks, immediately shut off the water supply and tighten the connections as needed.
Test each zone of your irrigation system to ensure that water is flowing through the pipes and sprinkler heads as intended. Activate each zone using the control box or manually operating the valves. Watch for proper water coverage and adjust the sprinkler heads if necessary.
If you have a large irrigation system or low water pressure, you may need to install a booster pump to ensure adequate water flow to all areas. A booster pump increases the water pressure in the system, preventing any issues with water distribution.
It’s recommended to adjust the water pressure to the appropriate level for your irrigation system. High water pressure can damage the pipes and cause inefficient water distribution, while low water pressure may result in inadequate coverage. Consult the specifications provided by the manufacturer of your irrigation system for the optimal water pressure range.
Once you’ve connected your irrigation system to the water source and confirmed that everything is functioning properly, you’re ready to move on to testing and adjusting the system for optimal performance. We’ll explore this process in detail in the next section.
By properly connecting your irrigation system to the water source, you’ll ensure that water flows smoothly and efficiently through the pipes, allowing your plants to thrive and flourish with the right amount of hydration.
Testing and Adjusting the System
With your irrigation system fully installed and connected, it’s time to test and adjust the system to ensure optimal performance. Thorough testing will help identify any issues or areas that require adjustment, ensuring that your plants receive the right amount of water.
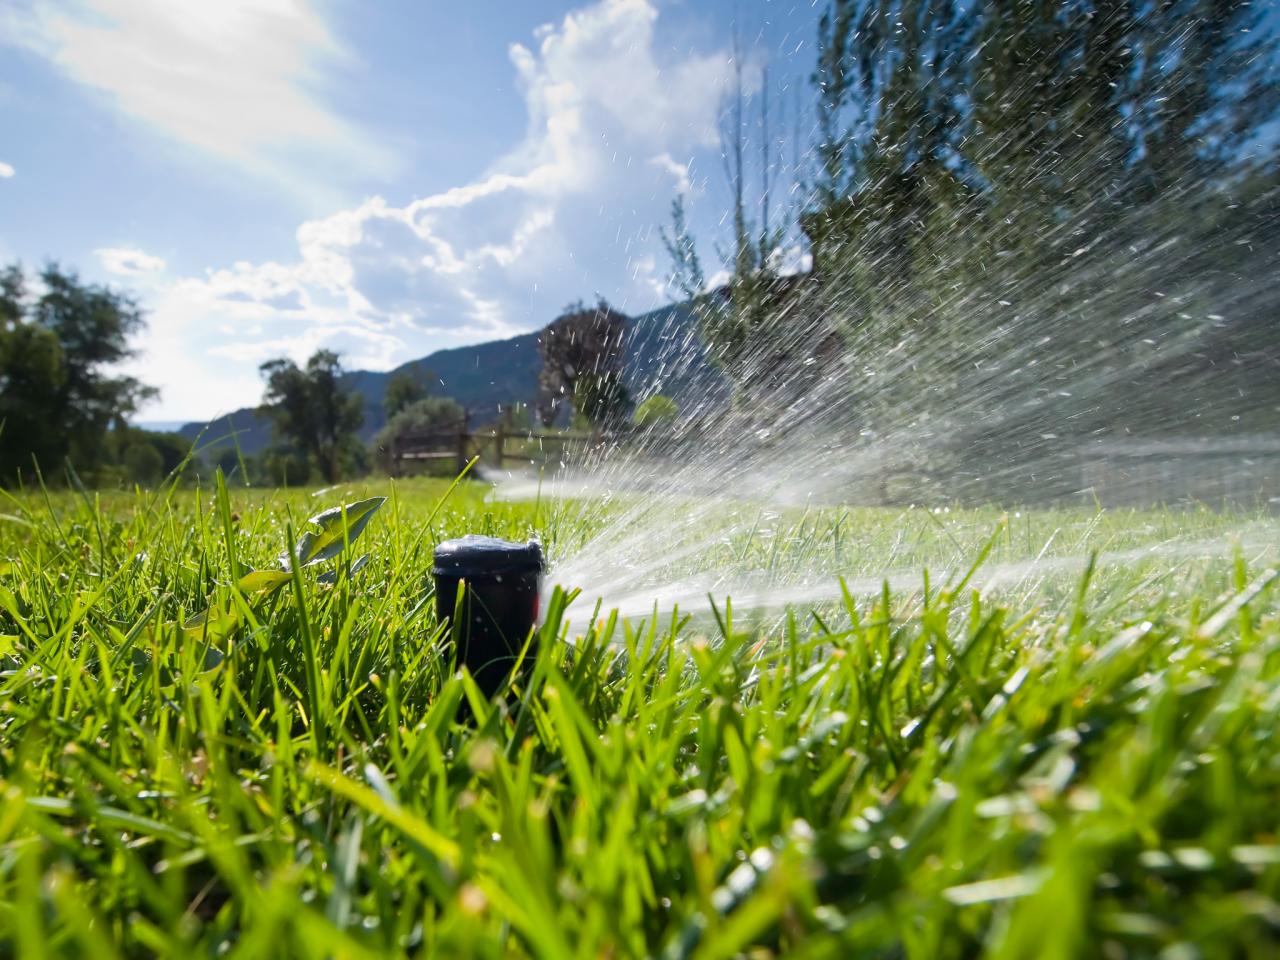
Begin by activating each zone of your irrigation system and carefully observe the water distribution. Pay attention to the coverage area of each sprinkler head and check for any dry spots or areas with excessive water. This step will help you identify any areas where the sprinkler heads may need to be adjusted or repositioned.
Walk through each zone and visually inspect the sprinkler heads for proper functionality. Ensure that they rotate or spray as intended and that there are no blockages or obstructions preventing water flow. Clean or replace any clogged sprinkler heads to ensure that water is distributed evenly.
Measure the water output of the sprinkler heads in each zone using catch cups or rain gauges. This will give you an idea of the amount of water being delivered and help you adjust the watering duration or frequency if needed. Aim for consistent water coverage without over- or under-watering.
Perform a thorough inspection of the irrigation pipes and fittings for any signs of leaks or cracks. Even small leaks can lead to wasted water and potentially damage your system. Repair or replace any faulty components to ensure the integrity of your irrigation system.
If you have a programmable control box, navigate through the settings and program the watering schedule according to your plant’s needs and local watering regulations. Take advantage of any features such as rain sensors or smart controllers that can help optimize water usage and prevent overwatering.
Make sure to regularly monitor the performance of your irrigation system throughout the season. Adjust the watering schedule and duration as needed based on weather conditions, plant requirements, and any changes in your yard’s landscape or plantings.
Efficient water management is key for a successful irrigation system. Consider implementing water-saving techniques such as cycle and soak, which breaks up watering into shorter intervals to prevent water runoff. This technique allows water to penetrate the soil deeply, promoting healthy root growth.
Don’t forget to keep up with regular maintenance tasks such as cleaning or replacing clogged nozzles, inspecting and repairing any damaged components, and winterizing your system to protect it during colder months. Proper maintenance will help extend the lifespan of your irrigation system and ensure its continued effectiveness.
Through thorough testing and adjustment, you’ll optimize the performance of your irrigation system, ensuring that your plants receive the right amount of water at the right time. Regular monitoring and maintenance will help keep your system operating efficiently and contribute to a healthy and vibrant landscape.
Maintaining Your Irrigation System
Maintaining your irrigation system is crucial for its longevity and continued effectiveness in providing water to your yard. Regular maintenance tasks will help prevent issues, ensure optimal performance, and extend the lifespan of your system.
One important maintenance task is checking for leaks and damage. Inspect the irrigation pipes, sprinkler heads, and connections regularly for any signs of leaks or cracks. Even small leaks can result in water waste and potential damage to your system. Repair or replace any faulty components to maintain the integrity of your irrigation system.
Inspect and clean the sprinkler heads regularly. Remove any debris, dirt, or grass clippings that may have accumulated on the nozzles, as these can affect the water distribution. Replace any clogged or damaged sprinkler heads promptly to ensure proper coverage.
Adjust the sprinkler heads as necessary to ensure optimal water coverage. Over time, soil erosion, plant growth, or foot traffic can cause the sprinkler heads to shift or become misaligned. Make sure they are level with the ground and pointing in the right direction for efficient water distribution.
Regularly monitor and adjust the watering schedule of your irrigation system. Take into account seasonal changes, weather conditions, and plant needs. Determine whether adjustments in watering duration or frequency are necessary to avoid overwatering or underwatering your plants.
Investigate and address any areas with dry spots or excessive water coverage. Dry spots may indicate a problem with water flow, such as a clogged nozzle or insufficient pressure. Excessive water coverage can lead to water wastage or overwatering. Adjust the sprinkler heads or make necessary repairs to ensure uniform water distribution.
Consider incorporating water-saving features or technologies into your irrigation system. Install rain sensors that automatically shut off the system during rainy weather to prevent unnecessary watering. Upgrade to smart controllers that use weather data to adjust watering schedules based on real-time conditions, optimizing water usage.
Don’t forget to winterize your irrigation system if you live in an area with freezing temperatures. Before the first frost, shut off the water supply to your system and drain any remaining water to prevent freezing and damage. Protect exposed pipes and components by insulating them or using protective covers.
Regularly assess your landscape and make adjustments to your irrigation system as needed. If you’ve made changes to your yard, such as adding new plants or removing existing ones, ensure that they are accounted for in the watering zones and schedule. Update your system accordingly to provide adequate water to each area.
Lastly, consider scheduling professional maintenance for your irrigation system. An experienced technician can perform a thorough inspection, identify any hidden issues, and provide expert guidance on optimizing your system’s performance. Regular professional maintenance can help catch problems early, ensuring the longevity and efficiency of your irrigation system.
By regularly maintaining your irrigation system, you’ll ensure that it operates at its best, providing efficient water distribution to your plants while reducing water waste. Consistent upkeep will help preserve the health and beauty of your landscape and maximize the value of your investment in an irrigation system.
Conclusion
Congratulations! You’ve learned how to install and maintain an irrigation system in your yard. By following the steps outlined in this guide, you can transform your outdoor space into a lush, thriving oasis while conserving water and saving time.
Assessing your yard and understanding its unique characteristics is the first crucial step in the installation process. By taking into account factors such as the size of your yard, types of plants, and water sources, you can design an irrigation system that meets your specific needs.
Gathering the necessary materials and tools ensures a smooth installation process. From irrigation pipes and sprinkler heads to trenching tools and control boxes, having everything ready ahead of time saves you valuable time and effort.
The planning stage, where you design the layout and placement of sprinkler heads and pipes, is pivotal in ensuring optimal water coverage. Consider factors such as plant water requirements, slopes, and obstacles to create an efficient and effective irrigation system.
Digging trenches accurately sets the foundation for your system. Straight and level trenches facilitate the installation of pipes and ensure proper water flow throughout your yard.
Installing the irrigation pipes and sprinkler heads with care and precision guarantees even water distribution to your plants. Test the system thoroughly to identify any issues or areas that require adjustment.
Connecting your system to the water source is a vital step in delivering water to your plants efficiently. Proper connections and appropriate water pressure ensure the optimal functioning of your irrigation system.
Testing and adjusting the system allows you to fine-tune and optimize its performance. Regular maintenance, including checking for leaks, cleaning sprinkler heads, and adjusting the watering schedule, ensures your system operates at its best.
By following these steps and maintaining your irrigation system, you’ll enjoy a beautiful, healthy yard year-round. Efficient water usage, precise water distribution, and proper system maintenance will contribute to the health of your plants, conserve water, and enhance the curb appeal of your home.
Now that you have the knowledge and tools, it’s time to dive in and create your own irrigation system. Get ready to enjoy the convenience, beauty, and sustainability that an irrigation system brings to your yard.