Home>Gardening Techniques>DIY Projects>How To Install An Irrigation System
DIY Projects
How To Install An Irrigation System
Modified: January 22, 2024
Discover how to easily hook up your own irrigation system with this step-by-step DIY guide. Transform your garden with this simple DIY project.
(Many of the links in this article redirect to a specific reviewed product. Your purchase of these products through affiliate links helps to generate commission for Chicagolandgardening.com, at no extra cost. Learn more)
Table of Contents
- Introduction
- Planning and Designing Your Irrigation System
- Choosing and Connecting Water Source
- Selecting the Right Irrigation Components
- Installing Irrigation Pipes
- Installing Sprinkler Heads
- Installing Control Valves
- Wiring the Irrigation System
- Testing and Adjusting the Irrigation System
- Troubleshooting Common Issues
- Maintenance and Winterization
- Conclusion
Introduction
Welcome to the world of DIY projects! If you are passionate about taking matters into your own hands and want to efficiently water your garden or lawn, installing an irrigation system is a fantastic option. With a well-designed and properly installed irrigation system, you can ensure that your plants receive the right amount of water, saving time, money, and effort in the process.
In this comprehensive guide, we will walk you through the step-by-step process of planning, designing, and installing a DIY irrigation system. Whether you have a small backyard garden or a sprawling lawn, this article will provide you with the knowledge and confidence to successfully complete your project.
Before we dive into the nitty-gritty details, it’s essential to understand the benefits of installing an irrigation system. First and foremost, it provides convenience. With an automated system, you no longer have to spend hours manually watering your plants. Instead, you can set a schedule and let the system take care of it for you.
Secondly, irrigation systems are designed to deliver water efficiently, resulting in water conservation. By targeting the root zone of plants, less water is wasted through evaporation or runoff. This is not only environmentally friendly but also helps to reduce your water bills.
Furthermore, an irrigation system promotes healthier plants. Consistent watering ensures that plants receive the proper amount of water, reducing the risk of over or under watering. This leads to stronger root systems, healthier foliage, and better overall plant growth.
Lastly, having an irrigation system can increase the value of your property. A well-maintained lawn and garden are appealing features for potential buyers. Plus, the ease of maintenance with an irrigation system is a selling point that can set your property apart.
In the following sections, we will guide you through the planning and designing process, selecting the right components, installation, troubleshooting common issues, and maintenance of your irrigation system. So, roll up your sleeves and let’s get started on building a reliable and efficient irrigation system for your outdoor space!
Planning and Designing Your Irrigation System
Before you start digging trenches and laying pipes, it’s crucial to spend some time planning and designing your irrigation system. A well-thought-out plan will ensure that your system is efficient, effective, and meets the specific needs of your garden or lawn.
The first step in the planning process is to assess your watering needs. Consider the size and layout of your outdoor space, the types of plants you have, and the local climate and soil conditions. This information will help you determine the water requirements of your plants and the coverage area needed for your system.
Next, create a detailed map of your garden or lawn, marking any existing structures, trees, or obstacles. This will help you visualize the irrigation zones and ensure that the system reaches every corner of your outdoor space.
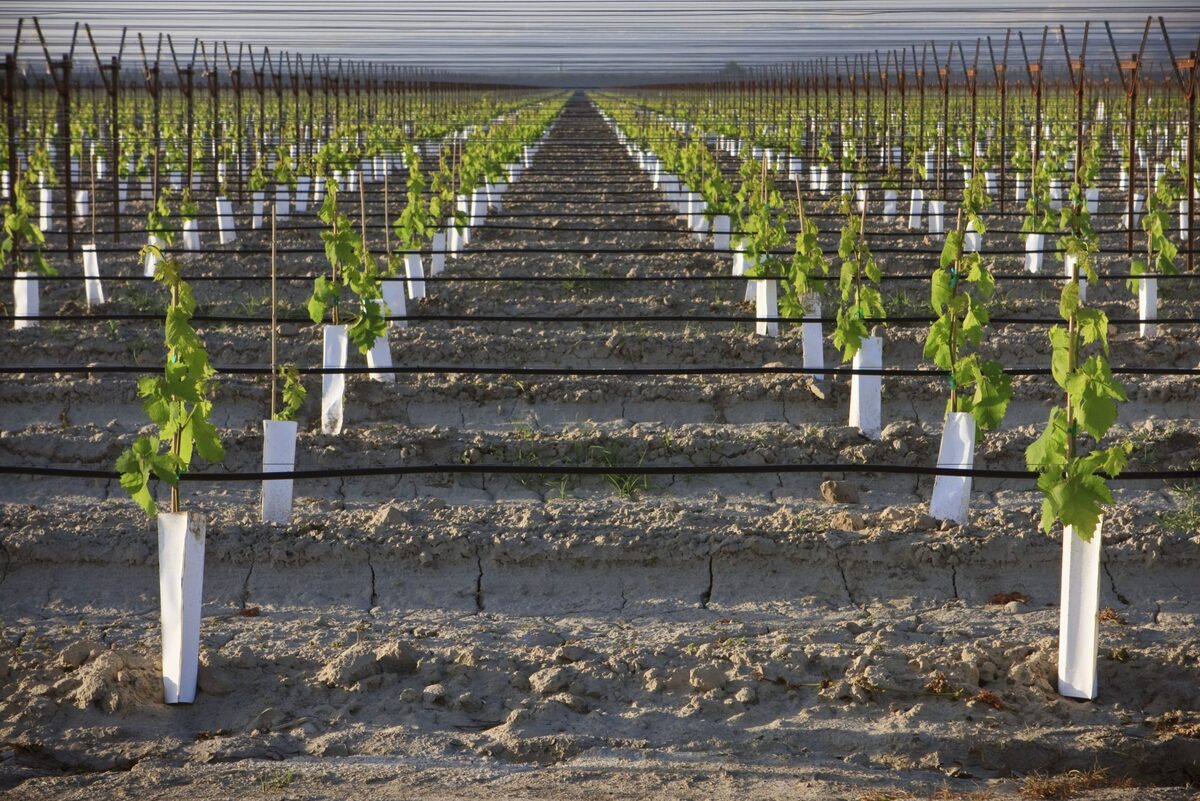
Once you have a clear understanding of your watering needs and property layout, you can proceed to choose the appropriate irrigation method. There are several options to consider, including sprinkler systems, drip irrigation, or a combination of both. Each method has its advantages and is suited for different types of plants and areas.
If you opt for a sprinkler system, determine the type of sprinkler heads that will be most effective for your needs. Sprinkler heads can vary in spray pattern, radius, and precipitation rate. It is important to select the right type of sprinkler heads to ensure even water distribution and avoid over or under watering.
After selecting the irrigation method and sprinkler heads, it’s time to plan the layout of your irrigation zones. Divide your outdoor space into zones based on factors such as plant water requirements, sun exposure, and soil conditions. This will allow you to create customized watering schedules for different areas, optimizing water usage and plant health.
When designing your irrigation system, consider factors such as water pressure and flow rate. If you have limited water pressure, you may need to install a booster pump to ensure adequate coverage. Additionally, calculate the flow rate of your water source to determine the number of sprinkler heads or drip emitters that can be supported.
Lastly, don’t forget to incorporate a controller or timer into your system. A controller allows you to set watering schedules, adjust run times, and easily manage your irrigation system. Look for a controller with features like weather sensors or smart technology to further optimize water usage.
By investing time in planning and designing your irrigation system, you can avoid costly mistakes and ensure a more efficient and effective watering solution for your outdoor space. So grab a pen and paper, sketch out your ideas, and get ready to bring your irrigation system to life!
Choosing and Connecting Water Source
One of the most critical aspects of installing an irrigation system is choosing the right water source and ensuring a proper connection. The water source you select will depend on the availability and accessibility of water on your property. Let’s explore the different options and how to connect them to your irrigation system.
If you have access to municipal water, connecting to the main water supply is a common choice. Locate the nearest water spigot or valve and determine if it has sufficient water pressure for your irrigation system. You may need to consult with a plumber or irrigation professional to assess the water pressure and install a pressure regulator if necessary.
In cases where a municipal water supply is not available or convenient, using a well is an alternative solution. Wells provide a reliable and independent water source for irrigation. If you have an existing well, ensure that it has sufficient capacity to meet your watering needs. It’s recommended to consult with a well specialist to assess the well’s condition and output.
When connecting your irrigation system to a water source, you will need a backflow prevention device. This device prevents water from flowing back into the main water supply, protecting against contamination. Check local codes and regulations to determine the specific type of backflow prevention device required in your area.
Next, consider the type of pipe material for connecting your irrigation system to the water source. PVC (polyvinyl chloride) pipes are commonly used due to their durability and affordability. PVC pipes are available in various sizes, so choose the appropriate diameter to accommodate the water flow and pressure requirements of your system.
You’ll also need fittings, such as connectors, tees, and elbows, to create a leak-free connection between pipes. When selecting fittings, ensure that they are compatible with the pipe material you are using.
An additional consideration is whether to use above-ground or underground pipes. Above-ground pipes are simpler to install and repair, but they are more prone to damage from UV rays, freezing temperatures, and physical disturbances. Underground pipes offer a cleaner look, protect against damage, and reduce the risk of tripping hazards.
Lastly, if you live in an area with freezing temperatures, it’s crucial to protect your water source and pipes from freezing. Install shut-off valves and drain valves at the lowest point of your system to allow for winterization. It’s also recommended to insulate pipes and wrap them with heat tape to prevent freezing and potential pipe bursts.
By carefully choosing and connecting your water source, you can ensure a reliable and efficient supply of water to your irrigation system. Take the time to assess your options, consult with professionals if needed, and make informed decisions to set the foundation for a successful irrigation project!
Selecting the Right Irrigation Components
When it comes to building an efficient and reliable irrigation system, selecting the right components is crucial. Each component plays a vital role in the overall functionality and effectiveness of your system. Let’s explore the key components and considerations to help you make informed decisions.
1. Sprinkler Heads: Sprinkler heads come in different types, including fixed, rotating, and pop-up. Consider the size and shape of the area to be watered, the water pressure available, and the desired spray pattern when selecting sprinkler heads. Choose heads that offer the appropriate coverage and precipitation rate for your specific plants and landscape.
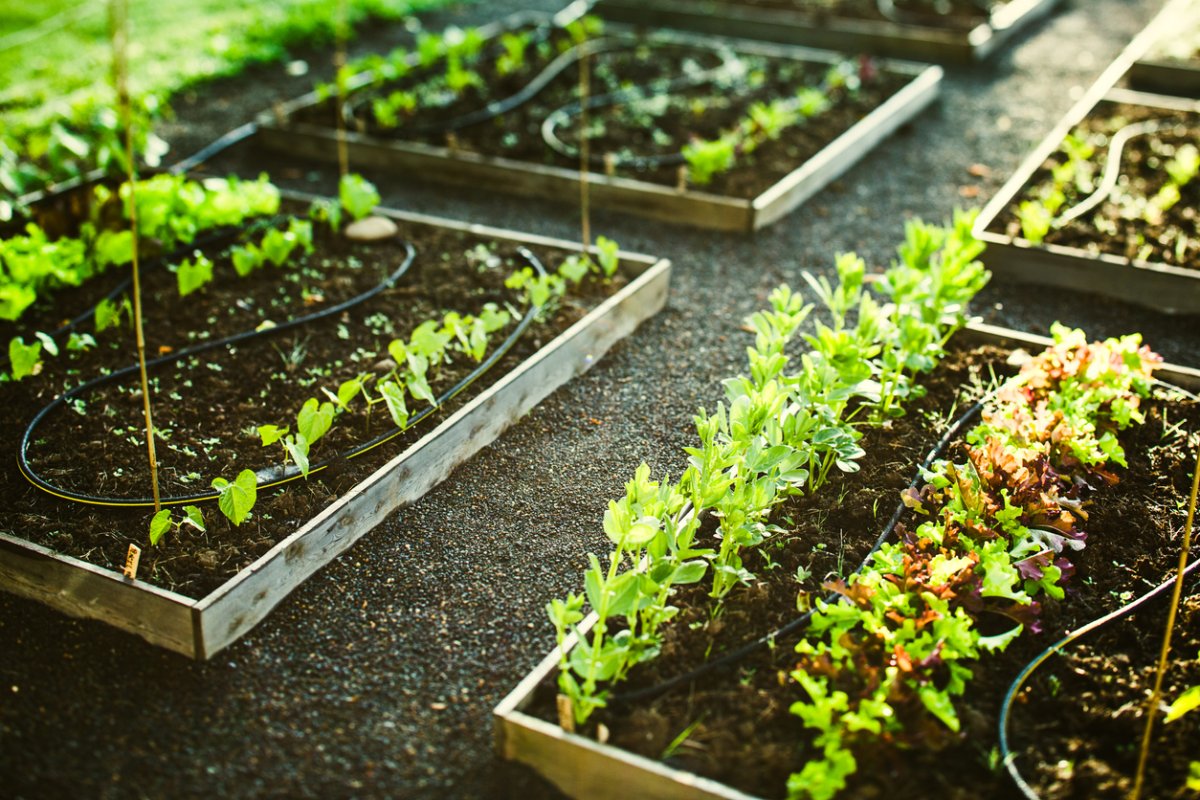
2. Drip Irrigation: Drip irrigation systems are an excellent choice for watering individual plants or areas with specific water needs. Drip emitters deliver water directly to the root zone, reducing water loss through evaporation and minimizing weed growth. Choose from various types of emitters, depending on the plant’s water requirements and soil conditions.
3. Pipes and Fittings: Select pipes and fittings that are compatible with the chosen irrigation method. PVC pipes are commonly used for their durability, while polyethylene pipes are more flexible and suitable for curved layouts. Consider the pipe size, pressure rating, and material when making your selection, ensuring compatibility with the water flow and system requirements.
4. Filters: Installing a filter in your irrigation system helps prevent clogging and reduces the risk of damage to components. Filters remove debris and sediment from the water source, ensuring clean water flows through the system. Choose a filter size and type based on the water quality and potential contaminants in your area.
5. Valves: Control valves are essential for regulating water flow to different zones of your irrigation system. Solenoid valves are commonly used and can be operated manually or automatically. Consider the number of zones you will have and the flow capacity of the valves to ensure proper water distribution and pressure control.
6. Sensors: Incorporating sensors into your irrigation system can optimize water usage and improve efficiency. Weather sensors can detect rainfall and temperature, adjusting the watering schedule accordingly. Soil moisture sensors measure the moisture levels in the soil, preventing over or under watering. Choose sensors that are compatible with your controller and provide accurate readings for your specific conditions.
7. Controller: The controller is the brain of your irrigation system, allowing you to set watering schedules and control different zones. Choose a controller that is user-friendly, programmable, and offers features like multiple programs, customizable run times, and water-saving settings. Consider controllers with smart technology that can connect to weather apps or receive real-time data for efficient irrigation management.
When selecting components, consider the quality and reliability of the products. Investing in durable and well-made components may initially cost more but will save you money in the long run by avoiding frequent repairs or replacements.
By carefully selecting the right irrigation components, tailored to your specific needs and landscape, you can ensure a highly efficient and effective irrigation system. Take the time to research, compare options, and consult with experts if necessary to make informed decisions that will contribute to the success of your project.
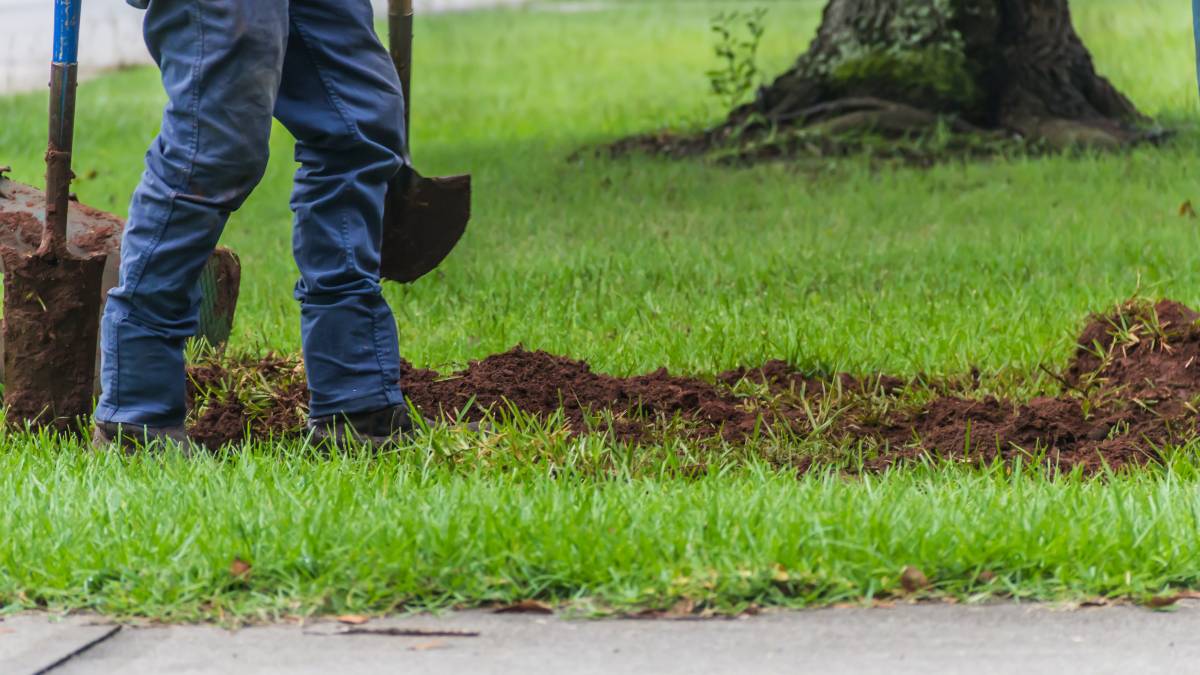
Installing Irrigation Pipes
Proper installation of irrigation pipes is essential for the efficient and reliable operation of your irrigation system. Whether you are using PVC pipes or polyethylene pipes, the installation process is relatively similar. Let’s walk through the key steps involved in installing irrigation pipes.
1. Prepare the Ground: Before laying the pipes, ensure that the ground is clear of debris, rocks, and vegetation. Level the soil appropriately to ensure consistent water distribution.
2. Lay Out the Pipes: Using your irrigation system design plan, lay the pipes along the predetermined path. Start from the water source and work your way out to each zone.
3. Cut and Connect Pipes: Use a PVC cutter or a sharp knife to cut the pipes to the required length. Join pipes together using appropriate connectors, such as couplings or tees, as per your system design.
4. Create Trenches: Dig trenches along the planned pipe path, ensuring the depth is sufficient to bury the pipes below the surface. The depth will depend on the recommended specifications for your pipes.
5. Attach Fittings: Install fittings, such as elbows and connectors, at the appropriate spots to allow for changes in direction and connections to sprinkler heads or drip emitters.
6. Bury the Pipes: Carefully place the pipes into the trenches, ensuring they are level and properly aligned. Cover the pipes with soil, and gently compact the ground to provide stability.
7. Install Pipe Stakes: Use pipe stakes or clamps to secure the pipes in place, preventing shifting or movement over time. This ensures that the pipes remain in position and maintain optimal water flow.
8. Repeat for Each Zone: Follow the same process for each irrigation zone, ensuring that pipes are connected correctly and securely buried in their respective trenches.
9. Pressure Test: Before connecting sprinkler heads or drip emitters, perform a pressure test to check for any leaks or issues in the pipe connections. This can be done by turning on the water and monitoring the system for any signs of water loss or inefficient flow.
10. Flush the System: After passing the pressure test, flush the system to remove any dirt or debris that may have entered the pipes during the installation process. Open the valves and let water flow through the system for a few minutes before installing the sprinkler heads or drip emitters.
Ensure that all pipes and fittings are properly aligned, sealed, and secure to prevent leaks and minimize water loss. Regularly inspect the pipes for any signs of wear or damage, and make necessary repairs as soon as possible to maintain the integrity of your irrigation system.
By following these steps and taking the time to install irrigation pipes correctly, you can ensure a reliable and efficient water distribution system for your plants and garden. Take care when handling pipes, use appropriate tools, and consult professional expertise if needed to ensure a successful installation.
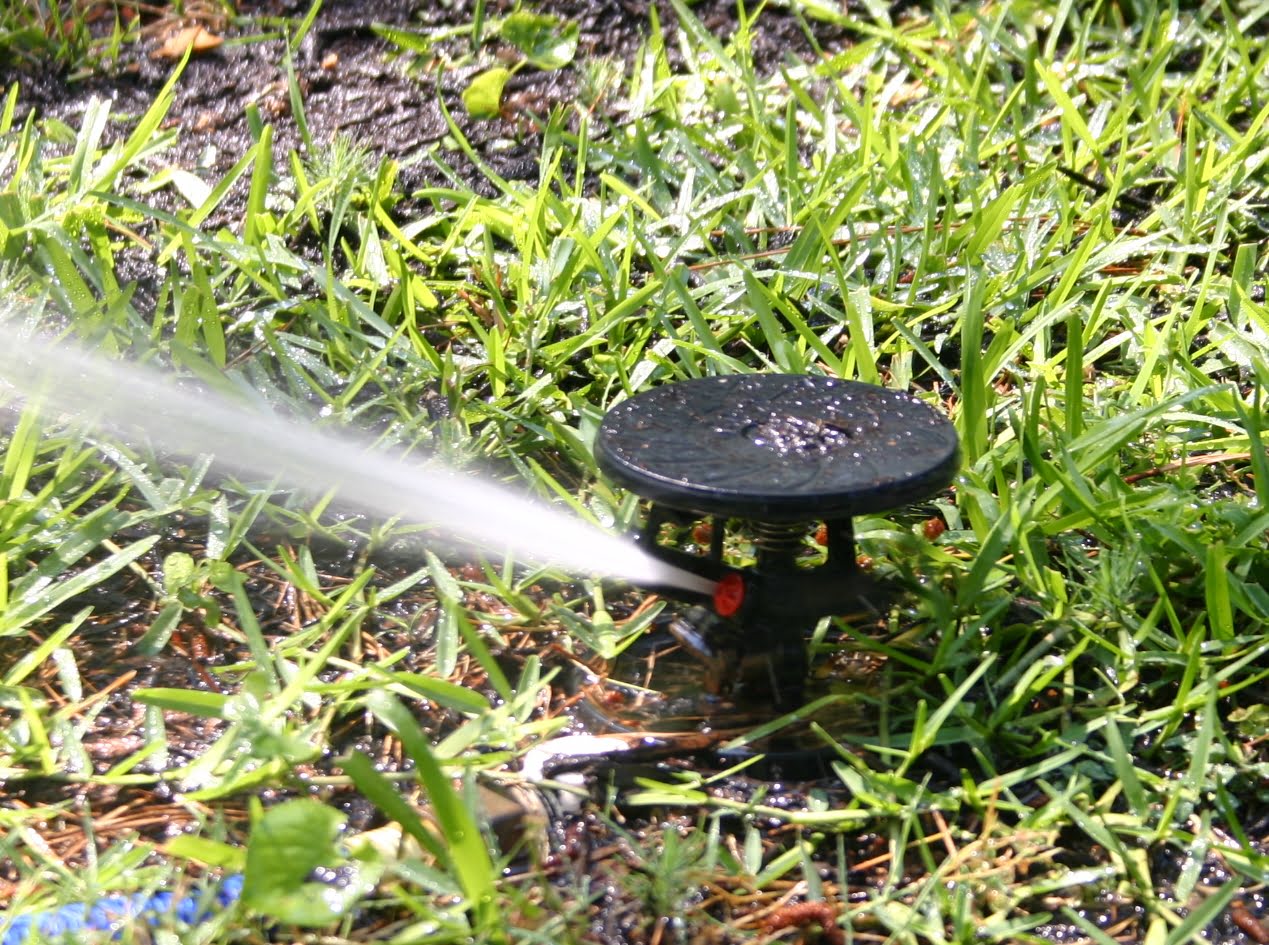
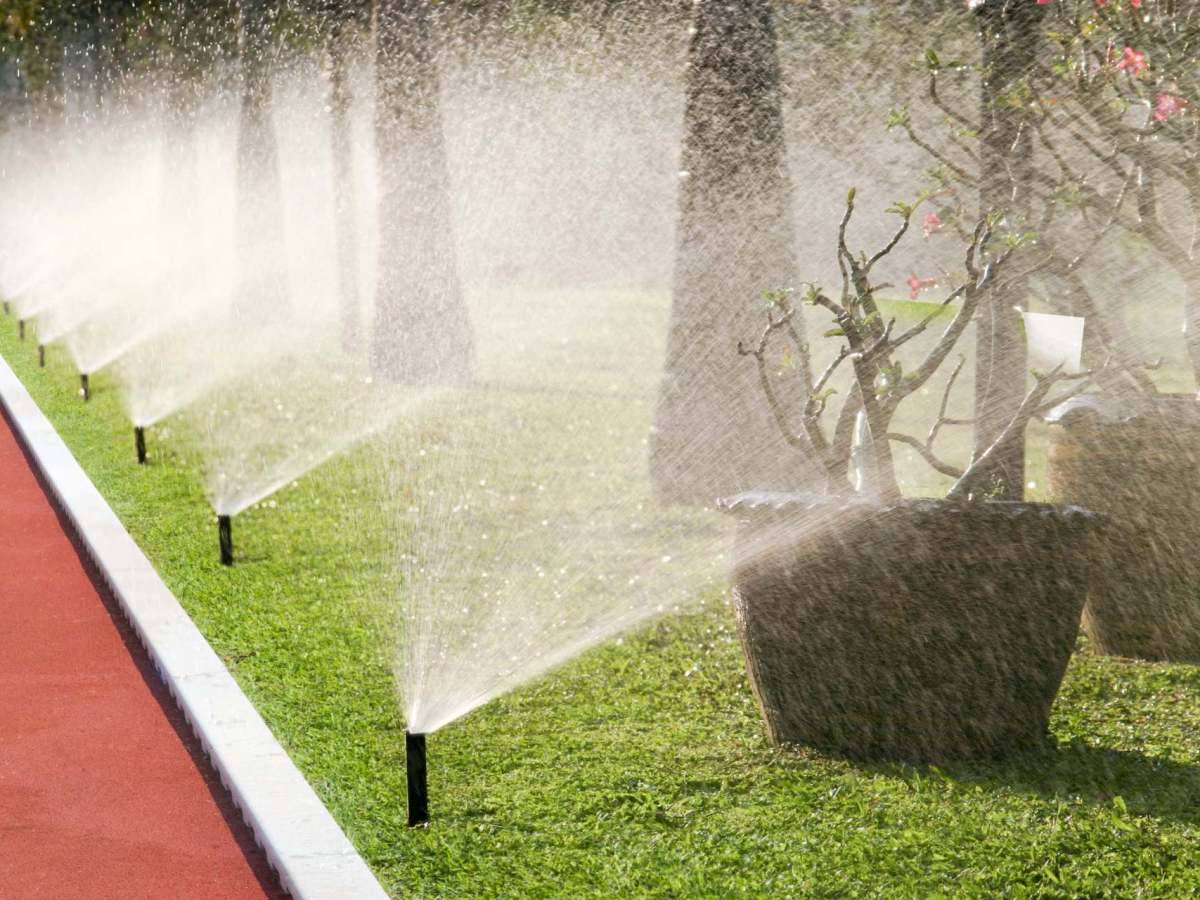
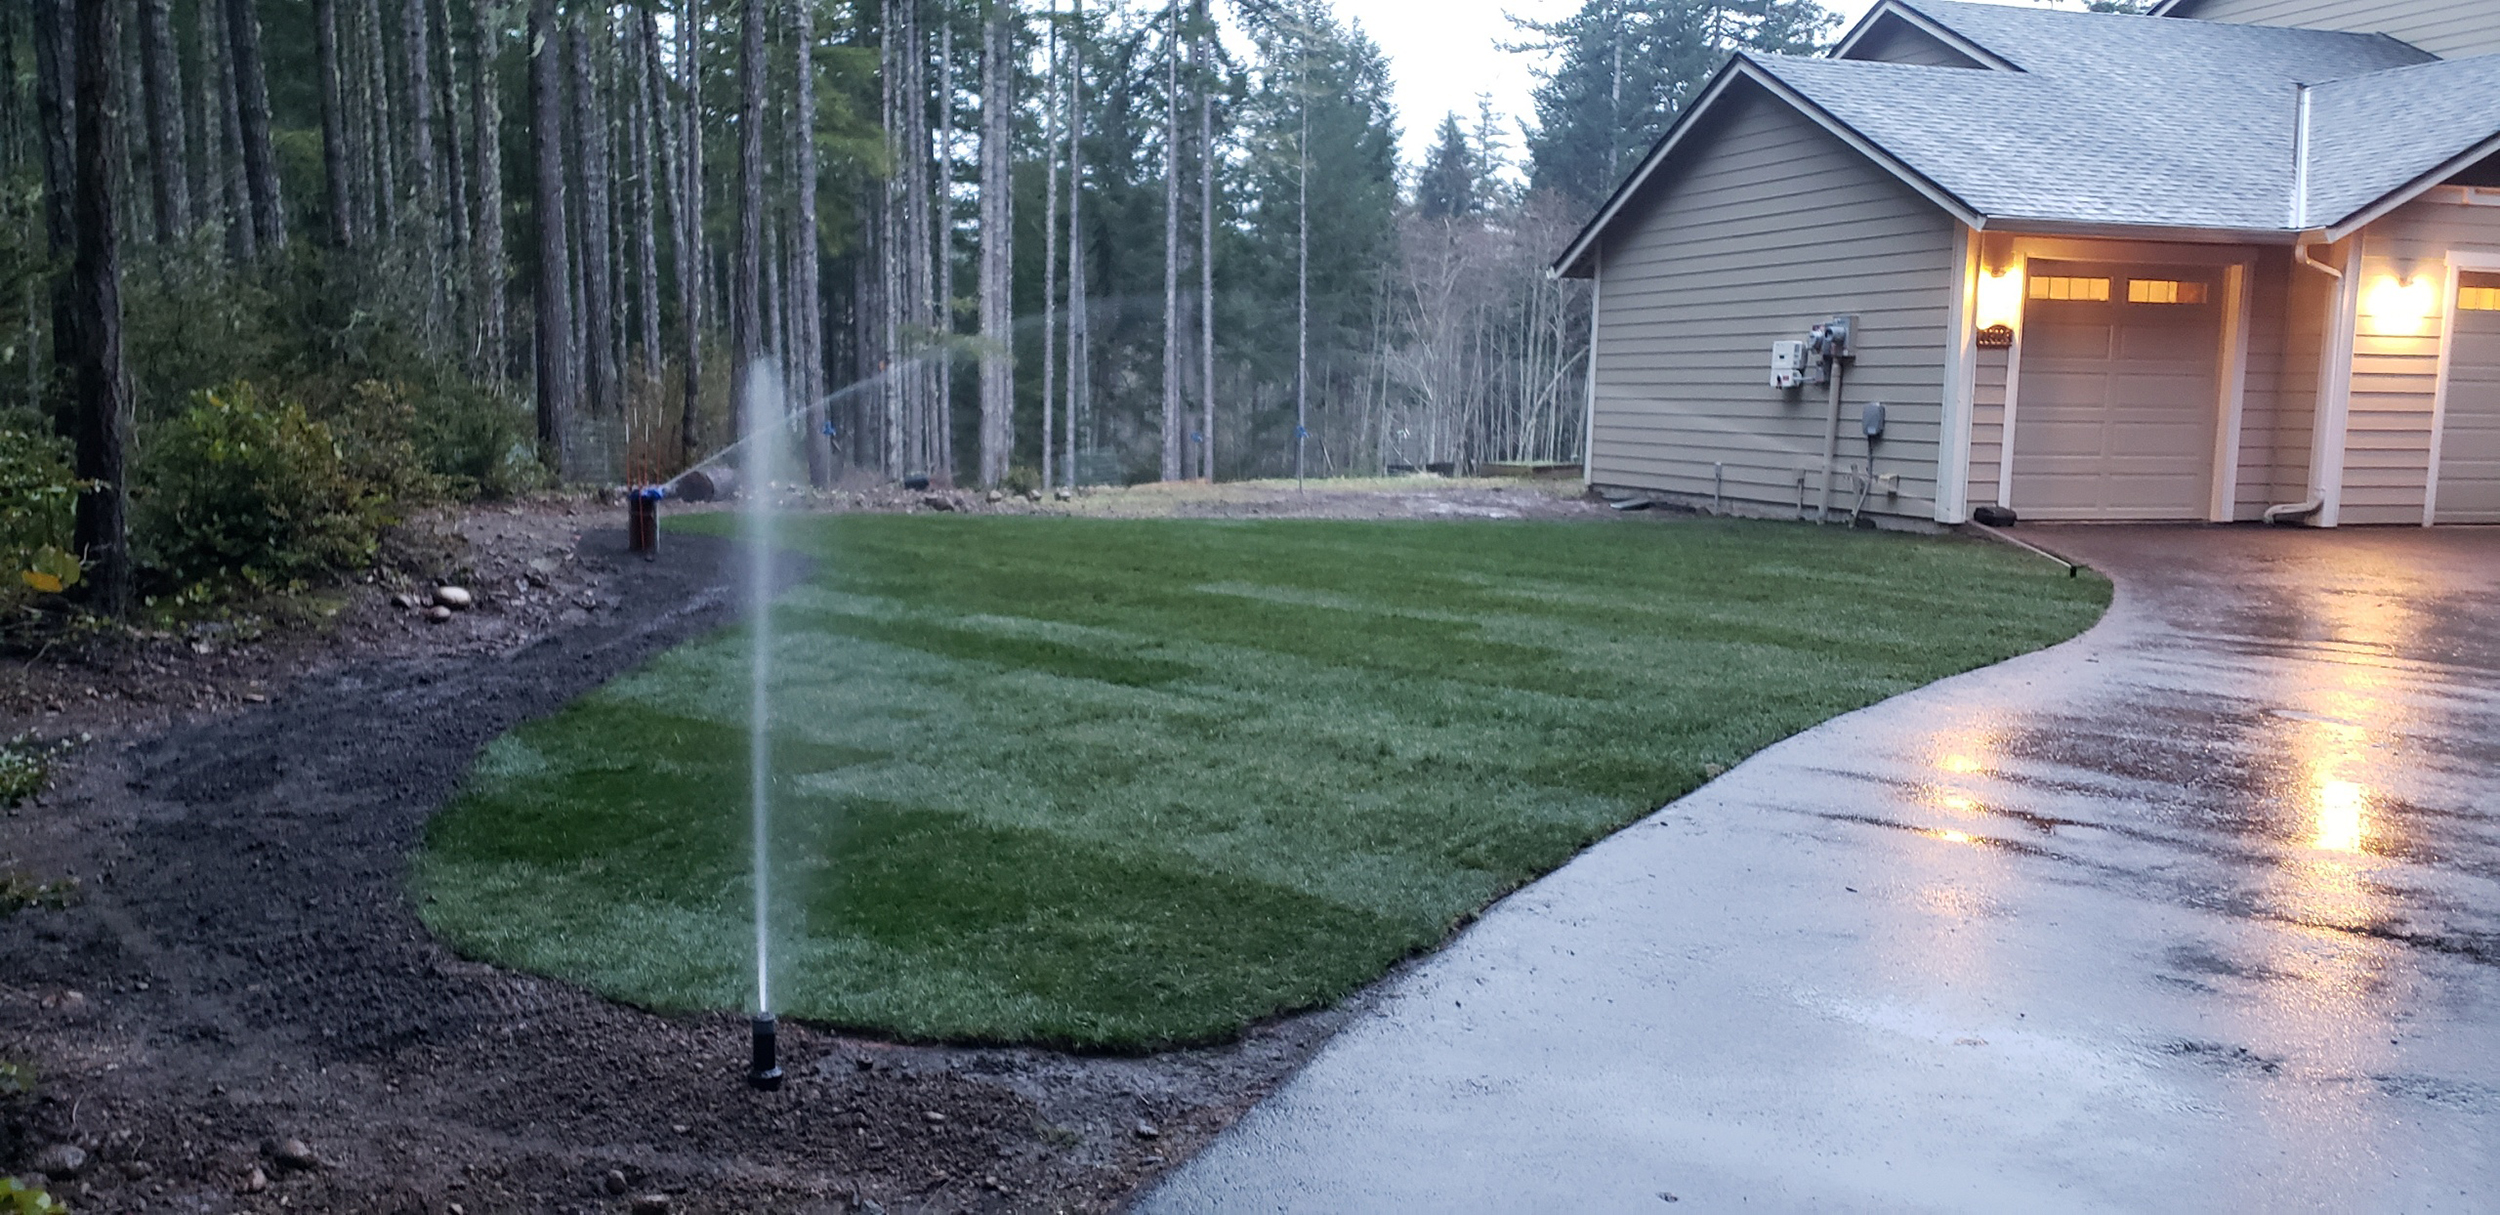
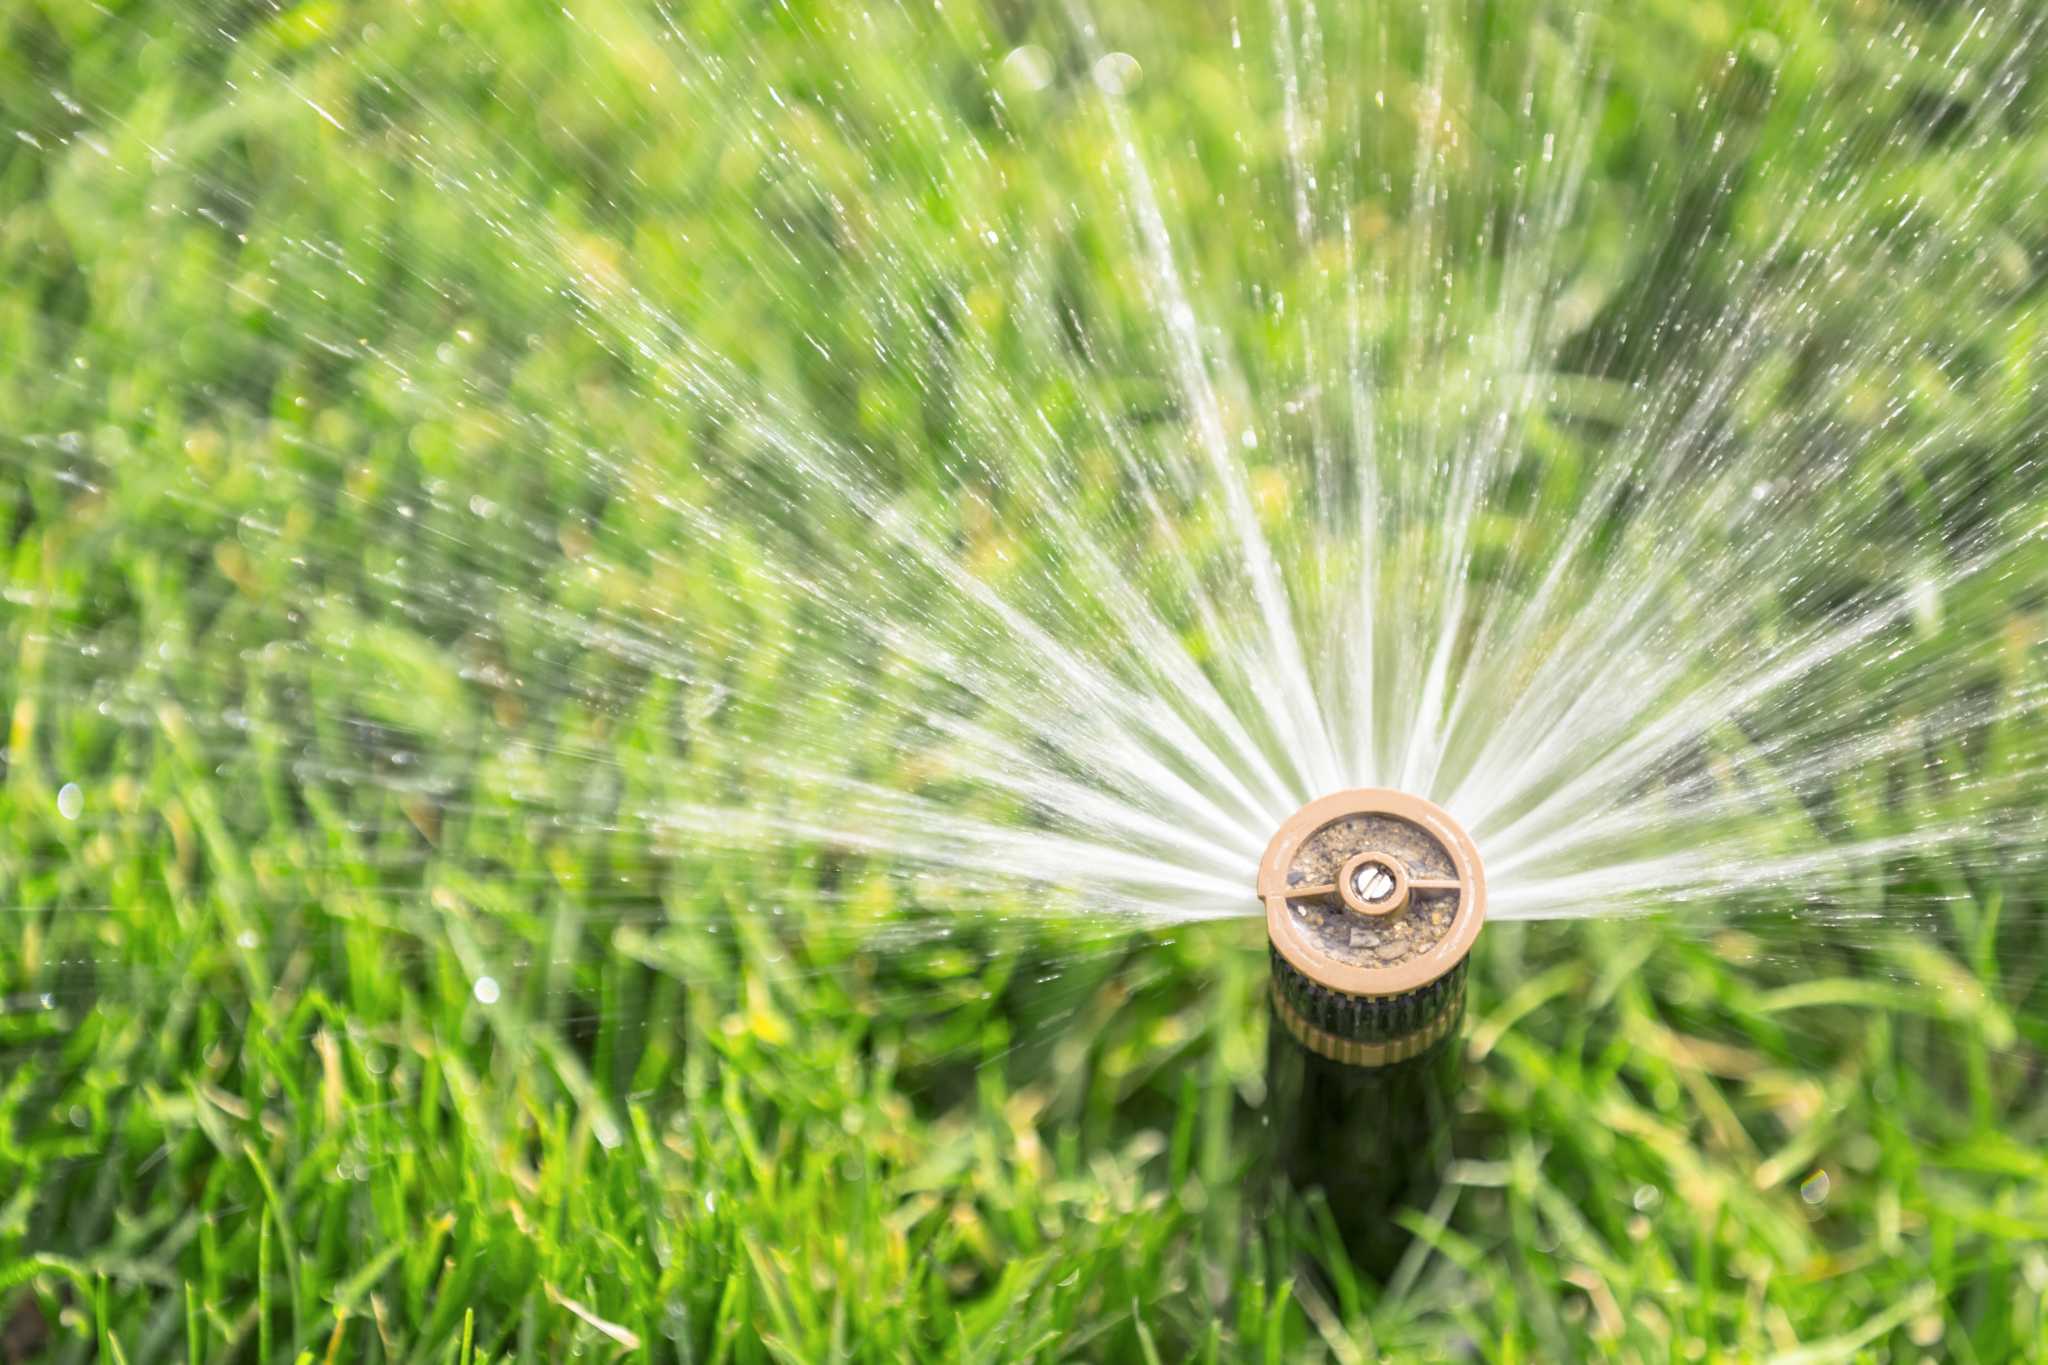
Installing Sprinkler Heads
Installing sprinkler heads is an integral part of setting up an effective irrigation system. Sprinkler heads distribute water evenly and efficiently to your desired areas, ensuring that your plants receive the right amount of water. Here are the steps to successfully install sprinkler heads in your irrigation system.
1. Placement and Layout: Refer to your irrigation design plan to determine the appropriate locations for each sprinkler head. Consider factors such as plant water requirements, the size and shape of the area, and the spray pattern of the sprinkler heads. Mark the desired positions for each sprinkler head.
2. Prepare the Area: Clear any debris or vegetation from the area where the sprinkler heads will be installed. Ensure that the soil is level and ready for installation.
3. Measure the Trench Depth: Determine the appropriate trench depth for the sprinkler heads to be placed. This can vary depending on the type of sprinkler heads you are using.
4. Dig the Trenches: Dig trenches along the designated locations for the sprinkler heads. Ensure that the trenches are wide enough to accommodate the sprinkler heads and provide enough space for proper water distribution.
5. Connect the Sprinkler Heads: Attach the sprinkler heads to the risers or lateral pipes in the trenches according to the manufacturer’s instructions. Be sure to use the appropriate fittings and connectors for a secure and leak-free connection.
6. Adjust the Sprinkler Heads: Position the sprinkler heads at the desired angle and height to achieve the optimal water distribution. Some sprinkler heads allow for adjustable spray patterns, so adjust them accordingly to cover your target areas.
7. Secure the Sprinkler Heads: Once positioned correctly, backfill the trenches with soil, ensuring that the sprinkler heads are firmly held in place. Gently compact the soil around the heads to provide stability.
8. Test the Sprinkler Heads: Before fully closing the trenches, turn on the water supply and test each sprinkler head to ensure proper operation. Check for any leaks, uneven spray patterns, or issues with water flow. Make any necessary adjustments or repairs as needed.
9. Cover and Protect: Once you are satisfied with the performance of the sprinkler heads, cover the trenches with soil, ensuring that the heads remain exposed. This will protect the sprinkler heads while allowing them to effectively distribute water.
Remember to regularly inspect and maintain your sprinkler heads to ensure optimal performance. Clean or replace clogged nozzles, adjust for changes in plant growth or landscape, and check for any damage or leaks.
Installing sprinkler heads requires attention to detail and careful consideration of your specific watering needs. By following these steps and taking the time to install them properly, you will have a reliable and efficient irrigation system that keeps your plants healthy and flourishing.
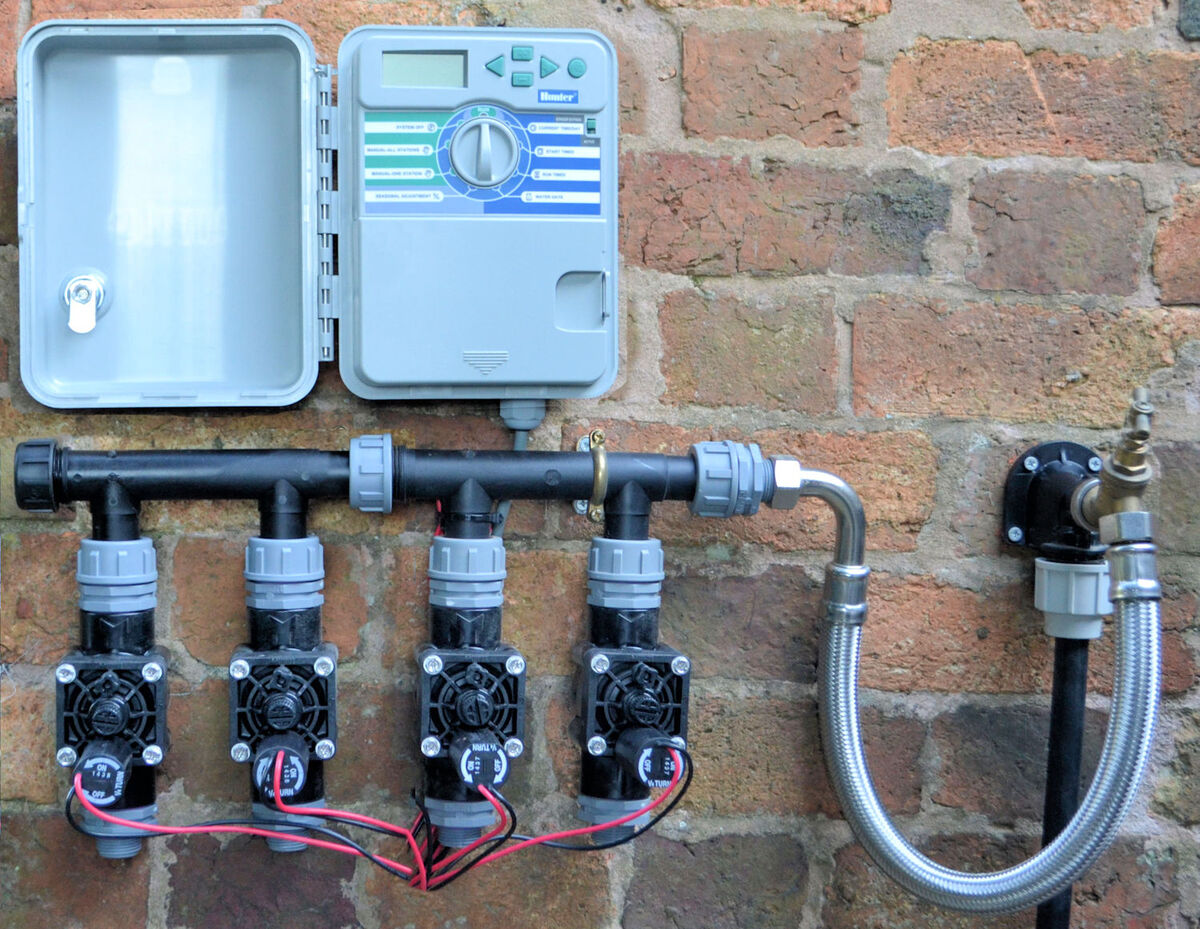
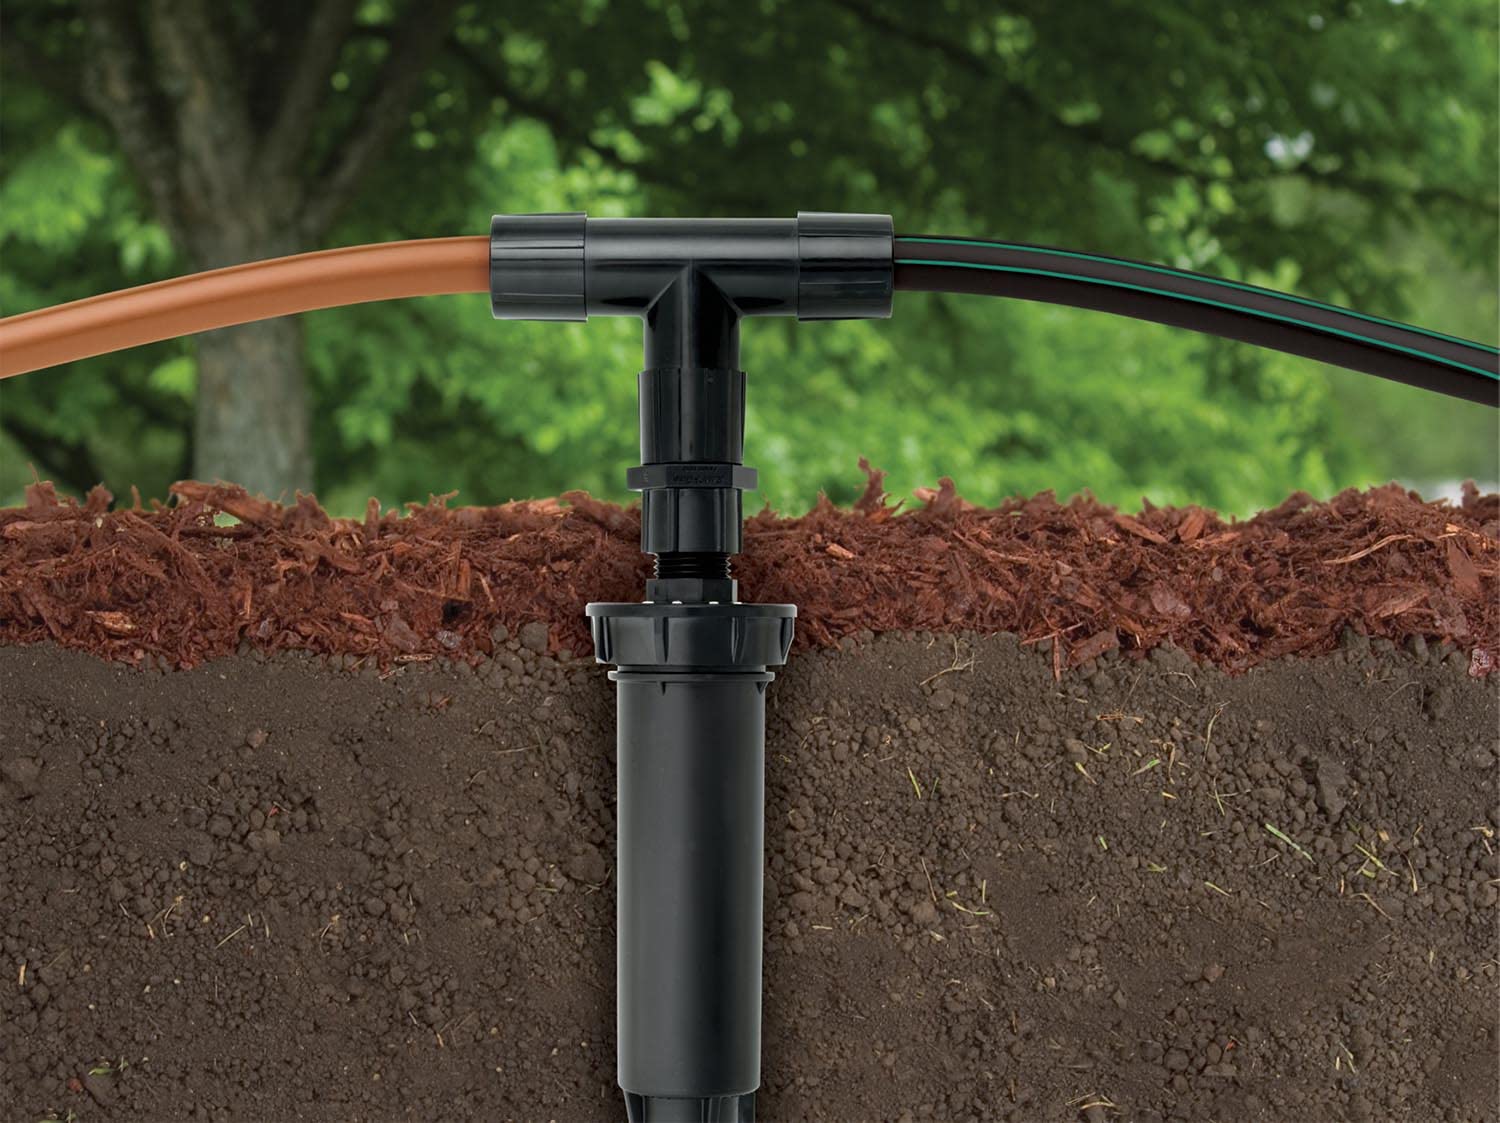
Installing Control Valves
Control valves are crucial components of an irrigation system as they regulate the flow of water to different zones. Proper installation of control valves ensures efficient water distribution and effective management of your irrigation system. Here is a step-by-step guide to installing control valves:
1. Select Valve Location: Determine the optimal location for your control valves. It’s best to install them above ground in a dedicated valve box for easy access and maintenance. Choose a location that is easily accessible and allows for proper valve operation.
2. Prepare the Valve Box: Dig a hole for the valve box, ensuring it is wide and deep enough to accommodate the control valves and necessary connections. Level the bottom of the hole and remove any debris or sharp objects that may damage the valves.
3. Connect Pipes to the Valves: Cut the main irrigation pipe at a suitable location near the valve box. Attach the appropriate fittings and connectors to connect the pipes to the control valves. Be sure to use pipe sealant or Teflon tape to create a watertight seal when making the connections.
4. Position the Control Valves: Install the control valves inside the valve box, ensuring they are positioned correctly according to your irrigation design plan. Check manufacturer instructions for any specific requirements regarding valve installation and orientation.
5. Secure the Control Valves: Use mounting brackets or screws to secure the control valves in place within the valve box. Ensure that the valves are firmly attached and do not move or shift during operation.
6. Connect Wiring: Connect the wiring from the control panel to the control valves. Follow the manufacturer’s instructions for proper wiring connections, ensuring that the polarity is correct and the connections are secure.
7. Test the Valves: Turn on the water supply and test each control valve to ensure proper operation. Check for any leaks, valve malfunctions, or issues with water flow. Make any necessary adjustments or repairs as needed.
8. Close the Valve Box: Once you are satisfied with the performance of the control valves, close the valve box and secure the lid. This will protect the valves from external factors, such as debris or weather conditions, while allowing access for future maintenance.
Regularly inspect and maintain your control valves to ensure they are functioning correctly. Clean or replace any clogged or damaged valves and check the wiring connections periodically for any loose or damaged wires.
By following these steps and taking the time to install control valves properly, you will have a well-controlled irrigation system that efficiently distributes water to the different zones of your garden or lawn.
Wiring the Irrigation System
Wiring your irrigation system is a crucial step in automating the watering process and ensuring efficient operation. By properly connecting the wires, you can control the timing and duration of irrigation with ease. Here’s a step-by-step guide to help you wire your irrigation system:
1. Verify Power Source: Ensure that you have a reliable power source near your irrigation system. This can be an outdoor electrical outlet or a dedicated electrical circuit specifically installed for the irrigation system.
2. Choose a Controller: Select a suitable controller that fits your needs and has the necessary features to accommodate your irrigation system. Consider controllers with multiple programs, customizable run times, and water-saving settings.
3. Mount the Controller: Install the controller in a secure and easily accessible location, such as a garage or utility room. Follow the manufacturer’s instructions for proper mounting, ensuring that the controller is level and securely attached.
4. Run the Main Wire: Run a main wire from the controller to the valve box where the control valves are located. Bury the wire at a depth that complies with local electrical codes and guidelines. Use conduit or direct burial wire suitable for outdoor use to protect the wire from damage.
5. Connect Wires to the Valves: Strip the ends of the wires and connect them to the corresponding terminals on the control valves. Follow the color-coding or labeling provided by the manufacturer to ensure proper connections.
6. Connect Wires to the Controller: Strip the ends of the wires and connect them to the corresponding terminals on the controller. Typically, the wires are connected to numbered or labeled terminal screws or ports on the controller. Again, ensure that the connections are secure and follow the manufacturer’s guidelines.
7. Test the Wiring: Turn on the controller and test each zone to ensure that the wires are properly connected and the valves operate as expected. Verify that the controller can activate and deactivate each zone independently.
8. Program the Controller: Follow the controller’s user manual to program the watering schedule, including start times, run durations, and days of the week. Incorporating rain sensors or other weather-based sensors can help optimize water usage and conserve resources.
9. Label the Wires: Label each wire connected to the controller and the valves to easily identify them in the future. This will save time and effort when troubleshooting or making adjustments to the system.
10. Secure and Protect the Wiring: Organize and secure the wiring using zip ties or conduit to prevent tangling and ensure a neat appearance. Keep the wiring protected from potential hazards like gardening tools, weather elements, or pests that could cause damage.
Regularly inspect and maintain your irrigation system’s wiring to ensure its proper functioning. Check for any frayed wires, loose connections, or signs of damage, and make necessary repairs promptly to avoid any potential issues.
By following these steps and taking the time to wire your irrigation system correctly, you can have a reliable automated watering solution that keeps your garden or lawn healthy and thriving.
Testing and Adjusting the Irrigation System
Once you have installed your irrigation system, it’s crucial to thoroughly test and make necessary adjustments to ensure its efficiency, effectiveness, and proper functioning. Testing and adjusting your irrigation system ensures that your plants receive the right amount of water while minimizing waste. Here are the steps to successfully test and adjust your irrigation system:
1. Activate the Zones: Begin by activating each zone of your irrigation system one at a time. This will allow you to observe the water distribution and coverage for each area.
2. Check for Coverage: Walk around each zone and visually inspect the coverage area of the sprinkler heads or drip emitters. Look for any dry spots or over-watered areas. Adjust the sprinkler heads or emitters, if necessary, to ensure even coverage.
3. Inspect for Leaks: During each zone’s activation, carefully inspect the entire system for any leaks. Check for water pooling, dripping, or spraying outside of the intended coverage area. Fix any leaks or faulty connections to prevent water wastage.
4. Measure Precipitation Rate: Use catch cups or small containers placed in various locations within each zone to measure the rate of water applied by the sprinkler heads. This will help you determine if the precipitation rate is consistent and appropriate for your plants’ needs.
5. Adjust Run Times: Based on your observations and precipitation rate measurements, fine-tune the run times for each zone. Increase or decrease the duration as needed to ensure that the soil receives the right amount of water without excess runoff or under-watering.
6. Consider Soil Absorption: Take into account the soil’s absorption rate in your adjustments. If you have fast-draining soil, you may need to run the irrigation system for shorter durations and more frequently. For slower-draining soil, longer run times with longer intervals between watering may be necessary.
7. Test the Controller: Verify that the controller is accurately programmed and activating each zone as intended. Check the current date, time, and watering schedule to ensure that the controller is functioning correctly.
8. Monitor Plant Health: Over the following days and weeks, monitor the health of your plants and the condition of the soil. Adjust the irrigation schedule if you notice signs of over or under watering, such as wilting plants or waterlogged soil.
9. Consider Weather Conditions: Take into account changing weather conditions when adjusting the irrigation system. Increase or decrease watering frequency or run times during periods of heavy rainfall or drought to avoid over or under watering.
10. Regular Maintenance: Proper maintenance is key to the long-term success of your irrigation system. Inspect and clean sprinkler heads regularly, replace any damaged components, and ensure that valves and wiring connections are in good condition.
By thoroughly testing and adjusting your irrigation system, you will ensure that it operates efficiently, meets your plants’ water requirements, and minimizes water wastage. Regular monitoring and maintenance are essential to keep your garden or lawn healthy and thriving.
Troubleshooting Common Issues
Even with a well-designed and properly installed irrigation system, occasional issues may arise. Understanding and being able to troubleshoot these common problems will help you maintain the efficiency and effectiveness of your system. Here are some common issues and troubleshooting tips:
1. Uneven Water Distribution: If you notice dry or over-watered areas, adjust the position of sprinkler heads to ensure even coverage. Check for clogged nozzles or emitters and clean or replace them as needed.
2. Low Water Pressure: If you experience low water pressure in your irrigation system, check for any restrictions in the water supply line or filters. Clean or replace clogged filters, and ensure that your water source can supply adequate pressure for your system.
3. Leaking Connections: Inspect all pipe and valve connections for any leaks. Tighten loose fittings and replace damaged or worn-out gaskets or O-rings. Ensure that all connections are properly sealed with pipe sealant or Teflon tape.
4. Valve Issues: If a specific zone fails to activate or does not shut off, check the control valve for any debris or blockage. Clean or replace faulty valves, solenoids, or diaphragms. Verify that the wiring connections to the valves are secure and properly functioning.
5. Electrical Problems: If your controller fails to turn on or doesn’t operate properly, check the power source and electrical connections. Test the controller’s circuit breaker or fuses and replace any blown fuses or reset the breaker if necessary.
6. Water Runoff: If you notice excessive water runoff, adjust the run times to allow for shorter, more frequent watering intervals. Consider using drip irrigation in areas prone to runoff to ensure more targeted and efficient water delivery.
7. Water Waste: Monitor water consumption and adjust your irrigation schedule according to weather conditions. Incorporate rain sensors or weather-based controllers to automatically adjust run times based on rainfall and moisture levels in the soil.
8. Plant Health Issues: If plants show signs of stress or decline, review your irrigation schedule and adjust watering frequency or run times accordingly. Consider factors such as the plant’s water requirements, soil type, and sunlight exposure when making adjustments.
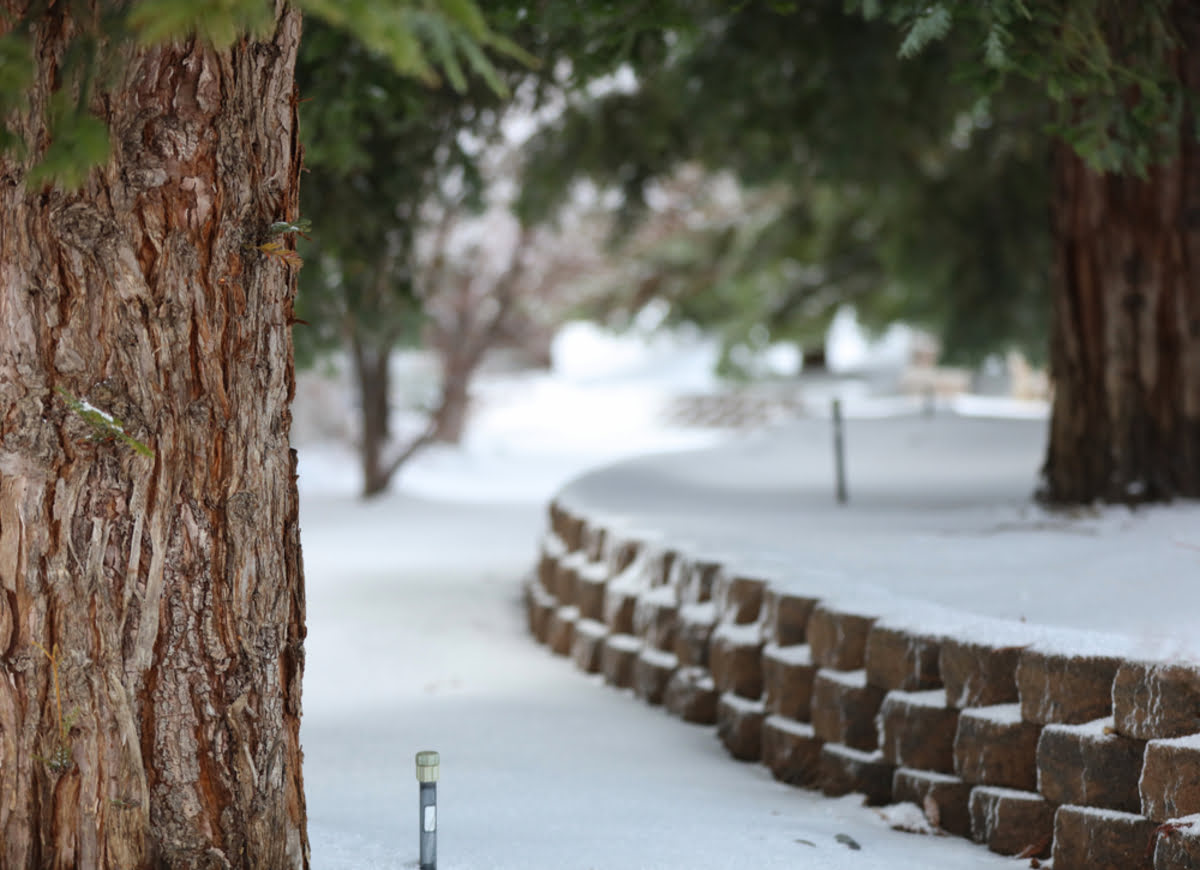
9. Freezing Conditions: Prepare your irrigation system for cold weather by winterizing it properly. Insulate exposed pipes, drain the system, and shut off water supply to prevent freezing and damage to pipes and components.
10. Professional Assistance: If troubleshooting steps do not resolve the issue or if you are unsure how to proceed, it’s advisable to seek professional help from an irrigation specialist or landscaper who can diagnose and fix more complex problems.
Regular maintenance and proactive troubleshooting will help you identify and address any issues before they cause significant damage to your irrigation system. Stay vigilant, address problems promptly, and enjoy the benefits of a well-functioning and efficient irrigation system.
Maintenance and Winterization
Maintaining and winterizing your irrigation system is essential to keep it in optimal condition and prevent damage during the colder months. Regular maintenance ensures the efficiency and longevity of your system, while proper winterization protects your pipes and components from freezing temperatures. Here are some maintenance and winterization tips:
1. Regular Inspections: Routinely inspect your irrigation system for any leaks, damaged components, or clogged sprinkler heads. Check for proper water distribution and ensure that all connections are secure.
2. Clean Sprinkler Heads: Clean clogged or dirty sprinkler heads to maintain their optimal performance. Remove any debris, mineral deposits, or dirt that may block the water flow. If necessary, soak the sprinkler heads in a cleaning solution and scrub with a soft brush.
3. Adjust Sprinkler Heads: Periodically check the alignment and height of sprinkler heads to ensure proper water coverage. Make any necessary adjustments to compensate for changes in plant growth or shifting soil.
4. Replace Faulty Valves: Inspect control valves for any leaks, malfunctions, or signs of wear. Replace damaged or faulty valves to ensure proper water flow and distribution.
5. Inspect and Repair Wiring: Regularly check the wiring connections, including the controller and valve wiring, for any loose or damaged wires. Repair or replace any frayed wires or faulty connectors to maintain proper system operation.
6. Drain the System: Before the arrival of freezing temperatures, drain the irrigation system to prevent water from freezing and causing damage to pipes and valves. Use the manual drain valves or an air compressor to remove any remaining water from the pipes.
7. Winterize Backflow Preventer: If you have a backflow preventer, properly winterize it by following the manufacturer’s instructions or seeking professional assistance. Drain the device to prevent freezing and damage.
8. Insulate Exposed Pipes: Wrap exposed pipes or above-ground components, such as valve boxes, with insulation material to protect them from freezing temperatures. Use foam insulating tape or pipe sleeves to provide adequate insulation.
9. Shut Off Water Supply: Turn off the water supply to the irrigation system during the winter months. This will prevent water from entering the system and freezing in the pipes.
10. Keep Records: Maintain a record of maintenance tasks, repairs, and adjustments made to the irrigation system. This will help you track the system’s performance and easily identify any recurring issues.
Remember to always consult the manufacturer’s guidelines and recommendations for specific maintenance procedures and winterization steps for your irrigation system model. If you are unsure or need assistance, consider hiring a professional to perform the maintenance and winterization tasks.
By regularly maintaining and properly winterizing your irrigation system, you can protect your investment and ensure its longevity and optimal performance through the changing seasons.
Conclusion
Congratulations! You have now gained a comprehensive understanding of how to plan, design, and install your very own DIY irrigation system. By following the steps outlined in this guide, you can create an efficient and effective watering solution for your garden or lawn.
Remember that careful planning and design are essential to ensure that your irrigation system meets the specific needs of your plants and landscape. Consider factors such as water requirements, soil conditions, and the layout of your outdoor space to make informed decisions about component selection, water source connection, and pipe installation.
Proper installation and regular maintenance are critical for the long-term success of your system. Take the time to ensure that sprinkler heads, control valves, and wiring connections are all properly installed and functioning correctly. Regularly inspect and clean your system, making any necessary adjustments to ensure proper water distribution and avoid water waste.
Additional considerations, such as winterization, are crucial to protect your irrigation system from the potential damage caused by freezing temperatures. By following the steps to drain and insulate your pipes, you can safeguard your system during the colder months and avoid costly repairs in the spring.
Remember, troubleshooting common issues is a normal part of maintaining any irrigation system. By understanding and addressing common problems, you can keep your system running smoothly and ensure that your plants receive the optimal amount of water.
Now that you have the knowledge and tools to create and maintain your own irrigation system, you can enjoy the convenience, efficiency, and health benefits that it brings to your garden or lawn. By providing consistent and targeted watering, your plants will thrive, saving you time, money, and effort in the process.
So, roll up your sleeves, put your newfound expertise to work, and enjoy a beautiful, lush outdoor space with your very own DIY irrigation system!