Home>Gardening Basics>Tools and Equipment>How To Install Irrigation Controller
Tools and Equipment
How To Install Irrigation Controller
Modified: January 22, 2024
Looking for the right tools and equipment to install your irrigation controller? Discover expert tips and recommendations in this comprehensive installation guide.
(Many of the links in this article redirect to a specific reviewed product. Your purchase of these products through affiliate links helps to generate commission for Chicagolandgardening.com, at no extra cost. Learn more)
Table of Contents
- Introduction
- Step 1: Gathering the necessary tools and materials
- Step 2: Planning the irrigation system layout
- Step 3: Mounting the irrigation controller
- Step 4: Connecting the controller to the power source
- Step 5: Connecting the irrigation valves to the controller
- Step 6: Testing the irrigation system
- Step 7: Adjusting the controller settings
- Step 8: Troubleshooting common issues
- Conclusion
Introduction
Welcome to the world of irrigation controllers! If you’re a gardener or have a lawn that requires regular watering, then having an irrigation controller is essential for maintaining a healthy and vibrant landscape. An irrigation controller is a device that automates the watering process, allowing you to schedule when and how long your sprinklers or drip irrigation system run.
Gone are the days of manually turning on and off your sprinklers or dragging hoses across your lawn. With an irrigation controller, you can easily set up a watering schedule, ensuring that your plants receive the right amount of water at the optimal times. This not only saves you time and effort but also helps conserve water by avoiding overwatering.
Installing an irrigation controller may seem daunting at first, but fear not! In this article, we will guide you through the step-by-step process of installing an irrigation controller. Whether you’re a seasoned DIYer or a beginner, we’ll provide you with all the necessary information to get your irrigation system up and running smoothly.
Before we dive into the installation process, it’s important to note that there are different types of irrigation controllers available on the market. Some are simple plug-and-play devices, while others require more complex wiring. For the purpose of this article, we will focus on the installation of a basic wired irrigation controller.
Now, let’s gather the necessary tools and materials and get started on our journey to a greener, healthier lawn!
Step 1: Gathering the necessary tools and materials
Before you begin installing an irrigation controller, you will need to gather all the necessary tools and materials. Having these items prepared ahead of time will make the installation process much smoother. Here’s what you’ll need:
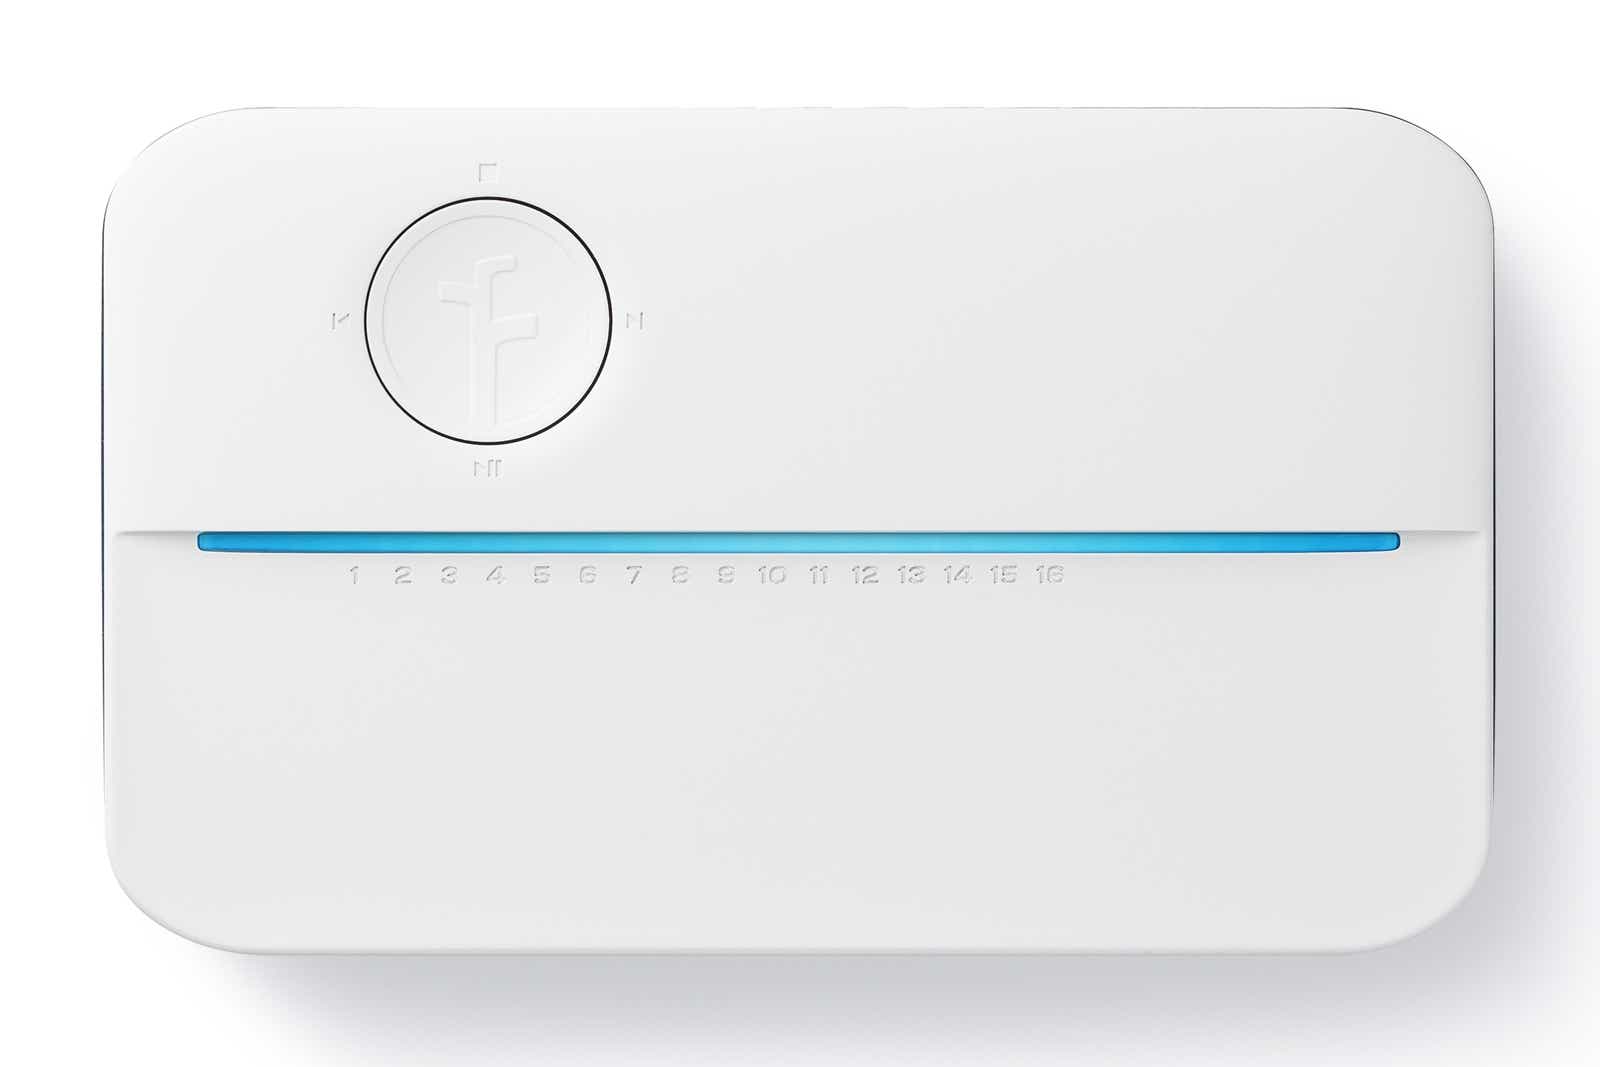
- Irrigation controller: Select a controller that suits your needs and the size of your irrigation system. There are various models available, so choose one that offers the features you desire, such as multiple zones, customizable schedules, and manual override options.
- Wire strippers: You’ll need these to strip the insulation off the wires, allowing for proper connections.
- Wire connectors: These will be used to securely connect the wires together.
- Wire nuts: Wire nuts are essential for connecting wires that are of different sizes or materials.
- Electrical tape: Use electrical tape to insulate and protect wire connections.
- Screwdrivers: Depending on the controller model, you may need a Phillips or flathead screwdriver for mounting and connecting the controller.
- Drill and drill bits: If the controller needs to be mounted to a surface, you’ll need a drill and appropriate drill bits to create the necessary holes.
- Pencil and measuring tape: These tools will help you plan and mark the locations for mounting the controller and connecting the wires.
- Electrical tester: An electrical tester is useful for ensuring that power is properly connected and for troubleshooting any wiring issues.
- User manual: While optional, having the user manual handy will provide detailed instructions specific to your irrigation controller model.
Once you have gathered all the necessary tools and materials, you are ready to move on to the next step: planning the layout of your irrigation system.
Step 2: Planning the irrigation system layout
Before you start installing the irrigation controller, it’s important to plan out the layout of your irrigation system. This will ensure that the controller is positioned correctly and that the irrigation zones are properly set up. Here are the key steps in planning the layout:
- Identify your water source: Determine where your water source is located, such as an outdoor spigot or a dedicated irrigation line. This will help you determine the location of the controller and the routing of the irrigation pipes.
- Map out your irrigation zones: Divide your landscape into different irrigation zones based on factors such as plant types, sun exposure, and soil moisture needs. Each zone will require its own set of irrigation valves and corresponding wiring.
- Determine valve locations: Mark the locations where the irrigation valves will be installed. These valves will control the flow of water to each zone. Consider factors such as accessibility and proximity to water sources when determining valve locations.
- Plan the wiring route: Determine the best route for running the wiring from the controller to each valve. This route should be efficient and avoid any potential obstacles, such as underground utilities or large tree roots.
- Consider wire length: Measure the distance from the controller to each valve location to ensure that you have enough wire to make the connections. It’s always a good idea to add a few extra feet to account for any unexpected obstacles or changes in the landscape.
- Mark the controller location: Based on your water source and valve locations, designate a suitable location for mounting the irrigation controller. This should be a secure and accessible spot, preferably near a power source.
By carefully planning the layout of your irrigation system, you can ensure efficient water distribution and seamless operation of the controller. With the layout in place, you’re now ready to move on to the next step: mounting the irrigation controller.
Step 3: Mounting the irrigation controller
Once you have planned the layout of your irrigation system, it’s time to mount the irrigation controller. Proper installation and positioning of the controller are crucial for easy access and optimal functionality. Follow these steps to mount the controller:
- Choose the mounting location: Based on your previous planning, select a suitable location for mounting the irrigation controller. It should be easily accessible, protected from the elements, and near a power source.
- Prepare the mounting surface: Ensure that the mounting surface, whether it’s a wall or a post, is clean and sturdy. Use a level to make sure the surface is straight before proceeding.
- Mark the mounting holes: Place the controller against the mounting surface and use a pencil to mark the locations of the mounting holes. Make sure the controller is level before marking the holes.
- Drill pilot holes: Use a drill with an appropriate drill bit to create pilot holes at the marked locations. The size of the drill bit should match the size of the mounting screws provided with the controller.
- Attach the controller: Align the mounting holes on the controller with the pilot holes on the mounting surface. Securely fasten the controller using the provided screws and a screwdriver.
- Double-check stability: After attaching the controller, gently shake it to ensure that it is securely mounted and doesn’t wobble. Make any necessary adjustments to ensure a stable installation.
Once the controller is securely mounted, you’re ready to move on to the next step: connecting the controller to the power source.
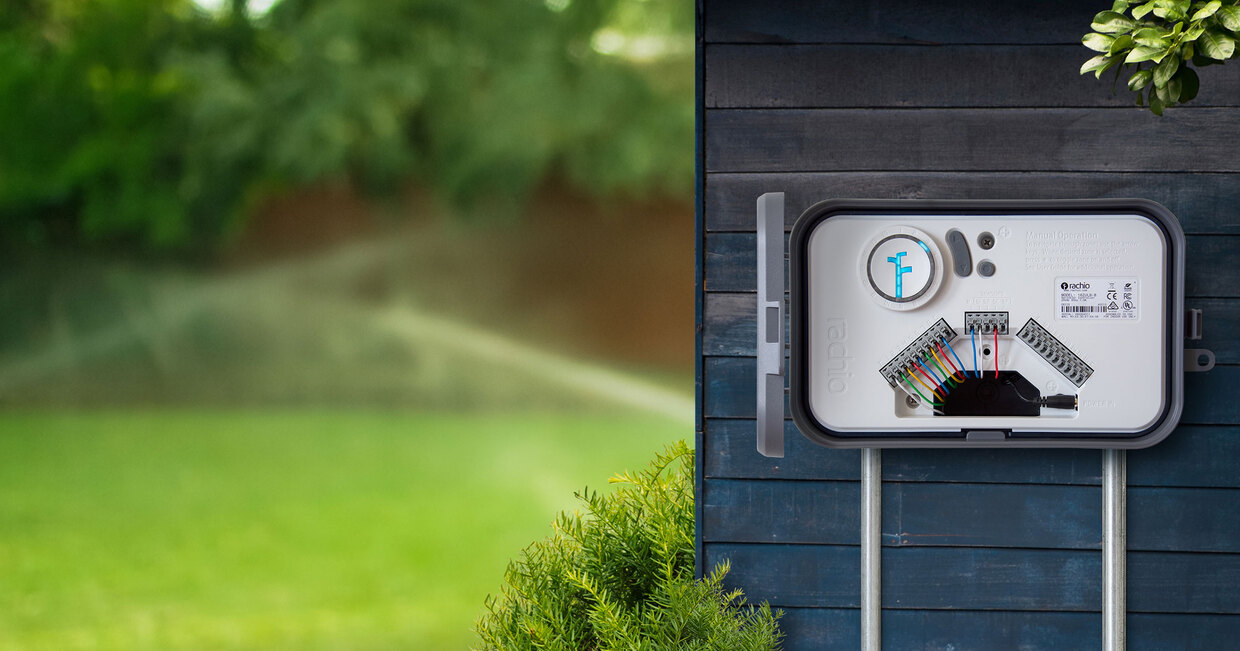
Step 4: Connecting the controller to the power source
Now that you have mounted the irrigation controller, it’s time to connect it to a power source. The power source will provide the necessary electrical supply to the controller, allowing it to function effectively. Follow these steps to connect the controller to the power source:
- Locate the power source: Identify the nearest power source or electrical outlet to your controller’s location. Ensure that it is a grounded outlet and can handle the power requirements of the controller.
- Turn off the power: Before making any electrical connections, turn off the power to the outlet from the circuit breaker. This will prevent any accidental electrical shocks or damage to the controller.
- Remove the controller cover: Using a screwdriver, remove the cover of the controller to access the internal wiring terminals. Take necessary precautions to avoid any damage to the controller or yourself while doing this.
- Identify the power terminals: Look for the power terminals on the controller. These terminals are typically labeled “Line” or “Power” and may be color-coded. Consult the user manual if you’re unsure about the specific terminals.
- Prepare the wires: Strip the insulation off the end of the power wires using wire strippers. The stripped portion should be long enough to securely connect to the power terminals.
- Connect the wires to the terminals: Insert the stripped ends of the wires into the appropriate power terminals on the controller. Ensure that the connections are tight and secure. You can use wire nuts or other suitable connectors to make the connections.
- Secure the connections: Once the wires are connected, gently tug on them to ensure they are firmly in place. Use electrical tape to wrap around the terminals and wires for added insulation and protection.
- Reattach the controller cover: After confirming the secure connections, carefully reattach the controller cover using the screws. Make sure the cover is properly aligned and closed.
- Turn on the power: Go back to the circuit breaker and switch on the power to the outlet. This will supply power to the controller and allow it to function.
- Verify power connection: Use an electrical tester to verify that power is flowing to the controller. Follow the instructions provided with the tester to ensure safe and accurate testing.
By properly connecting the controller to a power source, you have set the foundation for the next step: connecting the irrigation valves to the controller.
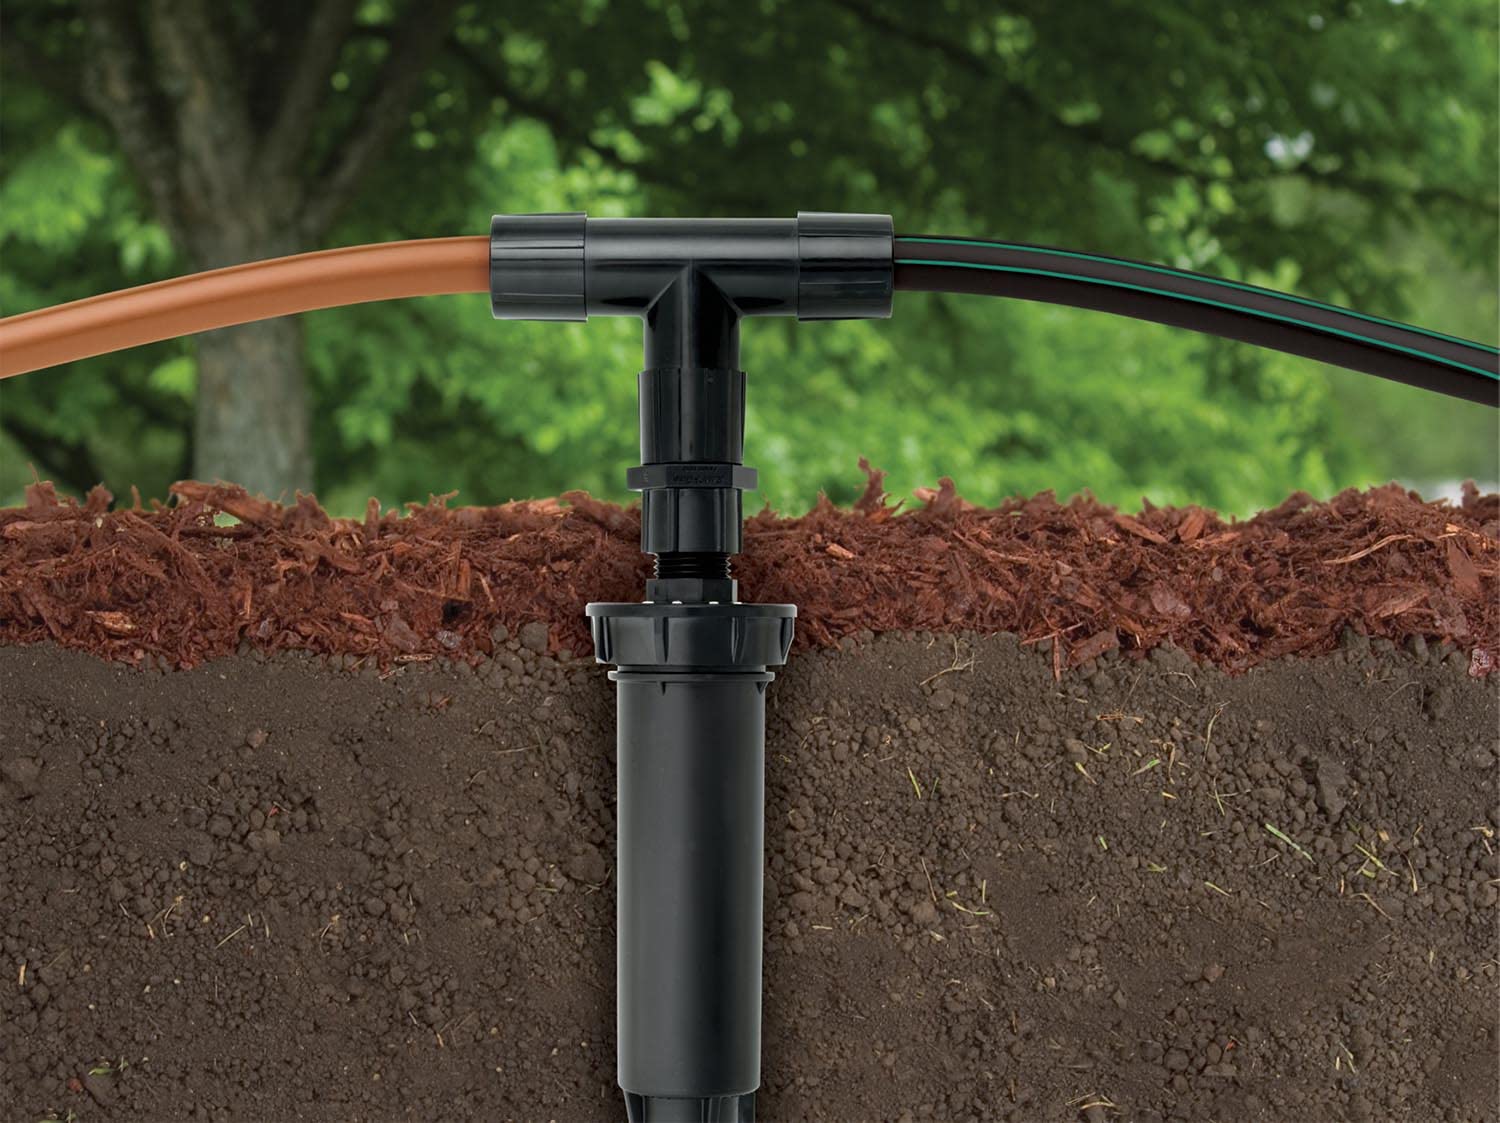
Step 5: Connecting the irrigation valves to the controller
With the irrigation controller now powered on, it’s time to connect the irrigation valves to the controller. The valves are responsible for controlling the flow of water to each specific zone in your irrigation system. By connecting them to the controller, you’ll be able to activate and deactivate each zone as desired. Here’s how to connect the irrigation valves:
- Locate the valve wiring terminals: Open the controller cover and identify the wiring terminals for the irrigation valves. These terminals are typically labeled with the zone numbers or names.
- Plan the wiring route: Determine the route for running the wires from each irrigation valve to the controller. This route should be efficient, avoiding any obstacles or interference with other components of the irrigation system.
- Prepare the wires: Strip the insulation off the ends of the irrigation valve wires using wire strippers. The stripped portion should be long enough to connect to the wiring terminals on the controller.
- Connect the wires to the terminals: Insert the stripped ends of each valve wire into the corresponding wiring terminal on the controller. Follow the labeling or numbering system to ensure the correct connections.
- Secure the connections: Tighten the screws on the wiring terminals to secure the wire connections. Ensure that the connections are tight to prevent any loose or faulty connections.
- Bundle and organize the wires: Use wire ties or clips to bundle and organize the valve wires. This will help keep them neat and prevent any tripping hazards or entanglements in the irrigation system.
- Test the connections: Before proceeding further, ensure that all the valve connections are properly secured and functional. Activate each zone via the controller to verify that water flows through the corresponding valve.
By successfully connecting the irrigation valves to the controller, you now have the ability to control the water flow to each zone in your irrigation system. This brings us to the next step: testing the irrigation system to ensure its proper functioning.
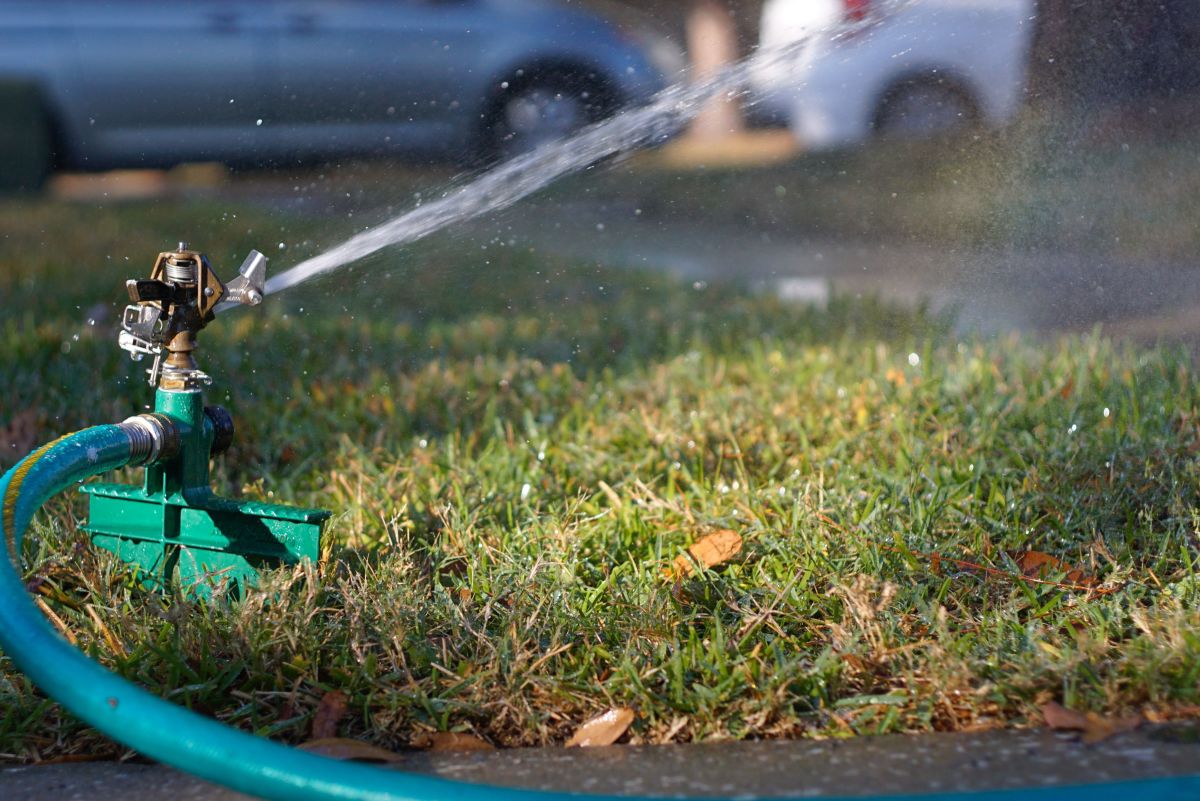
Step 6: Testing the irrigation system
Now that you have connected the irrigation valves to the controller, it’s time to test the irrigation system to ensure everything is functioning properly. Testing the system will help identify any issues or adjustments that need to be made. Follow these steps to test your irrigation system:
- Close all valves: Ensure that all irrigation valves are closed before starting the test. This will prevent any water from flowing until you’re ready.
- Set up a test schedule: Use the controller’s programming features to set up a test schedule. This can include running each zone for a short period of time to check for leaks, proper nozzle performance, and coverage.
- Initiate the test: Start the test schedule and observe the operation of each zone. Check for any signs of leakage, uneven water distribution, or malfunctioning sprinklers or drip emitters.
- Make necessary adjustments: If you notice any issues during the test, make note of them and adjust the system as needed. This may involve adjusting sprinkler heads or drip emitters, fixing leaks, or adjusting the controller’s programming for optimal watering times and durations.
- Re-test as needed: Once you have made the necessary adjustments, re-test the system to ensure that the changes have resolved any issues. Make additional adjustments if required.
- Monitor system performance: After completing the initial test and adjustments, continue to monitor the performance of your irrigation system over time. Regularly check for any signs of leaks, uneven water distribution, or other issues and address them promptly.
Testing your irrigation system is crucial to ensure that it operates efficiently and effectively. By identifying and addressing any issues early on, you can avoid water waste, maintain healthy plants, and save time and money in the long run.
Once you’re satisfied with the performance of your irrigation system, it’s time to move on to the next step: adjusting the controller settings to meet your specific watering needs.
Step 7: Adjusting the controller settings
Now that your irrigation system is tested and functioning properly, it’s time to fine-tune the controller settings to meet your specific watering needs. Adjusting the controller settings will ensure that your plants receive the right amount of water at the right times, promoting healthy growth and conserving water. Follow these steps to adjust the controller settings:
- Refer to the user manual: Consult the user manual that came with your irrigation controller for specific instructions on adjusting the settings. Each controller may have different programming options and features.
- Access the programming menu: Depending on the controller model, you may need to navigate through a series of menus and buttons to access the programming options. Refer to the user manual for guidance.
- Set the watering schedule: Determine the frequency and duration of watering for each zone based on your plants’ needs and environmental factors. You can program the controller to water different zones on different days and at specific times.
- Consider weather-based adjustments: Some irrigation controllers offer weather-based adjustment features that can automatically modify the watering schedule based on local weather conditions. Familiarize yourself with these options and enable them if available.
- Monitor and adjust as needed: Keep an eye on the performance of your irrigation system after adjusting the settings. Monitor the health and growth of your plants, evaluate water coverage, and make further adjustments if necessary.
- Regularly update settings: As seasons change and plant requirements evolve, it’s important to regularly review and update the controller settings accordingly. This will ensure that your irrigation system continues to meet the needs of your landscape.
By adjusting the controller settings, you can optimize the watering schedule to promote healthy plant growth and conserve water. Remember to periodically review and update the settings to adapt to changing conditions and plant needs.
With the controller settings properly adjusted, you’re now ready to move on to the final step: troubleshooting common issues that may arise with your irrigation system.
Step 8: Troubleshooting common issues
Even with careful planning and proper installation, issues may still arise with your irrigation system. Troubleshooting common problems will help you identify and resolve any issues quickly, ensuring that your system operates smoothly. Follow these steps to troubleshoot common issues:
- Check for water leaks: Inspect the entire irrigation system, including pipes, valves, and sprinklers, for any signs of leaks. Repair or replace any damaged components.
- Verify valve functionality: Manually open and close each valve to check if it is operating correctly. Ensure that water flows to the respective zones as intended.
- Inspect sprinkler heads and emitters: Examine each sprinkler head or drip emitter to ensure that it is not clogged or damaged. Clean or replace any faulty components as needed.
- Check controller programming: Double-check the programming settings on your irrigation controller to ensure that the watering schedule and durations are correctly programmed.
- Test the electrical connections: Use an electrical tester to verify that all wiring connections, both at the controller and the valves, are secure and functioning properly.
- Inspect water pressure: Check the water pressure within your system to ensure it falls within the recommended range. Adjustments to the pressure regulator may be necessary if the pressure is too high or too low.
- Consider weather-related factors: Take into account any unusual weather conditions, such as heavy rainfall or drought, that may affect the performance of your irrigation system. Adjust the watering schedule accordingly.
- Consult professional help if needed: If you’re unable to identify or resolve an issue with your irrigation system, don’t hesitate to seek assistance from a professional irrigation technician or landscaper.
By troubleshooting common issues, you can quickly identify and address any problems that may arise with your irrigation system. Regular maintenance and periodic checks will help keep your system running efficiently, ensuring healthy and vibrant plants.
With your troubleshooting skills honed, you can now confidently maintain and enjoy the benefits of your fully functioning irrigation system.
Conclusion
Congratulations on successfully installing and setting up your irrigation controller! By following the steps outlined in this guide, you have taken a significant step towards maintaining a healthy and vibrant landscape. With the ability to automate your watering schedule and customize it to your specific needs, you can ensure that your plants receive the optimal amount of water without waste.
Throughout this process, you gathered the necessary tools and materials, planned the layout of your irrigation system, mounted the controller, connected it to a power source, and linked the irrigation valves to the controller. You then tested the system to ensure proper functioning and adjusted the controller settings based on your specific watering requirements. Finally, you learned how to troubleshoot common issues that may arise with your irrigation system.
Regular maintenance and periodic checks will help keep your irrigation system in optimal condition. It’s important to monitor the performance of your system, making any necessary adjustments as seasons change and plants grow. By doing so, you can ensure efficient water usage, promote plant health, and contribute to environmental conservation.
If you encounter any challenges along the way or feel unsure about any aspect of your irrigation system, don’t hesitate to seek professional assistance. Irrigation technicians or landscapers can provide valuable guidance and support to address any complex issues.
Remember, a well-maintained irrigation system is the key to a beautiful, lush landscape. Enjoy the convenience and benefits of your automated irrigation system, and revel in the beauty of your thriving plants and gardens.