Home>Gardening Techniques>DIY Projects>How To Install A Backyard Fence

DIY Projects
How To Install A Backyard Fence
Modified: February 8, 2024
Learn how to install a beautiful backyard fence with this step-by-step guide. Perfect for DIY projects!
(Many of the links in this article redirect to a specific reviewed product. Your purchase of these products through affiliate links helps to generate commission for Chicagolandgardening.com, at no extra cost. Learn more)
Table of Contents
Introduction
Installing a backyard fence is an exciting and rewarding DIY project that can provide privacy, security, and aesthetic appeal to your outdoor space. Whether you want to keep out nosy neighbors, protect your children and pets, or simply enhance the overall look of your property, a well-constructed fence can fulfill all of these needs and more.
In this comprehensive guide, we will take you through the step-by-step process of installing a backyard fence. From planning and measuring to digging post holes and attaching panels, we will cover all the essential tasks you need to complete to ensure a successful fence installation.
But before you grab your tools and start digging, it’s important to have a clear vision of what you want to achieve with your fence. Are you looking for a tall and sturdy privacy fence, or do you prefer a decorative picket fence to add charm and character to your yard? Understanding your goals and considering factors like the layout of your property, local regulations, and your budget will help you make informed decisions throughout the installation process.
We will also provide a list of the materials and tools you’ll need, along with tips and tricks to make the installation go smoothly. Whether you’re a seasoned DIY enthusiast or a beginner, this guide is designed to be accessible and easy to follow, giving you the confidence to tackle your fence project with ease.
So, roll up your sleeves, put on your work boots, and let’s get started on transforming your backyard into a functional and beautiful space with the installation of a quality fence.
Step 1: Determine the Fence Layout
Before you begin installing a backyard fence, it’s essential to determine the layout of the fence. The layout will help you understand the dimensions, shape, and positioning of the fence. This step is crucial as it will ensure that the fence aligns with your property lines and meets any local regulations or homeowner’s association guidelines.
Start by identifying the boundary lines of your property. Use a property survey or consult with your local municipality to verify the exact location of your property lines. This will prevent any encroachment issues with your neighbors and ensure that you are building the fence entirely on your property.
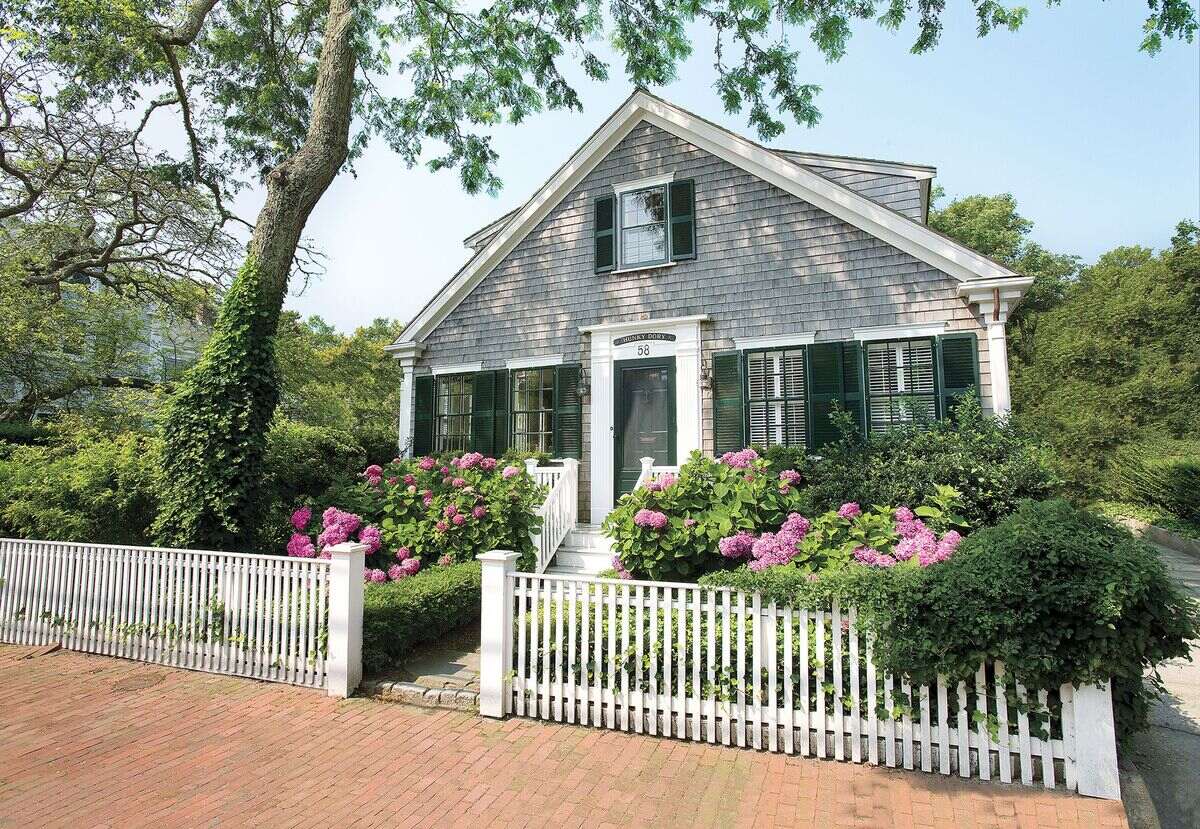
Next, decide on the type of fence you want to install. Privacy fences typically require solid panels, while decorative fences can feature pickets or posts spaced apart. Consider your needs for privacy, security, and aesthetic appeal when choosing the design for your fence.
Once you have determined the type of fence, mark the fence line using stakes and string. Make sure the string is taut and straight to ensure a precise fence line. Use a measuring tape to ensure that the fence line is an even distance from your property line, ensuring consistency throughout the installation process.
Take note of any obstacles or challenges along the fence line, such as trees, slopes, or underground utilities. These factors can influence the positioning and design of your fence. Make adjustments to the fence line if necessary to accommodate these obstacles and ensure a seamless installation.
Additionally, check with your local building codes and homeowner’s association guidelines to determine any height restrictions or additional requirements for your fence. It’s important to comply with these regulations to avoid any legal issues down the line.
By taking the time to determine the fence layout accurately, you will set a solid foundation for your fence installation project. It will ensure that your fence aligns with your property lines, meets local regulations, and suits your specific needs in terms of privacy, security, and aesthetics.
Step 2: Gather Necessary Materials and Tools
Once you have determined the layout of your backyard fence, the next step is to gather all the necessary materials and tools. Having everything prepared beforehand will make the installation process smoother and more efficient.
Here is a list of materials and tools you will need:
- Fence panels or boards
- Fence posts
- Concrete mix
- Gravel
- Nails or screws
- Gate (if desired)
- Hinges and latch (for gate installation)
- Post hole digger or auger
- Tape measure or measuring wheel
- String or mason’s line
- Level
- Hammer or drill
- Saw or circular saw
- Shovel or post pounder
- Work gloves
- Safety glasses
Make sure to choose high-quality materials that are suitable for your specific fence design and the climate in your area. If you are unsure about the quantity of materials you need, consult with a professional or refer to online calculators to estimate the required amount of fencing materials and concrete mix.
Before you start the installation, ensure that you have all the necessary tools in good working condition. Inspect your tools for any damage or wear and replace or repair them as needed. Also, consider wearing appropriate safety gear, including work gloves and safety glasses, to protect yourself during the installation process.
By gathering all of the required materials and tools ahead of time, you’ll be fully prepared to begin building your backyard fence. This will help prevent any unnecessary delays or interruptions during the installation process, allowing you to complete the project efficiently and successfully.
Step 3: Mark the Fence Line
With the necessary materials and tools at hand, it’s time to mark the fence line on your property. This step is crucial as it will ensure that your fence is installed in the correct position and follows the intended layout.
To start, place stakes at the beginning and end points of your fence line. This will serve as your reference points. Then, tie a string tightly between the stakes, making sure it is level and straight. This string will act as a guide for the entire fence line, ensuring a consistent installation.
Using a measuring tape, stake markers, and a level, measure and mark the locations for the fence posts along the string line. The spacing between the posts will depend on the type of fence you are installing. Generally, posts should be spaced 6 to 8 feet apart for privacy fences, and 6 to 10 feet apart for decorative fences. Make sure to follow any specific guidelines provided by the fence manufacturer.
Once you have marked the positions of the fence posts, double-check the alignment by measuring the distance between each stake marker. Adjust the markers as needed to ensure uniform spacing and alignment.
If your fence line encounters any corners or changes in direction, it’s important to mark those points as well. Use a square or level to ensure that the corners are at right angles, and adjust the string line accordingly.
Take note of any obstacles or challenges along the fence line, such as trees, rocks, or sloped areas. Make adjustments to the string line and position of the fence posts if necessary to accommodate these obstacles and ensure a proper installation.
By accurately marking the fence line, you’ll ensure that your fence is installed in the desired position, follows the layout plan, and maintains a consistent and professional appearance. Taking the time to measure and mark the fence line will set the foundation for the rest of the installation process.
Step 4: Dig Post Holes
With the fence line marked, it’s time to dig the post holes. The post holes will anchor the fence posts securely into the ground and provide stability for the entire fence structure.
Start by selecting the appropriate size for your post holes. Generally, the diameter of the hole should be about three times the width of the post. For example, if you have 4×4 inch fence posts, dig holes with a diameter of around 12 inches.
Using a post hole digger or auger, start digging the holes at the marked locations along the fence line. Dig the holes to a depth that is approximately one-third of the length of the fence posts. For example, if your fence posts are 6 feet tall, dig the holes to a depth of 2 feet.
Make sure the sides of the holes are straight and even. Use a level to check for plumbness, ensuring that the holes are vertically aligned. Adjust the depth or width of the holes as needed to maintain the proper alignment.
As you dig the post holes, be mindful of any underground utilities or obstacles that may be present. If necessary, contact your local utility companies to locate and mark any buried lines before digging.
Once you have finished digging all the post holes, remove any excess dirt or debris from the holes. You can use a shovel or post hole digger to clean out the holes and create a smooth and level surface at the bottom.
By digging properly sized and aligned post holes, you will ensure that your fence posts will be securely anchored in the ground, providing stability and support for your fence. Taking the time to dig accurate and level post holes is crucial for a strong and durable fence installation.
Step 5: Set Fence Posts in Concrete
With the post holes dug, it’s time to set the fence posts in concrete. This step is essential for ensuring the stability and longevity of your fence.
Start by inserting the first fence post into the first post hole. Make sure the post is plumb and level using a level tool. To hold the post in place while pouring the concrete, consider using braces or temporary supports. This will prevent the post from shifting or tilting as the concrete sets.
Next, mix the concrete according to the manufacturer’s instructions. Ensure that the concrete mix is of the appropriate consistency – not too dry or too wet. To mix the concrete, you can use a wheelbarrow and a shovel or rent a concrete mixer for larger projects.
Carefully pour the concrete mix into the post hole, filling it up to a few inches below the ground level. Use a shovel or a trowel to ensure that the concrete is evenly distributed and fills all the gaps around the post. Avoid overfilling the hole with concrete, as excess material can create an uneven finish and increase the risk of cracking.
As you pour the concrete, continue to check the post’s plumbness and levelness. Make any necessary adjustments to ensure that the post is perfectly aligned. Use the level tool to ensure that the post remains straight as the concrete sets.
Repeat this process for each fence post, ensuring that they are evenly spaced and aligned along the fence line. Allow the concrete to cure according to the manufacturer’s instructions before proceeding to the next step.
Setting the fence posts in concrete provides a strong and stable foundation for your fence. The concrete will hold the posts securely in place, preventing them from shifting or leaning over time. Taking the time to properly set the fence posts will ensure a long-lasting and sturdy fence installation.
Step 6: Attach Fence Panels
With the fence posts securely set in concrete, it’s time to attach the fence panels. This step will transform the bare posts into a complete and functional fence.
Start by positioning the first fence panel between two adjacent posts. The panel should be aligned with the top and bottom of the posts, ensuring a level and uniform appearance. Depending on the type of fence panel you have, you will either slide it into the grooves on the posts or attach it using nails or screws.
If your fence panels have grooves, simply slide them into the corresponding slots on the fence posts. Ensure that the panels are securely in place and level along the top.
If your fence panels do not have grooves, you will need to attach them to the posts using nails or screws. Use galvanized nails or corrosion-resistant screws to prevent rusting. Position the panel against the posts, making sure it is level and aligned. Then, secure the panel to the posts by driving nails or screws through the panel and into the posts at regular intervals, typically every 6-8 inches.
Continue attaching the remaining fence panels in the same manner, ensuring they are evenly spaced and aligned. Use a level to ensure that each panel is straight and plumb.
As you attach the fence panels, check for any gaps or misalignments between the panels. Make any necessary adjustments to ensure a seamless and uniform appearance. If needed, trim the panels to fit using a saw or circular saw, ensuring clean and precise cuts.
If your fence design includes a gate, install it following the manufacturer’s instructions. Attach the hinges to the gate and then attach the other end of the hinges to one of the fence posts. Install the latch on the opposite side for secure closure.
By attaching the fence panels correctly, you will create a solid and visually appealing fence structure. Taking the time to ensure proper alignment and secure attachment will result in a fence that is not only functional but also enhances the overall look and value of your property.
Step 7: Install Fence Gate
Once the fence panels are securely in place, it’s time to install the fence gate. The gate provides access to your yard while maintaining the security and aesthetics of your fence.
Start by determining the location of the gate along the fence line. Consider factors such as convenience, usability, and the layout of your yard. Ensure that the gate opening is wide enough to accommodate the desired entry and any large items, such as lawnmowers or wheelbarrows, that may need to pass through.
Next, attach the gate hinges to one of the fence posts. Place the hinges at the desired height and ensure they are level and aligned. Use screws or nails provided with the hinge kit to securely attach the hinges to the post.
With the hinges attached to the post, position the gate against the hinges. Ensure the gate is level and aligned with the fence line. Depending on the type of gate you have, you may need someone to assist you in holding the gate in place while you attach the hinges.
Using screws or nails provided with the hinge kit, secure the hinges to the gate. Ensure that the gate swings freely and smoothly by opening and closing it a few times. Adjust the hinges if necessary to achieve the desired swing and clearance.
Install a gate latch on the opposite side of the gate from the hinges. The latch will ensure the gate stays closed securely. Position the latch at the desired height and ensure it aligns properly with the latch mechanism on the gate. Secure the latch using screws or nails provided with the latch kit.
Once the gate latch is installed, test the gate by opening and closing it a few times to ensure it operates smoothly and securely. Make any necessary adjustments to the hinges or latch to achieve the desired fit and function.
By installing the fence gate correctly, you will have a functional and secure entry point to your yard. Taking the time to ensure proper alignment and secure attachment of the gate will provide ease of access and enhance the overall functionality of your backyard fence.
Step 8: Secure Fence Panels
After installing the fence gate, the next step is to secure the fence panels to ensure they remain sturdy and in place. Properly securing the fence panels will prevent them from shifting or becoming loose over time, maintaining the integrity of your fence.
Start by checking each fence panel for any signs of movement or instability. If you notice any panels that are loose or have gaps between them and the posts, take the necessary steps to secure them.
One common method for securing fence panels is by using nails or screws. Check the existing nails or screws used to attach the panels and ensure they are tight. If any nails or screws are loose or missing, replace them with new ones to ensure a secure attachment.
If you find that the fence panels are still loose or have gaps even with secure nails or screws, additional support may be needed. One option is to add additional bracing to the fence panels. This can be achieved by attaching horizontal or diagonal braces between the panels and the posts using nails or screws. The bracing will provide extra stability and prevent the panels from shifting.
Another method for securing fence panels is by using brackets or brackets with hidden fasteners. These are specifically designed to securely attach the panels to the posts, allowing for easy adjustment and providing a clean and finished look. Follow the manufacturer’s instructions when using these brackets to ensure proper installation.
Additionally, consider adding a cap rail or trim to the top of the fence panels. This will not only provide an aesthetically pleasing finish but also help secure the panels in place.
Regular maintenance is important to ensure the ongoing security of the fence panels. Inspect the panels periodically and make any necessary repairs or adjustments to keep them securely attached to the posts.
By taking the time to secure the fence panels properly, you will ensure the long-term stability and functionality of your fence. A secure fence enhances the overall appearance of your backyard while providing privacy, security, and peace of mind.
Step 9: Add Finishing Touches
With the fence panels securely in place, it’s time to add the finishing touches to complete your backyard fence installation. These final touches will not only enhance the overall appearance of your fence but also contribute to its functionality and longevity.
One important finishing touch is to treat or stain the fence panels. Applying a protective coat of stain or paint will help to protect the wood from weathering, rot, and insects. Choose a high-quality product that is designed for exterior use and follow the manufacturer’s instructions for application. This will help preserve the natural beauty of the wood and extend the lifespan of your fence.
Consider adding decorative elements such as lattice panels, post caps, or finials to enhance the aesthetic appeal of your fence. These decorative elements can be easily attached to the top of the fence posts or panels to add a touch of style and elegance.
Another finishing touch is to add landscaping around your fence. Planting flowers, shrubs, or climbing vines near the fence line can soften its appearance and create a more inviting and cohesive outdoor space. Be mindful of the mature size of the plants you choose to prevent them from interfering with the fence structure in the future.
In addition to the decorative elements, ensure that the fence is properly secured to the ground. Use gravel or landscape fabric along the fence line to prevent soil erosion and weed growth. This will help maintain the integrity of your fence and keep it looking neat and tidy.
Lastly, regularly inspect and maintain your fence to prolong its lifespan. Check for any loose boards, damaged hardware, or signs of wear and tear. Make any necessary repairs promptly to keep your fence looking and functioning its best.
By adding these finishing touches, you will elevate the overall appearance and functionality of your backyard fence. The combination of aesthetic enhancements, protective coatings, and thoughtful landscaping will ensure that your fence stands the test of time and continues to enhance your outdoor space for years to come.
Conclusion
Congratulations! You have successfully completed the installation of your backyard fence. Through careful planning, measuring, digging, and securing, you have created a functional and beautiful fence that enhances your privacy, security, and overall enjoyment of your outdoor space.
Installing a backyard fence is a rewarding DIY project that not only adds value to your property but also allows you to showcase your creativity and craftsmanship. From determining the layout and gathering materials to securing the fence panels and adding finishing touches, each step has contributed to the successful completion of your project.
Remember to regularly inspect and maintain your fence to ensure its longevity and optimal performance. Check for any signs of damage, loose components, or wear and tear, and address them promptly to keep your fence looking and functioning at its best.
We hope this comprehensive guide has provided you with the knowledge and confidence to tackle your backyard fence installation. Remember to consult local regulations and building codes, as well as any homeowner’s association guidelines, to ensure compliance and avoid any potential issues.
Thank you for taking the time and effort to create a secure and aesthetically pleasing outdoor space with your new backyard fence. Enjoy the privacy, security, and beauty it brings to your home, and savor the satisfaction of a job well done!