Home>Gardening Techniques>DIY Projects>How To Make Basketball Court In Backyard

DIY Projects
How To Make Basketball Court In Backyard
Modified: January 22, 2024
Learn how to create your own basketball court in your backyard with this easy DIY project. Improve your skills and enjoy the game right at home!
(Many of the links in this article redirect to a specific reviewed product. Your purchase of these products through affiliate links helps to generate commission for Chicagolandgardening.com, at no extra cost. Learn more)
Table of Contents
- Introduction
- Step 1: Choose a Suitable Location
- Step 2: Measure and Mark the Court Dimensions
- Step 3: Clear the Area and Prepare the Ground
- Step 4: Level and Grade the Surface
- Step 5: Install the Base Material
- Step 6: Compact the Base Material
- Step 7: Lay and Secure the Ground Cover
- Step 8: Paint the Court Lines and Markings
- Step 9: Install the Basketball Hoop
- Step 10: Add Basketball Accessories
- Conclusion
Introduction
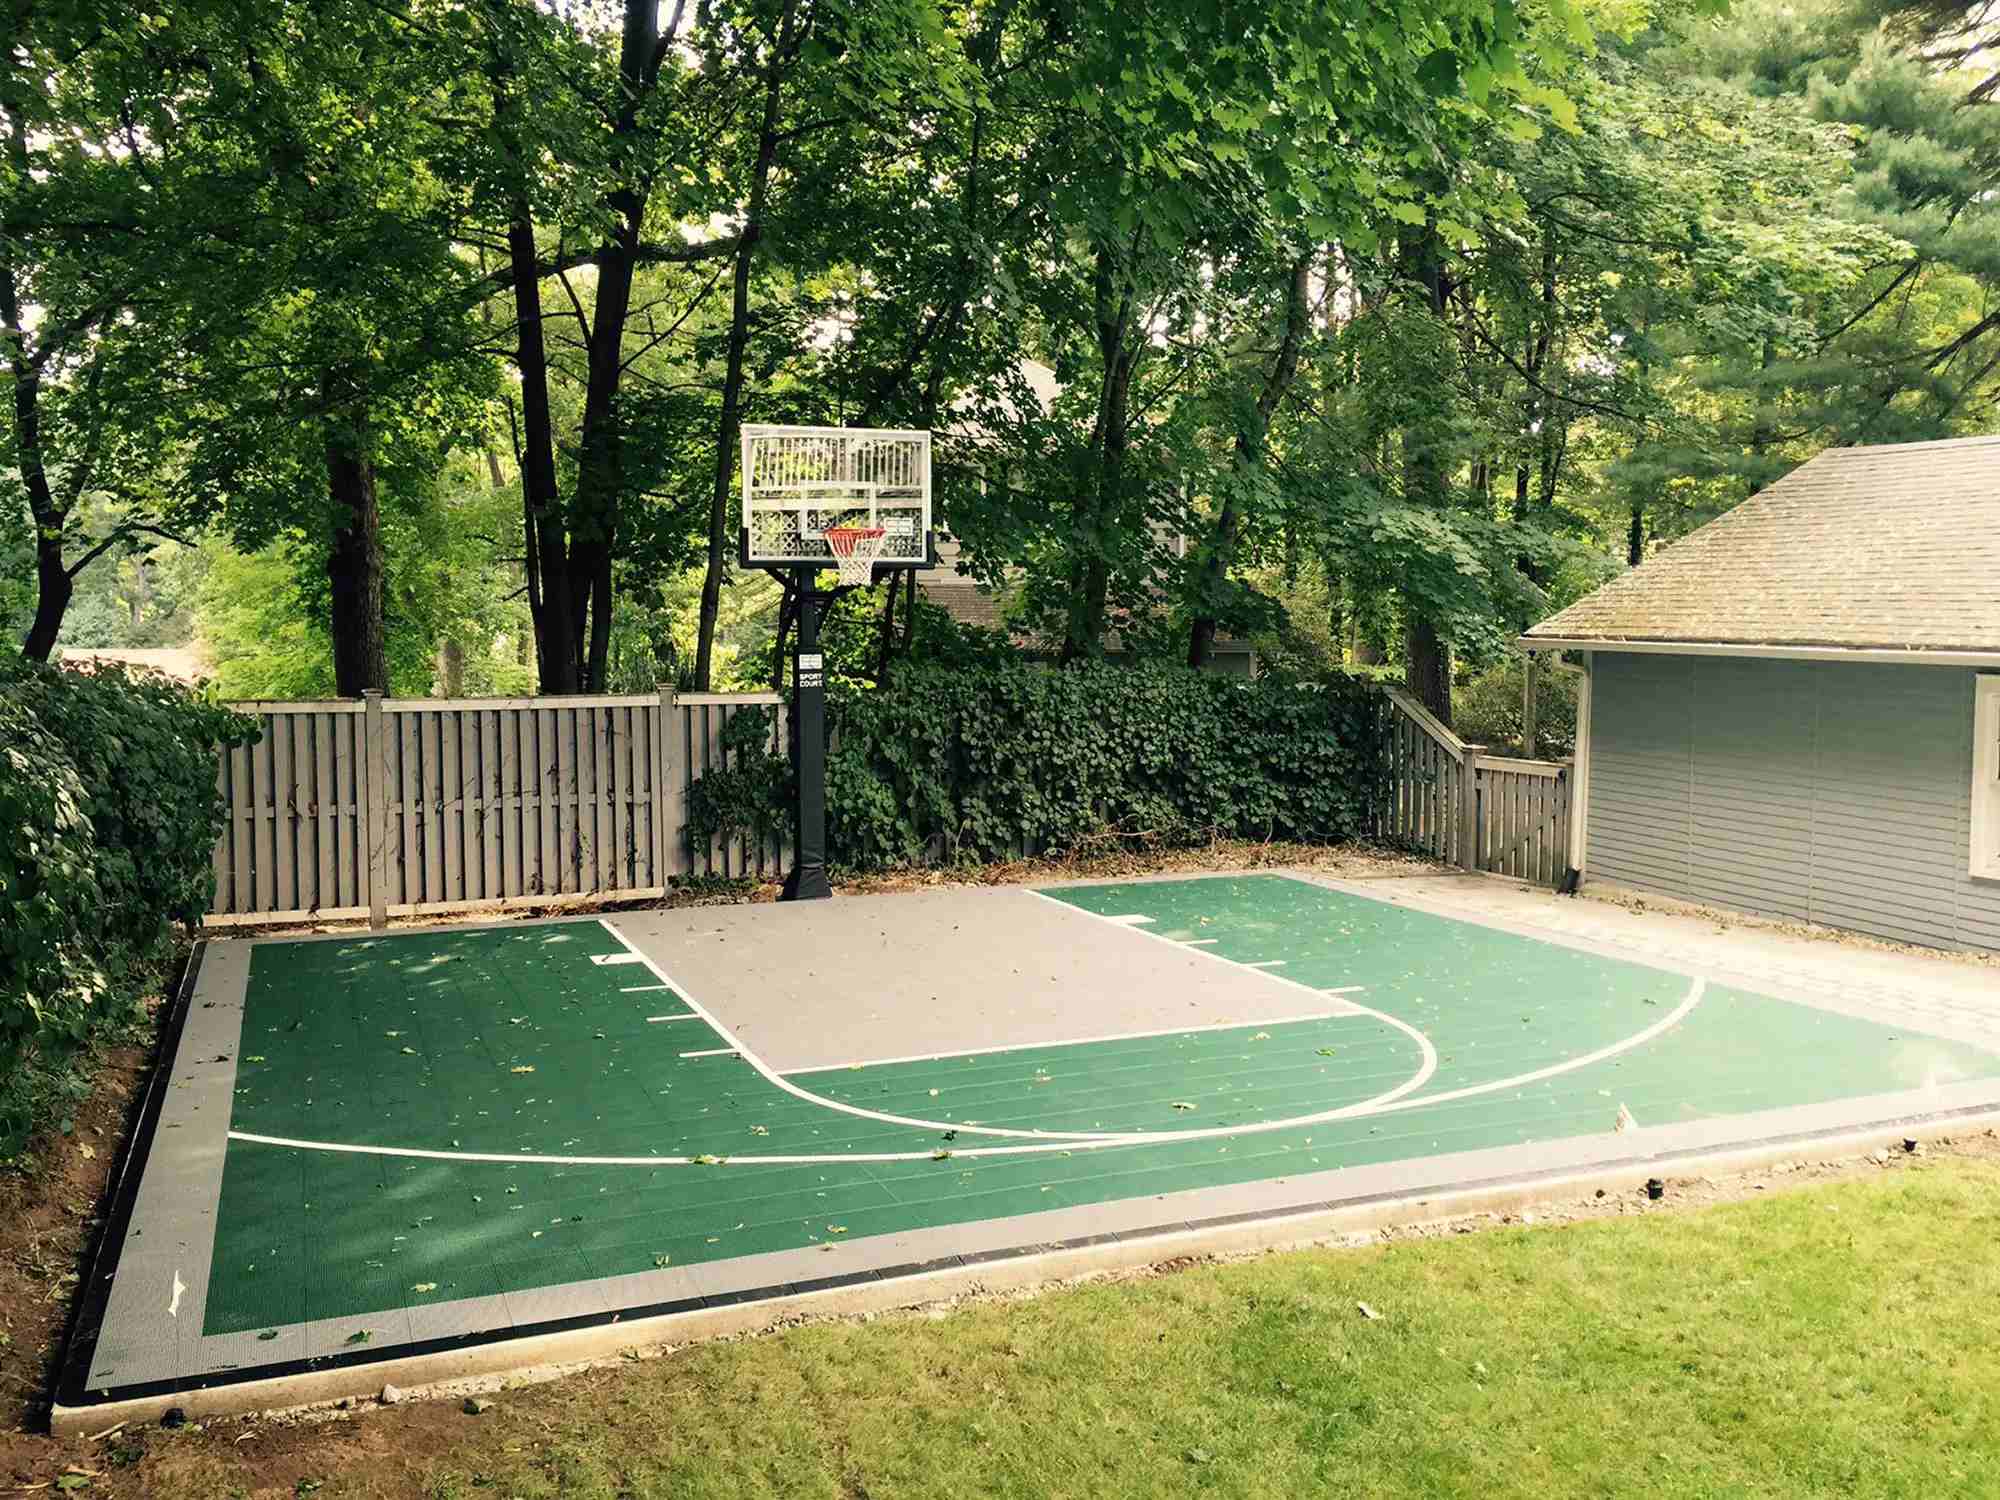
Having a basketball court in your backyard can bring endless fun and entertainment for the whole family. Whether you’re a basketball enthusiast looking to practice your skills or just want to have a recreational area for friendly games, creating a basketball court in your backyard is a great DIY project that can add value to your property.
Building a backyard basketball court may seem like a daunting task, but with proper planning and preparation, it can be accomplished without the need for professional assistance. This article will guide you through the step-by-step process of creating a basketball court in your own backyard, from selecting the suitable location to adding finishing touches and accessories.
Before diving into the details, it’s important to note that building a basketball court requires careful consideration of factors such as available space, budget, and local regulations. Additionally, ensure that you have the necessary tools and materials, as well as the physical ability to complete the project.
Now let’s get started with the first step in creating your very own backyard basketball court.
Step 1: Choose a Suitable Location
The first step in creating a basketball court in your backyard is to choose a suitable location. Consider the available space, ensuring that it is large enough to accommodate a standard-sized basketball court. Ideally, you should have a clear area that measures at least 25 feet by 40 feet.
When selecting the location, take into account any obstacles such as trees, bushes, or existing structures that may need to be removed or relocated. Ensure that there is enough room for players to move freely and without any hindrances.
Additionally, consider the surface and terrain of the chosen location. Ideally, you want a flat and level area to ensure a safe and enjoyable playing experience. It may be necessary to clear and level the ground in preparation for the court construction.
Another factor to consider is the proximity to other structures or neighbors. Make sure that the placement of the basketball court doesn’t interfere with any existing structures, and that there is ample space for players to move around without causing disturbances to others.
Furthermore, check with your local government or homeowner’s association for any regulations or permits required to build a basketball court in your backyard. Some jurisdictions may have specific guidelines on the size, placement, and construction specifications for outdoor sports facilities.
Once you have carefully considered all these factors, you can proceed to the next step of measuring and marking the court dimensions.
Step 2: Measure and Mark the Court Dimensions
After choosing a suitable location for your basketball court, the next step is to measure and mark the court dimensions. This is a crucial step to ensure that the court is properly sized and meets regulation standards.
Start by measuring the length and width of the court. A standard basketball court is typically 94 feet long and 50 feet wide for professional play. However, for backyard courts, a smaller size of around 25 feet by 40 feet is more common and suitable.
Once you have determined the dimensions, mark the boundaries of the court using stakes and string. Start by placing stakes at the four corners of the court. Then, use a measuring tape to measure the length and width from each corner, placing additional stakes or markers at appropriate intervals.
After marking the boundaries, it’s time to mark the key lines and other court markings. These include the centerline, free-throw line, three-point line, and any other lines specified by the regulations you wish to follow or your personal preferences. Ensure that these lines are straight, using a laser level or long straight board as a guide.
Throughout the marking process, take frequent measurements and make adjustments as needed to ensure the accuracy of the court dimensions. It’s essential to take your time with this step to avoid any errors that may affect the overall playability of the court.
Once you have finished measuring and marking the court dimensions, you can move on to the next step of clearing and preparing the ground for construction.
Step 3: Clear the Area and Prepare the Ground
After measuring and marking the dimensions of your basketball court, it’s time to clear the area and prepare the ground for construction. This step is crucial to ensure a solid foundation and a smooth playing surface.
Start by removing any existing vegetation, rocks, or debris from the designated area. This includes grass, weeds, and any other obstacles that may interfere with the construction process. Use a shovel, rake, or a sod cutter to remove the vegetation and create a clean canvas for the court.
Next, assess the condition of the soil. It’s important to have a stable and well-drained surface for your basketball court. If the soil is too compacted or consists of clay, it may be necessary to amend it by adding topsoil or sand to improve its texture and drainage.
If there are any low spots or high spots on the ground, you will need to level the surface. Use a rake or a leveling tool to distribute the soil evenly and create a flat playing area. Pay attention to any slopes or unevenness and make necessary adjustments to achieve a level surface.
Once the ground is cleared and leveled, it’s a good idea to lay down a layer of landscape fabric or geotextile material over the area. This will help prevent weed growth and provide some additional stability to the ground. Secure the fabric in place by using landscape staples or heavy-duty tape.
Preparing the ground also involves considering drainage. Ensure that there is proper slope or drainage system in place to prevent accumulation of water on the court surface. Poor drainage can lead to waterlogging and damage the court over time.
By clearing the area of vegetation, properly leveling the ground, and addressing drainage concerns, you have now prepared the ground for the next steps in building your backyard basketball court.
Step 4: Level and Grade the Surface
After clearing and preparing the ground, the next step in building a basketball court in your backyard is to level and grade the surface. This step is essential to ensure a smooth and even playing surface that minimizes the risk of injuries and provides optimal performance.
If you have already leveled the ground in the previous step, you may only need to perform minor adjustments to achieve the desired levelness. However, if the ground still has significant slopes or unevenness, you will need to make more extensive grading efforts.
Start by using a long, straight board or a level tool to identify any high or low spots on the surface. If there are high spots, you can use a shovel or a grading rake to remove excess soil and create a more even surface. Alternatively, if there are low spots, you can add soil or sand to fill in the depressions.
It’s important to take your time and be meticulous during this process to achieve a level playing surface. Use a measuring tape or a level tool to regularly check for inconsistencies and make adjustments accordingly. Pay close attention to the area where the basketball hoop will be installed to ensure it is perfectly level.
In addition to achieving levelness, grading the surface also involves ensuring proper slope for drainage. The court surface should have a slight slope of approximately 1 inch for every 10 feet to prevent water from pooling and causing damage. Use a level tool to check the slope and make adjustments as needed.
Once you are satisfied with the levelness and slope of the surface, you can proceed to the next step of installing the base material.
Step 5: Install the Base Material
After leveling and grading the surface of your backyard basketball court, it’s time to install the base material. The base material is crucial for providing stability, proper drainage, and a solid foundation for the court.
The most commonly used base material for basketball courts is gravel or crushed stone. These materials offer excellent drainage capabilities and provide a stable and compacted surface for optimal performance.
Start by spreading a layer of the base material evenly over the entire court area. The thickness of the base material will depend on the specific requirements of your court. Generally, a thickness of 4 to 6 inches is recommended.
Use a rake or shovel to spread the material and ensure it is distributed uniformly. Pay special attention to the edges and corners of the court, making sure to create a smooth transition between the base material and the surrounding ground.
Once the base material is spread, use a compactor or plate compactor to compact the surface. This will help stabilize the base material, prevent shifting or settling, and create a solid foundation for the court.
Make multiple passes with the compactor, going over the entire court area in a grid pattern. This will ensure that the base material is effectively compacted and there are no weak spots or pockets of loose material.
During the compaction process, periodically check the levelness of the surface. Make adjustments as necessary to maintain a level and even playing area.
After compacting the base material, you can check the stability by walking on the surface and examining for any signs of sinking or shifting. If any issues are found, add more base material and re-compact that particular area.
By properly installing and compacting the base material, you have now created a solid and stable foundation for your backyard basketball court. This sets the stage for the next steps of laying and securing the ground cover.
Step 6: Compact the Base Material
Once you have installed the base material for your backyard basketball court, the next step is to compact the base. Compactiing the base material is crucial for creating a stable and level surface that will ensure optimal performance and longevity of the court.
To begin, you will need to use a compactor or plate compactor to compact the base material. These machines use vibrating force to compress the material, reducing air spaces and creating a solid foundation.
Start by making multiple passes with the compactor over the entire court area, ensuring even coverage. It’s important to move the compactor in overlapping passes, making sure to go over every inch of the base material.
While compacting, pay attention to any areas that may appear loose or uneven. These areas should be compacted more extensively to ensure proper stability and prevent future settling.
Take breaks during the compaction process to check the levelness of the surface. Use a level tool or straight board to ensure the base material is evenly compacted and there are no high or low spots.
Make additional adjustments as needed, adding more base material to low spots and compacting it thoroughly. This will help achieve a level playing surface that is crucial for a great basketball experience.
Continue making passes with the compactor until the base material feels solid and there are no signs of movement or shifting underfoot. This indicates that the base material has been effectively compacted.
Once you are satisfied with the compaction process, it’s time to move on to the next step of laying and securing the ground cover. The compacted base material provides a solid foundation for the ground cover, ensuring a smooth and durable playing surface for your backyard basketball court.
Step 7: Lay and Secure the Ground Cover
After compacting the base material for your backyard basketball court, the next step is to lay and secure the ground cover. The ground cover provides the playing surface and adds the finishing touch to your court.
The most common and recommended ground cover for outdoor basketball courts is sports turf or artificial grass. These options offer excellent durability, traction, and require minimal maintenance compared to natural grass.
Start by rolling out the ground cover over the entire court area. Ensure that it is properly positioned and aligned with the court boundaries and markings. Use a utility knife to trim any excess material along the edges.
Once the ground cover is in place, secure it to the base material using landscape staples or heavy-duty tape. Place the staples or tape at regular intervals along the edges and seams to prevent any shifting or movement during play.
If you opt for artificial grass, ensure that the seams are properly joined and that the grass blades are facing the correct direction. Follow the manufacturer’s instructions for installation and secure the edges as needed.
When securing the ground cover, be mindful of any lines or markings on the court. Take extra care to smooth out the ground cover around these areas to maintain the integrity of the court design.
After securing the ground cover, walk on the surface to ensure it is properly attached and there are no loose areas. Take the time to inspect the entire court, checking for any wrinkles, bumps, or unevenness that may affect playability.
Once you are satisfied with the laying and securing of the ground cover, you are one step closer to completing your backyard basketball court. The ground cover provides the final touch, giving your court a professional and polished appearance.
Step 8: Paint the Court Lines and Markings
After laying and securing the ground cover for your backyard basketball court, it’s time to paint the court lines and markings. This step is crucial for creating a professional-looking court and ensuring that it meets regulations and standards.
Before painting, make sure the ground cover is dry and free from any debris or dirt. Use a broom or leaf blower to clean the surface and ensure a smooth painting process.
Start by measuring and marking the positions of the key lines and markings on the court. This includes the centerline, free-throw line, three-point line, and any other specific lines that you want to incorporate.
Use painter’s tape or a string as a guide to create straight and accurate lines. Place the tape or string along the marked positions, ensuring that they are secure and properly aligned.
Once the lines are in place, it’s time to apply the paint. Use acrylic or latex paint that is specifically designed for outdoor sports surfaces. These paints are durable, weather-resistant, and provide good traction for gameplay.
Start by painting the main lines, such as the boundary lines and the key lines. Use a roller or a paintbrush to apply the paint evenly and follow the edges of the tape or string to maintain straight lines.
For the smaller details, such as the three-point line or the center circle, you may need to use stencils or specialized tools to ensure accuracy and consistency. Take your time and be meticulous during this process to achieve precise and professional-looking markings.
Allow the paint to dry completely before removing the tape or string. This will prevent any smudging or smearing of the lines.
Once the paint is dry and the tape or string is removed, take a final inspection of the court lines and markings. Touch up any areas that may require additional paint or adjustments.
By painting the court lines and markings, you have now brought your backyard basketball court to life. The painted lines add the finishing touch, transforming the court into a professional and regulation-standard playing area.
Step 9: Install the Basketball Hoop
After completing the necessary groundwork for your backyard basketball court, it’s time to install the basketball hoop. This step is crucial as it provides the equipment needed for gameplay and adds the final touch to your court.
First, determine the optimal location for the basketball hoop. It should be positioned at the center of one of the shorter ends of the court, facing the length of the court. Ensure there is ample space around the hoop for players to move freely.
Next, gather the necessary tools and materials for installation. This may include a ladder, wrench, screws, and concrete or a mounting bracket depending on your preferred method of installation.
If you choose to install the hoop with concrete, dig a hole at the desired location and follow the instructions provided by the manufacturer to set the pole securely into the ground. Make sure the pole is straight and level before allowing the concrete to dry and set completely.
If you opt for a mounting bracket installation, follow the manufacturer’s instructions to properly attach the bracket to a secure surface such as a wall or a sturdy post.
Once the hoop is installed, double-check its stability and make any necessary adjustments. Ensure that it is securely fastened and can withstand vigorous play.
Consider adding additional safety features such as padding or other protective measures around the hoop to minimize the risk of injuries during gameplay.
Test the hoop by throwing a few shots and checking its stability and alignment. Adjust the height and angle if needed to ensure proper gameplay.
Lastly, take a step back and admire your completed backyard basketball court. The installed basketball hoop not only provides the equipment for enjoyable gameplay, but it also serves as a visual centerpiece that showcases your dedication to creating an amazing space for family and friends to enjoy.
Step 10: Add Basketball Accessories
With the basketball hoop installed and the court ready for play, the final step in creating your backyard basketball court is to add basketball accessories. These accessories can enhance your playing experience and make your court more functional and enjoyable.
One essential accessory is a basketball. Choose a high-quality basketball suitable for outdoor use and the level of play you anticipate. Consider factors such as grip, durability, and size to ensure it meets your specific needs.
Another important accessory is a basketball net. A net adds an element of satisfaction as you see the ball swish through the hoop. Install a durable and weather-resistant net that can withstand outdoor conditions.
Additionally, consider adding a basketball storage solution. This can be a wall-mounted basketball rack or a standalone storage unit to keep your basketballs organized and protected from damage.
Other accessories to consider include a scoreboard or a shot clock to keep track of scores and time during games, a basketball hoop height adjuster to cater to players of different ages and skill levels, and lighting for nighttime play.
For added safety and convenience, you may want to install court markings or signage that provides guidelines for gameplay, such as out-of-bounds areas or specific rules regarding the use of the court.
Furthermore, don’t forget about seating and seating arrangements. You can add benches or chairs around the court to provide a comfortable area for players to rest or to accommodate spectators.
Lastly, consider adding aesthetic touches to your backyard basketball court. This could include landscaping around the court, painting the surrounding fence or walls, or adding a mural or artwork that reflects your love for basketball.
By adding these basketball accessories, you can personalize your backyard basketball court, making it a functional and enjoyable space for both playing games and spending quality time with friends and family.
Conclusion
Creating a basketball court in your backyard is a rewarding and fulfilling DIY project that can provide endless hours of fun, fitness, and entertainment for the whole family. By following the step-by-step process outlined in this guide, you can successfully build a backyard basketball court that meets your needs and exceeds your expectations.
From choosing a suitable location and measuring the court dimensions to clearing and preparing the ground, every step is crucial in ensuring a solid foundation for your court. Properly leveling, grading, and compacting the surface sets the stage for a smooth and level playing area.
Installing the ground cover and painting the court lines and markings adds the finishing touches, transforming your backyard into a professional-looking basketball court. The installation of the basketball hoop and other accessories enhances the playing experience and adds functionality to your court.
Throughout this project, it’s important to prioritize safety and follow any regulations or guidelines set by your local authorities. Taking the time to plan and prepare properly will result in a high-quality court that can be enjoyed for years to come.
Remember, building a backyard basketball court requires careful consideration of various factors such as available space, budget, and local regulations. It’s also essential to have the appropriate tools and materials, as well as the physical ability to complete the project.
Once your backyard basketball court is complete, gather your family and friends and enjoy playing games and improving your basketball skills. Embrace the joy and excitement that this DIY project brings, and create lasting memories on your very own court.
Now it’s time to grab a basketball, shoot some hoops, and have an incredible time on your new backyard basketball court!
