Home>Gardening News and Trends>Gardening Trends>How To Propagate Plants

Gardening Trends
How To Propagate Plants
Published: February 3, 2024
Discover the latest gardening trends and learn how to propagate plants with our helpful guide. Start growing your own beautiful garden today!
(Many of the links in this article redirect to a specific reviewed product. Your purchase of these products through affiliate links helps to generate commission for Chicagolandgardening.com, at no extra cost. Learn more)
Table of Contents
Introduction
Gardening is a beloved hobby for many people around the world. Whether you have a sprawling backyard or a small urban balcony, the joys of tending to plants and watching them flourish are undeniable. While purchasing new plants from a local nursery is one way to expand your garden, another cost-effective and rewarding option is plant propagation.
Plant propagation refers to the process of creating new plants from existing ones. It allows you to multiply your favorite plants, create a diverse range of species, and share them with friends or fellow gardeners. There are several methods of plant propagation, each with its own set of advantages and suitable plant types.
In this article, we will explore various plant propagation techniques and their application in different scenarios. Whether you’re a seasoned gardener looking to expand your collection or a beginner looking to dive into the world of plant propagation, this guide will equip you with the knowledge and skills to successfully propagate plants.
Before we dive into the methods, it’s essential to understand the importance of choosing the right method for each plant type. Some plants may thrive through seed propagation, while others may require stem cuttings or division. Understanding the specific needs of the plant is key to successful propagation.
Furthermore, while plant propagation can be a fun and rewarding process, it requires patience and attention to detail. The success rate may vary depending on factors such as the plant species, environmental conditions, and propagation technique. Nevertheless, with proper care and practice, you’ll soon become proficient in propagating plants and enjoy the satisfaction of seeing your garden thrive with new life.
Choosing the Right Method
When it comes to plant propagation, it’s crucial to choose the right method for each specific plant. Different plants have unique characteristics, growth habits, and propagation requirements. Understanding these factors will help you determine the most effective propagation method.
One of the most common methods of plant propagation is seed propagation. This method is suitable for a wide range of plants, including flowers, vegetables, and some woody plants. Collecting seeds from mature plants or purchasing them from reliable sources gives you the opportunity to grow new plants without much effort. However, some plant species may have specific germination requirements, such as stratification or scarification, which need to be considered.
Stem cuttings are another popular method, particularly for herbaceous plants and some woody plants. This involves taking a portion of the plant stem and encouraging it to root. Depending on the plant, you can take stem cuttings from softwood, semi-hardwood, or hardwood sections. Softwood cuttings, taken from young and tender growth, generally root easily and quickly. Semi-hardwood and hardwood cuttings, taken from more mature growth, may require additional time and care to root successfully.
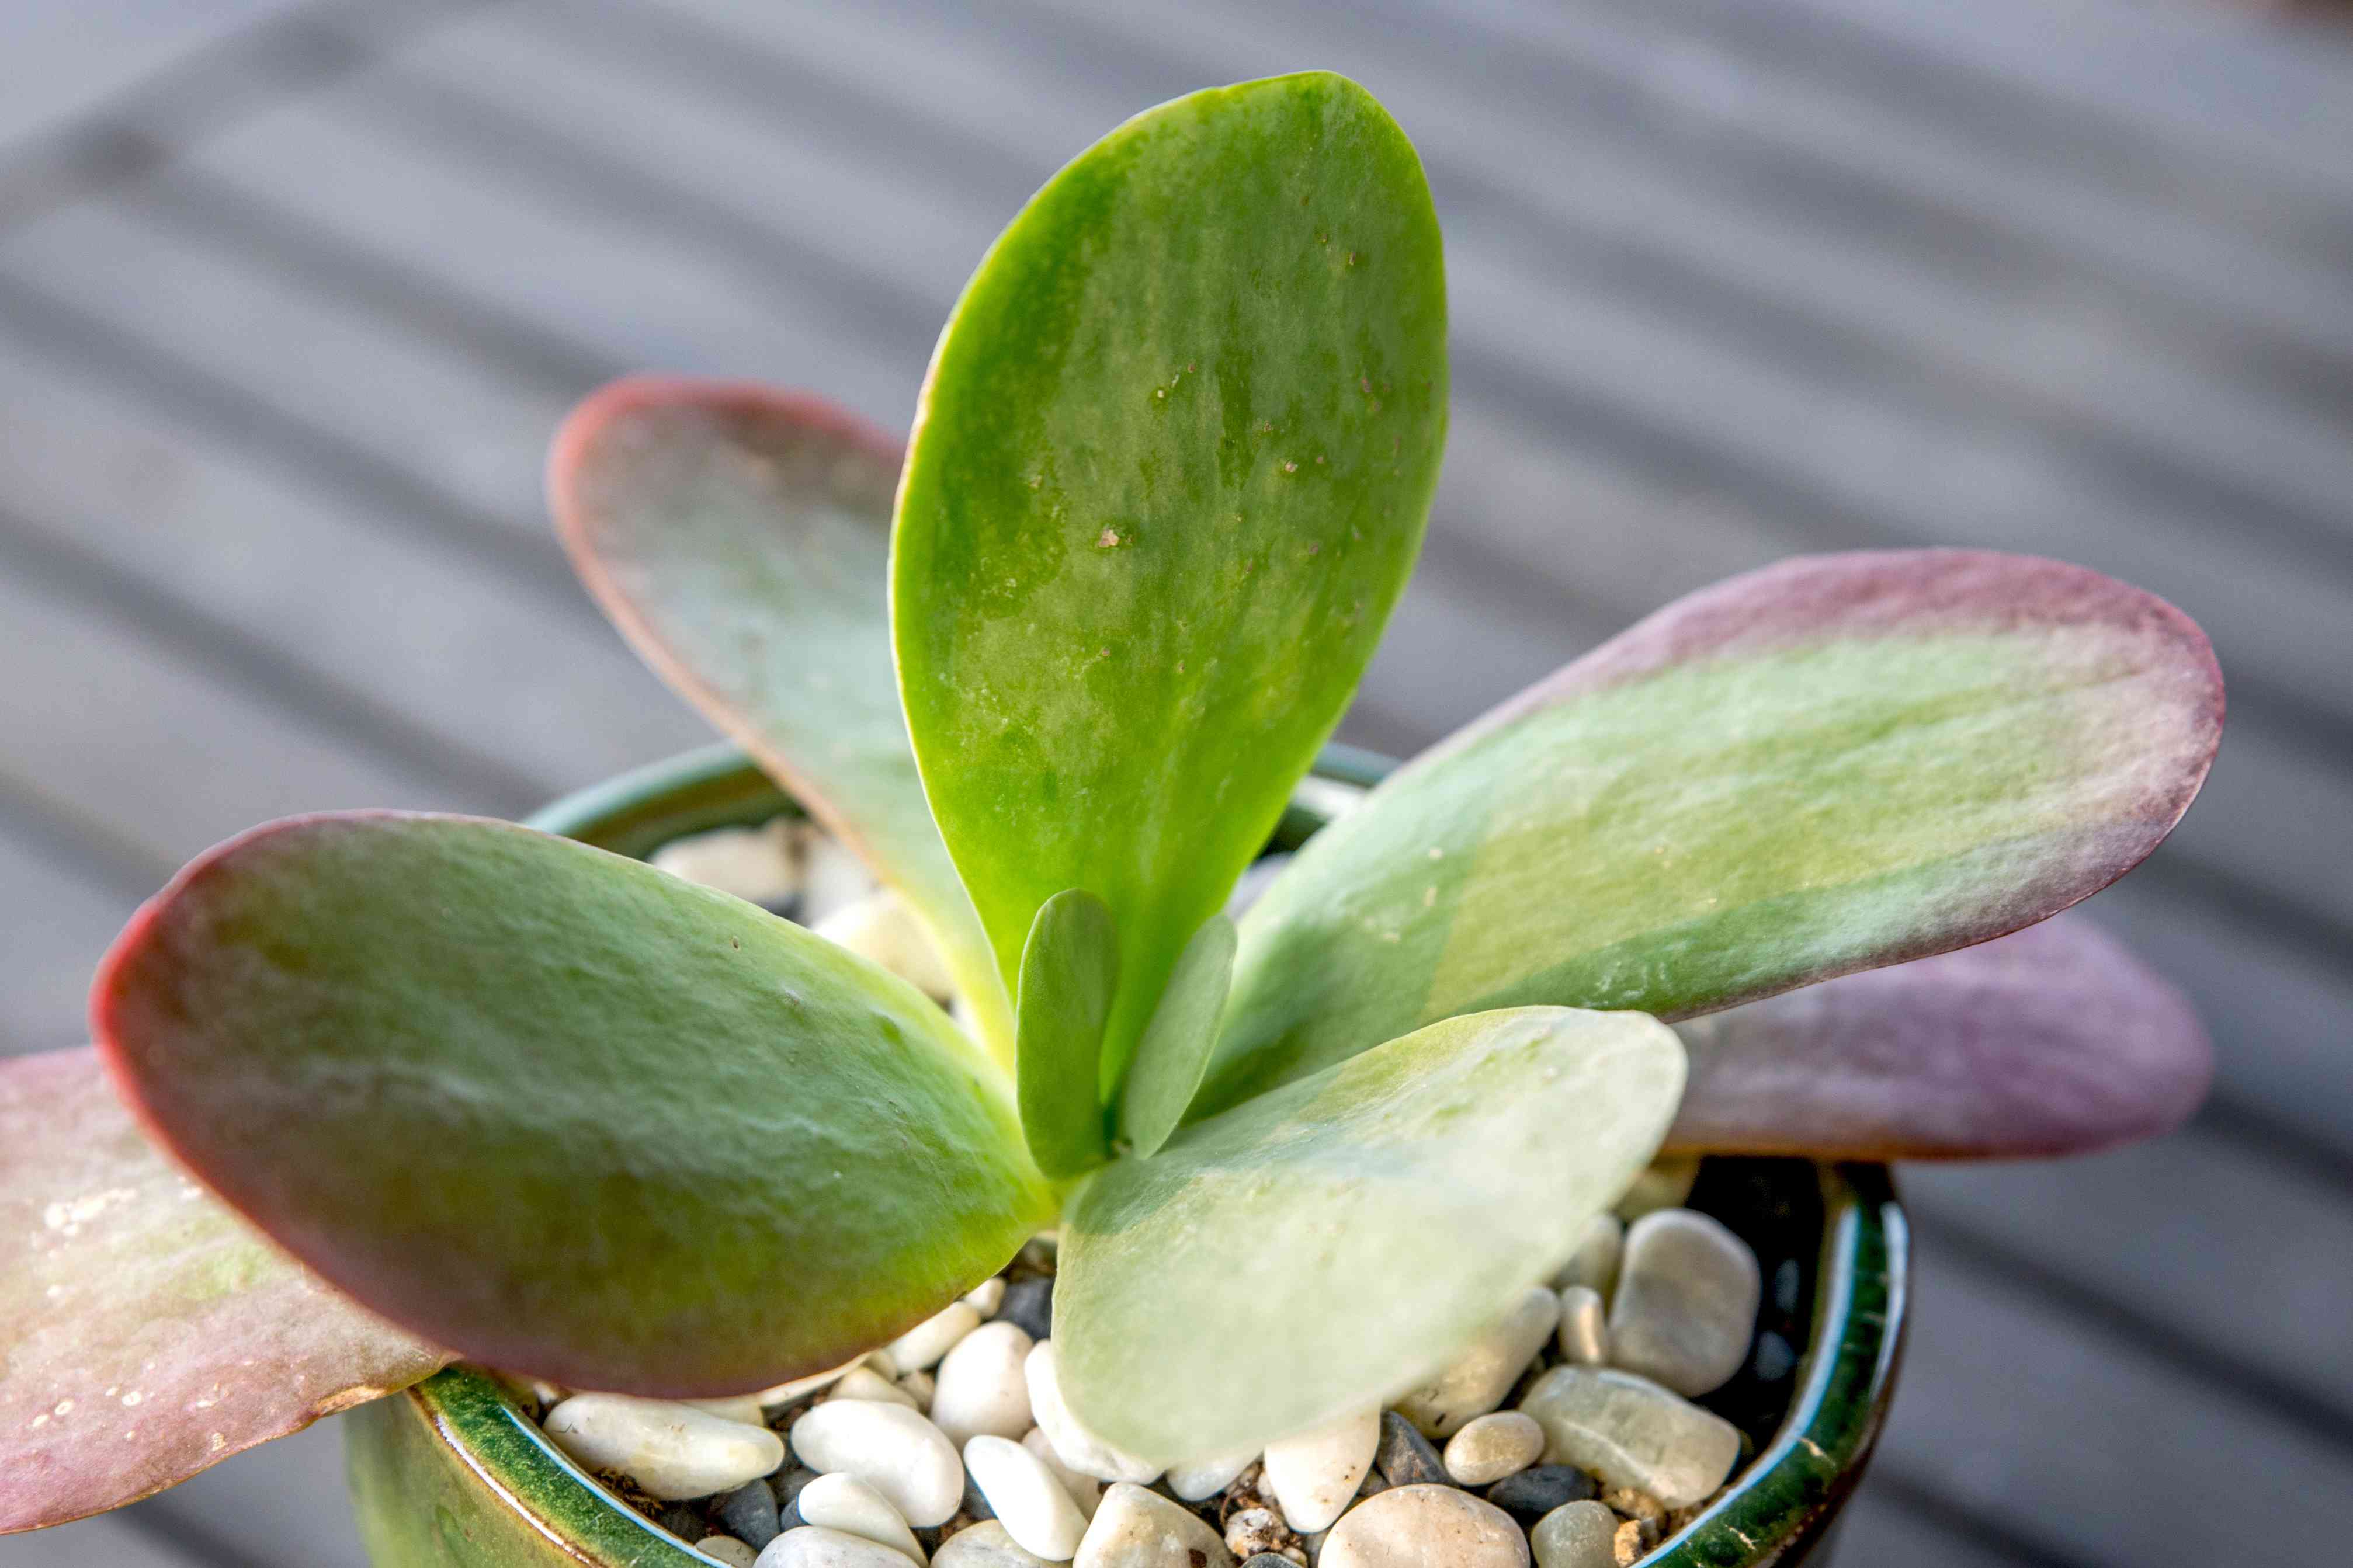
Leaf cuttings are a specialized form of propagation commonly used for plants with succulent leaves, such as jade plants and African violets. These plants have the unique ability to develop roots directly from their leaves. By carefully removing a leaf and placing it in suitable growing conditions, you can encourage it to produce new roots and eventually grow into a fully independent plant.
For plants with fleshy or tuberous roots, root cuttings offer an effective method of propagation. This involves taking a section of the root and encouraging it to develop new shoots and roots. Root cuttings are particularly useful for plants like daylilies, hostas, and dahlias. It’s important to ensure that the root section you choose is free from diseases or damage.
Division is another common propagation method, especially for perennial plants that naturally form clumps or have a rhizomatous growth habit. Dividing plants involves separating the parent plant into smaller sections, each with its own set of roots and stems. This method not only helps in propagating new plants but also rejuvenates crowded or overgrown clumps, leading to healthier growth.
Layering is a propagation technique that works well for some climbing plants, such as jasmine and clematis. It involves bending a flexible stem of the plant to the ground and encouraging it to produce roots while still attached to the parent plant. Once the roots are established, you can cut the new plant free and transplant it elsewhere.
Grafting is a more advanced form of plant propagation used for specific purposes, such as combining the desirable characteristics of two different plants. It involves joining a section of one plant, known as the scion, with another plant, known as the rootstock. Grafting is commonly used in fruit tree propagation and allows for the production of trees with improved disease resistance, increased fruit production, or different fruit varieties on the same tree.
When choosing the right propagation method, consider the characteristics of the plant, your experience level, and the resources available to you. With a bit of research and practice, you’ll become adept at selecting the most suitable method for each plant, ensuring successful propagation and the continued growth of your garden.
Collecting Seeds
Seed propagation is an exciting and cost-effective method of plant propagation. By collecting seeds from mature plants, you can grow new plants that retain the desired traits of the parent plant. Additionally, collecting and preserving seeds allows you to save money and create a sustainable source of plants for future gardening endeavors.
When collecting seeds, it’s important to choose seeds from healthy, disease-free plants. Select seeds from the best-performing plants in your garden or from reputable seed sources. This ensures that the resulting plants will have the desired characteristics and will be more likely to thrive.
Timing is critical when collecting seeds. Most plants produce seeds once they have finished flowering and the seed pods or fruits have ripened. Keep a close eye on your plants and monitor them regularly to determine when the seeds are ready for collection. Signs of maturity include changes in color, drying or cracking of seed pods, or the natural release of seeds from the plant.
Once the seeds are ready for collection, use gentle techniques to harvest them. For larger seeds such as sunflower or pumpkin seeds, wait until the seed heads have completely dried on the plant before removing them. Carefully cut the seed heads and collect the seeds in a container. For smaller seeds, gently shake the seed pods or fruits to dislodge the seeds.
After collection, it’s important to properly store the seeds to maintain their viability. Place the seeds in a cool, dry location away from direct sunlight. Use envelopes or labeled containers to keep the seeds organized and prevent cross-contamination. Adding desiccant packets or rice grains to the container can help absorb excess moisture and prolong seed viability.
Labeling the seeds with the plant name, collection date, and any important notes can be helpful for future reference. This allows you to track the success and characteristics of each batch of seeds and make adjustments for future plant propagation.
Remember that not all seeds will germinate successfully, and some may have specific germination requirements. Some seeds may need a period of cold stratification or scarification to break their dormancy. Researching the specific requirements of each plant species will increase the chances of successful germination.
Collecting seeds from your garden or swapping seeds with fellow gardeners is not only a practical way to expand your plant collection but also a way to preserve the biodiversity of certain plants. By saving and sharing seeds, you contribute to the conservation of rare or heirloom plant varieties and help maintain genetic diversity in the gardening community.
So, the next time you notice mature seed heads or pods in your garden, take a moment to collect and store the seeds. With a little patience and care, you’ll be rewarded with a new generation of plants to enhance your garden.
Preparing Soil and Containers
Proper soil preparation and container selection are essential for successful plant propagation. Creating the ideal growing medium and providing the right environment for your plants will greatly increase their chances of rooting and thriving.
The first step in preparing for plant propagation is to choose the right soil or growing medium. Opt for a well-draining mixture that retains some moisture without becoming waterlogged. A combination of peat moss, perlite, and vermiculite is commonly used for seed starting and rooting cuttings. You can also use a pre-packaged seed starting mix or create your own mixture by combining equal parts of compost, sand, and worm castings.
Before filling your containers with the growing medium, ensure they are clean and sterile. This helps prevent the spread of diseases or pests to your new plants. Wash containers with warm soapy water, rinse thoroughly, and sanitize them by soaking in a solution of one part bleach to nine parts water. Rinse again with clean water to remove any residue.
Fill the containers with the prepared growing medium, leaving a small space at the top to allow for watering and proper air circulation. Gently tamp down the soil to eliminate any air pockets, but avoid compacting it tightly as this can hinder root development.
For seed starting, trays or individual cells are commonly used. These containers provide a controlled environment and allow for easy transplanting once the seedlings are ready. Ensure that the trays or cells have drainage holes to prevent waterlogging.
When propagating stem or leaf cuttings, small pots or cell packs can be used. Make sure the containers are deep enough to accommodate the length of the cuttings and have drainage holes at the bottom to prevent excess water buildup.
It’s important to provide the right conditions for successful propagation. Most plants prefer a warm, bright, and humid environment to stimulate root growth. Consider using a heat mat or a heated propagator to maintain a consistent temperature, particularly for plants that require warmth for germination or rooting.
Consider placing a clear plastic dome or covering over the containers to create a mini greenhouse effect that retains humidity. This helps prevent moisture loss and promotes faster root development. However, ensure that the covering is vented or removed periodically to avoid excessive humidity, which can lead to mold or fungal issues.
Lastly, label your containers with plant names and date of propagation. This will help you keep track of the progress and ensure proper care for each batch of propagated plants.
By utilizing well-prepared soil or growing medium and choosing the appropriate containers, you provide a nurturing environment for your propagating plants. This will greatly enhance their chances of successful rooting and subsequent growth into healthy, thriving plants.
Planting Seeds
Planting seeds is an exciting and crucial step in the plant propagation process. Whether you’re starting seeds indoors or sowing them directly in the garden, proper planting techniques will ensure optimal germination and healthy seedlings.
Before planting, moisten the growing medium to the point where it feels evenly damp but not saturated. This will provide a moist environment that encourages seed germination.
Depending on the size of the seeds, you can either broadcast them over the surface of the soil or plant them individually. Smaller seeds can be sprinkled evenly across the soil, while larger seeds need to be spaced out to give each seedling enough room to grow.
When planting seeds, follow the recommended depth and spacing guidelines specific to the plant species. As a general rule, plant seeds at a depth that is two to three times the size of the seed. Gently press the soil over the seeds to ensure good seed-to-soil contact and prevent drying out.
After planting, water the seeds gently using a watering can or fine mist spray bottle. Avoid using a strong stream of water, as it can displace the seeds or cause soil erosion. It’s important to keep the soil consistently moist throughout the germination process to encourage successful sprouting.
For indoor planting, cover the containers with a clear plastic dome or plastic wrap to create a humid environment and retain moisture. Place the containers in a warm location or on a heat mat to provide the optimum temperature for germination. Once the seeds have germinated and developed their first set of true leaves, remove the covering to allow for proper air circulation.
When sowing seeds directly in the garden, ensure that the soil is well-prepared and free from weeds. Use a garden rake or handheld cultivator to remove any debris and create a smooth planting surface. Follow the seed packet instructions for spacing and planting depth, and label the areas where you have planted seeds to avoid accidentally disturbing them.
It’s important to monitor the moisture levels of the soil regularly after planting seeds. Watering should be done gently, ensuring that the soil remains evenly moist but not waterlogged. Too much moisture can lead to rot or disease, while too little moisture can hinder germination and seedling growth.
Be patient as you wait for the seeds to germinate. Different plants have different germination timings, ranging from a few days to a few weeks. Provide consistent care, monitor the soil moisture, and provide adequate light for the seedlings as they emerge.
Once the seedlings have grown several sets of leaves and have become stronger, they can be thinned or transplanted into larger containers or directly into the garden. Thinning seedlings allows the remaining plants to have enough space and resources to thrive.
With proper planting techniques and care, your seeds will sprout and grow into healthy seedlings, ready to flourish in your garden. Remember to provide the right amount of water, light, and nutrients as the seedlings continue to grow, and enjoy the satisfaction of seeing your propagated plants thrive.
Watering and Fertilizing
Proper watering and fertilizing are crucial for the healthy growth and development of propagated plants. Providing the right amount of water and nutrients ensures that your plants have the necessary resources to thrive. However, it’s essential to strike a balance and avoid overwatering or overfertilizing, as this can lead to detrimental effects.
Watering is a fundamental aspect of plant care, especially during the early stages of growth. When watering your propagated plants, it’s important to keep the soil evenly moist, but not waterlogged. Overwatering can lead to root rot and poor root development. On the other hand, underwatering can result in stunted growth and dehydration.
Monitor the moisture levels of the soil by inserting your finger about an inch deep into the soil. If it feels dry at this depth, it’s time to water. Use a watering can or gentle sprayer to moisten the soil evenly. Water slowly and allow the water to penetrate the root zone. Ensure that the excess water is draining out of the containers or garden bed, as stagnant water can lead to root diseases.
During the initial stages of growth, it’s important to keep the soil consistently moist to facilitate seed germination or root development. However, as the plants mature, the watering frequency and amount can be adjusted. Take into consideration factors such as the plant’s water requirements, environmental conditions, and the type of growing medium used.
Fertilizing is another essential aspect of plant care, providing the necessary nutrients for healthy growth. For seedlings and propagated plants, it’s important to start fertilizing once they have developed their second set of true leaves. Use a balanced, water-soluble fertilizer diluted to half or quarter strength, following the instructions on the package.
Apply the diluted fertilizer to the soil around the plants, avoiding direct contact with the leaves. This ensures that the roots can absorb the nutrients effectively. It’s important to note that excessive fertilization can lead to fertilizer burn or nutrient imbalances, which can harm the plants. Follow the recommended fertilization schedule and adjust the frequency and strength based on the plant’s needs.
Organic fertilizers, such as compost or well-rotted manure, can also be used to provide slow-release nutrients to the plants. These natural fertilizers contribute to soil health by improving its structure and promoting beneficial microbial activity.
Regularly monitor the health and growth of your propagated plants to assess their watering and fertilization needs. Pay attention to signs such as yellowing leaves, stunted growth, or wilting, as these may indicate either overwatering or nutrient deficiencies. Adjust your watering and fertilizing practices accordingly to maintain optimum plant health.
Remember that each plant species has its own specific water and nutrient requirements. Research the needs of the plants you are propagating and tailor your watering and fertilizing practices accordingly. By providing the correct amounts of water and nutrients, you’ll ensure that your propagated plants grow vigorously and thrive in their new environment.
Transplanting Seedlings
Transplanting seedlings is an important step in the plant propagation process, as it allows the young plants to establish themselves in a larger container or in the garden. Transplanting provides the seedlings with more space, nutrients, and optimal growing conditions for continued growth and development.
Before transplanting, ensure that the seedlings have developed a strong root system and have grown several sets of true leaves. This indicates that they are ready to be moved to their new location. Transplanting too early can stress the seedlings and hinder their growth.
Prepare the new containers or garden bed by filling them with well-draining soil or growing medium. Ensure that the containers have drainage holes to prevent waterlogging. If transplanting into the garden, prepare the soil by removing any weeds and loosening it to promote better root penetration.
Gently remove the seedlings from their original containers, taking care not to damage the delicate roots. You can use a small tool or your fingers to loosen the soil around the seedlings and carefully lift them from the container. Avoid pulling on the seedlings directly to prevent damage.
Handle the seedlings by their leaves or the base of the stem, rather than the fragile stem itself. This helps prevent damage to the stem and potential stunting of growth. If the seedlings are closely spaced, it’s advisable to separate them and transplant them individually to provide each plant with enough space to grow.
Make a hole in the soil of the new container or garden bed that is slightly larger than the root ball of the seedling. Gently place the seedling into the hole and backfill with soil, ensuring that the roots are completely covered and the seedling is held upright. Lightly firm the soil around the base of the seedling to provide stability.
After transplanting, thoroughly water the seedlings to settle the soil around the roots and eliminate any air pockets. This helps to ensure proper hydration and good contact between the roots and the surrounding soil. Avoid saturating the soil, as this can lead to waterlogged conditions.
During the first few days after transplanting, it’s important to provide extra care and attention to the seedlings. Shield them from direct sunlight and strong winds to prevent wilting or damage. Gradually acclimate the seedlings to their new environment by exposing them to increasing amounts of sunlight over the course of a few days.
Monitor the moisture levels of the soil and water the transplanted seedlings as needed. Ensure that the soil remains evenly moist but not saturated. Over time, as the plants establish themselves and develop a stronger root system, gradually reduce the frequency of watering to encourage deeper root growth.
Transplant shock is common among seedlings after being moved to a new location. To minimize stress and aid in their recovery, avoid fertilizing immediately after transplanting. Allow the seedlings to settle and adjust to their new environment for a week or two before applying any additional fertilizers.
Transplanting seedlings is an important step in the process of plant propagation, promoting their continued growth and development. By following proper transplanting techniques and providing appropriate care, you’ll ensure that your seedlings thrive in their new containers or garden and go on to produce a bountiful harvest or a beautiful display of flowers.
Stem Cuttings
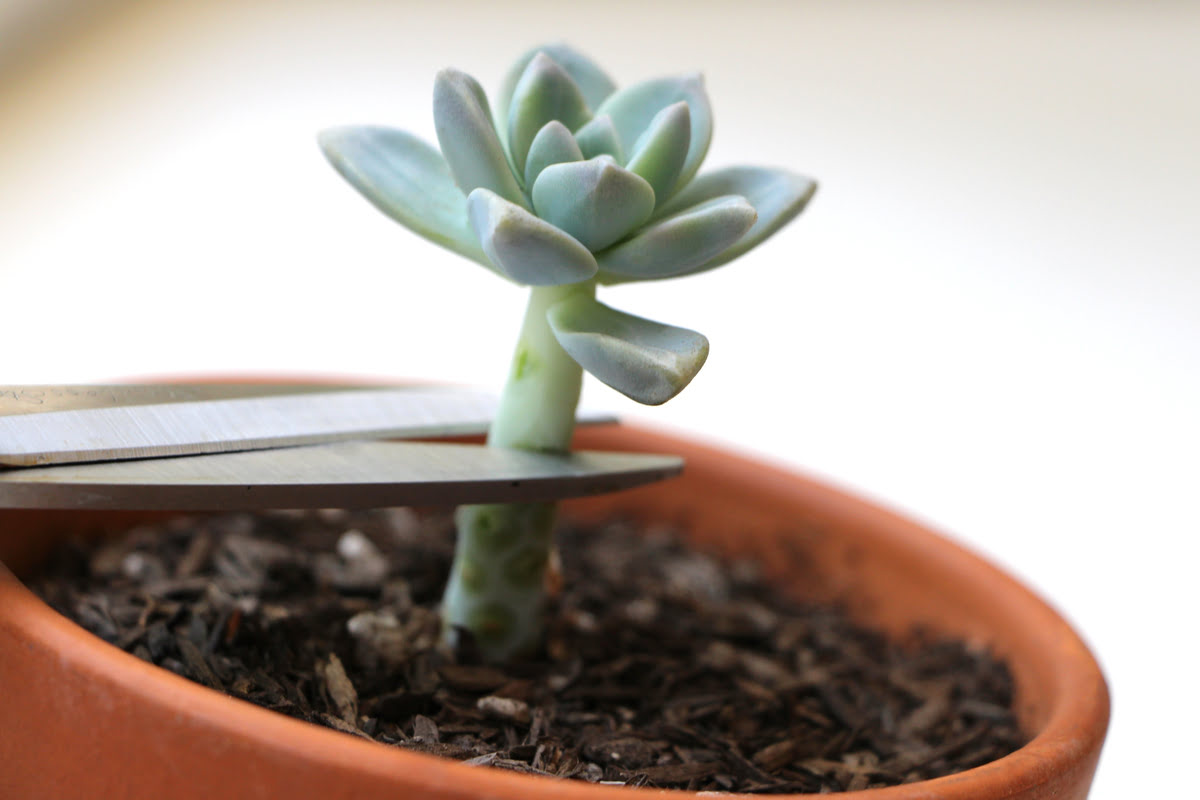
Stem cuttings are a popular and effective method of plant propagation. This technique involves taking a portion of a healthy plant stem and encouraging it to develop roots, allowing for the creation of new, genetically identical plants. Stem cuttings can be used to propagate a wide range of plants, including herbaceous perennials, shrubs, and even some woody plants.
To begin the process of stem cutting propagation, select a healthy, disease-free plant with vigorous growth. Use clean, sharp pruning shears or a sharp knife to take cuttings from the stem. Choose a stem that is moderately thick, about 4-6 inches long, and has at least two to three nodes, which are the areas where leaves emerge.
Make a clean, diagonal cut just below a node, ensuring that the cut is at a 45-degree angle. This increases the surface area available for rooting while reducing the risk of rotting. Remove any lower leaves or flowers from the bottom one-third to one-half of the cutting, as these can potentially rot when placed in the growing medium.
Once the cuttings are prepared, dip the lower end of the stem in a rooting hormone powder or gel, which can help promote root development. While using a rooting hormone is not always necessary, it can increase the chances of successful rooting, especially for more difficult-to-root species.
Prepare a container with a well-draining growing medium, such as a mixture of peat moss and perlite or a specialized rooting mix. Using a potting mix that holds moisture but allows for good aeration is important for successful root development. Moisten the growing medium before inserting the cuttings.
Make planting holes in the growing medium and gently insert the lower end of each cutting into a hole, ensuring good soil-to-stem contact. Place multiple cuttings in the same container, leaving enough space between them to allow for air circulation and growth. Cover the container with a clear plastic bag or use a propagator with a transparent lid to create a humid environment that promotes moisture retention.
Place the container in a warm and bright location, but out of direct sunlight, which can cause excessive temperature increases and potential damage to the cuttings. The ideal temperature for most stem cuttings ranges from 65-75°F (18-24°C). Regularly check the moisture levels of the growing medium and mist the cuttings with water to maintain humidity.
Over the next few weeks, monitor the progress of the cuttings. Signs of successful rooting include the emergence of new growth or resistance when lightly tugged. Keep in mind that not all cuttings will successfully root, and the success rate may vary depending on the plant species and environmental conditions.
Once the cuttings have developed a healthy root system, they can be transplanted into individual pots or directly into the garden, depending on the plant’s requirements. Avoid transplanting too soon; wait until the roots have sufficiently developed to support the plant.
Stem cuttings offer an excellent way to multiply your favorite plants and create new additions to your garden. With care and patience, stem cuttings can be a rewarding method of plant propagation, allowing you to expand your garden while preserving the desirable traits of your chosen plants.
Leaf Cuttings
Leaf cuttings are a specialized propagation method commonly used for plants with succulent leaves, such as jade plants, African violets, and certain succulents. This technique allows for the creation of new plants from individual leaves, making it an efficient and rewarding method of plant propagation.
To propagate plants through leaf cuttings, carefully select a healthy leaf from the parent plant. Gently twist or cut the leaf from the stem, ensuring that a small section of the leaf’s petiole remains attached. The petiole is the stalk-like structure that connects the leaf to the plant stem.
Once you have obtained the leaf, you may need to make a small incision along the midrib, or central vein, of the leaf to encourage root development. This step is necessary mainly for plants with thick or leathery leaves that do not naturally produce roots.
Next, prepare a container with a well-draining growing medium suited for succulent plants. A mix consisting of equal parts peat moss and perlite or a specialized succulent mix will work well. Insert the leaf cuttings into the growing medium, burying the petiole end about an inch or so into the soil.
It’s important to mist the cuttings and the surrounding soil with water to introduce moisture and create a humid environment. Be cautious not to overwater, as excessive moisture can lead to rotting. Cover the container with a clear plastic bag or use a propagator with a transparent lid to maintain the necessary humidity.
Place the container in a brightly lit area without exposing the cuttings to direct sunlight, which can cause leaf burn. Mild temperatures between 65-75°F (18-24°C) are ideal for leaf cuttings to root successfully.
With leaf cuttings, new plantlets will emerge from the base of the leaf or along the incision made along the midrib. These plantlets develop their own root systems and eventually become independent plants. Be patient, as it may take several weeks or even months for the plantlets to develop and form visible roots and leaves.
As the plantlets grow and develop, you can gradually acclimate them to lower humidity levels by introducing some airflow and removing the plastic covering for short periods. This will help prepare them for life outside of the humid environment and promote healthier growth.
Once the plantlets have established a sufficient root system, they can be carefully separated from the leaf and potted into individual containers with well-draining soil. Handle the plantlets gently to avoid damaging the young roots.
Leaf cuttings provide an excellent way to propagate succulent plants and expand your collection. With patience and proper care, you can propagate multiple new plants from a single leaf, allowing you to enjoy the beauty and diversity of succulents in your garden or indoor space.
Root Cuttings
Root cuttings are a propagation technique commonly used for plants with fleshy or tuberous roots, such as daylilies, hostas, and dahlias. This method involves taking a section of the root and encouraging it to develop new shoots and roots, resulting in the creation of new plants that are genetically identical to the parent plant.
To propagate plants through root cuttings, carefully select a healthy plant with well-developed roots. Dig around the base of the plant and locate a healthy section of the root. Using sharp, clean pruning shears or a knife, cut a portion of the root, making sure it has multiple bud or shoot points.
The root cutting should be about 2-3 inches in length, although this can vary depending on the plant species. It’s important to ensure that each root cutting has at least one bud or shoot point, as this is where new growth will emerge.
After obtaining the root cutting, you can apply a rooting hormone powder or gel to the cut ends to stimulate root development. While not necessary for all plants, using a rooting hormone can increase the chances of successful rooting, especially for more challenging species.
Prepare a container or planting bed with well-draining soil or growing medium. Make planting holes that are deep enough to accommodate the root cuttings, leaving the bud or shoot point exposed above the soil surface. Plant the root cuttings in the holes and backfill with soil, gently firming it around the cuttings.
Water the soil thoroughly after planting to settle it around the root cuttings and ensure good contact between the roots and the surrounding soil. Keep the soil consistently moist but not waterlogged during the rooting process.
Place the container or planting bed in a location that provides bright, indirect light. Avoid exposing the root cuttings to direct sunlight, as this can cause excessive heat and potential damage. Aim for temperatures between 65-75°F (18-24°C) for optimal root development.
Over the next few weeks, monitor the moisture levels of the soil and water the root cuttings as needed to maintain consistent moisture. As new shoots and roots begin to develop, you may notice small, visible growth above the soil surface. This indicates that the root cuttings have successfully rooted and are establishing themselves.
Once the root cuttings have developed a strong root system and new growth, they can be transplanted into individual containers or directly into the garden. Handle the plants carefully to avoid damage to the young roots.
Root cuttings offer an effective method of multiplying your favorite plants with fleshy or tuberous roots. By following proper techniques and providing the necessary care, you can successfully propagate new plants and enjoy the beauty and resilience of these species in your garden.
Dividing Plants
Dividing plants is a popular method of propagation, particularly for perennial plants that naturally form clumps or have a rhizomatous growth habit. This technique involves separating the parent plant into smaller sections, each with its own set of roots and stems. Dividing not only allows you to propagate new plants but also helps rejuvenate crowded or overgrown clumps, leading to healthier growth.
To divide plants, start by carefully removing the parent plant from the ground or container. Gently shake off excess soil to expose the plant’s roots and clumps. Depending on the plant’s growth habit, you may be able to divide it by hand or use gardening tools such as a sharp knife, garden fork, or spade.
Inspect the plant’s root system and identify natural divisions or areas where the plant can be easily separated. Look for natural separations or growth points, such as the emergence of new shoots or natural gaps between clumps.
Using clean and sharp tools, divide the plant into smaller sections. Each division should have a portion of the roots and a healthy portion of the stems or shoots. Ensure that each division has enough roots to support its growth and establish itself as an independent plant.
If the roots are tightly intertwined and difficult to separate, gently tease them apart, being careful not to damage the roots. Some plants may require a little more effort to divide, but with patience and care, you can successfully separate them into individual sections.
Once divided, each section can be planted in its own container or directly into the garden. Prepare the planting area or container with well-draining soil and create a hole large enough to accommodate the roots of each section. Place the division in the hole, making sure to position it at the same depth as it was originally planted.
Backfill the hole with soil, gently firming it around the roots to provide support for the newly planted section. Water the divisions thoroughly after planting to help settle the soil and reduce any air pockets around the roots.
For the first few weeks after dividing, provide regular watering and monitor the moisture levels in the soil. Keep the newly divided plants in a shaded or partially shaded area to reduce stress and promote root establishment. Gradually expose them to more sunlight over time, allowing the plants to adjust to their new growing conditions.
Depending on the plant species, it may take some time for the divided sections to establish and show new growth. However, with proper care and favorable growing conditions, the divisions will gradually grow into individual plants, filling your garden with fresh foliage and vibrant blooms.
Dividing plants not only allows you to propagate new plants but also promotes the health and longevity of the parent plant. Regularly dividing crowded clumps helps improve airflow, nutrient uptake, and overall plant vigor. It’s a rewarding method of propagation that rejuvenates your garden and adds diversity to your plant collection.
Layering Technique
Layering is a propagation technique that works well for certain plants, especially those with flexible or trailing stems. This method involves bending a stem of the parent plant to the ground and encouraging it to produce roots while still attached to the parent plant. Once the roots are established, the new plant can be cut free and transplanted as an independent specimen.
To utilize the layering technique, select a healthy and flexible stem from the parent plant. Remove any leaves or side shoots from the bottom section of the stem, leaving the top portion intact. The length of the stem to be layered varies depending on the plant species, but a general rule is about 6-12 inches.
Bury the section of the stem that is to be layered into the soil, leaving the top portion exposed. If necessary, use a small stake or rocks to hold the stem in place. Ensure that the buried section of the stem makes good contact with the soil to encourage root development.
In some cases, you can make a small incision or scrape a small portion of the stem where it will come into contact with the soil. This helps to stimulate the production of new roots. You can also apply rooting hormone to enhance root development, although it is not always necessary for successful layering.
Moisten the soil around the layered stem and ensure that it remains consistently moist during the rooting process. Cover the area with mulch or a clear plastic dome to maintain humidity and create a favorable microclimate for root growth.
Monitor the layered stem regularly, looking for signs of root development. After a few weeks to a few months, you may notice new shoots emerging from the buried section or feel resistance when gently tugging on the layered stem.
Once the roots are well established, you can cut the newly rooted section free from the parent plant. Sever the rooted portion just below the new root system, ensuring that it has enough roots to support its growth. Carefully remove any remaining soil or debris from the roots.
Transplant the newly rooted plant into a container or directly into the garden, using well-draining soil. Keep the soil evenly moist during the initial period of acclimatization to the new environment.
The layering technique offers an effective and convenient way to propagate plants without the need for additional equipment or specialized growing conditions. It is particularly useful for plants with cascading or trailing growth habits, such as certain vining plants and groundcovers.
Layering provides a natural method of plant propagation, allowing you to expand your plant collection and create new specimens from existing favorites. With a little patience and care, you can successfully utilize layering to propagate plants and enhance the beauty of your garden or indoor space.
Grafting Technique
Grafting is a specialized propagation technique that involves joining two different plants, known as the scion and the rootstock, to create a single plant with desirable characteristics. This method is commonly used in fruit tree propagation but can also be applied to other plants, such as roses and certain ornamentals. Grafting allows for the combination of desired traits, such as disease resistance or specific fruit varieties, resulting in a plant that inherits the best attributes of both the scion and the rootstock.
To perform grafting, start by selecting a healthy scion and a compatible rootstock. The scion is the part of the plant that provides the desired traits, such as flavorful fruits or unique flower colors. The rootstock is the lower part of the plant that provides a strong root system and disease resistance.
Take a sharp knife and make a clean, slanted cut just above a bud on both the scion and the rootstock. The cuts should match up so that they fit together snugly when joined. The goal is to create as much cambium contact as possible, as this is the layer responsible for the transport of water, nutrients, and growth hormones.
Place the cut surfaces of the scion and the rootstock together, aligning them as precisely as possible. Use grafting or budding tape to tightly bind the two parts together, ensuring that the cambium layers are in contact and protected from drying out. Alternatively, you can use grafting wax or a grafting compound to seal the graft union and prevent water loss.
After grafting, protect the delicate union by covering it with a grafting sealant or plastic bag to maintain humidity. This helps to prevent desiccation and encourages the formation of callus tissue, which will eventually fuse the scion and rootstock together.
Place the grafted plant in a warm and humid environment, such as a greenhouse or a high-humidity propagation chamber. Provide indirect light and ensure that the temperature remains consistent, ideally between 65-75°F (18-24°C). Maintain high humidity levels by regularly misting the grafted plant or using a humidifier.
Over time, the grafted plant will form a strong bond between the scion and the rootstock, and new growth will emerge. Monitor the plant closely during this period and remove any shoots or buds that develop below the graft union, as these may originate from the rootstock and can negatively affect the growth of the scion.
Once the grafted plant has established itself and the union has significantly healed, it can be moved to its permanent location, such as a garden bed or larger container. Provide regular care and maintenance to ensure the long-term success of the grafted plant.
Grafting requires skill and precision, as well as an understanding of the grafting compatibility between different plants. It is a technique that is commonly practiced by experienced gardeners and horticulturists to create unique and desirable plant combinations.
By mastering the art of grafting, you can unlock a world of possibilities in plant breeding and create plants with improved characteristics and performance. With practice and patience, you can successfully utilize the grafting technique to propagate plants and add diversity and resilience to your garden.
Conclusion
Plant propagation is a fascinating and rewarding practice that allows gardeners to expand their plant collections, share their favorite plants with others, and create new, thriving specimens. Whether you prefer seed propagation, stem cuttings, leaf cuttings, root cuttings, division, layering, or grafting, each method offers unique advantages and opportunities to multiply plants.
Choosing the right propagation method for each plant is essential for the success of the process. Consider the characteristics of the plant, including its growth habit, root structure, and preferred environment. Research specific requirements such as germination needs, cutting types, or compatibility for successful grafting. By understanding the needs of the plant, you can optimize the chances of propagating new plants successfully.
Preparing the soil and selecting suitable containers play a crucial role in providing the ideal growing conditions for propagated plants. Ensure that the soil or growing medium is well-draining, and containers have proper drainage holes to prevent waterlogging. By maintaining the right moisture levels and providing a nurturing environment, you give your propagated plants the best chance of root development and healthy growth.
Watering and fertilizing are critical aspects to ensure the health and vitality of propagated plants. Proper watering techniques, such as maintaining consistent moisture without overwatering, help prevent root diseases and promote root establishment. Appropriate fertilization ensures that the plants receive essential nutrients for vigorous growth. Regular monitoring and adjustment of watering and fertilizing practices based on individual plant needs are key to successful propagation.
The various methods of plant propagation discussed, such as stem cuttings, leaf cuttings, root cuttings, division, layering, and grafting, offer flexibility and opportunities to propagate plants with different growth habits and characteristics. Each method requires its own care and technique to ensure optimal success.
Whether you’re a beginner or an experienced gardener, plant propagation provides endless possibilities to explore and expand your garden. It allows you to create a diverse range of plants, replicate your favorite specimens, and share your love for gardening with others. Embrace the art and science of plant propagation, and watch your garden thrive with a vibrant array of new life.