Home>Gardening News and Trends>Latest News>How To Rehydrate Insects
Latest News
How To Rehydrate Insects
Modified: January 22, 2024
Discover the latest news on how to rehydrate insects and bring them back to life with this informative guide. Learn the best methods for rehydration and preservation.
(Many of the links in this article redirect to a specific reviewed product. Your purchase of these products through affiliate links helps to generate commission for Chicagolandgardening.com, at no extra cost. Learn more)
Table of Contents
Introduction
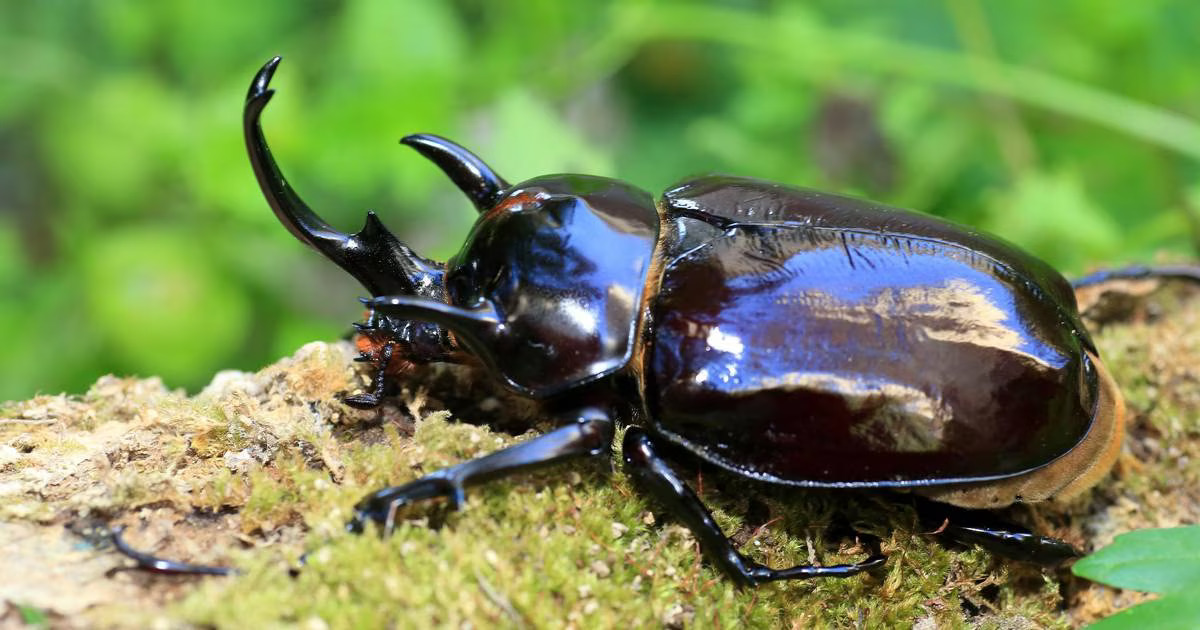
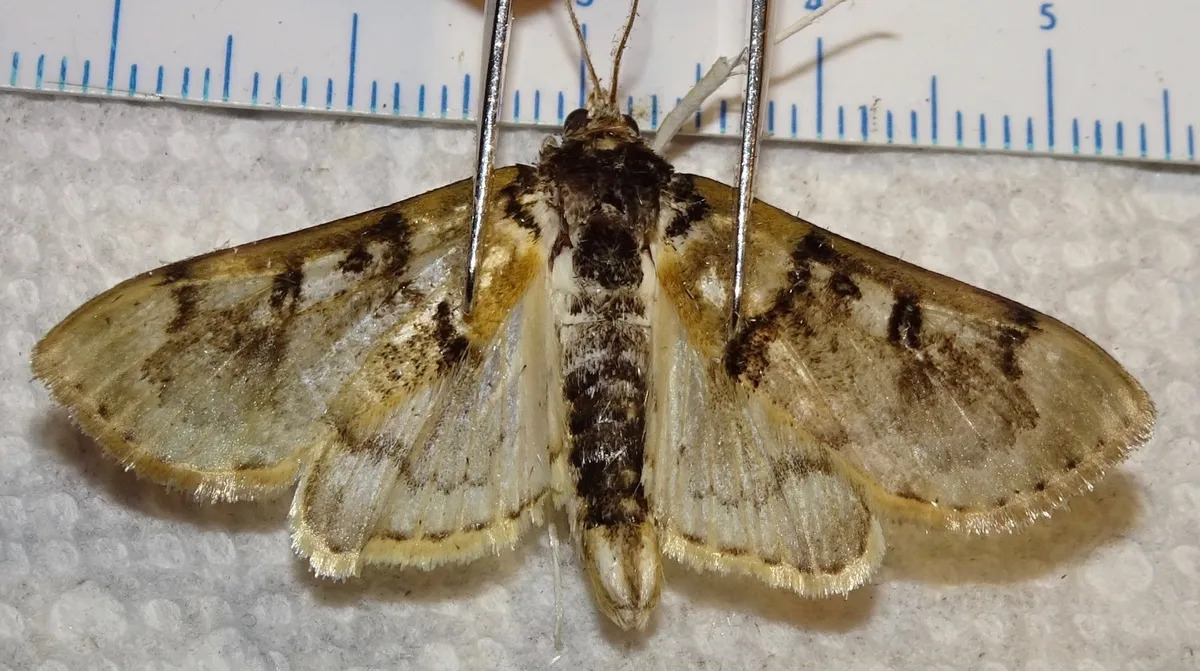
Rehydrating insects is a critical process in preserving and preparing them for various purposes, such as scientific research, education, or artistic displays. Insects, like all living organisms, require water to maintain their structure, function, and overall viability. However, over time, insects can become dehydrated, leading to shrinkage, brittleness, and deterioration. Hence, rehydration is vital to restore their appearance and integrity.
A well-hydrated insect not only looks more vibrant but also provides better specimens for study or exhibition. Whether you are an entomologist, a hobbyist, or someone with a keen interest in insects, understanding the techniques and benefits of rehydration can greatly enhance your experience and results.
This comprehensive guide will explore the various methods and factors involved in rehydrating insects effectively. It will equip you with the necessary knowledge to revive and preserve insects while maintaining their natural form and features. So, let’s dive in and discover the fascinating world of insect rehydration.
Benefits of Rehydrating Insects
Rehydrating insects offers a multitude of benefits that go beyond simple reconstitution of their physical appearance. Here are some key advantages of rehydration:
- Restoring Natural Form: When insects become dehydrated, they often shrink and lose their natural shape. Rehydration helps to plump them up and restore their original form, allowing for more accurate examination or display.
- Preservation: Insects that have been properly rehydrated and preserved can remain intact and suitable for research or educational purposes for extended periods. This ensures that the specimens can be studied or displayed without deteriorating or losing their scientific value.
- Improved Insect Photography: Rehydrated insects are more visually appealing and photogenic. Their vibrant colors and enhanced features make them excellent subjects for macrophotography or artistic representations.
- Enhanced Educational Value: Rehydrated insects provide better educational resources for students, teachers, and enthusiasts. They allow for closer examination of intricate details, enhancing the learning experience and enabling a deeper understanding of insect biology and ecology.
- Facilitating Taxonomic Identification: In many instances, dehydrated insects can be difficult to identify due to structural distortions. Rehydration helps in reversing these deformities, making it easier to recognize and classify the insect species accurately.
- Minimizing Damage: Rehydration poses less risk of harming delicate insect specimens compared to alternative methods that involve chemical solutions or heat. With proper rehydration techniques, the integrity of the insects can be better preserved.
By rehydrating insects, these benefits can be fully realized, making them more useful and visually appealing for various purposes. Let’s now explore the methods and techniques involved in effectively rehydrating insects.
Preparing for Rehydration
Before you begin the process of rehydrating insects, it is essential to prepare them properly. This preparation involves several important steps:
- Cleaning: Start by removing any debris, dirt, or foreign particles from the insect’s body. Gently brush the specimen using a soft-bristled brush or compressed air. Avoid using water or any liquid at this stage, as it can further dehydrate the insect.
- Assessing Dehydration Level: It is essential to assess the level of dehydration in the insect before determining the rehydration method. Dehydration can be classified as either mild, moderate, or severe, based on the insect’s appearance and flexibility. This assessment will help you choose the appropriate rehydration technique.
- Controlled Environment: Consider the environmental conditions necessary for rehydration. Ensure the temperature and humidity levels are suitable for the specific insect species you are working with. This will promote better water absorption and prevent further complications during the rehydration process.
- Equipment Preparation: Set up the necessary equipment and materials for rehydration. This may include water bowls, moisture chambers, spray bottles, or humidity boxes, depending on the chosen rehydration method. Make sure all equipment is clean and sterilized to prevent contamination.
- Prioritize Fragile Specimens: If you have multiple specimens to rehydrate, consider starting with the most delicate or valuable ones first. This approach ensures that you have ample time and energy to handle them carefully and minimize the risk of damage.
By following these preparatory steps, you can ensure that your rehydration process is effective and efficient. With a clean and properly assessed specimen, along with a controlled environment and suitable equipment, you are now ready to move on to the rehydration techniques. Let’s explore various methods of rehydrating insects in the following sections.
Method 1: Using Water Bowl
Using a water bowl is a simple and effective method for rehydrating insects. This method is suitable for mildly dehydrated specimens and works well for larger insects. Here’s how to utilize this rehydration technique:
- Select a shallow bowl: Choose a clean, shallow bowl that is large enough to accommodate the size of the insect. Avoid using a bowl with sharp edges or rough surfaces that could potentially damage the delicate insect.
- Add distilled water: Fill the bowl with distilled water, ensuring that it is not too deep to submerge the entire insect. Distilled water is recommended to prevent any impurities or chemicals from affecting the specimen during rehydration.
- Place a platform: To prevent direct contact between the insect and the water, place a small platform inside the bowl. This can be a piece of foam, a floating leaf, or a rock. The platform should be large enough to support the insect without causing it to sink.
- Position the insect: Gently place the dehydrated insect on the platform, ensuring it is not submerged in the water. Take extra care to avoid touching or damaging the fragile body parts.
- Cover the bowl: To maintain consistent humidity, cover the bowl with a lid or plastic wrap. This helps prevent evaporation and allows the insect to absorb moisture effectively.
- Monitor and adjust: Regularly check the progress of rehydration by observing the appearance and flexibility of the insect. If the water level decreases, add small amounts of distilled water as needed. Avoid excessive moisture to prevent potential complications.
- Patience is key: Rehydration can take several hours to a couple of days, depending on the size and level of dehydration. Be patient and avoid rushing the process to ensure the best results.
Using a water bowl is a straightforward and low-maintenance method for rehydrating insects. It allows for controlled absorption of moisture and is particularly useful for larger specimens. However, for more severely dehydrated or delicate insects, alternative methods may be more appropriate. Let’s explore another rehydration technique in the next section.
Method 2: Using Moisture Chamber
When dealing with more severely dehydrated or fragile insects, using a moisture chamber can be an effective rehydration method. This technique creates a controlled environment with high humidity to facilitate the absorption of moisture by the specimen. Here’s how to implement this method:
- Select a container: Choose a clear container with a lid or cover, such as a plastic container or a glass jar. It should be large enough to accommodate the insect and allow for some airflow.
- Add a moisture source: Place a damp sponge or a layer of moistened paper towel at the bottom of the container. This acts as the moisture source, providing a humid environment for the insect.
- Position the specimen: Carefully place the dehydrated insect on a small platform or a piece of mesh above the moisture source. This ensures that the insect does not come into direct contact with the moisture, preventing potential damage.
- Seal the container: Close the lid or cover tightly to create a sealed chamber. This traps the moisture inside the container, allowing the insect to absorb it gradually.
- Monitor and maintain the humidity: Regularly check the container to ensure that the moisture source remains damp. If it starts to dry out, add a small amount of water to maintain the desired humidity level inside the chamber.
- Observe the progress: Over time, the insect will slowly absorb the moisture from the chamber. Monitor the specimen for signs of rehydration, such as increased flexibility or plumping of the body. This method may take several days or even weeks for severely dehydrated specimens.
- Gradually acclimate the insect: Once the insect appears adequately rehydrated, gradually acclimate it to lower humidity levels by providing a transitional environment. This prepares the specimen for long-term storage or further preservation techniques.
A moisture chamber provides a controlled and humid environment, ideal for rehydrating fragile or highly dehydrated insects. The gradual absorption of moisture helps restore the specimen’s integrity without causing additional damage. However, for smaller insects or those with mild dehydration, different rehydration methods may be more suitable. In the next section, we will explore another effective technique: spraying with water.
Method 3: Spraying with Water
Spraying with water is a versatile and targeted method for rehydrating insects. It is particularly useful for smaller or delicate specimens, as it allows for careful control of moisture application. Here’s how to use this rehydration technique:
- Prepare a spray bottle: Fill a spray bottle with distilled water. The fine mist produced by the spray bottle ensures even distribution of water without saturating the insect.
- Position the specimen: Carefully place the dehydrated insect on a clean surface, such as a soft cloth or a piece of white paper. This provides a contrast for better observation and prevents the insect from getting lost or damaged in the process.
- Mist the insect: Hold the spray bottle a few inches away from the specimen and lightly mist it with water. Move the spray bottle in a sweeping motion to cover the entire insect’s body. Avoid spraying too close or with excessive force, as this may cause damage or displace fragile appendages.
- Monitor and repeat if necessary: Observe the insect and assess its hydration level. If needed, repeat the spraying process to ensure thorough rehydration. Take note of the insect’s progress and adjust the frequency of spraying accordingly.
- Focus on problem areas: Some insects may have specific areas that require extra attention during rehydration, such as wings or antennae. Direct the spray towards these areas to ensure they receive adequate moisture.
- Avoid over-saturation: It is crucial to avoid over-saturating the insect with water, as this can cause damage or create unfavorable conditions for rehydration. Maintain a careful balance and only apply enough moisture to gradually rehydrate the specimen.
- Allow drying time: After misting the insect, allow it some time to absorb the moisture and dry off naturally. Avoid handling or disturbing the specimen until it is fully dry to prevent damage.
Spraying with water provides a targeted and controlled approach to rehydrating smaller or delicate insects. With careful application, it allows for effective rehydration without the risk of over-saturation or damage. However, this method may not be suitable for severely dehydrated specimens or larger insects. In the next section, we will explore another rehydration technique: soaking in water.
Method 4: Soaking in Water
Soaking in water is a straightforward yet effective method for rehydrating insects, especially those that are severely dehydrated or have a hard exoskeleton. This technique allows for deep hydration by immersing the specimen in water. Here’s how to use the soaking method:
- Choose a suitable container: Select a clean and appropriately sized container that can accommodate the insect comfortably without causing damage. Avoid containers with rough or sharp edges that could potentially harm the specimen.
- Fill the container with water: Fill the container with distilled water, ensuring that the water level is not too high to submerge the entire insect. The use of distilled water helps prevent any impurities or chemicals from affecting the specimen.
- Place the specimen in the water: Gently place the dehydrated insect into the container, ensuring it is fully submerged. Take extra care to avoid damaging delicate body parts, such as wings or antennae, during the process.
- Monitor the soaking process: Keep a close eye on the specimen while it is soaking in water. Observe the coloration, flexibility, and overall condition of the insect as it absorbs moisture. This helps determine the progress of rehydration and the appropriate duration of soaking.
- Change the water if necessary: Depending on the condition of the insect and the degree of dehydration, the water may become discolored over time. If the water turns murky or noticeably dirty, replace it with fresh distilled water to maintain cleanliness and prevent potential contamination.
- Remove the insect and allow drying: Once the specimen appears adequately rehydrated, carefully remove it from the water using gentle handling techniques. Place the insect on a clean surface or a piece of absorbent paper towel to allow excess water to drain off and the specimen to dry naturally.
- Ensure proper drying: Allow the insect to dry completely before further handling or storage. This prevents damage and reduces the risk of fungal growth or decomposition. Also, avoid exposing the specimen to direct sunlight or excessive heat during the drying process.
Soaking in water is an effective method for rehydrating severely dehydrated insects or those with a hard exoskeleton. The immersion in water allows for thorough hydration, restoring the insect’s appearance and structure. However, it is essential to monitor the process carefully and ensure proper drying to avoid potential damage. In the next section, we will explore another rehydration technique: using a humidity box.
Method 5: Using Humidity Box
A humidity box is a specialized enclosure that provides a controlled and humid environment for rehydrating insects. This method is particularly useful for delicate or highly sensitive specimens that require precise humidity levels. Here’s how to effectively use a humidity box for rehydration:
- Prepare the humidity box: Choose a transparent container with a tight-fitting lid, such as a plastic or glass container. Ensure it is clean and free from any contaminants that could harm the insect. Ventilation holes can be added to regulate airflow if necessary.
- Add a substrate: Place a layer of moistened substrate or material with high water-holding capacity at the bottom of the humidity box. Suitable options include dampened paper towels, cotton balls, or sponge pieces. The substrate acts as a source of humidity for the enclosed space.
- Position the specimen: Carefully place the dehydrated insect on a small platform or a piece of mesh above the moistened substrate. Keep the insect elevated to prevent direct contact with the wet material, which could cause damage or excessive moisture absorption.
- Seal the enclosure: Close the lid tightly to create a sealed environment within the humidity box. This traps the moisture, allowing it to circulate and create the desired level of humidity for rehydration. Check that the lid is secure to prevent any accidental openings.
- Monitor and adjust humidity: Regularly monitor the humidity levels within the box. Use a hygrometer or a similar device to measure and maintain the desired humidity range for the specific insect species. Adjust the moisture level by adding or removing substrate or adjusting ventilation as needed.
- Observe the rehydration process: Over time, the enclosed space will become saturated with moisture, allowing the insect to gradually rehydrate. Monitor the specimen’s appearance, flexibility, and overall condition to determine the progress of rehydration.
- Gradually acclimate: Once the insect appears adequately rehydrated, gradually acclimate it to ambient humidity levels by providing a transitional environment. This prepares the specimen for long-term storage or further preservation techniques.
A humidity box provides a controlled and controlled environment for rehydrating delicate or sensitive insects. With careful monitoring and adjustments, it ensures optimal humidity levels for effective rehydration. However, it is crucial to regularly check the humidity levels and prevent excessive moisture to avoid potential complications. In the next section, we will discuss some important factors to consider during the rehydration process.
Factors to Consider During Rehydration
Rehydrating insects requires careful consideration of various factors to ensure successful and safe results. By taking into account these key factors, you can optimize the rehydration process for your specimens. Here are some important factors to consider:
- Dehydration Level: Assess the level of dehydration in the insect before choosing a rehydration method. Mildly dehydrated specimens may only require a simple method like using a water bowl, while severely dehydrated ones may need more intensive techniques like soaking or a humidity box.
- Insect Species: Different insect species have different tolerances and requirements for rehydration. Research the specific needs of the insect species you are working with and tailor your approach accordingly. Some insects may require higher humidity levels, while others may be more sensitive to moisture.
- Size and Fragility: Consider the size and fragility of the specimen. Larger and more delicate insects may require gentler rehydration techniques to prevent damage to their body parts. Smaller and more robust insects may be suitable for methods like spraying with water or using a moisture chamber.
- Environmental Conditions: Create a suitable environment for rehydration by controlling temperature and humidity levels. Certain insects may require specific conditions to promote effective water absorption. Adapting the environment to mimic the natural habitat of the insect can enhance the rehydration process.
- Duration of Rehydration: The duration of rehydration depends on various factors, including the level of dehydration, the rehydration method chosen, and the size of the insect. Be patient and allow sufficient time for the insect to absorb moisture gradually. Rushing the process may lead to inadequate rehydration or damage to the specimen.
- Observation and Monitoring: Regularly observe the rehydration progress by assessing the appearance and flexibility of the insect. It is essential to monitor the specimen for any signs of improvement or potential issues. Adjust the rehydration method or environmental conditions if necessary.
- Proper Handling: Handle the dehydrated insects with extreme care to avoid causing damage or further dehydration. Use soft brushes, forceps, or other suitable tools to manipulate the specimens gently. Avoid touching delicate body parts, such as wings or antennae, as they are particularly vulnerable during the rehydration process.
- Potential Risks: Be aware of potential risks associated with the chosen rehydration method. Excessive moisture, improper handling, or unsuitable environmental conditions can harm the insect or lead to the growth of mold or fungi. Take precautions to minimize these risks and ensure the safety of both the specimens and yourself.
Considering these factors and adapting your rehydration approach accordingly will help ensure successful outcomes and maintain the integrity of your insect specimens. Now that you are aware of important considerations, let’s explore some common mistakes to avoid during the rehydration process.
Common Mistakes to Avoid
While rehydrating insects, it is important to be aware of and avoid common mistakes that can hinder the effectiveness of the process or potentially damage the specimens. By steering clear of these mistakes, you can ensure the best possible outcomes. Here are some common mistakes to avoid during the rehydration process:
- Excessive Force: Avoid applying excessive force when handling or manipulating the dehydrated insects. Use gentle tools and techniques to prevent causing damage to delicate body parts or further dehydrating the specimens.
- Over-Saturation: Do not over-saturate the specimens with water during rehydration. Excessive moisture can lead to further damage, promote the growth of mold or fungi, and create unsuitable conditions for the specimens. Gradual and controlled hydration is key.
- Improper Environment: Ensure that the rehydration environment has the appropriate temperature and humidity levels for the specific insect species. Failure to create and maintain suitable conditions can hinder water absorption and impede the rehydration process.
- Using Contaminated Water: Avoid using tap water or water from questionable sources that may contain impurities or chemicals. Instead, use distilled water to prevent unwanted substances from affecting the quality of the insects or the success of the rehydration process.
- Not Monitoring Progress: Regular observation and monitoring of the rehydration progress are crucial. Failing to monitor the specimens can lead to inadequate hydration or damage going unnoticed, compromising the overall results.
- Skipping Preparation Steps: Neglecting essential preparatory steps, such as cleaning the insects or assessing their dehydration level, can lead to suboptimal rehydration results. Take the time to properly prepare the specimens before starting the rehydration process.
- Rushing the Process: Rehydration is a time-consuming process that requires patience and dedication. Rushing the process can result in inadequate hydration or damage to the specimens. Allow sufficient time for the insects to absorb moisture gradually and avoid taking shortcuts.
- Poor Handling Techniques: Use proper handling techniques when working with dehydrated insects. Rough handling or the use of inappropriate tools can cause physical damage or break fragile body parts. Handle the specimens with care and precision.
By avoiding these common mistakes, you can optimize the rehydration process and ensure the best possible outcomes for your insect specimens. Remember to prioritize their well-being and take the necessary precautions to preserve their integrity throughout the rehydration journey.
Conclusion
Rehydrating insects is a vital process in preserving and preparing these fascinating creatures for scientific study, educational display, or artistic endeavors. By restoring their natural form and structure, rehydration enhances their visual appeal, educational value, and longevity.
In this comprehensive guide, we explored various rehydration methods, including using a water bowl, a moisture chamber, spraying with water, soaking in water, and utilizing a humidity box. Each method has its advantages and suitability for different types of insects and levels of dehydration.
Throughout the rehydration process, it is crucial to consider factors such as the dehydration level, insect species, size and fragility, environmental conditions, duration of rehydration, observation and monitoring, proper handling techniques, and potential risks. Being mindful of these factors will ensure the success of the rehydration process and the preservation of the specimens’ integrity.
Additionally, we discussed common mistakes to avoid during rehydration, such as using excessive force, over-saturating the specimens, neglecting proper environment and preparation, not monitoring progress, rushing the process, and poor handling techniques. By avoiding these mistakes, you can optimize the rehydration process and maintain the quality of the specimens.
Rehydrating insects is an intricate and delicate process that requires patience, attention to detail, and a deep understanding of the specific needs of each specimen. By following the appropriate methods, considering the necessary factors, and avoiding common mistakes, you can successfully bring these magnificent creatures back to life and enjoy their beauty, educational value, and scientific significance.
So, whether you are a scientist, a hobbyist, or simply a curious insect enthusiast, embrace the world of rehydration and embark on the journey of preserving and appreciating these incredible creatures.