Home>Gardening Techniques>DIY Projects>How To Connect Drip Irrigation Hose?
DIY Projects
How To Connect Drip Irrigation Hose?
Modified: January 22, 2024
Learn how to connect a drip irrigation hose for your DIY projects and maximize water efficiency in your garden. Step-by-step instructions included!
(Many of the links in this article redirect to a specific reviewed product. Your purchase of these products through affiliate links helps to generate commission for Chicagolandgardening.com, at no extra cost. Learn more)
Table of Contents
- Introduction
- Step 1: Gather Necessary Materials
- Step 2: Prepare the Area for Installation
- Step 3: Lay Out the Drip Irrigation Hose
- Step 4: Connect the Drip Irrigation Hose to the Water Source
- Step 5: Attach Emitters or Drip Heads to the Hose
- Step 6: Test the System
- Step 7: Adjust and Fine-tune the Irrigation System
- Conclusion
Introduction
Are you tired of spending hours manually watering your plants and garden? Do you want to conserve water while keeping your plants healthy and thriving? Look no further than drip irrigation. Drip irrigation is an efficient and effective way to deliver water directly to the roots of your plants, reducing water waste and promoting healthier growth.
In this article, we will guide you through the process of connecting a drip irrigation hose, step by step. Whether you are a seasoned DIY enthusiast or a beginner, we’ve got you covered. By following these simple steps, you’ll have your drip irrigation system up and running in no time.
Before we dive into the steps, let’s briefly discuss the benefits of using drip irrigation. Firstly, it helps conserve water by delivering water only where it is needed – directly to the roots of the plants. This targeted approach reduces evaporation and runoff, resulting in significant water savings. Secondly, drip irrigation promotes healthier plant growth by preventing water stress and reducing the likelihood of diseases caused by overwatering. Lastly, it saves you time and effort by automating the watering process, allowing you to focus on other garden tasks.
Now that you understand the advantages, let’s move on to the steps required to connect a drip irrigation hose.
Step 1: Gather Necessary Materials
Before you begin the installation process, it’s essential to gather all the necessary materials. Having everything ready will make the process smoother and more efficient. Here’s a list of the materials you’ll need:
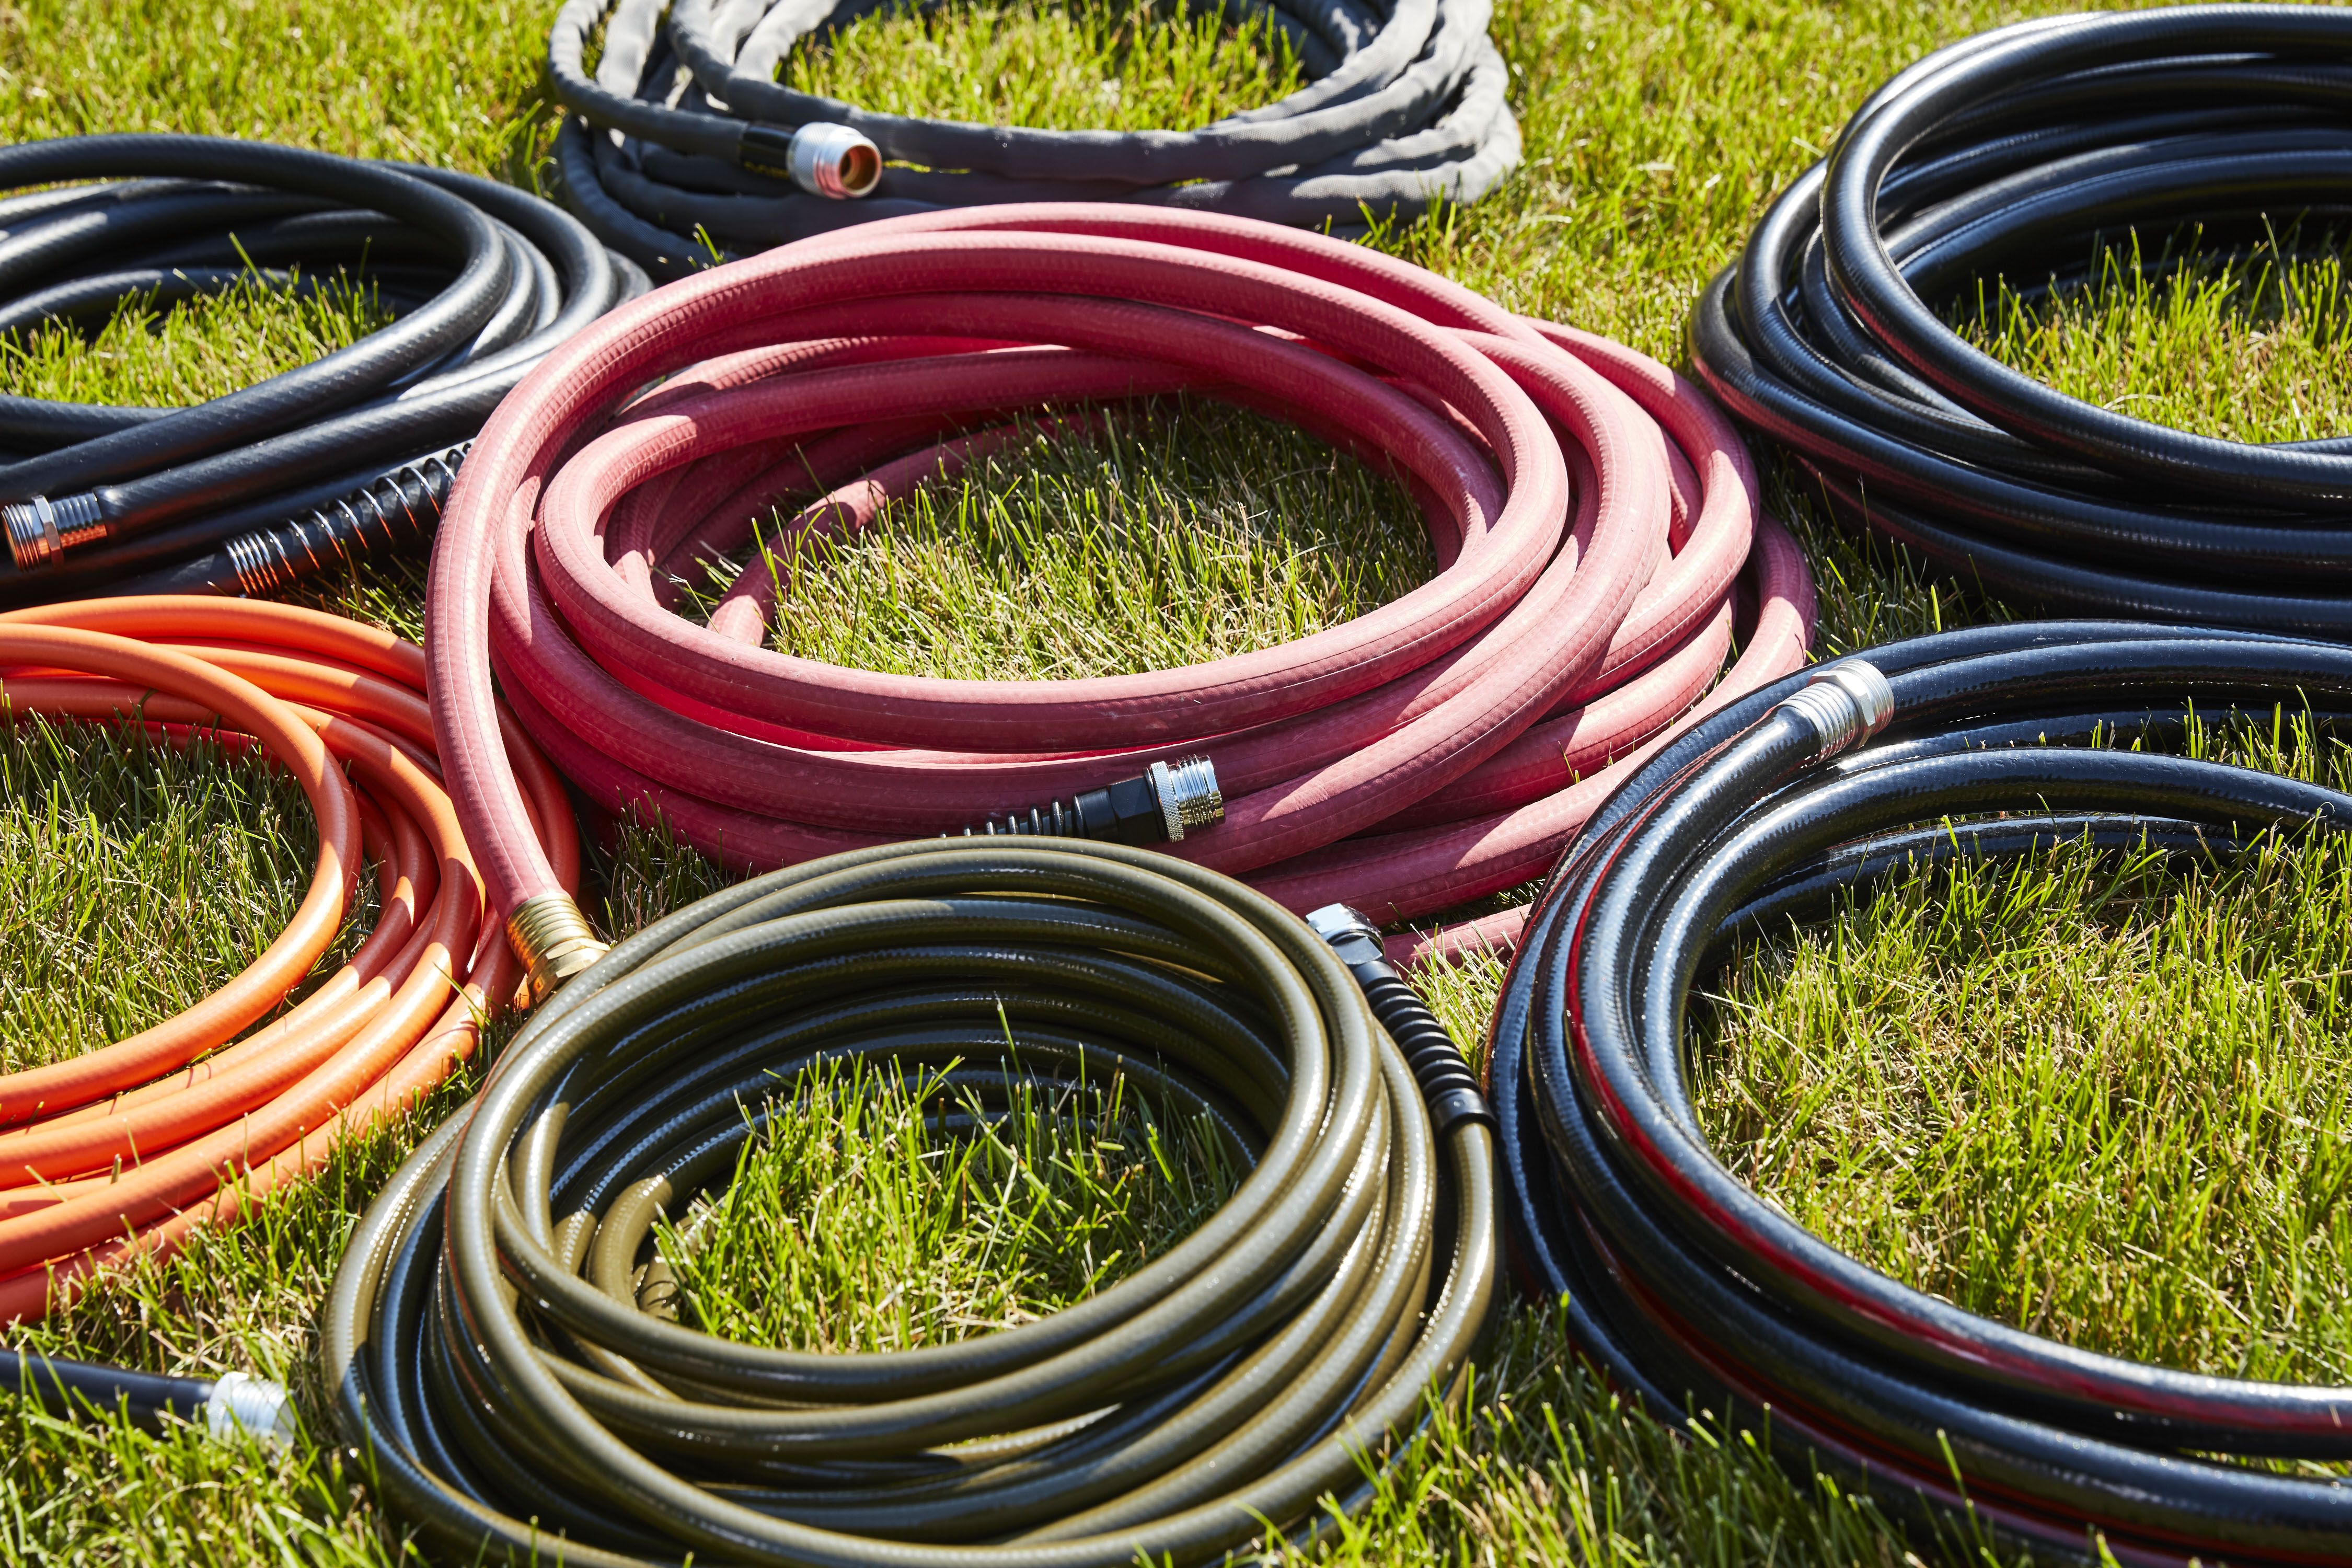
- Drip irrigation hose: This is the main component of the system. Look for a high-quality hose made of durable materials that can withstand outdoor conditions.
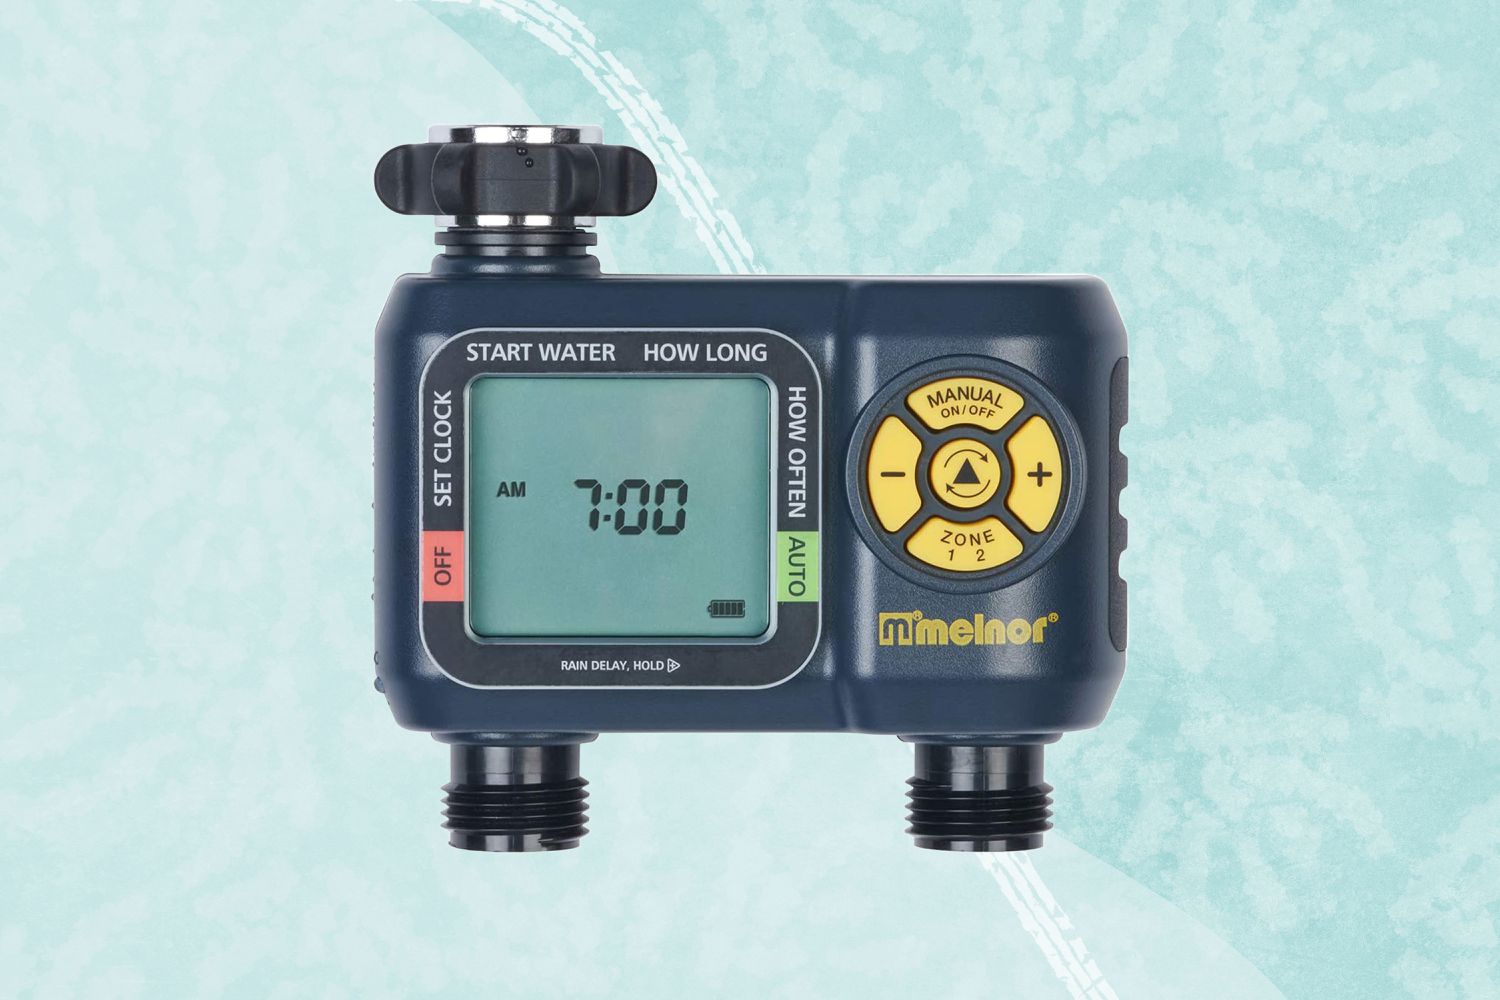
- Water source: Determine where your water source will be. It could be a faucet, a hose timer, or a sprinkler system.
- Pressure regulator: To ensure the correct water pressure for your drip system, a pressure regulator is necessary. Choose one based on the recommended pressure range of your specific drip irrigation setup.
- Backflow preventer: This valve prevents water from flowing back into the main water supply, helping to prevent contamination.
- Filter: A filter prevents debris from clogging the emitters in your drip system. Make sure to choose a filter suitable for the water source in your area.
- Connectors: You’ll need connectors to attach the drip irrigation hose to the water source and other components. These can include hose connectors, tees, elbows, and end caps.
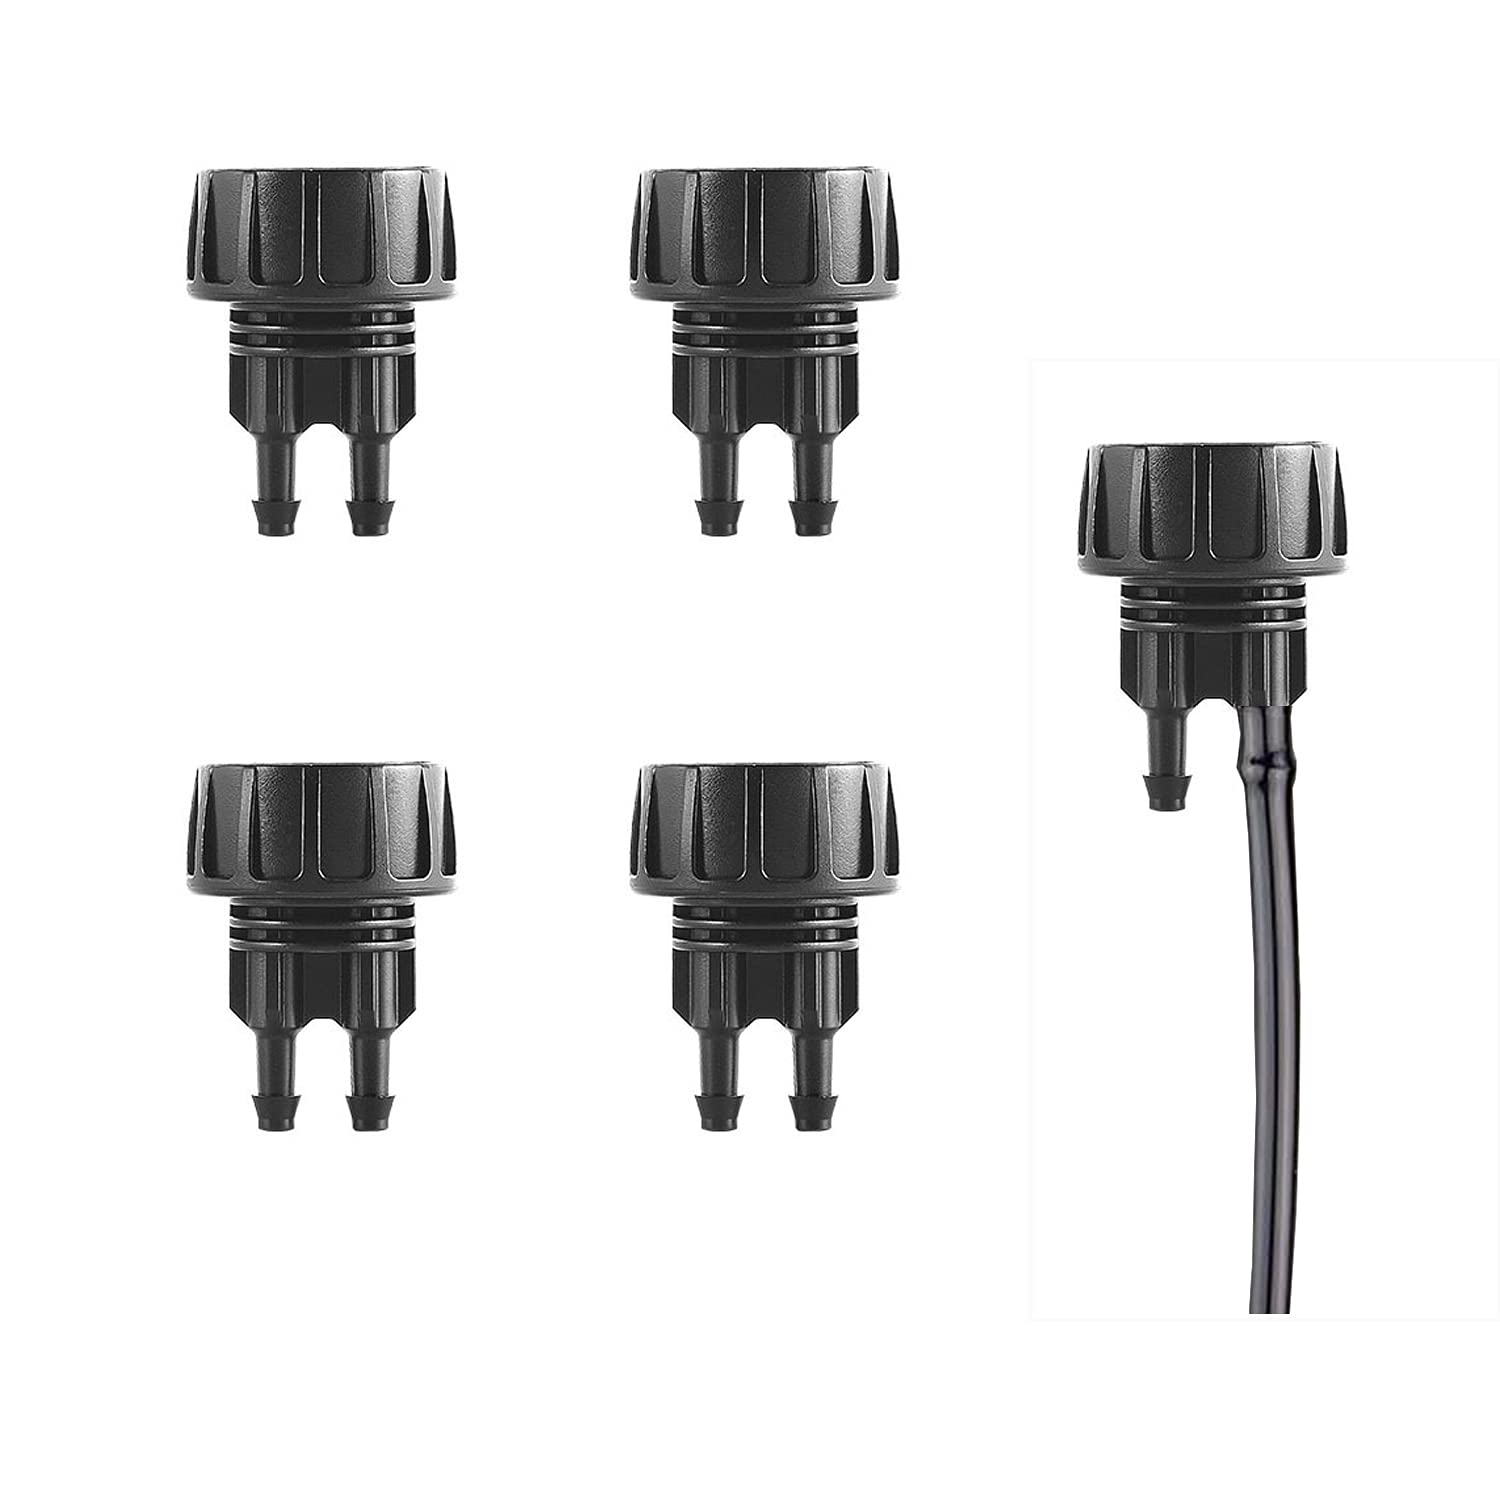
- Emitters or drip heads: Depending on your specific watering needs, choose the appropriate emitters or drip heads for your plants. These devices control the flow and distribution of water.
- Tools: Prepare a set of basic tools, including scissors, a hole punch, and a wrench. These will come in handy during the installation process.
- Teflon tape: This is important for securing connections and preventing leaks. Wrap the threads of the connectors with Teflon tape to create a tight seal.
Take the time to gather all these materials before you start the installation. This will save you from any last-minute trips to the hardware store and ensure a smooth workflow throughout the process.
Step 2: Prepare the Area for Installation
Once you have gathered all the necessary materials, it’s time to prepare the area where you will be installing the drip irrigation system. Here are the steps to follow:
- Clear the area: Remove any obstructions, weeds, or debris from the area where the drip irrigation hose will be installed. This will ensure easy access and prevent any potential damage to the system.
- Measure and plan: Measure the length of the area you want to cover with the drip irrigation hose. This will help you determine the amount of tubing and other components you’ll need. Plan the layout of the hose, considering the location of your plants and the water source.
- Prepare the water source: If you’re connecting the drip irrigation system to a faucet, ensure the faucet is in good working condition. If necessary, repair any leaks or replace the faucet. Make sure the water source is easily accessible for connection.
- Check water pressure: Before connecting the system, check the water pressure to ensure it falls within the recommended range for your drip irrigation setup. Adjust the pressure regulator as needed to achieve the appropriate pressure level.
- Install the backflow preventer: Connect the backflow preventer to the water source to protect against contamination. Follow the manufacturer’s instructions for installation.
Preparing the area beforehand will save you time and help avoid any potential issues during the installation process. Clearing the area and planning the layout will ensure an organized and efficient installation of the drip irrigation system.
Step 3: Lay Out the Drip Irrigation Hose
With the area prepared, it’s time to lay out the drip irrigation hose. This step involves positioning and securing the hose before making any connections. Follow these steps to lay out the hose:
- Unroll the hose: Start by unrolling the drip irrigation hose along the desired path. Avoid stretching or kinking the hose to ensure proper water flow. If needed, use stakes or clips to hold the hose in place and prevent it from moving.
- Position the hose near the plants: Place the hose close to the base of your plants, ensuring that it is within reach of their roots. Take note of any areas that may require additional lengths of hose or connectors.
- Create loops: If you have plants of varying sizes or in different areas, create loops in the hose to provide sufficient water coverage. Be sure to leave enough space between the loops for easy access and maintenance.
- Elevate the hose (if needed): If you have plants on sloped surfaces or areas prone to waterlogging, you may need to elevate the hose. This can be done using risers or by placing the hose on top of mulch or rocks.
- Secure the hose: Once the hose is positioned and laid out correctly, secure it in place. Use stakes, clips, or hooks to keep the hose in place and prevent it from shifting or being damaged by foot traffic or other activities.
Take your time with this step to ensure that the hose is positioned correctly. Proper placement and securing of the hose will contribute to the overall efficiency and effectiveness of your drip irrigation system.
Step 4: Connect the Drip Irrigation Hose to the Water Source
Now that the drip irrigation hose is laid out, it’s time to connect it to the water source. This step involves attaching the necessary connectors and ensuring a secure connection. Here’s how to connect the drip irrigation hose to the water source:
- Attach the hose connector: Start by attaching a hose connector to the end of the drip irrigation hose. This will allow you to connect the hose to the water source. Ensure that the connector is compatible with your hose and water source.
- Apply Teflon tape: Before connecting the hose to the water source, apply a few wraps of Teflon tape to the threaded end of the connector. This will help create a tight seal and prevent leaks.
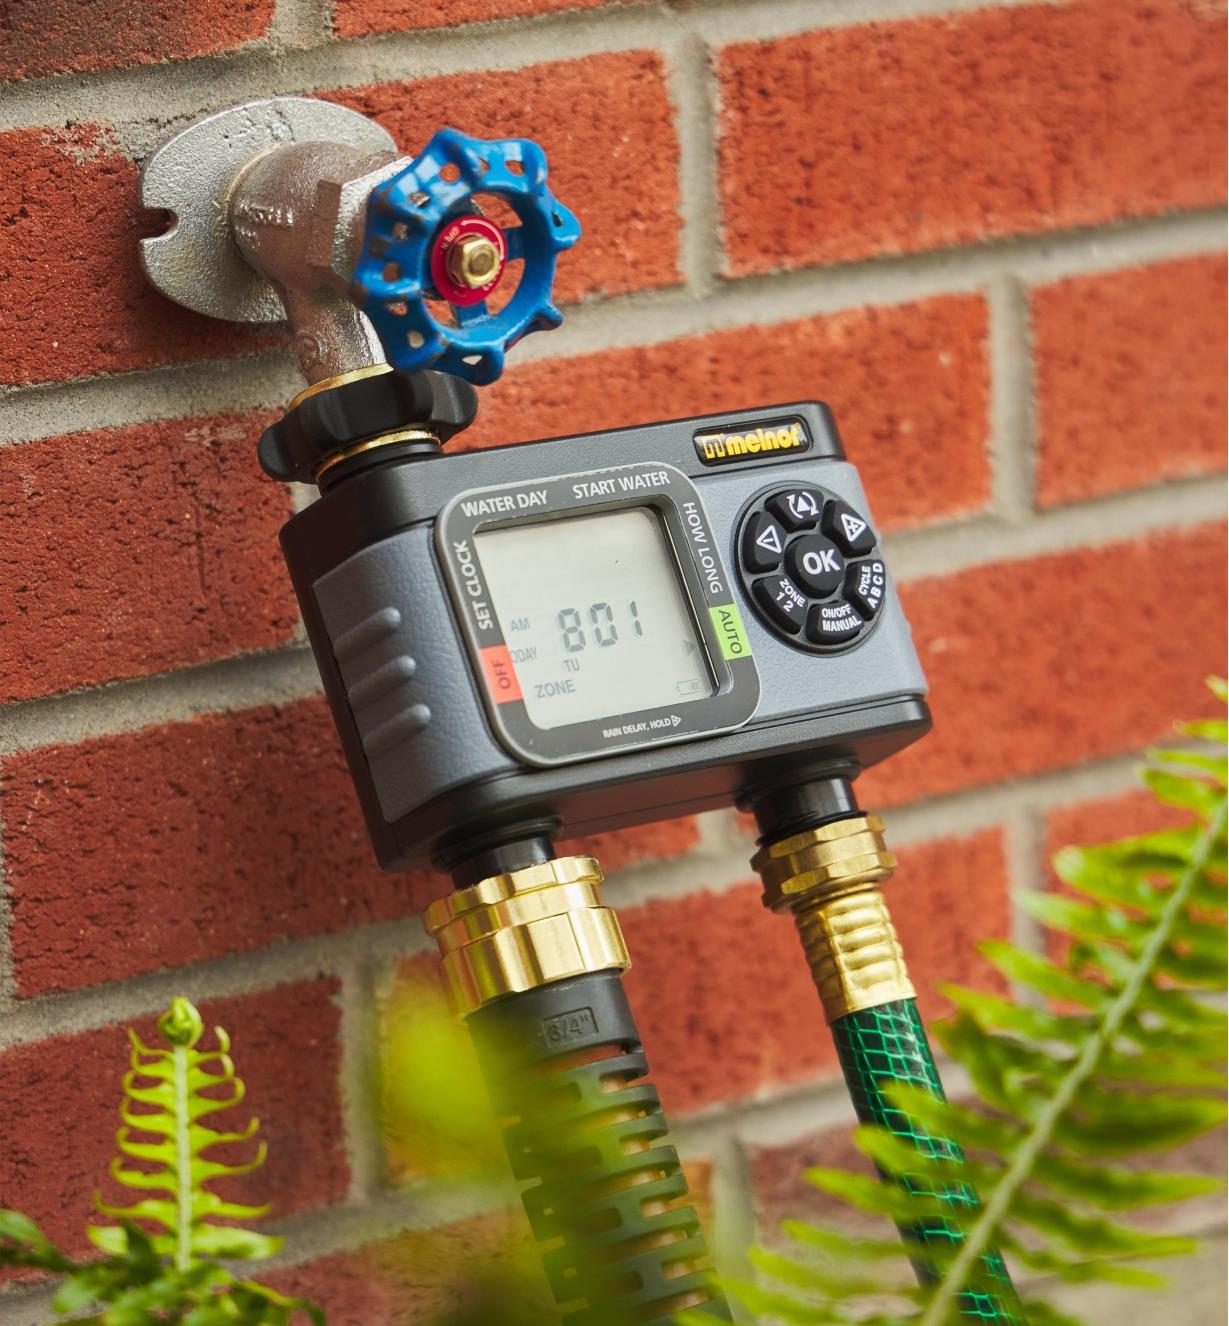
- Connect the hose to the water source: Screw the hose connector onto the water source, such as a faucet or hose timer, until it is tight and secure. Use a wrench if necessary, but be careful not to over-tighten.
- Turn on the water: Once the hose is connected to the water source, slowly turn on the water to allow it to flow through the system. Check for any leaks or water pressure issues. Adjust the pressure regulator if needed to achieve the desired flow rate.
- Check the flow: Inspect the drip irrigation hose to ensure that water is flowing evenly along its length. Adjust the positioning or elevation of the hose if there are any areas with inadequate water distribution.
It is crucial to ensure a tight and secure connection between the drip irrigation hose and the water source to prevent leaks and ensure proper water flow. Take your time during this step to guarantee a reliable connection that will support the efficiency of your drip irrigation system.
Step 5: Attach Emitters or Drip Heads to the Hose
Once the drip irrigation hose is properly connected to the water source, it’s time to attach emitters or drip heads to deliver water directly to your plants. This step is crucial in ensuring the efficient and targeted distribution of water. Here’s how to attach emitters or drip heads:
- Choose the appropriate emitters or drip heads: Depending on your plants’ watering needs, select the appropriate emitters or drip heads. Consider factors such as plant type, sun exposure, and desired water flow rate. Consult the manufacturer’s guidelines for recommended emitter spacing and flow rates.
- Punch holes in the hose: Use a hole punch tool or a sharp object to create holes in the drip irrigation hose where you want to place the emitters or drip heads. Make sure the holes are the appropriate size to fit the chosen emitters.
- Insert the emitters: Insert the emitters or drip heads into the holes you created in the hose. Push them in gently but firmly to ensure a secure fit. If necessary, use additional connectors or adapters for specific emitters.
- Check the flow rate: Before finalizing the placement of the emitters, check the flow rate of each one. Adjust the flow rate using the emitter’s built-in adjustment mechanism or by adding flow control devices if needed.
- Position the emitters: Position the emitters or drip heads near the base of each plant, ensuring that water is delivered directly to the root zone. Space the emitters according to the recommended guidelines and the water requirements of your plants.
- Test the system: Turn on the water and let the system run for a few minutes to observe the water distribution. Check for any clogged or malfunctioning emitters and adjust their positions if necessary.
Attaching emitters or drip heads is a crucial step in ensuring proper watering for your plants. Take your time to carefully choose the right emitters, position them correctly, and test the system to ensure optimal water distribution.
Step 6: Test the System
With the emitters or drip heads in place, it’s time to test the drip irrigation system to ensure everything is working as intended. Testing the system will help identify any issues, such as leaks or inadequate water distribution, and allow you to make necessary adjustments. Here’s how to test the system:
- Turn on the water: Start by gradually turning on the water to allow it to flow through the drip irrigation system. Keep an eye out for any leaks or signs of water escaping from the connectors, emitters, or drip heads.
- Check for even water distribution: Observe the water distribution along the length of the drip irrigation hose. Ensure that all emitters or drip heads are delivering water evenly and reaching the desired plants.
- Inspect for clogged emitters: Check each emitter or drip head for any signs of clogging. If you notice reduced or uneven water flow from certain emitters, remove and clean them according to the manufacturer’s instructions.
- Adjust flow rate and positioning: Fine-tune the system by adjusting the flow rate and the positioning of emitters or drip heads as needed. Focus on areas where plants may require more or less water, and ensure proper coverage.
- Monitor for a sufficient watering duration: Run the system for a sufficient amount of time to ensure that plants are receiving the appropriate amount of water. Consider factors such as soil type, plant needs, and weather conditions.
Testing the system is crucial to ensure its effectiveness and efficiency. By identifying and addressing any issues during this step, you can optimize the performance of your drip irrigation system and provide the best possible watering for your plants.
Step 7: Adjust and Fine-tune the Irrigation System
After testing the drip irrigation system, it’s time to make any necessary adjustments and fine-tune its performance. This step allows you to optimize water distribution, address any issues, and ensure that your plants receive the right amount of water. Here’s how to adjust and fine-tune the irrigation system:
- Observe plant health: Monitor the health and growth of your plants after the initial watering cycles. Look for signs of overwatering or underwatering, such as wilting, yellowing leaves, or root rot. Adjust the watering schedule or the flow rate of specific emitters to meet the needs of your plants.
- Consider weather conditions: Take into account the current weather conditions and adjust the watering schedule accordingly. During hot and dry periods, you may need to increase the frequency or duration of watering. Conversely, during cooler or rainy seasons, you may need to reduce watering.
- Check for leaks and damaged components: Regularly inspect the system for any leaks, damaged hose segments, or malfunctioning connectors. Repair or replace any faulty components to maintain the efficiency of the system.
- Monitor water usage: Keep track of your water usage and adjust the irrigation system if you notice excessive water consumption. Fine-tune the system by reducing the flow rate, adjusting the watering schedule, or adding water-saving devices such as drip irrigation pressure compensating emitters.
- Regular maintenance: Perform routine maintenance on the drip irrigation system, including cleaning the emitters, clearing any clogged lines or filters, and checking for any obstructions or blockages. This will ensure consistent water distribution and prevent potential issues.
Adjusting and fine-tuning the irrigation system is an ongoing process. Keep a close eye on the health of your plants, consider environmental factors, and make necessary adjustments to provide optimal watering. Regular maintenance will help extend the life of the system and ensure its efficient operation over time.
Conclusion
Congratulations! You have successfully learned how to connect a drip irrigation hose and create an efficient watering system for your plants. By implementing these steps, you can save water, promote healthier plant growth, and reduce the time and effort required to maintain your garden. Let’s recap the key points:
1. Gather the necessary materials, including the drip irrigation hose, connectors, emitters or drip heads, and tools.
2. Prepare the area by clearing obstructions, measuring and planning the layout, and ensuring a suitable water source.
3. Lay out the drip irrigation hose carefully, considering plant positioning and providing adequate coverage.
4. Connect the hose to the water source, ensuring a secure and leak-free connection using appropriate connectors and Teflon tape.
5. Attach emitters or drip heads to deliver water directly to the plants, considering their needs and adjusting the flow rate if necessary.
6. Test the system for leaks, even water distribution, and proper functioning of the emitters. Adjust as needed to optimize water delivery.
7. Fine-tune the system by observing plant health, considering weather conditions, addressing leaks or damage, and performing regular maintenance.
Remember, a well-maintained and properly adjusted drip irrigation system will help you conserve water, promote healthier plant growth, and enjoy a flourishing garden. By following these steps and consistently monitoring and adjusting your system, you will be on your way to a more sustainable and efficient way of watering your plants.
So, put your newfound knowledge into action and start enjoying the benefits of a drip irrigation system in your garden today!