Home>Gardening Techniques>Plant Care>How To Save Dahlia Bulbs

Plant Care
How To Save Dahlia Bulbs
Published: January 23, 2024
Learn how to properly care for your dahlia bulbs and save them for future seasons. Discover expert tips and techniques for successful plant care.
(Many of the links in this article redirect to a specific reviewed product. Your purchase of these products through affiliate links helps to generate commission for Chicagolandgardening.com, at no extra cost. Learn more)
Table of Contents
Introduction
Welcome to the world of dahlia bulbs! These vibrant and versatile flowers bring beauty and elegance to any garden or landscape. However, as the autumn chill sets in, it becomes necessary to protect your dahlias from the harsh winter conditions. This is where the process of saving dahlia bulbs comes into play.
Dahlia bulbs are tubers that store essential nutrients and energy for the plant to survive during the dormant period. By properly saving and storing these bulbs, you can ensure their vitality and enjoy a vibrant display of dahlias year after year.
In this article, we will guide you through the step-by-step process of saving dahlia bulbs, from choosing the right time to replanting them in the spring. We will share valuable tips and insights to help you preserve and care for your dahlia bulbs, ensuring their well-being and longevity.
Let’s dive in and learn how to save your dahlia bulbs, so you can continue to enjoy their beauty and splendor in your garden.
Choosing the Right Time
Timing is crucial when it comes to saving dahlia bulbs. You want to wait until after the first frost when the foliage has yellowed and the plants have entered dormancy. Typically, this occurs in late fall, around October or November, depending on your region.
It’s important not to dig up the bulbs too early, as the plant needs time to transfer energy from the foliage to the tubers. This energy will sustain the bulbs during the storage period and help them thrive when replanted in the spring. Waiting until after the first frost ensures that the energy transfer process is complete.
On the other hand, you don’t want to wait too long and risk damaging the bulbs. If the ground becomes frozen or excessively wet, it can make digging up the bulbs difficult and increase the likelihood of rot or disease. Aim to save your dahlia bulbs when the ground is still workable, but the plants are dormant.
Keep in mind that the specific timing may vary depending on your local climate and weather conditions. Keep an eye on your dahlias as the colder temperatures approach, and use the first frost as a general guideline to determine the right time for saving your dahlia bulbs.
By choosing the right time to save your dahlia bulbs, you are setting the foundation for successful storage and replanting, ensuring healthy and vibrant blooms in the seasons to come.
Preparing the Soil
Before digging up your dahlia bulbs, it’s important to prepare the soil to ensure optimal conditions for their growth and storage. Here are some steps to follow:
- Clear the area: Remove any weeds, debris, or other plants near your dahlia bed. This will help prevent competition for nutrients and minimize the risk of pests and diseases.
- Loosen the soil: Use a garden fork or a tiller to loosen the soil in the dahlia bed. This will make it easier to dig up the bulbs without causing damage. Avoid working the soil when it is wet, as it can lead to compaction.
- Add organic matter: Incorporate organic matter such as compost, well-rotted manure, or leaf mold into the soil. This will improve its structure, drainage, and nutrient content, providing a favorable environment for the bulbs.
- Check the pH level: Dahlias prefer slightly acidic to neutral soil, with a pH range of 6.0 to 7.0. Test the soil’s pH level and make any necessary adjustments using amendments like lime or sulfur.
- Provide adequate drainage: Ensure that the dahlia bed has good drainage to prevent waterlogging, which can lead to bulb rot. If the soil is heavy clay, consider adding sand or perlite to improve drainage.
- Amend with nutrients: If the soil is lacking in nutrients, apply a balanced slow-release fertilizer or organic amendments like bone meal or blood meal. This will provide essential nutrients for the bulbs during storage and promote healthy growth when replanted.
By properly preparing the soil, you are creating a nourishing environment that will support the health and vigor of your dahlia bulbs. This will increase their chances of thriving during storage and producing stunning blooms when they are replanted in the spring.
Digging Up Dahlia Bulbs
When the time comes to dig up your dahlia bulbs, it’s important to approach the task with care to avoid damaging the tubers. Follow these steps for a successful digging process:
- Cut back the foliage: Start by trimming the foliage of your dahlia plants back to about 6 inches from the ground. This will make it easier to see and access the bulbs.
- Loosen the soil: Use a garden fork or a spade to gently loosen the soil around the base of the plants, being mindful not to damage the bulbs. Work in a circular motion, gradually moving closer to the stem until the entire root system is loosened.
- Lift the clump: Once the soil is loose, carefully lift the clump of dahlias out of the ground by grasping the stem near the base. Avoid pulling or yanking, as this can break the stems or separate the tubers from the roots.
- Shake off excess soil: Gently shake the clump to remove any loose soil clinging to the tubers. Be careful not to be too vigorous, as you don’t want to damage the bulbs or cause them to detach from the main stem.
- Separate the tubers: Inspect the clump and identify individual tubers. Carefully separate them from the main stem, ensuring that each tuber has its own set of roots attached. Use clean pruning shears or a sharp knife to make clean cuts.
- Inspect for damage or disease: As you separate the tubers, examine them for any signs of damage, rot, or disease. Discard any bulbs that appear unhealthy or show signs of decay.
Digging up your dahlia bulbs requires patience and precision. By following these steps, you can safely remove the bulbs from the ground, protecting them from damage and ensuring their viability for storage and future replanting.
Cleaning and Sorting Bulbs
Once you have dug up your dahlia bulbs, it’s time to clean and sort them to ensure their health and proper storage. Follow these steps to clean and sort your bulbs:
- Remove excess soil: Gently remove any remaining soil from the bulbs by gently rinsing them with water or using a soft brush. Avoid using excessive force or scrubbing, as this can damage the bulbs.
- Inspect for damage or disease: As you clean the bulbs, carefully examine each one for any signs of damage, pests, or disease. Look for soft spots, discoloration, or mold. Discard any bulbs that show signs of rot or disease to prevent spreading to the healthy bulbs.
- Trim the stems: Trim the remaining stems of the bulbs to about 1-2 inches in length. This will help prevent moisture loss during storage and create a neater appearance.
- Sort by size and variety: Sort the clean bulbs into groups based on their size and variety. This will make it easier to keep track of each type and ensure proper labeling and storage.
- Label each variety: Use markers or labels to clearly indicate the variety of each bulb. This will help you identify and differentiate them during the storage and replanting process.
- Place in a well-ventilated area: Arrange the clean and sorted bulbs in a single layer on trays or baskets in a well-ventilated area. This will allow them to dry thoroughly and prevent moisture buildup that can lead to rot.
- Allow bulbs to dry: Let the bulbs dry for at least a week, or until they feel firm and the stems are completely dry. Avoid exposing them to direct sunlight or high temperatures, as this can cause damage or premature sprouting.
Cleaning and sorting your dahlia bulbs is an essential step in their preservation and storage. By following these steps, you can ensure that your bulbs are healthy, organized, and ready for successful storage until the next planting season.
Drying Bulbs
After cleaning and sorting your dahlia bulbs, the next crucial step is to ensure they are properly dried before storage. Drying the bulbs helps prevent rot and fungal diseases, and prepares them for a period of dormancy. Follow these steps to effectively dry your dahlia bulbs:
- Single layer drying: Arrange the cleaned bulbs in a single layer on a clean and dry surface, such as a mesh screen or a tray lined with newspaper. This allows for proper air circulation and even drying.
- Choose a well-ventilated area: Place the drying bulbs in a cool, dry, and well-ventilated area. This can be a basement, a garage, or a shaded spot outdoors. Avoid areas with high humidity or direct sunlight, as this can lead to mold or premature sprouting.
- Avoid stacking or overcrowding: Ensure that the bulbs are not stacked or overcrowded during the drying process. This prevents the buildup of moisture and allows for even drying. Leave some space between each bulb.
- Check regularly: Periodically check the bulbs during the drying process. Inspect for any signs of rot, mold, or pests. Remove any bulbs that show signs of damage to prevent the spread to healthy bulbs.
- Allow sufficient drying time: Depending on the size and moisture content of the bulbs, drying can take anywhere from one to three weeks. The bulbs are sufficiently dry when they feel firm to the touch and the stems are completely dry.
- Store in a cool, dry place: Once the bulbs are completely dry, you can proceed with storing them in a cool, dry, and dark place. This can be a basement, a garage, or a designated area where the temperature remains consistently between 40-50°F (4-10°C).
Properly drying your dahlia bulbs is essential for their long-term storage and future vitality. By following these steps, you can ensure that your bulbs are well-prepared for a period of dormancy and ready to be replanted in the spring for another season of beautiful blooms.
Storing Bulbs
After your dahlia bulbs have been properly dried, it’s time to store them in a location that provides the ideal conditions for their long-term preservation. Proper storage is crucial for maintaining the health and viability of your bulbs. Here’s how to store your dahlia bulbs:
- Clean and label: Ensure that your bulbs are clean and properly labeled with their variety. This will help you keep track of them during storage and when it’s time to replant.
- Choose a suitable storage container: Select a storage container that provides good ventilation, such as a wooden crate, a mesh bag, or a cardboard box with air holes. Avoid using plastic bags or airtight containers, as they can trap moisture and promote rot.
- Add drying agents: To further protect against moisture buildup and rot, you can add drying agents like silica gel packets or a layer of dry peat moss at the bottom of the storage container. This helps absorb excess moisture and keep the bulbs dry.
- Arrange bulbs: Place the clean and labeled bulbs in the storage container in a single layer. Avoid overcrowding the bulbs, as this can lead to increased moisture and potential rot. If you have a large number of bulbs, consider using multiple containers.
- Store in a cool, dry, and dark place: Place the storage containers in a cool, dry, and dark location with a consistent temperature between 40-50°F (4-10°C). This can be a basement, a garage, or any area where the temperature remains relatively stable.
- Check regularly: Periodically check on your stored bulbs throughout the storage period. Inspect for any signs of rot, mold, or pests. Remove any bulbs that show signs of damage or deterioration to prevent the spread to healthy bulbs.
- Ensure proper ventilation: Proper airflow is essential for maintaining the health of stored bulbs. Make sure there is adequate ventilation in the storage area to prevent moisture buildup and allow for circulation.
By following these storage steps, you can provide the optimal conditions for your dahlia bulbs during their dormant period. This will ensure that they remain healthy, viable, and ready for replanting when the time comes for another season of stunning dahlias in your garden.
Replanting Dahlia Bulbs
After a period of dormancy, it’s time to bring your dahlia bulbs out of storage and replant them to enjoy another season of beautiful blooms. Follow these steps to successfully replant your dahlia bulbs:
- Choose the right time: Wait until the danger of frost has passed and the soil has warmed up in the spring before replanting your dahlia bulbs. This is typically around mid to late spring, depending on your region.
- Prepare the soil: Before planting, prepare the soil by loosening it and incorporating organic matter like compost or well-rotted manure to improve drainage and nutrient content.
- Choose a suitable location: Select a sunny location with well-drained soil for optimum growth and flowering. Dahlias thrive in areas with at least 6-8 hours of direct sunlight per day.
- Dig the planting hole: Dig a hole large enough to accommodate the dahlia bulb. The depth of the hole should allow the bulb to be planted with the top just below the soil surface.
- Plant the bulbs: Place the bulb in the planting hole with the eye (growth point) facing up. Fill the hole with soil, firming it gently around the bulb to ensure good soil-to-bulb contact.
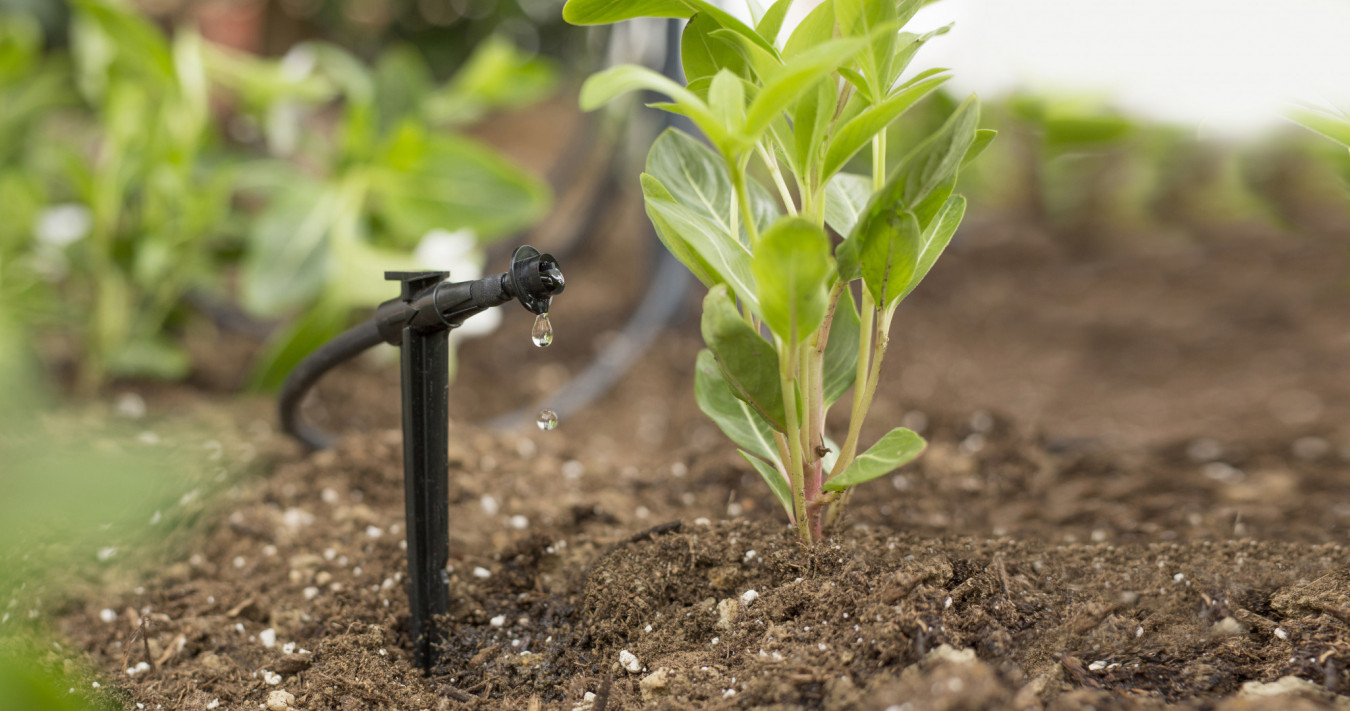
- Water thoroughly: After planting, water the area thoroughly to settle the soil and provide moisture for the bulb. Ensure that the soil is evenly moist but not waterlogged throughout the growing season.
- Provide support: Depending on the variety and size of your dahlias, consider providing support such as stakes or cages to help the plants remain upright as they grow.
- Maintain regular care: Keep an eye on your dahlias as they grow and provide regular care, including watering, fertilizing, and monitoring for pests and diseases. Remove any weeds that compete with the dahlias for nutrients.
- Enjoy the blooms: With proper care and maintenance, your dahlia bulbs will reward you with stunning blooms throughout the growing season. Regularly deadhead spent flowers to encourage continuous blooming.
Replanting your dahlia bulbs is an exciting time that marks the start of a new season of vibrant blooms. By following these steps, you can ensure successful establishment and growth, and enjoy the beauty and splendor of your dahlias in all their glory.
Conclusion
Saving dahlia bulbs is a rewarding and essential process for preserving the beauty and longevity of these stunning flowers. By choosing the right time, preparing the soil, digging up the bulbs, cleaning and sorting them, drying properly, and storing them correctly, you can ensure their health and vitality for future seasons of growth and blooming.
Throughout this article, we have provided you with step-by-step instructions and insights on each stage of the process. Taking the time to carefully dig up, clean, dry, and store your dahlia bulbs will reward you with vibrant blooms year after year.
Remember, each variety of dahlia may have specific care requirements, so be sure to research and understand the needs of your particular bulbs. With proper care and attention, your dahlia bulbs will thrive and provide a dazzling display in your garden.
So, roll up your sleeves, get your hands dirty, and embark on the journey of saving and caring for your dahlia bulbs. Enjoy the beauty and splendor that these magnificent flowers bring to your outdoor space, and revel in the satisfaction of knowing that you have successfully preserved and nurtured their vitality for seasons to come.