Home>Gardening Tips and Tricks>Problem Solving>How To Save Herbs
Problem Solving
How To Save Herbs
Modified: January 22, 2024
Learn effective problem-solving techniques to save and preserve your herbs. Discover expert tips and tricks to overcome common challenges and ensure the longevity of your herb garden.
(Many of the links in this article redirect to a specific reviewed product. Your purchase of these products through affiliate links helps to generate commission for Chicagolandgardening.com, at no extra cost. Learn more)
Table of Contents
Introduction
Welcome to the world of herbs! Whether you have a bountiful herb garden or simply enjoy cooking with fresh herbs, you know how delightful it is to incorporate their aromatic flavors into your dishes. But what happens when you have an abundance of herbs and can’t use them all at once? That’s where saving herbs comes in handy.
Saving herbs allows you to preserve their freshness, flavor, and medicinal properties, ensuring that you can enjoy them long after their growing season. Whether you have an overabundance of basil, rosemary, mint, or any other herb, there are various methods for saving them that will keep their essence intact.
In this article, we will explore the different methods of saving herbs, including drying, freezing, and making herb-infused oils, vinegars, and butters. We will also discuss the proper storage techniques to maintain the quality of dried herbs. By the end of this article, you’ll have a plethora of options to choose from when it comes to preserving your herbs.
So, let’s dive in and discover the wonderful world of saving herbs!
Importance of Saving Herbs
For herb enthusiasts and home cooks, the importance of saving herbs cannot be overstated. Here are a few reasons why saving herbs is so crucial:
- Extended Availability: When you save herbs, you extend their availability beyond their growing season. This means that you can enjoy the flavors and benefits of your favorite herbs all year round, even when they are not readily available in your garden or the grocery store.
- Economical Choice: Growing your own herbs or purchasing them in bulk can be a cost-effective option. By saving herbs, you prevent wastage and maximize their usage, saving money in the long run. Additionally, homemade herb-infused products can be much cheaper compared to store-bought alternatives.
- Preservation of Freshness: Fresh herbs have vibrant colors, intense flavors, and potent aroma that can elevate any dish. Saving herbs allows you to lock in their freshness, ensuring that their natural essence is preserved. This way, you can enjoy the same quality of herbs in your recipes without compromise.
- Health Benefits: Herbs are not just flavorful additions to dishes; they also offer numerous health benefits. Many herbs have medicinal properties that can improve digestion, boost the immune system, reduce inflammation, and promote overall well-being. By saving herbs, you can continue to harness their therapeutic properties for culinary and medicinal purposes.
- Creative Culinary Exploration: Saving herbs opens up a world of culinary possibilities. Whether you’re experimenting with new recipes, adding a twist to classic dishes, or creating your own infused oils and vinegars, saving herbs allows you to explore and enhance your culinary skills. The preserved herbs can be used in soups, stews, sauces, marinades, teas, cocktails, and more.
Now that you understand the importance of saving herbs, let’s delve into the different methods you can employ to preserve the freshness and flavors of your beloved herbs.
Different Methods of Saving Herbs
There are several methods you can use to save herbs and extend their shelf life. Here, we will explore the most popular and effective methods:
- Drying Herbs: Drying is one of the oldest and simplest methods of preserving herbs. It involves removing the moisture from the herbs, which helps to retain their flavor and aroma. There are several ways to dry herbs, such as air drying, using a dehydrator, or using the oven. Each method has its own advantages, and the choice depends on personal preference and the available resources.
- Freezing Herbs: Freezing herbs is another excellent method for preserving their freshness. This method involves washing and chopping the herbs before placing them in freezer-safe containers or bags. Freezing herbs helps to maintain their color, flavor, and aroma. Frozen herbs can be added directly to cooked dishes, making it a convenient option when you need herbs on hand all year round.
- Making Herb-infused Oils: Herb-infused oils are a fantastic way to preserve the essence of herbs while infusing them into a carrier oil, such as olive oil. The process involves heating the oil and adding dried or fresh herbs to infuse their flavors. Herb-infused oils can be used in cooking, salad dressings, marinades, and even for skincare purposes.
- Making Herb-infused Vinegars: Herb-infused vinegars offer a unique tangy and aromatic twist to your culinary creations. The process involves combining fresh or dried herbs with vinegar and allowing them to infuse over time. Herb-infused vinegars can be used in salad dressings, marinades, pickling, and even as a refreshing drink when mixed with water.
- Making Herb Butters: Herb butter is a versatile and delicious way to preserve herbs. It involves blending fresh or dried herbs into softened butter, which can then be used as a spread, topping for grilled meats, or as an ingredient in various recipes. Herb butter can be stored in the refrigerator or freezer for future use.
Each method has its own benefits and is suited for different purposes. Feel free to experiment with different methods and find the ones that work best for your preferences and needs. Now, let’s explore each of these methods in more detail.
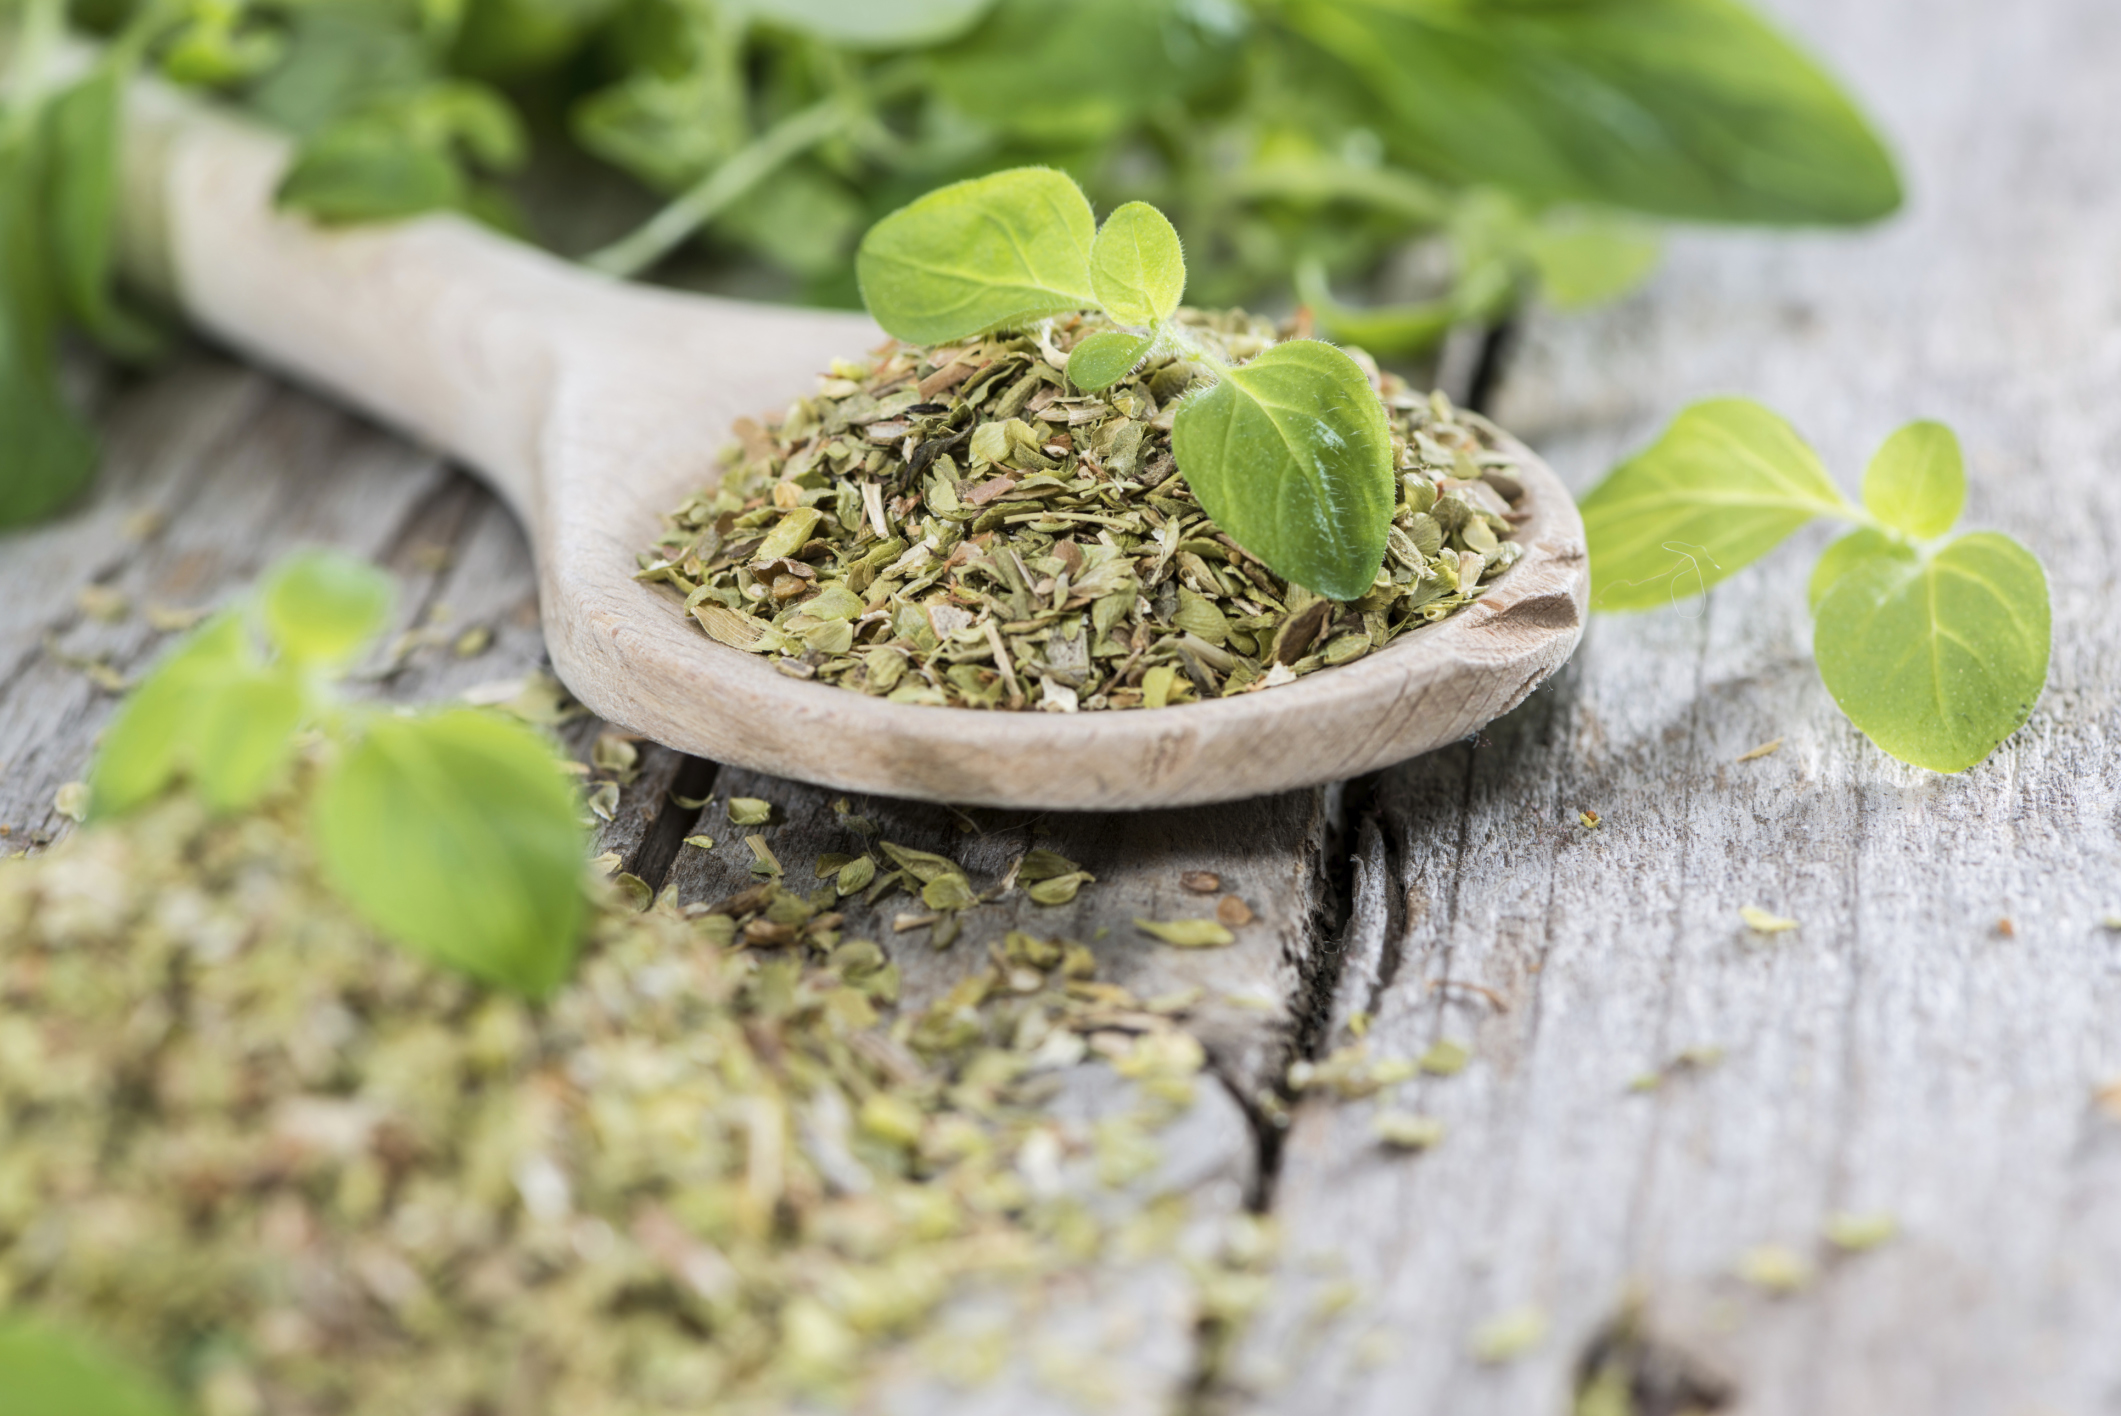
Drying Herbs
Drying herbs is a traditional and effective method of preserving their flavors and extending their shelf life. When herbs are dried, most of their moisture is removed, allowing them to retain their flavor, aroma, and nutritional value. Here are a few methods you can use to dry herbs:
- Air Drying: Air drying is the most common and easiest method of drying herbs. To air dry herbs, gather small bunches of fresh herbs and tie them with twine or rubber bands. Hang the bundles upside down in a warm, dry, and well-ventilated area. Avoid direct sunlight as it can cause the herbs to lose their color and potency. Within a few days or weeks, depending on the herb, the leaves will become crispy and dry. Once fully dry, store the herbs in an airtight container away from light and moisture.
- Using a Dehydrator: If you want to speed up the drying process, consider using a dehydrator. Spread the herbs in a single layer on the dehydrator trays and set the temperature to a low setting, usually between 95°F and 115°F (35°C and 46°C). The dehydrator will circulate warm air, gently drying the herbs without overheating them. Check the herbs regularly to ensure they are drying evenly. Once dry, remove the herbs from the dehydrator and store them in airtight containers.
- Oven Drying: If you don’t have a dehydrator, you can use your oven to dry herbs. Preheat the oven to its lowest setting, usually around 140°F (60°C). Place the herbs on a baking sheet lined with parchment paper, ensuring they are in a single layer and not touching each other. Place the baking sheet in the oven and prop the oven door open slightly to allow moisture to escape. Keep a close eye on the herbs and remove them once they are dry and crumbly. Allow them to cool completely before storing them in airtight containers.
Regardless of the method you choose, it’s important to handle the herbs gently during the drying process to prevent bruising or damage. It’s also important to harvest herbs at their peak for optimal flavor and potency.
Dried herbs can be used directly in cooking, or you can grind them into a powder using a mortar and pestle or a spice grinder. Remember to store dried herbs in airtight containers away from light, heat, and moisture to prolong their shelf life and preserve their flavors. Properly dried and stored herbs can last for up to a year or more.
Now that you know how to dry herbs, let’s move on to the next method: freezing herbs.
Freezing Herbs
Freezing herbs is a simple and convenient method to preserve their freshness and vibrant flavors. This method is ideal for herbs that don’t retain their flavor well when dried, such as basil, cilantro, and mint. Here’s how you can freeze herbs:
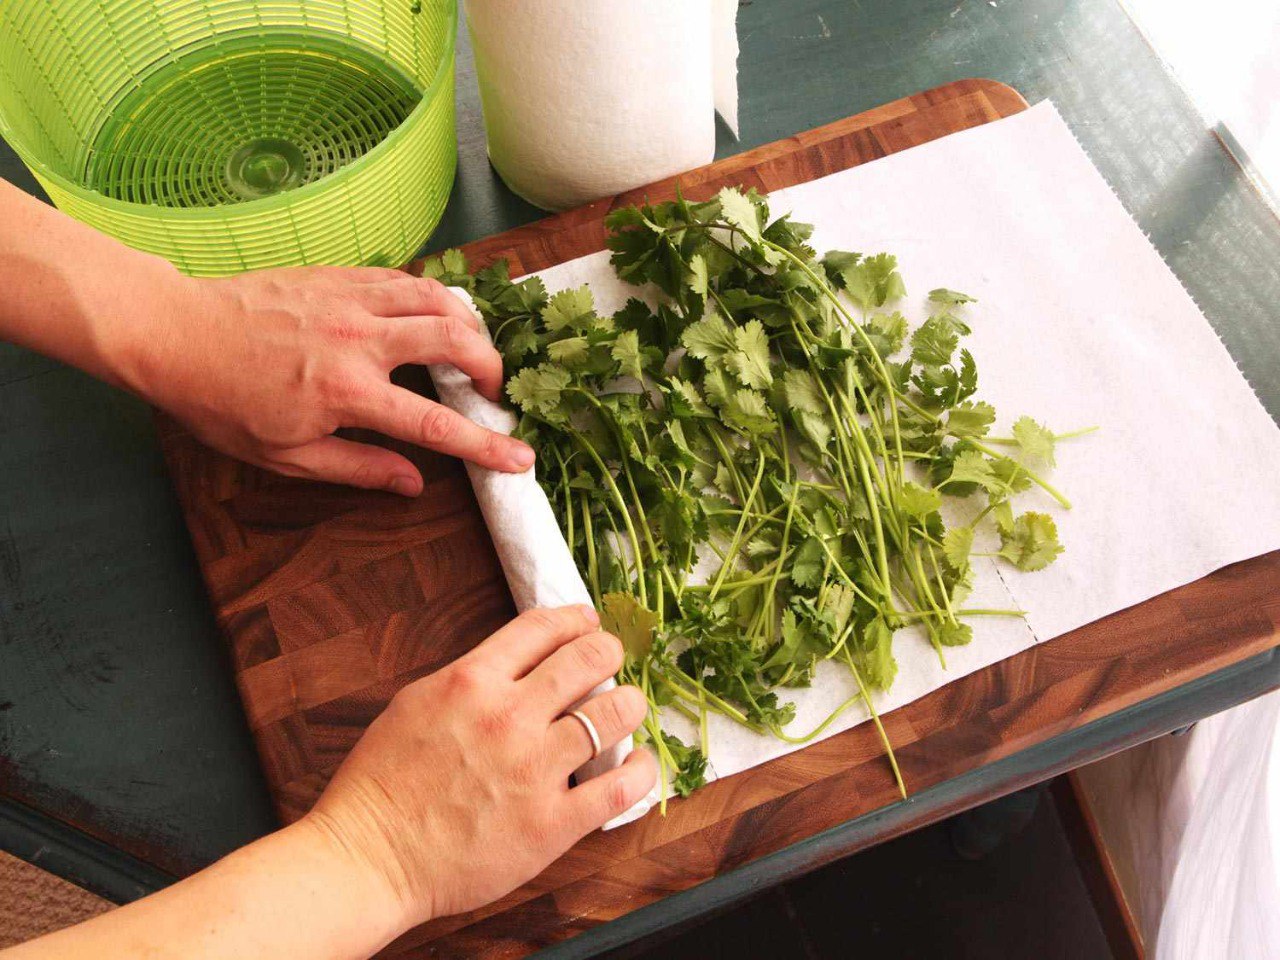
- Wash and Dry: Start by washing the herbs gently under running water to remove any dirt or debris. Pat them dry with a clean kitchen towel or use a salad spinner to remove excess moisture.
- Chop or Leave Whole: Depending on your preference and how you plan to use the herbs, you can choose to chop them finely or leave them whole. Keep in mind that finely chopped herbs are more convenient for adding to dishes, while whole herbs are better for garnishing or infusing into liquids.
- Flash Freeze: Arrange the herbs in a single layer on a baking sheet lined with parchment paper or a silicone mat. Make sure the herbs are not touching each other. Place the baking sheet in the freezer and allow the herbs to freeze completely. This method, known as flash freezing, prevents the herbs from sticking together, making it easier to portion out the desired amount later on.
- Transfer to Containers: Once the herbs are frozen, transfer them into freezer-safe containers or resealable plastic bags. Remove as much air as possible from the bags before sealing them to prevent freezer burn. Label the containers or bags with the herb name and the date of freezing.
- Usage: Frozen herbs can be used directly in cooked dishes, such as soups, stews, sauces, and stir-fries. You can add them frozen or thaw them before use, depending on the recipe. For thawing, simply remove the desired amount of herbs from the freezer and allow them to defrost in the refrigerator or at room temperature.
By freezing herbs, you can enjoy the fresh flavors of your favorite herbs even during the off-season. It’s a great way to have a stash of herbs readily available for impromptu culinary creations.
Remember to label and date your frozen herbs for easy reference and use them within a year for optimal flavor. Now, let’s explore another creative method to save and savor the essence of herbs: making herb-infused oils.
Making Herb-infused Oils
Herb-infused oils are a delightful way to preserve the flavors and aromas of fresh herbs while incorporating them into various culinary creations. The process of making herb-infused oils is surprisingly simple and can be customized according to your preferences. Here’s how to make herb-infused oils:
- Select Your Herbs: Choose fresh herbs with robust flavors, such as basil, rosemary, thyme, or dill. Rinse the herbs gently to remove any dirt or debris and pat them dry with a towel to remove excess moisture. Dry herbs can also be used, but fresh herbs tend to yield a more intense flavor.
- Prep the Herbs: Remove any woody stems or tough parts from the herbs and finely chop them. This helps release the flavors and allows the oils to infuse more easily. You can also leave the herbs whole if you prefer a milder infusion.
- Choose Your Oil: Select a high-quality oil with a neutral flavor, such as olive oil, avocado oil, or grapeseed oil. The oil acts as a carrier and absorbs the flavors and aromas of the herbs. Extra virgin olive oil is a popular choice due to its rich flavor and health benefits.
- Infusion Method: There are two common methods for infusing the herbs into the oil: the cold infusion method and the heat infusion method.
- Cold Infusion Method: In this method, place the chopped herbs or whole herbs in a clean, dry glass jar. Pour the oil over the herbs until they are completely submerged. Seal the jar tightly and store it in a cool, dark place for about 2 to 4 weeks. Shake the jar gently every few days to help distribute the flavors. Once the desired level of infusion is reached, strain the oil through a fine mesh sieve or cheesecloth, discarding the herbs. Transfer the infused oil into a clean, airtight glass bottle for storage.
- Heat Infusion Method: This method allows for a quicker infusion process. Gently heat the oil in a saucepan over low heat until warm, but not boiling. Add the herbs to the warm oil and allow them to infuse for about 1 to 2 hours, stirring occasionally. Remove from heat and let it cool completely. Strain the oil to remove the herbs and transfer the infused oil into a clean, airtight glass bottle.
- Storage and Usage: Store the herb-infused oil in a cool, dark place to maintain its freshness and flavors. Label the bottle with the herb used and the date of infusion. Herb-infused oils can be used in salad dressings, marinades, drizzled over roasted vegetables, or used as a dipping oil for bread. They also make fantastic gifts for food enthusiasts!
Experiment with different herb combinations and oils to create your own unique flavors. Get creative and add other ingredients like garlic cloves, chili flakes, or lemon zest for an extra twist. Now you have a versatile and flavorful herb-infused oil to enhance your culinary creations.
Next, let’s discover the art of making herb-infused vinegars.
Making Herb-infused Vinegars
Herb-infused vinegars add a delightful tang and herbal aroma to your dishes, making them an excellent way to preserve and enjoy the essence of herbs. Creating your own herb-infused vinegars is easy, and the possibilities for flavor combinations are endless. Here’s how to make herb-infused vinegars:
- Choose Your Herbs: Select fresh herbs with robust flavors, such as thyme, rosemary, tarragon, or basil. Rinse the herbs gently to remove any dirt or debris and pat them dry with a towel to remove excess moisture. You can use a single herb or a combination of herbs to create unique flavor profiles.
- Prep the Herbs: Remove any tough stems or woody parts from the herbs and roughly chop them. Rough chopping helps release the flavors and allows the vinegars to infuse more effectively. If you prefer a milder infusion, you can leave the herbs whole.
- Choose Your Vinegar: Choose a high-quality vinegar with a neutral or complementary flavor, such as white wine vinegar, apple cider vinegar, or rice vinegar. The acidity of the vinegar helps preserve the herbs and extracts their flavors. Experiment with different types of vinegar to find the one that best suits your taste preferences.
- Combine Herbs and Vinegar: Place the chopped herbs or whole herbs in a clean, dry glass jar. Pour the vinegar over the herbs until they are completely submerged. Use a non-reactive lid, such as a plastic or cork lid, to avoid any corrosion caused by the acidity of the vinegar. Seal the jar tightly and give it a gentle shake to distribute the herbs.
- Infusion Period: Store the jar in a cool, dark place for about 2 to 4 weeks to allow the flavors to infuse. Shake the jar occasionally to help release the herb flavors. The longer the infusion period, the stronger the herb flavors will be, so adjust the infusion time based on your taste preferences.
- Strain and Transfer: After the desired infusion period, strain the herb-infused vinegar through a fine mesh sieve or cheesecloth to remove the herbs. Transfer the infused vinegar into a clean, airtight glass bottle or jar for storage. You can add a sprig or two of fresh herbs to the bottle for visual appeal if desired.
- Usage: Herb-infused vinegars can be used in salad dressings, marinades, sauces, or as a flavorful addition to various dishes. They also make wonderful gifts for food lovers! Label the bottle with the herb used and the date of infusion for easy reference.
Feel free to experiment with different herbs and vinegars to create unique flavor combinations. Add ingredients like garlic, chili flakes, or citrus zest to elevate the flavor profile even further. With homemade herb-infused vinegars, you’ll have a tangy and aromatic addition to your culinary repertoire.
Now, let’s move on to another method of preserving herbs: making herb butters.
Making Herb Butters
Herb butters are a delightful way to preserve the flavors and aromas of herbs while adding a creamy and savory twist to your dishes. Whether slathered on bread, melted onto grilled meats, or used as a flavor enhancer in cooking, herb butters are versatile and easy to make. Here’s how to make your own herb butter:
- Select Your Herbs: Choose fresh herbs with robust flavors, such as parsley, chives, thyme, or rosemary. Rinse the herbs gently to remove any dirt or debris and pat them dry with a towel to remove excess moisture. You can use one type of herb or create unique flavor combinations using multiple herbs.
- Prep the Herbs: Remove any tough stems or woody parts from the herbs and finely chop them. Finely chopping the herbs helps to distribute their flavors evenly throughout the butter.
- Soften the Butter: Allow the butter to come to room temperature so that it becomes soft and malleable. This makes it easier to mix the herbs into the butter and ensures even distribution of flavors.
- Mix the Herbs and Butter: In a bowl, combine the softened butter and the chopped herbs. Use a fork or spoon to mix them together until the herbs are evenly incorporated into the butter. You can also add a pinch of salt or other seasonings to enhance the flavor, if desired.
- Shape and Store the Butter: Place the herb butter mixture on a sheet of parchment paper or plastic wrap. Roll the paper or wrap around the butter to form a log or shape it into a small mound. Twist the ends of the paper or wrap tightly to secure the butter. Refrigerate the herb butter for at least an hour, or until firm. You can also freeze the herb butter for longer storage.
- Usage: Herb butter can be used in various ways – spread it on bread, melt it over grilled meats or vegetables, or use it as a base for sauces and dressings. It adds a burst of flavor to any dish and is incredibly versatile in the kitchen. You can also slice portions of the herb butter log for easy use when needed.
Experiment with different herbs and add-ins to create your own unique herb butter combinations. From simple garlic and parsley butter to complex herb blends, the possibilities are endless.
Remember to label the herb butter with the herbs used and the date of preparation for easy reference. Stored in the refrigerator or freezer, herb butter can last for several weeks or months, allowing you to enjoy the fresh flavors of herbs even when they are not in season.
Now that you know how to make herb butter, you have yet another delicious and aromatic way to preserve the essence of herbs. Next, we will explore the proper storage techniques for dried herbs.
Storing Dried Herbs Properly
Proper storage is key to maintaining the quality, flavor, and aroma of dried herbs. When stored correctly, dried herbs can last for a long time while retaining their potency. Here are some tips for storing dried herbs properly:
- Choose Airtight Containers: Store dried herbs in airtight containers to protect them from exposure to air, moisture, and light. Glass jars with tight-fitting lids are ideal for preserving the freshness of dried herbs. Make sure the containers are clean, dry, and free from any residual smells or odors.
- Label and Date: Properly label each container with the name of the herb and the date of drying. This ensures that you can easily identify and track the freshness of your herbs over time.
- Store in a Cool, Dark Place: Herbs are sensitive to light, heat, and moisture. To maximize their shelf life, store dried herbs in a cool, dark place, away from direct sunlight or heat sources like stoves or ovens. A pantry or cupboard is an ideal location for storing dried herbs.
- Avoid Excessive Handling: Limit the exposure of dried herbs to air and moisture by avoiding excessive handling. When using dried herbs, take out the desired amount and promptly close the container to prevent the rest from losing their flavor and potency.
- Keep Away from Spices: Store dried herbs separately from other strongly scented spices. Herbs can absorb the aromas of nearby spices, potentially altering their own flavors. If you prefer to store herbs and spices in close proximity, consider using odor-proof containers or zip-top bags to prevent flavor cross-contamination.
- Check for Quality: Periodically check your stored dried herbs for any signs of moisture, mold, or loss of flavor. If the herbs appear discolored, have a musty smell, or lack potency, it’s best to discard them and replace them with fresh ones.
By following these storage guidelines, you can preserve the quality and flavors of your dried herbs for an extended period. However, keep in mind that dried herbs will gradually lose their potency over time. It’s a good practice to replenish your herb stash periodically to ensure you always have high-quality herbs on hand for your culinary experiments.
Now that you know how to properly store dried herbs, you can enjoy their flavors and aromas for an extended period. Let’s move on to some important cautions and additional tips for saving herbs.
Cautions and Tips for Saving Herbs
While saving herbs is a wonderful way to preserve their flavors and aromas, there are a few cautions and tips to keep in mind to ensure the best results. Here are some important considerations:
- Harvest at the Right Time: For optimal flavor and potency, harvest herbs at their peak. In general, it’s best to harvest herbs in the morning after the dew has dried but before the heat of the day. This is when the essential oil content is at its highest.
- Quality of Herbs: Use fresh and high-quality herbs for best results. Fresh herbs have better flavors and aromas compared to dried ones. If you’re using dried herbs, make sure they haven’t passed their expiration date and are still potent.
- Proper Washing and Drying: Before saving or using fresh herbs, make sure to wash them gently to remove any dirt or debris. Pat them dry with a towel or use a salad spinner to remove excess moisture. Properly dried herbs help prevent mold and decay during the preservation process.
- Avoid Contaminated Herbs: Ensure that the herbs you save are free from insect infestations, diseases, or mold. Infected or contaminated herbs should not be saved, as they can spoil other herbs in storage.
- Use Safe Containment: When storing herb-infused oils, vinegars, or butters, ensure that you are using clean and sterilized containers. Proper sealing and hygiene prevent the growth of bacteria and maintain the integrity of the preserved herbs.
- Proportion and Taste: Experiment with the proportion of herbs used in your preservation methods. Consider the strength and intensity of each herb to strike the right balance of flavors. Taste as you go to achieve the desired flavor profile.
- Safe Herb Choices: Some herbs may not be suitable for certain preservation methods. For example, delicate herbs like basil may lose their vibrant color and flavor when dried, but they work well in herb-infused oils or vinegars. Research the specific herb and preservation method to ensure compatibility.
- Storage Considerations: Keep your saved herbs away from open flames, heat sources, and excessive humidity. Extreme temperatures can cause the herbs to lose their potency and flavor more quickly.
- Rotate and Discard: Dried herbs and preserved products should be used within a reasonable time frame. Over time, they may lose flavor and become less potent. To ensure optimal freshness, rotate your herb stock and discard any herbs that show signs of spoilage or diminished quality.
By following these cautions and tips, you can preserve herbs successfully and enjoy their flavors and aromas for an extended period. Remember to always use your saved herbs within their recommended shelf life for the best culinary results.
With these helpful guidelines and considerations, you are now equipped to save your favorite herbs and enjoy their delightful flavors and aromas long after the growing season has ended.
Conclusion
Saving herbs is a valuable skill that allows you to preserve the freshness, flavors, and aromas of your favorite herbs long after their growing season. Through various methods such as drying, freezing, making herb-infused oils, vinegars, and butters, you can ensure that your herbs are available to enhance your culinary creations throughout the year.
Drying herbs is a traditional and effective method that removes moisture and helps to retain the essence of the herbs. Air drying, using a dehydrator, or oven drying are all viable options to dry herbs to perfection. Freezing herbs is another simple and convenient method that maintains their vibrant colors and flavors. Flash freeze the herbs before transferring them to freezer-safe containers for easy usage in cooking.
Making herb-infused oils and vinegars is a creative way to save herbs while infusing their unique flavors into various dishes and dressings. Herb-infused oils add depth and richness, while herb-infused vinegars provide a tangy and aromatic twist to your culinary creations. Herb butters, on the other hand, offer a creamy and savory addition that can take your dishes to the next level.
Proper storage is essential for preserving the quality and potency of dried herbs. Choose airtight containers and store them in a cool, dark place to maintain freshness. Label and date your herbs for easy identification and rotation purposes. Additionally, exercise caution when saving herbs, ensuring they are of high quality, properly washed and dried, and free from contamination or spoilage.
By following these tips and guidelines, you can successfully save your herbs and enjoy their flavors and aromas for an extended period. Whether you’re a seasoned herb enthusiast or a home cook looking to elevate your culinary skills, the art of saving herbs opens a world of possibilities.
So, embrace the wonderful world of saving herbs and savor the essence of these aromatic plants in your favorite dishes. Whether it’s a sprinkle of dried herbs, a spoonful of herb-infused oil, or a dollop of herb butter, these preserved herbs will add that magic touch to your culinary creations throughout the seasons.