Home>Gardening Tips and Tricks>Maximizing Yield>How Do You Freeze Herbs
Maximizing Yield
How Do You Freeze Herbs
Modified: January 22, 2024
Learn how to maximize your herb yield by freezing them. Discover the best techniques and tips to preserve the freshness and flavor of your herbs.
(Many of the links in this article redirect to a specific reviewed product. Your purchase of these products through affiliate links helps to generate commission for Chicagolandgardening.com, at no extra cost. Learn more)
Table of Contents
Introduction
Welcome to the world of herbal preservation! Whether you are an avid gardener with a surplus of fresh herbs or simply looking to add flavor to your culinary creations, freezing herbs is a fantastic way to maximize their yield and keep them fresh for an extended period of time.
Freezing herbs not only allows you to enjoy the vibrant flavors and aromas year-round but also helps to minimize waste. Instead of letting those precious herbs wither away and lose their potency, freezing them preserves their natural essence, ensuring you always have a store of flavorful ingredients on hand.
But why freeze herbs, you may wonder, when you can simply dry them? While drying herbs is a common preservation method, freezing offers distinct advantages. When herbs are frozen, their essential oils are locked in, preserving their flavor and fragrance more effectively than drying. Additionally, frozen herbs retain their vibrant green color and a fresher taste, making them a preferred choice for many culinary enthusiasts.
With the right techniques and a little preparation, freezing herbs is an easy and efficient process. In this article, we will guide you through the steps of freezing herbs, from choosing the right herbs to storing and using them effectively. So, let’s dive in and discover how you can prolong the life of your favorite herbs and take your culinary creations to new heights!
Why Freeze Herbs?
When it comes to preserving herbs, freezing is one of the best methods available. Here are a few compelling reasons why you should consider freezing your herbs:
- Retains Freshness: Freezing herbs allows you to capture their freshness at its peak. Unlike drying methods which can cause herbs to lose their flavor and aroma, freezing locks in the essential oils, ensuring that you can enjoy the same vibrant taste and fragrance even after months of storage.
- Prolongs Shelf Life: By freezing herbs, you can extend their shelf life significantly. Fresh herbs often have a short lifespan, withering away within days. Freezing suspends their deterioration process and allows you to enjoy the herbs for months, providing you with a constant supply of flavorful ingredients without worrying about spoilage.
- Preserves Nutritional Value: Freezing herbs helps preserve their nutrient content. Herbs are known for their various health benefits, and by freezing them, you can retain their valuable vitamins, minerals, and antioxidants. This ensures that you can enjoy the nutritional benefits of herbs even when they are out of season.
- Convenience: Having a stash of frozen herbs in your freezer offers unparalleled convenience. You’ll always have access to a wide variety of herbs right at your fingertips, making it easy to incorporate them into your everyday cooking. No need to rush to the store or grow them in your garden every time a recipe calls for them.
- Cost-Effective: Buying fresh herbs from the store can be expensive, especially when they are out of season. Freezing herbs allows you to take advantage of seasonal abundance or your own homegrown herbs while saving money. You can stock up on fresh herbs when they are readily available and freeze them for later use, reducing your overall grocery expenses.
- Versatility: Frozen herbs can be used in a variety of dishes. Whether you’re creating savory sauces, hearty stews, refreshing beverages, or even baking sweet treats, you can easily incorporate frozen herbs into your recipes. Their flavor and aroma will infuse your dishes, adding a burst of freshness and complexity.
Now that you understand why freezing herbs is a fantastic option, let’s explore the process of selecting the right herbs and preparing them for freezing.
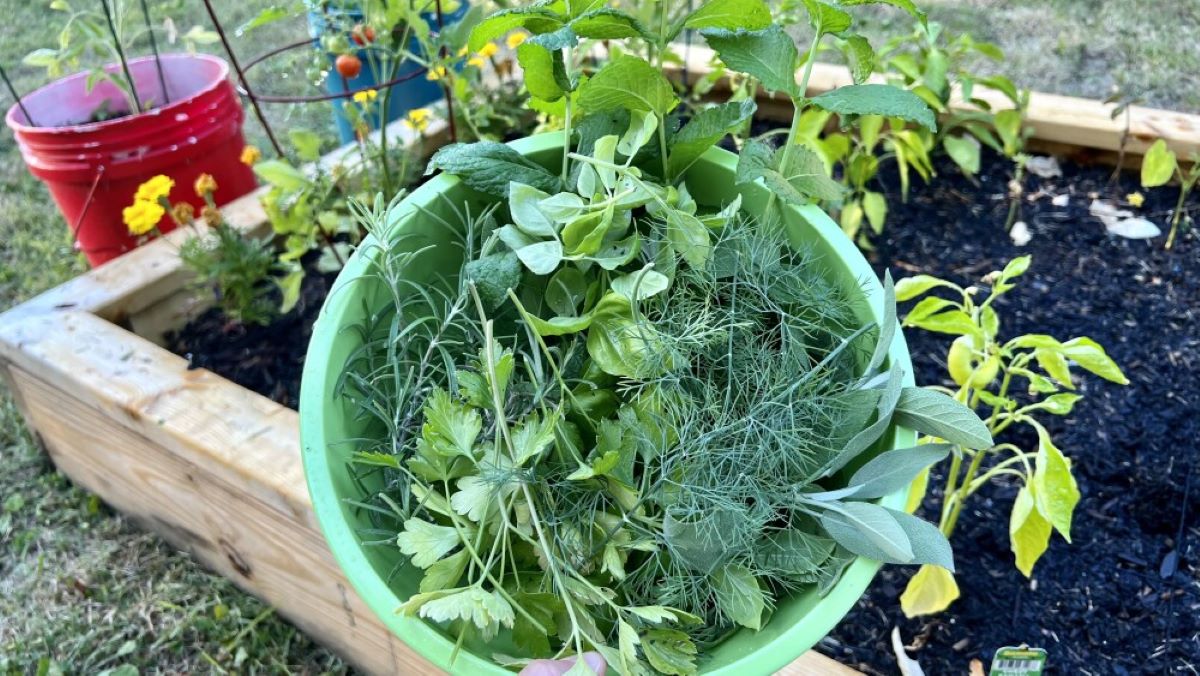
Choosing the Right Herbs
When it comes to freezing herbs, not all varieties are created equal. Some herbs freeze better than others, retaining their flavor and texture more effectively. Here are some factors to consider when choosing the right herbs for freezing:
- Hardiness: Select herbs that are known for their hardiness and ability to withstand freezing temperatures. Herbs like rosemary, thyme, sage, oregano, and parsley freeze exceptionally well. Softer herbs like basil, cilantro, and mint can also be frozen, but they may experience some texture changes.
- Freshness: Choose herbs that are fresh and in their prime. The quality of the herbs at the time of freezing will directly impact the quality of the frozen product. Harvest your herbs in the morning when the essential oils are at their peak for maximum flavor and aroma.
- Culinary Use: Consider the herbs you commonly use in your cooking or the ones that complement the dishes you enjoy. Freezing your favorite herbs ensures that you always have them readily available for seasoning your dishes with familiar flavors. Experiment with different combinations to suit your taste preferences.
- Growing Conditions: Take note of the growing conditions for each herb. Some herbs, like basil and parsley, thrive in warmer temperatures, while others, like rosemary and thyme, prefer a cooler environment. Understanding the optimal growing conditions will give you insight into how well they may freeze.
- Personal Preference: Ultimately, the choice of herbs for freezing comes down to personal preference and the flavors you enjoy. Consider the herbs that you use frequently and would benefit from freezing to have on hand year-round.
Remember, not all herbs freeze the same way, so it’s important to take these factors into account when selecting the herbs you want to freeze. With the right herbs chosen, you’re now ready to move on to the next step: harvesting and cleaning your herbs.
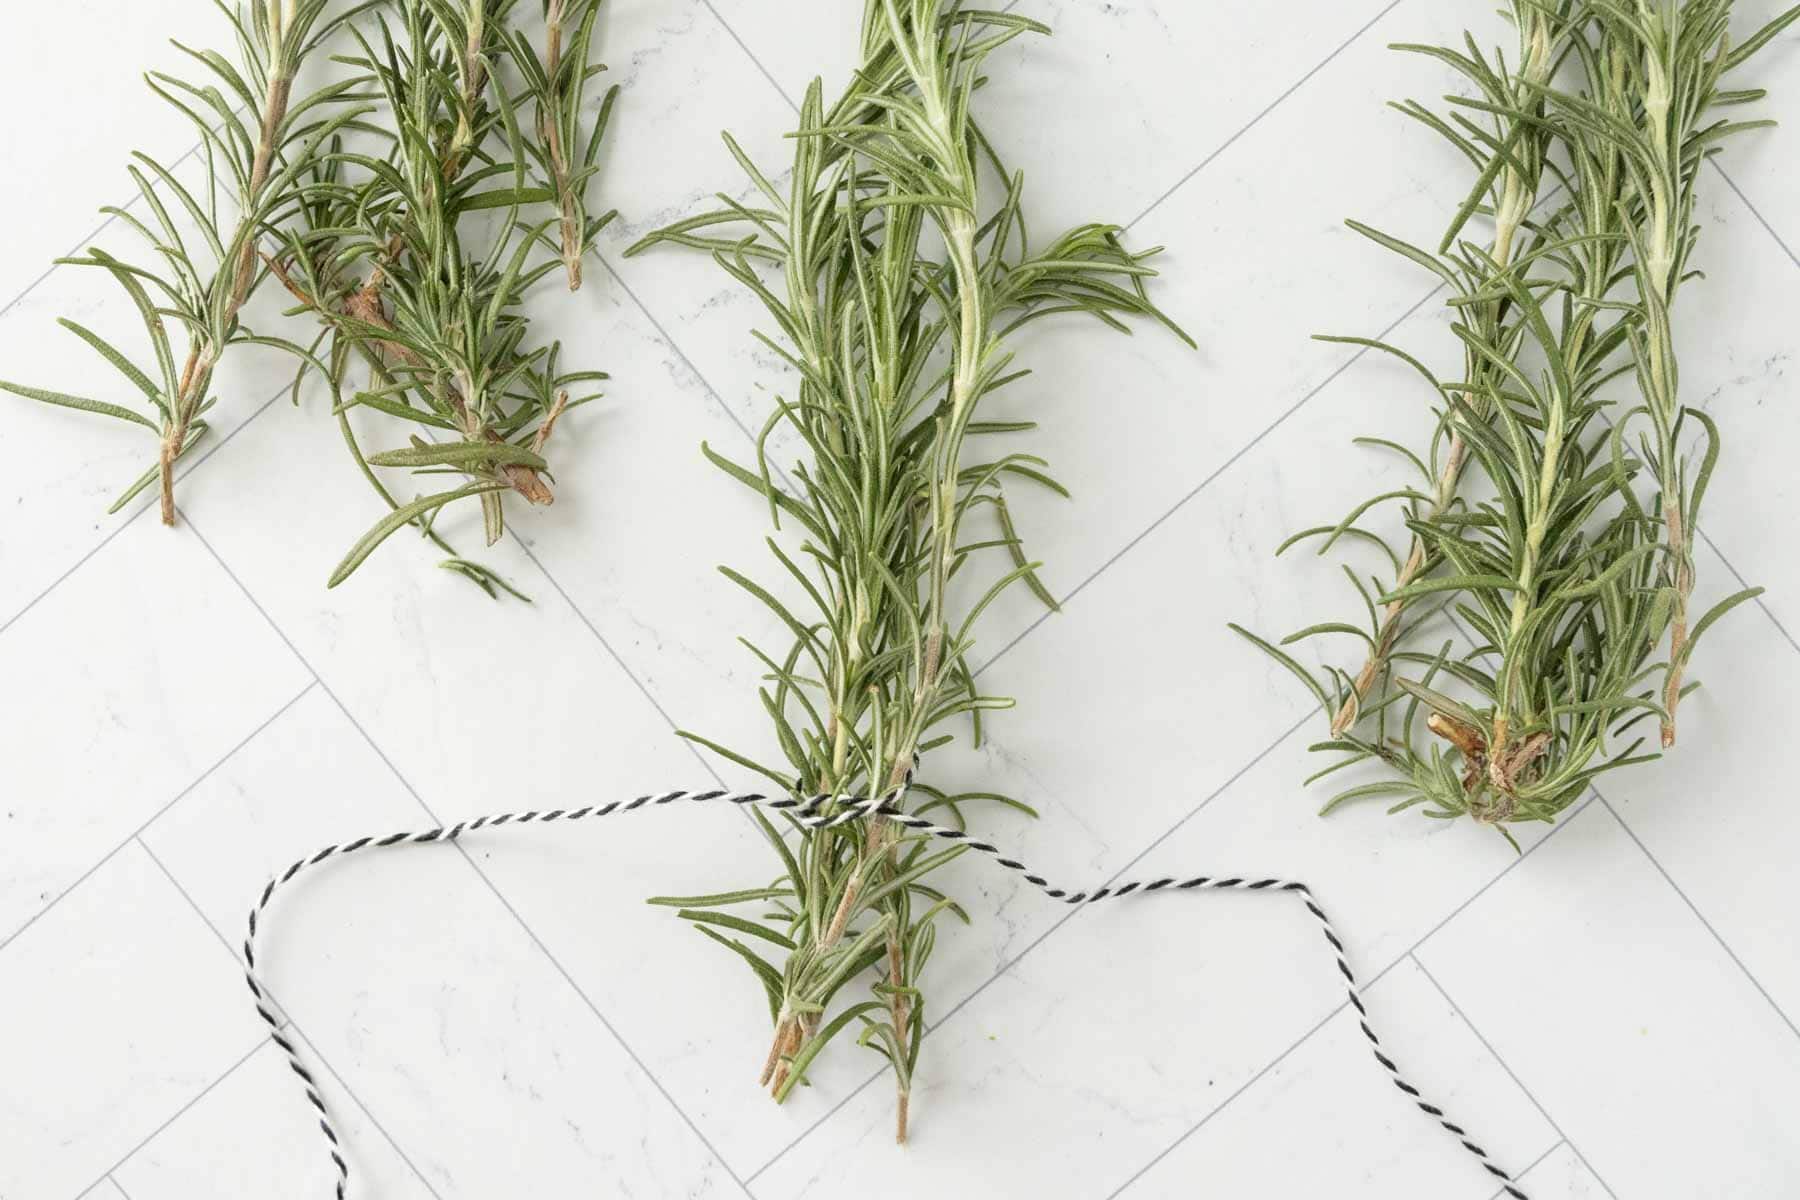
Harvesting and Cleaning Herbs
Harvesting and cleaning your herbs properly is crucial to ensure the best possible flavor and quality when freezing. Follow these simple steps to harvest and clean your herbs:
- Timing: Harvest herbs in the morning after the dew has dried but before the heat of the day sets in. This is when the essential oils are most concentrated, resulting in the best flavor.
- Method: Depending on the herb, you can either harvest the entire plant or selectively pick leaves and stems. For leafy herbs like basil and parsley, start from the top and pinch off individual leaves or snip stems just above a leaf junction. For hardier herbs like rosemary or thyme, you can harvest larger sprigs or branches.
- Cleaning: Once you’ve harvested your herbs, it’s important to remove any dirt, debris, or insects. Gently rinse the herbs under cold running water to wash away any impurities. Be careful not to bruise or damage the delicate leaves.
- Drying: After rinsing, pat the herbs dry with a clean kitchen towel or paper towels. Make sure they are thoroughly dry before proceeding to the next steps. Excess moisture can lead to freezer burn or the formation of ice crystals, affecting the quality of the frozen herbs.
- Inspect and Discard: Take a moment to inspect the herbs for any signs of damage or discoloration. Remove any leaves or stems that look wilted, bruised, or discolored. Only select the freshest and healthiest parts of the herbs for freezing.
By harvesting your herbs at the right time and cleaning them properly, you ensure that you are freezing herbs that are at their peak quality. The next step in the process is blanching the herbs, which helps to preserve their color and flavor. Let’s dive into the blanching process in the next section.
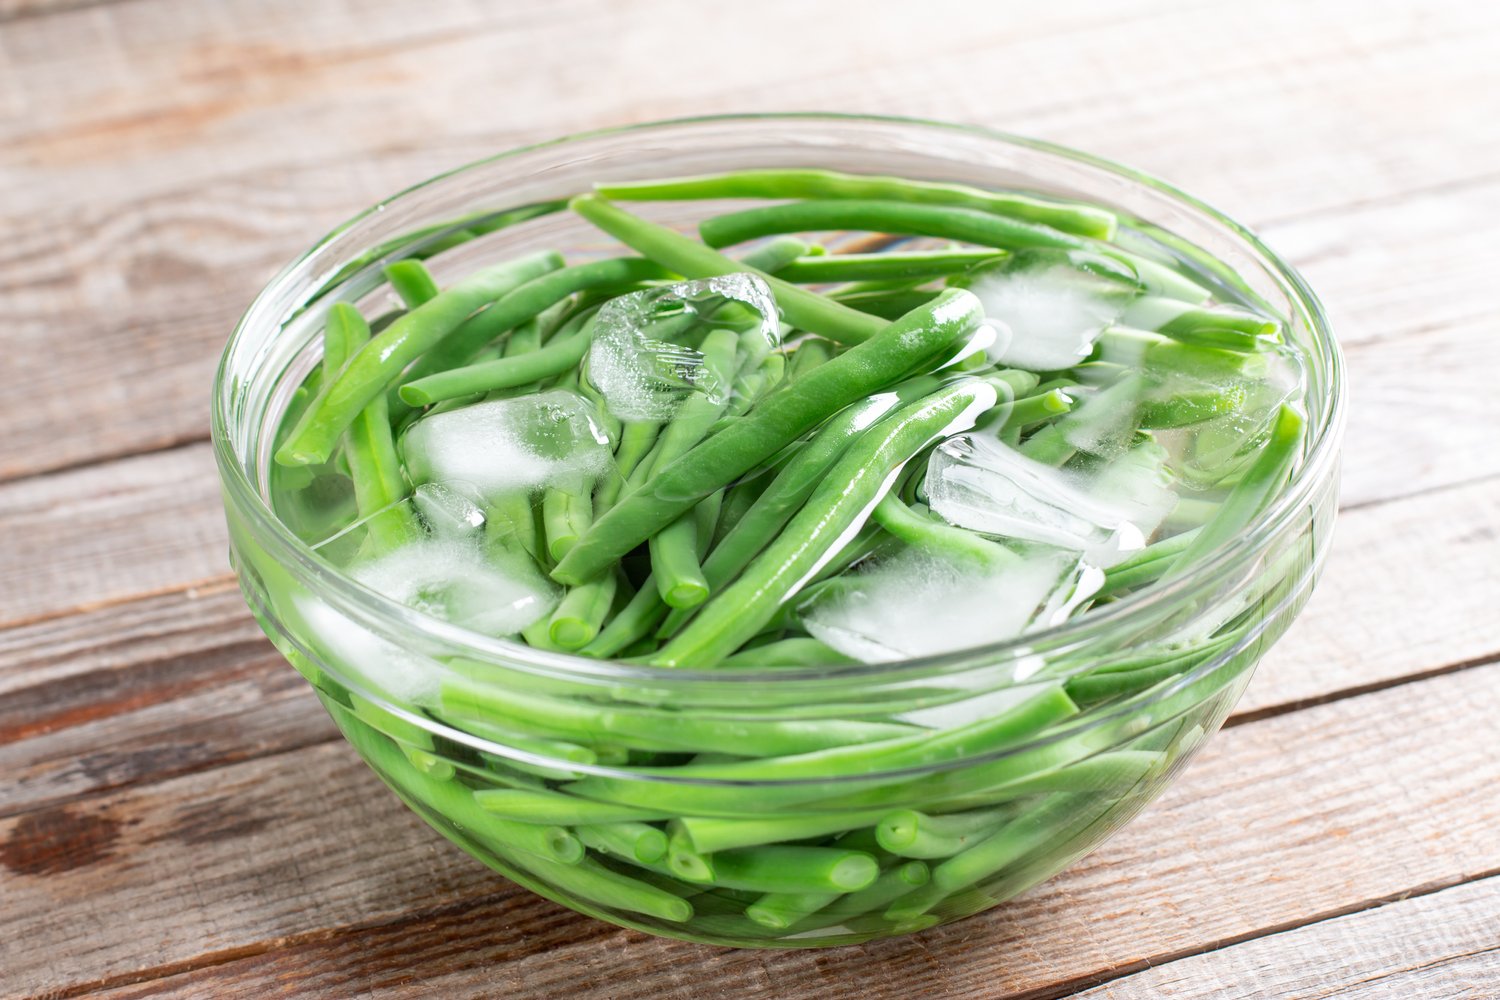
Blanching Herbs
Blanching herbs before freezing is an essential step that helps maintain their vibrant color, texture, and flavor. The blanching process involves briefly boiling the herbs and then immediately plunging them into ice water to stop the cooking process. Here’s how to blanch herbs effectively:
- Prepare the Blanching Water: Fill a large pot with water and bring it to a rolling boil. Add a pinch of salt to the water to help preserve the color and flavor of the herbs.
- Blanching Time: Drop the washed and trimmed herbs into the boiling water. The blanching time will vary depending on the herb’s texture. Tender herbs like basil or cilantro only need a quick 10 to 15 seconds in the boiling water, while sturdier herbs like rosemary or thyme may require 30 to 40 seconds.
- Ice Water Bath: As soon as the blanching time is up, quickly transfer the herbs to a bowl of ice water. This helps to cool them down rapidly and stops the cooking process. Leave the herbs in the ice water for the same amount of time you blanched them.
- Drain and Pat Dry: Remove the herbs from the ice water bath and gently pat them dry with a clean kitchen towel or paper towels. Make sure they are completely dry before proceeding to the next steps.
- Labeling and Packaging: At this stage, if you are freezing different herbs or mixtures, it’s a good idea to label and package them separately in freezer-safe containers or bags. This makes it easier to identify and use them in the future.
Blanching helps to retain the color, texture, and flavor of the herbs, making them more appealing and easy to incorporate into your dishes. Now that you’ve blanched your herbs, it’s time to explore different freezing methods for preserving them effectively.
Freezing Methods
When it comes to freezing herbs, there are a few different methods you can choose from based on your preferences and the herbs you’re working with. Let’s explore some of the common freezing methods:
- Whole Leaf Freezing: This method is suitable for herbs like basil, parsley, or mint. After blanching and drying the leaves, arrange them in a single layer on a baking sheet lined with parchment paper. Place the baking sheet in the freezer until the leaves are frozen solid. Once frozen, transfer the leaves to freezer-safe containers or bags. This method allows you to easily remove individual leaves as needed.
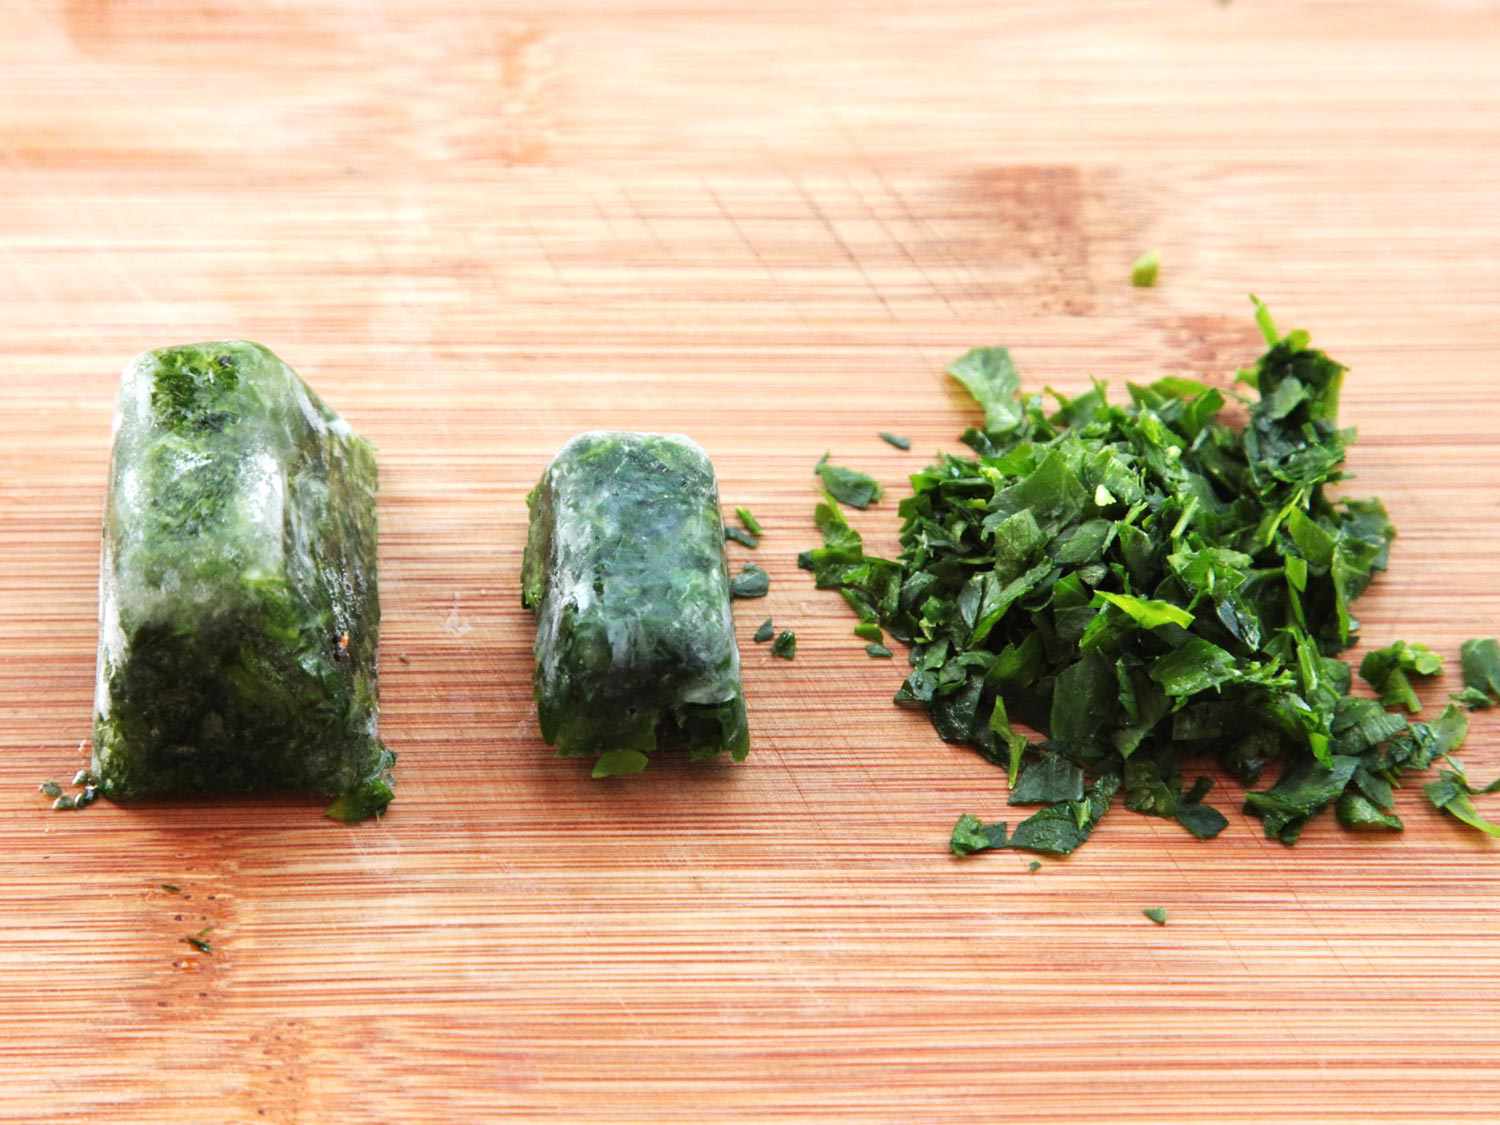
- Herb Cubes: Herb cubes are a convenient way to have pre-measured portions of herbs ready to use. After blanching and drying the herbs, chop or finely mince them. Fill ice cube trays halfway with the herbs and top them off with water or olive oil to fill the remaining space. Freeze until solid, then transfer the herb cubes to freezer-safe containers or bags. These cubes can be readily added to soups, stews, or sauces while cooking.
- Pureed Herb Freezing: This method works well for soft herbs like cilantro, basil, or dill. After blanching and drying the herbs, place them in a food processor or blender with a small amount of water or olive oil. Puree until smooth, then transfer the puree to ice cube trays or freezer-safe containers. This puree can be used to flavor sauces, marinades, or dressings.
- Herb Mixture Freezing: If you often use a specific combination of herbs in your cooking, consider freezing them together as a mixture. Once you have blanched and dried the herbs, finely chop or mince them. Combine the herbs in your desired ratios and transfer them to freezer-safe containers or bags. This method allows you to have a convenient blend of herbs ready to use whenever you need them.
- Freezing in Oil: Another popular method is freezing herbs in oil. After blanching and drying the herbs, chop them finely and place them in ice cube trays. Fill each compartment halfway with the chopped herbs and top with olive oil. Freeze until solid, then transfer the herb oil cubes to freezer-safe containers or bags. These cubes can be used to add flavor to sautés, roasted vegetables, or pasta dishes.
Choose the freezing method that suits your needs and the specific herbs you are working with. Properly packaged and labeled, your frozen herbs will stay fresh and flavorful for several months, ensuring you always have a supply on hand. Next, we’ll explore how to freeze individual herbs and herb mixtures using these methods.
Freezing Individual Herbs
Freezing individual herbs is a convenient way to preserve them in their whole leaf form. This method allows you to easily access and use the herbs as needed in your cooking. Here’s how to freeze individual herbs:
- Blanch and Dry: Start by blanching the herbs following the instructions mentioned earlier. Once blanched, gently pat them dry with a clean kitchen towel or paper towels.
- Arrange on a Baking Sheet: Next, arrange the herbs in a single layer on a baking sheet lined with parchment paper. Make sure the leaves are not touching each other to prevent them from sticking together.
- Flash Freeze: Place the baking sheet with the herbs in the freezer and allow them to freeze until solid. This process, known as flash freezing, ensures that the herbs freeze individually and do not clump together.
- Transfer to Freezer Bags or Containers: Once the herbs are frozen, carefully transfer them to freezer-safe bags or containers. Label the bags or containers with the herb name and date to easily identify them in the future.
- Remove Air and Seal: Squeeze out any excess air from the bags or containers before sealing them. This step helps prevent freezer burn and ensures the freshness of the herbs.
By freezing individual herbs, you have the freedom to take out only the amount you need for a particular recipe, keeping the rest safely stored in the freezer. Whether it’s fresh basil for a pasta dish or fragrant rosemary for a roast, you’ll always have the right herbs readily available. Next, let’s explore how to freeze herb mixtures for even more flavor possibilities.
Freezing Herb Mixtures
Freezing herb mixtures allows you to create convenient flavor combinations that can instantly elevate your dishes. Whether it’s a blend of herbs for Italian cuisine or a medley for savory soups, freezing herb mixtures is a time-saving and versatile method. Here’s how to freeze herb mixtures:
- Blanch and Dry: Begin by blanching the herbs as mentioned earlier and patting them dry.
- Combine the Herbs: Finely chop or mince the herbs according to your desired ratio and flavor profile. You can experiment with different combinations to suit your taste preferences.
- Divide and Package: Divide the herb mixture into portion sizes that you are likely to use in a single recipe. This helps prevent unnecessary thawing and refreezing. Place each portion in a freezer-safe bag or container.
- Label and Seal: Label each bag or container with the herb mixture name and date. This makes it easier to identify and use the desired blend in the future. Remove any excess air from the bags or containers before sealing them.
- Freeze for Future Use: Transfer the herb mixtures to the freezer and allow them to freeze solid. These herb mixtures will maintain their flavors and be ready to enhance your dishes whenever needed.
Having a variety of frozen herb mixtures on hand gives you the opportunity to add complex flavors to your meals with minimal effort. Whether it’s a Mediterranean blend for a fresh salad or a spicy Cajun mix for a flavorful stew, frozen herb mixtures provide endless culinary possibilities. In the next section, we’ll discuss the proper storage and thawing methods for your frozen herbs.
Storing Frozen Herbs
Proper storage of your frozen herbs is key to maintaining their quality and flavor. Follow these guidelines to ensure that your herbs stay fresh and ready to use:
- Transfer to Freezer-Safe Containers: Once your herbs are frozen solid, transfer them from the baking sheet or bags to freezer-safe containers or airtight freezer bags. This step helps protect the herbs from freezer burn and odors.
- Label and Date: Label each container or bag with the name of the herb or herb mixture and the date of freezing. This will make it easier to identify and keep track of the herbs in your freezer.
- Stackable Storage: If space is limited in your freezer, consider using stackable containers or flat freezer bags to maximize storage efficiency. This allows you to neatly organize and store your frozen herbs while minimizing the space they occupy.
- Temperature and Placement: It’s important to store your frozen herbs in the coldest part of your freezer, ideally at 0°F (-18°C) or below. This helps maintain their quality for a longer period. Avoid storing herbs near the freezer door or in areas where they may be exposed to temperature fluctuations.
- Rotation: To ensure that you’re always using the oldest herbs first, practice a rotation system. Place the newly frozen herbs at the back of the freezer and use the ones that have been there the longest first. This helps avoid freezer burn and ensures freshness.
By following these storage guidelines, you can preserve the flavor, color, and aroma of your frozen herbs for several months. Now that your herbs are properly stored, let’s explore the best methods for thawing and using your frozen herbs in culinary creations!
Thawing and Using Frozen Herbs
Thawing frozen herbs properly is essential to retain their flavor and texture. Here’s how to thaw and use your frozen herbs:
- In the Refrigerator: The preferred method for thawing frozen herbs is to transfer them from the freezer to the refrigerator. Place the frozen herbs in a bowl or container and let them thaw slowly overnight or for a few hours. Thawing in the refrigerator helps preserve the quality and flavor of the herbs.
- In Recipes: If you’re using the frozen herbs directly in a cooked dish, you can add them to the recipe while they are still frozen. The heat will defrost them quickly, allowing you to enjoy the fresh flavors and aromas of the herbs.
- Quick Thawing: If you’re short on time or need to thaw the herbs immediately, you can do a quick thaw by placing the frozen herbs in a bowl of cool water. Change the water every 15-30 minutes until the herbs are thawed. Avoid using warm water, as it can cause the herbs to lose their flavor and become limp.
- Using Frozen Herbs: Frozen herbs can be used in a similar way to fresh herbs. Keep in mind that the texture may be slightly softer after freezing, but the flavors are still vibrant. Add frozen herbs directly to soups, stews, sauces, marinades, dressings, or any recipe that calls for fresh herbs. They will thaw quickly and release their flavors while cooking.
- Proportions: When using frozen herbs, you may need to adjust the quantities slightly. As a general rule, use about 1/3 to 1/2 of the amount of frozen herbs compared to the fresh herbs called for in a recipe. Taste as you go to ensure the desired flavor intensity.
Thawed frozen herbs should be used promptly for optimal flavor. If you have any leftover thawed herbs, you can repackage them and refreeze them. However, keep in mind that each refreezing may slightly affect the quality and texture of the herbs.
Now that you know the proper thawing methods, you can easily incorporate your frozen herbs into your culinary creations and enjoy the fresh flavors year-round!
Tips and Tricks for Freezing Herbs
Freezing herbs is a simple and efficient way to preserve their flavor and extend their lifespan. To make the most out of your frozen herbs, here are some useful tips and tricks to keep in mind:
- Label and Date: Properly label and date each package or container of frozen herbs. This will help you easily identify them and keep track of their freshness over time.
- Portion Control: Consider freezing herbs in portion sizes that match your recipes. By doing so, you can easily grab the amount you need without thawing more than necessary.
- Pre-Freeze for Easy Separation: Before freezing your herbs in bags or containers, pre-freeze them on a baking sheet. This will prevent them from sticking together, allowing you to remove individual leaves or portions easily.
- Combine Complementary Herbs: Try freezing complementary herbs together to simplify your meal preparation. For example, freeze a combination of rosemary, thyme, and sage for a tasty blend that works well in roasted meat dishes.
- Make Herb-infused Oils: Instead of freezing herbs alone, consider making herb-infused oils. Simply place your favorite herbs in a jar, cover them with olive oil, and let them infuse for a few weeks. The resulting oil can be frozen in ice cube trays or small containers for easy use.
- Trim Before Freezing: If you prefer to freeze whole herb stalks, trim off any wilted or discolored leaves before freezing. This helps maintain the quality and appearance of the frozen herbs.
- Use Freezer-Safe Containers: Ensure that the containers or bags you use for freezing are specifically designed to be safe for use in the freezer. This prevents freezer burn and helps maintain the flavors of your herbs.
- Experiment with Herb Mixtures: Don’t be afraid to experiment with different combinations of herbs when creating mixtures for freezing. Get creative and customize your blends to suit your favorite recipes and flavor preferences.
- Freeze Herb Stems for Stock: Don’t discard herb stems! Freeze them separately to add flavor to stocks and broths. They can be used to enhance the taste of soups, stews, and sauces.
- Keep Herbs Dry: Moisture is the enemy when freezing herbs. Make sure your herbs are thoroughly dried before freezing to prevent the formation of ice crystals and freezer burn.
By applying these tips and tricks, you can optimize the freezing process and keep your herbs fresh and flavorful for an extended period. Whether you’re a seasoned cook or a culinary enthusiast, freezing herbs is a valuable technique that allows you to enjoy the taste and aroma of fresh herbs year-round.
Conclusion
Freezing herbs is a wonderful way to prolong the life and maximize the yield of your favorite herbs. By using proper techniques and storage methods, you can retain the vibrant flavors, colors, and aromas of fresh herbs for an extended period, allowing you to enjoy them in your culinary creations year-round. Whether you choose to freeze individual herbs, create herb mixtures, or make herb-infused oils, the versatility and convenience of frozen herbs are undeniable.
From choosing the right herbs to blanching, freezing, and proper storage, each step plays a crucial role in maintaining the quality of the herbs. Harsh winters or limited availability won’t hinder your ability to enjoy the taste of fresh herbs when you have a well-stocked freezer filled with frozen herbs.
Remember to label and date your packages, practice portion control, and take advantage of various freezing methods to suit your needs and culinary preferences. By following the tips and tricks, you can create customized herb combinations, infuse oils, and add bursts of flavor to your dishes effortlessly.
So, embrace the art of freezing herbs and elevate your culinary experiences. Whether you’re adding a sprig of rosemary to a hearty stew or garnishing a dish with fresh basil, frozen herbs will enhance the flavors and aromas of your meals. Take advantage of the convenience, cost-effectiveness, and nutrient retention that freezing herbs offers, and elevate your cooking to new heights.