Home>Gardening Techniques>DIY Projects>How Do You Build A Greenhouse
DIY Projects
How Do You Build A Greenhouse
Modified: January 22, 2024
Learn how to build a DIY greenhouse from scratch with our step-by-step guide. Create a sustainable and eco-friendly space for your plants and gardening projects.
(Many of the links in this article redirect to a specific reviewed product. Your purchase of these products through affiliate links helps to generate commission for Chicagolandgardening.com, at no extra cost. Learn more)
Table of Contents
- Introduction
- Benefits of Building a Greenhouse
- Choosing the Right Location
- Selecting the Type of Greenhouse
- Materials Needed for Construction
- Building the Foundation
- Constructing the Frame
- Installing the Covering
- Ventilation and Temperature Control
- Irrigation and Watering System
- Setting Up the Shelving and Benches
- Choosing and Maintaining the Plants
- Conclusion
Introduction
Welcome to the world of DIY projects! If you have a green thumb and a passion for gardening, building a greenhouse can be a rewarding and fulfilling endeavor. Not only does it provide a controlled environment for growing plants, but it also allows you to extend the growing season and experiment with a wider range of plant varieties.
A greenhouse is a structure designed to create a favorable microclimate for plants. It helps to regulate temperature, humidity, and light conditions, offering plants protection from harsh weather conditions and pests. Whether you’re a seasoned gardener or a beginner, constructing your own greenhouse allows you to customize it to suit your specific needs and preferences.
In this comprehensive guide, we will walk you through the process of building your own greenhouse. From selecting the right location to choosing the materials and setting up the necessary systems, we will cover all the essential steps to help you create an ideal environment for your plants to thrive.
But why should you consider building a greenhouse in the first place? Let’s explore the numerous benefits it offers.
Benefits of Building a Greenhouse
Building a greenhouse comes with a multitude of benefits that can enhance your gardening experience and yield successful results. Here are a few advantages to consider:
1. Extended Growing Season: One of the greatest advantages of having a greenhouse is the ability to extend your growing season. In a greenhouse, you can control the temperature and protect your plants from frost, allowing you to start planting earlier in the spring and grow plants well into the fall. This means you can enjoy fresh produce for an extended period.
2. Protection from Harsh Weather: Unpredictable weather conditions can wreak havoc on your garden. A greenhouse provides a sheltered environment, shielding your plants from extreme temperatures, heavy rains, strong winds, and hailstorms. This protection allows your delicate plants to grow healthier and reduces the risk of crop loss.
3. Pest and Disease Control: In an enclosed space like a greenhouse, you have better control over pests and diseases. By keeping insects and animals out, you minimize the risk of infestations and the need for harmful pesticides. Additionally, the controlled environment helps prevent the spread of common plant diseases, leading to healthier plants overall.
4. Increased Plant Variety: A greenhouse offers more freedom to experiment with plant varieties that may not thrive in your region’s natural climate. You can grow tropical plants, exotic fruits, and delicate flowers that require specific temperature and humidity conditions.
5. Better Growth and Yield: Greenhouse-grown plants tend to have faster growth rates and higher yields compared to plants grown in open gardens. The controlled environment allows for optimal conditions, including consistent sunlight exposure, regulated temperature, and balanced moisture levels, resulting in healthier and more productive plants.
6. Flexibility in Gardening Techniques: With a greenhouse, you have more options to implement various gardening techniques. You can experiment with hydroponics or aquaponics, grow plants vertically to save space, and even create a year-round garden for continuous harvesting.
These benefits make building a greenhouse an attractive option for avid gardeners and those looking to enhance their gardening skills. In the next section, we will guide you through the process of choosing the right location for your greenhouse.
Choosing the Right Location
When it comes to building a greenhouse, choosing the right location is crucial for the success of your plants. Here are some factors to consider when selecting the optimum spot:
1. Sunlight Exposure: Look for a location that receives ample sunlight throughout the day. Most plants require at least 6 hours of direct sunlight to thrive. Avoid areas shaded by tall trees or buildings that could obstruct the sunlight.
2. Accessibility: Ensure the greenhouse is easily accessible, both for your convenience and to facilitate transporting materials, tools, and water. Also, consider proximity to a water source for irrigation purposes.
3. Wind Exposure: Pay attention to your local wind patterns and choose a location that is sheltered from strong winds. High winds can damage the structure of the greenhouse and affect plant growth.
4. Slope and Drainage: Select a level area for the greenhouse to ensure proper drainage. Avoid low-lying areas that might accumulate water or become waterlogged during heavy rainfall.
5. Orientation: Consider the orientation of your greenhouse. In Northern Hemisphere locations, a south-facing orientation maximizes sunlight exposure. In Southern Hemisphere locations, a north-facing orientation is preferable. This allows for even distribution of sunlight throughout the day.
6. Privacy: If you have privacy concerns or want to keep your greenhouse more secluded, choose a spot that is not easily visible from the street or neighboring properties.
7. Future Expansion: Keep in mind that you might want to expand your greenhouse in the future. Leave some space around the structure to accommodate any potential expansion plans.
By considering these factors, you can choose a location that provides optimal conditions for your greenhouse. Once you have determined the perfect spot, it’s time to move on to the next step: selecting the type of greenhouse that suits your needs.
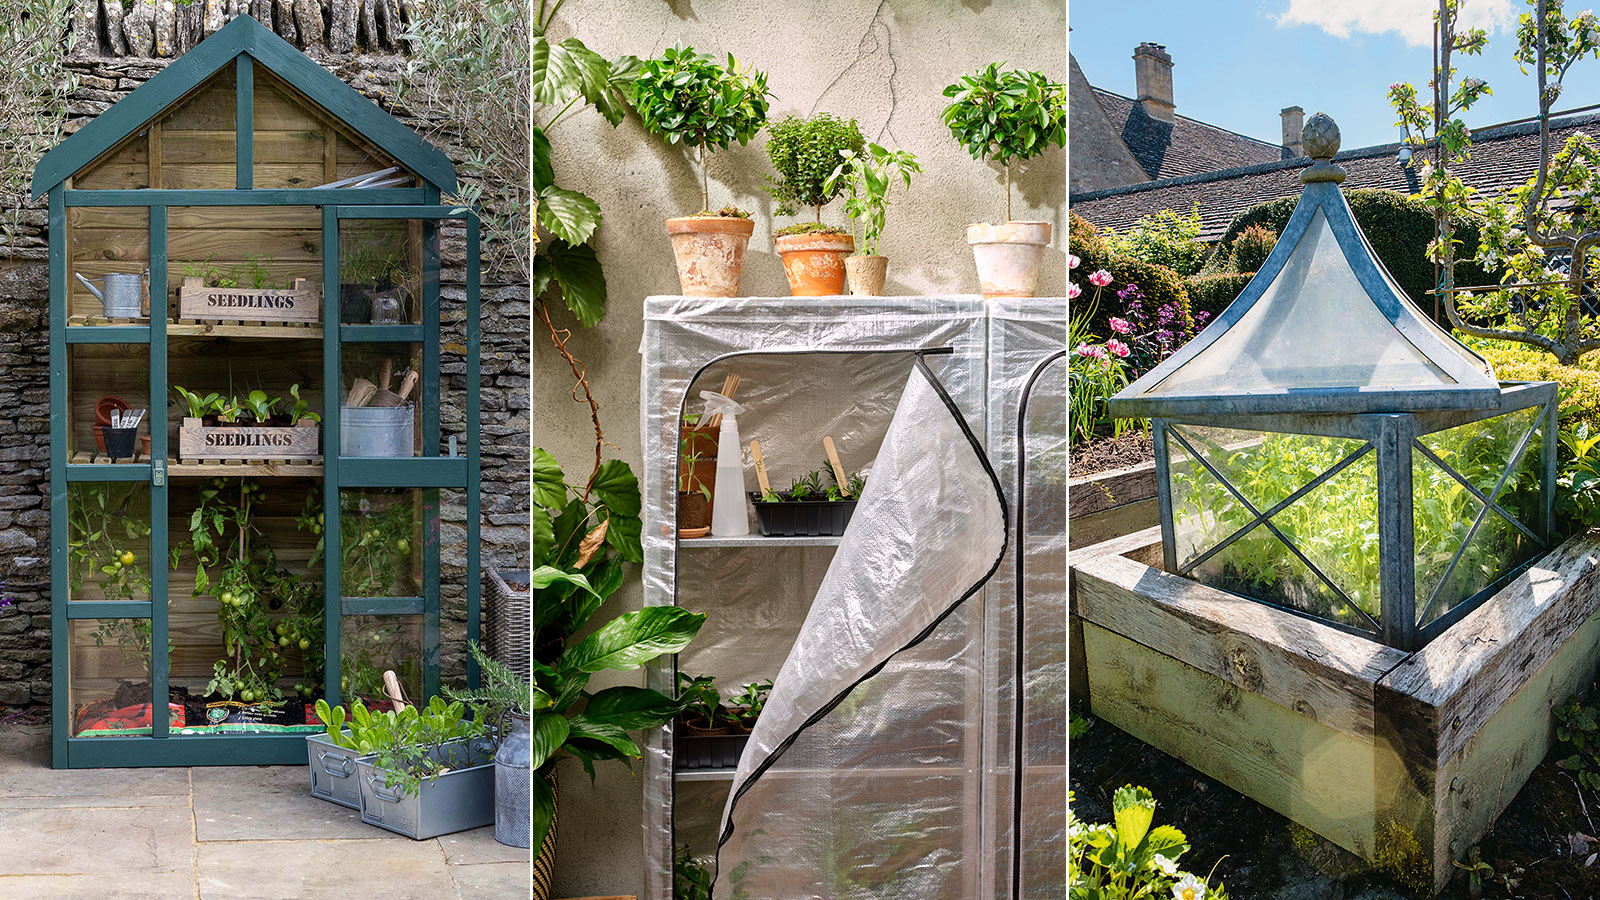
Selecting the Type of Greenhouse
When it comes to selecting the type of greenhouse, there are several options available, each with its own advantages and considerations. Here are some popular types of greenhouses:
1. Lean-To Greenhouse: This type of greenhouse is built against an existing structure, such as a house or a garage, utilizing one wall as a support. Lean-to greenhouses are space-efficient and cost-effective, as they require fewer materials. They are ideal for homeowners with limited yard space or those looking for easy access to utilities.
2. Freestanding Greenhouse: As the name suggests, freestanding greenhouses are standalone structures that can be placed anywhere in your yard. They offer more flexibility in terms of size, design, and layout. Freestanding greenhouses provide better ventilation and easier access for maintenance and gardening tasks. They are a popular choice for avid gardeners or those with larger yards.
3. Attached Greenhouse: Similar to lean-to greenhouses, attached greenhouses are built against an existing structure. However, unlike lean-to greenhouses, they are not limited to utilizing just one wall. Attached greenhouses provide more space and options for customization, as they can be designed to fit the specific dimensions of the attached building.
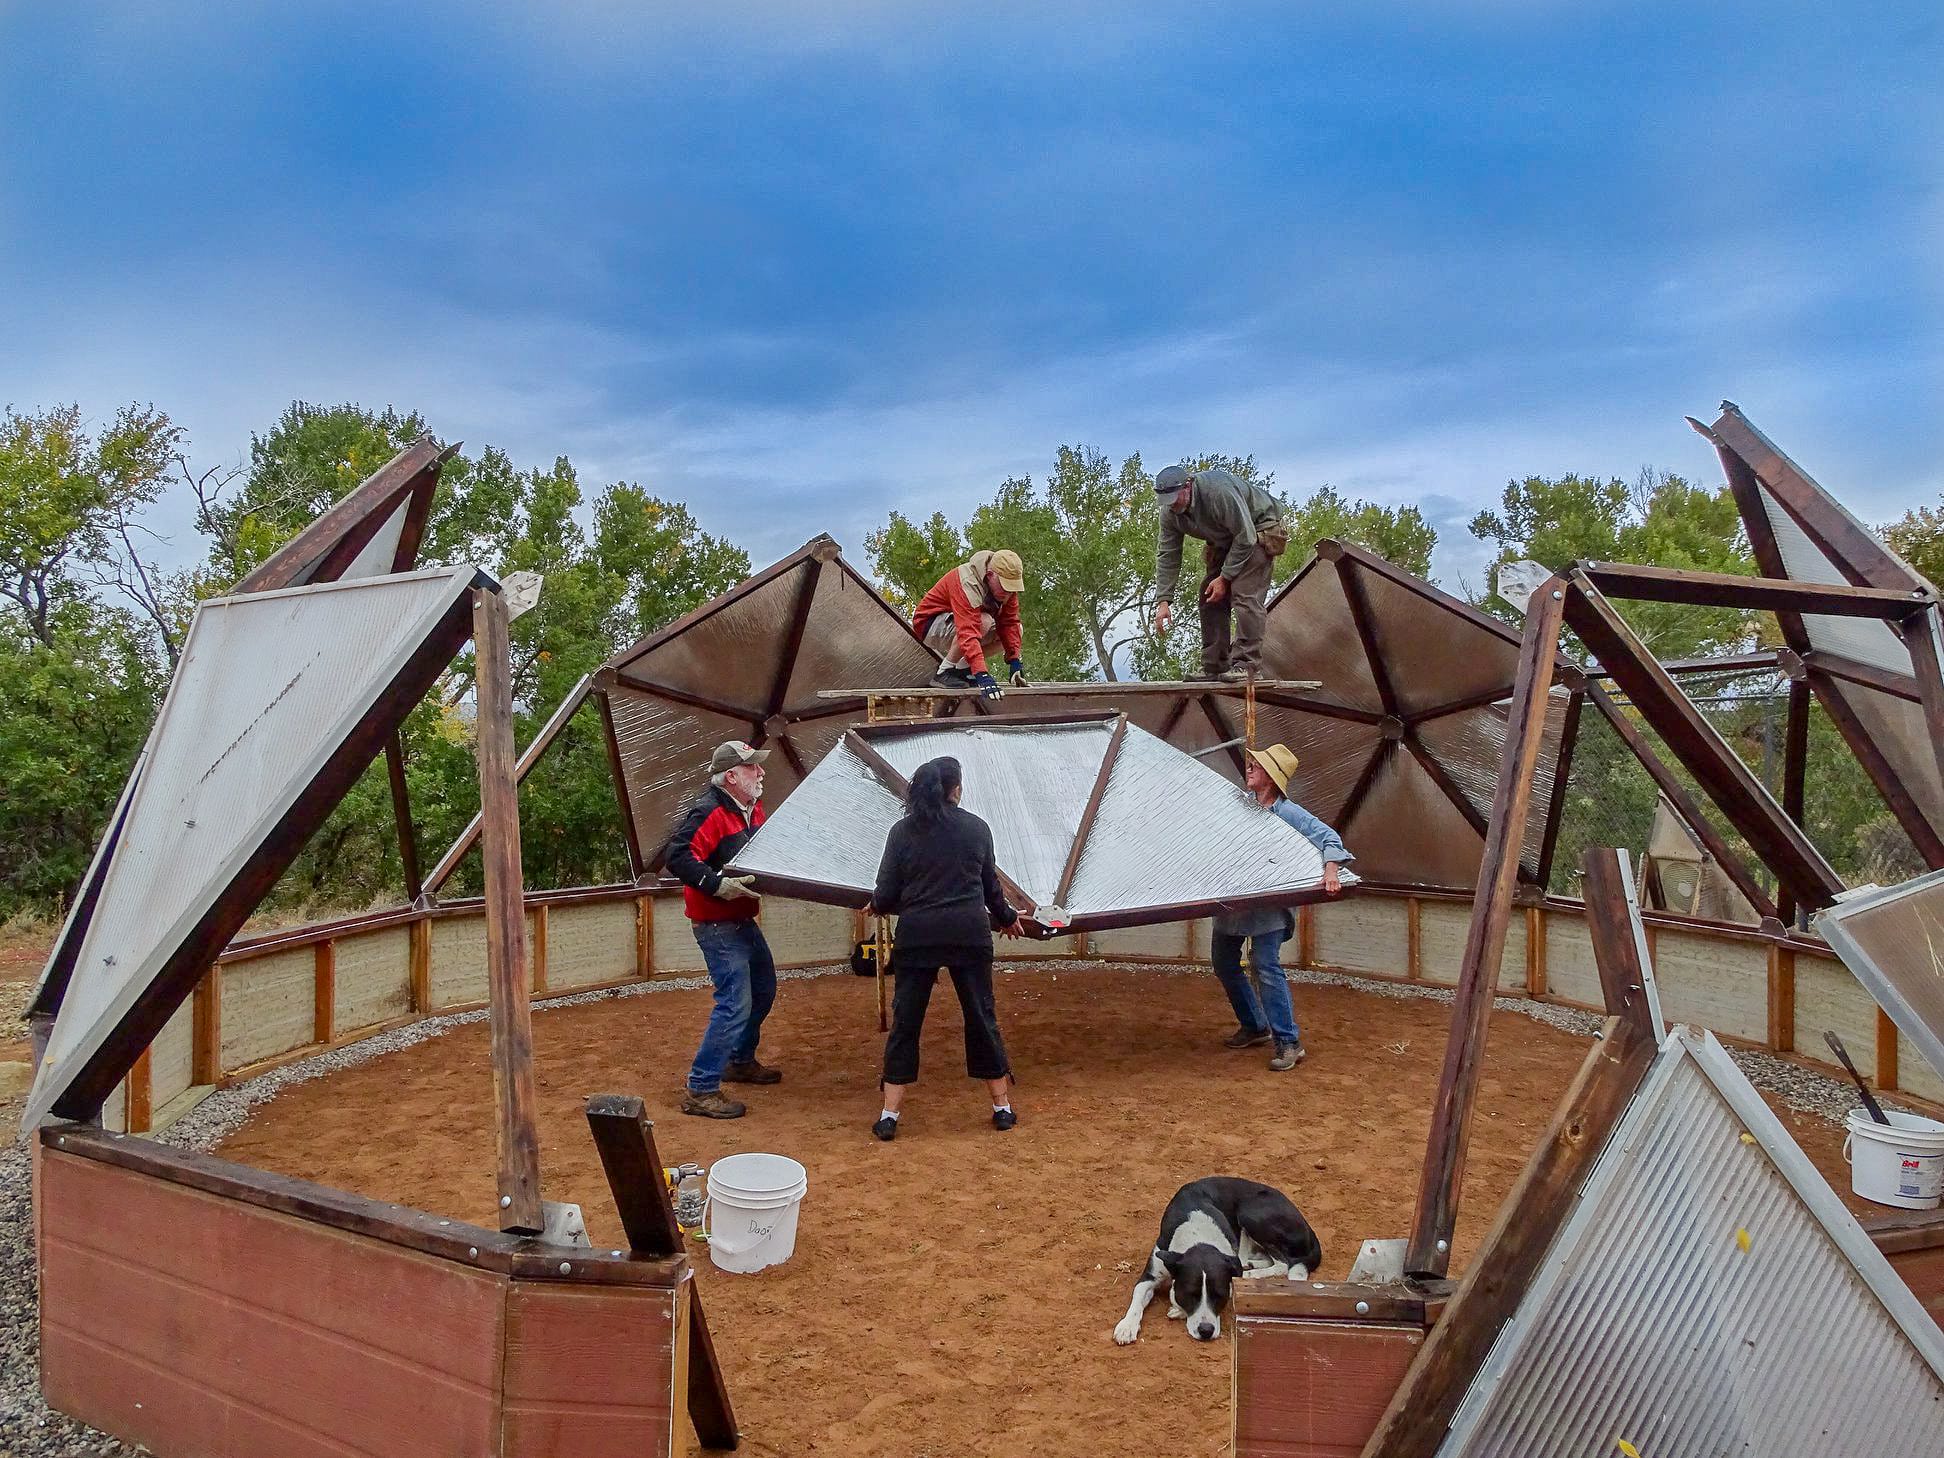
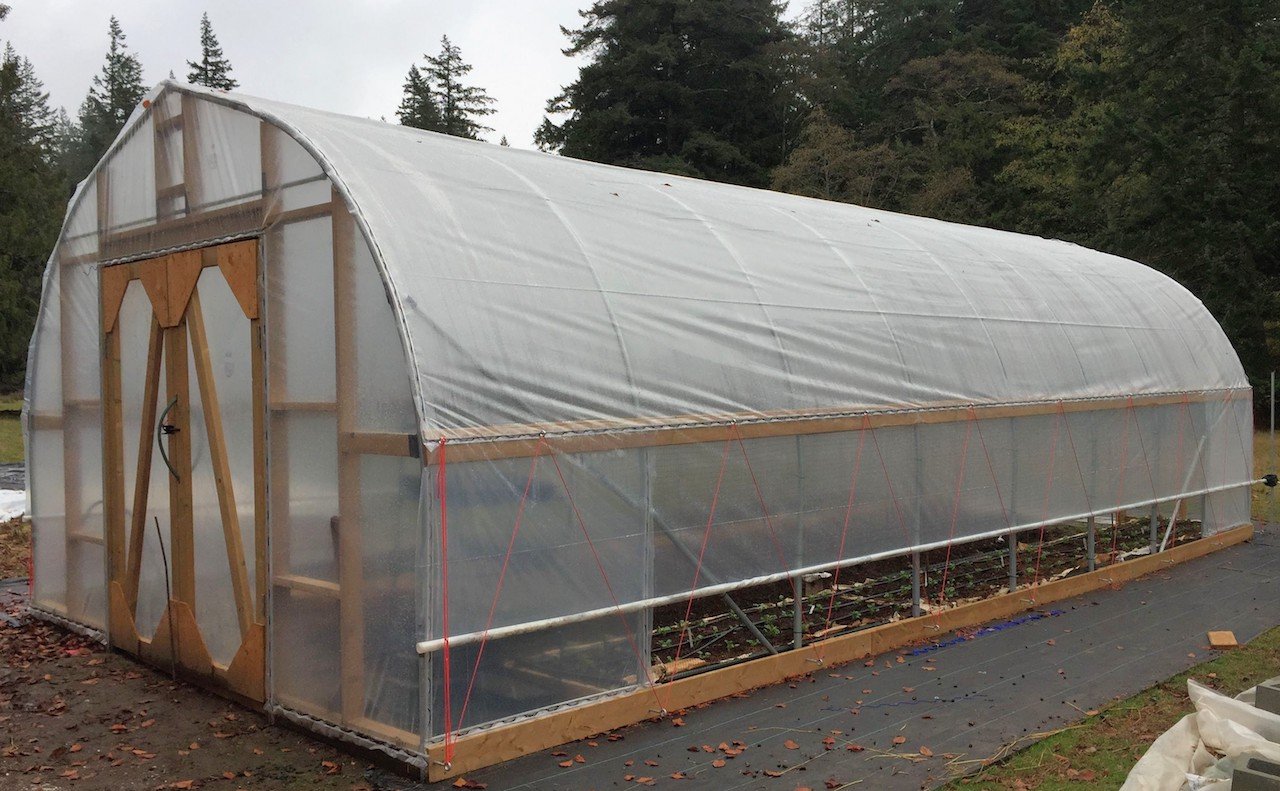
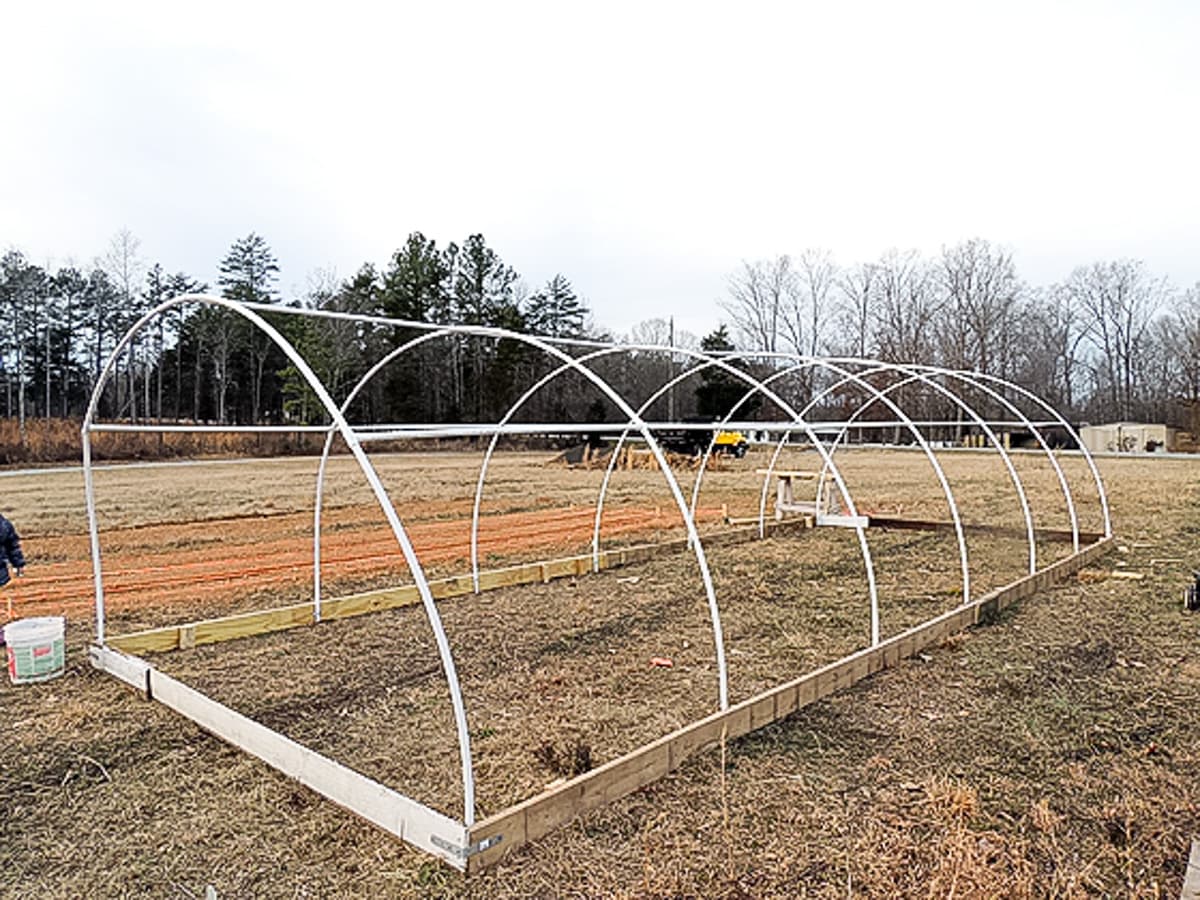
4. Hoop House/Greenhouse: Hoop houses, also known as high tunnels, are affordable and easy to construct. They consist of a series of curved steel or PVC pipes covered with a plastic film. Hoop houses are popular among small-scale gardeners and farmers, as they offer a cost-effective solution for extending the growing season and protecting crops from the elements.
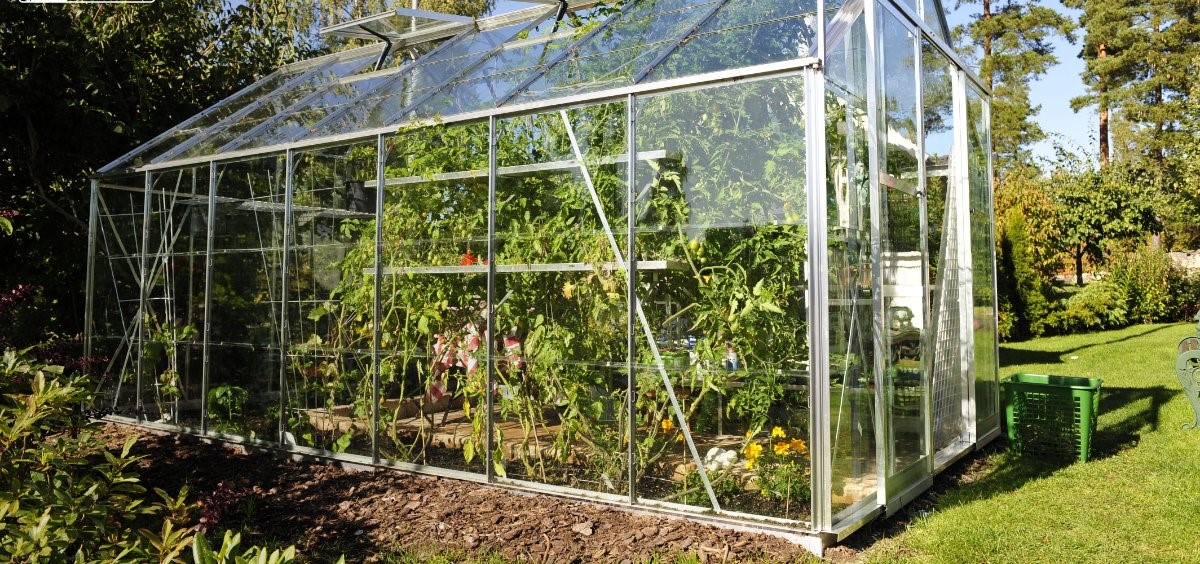
5. Glass Greenhouse: Glass greenhouses are known for their aesthetics and durability. They provide excellent light transmission, heat retention, and visibility. Glass greenhouses require a more substantial initial investment and are best suited for serious gardeners or commercial growers who prioritize long-term usage and aesthetics.
6. Polycarbonate Greenhouse: Polycarbonate is a popular alternative to glass due to its durability, light transmission, and insulation properties. Polycarbonate is lighter and less expensive than glass, making it a practical choice for both hobbyists and commercial growers. Polycarbonate greenhouses also provide better insulation, reducing heating costs during colder months.
Consider your gardening needs, available space, budget, and long-term goals when selecting the type of greenhouse. Each type has its own advantages and considerations, so choose the one that aligns best with your requirements.
Now that you have chosen the type of greenhouse, let’s move on to the next step: gathering the necessary materials for construction.
Materials Needed for Construction
Before you start building your greenhouse, it’s essential to gather all the necessary materials. Having everything prepared in advance will help streamline the construction process. Here are the materials typically needed for building a greenhouse:
1. Frame Materials: The frame forms the structure of your greenhouse and provides support. Common frame materials include wood, aluminum, or galvanized steel. Wood offers a natural, rustic look and is relatively affordable, while aluminum and galvanized steel are more durable and weather-resistant.
2. Covering Material: The covering material is what protects your greenhouse and allows light to enter. Options include glass, polycarbonate panels, or greenhouse plastic film. Glass provides excellent visibility and durability, while polycarbonate panels offer good light transmission and insulation. Greenhouse plastic film is a cost-effective option but may require replacement over time.
3. Fasteners: Fasteners such as screws, nails, and brackets are essential for securing the frame and attaching the covering material. Choose materials that are resistant to corrosion, especially if your greenhouse will be exposed to moisture.
4. Foundation Materials: Depending on the type of greenhouse and local building codes, you may need materials for the foundation. Options include concrete footers, treated lumber, or gravel. The foundation provides stability and prevents shifting or settling of the greenhouse structure.
5. Ventilation System: A ventilation system is crucial for regulating temperature and air circulation inside the greenhouse. Materials for the ventilation system may include fans, vents, louvers, and automatic vent openers. These components ensure proper airflow and prevent overheating.
6. Irrigation System: To keep your plants properly hydrated, you will need an irrigation system. This may include hoses, drip irrigation lines, sprinklers, timers, and a water source. An efficient irrigation system ensures that your plants receive the necessary water without wastage.
7. Shelving and Benches: Shelving and benches provide space for organizing your plants and gardening tools. You can use materials such as wood, metal, or wire mesh to construct shelves and benches according to your requirements.
8. Additional Accessories: Depending on your needs, you might also consider additional accessories such as heating systems, shading materials, and supplemental lighting. These accessories can help you create the optimal growing conditions for your plants.
Before purchasing the materials, it’s a good idea to create a detailed plan and determine the exact quantities needed. This will help you estimate costs more accurately and avoid any last-minute trips to the hardware store.
Now that you have gathered the necessary materials, it’s time to start building the foundation of your greenhouse.
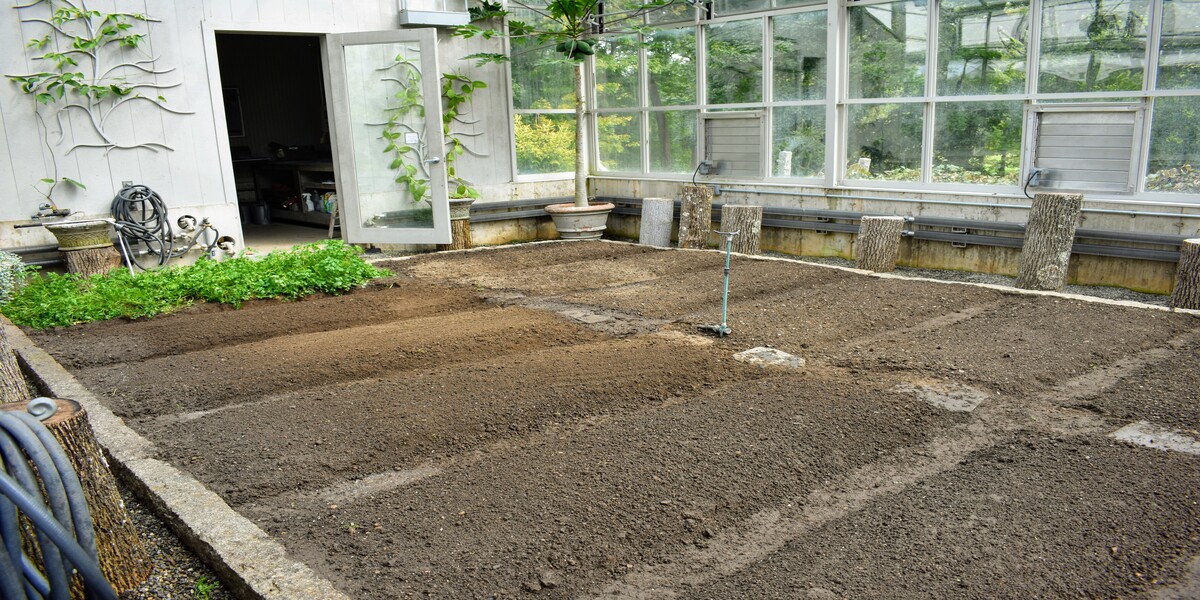
Building the Foundation
The foundation is a crucial component of your greenhouse construction, as it provides stability and ensures the structure’s long-term integrity. Here are the steps to follow when building the foundation:
1. Clear and Level the Site: Start by clearing the site of any debris, rocks, or vegetation. Ensure that the area is level, as this will help prevent any structural issues in the future.
2. Determine the Foundation Type: Depending on your greenhouse type and local building codes, you can choose from various foundation options. Common choices include concrete footers, treated lumber, or a simple gravel base. Consult local regulations and consider soil conditions to determine the most suitable foundation for your greenhouse.
3. Mark the Perimeter: Use stakes and string to mark the perimeter of the greenhouse. This will serve as a guide when excavating or constructing the foundation. Double-check the measurements to ensure accuracy.
4. Excavate the Foundation: If you are building a concrete or treated lumber foundation, excavate the marked area to the required depth. Remove the soil and create a level base for the foundation materials.
5. Install the Foundation: Proceed with installing the chosen foundation material. If using concrete footers, pour the concrete into the excavated trenches and smooth the surface. For a treated lumber foundation, position the lumber around the perimeter and secure it in place. Gravel bases should be leveled and compacted for stability.
6. Allow for Curing or Settling: If you have installed a concrete foundation, allow it to cure as per manufacturer recommendations. This usually involves keeping the concrete moist and avoiding heavy loads on the foundation. Treated lumber and gravel bases may require some time to settle before moving forward with the construction.
7. Double-Check Levelness: Before proceeding, verify that the foundation is level and square. Use a level and a measuring tape to ensure accuracy. Adjust as necessary to achieve a flat and even surface.
Building a solid foundation is essential for the stability and durability of your greenhouse. Take your time during this stage to ensure a strong base for the rest of the construction process.
With the foundation in place, it’s time to move on to the next step: constructing the frame of your greenhouse.
Constructing the Frame
Now that you have built a solid foundation for your greenhouse, it’s time to move on to constructing the frame. The frame provides the structural support for the greenhouse structure. Follow these steps to effectively build the frame:
1. Gather the Frame Materials: Start by gathering the materials needed for the frame, such as wood, aluminum, or galvanized steel. Ensure that you have enough materials for the desired size and design of your greenhouse.
2. Measure and Cut: Measure and mark the frame pieces according to your greenhouse plans. Use a saw or appropriate cutting tool to cut the pieces to the desired dimensions. Take care to make accurate cuts for precise fitting.
3. Assemble the Frame: Begin assembling the frame by connecting the frame pieces. Depending on the design of your greenhouse, you may use screws, nails, or brackets to secure the joints. Double-check measurements and make necessary adjustments to ensure a square and straight frame.
4. Add Cross Braces: Install cross braces at strategic points within the frame to provide additional stability. These braces can be made from the same frame materials and connected securely to the frame, preventing any wobbling or shifting.
5. Attach Frame to Foundation: Once the frame is assembled, securely anchor it to the foundation. This may involve using metal brackets or screws to secure the frame to the foundation material. Ensure that the frame is centered and aligned with the foundation before attaching.
6. Reinforce Weak Points: Inspect the frame for any weak points or areas that need extra reinforcement. Adding additional support, such as diagonal braces or corner brackets, can strengthen the frame and improve its stability.
7. Check for Levelness: Use a level to check that the frame is level and plumb on all sides. Adjust the frame as necessary to ensure it is evenly balanced. A level frame is crucial for proper installation of the covering material and overall stability of the structure.
Remember to consult your greenhouse plans and follow any specific instructions provided. Each greenhouse design may have its own unique assembly process, so be sure to refer to the manufacturer’s guidelines or seek expert advice if needed.
With the frame constructed and securely in place, it’s time to move on to the next step: installing the covering material for your greenhouse. This step will help protect your plants and create a suitable growing environment.
Installing the Covering
Assembling the frame of your greenhouse is an important step, but it’s not complete without installing the covering material. The covering not only protects your plants but also helps create the ideal growing conditions inside the greenhouse. Follow these steps to effectively install the covering:
1. Choose the Covering Material: Depending on your budget, climate, and specific requirements, choose the appropriate covering material for your greenhouse. Common options include glass, polycarbonate panels, or greenhouse plastic film.
2. Measure and Cut the Covering: Measure the dimensions of the greenhouse frame and cut the covering material to size. Ensure that you have enough material to cover the entire structure, with a little extra for overlap and securing.
3. Start from the Bottom: Begin installing the covering material from the bottom of the greenhouse frame. Attach it securely using clips, fasteners, or a method recommended by the manufacturer. Make sure the material is taut and wrinkle-free.
4. Work Your Way Up: Continuously work your way up the frame, attaching and securing the covering material as you go. Take care to maintain an even tension to prevent sagging or bunching of the material.
5. Overlap the Seams: If you’re using multiple pieces of covering material, overlap the seams to ensure a tight and watertight seal. Use appropriate methods, such as adhesive tapes or connectors, to create a secure connection between the overlapping pieces.
6. Install Vent Windows and Doors: Cut openings in the covering material to accommodate vent windows and doors. Install these features according to the instructions provided, ensuring proper operation for ventilation purposes.
7. Secure the Covering Material: Make sure the covering material is securely fastened to the greenhouse frame. Use clips, screws, or other fastening methods recommended for your specific covering material. This will ensure that the covering stays in place during strong winds or storms.
8. Double-Check for Any Gaps: Inspect the greenhouse for any gaps or areas where the covering material may not be fully sealed. This could allow drafts or pests to enter the greenhouse. Seal any gaps with appropriate sealing materials to maintain a controlled environment.
Installing the covering material is a crucial step in creating a functional greenhouse. It provides the necessary protection and insulation for your plants and helps create the desired growing conditions. Once the covering is installed, you can move on to the next steps, including setting up ventilation and temperature control systems.
Ventilation and Temperature Control
Proper ventilation and temperature control are essential for maintaining a healthy and thriving environment inside your greenhouse. Adequate airflow and controlled temperatures contribute to optimal plant growth. Here are some tips for effective ventilation and temperature control:
1. Ventilation System: Install vents or windows in your greenhouse to allow fresh air to circulate. This helps regulate temperature, replenish carbon dioxide levels, and prevent the buildup of excess humidity. Automatic vent openers or fan systems can be utilized to regulate ventilation based on temperature changes.
2. Vent Placement: Position vents or windows strategically to ensure proper air circulation. Typically, vents should be placed near the roof to allow hot air to rise and escape, while fresh cool air enters from the lower areas. This creates a natural airflow pattern inside the greenhouse.
3. Shading: In regions with intense sunlight or hot climates, shading is important to prevent overheating. Shade cloth or blinds can be used to reduce the amount of direct sunlight entering the greenhouse. This helps to maintain optimal temperature levels and protect sensitive plants from sunburn.
4. Temperature Monitoring: Use a thermometer or temperature monitoring system inside your greenhouse. This allows you to accurately monitor and maintain the ideal temperature range for your plants. Adjust ventilation and shading as needed to achieve the desired temperature.
5. Heating System: In colder climates or during the winter months, a heating system may be necessary to maintain an appropriate temperature. Options include electric or gas heaters, radiant heating, or even geothermal systems. Ensure that the heating system is safe, efficient, and properly installed.
6. Insulation: Insulate your greenhouse to help maintain consistent temperatures and reduce heat loss during colder periods. This may involve adding extra insulation to the walls, floor, and ceiling of the greenhouse. Choose materials that provide good insulation properties, such as double-glazed glass or insulated polycarbonate panels.
7. Monitors and Controls: Consider using automated monitoring and control systems to maintain optimal temperature and humidity levels. These systems can be programmed to adjust ventilation, heating, and shading based on pre-set parameters, helping to optimize plant growth and reduce manual interventions.
Remember that the ventilation and temperature control needs of your greenhouse may vary depending on factors such as the type of plants grown, your geographic location, and seasonal weather patterns. Regularly monitor and adjust these systems to provide the best environment for your plants throughout the year.
Now that you have set up ventilation and temperature control in your greenhouse, it’s time to focus on another crucial aspect: establishing an efficient irrigation and watering system.
Irrigation and Watering System
An efficient irrigation and watering system is essential for maintaining proper hydration and optimal plant growth in your greenhouse. Here are some considerations and techniques to ensure your plants receive the right amount of water:
1. Drip Irrigation: Use a drip irrigation system to deliver water directly to the plant roots. This minimizes water wastage and helps prevent waterlogging. Drip systems can be automated with timers or controlled manually to ensure plants receive water at the appropriate intervals.
2. Soaker Hoses: Soaker hoses are another effective option for greenhouse irrigation. These porous hoses allow water to seep slowly into the soil, delivering moisture directly to the root zone. They are especially useful for larger plants or beds where drip emitters may not provide sufficient coverage.
3. Watering Schedule: Establish a watering schedule based on the needs of your plants and the prevailing environmental conditions. Different plants have varying water requirements, so ensure that you research and understand the specific watering needs of each type of plant you are growing.
4. Automated Systems: Consider using automated irrigation systems with moisture sensors. These systems can monitor soil moisture levels and trigger watering only when necessary. This helps prevent overwatering and ensures plants receive water when they need it most.
5. Water Quality: Use high-quality water for irrigation to prevent the buildup of salts, minerals, or contaminants that can harm plants. If your water source has high mineral content, consider installing a filtration system or using alternative water sources.
6. Mulching: Apply a layer of organic mulch, such as straw or wood chips, around your plants. Mulch helps retain moisture in the soil, reduces evaporation, and suppresses weed growth. This can significantly reduce your watering requirements and contribute to water conservation.
7. Proper Drainage: Ensure your greenhouse has proper drainage to prevent waterlogging. Excess water can lead to root rot and other fungal diseases. Use well-draining soil mixes and create drainage channels or install drainage pipes if necessary.
8. Regular Monitoring: Regularly check the moisture levels of the soil and the overall health of your plants. Make adjustments to your watering schedule or system as needed. Monitor weather conditions, as humidity levels and seasonal changes can affect plant water requirements.
Remember that overwatering can be just as harmful to plants as underwatering. It is important to strike a balance and provide your plants with the adequate amount of water they need for healthy growth.
Now that you have established an efficient irrigation and watering system, it’s time to set up the shelving and benches in your greenhouse to maximize your growing space.
Setting Up the Shelving and Benches
Setting up shelving and benches in your greenhouse is essential for maximizing your growing space and organizing your plants effectively. Here are some tips for setting up the shelving and benches:
1. Assess the Space: Take a close look at the available space in your greenhouse and consider its layout. Evaluate factors such as height, depth, and width to determine the most efficient way to utilize the space.
2. Choose the Right Materials: Select durable and moisture-resistant materials for your shelving and benches. Options include stainless steel, plastic, or treated lumber. Consider the weight-bearing capacity of the materials to ensure they can support the weight of your plants.
3. Optimize Height and Placement: Adjust the height of your shelving and benches to accommodate the specific needs of your plants. Taller plants may require more space between shelves, while shorter plants can be placed closer together. Leave ample space for plants to grow and for easy access to each level.
4. Arrange for Proper Drainage: Ensure that your shelving and benches allow for proper drainage. Placing trays or using slatted surfaces will prevent excess water from pooling and potentially damaging your plants. Make sure the draining water does not create a mess or become a slipping hazard.
5. Consider Lighting: If you have supplemental lighting in your greenhouse, position shelving and benches to optimize light distribution. Place taller plants or those requiring more light on higher shelves, while providing enough clearance for the light source to reach lower levels.
6. Provide Ample Accessibility: Arrange your shelving and benches in a way that allows easy access to all plants for watering, pruning, and harvesting. Avoid overcrowding or tightly spacing the plants, as this can make maintenance tasks difficult.
7. Utilize Extra Space: Make the most of any available vertical or wall space by adding wall-mounted shelves or hanging baskets. This will expand your growing area and further enhance your greenhouse’s efficiency.
8. Continuous Adjustment: Regularly assess and adjust your shelving and benches as your plants grow and your needs change. Rearrange or add additional shelving if necessary to accommodate new plants or optimize space utilization.
Organizing your plants on shelving and benches promotes better airflow and allows for easier monitoring and maintenance. It also creates a visually appealing and well-organized environment in your greenhouse, enhancing your gardening experience.
With the shelving and benches set up, it’s time to turn your attention to choosing and maintaining the plants that will thrive in your greenhouse. Harvesting the fruits of your labor is the ultimate reward for your DIY greenhouse project.
Choosing and Maintaining the Plants
Choosing the right plants for your greenhouse is crucial for a successful and productive gardening experience. Consider these tips for selecting and maintaining your greenhouse plants:
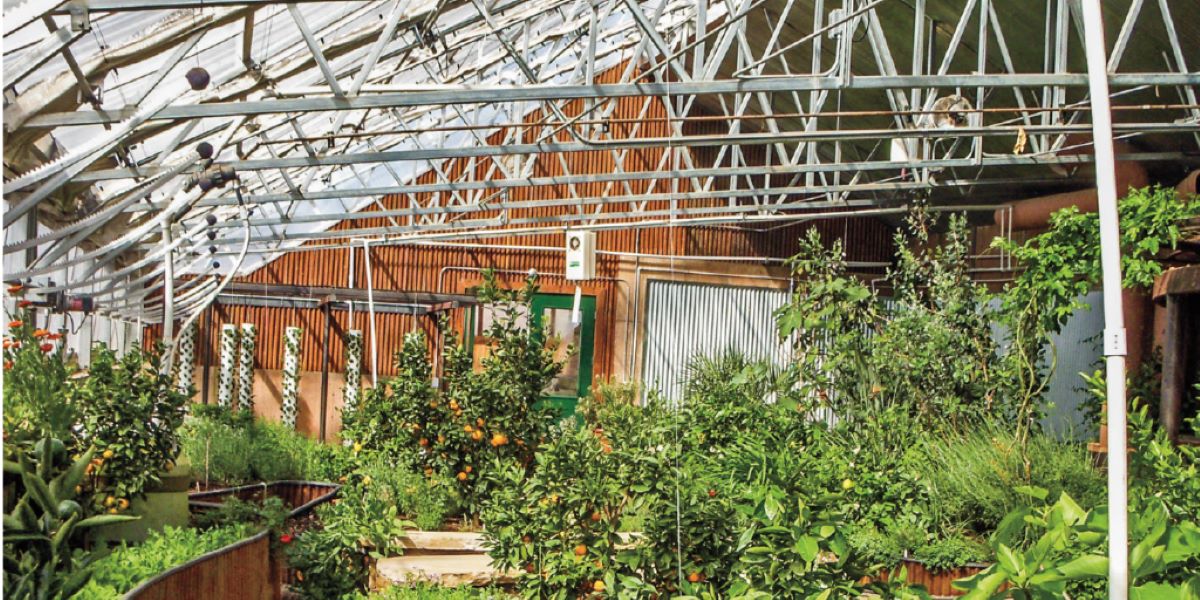
1. Assess Your Growing Conditions: Take into account the specific conditions in your greenhouse, such as temperature, humidity, and light levels. Choose plants that thrive in these conditions. Some common greenhouse plants include tomatoes, cucumbers, herbs, leafy greens, and flowering plants like orchids or geraniums.
2. Consider Seasonality: Determine whether you want to focus on growing plants year-round or if you prefer seasonal crops. If you want to enjoy a variety of produce throughout the year, select plants that have different maturation times to stagger their harvesting periods.
3. Research Plant Requirements: Each plant has unique care requirements. Research the specific needs of the plants you want to grow, including watering, fertilizing, and pruning techniques. Pay attention to their preferred temperature ranges, light requirements, and pest susceptibility.
4. Companion Planting: Consider implementing companion planting techniques in your greenhouse. Pairing compatible plants together can provide mutual benefits, such as pest protection, improved pollination, or enhanced growth. For example, planting marigolds alongside tomatoes can help deter pests.
5. Crop Rotation: Practice crop rotation to maintain soil health and minimize the risk of pest and disease infestations. Avoid planting the same plant family in the same spot year after year. Rotate your crops to different sections of your greenhouse to allow the soil to replenish nutrients naturally.
6. Regular Monitoring and Maintenance: Regularly inspect your plants for signs of pests, diseases, or nutrient deficiencies. Monitor soil moisture levels, adjust watering schedules as needed, and provide appropriate fertilization. Remove any dead or diseased plant material promptly to prevent the spread of diseases.
7. Pest and Disease Control: Implement integrated pest management strategies to control pests in your greenhouse. Use natural pest control methods like introducing beneficial insects, practicing good sanitation, and deploying physical barriers to minimize chemical interventions. Regularly check for signs of pests and intervene early to prevent infestations.
8. Harvesting and Pruning: Harvest your crops when they are at their peak ripeness to ensure the best flavor and nutritional value. Regularly prune your plants to promote healthy growth, shape them, and prevent overcrowding. Proper pruning techniques help improve air circulation and reduce the risk of diseases.
Remember to continuously educate yourself about the specific care needs of the plants you choose to cultivate in your greenhouse. Stay proactive in providing the ideal growing conditions for your plants to thrive, and you will reap the rewards of a bountiful harvest.
Now that you have learned the essentials of choosing and maintaining plants, let’s wrap up this guide with a recap of the key points and emphasize the importance of ongoing care and passion for your greenhouse project.
Conclusion
Building a greenhouse is an exciting and rewarding DIY project that allows you to create an optimal environment for your plants and extend your gardening season. Throughout this guide, we have explored the various steps involved in constructing a greenhouse, including choosing the right location, selecting the type of greenhouse, gathering materials, building the foundation and frame, installing the covering, setting up ventilation and temperature control, establishing an irrigation system, setting up shelving and benches, and choosing and maintaining the plants.
By carefully considering these steps and implementing the tips and techniques provided, you can create a functional and productive greenhouse in which your plants can thrive. The benefits of building a greenhouse are numerous, from extending the growing season and protecting plants from harsh weather conditions to providing optimal growing conditions for a wide variety of plants.
Remember that ongoing care and maintenance of your greenhouse are crucial for its success. Regular monitoring of temperature, humidity, and plant health, along with proper watering, fertilization, and pest control, will ensure your plants remain healthy and productive throughout the year.
As you embark on your greenhouse project, don’t forget to inject your own creativity and personal touch. Experiment with different plant varieties, explore innovative growing techniques, and enjoy the process of nurturing your plants in this specialized environment.
So roll up your sleeves, put on your gardening gloves, and let your love for plants and DIY projects guide you as you embark on the wonderful journey of building and maintaining your very own greenhouse. Happy gardening!