Home>Garden Design>How To Build A Greenhouse With Polycarbonate Panels
Garden Design
How To Build A Greenhouse With Polycarbonate Panels
Modified: January 22, 2024
Learn how to plan your garden and build a greenhouse with polycarbonate panels for an eco-friendly and efficient gardening solution.
(Many of the links in this article redirect to a specific reviewed product. Your purchase of these products through affiliate links helps to generate commission for Chicagolandgardening.com, at no extra cost. Learn more)
Table of Contents
- Introduction
- Step 1: Choosing a Location
- Step 2: Gathering Materials and Tools
- Step 3: Preparing the Foundation
- Step 4: Assembling the Frame
- Step 5: Installing the Polycarbonate Panels
- Step 6: Adding Ventilation and Insulation
- Step 7: Building Doors and Windows
- Step 8: Setting up Irrigation and Shelving
- Step 9: Maintaining and Troubleshooting the Greenhouse
- Conclusion
Introduction
Welcome to the world of gardening! Planning and building your own garden can be an incredibly rewarding and fulfilling experience. Not only does it allow you to grow fresh and healthy produce, but it also provides an opportunity to create a tranquil space where you can find solace and connection with nature. One essential element of a successful garden is a greenhouse, which extends the growing season and provides a controlled environment for your plants to thrive.
In this article, we will guide you through the process of building a greenhouse using polycarbonate panels. Polycarbonate is an ideal material for greenhouses due to its excellent durability, light transmission, and insulation properties. Whether you are a seasoned gardener or a beginner, this step-by-step guide will equip you with the knowledge and skills to create your own greenhouse that suits your needs, budget, and available space.
Before diving into the construction process, it is crucial to envision the purpose and size of your greenhouse. Are you planning to grow vegetables, flowers, or both? Do you have limited space or an expansive backyard? Consider these factors to help you determine the appropriate size, shape, and design for your greenhouse.
Building a greenhouse requires careful planning and attention to detail. You will need to choose a suitable location, gather the necessary materials and tools, prepare the foundation, assemble the frame, install the polycarbonate panels, and add ventilation, insulation, doors, and windows. Lastly, we will cover the important aspects of maintaining and troubleshooting your greenhouse to ensure the success of your gardening endeavors.
So, let’s embark on this exciting journey of building your very own greenhouse with polycarbonate panels. Get ready to enjoy the benefits of year-round gardening, witness the magic of plant growth, and create a haven of greenery right in your own backyard.
Step 1: Choosing a Location
The location of your greenhouse plays a crucial role in its success. It is essential to choose a spot that receives an adequate amount of sunlight throughout the day. Most greenhouse plants require at least six hours of direct sunlight to thrive. Observe your yard and identify an area that gets maximum sun exposure.
In addition to sunlight, consider other environmental factors such as wind patterns and access to water. Select a location that is sheltered from strong winds to prevent damage to the structure. Having a water source nearby will make it easier for you to provide irrigation to your plants.
It is also important to consider the proximity of your greenhouse to your house or other structures. You will likely spend a significant amount of time tending to your plants, so having the greenhouse close by will make it more convenient for you.
Furthermore, think about the layout and design of your yard. Consider whether you want your greenhouse to be a focal point or blend seamlessly with the existing landscape. Take measurements of the available space to ensure that the greenhouse you plan to build fits comfortably within the area.
Lastly, check with your local authorities and inquire about any necessary permits or regulations for building a greenhouse. Some areas may have specific guidelines regarding the size, height, and placement of structures in residential properties.
By carefully selecting the location for your greenhouse, you can create an optimal environment for your plants to thrive. Take into account the sunlight, wind patterns, water source, proximity to your house, and any local regulations. Once you have chosen the perfect spot, you can move on to the next step – gathering the materials and tools necessary for building your greenhouse.
Step 2: Gathering Materials and Tools
Now that you have chosen the location for your greenhouse, it’s time to gather the necessary materials and tools to start the construction process. Here is a list of the key items you will need:
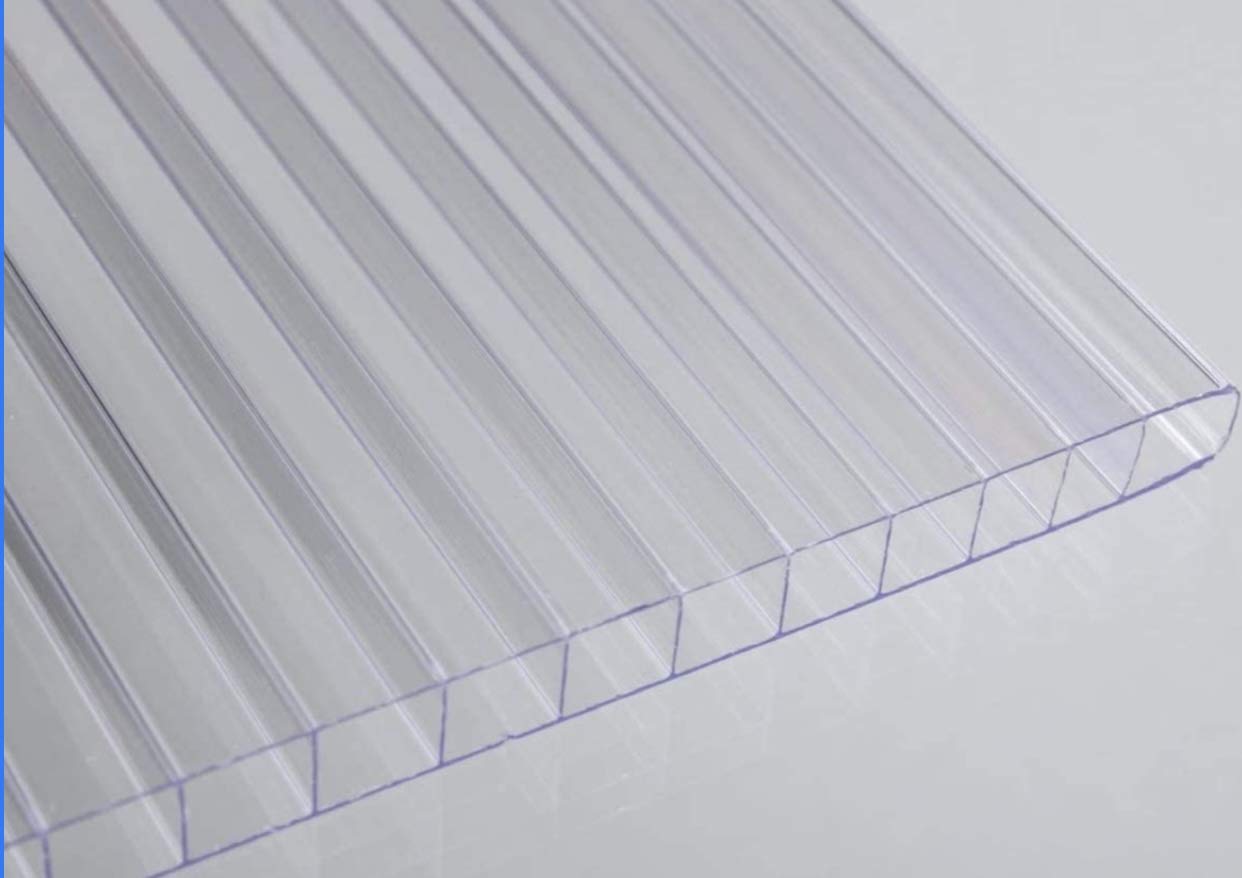
- Polycarbonate panels: These panels will form the walls and roof of your greenhouse. Choose high-quality, UV-resistant panels that offer good insulation and light transmission.
- Frame materials: You will need materials such as PVC pipes, wooden beams, or metal bars to construct the frame of your greenhouse. Select sturdy and durable materials that can withstand the elements.
- Fasteners: Depending on the type of frame you choose, you will need appropriate fasteners such as screws, nails, or connectors to secure the frame together.
- Foundation materials: Consider whether you want to build a raised greenhouse or one with a concrete foundation. Gather the necessary materials such as concrete blocks, gravel, or lumber for the foundation.
- Ventilation equipment: To regulate temperature and humidity levels, you will need ventilation equipment such as exhaust fans, vents, and louvers. Choose options that provide adequate airflow for your greenhouse size.
- Insulation materials: If you live in a colder climate, insulation will help maintain a stable temperature inside your greenhouse. Consider using materials like bubble wrap, fiberglass, or foam insulation panels.
- Tools: The tools you need will depend on the specific design and materials of your greenhouse. However, common tools include a saw, screwdriver, hammer, drill, measuring tape, and level.
It is important to ensure that you have all the necessary materials and tools before you start building your greenhouse. This will save you time and frustration during the construction process. Consider creating a checklist and organizing your materials and tools in advance.
Additionally, keep in mind any safety equipment you may need, such as gloves, safety glasses, and a sturdy ladder. Safety should always be a priority when working on any construction project.
Once you have gathered all the materials and tools, you are ready to move on to the next step – preparing the foundation for your greenhouse.
Step 3: Preparing the Foundation
The foundation of your greenhouse is crucial for its stability and longevity. It provides a solid base for the structure and helps anchor it to the ground. The type of foundation you choose will depend on various factors such as the size of your greenhouse, local building codes, and personal preference. Here are a few options to consider:
- Concrete slab: A concrete slab is a popular choice for larger, permanent greenhouses. It provides a sturdy and level surface for the greenhouse. Ensure that the slab is thick enough to withstand the weight of the structure.
- Concrete blocks or pavers: If you prefer a raised greenhouse, you can use concrete blocks or pavers to create a foundation. This option offers good drainage and allows for easy leveling of the structure.
- Wooden platform: For smaller and portable greenhouses, a wooden platform is a viable option. Use pressure-treated lumber and ensure that the platform is leveled and securely anchored to the ground.
- Gravel or crushed stone: Another option for a raised greenhouse is to lay a bed of gravel or crushed stone. This provides good drainage and can be easily leveled.
Before preparing the foundation, ensure that the ground is properly leveled. Clear any debris and vegetation from the area. If necessary, use a shovel or a garden tiller to even out the soil and remove any obstructions.
Once the ground is prepared, begin constructing the foundation according to your chosen method. Follow the appropriate building codes and guidelines to ensure structural integrity. Take measurements and use a level to ensure that the foundation is even and balanced.
Remember to consider the ventilation requirements of your greenhouse when preparing the foundation. If your design includes vents or fans, plan their placement in the foundation to accommodate the necessary airflow.
After completing the foundation, allow it to fully cure or settle before proceeding with the construction. This will ensure that the foundation is stable and ready to support the weight of the greenhouse.
Now that the foundation is prepared, you can move on to the exciting next step – assembling the frame of your greenhouse.
Step 4: Assembling the Frame
Now that you have prepared the foundation for your greenhouse, it’s time to start assembling the frame. The frame provides the structural support for your greenhouse and holds the polycarbonate panels in place. Here are the key steps to follow:
- Refer to the manufacturer’s instructions or your chosen greenhouse design plan for specific measurements and assembly instructions.
- Start by laying out the frame materials according to the design. If you are using PVC pipes, cut them to the required lengths using a saw. If you are using wooden beams or metal bars, ensure that they are properly measured and cut as well.
- Connect the frame pieces together using the appropriate fasteners such as screws, nails, or connectors. Ensure that the connections are secure and tight.
- As you assemble the frame, periodically check for squareness and levelness using a measuring tape and a level. This ensures that the frame is properly aligned and will result in a sturdy structure.
- If your greenhouse design includes any additional structural elements such as support beams, cross braces, or trusses, install them according to the instructions.
- Once the frame is fully assembled, position it on the prepared foundation. Use the appropriate hardware or brackets to secure the frame to the foundation. This will prevent shifting or movement of the structure.
- Double-check the frame for stability and make any necessary adjustments before proceeding to the next step.
During the frame assembly process, it is important to work carefully and methodically to ensure a strong and durable structure. Take your time to ensure that the frame is properly aligned and securely fastened together.
Remember to consider the design and layout of your greenhouse. If you plan to have doors or windows, make sure to leave openings in the frame for their installation.
Once you have successfully assembled the frame, you’re ready to move on to the next exciting step – installing the polycarbonate panels onto the frame.
Step 5: Installing the Polycarbonate Panels
Now that the frame of your greenhouse is assembled, it’s time to install the polycarbonate panels. These panels will form the walls and roof of your greenhouse, providing insulation and allowing light to penetrate. Here are the steps to follow:
- Measure the dimensions of each panel and mark the corresponding areas on the frame where they will be installed.
- Prepare the panels by removing any protective film or packaging. Ensure that the panels are clean and free from any dirt or debris.
- Begin with the end wall panels. Place the panel against the frame and align it with the marked areas. Use the appropriate fasteners, such as screws or clips, to secure the panel to the frame. Repeat this process for the remaining end wall panels.
- Continue by installing the roof panels. Depending on your greenhouse design, you may need to cut the panels to fit the desired shape. Use a fine-toothed saw or a panel cutter to make precise cuts.
- Secure the roof panels to the frame using the appropriate fasteners. Make sure each panel is aligned properly and tightly fastened.
- If your greenhouse design includes side wall panels, install them in a similar manner, following the specific instructions or design plan.
- Once all the polycarbonate panels are installed, double-check for any gaps or areas that require additional sealing. Use weather stripping or silicone caulking to seal any openings to prevent air or water leakage.
- Carefully clean the panels using a mild soap and water solution to remove any dirt or residue. Avoid using harsh chemicals or abrasive cleaners that can damage the panels.
During the panel installation, it is important to work carefully to avoid damaging the panels. Handle them with care and follow the manufacturer’s instructions for proper installation.
Remember to consider the ventilation requirements of your greenhouse. If your design includes vents, install them accordingly on the polycarbonate panels to ensure proper airflow.
Once all the panels are securely in place, take a step back and admire your progress. The structure is now taking shape, and you’re one step closer to enjoying your very own greenhouse.
Step 6: Adding Ventilation and Insulation
Proper ventilation and insulation are essential for maintaining optimal conditions inside your greenhouse. Ventilation helps regulate temperature, humidity, and air circulation, while insulation helps retain heat during colder months. Here are the steps to add ventilation and insulation to your greenhouse:
- Determine the appropriate ventilation options for your greenhouse design. Common options include exhaust fans, vents, louvers, or windows. Consider the size of your greenhouse and the ventilation needs of the plants you will be growing.
- Install the ventilation equipment according to the manufacturer’s instructions or your chosen design plan. Ensure that they are strategically placed to promote proper air movement and circulation.
- Consider installing automatic ventilation systems, such as thermostatically controlled vents or motorized windows, to regulate temperature and humidity levels automatically.
- Add insulation to your greenhouse to maintain a stable temperature and protect your plants during colder months. Bubble wrap, fiberglass, or foam insulation panels are commonly used for this purpose.
- Measure and cut the insulation materials to fit the size and shape of your greenhouse. Install them on the walls and roof, making sure there are no gaps or areas of air leakage.
- Secure the insulation materials using adhesive or fasteners that are appropriate for the type of material you are using.
- Inspect your greenhouse for any areas that may require additional insulation, such as around doors, windows, or gaps in the frame. Use weather stripping or sealant to seal these areas, preventing drafts and heat loss.
- Regularly monitor and adjust the ventilation and insulation systems as needed based on the changing climate and needs of your plants.
Proper ventilation and insulation are crucial for creating a favorable environment inside your greenhouse. They help prevent temperature extremes and maintain optimal growing conditions for your plants.
Remember to consider the specific requirements of your plants when it comes to temperature, humidity, and air circulation. Different plants have different needs, and adjusting the ventilation and insulation systems accordingly will help ensure their success.
With ventilation and insulation in place, your greenhouse is now equipped to provide a comfortable and controlled environment for your plants to flourish.
Step 7: Building Doors and Windows
Doors and windows are essential components of your greenhouse, providing access, ventilation, and natural light. Building them correctly will enhance the functionality and aesthetics of your greenhouse. Here are the steps to build doors and windows for your greenhouse:
- Determine the desired size and location of your greenhouse doors and windows. Consider factors such as ease of access, airflow, and sunlight exposure for your plants.
- Select the appropriate materials for your doors and windows. Common options include polycarbonate panels, glass, or wood.
- Measure and cut the materials to fit the dimensions of your desired doors and windows. Ensure that they align properly with the frame and other panels.
- Secure the doors and windows to the frame using hinges, handles, and latches. Make sure they open and close smoothly and securely.
- Add weather stripping or seals around the doors and windows to prevent drafts and moisture infiltration.
- To increase the flexibility of your greenhouse, consider incorporating adjustable vents or louvers within the doors or windows. This allows for precise control of air circulation and temperature.
- Install any necessary hardware for security, such as locks or window guards, to protect your greenhouse from unwanted entry.
- Add any additional decorative elements, such as window boxes or trim, to enhance the overall appearance of your greenhouse.
Building doors and windows for your greenhouse requires attention to detail and proper installation to ensure functionality and durability. Take the time to measure accurately, select quality materials, and secure the components properly.
Remember to consider the size and position of your doors and windows to optimize access and ventilation. Additionally, ensure that they are properly sealed to prevent air leakage and maintain a controlled environment.
With well-built doors and windows, your greenhouse is now ready to welcome you and your plants as you embark on your gardening journey.
Step 8: Setting up Irrigation and Shelving
Irrigation and shelving are important components that contribute to the efficiency and organization of your greenhouse. Proper irrigation ensures that your plants receive the necessary water, while shelving provides optimal space for arranging and displaying your plants. Here are the steps to set up irrigation and shelving in your greenhouse:
- Assess the watering needs of your plants and determine the appropriate irrigation system. Options include drip irrigation, sprinklers, or a combination of both.
- Install the irrigation system, following the manufacturer’s instructions. Lay out the tubing or pipes strategically to reach all areas of your greenhouse.
- If using a drip irrigation system, attach emitters or drippers to the tubing near the plants. Adjust the flow rate to ensure proper water distribution.
- Consider incorporating a timer or automated system to regulate the irrigation schedule, ensuring consistent and efficient watering.
- Set up a catchment system or drainage system to collect excess water and prevent waterlogging in your greenhouse.
- Next, focus on setting up shelving and organizing your plants. Evaluate the available space and determine the most efficient layout for your plants.
- Install shelving units, making sure they are sturdy and securely attached to the walls or frame of your greenhouse.
- Consider using adjustable shelves to accommodate different plant heights and optimize space utilization.
- Arrange your plants on the shelves, taking into account factors such as sunlight requirements, water needs, and growth habits.
- Label your plants or use a plant inventory system to keep track of their names, care instructions, and any other relevant information.
Setting up irrigation and shelving requires careful planning to ensure efficient use of space and optimal plant care. Consider the specific needs of your plants, such as water requirements and lighting preferences, when setting up the irrigation system and arranging your shelving.
Regularly monitor and adjust the irrigation schedule and shelving arrangement as needed to accommodate the growth and changing needs of your plants. This will help you maintain a well-organized and thriving greenhouse environment.
With the irrigation system in place and shelves neatly arranged, your greenhouse is ready to nurture your plants and provide them with the ideal growing conditions.
Step 9: Maintaining and Troubleshooting the Greenhouse
Maintaining and troubleshooting your greenhouse is crucial for the long-term success of your plants and the overall functionality of the structure. Regular maintenance ensures that everything is in working order and helps identify and address any issues before they escalate. Here are some key steps for maintaining and troubleshooting your greenhouse:
- Perform regular inspections of your greenhouse to check for any signs of wear, damage, or potential problems. Look for cracks in the polycarbonate panels, loose fasteners, or any areas that may be prone to leaks.
- Check the effectiveness of your ventilation system. Ensure that vents, louvers, or fans are functioning properly and providing sufficient airflow.
- Monitor the temperature and humidity levels inside your greenhouse. Adjust the ventilation and insulation as needed to maintain optimal conditions for your plants.
- Regularly clean the polycarbonate panels to remove dirt, debris, and any potential obstructions to light transmission.
- Inspect and maintain the irrigation system. Ensure that the tubing, emitters, or sprinklers are free from clogs and properly delivering water to your plants.
- Monitor for pests and diseases. Regularly check your plants for any signs of insect infestation or plant diseases. Implement appropriate pest control measures to protect your plants.
- Prune and trim your plants regularly to promote healthy growth and prevent overcrowding.
- Address any structural issues promptly. If you notice cracks, leaks, or damage to the frame or foundation, take immediate measures to repair or reinforce the affected areas.
- Keep a record of your maintenance activities, including watering schedules, pest control measures, and any changes you make to the greenhouse environment. This will help you track your progress and make informed adjustments for future plant care.
- Stay informed and continuously educate yourself about greenhouse gardening. Join online forums, attend workshops, or seek advice from experienced gardeners. Learning from others’ experiences can provide valuable insights and help you troubleshoot any challenges that may arise.
Maintaining and troubleshooting your greenhouse is an ongoing process. By regularly inspecting, cleaning, and addressing any issues that arise, you can ensure that your greenhouse remains a healthy and thriving environment for your plants.
Remember, prevention is key. By being proactive and addressing any maintenance or troubleshooting needs promptly, you can minimize the risk of problems escalating and maximize the enjoyment and success of your greenhouse gardening.
Conclusion
Congratulations on successfully completing the construction of your greenhouse with polycarbonate panels! You have created a space where you can cultivate beautiful plants and enjoy the wonders of gardening all year round. By following the step-by-step guide provided in this article, you have gained the knowledge and skills necessary to build a functional and efficient greenhouse.
Remember, the location of your greenhouse is crucial, ensuring it receives ample sunlight and is sheltered from strong winds. Gathering the right materials and tools, preparing a solid foundation, and assembling a sturdy frame are essential steps in the construction process. Installing polycarbonate panels, setting up ventilation and insulation, and building doors and windows further enhance the functionality and comfort of your greenhouse.
Once your greenhouse is built, focus on establishing an effective irrigation system and organizing your plants with well-designed shelving. Regular maintenance and troubleshooting are vital to ensure the continued success of your greenhouse. Monitor temperature and humidity levels, inspect for any signs of damage or pests, and make necessary adjustments to maintain an optimal environment for your plants.
Through this journey, you will discover the joy of tending to your plants, witnessing their growth, and reaping the rewards of your hard work. Gardening not only provides an opportunity to grow fresh and healthy produce but also offers a sense of calm and connection with nature.
As you continue your greenhouse gardening endeavors, remember to stay curious and continue expanding your knowledge. Learn from other experienced gardeners, experiment with new techniques, and adapt to the evolving needs of your plants. Gardening is a lifelong journey filled with opportunities for growth and discovery.
Enjoy the beauty and serenity of your greenhouse, and may it bring you countless hours of joy and fulfillment as you nurture and care for your plants. Happy gardening!