Home>Gardening Techniques>DIY Projects>How To Build A Hoop Greenhouse
DIY Projects
How To Build A Hoop Greenhouse
Modified: January 22, 2024
Learn how to build a DIY hoop greenhouse with this step-by-step guide. Perfect for DIY projects and gardening enthusiasts.
(Many of the links in this article redirect to a specific reviewed product. Your purchase of these products through affiliate links helps to generate commission for Chicagolandgardening.com, at no extra cost. Learn more)
Table of Contents
Introduction
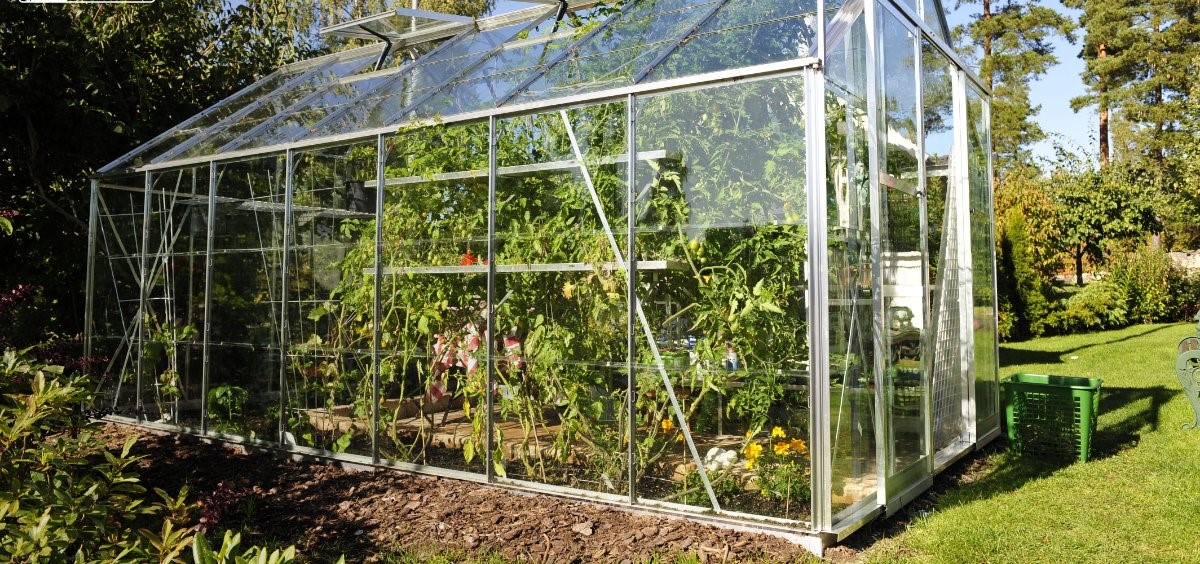
Are you a garden enthusiast looking to extend your growing season and protect your plants from harsh weather conditions? Building a hoop greenhouse might be the perfect solution for you. A hoop greenhouse is a cost-effective and versatile structure that allows you to create a controlled environment for growing plants year-round.
With a hoop greenhouse, you can start planting early in the spring, extend your harvest in the fall, and even grow certain crops throughout the winter. Whether you’re a beginner or an experienced gardener, constructing your own hoop greenhouse can be a rewarding and fulfilling DIY project.
In this article, we will guide you through the step-by-step process of building a hoop greenhouse. From selecting the ideal location to installing the necessary equipment, we will provide you with all the information and tips you need to successfully complete this project. So, roll up your sleeves and get ready to create a thriving haven for your plants!
Before we delve into the construction process, there are a few factors to consider when planning your hoop greenhouse. These include the location, materials, and tools you will need. By taking these factors into account, you can ensure your greenhouse is ideally situated and equipped for optimal plant growth and protection.
Choosing the Location
When it comes to building a hoop greenhouse, selecting the right location is crucial for the success of your plants. Here are some factors to consider when choosing a suitable spot:
- Sunlight: Ensure that your hoop greenhouse receives the maximum amount of sunlight throughout the day. Ideally, it should be positioned in a place where it can get at least six to eight hours of direct sunlight. Avoid areas that are shaded by trees or buildings, as this can hinder the growth of your plants.
- Accessibility: Consider the ease of access to your greenhouse. It should be situated in a location that is convenient for you to enter and exit, as well as to transport your tools and supplies. Additionally, consider factors such as water availability and proximity to your house, making it easier to monitor and tend to your plants.
- Wind Protection: Take into account the direction and intensity of the prevailing winds in your area. Position your hoop greenhouse in a way that protects it from strong winds, as they can cause damage to the structure and stress your plants. Consider using natural windbreakers, such as hedges or fences, to create a barrier against the wind.
- Drainage: Choose a location with good drainage to prevent waterlogging and excessive moisture around your plants. Avoid areas that are prone to flooding or have poor soil drainage. If necessary, you can improve the drainage by adding a layer of gravel or creating a slight slope in the ground.
- Future Expansion: Keep in mind the potential for future expansion when selecting the location. If you plan on expanding your greenhouse in the future, choose a spot that allows for additional space or easy modification of the existing structure.
By considering these factors, you can select an ideal location for your hoop greenhouse that provides the necessary conditions for your plants to thrive. Once you have chosen the perfect spot, it’s time to gather the materials and tools needed for the construction process. Stay tuned!
Gathering the Materials and Tools
Before you start building your hoop greenhouse, it’s important to gather all the necessary materials and tools. Here’s a list of what you’ll need:
Materials:
- Greenhouse frame materials: This typically includes PVC pipes or metal conduit, depending on your preference and budget. Calculate the required length based on the desired dimensions of your hoop greenhouse.
- Plastic covering: Choose a durable and UV-resistant greenhouse-grade plastic film to cover the frame. You can opt for clear, translucent, or opaque plastic, depending on your specific needs.
- Fasteners: You’ll need screws, bolts, or clips to secure the frame and plastic to the structure. Make sure you choose appropriate fasteners for your chosen materials.
- Ground stakes: These will help anchor the greenhouse to the ground and provide stability, especially in windy conditions.
- Door materials: Select a sturdy yet lightweight material for the entrance of your hoop greenhouse. This could be a wooden or PVC door, or even a simple plastic flap.
- Irrigation system: Depending on your preference, you may need pipes, fittings, and a watering system to ensure efficient watering of your plants.
Tools:
- Measuring tape and level: These are essential for accurately measuring and ensuring that your greenhouse is level during construction.
- Hacksaw or pipe cutter: This will be used to cut the PVC pipes or metal conduit to the desired lengths.
- Screwdriver or drill: Use this to attach the frame and plastic covering to the structure.
- Hammer: Needed for driving in ground stakes and securing other components.
- Utility knife: Use this to cut the plastic covering to the correct size and shape.
- Shovel or post hole digger: Required for digging holes in the ground to anchor the greenhouse and install the door.
Make sure to gather all these materials and tools before starting your project. It is always helpful to double-check the quantities and sizes required to avoid any last-minute trips to the hardware store. With everything in place, you’re ready to proceed with building the hoop structure. Keep reading for the next steps!
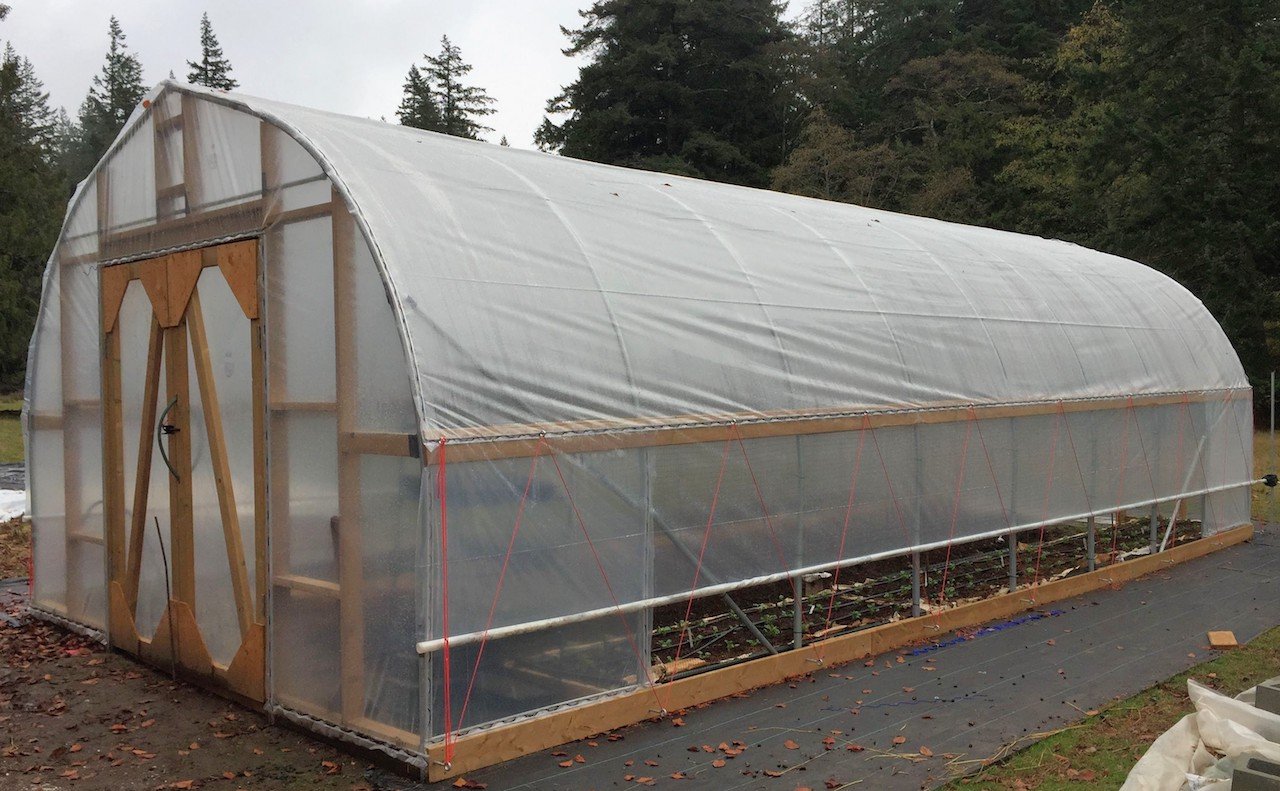
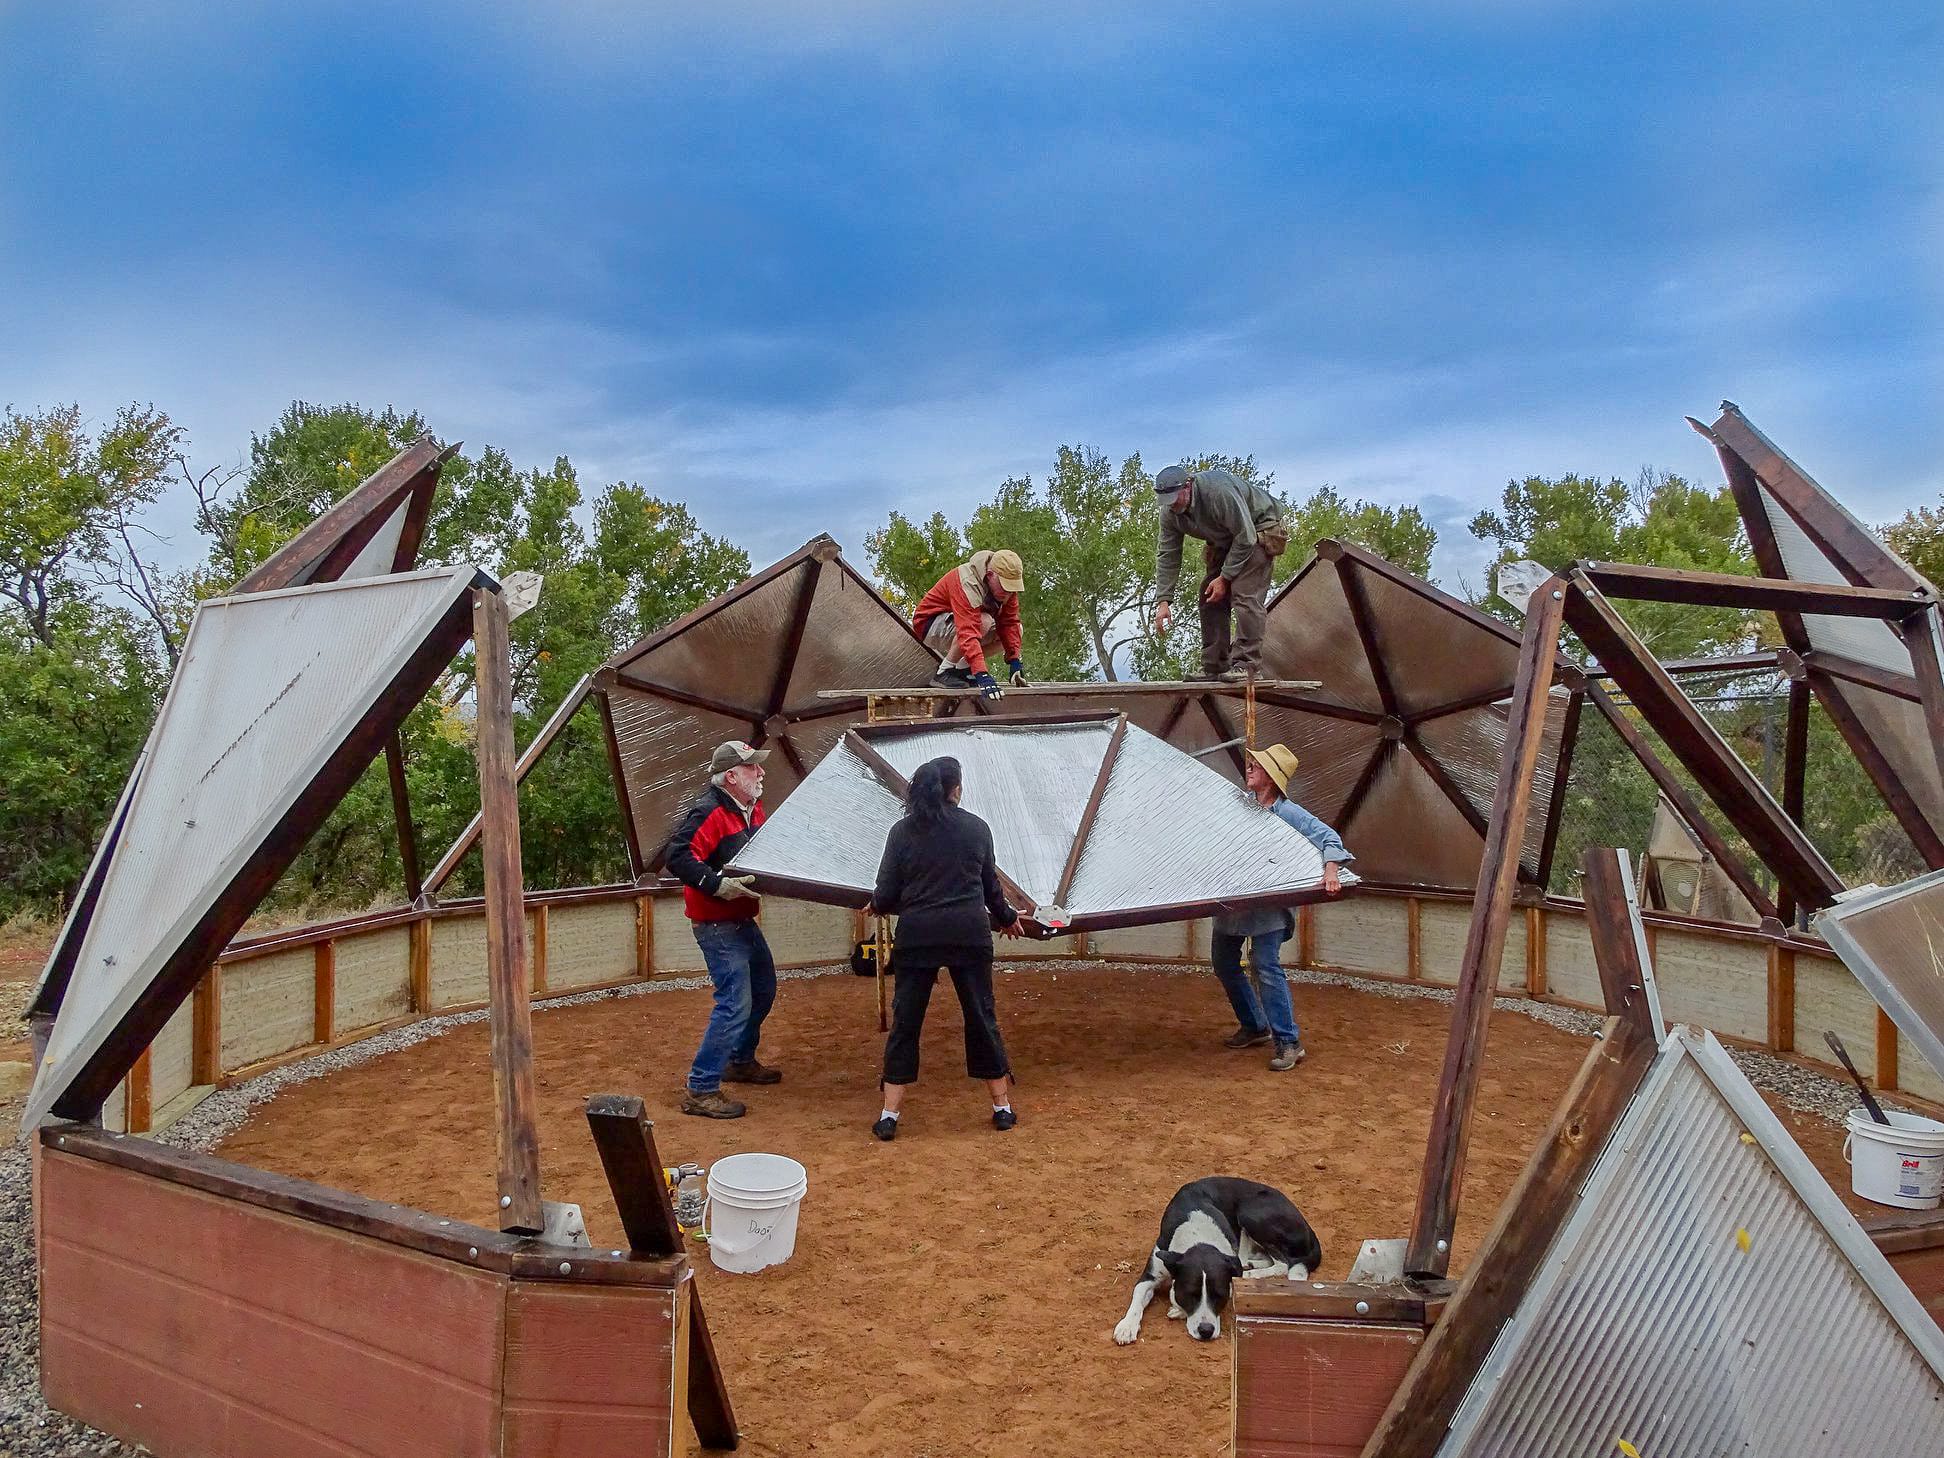
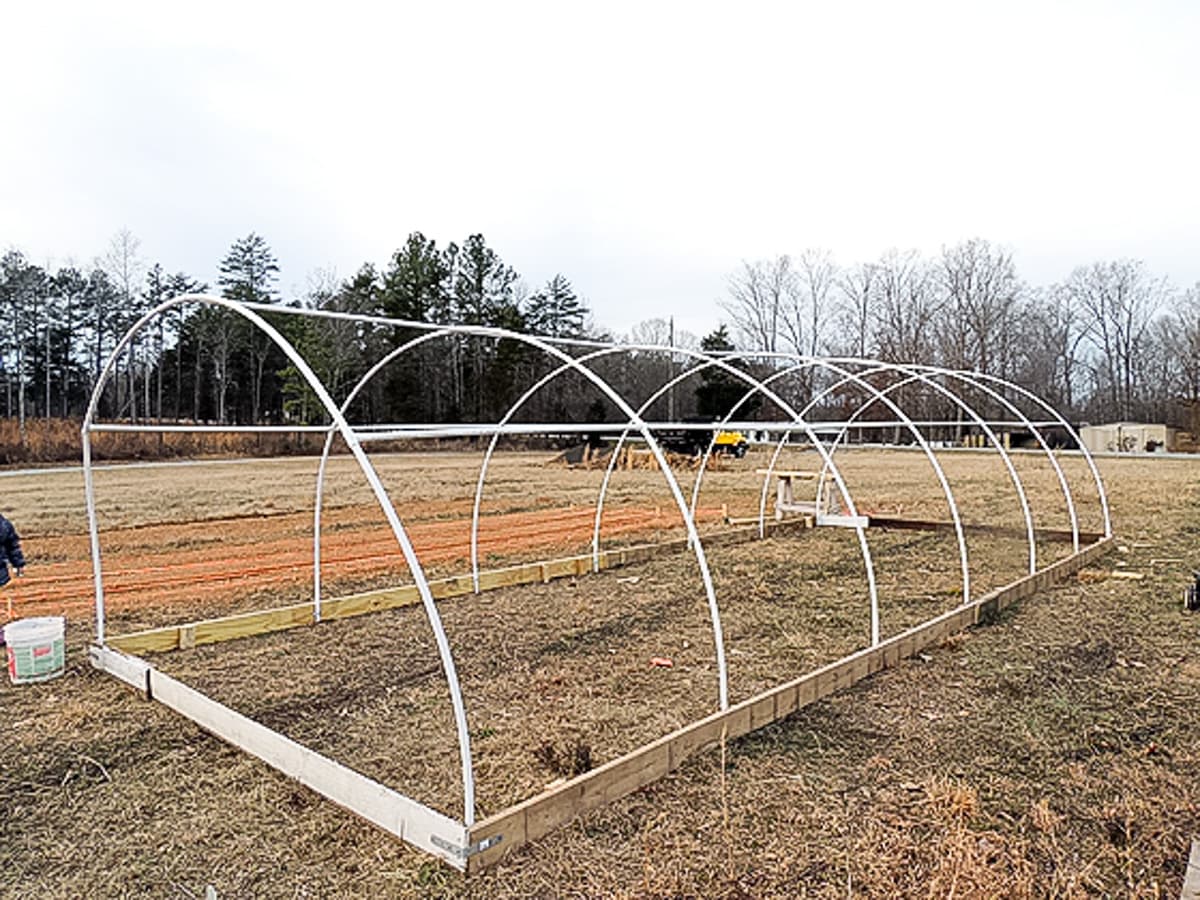
Building the Hoop Structure
Now that you have all the necessary materials and tools, it’s time to start building the hoop structure of your greenhouse. Here’s a step-by-step guide on how to construct the frame:
- Measure and mark the dimensions: Begin by measuring and marking the desired width and length of your hoop greenhouse on the ground. This will serve as a guide for placing the hoops.
- Install the ground stakes: Using a shovel or post hole digger, dig holes along the marked area for the ground stakes. Place the stakes at regular intervals, approximately 4-6 feet apart, and drive them into the ground until they are secure.
- Create the hoops: If using PVC pipes, cut them to the desired length for the height of your greenhouse. Gently bend each pipe and insert the ends into the ground stakes on either side. If using metal conduit, bend it into an arch shape and secure the ends to the ground stakes.
- Secure the hoops: Once the hoops are in place, attach them to the ground stakes using screws or clips. This will provide stability and prevent them from shifting or collapsing.
- Add cross supports (optional): To further strengthen the structure, you can add cross supports between the hoops. Use additional PVC pipes or metal conduit to create a horizontal brace across the center of the structure, attaching them securely to the hoops.
Once the hoop structure is complete, take a moment to ensure that it is level and secure. Make any necessary adjustments to ensure stability and proper alignment. With the frame in place, you’re ready to move on to the next step: attaching the plastic covering. We’ll cover that in the next section, so keep reading!
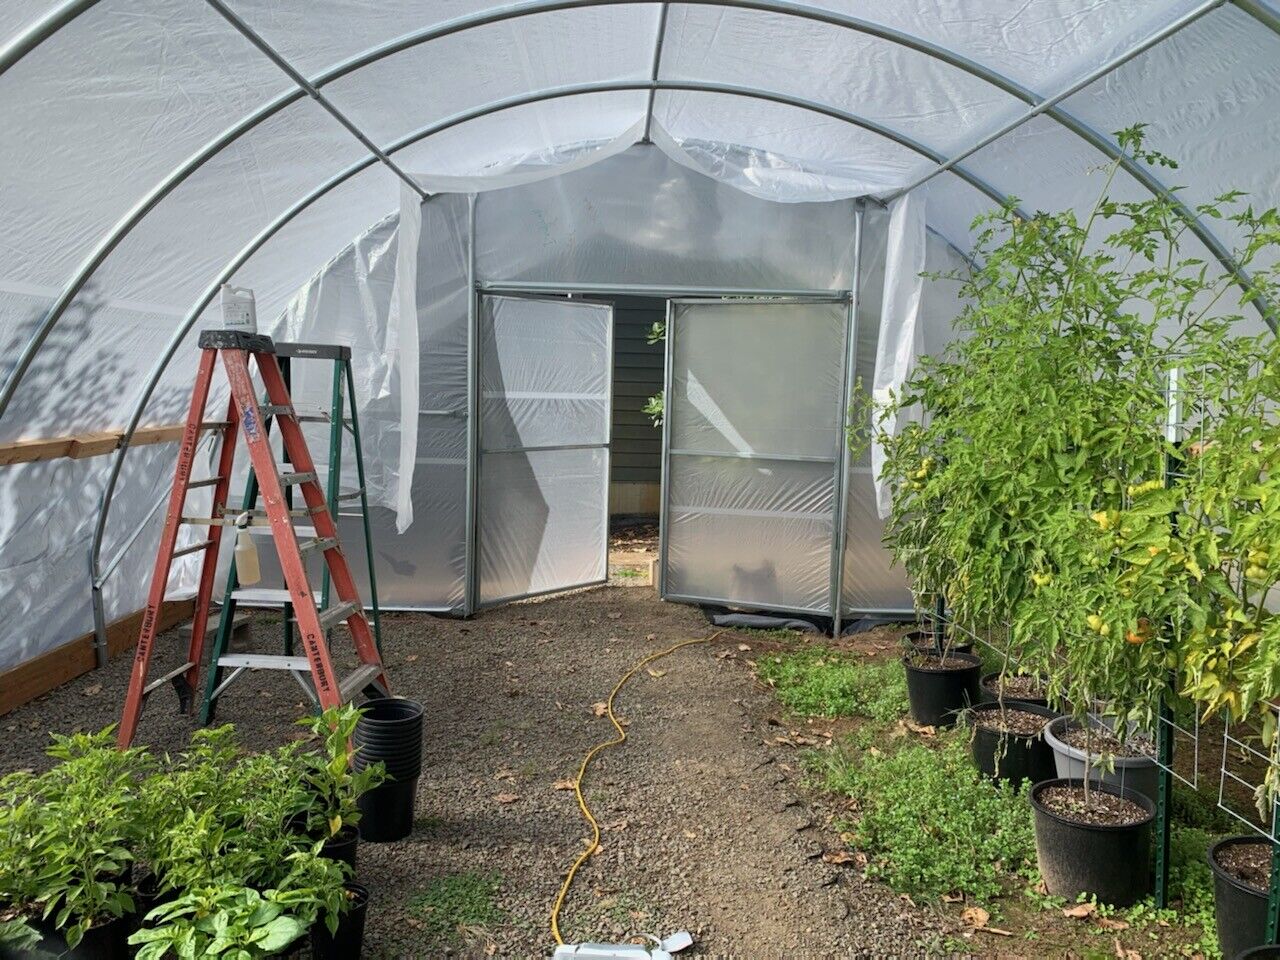
Attaching the Plastic Covering
Now that the hoop structure is built, it’s time to attach the plastic covering to create a sealed environment for your plants. Here’s how you can do it:
- Measure and cut the plastic: Using a utility knife, measure and carefully cut the greenhouse-grade plastic film to the appropriate size. Leave some extra material on each side to ensure a secure fit.
- Secure one end of the plastic: Start at one end of the hoop structure and secure the plastic to the frame using screws, bolts, or clips. Pull the plastic taut as you go, ensuring it is smooth and wrinkle-free.
- Secure the opposite end: Once the first end is secure, move to the opposite end and repeat the process, pulling the plastic tight and securing it to the frame.
- Secure the sides: Working from the ends towards the center, secure the plastic along the sides of the frame. Use the same method of screws, bolts, or clips to attach the plastic and keep it in place.
- Trim excess plastic: Once the plastic is securely attached, use a utility knife to carefully trim any excess material along the edges. This will give your greenhouse a clean and finished appearance.
Throughout the process, make sure to keep the plastic tight and smooth to avoid sagging or wrinkling. This will ensure proper insulation and light distribution within the greenhouse. Additionally, check that the plastic is properly sealed and covers the entire structure, leaving no gaps that could let in drafts or pests.
Remember, the plastic covering is essential for creating a controlled environment for your plants, providing insulation and protection from external elements. Take your time to ensure it is properly attached before moving on to the next steps of creating the entrance and ventilation. Stay tuned for the next section!
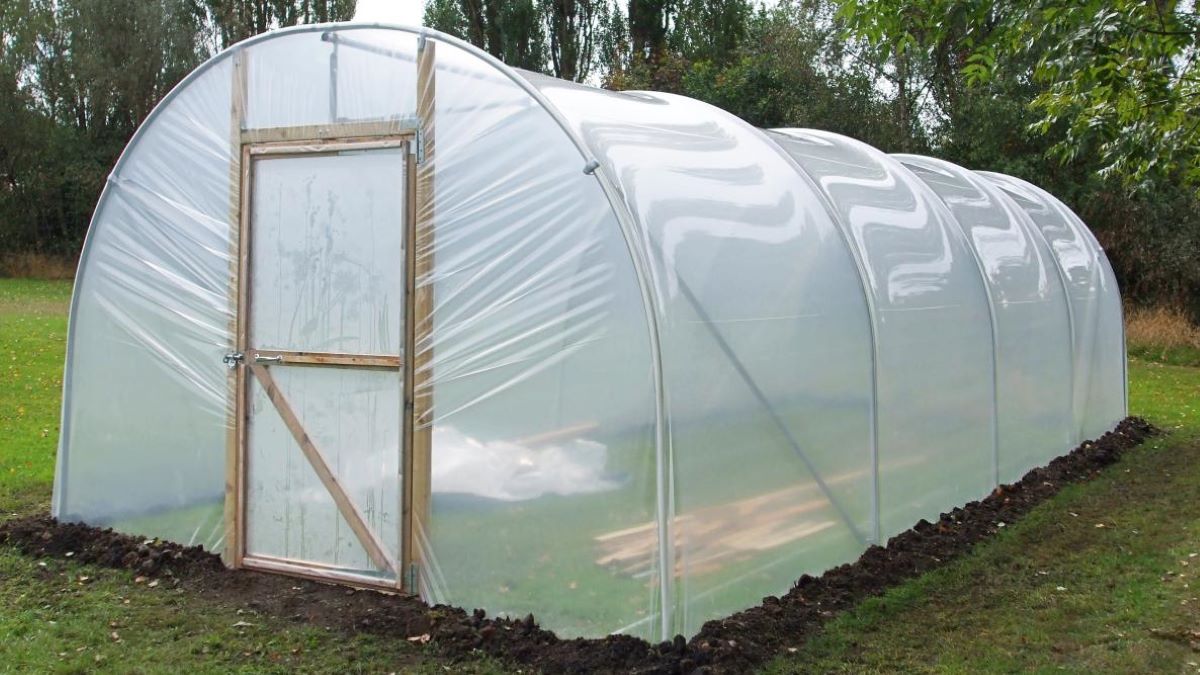
Creating the Entrance and Ventilation
Now that your hoop greenhouse is covered with plastic, it’s time to create an entrance and ensure proper ventilation. Here’s what you need to do:
Creating the Entrance:
- Choose the location: Decide where you want the entrance of your greenhouse to be. It’s typically best to have the entrance facing south for maximum sunlight exposure.
- Measure and cut the opening: Use a measuring tape to determine the size of the entrance you want, then mark and cut a suitable opening in the plastic covering. You can create a simple flap door or opt for a more elaborate hinged door, depending on your preference.
- Install the entrance: Securely attach the door of your choice to the frame of the greenhouse using hinges, screws, or clips. Make sure the door is easy to open and close, allowing for convenient access to your plants.
Ensuring Proper Ventilation:
- Create vents: To ensure proper airflow and regulate the temperature inside the greenhouse, it’s important to create vents. These can be windows or openings along the sides or top of the greenhouse. Consider using vents with adjustable covers, allowing you to control the amount of airflow.
- Add insect screens: To prevent unwanted pests from entering your greenhouse through the vents, attach insect screens to cover the openings. This will help protect your plants while still allowing for proper ventilation.
Having a well-designed entrance and proper ventilation is essential for maintaining the health and productivity of your plants. The entrance allows you easy access for planting, tending, and harvesting, while ventilation helps control temperature, humidity, and airflow within the greenhouse.
With the entrance and ventilation in place, you’re one step closer to having a fully functional hoop greenhouse. The next step is installing an irrigation system to keep your plants properly hydrated. Keep reading for the next section!
Installing an Irrigation System
An efficient and reliable irrigation system is essential for maintaining the health and growth of your plants in a hoop greenhouse. Here are the steps to install an effective irrigation system:
- Choose the type of irrigation: There are various types of irrigation systems to choose from, including drip irrigation, soaker hoses, and overhead sprinklers. Consider factors such as water efficiency, plant water requirements, and ease of installation when selecting the best option for your greenhouse.
- Plan the layout: Determine the location of your plants and calculate the irrigation requirements for each area. This will help you design a well-distributed system that delivers water precisely where it’s needed.
- Install the water source: Connect a water source, such as a hose or a drip system, to a suitable water supply. Make sure you have a reliable and regulated water pressure to avoid unnecessary stress on your plants.
- Lay out the irrigation lines: Place the irrigation lines strategically along the rows or beds of your plants. If using a drip irrigation system, position the emitters near the base of the plants for efficient water delivery directly to the roots.
- Secure the lines: Use clips or stakes to secure the irrigation lines, keeping them in place and preventing accidental movement or damage.
- Add a timer (optional): Consider installing a timer to automate the irrigation process, saving you time and ensuring consistent watering. This can be particularly useful if you’re away from your greenhouse for extended periods.
Ensure that the irrigation system provides adequate moisture for your plants without overwatering them. Monitor the soil moisture levels and adjust the watering schedule as needed based on the specific requirements of your crops.
Proper water management is crucial for the success of your hoop greenhouse. By installing an efficient irrigation system, you can ensure that your plants receive the appropriate amount of water, leading to healthier growth and higher yields.
Now that you have a functional irrigation system in place, it’s time to set up shelves and benches to optimize the use of space in your greenhouse. Keep reading for the next section!
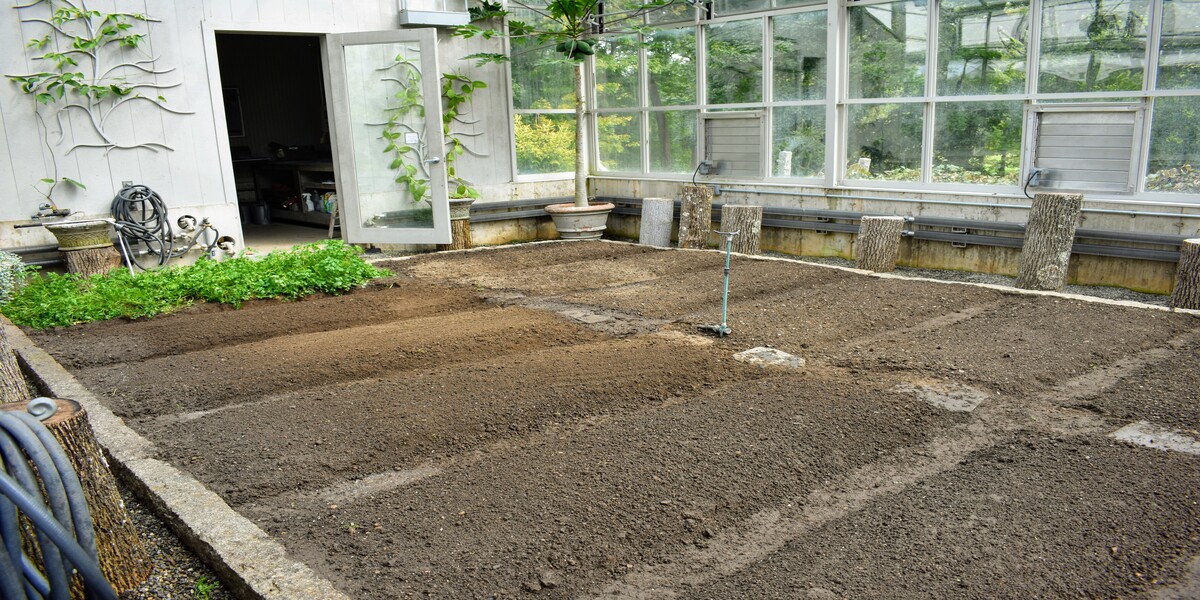
Setting up Shelves and Benches
Setting up shelves and benches in your hoop greenhouse is a great way to maximize the use of vertical space and provide optimal growing conditions for your plants. Here are the steps to set up shelves and benches:
- Assess the space: Take a look at the available space in your greenhouse and determine where you can install shelves and benches. Consider factors such as sunlight exposure, accessibility, and the specific needs of your plants.
- Choose the materials: Select materials that are sturdy, durable, and resistant to moisture. Common options include treated lumber, metal wire shelves, or plastic shelving units. Ensure that the materials are suitable for use in a humid environment.
- Measure and cut: Measure the size and dimensions for your shelves and benches based on the available space. Use a saw or appropriate cutting tools to cut the materials to the desired lengths.
- Install the supports: Attach brackets or support posts to the walls or sides of your greenhouse. Make sure they are securely fastened to provide stability for the shelves and benches.
- Place the shelves and benches: Position the pre-cut materials on top of the supports or brackets. Ensure that they are level and firmly in place, with enough space for proper airflow and access around the plants.
- Add additional features (optional): Consider adding drip trays under the shelves or benches to collect excess water. This will prevent water from pooling on the floor and make it easier to maintain a clean and tidy greenhouse.
By setting up shelves and benches, you can create multiple tiers for your plants, making the most of the available space and optimizing the growing conditions. It also allows for easier organization and maintenance, making it convenient to tend to your plants and monitor their progress.
As your plants grow, adjust the positioning of the shelves and benches to accommodate their height and ensure that they are receiving adequate light and airflow. This will help prevent overcrowding and promote healthy growth.
With shelves and benches installed, your hoop greenhouse is now ready to provide an organized and efficient space for your plants to thrive. The final step is to learn how to maintain the greenhouse effectively, ensuring long-term success. Keep reading for the next section!
Maintaining the Hoop Greenhouse
Once your hoop greenhouse is built and set up, regular maintenance is essential to ensure the health and productivity of your plants. Here are some key maintenance tasks to keep in mind:
Monitoring and Adjusting Conditions:
- Temperature: Regularly monitor the temperature inside the greenhouse, especially during extreme weather conditions. Adjust the ventilation and provide shade or additional insulation as needed to maintain a suitable temperature for your plants.
- Humidity: Check the humidity levels inside the greenhouse and make adjustments if necessary. High humidity can lead to fungal diseases, while low humidity can cause stress to certain plants. Use fans or misters to control humidity levels as needed.
- Watering: Regularly check the soil moisture levels and ensure that your plants are receiving appropriate water. Adjust the watering schedule and methods based on the specific needs of your crops.
- Pest and disease control: Keep a close eye on your plants for any signs of pests or diseases. Take immediate action to prevent the spread and damage caused by these unwanted visitors. Consider using organic pest control methods or natural predators to maintain a healthy growing environment.
General Maintenance:
- Cleanliness: Regularly clean the greenhouse, including the flooring, walls, and shelves. Remove any debris, weeds, or fallen leaves that may harbor pests or diseases.
- Inspecting the structure: Periodically inspect the hoop structure for any signs of damage or weakness. Repair or replace any broken or worn-out components to ensure the integrity and stability of the greenhouse.
- Replacing plastic covering: Over time, the plastic covering may become worn out or damaged. Monitor its condition and replace it when necessary to maintain proper insulation and light transmission.
- Fertilization: Depending on the types of plants you’re growing, utilize appropriate fertilization methods to provide the necessary nutrients for optimal growth and production.
By staying on top of regular maintenance tasks, you can prevent issues before they become major problems and ensure a flourishing hoop greenhouse. Remember to also stay informed about the specific care requirements of each crop you’re growing, as they may have unique maintenance needs.
Now that you have a good understanding of how to maintain your hoop greenhouse, you can enjoy the rewarding experience of harvesting fresh, homegrown produce all year round. With proper care and attention, your hoop greenhouse will continue to provide a thriving environment for your plants for many seasons to come.
Conclusion
Congratulations! You have reached the end of our comprehensive guide on how to build and maintain a hoop greenhouse. By following the steps outlined in this article, you now have the knowledge and confidence to embark on your own DIY greenhouse project.
A hoop greenhouse is a fantastic addition to any garden, allowing you to extend your growing season, protect your plants from harsh weather, and create an ideal environment for year-round cultivation. With careful planning and attention to detail, you can create a thriving oasis for your plants.
Remember to choose the location wisely, gather the necessary materials and tools, and construct a solid hoop structure. Attach the plastic covering securely, create an entrance with proper ventilation, and install an efficient irrigation system to ensure your plants receive the necessary water and airflow.
Setting up shelves and benches will optimize the use of space, and regular maintenance, such as monitoring temperature and humidity levels, watering, pest control, and general upkeep, will ensure the ongoing success of your hoop greenhouse.
Creating and maintaining a hoop greenhouse is a rewarding journey that allows you to exercise your green thumb, grow your own food, and enjoy the therapeutic benefits of gardening. So, roll up your sleeves, put your DIY skills to the test, and start building your very own hoop greenhouse today.
Happy gardening!