Home>Gardening Techniques>DIY Projects>How To Build Greenhouse Planter Boxes
DIY Projects
How To Build Greenhouse Planter Boxes
Modified: January 22, 2024
Learn how to build your own DIY greenhouse planter boxes with this step-by-step guide. Perfect for green thumbs and DIY enthusiasts looking to create their own outdoor oasis.
(Many of the links in this article redirect to a specific reviewed product. Your purchase of these products through affiliate links helps to generate commission for Chicagolandgardening.com, at no extra cost. Learn more)
Table of Contents
- Introduction
- Materials Needed
- Step 1: Choosing the Right Location
- Step 2: Designing the Greenhouse Planter Boxes
- Step 3: Gathering the Necessary Tools
- Step 4: Building the Frame
- Step 5: Attaching the Panels
- Step 6: Installing the Roof
- Step 7: Adding the Planter Boxes
- Step 8: Preparing the Soil
- Step 9: Planting and Maintaining the Greenhouse Planter Boxes
- Conclusion
Introduction
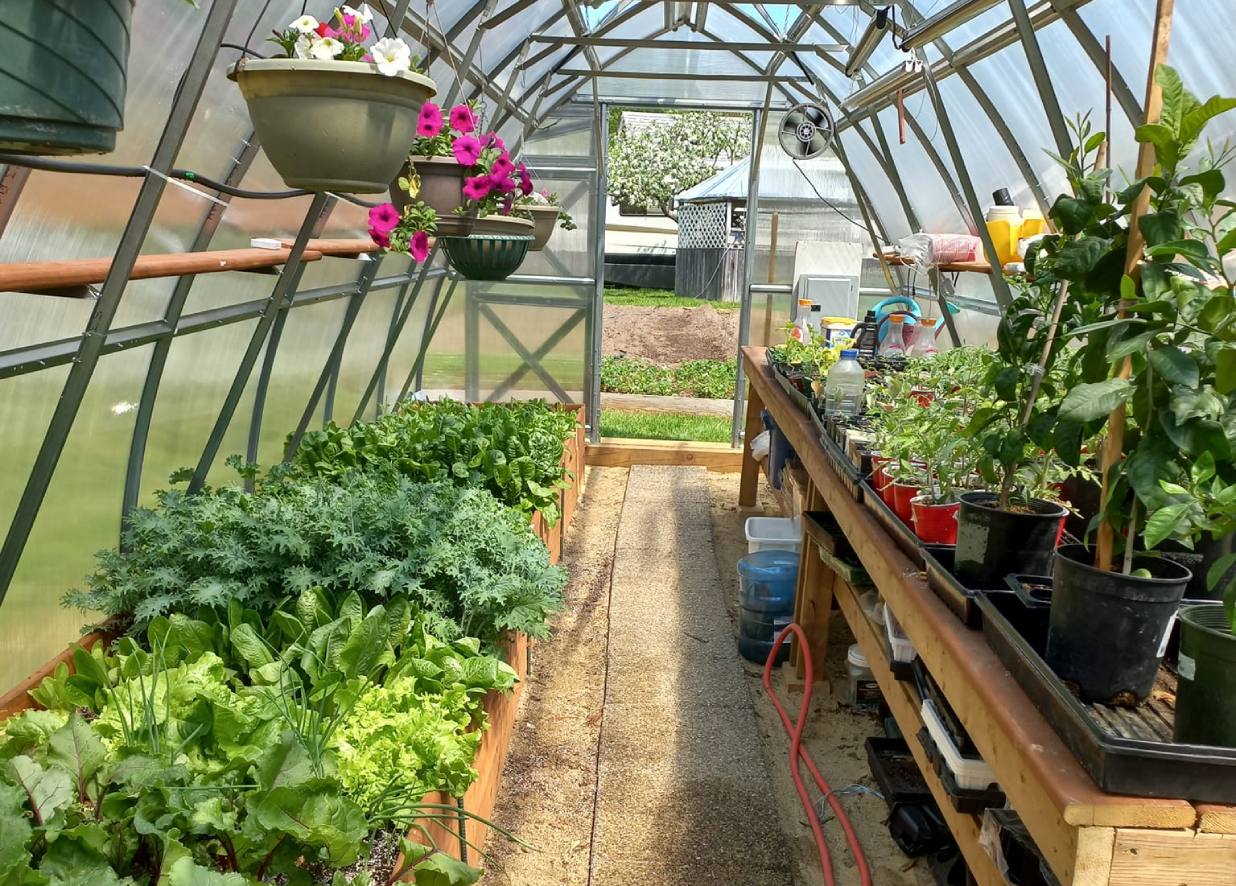
Welcome to the world of DIY projects! If you have a green thumb and a love for growing your own plants, then building greenhouse planter boxes is the perfect project for you. Not only do these planter boxes provide a controlled environment for your plants to thrive, but they also add a touch of beauty to your garden.
With the right tools, materials, and guidance, you can create your very own greenhouse planter boxes that will last for years to come. Whether you are a seasoned DIY enthusiast or a beginner looking for a new challenge, this comprehensive guide will take you through the step-by-step process of building and maintaining your greenhouse planter boxes.
In this article, we will cover everything you need to know, from choosing the right location for your greenhouse planter boxes to designing the perfect layout. We will also guide you through the construction process, including the necessary tools and techniques. Additionally, we will discuss soil preparation, planting techniques, and how to effectively maintain your planter boxes for optimal plant growth.
So, roll up your sleeves, grab your tools, and let’s get started on this exciting DIY project!
Materials Needed
Before you get started with building your greenhouse planter boxes, it is important to gather all the necessary materials. Here is a list of items you will need:
- Lumber: Choose untreated cedar or redwood for its durability and resistance to rot.
- Galvanized screws: These will secure the wooden panels together.
- Polycarbonate panels or greenhouse plastic: Depending on your preference and budget, you can choose either polycarbonate panels for superior insulation or greenhouse plastic for a more cost-effective option.
- Roofing nails: These will be used to attach the polycarbonate panels or greenhouse plastic to the frame.
- Wood glue: This will provide additional strength to the joints.
- Hinges and handles: These will be used for the doors of the greenhouse planter boxes.
- Screen or shade cloth: This will help regulate the temperature inside the planter boxes.
- Drainage materials: You will need gravel or stones to create a well-draining base for the planter boxes.
- Potting soil: Choose a high-quality potting mix specifically designed for greenhouse gardening.
- Seeds or starter plants: Depending on your preference, you can start from seeds or purchase starter plants from a local nursery.
- Watering can or hose: To provide your plants with the necessary moisture.
- Gardening tools: Including a trowel, pruners, and gloves for maintaining and caring for your plants.
Make sure to gather all these materials before you begin the construction process. This will ensure that you have everything you need on hand, minimizing any potential delays.
Now that you have your materials ready, let’s move on to the next step: choosing the right location for your greenhouse planter boxes.
Step 1: Choosing the Right Location
The success of your greenhouse planter boxes greatly depends on choosing the right location. Here are some factors to consider:
1. Sunlight: Select a spot that receives at least 6-8 hours of direct sunlight per day. Most plants thrive in full sun, so choose an area that is not shaded by trees or buildings.
2. Space: Determine how much space you have available and plan accordingly. Consider the size of the planter boxes and leave enough room for easy access and maintenance.
3. Accessibility: Choose a location that is easily accessible for watering, fertilizing, and harvesting. Having a water source nearby is also convenient.
4. Wind Protection: While some airflow is necessary for plant health, excessive wind can damage or uproot your plants. Consider placing your greenhouse planter boxes near a natural windbreak, such as a fence or shrubs.
5. Level Ground: Ensure that the ground is level to prevent water pooling and structural issues. You can use a level tool or adjust the ground as needed.
6. Drainage: Good drainage is essential to prevent waterlogging and root rot. Avoid low-lying areas or areas with poor drainage. If needed, you can create a raised bed with proper drainage systems.
7. Proximity to utilities: If you plan to install electricity or water in your greenhouse, choose a location that is close to the necessary utilities.
Take your time to assess different areas in your garden or backyard and choose the location that meets these criteria. Once you have selected the ideal spot, it’s time to move on to the next step: designing the greenhouse planter boxes.
Step 2: Designing the Greenhouse Planter Boxes
The design of your greenhouse planter boxes can greatly impact the functionality and aesthetics of your growing space. Here are some key considerations when designing your planter boxes:
1. Dimensions: Determine the desired dimensions of your planter boxes based on the available space and the number of plants you intend to grow. Keep in mind that taller planter boxes may require additional support and stability.
2. Materials: Choose the type of material you want to use for your planter boxes. Wood is a popular choice due to its durability, but you can also consider other materials such as metal or recycled plastic.
3. Style: Consider the aesthetic appeal of the planter boxes and how they will complement the overall look of your garden or backyard. You can opt for a sleek and modern design or a more rustic and natural look.
4. Ventilation: Plan for proper ventilation by incorporating vents or windows in your greenhouse planter boxes. This will allow for air circulation and help regulate the temperature and humidity inside.
5. Accessibility: Think about easy access to your plants for watering, fertilizing, and harvesting. Incorporate features such as hinged doors or removable panels to make maintenance tasks more convenient.
6. Irrigation: Consider the irrigation system you will use to water your plants. This can include drip irrigation, a watering hose, or a self-watering system. Design your planter boxes to accommodate the irrigation method of your choice.
7. Additional features: Think about additional features you might want to incorporate into your design, such as shelves, trellises, or hooks for hanging plants.
Sketch out your design ideas or use a computer-aided design (CAD) program to visualize your greenhouse planter boxes. Make sure to take accurate measurements and consider all the factors mentioned above. Once you have finalized your design, it’s time to gather the necessary tools for the construction process.
Step 3: Gathering the Necessary Tools
Now that you have your greenhouse planter box design prepared, it’s time to gather the tools needed to bring your project to life. Here are the essential tools you will require:
- Measuring tape: To ensure accurate measurements during construction.
- Saw: Whether it’s a circular saw, hand saw, or miter saw, you will need it to cut the lumber to the desired dimensions.
- Screwdriver: For driving screws into the wood and securing the panels together.
- Drill: To create pilot holes for the screws and to attach any hardware or accessories.
- Level: Used to ensure that the planter boxes are level and properly aligned.
- Pencil: For marking measurements, cut lines, and other important details on the lumber.
- Safety equipment: Safety glasses, gloves, and ear protection are essential for protecting yourself during the construction process.
- Sanding tools: Sandpaper or a power sander will be useful for smoothing rough edges and surfaces.
- Paint or sealant: If desired, you may want to paint or seal the wood to protect it against moisture and weathering.
It’s important to have all the necessary tools ready before starting the construction process. This will ensure a smooth workflow and prevent any delays.
Remember to prioritize safety while using these tools. Follow proper guidelines, wear protective gear, and use caution to avoid accidents or injuries.
Now that you have your tools prepared, it’s time to move on to the actual construction process. In the next step, we will guide you through building the frame of your greenhouse planter boxes.
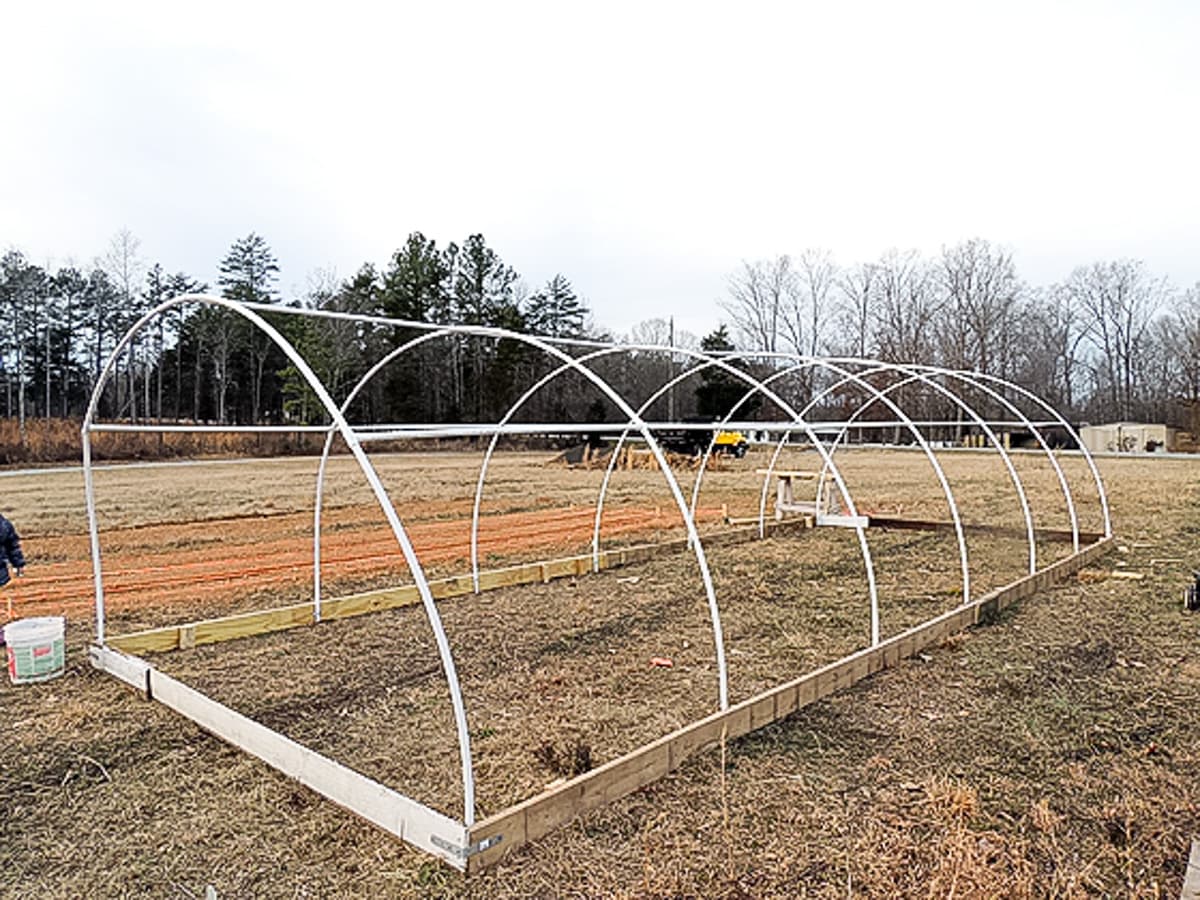
Step 4: Building the Frame
With the necessary tools on hand, it’s time to start building the frame for your greenhouse planter boxes. Follow these steps to construct a sturdy and stable frame:
- Measure and cut the lumber: Using your design plans, measure and mark the lengths needed for the sides, edges, and corners of the frame. Use a saw to make precise cuts.
- Assemble the sides: Lay out the cut pieces on a flat surface and begin assembling the sides of the planter boxes. Use screws and a drill to attach the pieces together at the corners. Reinforce the joints with wood glue for added strength.
- Connect the sides and edges: Attach the sides to the edges of the planter boxes using screws and wood glue. Ensure that the corners are squared and that the frame is level.
- Adding support: Depending on the size and height of your planter boxes, you may need to add additional support in the form of crossbars or bracing. This will prevent the frame from sagging or bowing over time.
- Sand and finish: Once the frame is assembled, use sandpaper or a power sander to smooth any rough edges or surfaces. If desired, apply a coat of paint or sealant to protect the wood from moisture and weathering.
Take your time during the construction process to ensure that the frame is sturdy and even. Double-check the measurements and use level tools to ensure proper alignment. This will help guarantee the stability and longevity of your greenhouse planter boxes.
Now that the frame is complete, it’s time to move on to the next step: attaching the panels to create the walls of your greenhouse planter boxes.
Step 5: Attaching the Panels
Now that the frame of your greenhouse planter boxes is complete, it’s time to attach the panels and create the walls. The type of material you have chosen will determine the method of attachment. Here are the general steps:
- Prepare the panels: If you are using polycarbonate panels, measure and cut them to fit the dimensions of your planter boxes. If using greenhouse plastic, ensure you have enough to cover all sides.
- Start with one side: Begin on one side of the planter box and position the first panel against the frame. Use roofing nails or screws to secure the panel in place. Repeat this process for each side.
- Overlap the panels: If you are using multiple panels to cover a side, ensure they overlap slightly to prevent any gaps. Secure them in place using the same method as before.
- Secure the panels to the frame: As you attach the panels, make sure they are firmly secured to the frame. Use additional nails or screws as needed to prevent any movement or gaps.
- Cut openings: If you plan to have doors or windows in your greenhouse planter boxes, carefully measure and cut out the openings in the paneling. Attach hinges and handles for the doors.
- Seal any gaps: Once all the panels are attached, carefully inspect for any gaps or areas where pests or moisture could enter. Use caulk or weatherstripping to seal these areas and ensure a tight seal.
Remember to follow the manufacturer’s instructions when working with polycarbonate panels or greenhouse plastic to ensure proper installation. Take your time during this step to ensure that the panels are securely attached and provide a solid barrier for your plants.
With the panels in place, your greenhouse planter boxes are beginning to take shape. In the next step, we will guide you through installing the roof to provide protection and insulation for your plants.
Step 6: Installing the Roof
With the walls of your greenhouse planter boxes complete, it’s time to install the roof to provide additional protection and insulation for your plants. Here’s how you can do it:
- Select the roofing material: Depending on your preference and budget, choose a suitable roofing material such as polycarbonate panels or greenhouse plastic.
- Measure and cut: Measure the dimensions of your planter boxes and cut the roofing material accordingly to fit the roof surface.
- Attach the roofing material: Start at one end and align the first piece of roofing material with the edge of the frame. Use roofing nails or screws to secure it in place. Repeat this process for the remaining pieces, overlapping them slightly to prevent any leaks.
- Seal the edges: Apply weatherproof tape or sealant along the edges of the roofing material to ensure a watertight seal and prevent any moisture or pests from entering.
- Check for stability: Make sure that the roof is securely attached and does not have any gaps or loose sections. Reinforce with additional nails or screws if necessary.
- Test for water drainage: Use a hose or watering can to simulate rainfall and check for proper drainage on the roof. It should slope slightly to allow water to flow off easily.
Installing the roof is an important step to protect your plants from excessive sunlight, rain, and other external elements. It also helps to create a more controlled environment inside your greenhouse planter boxes.
Take your time during the installation process to ensure that the roofing material is properly secured and provides the necessary insulation for your plants.
With the roof in place, your greenhouse planter boxes are almost complete. In the next step, we will guide you through adding the planter boxes to the structure.
Step 7: Adding the Planter Boxes
With the main structure of your greenhouse complete, it’s time to add the planter boxes. These boxes will provide the necessary space for your plants to grow and thrive. Here’s how you can add them to your greenhouse:
- Measure and mark: Determine the desired size and spacing for your planter boxes within the greenhouse. Use a tape measure and pencil to mark the locations where the planter boxes will be placed.
- Secure the boxes: Position the planter boxes on the marked locations and secure them to the frame using screws or nails. Make sure the boxes are level and properly aligned with the frame.
- Stabilize the boxes: To ensure stability, attach additional support to the planter boxes if needed. This can be in the form of brackets, corner braces, or crossbars, depending on the size and weight of the planter boxes.
- Check for proper drainage: Ensure that the planter boxes have adequate drainage holes to prevent waterlogging. If necessary, add an additional layer of gravel or stones at the bottom of the boxes to improve drainage.
- Test stability: Give the planter boxes a gentle shake to ensure they are securely attached and do not wobble. Reinforce any weak points or loose connections to ensure the stability of the boxes.
Adding the planter boxes to your greenhouse is an exciting step as it signifies that your growing space is ready for planting. Take your time during this step to ensure that the boxes are properly positioned and securely attached to the frame.
Once the planter boxes are in place, you’re ready to move on to the next step: preparing the soil for planting in your greenhouse planter boxes.
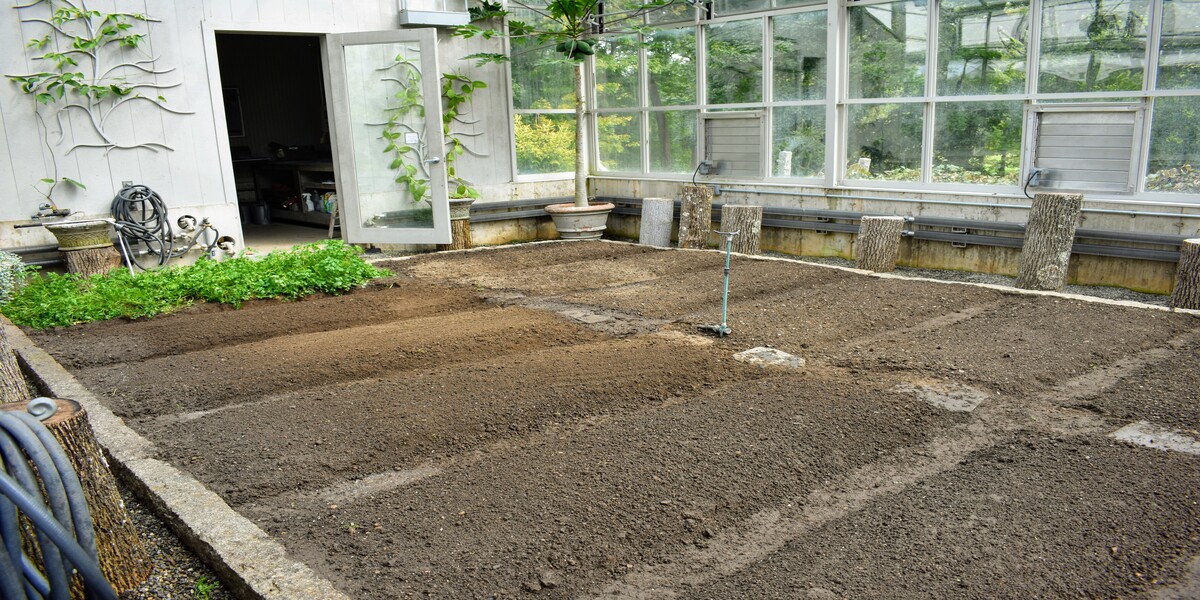
Step 8: Preparing the Soil
Now that your greenhouse planter boxes are set up, it’s time to prepare the soil for planting. Proper soil preparation is crucial for the healthy growth of your plants. Here’s how you can do it:
- Remove any debris: Start by removing any weeds, rocks, or other debris from the planter boxes. This will create a clean and suitable environment for your plants.
- Amend the soil: Depending on the needs of your plants, you may need to amend the soil with organic matter, such as compost or aged manure, to improve its fertility and nutrient content.
- Test and adjust pH levels: Use a pH testing kit to check the acidity or alkalinity of the soil. Different plants thrive in different pH levels, so adjust the pH if necessary by adding lime or sulfur.
- Provide drainage: Ensure that the soil has proper drainage by adding a layer of gravel or sand at the bottom of the planter boxes. This will prevent waterlogging and promote healthy root growth.
- Loosen and aerate: Use a garden fork or a hand cultivator to loosen and aerate the soil. This will improve its texture, drainage, and allow oxygen to reach the plant roots.
- Remove any weeds: Check for any remaining weeds and remove them from the soil. It’s important to start with a weed-free environment to prevent competition and unwanted growth.
- Consider soil moisture: Depending on the requirements of your plants, ensure that the soil has the right moisture content. Some plants prefer moist soil, while others prefer drier conditions. Water the soil accordingly.
By properly preparing the soil, you provide your plants with a healthy and nourishing foundation for growth. Take the time to ensure that the soil is well-balanced with adequate nutrient content and proper drainage.
With the soil prepared, you’re now ready for the exciting part: planting and maintaining your plants in the greenhouse planter boxes. We’ll cover that in the next step.
Step 9: Planting and Maintaining the Greenhouse Planter Boxes
Now that your greenhouse planter boxes are prepared and ready, it’s time to start planting and maintaining your plants. Follow these steps to ensure the success of your greenhouse garden:
- Select your plants: Choose plants that are suitable for greenhouse gardening and thrive in the controlled environment. Consider factors such as sunlight requirements, temperature tolerance, and growth habits.
- Planting technique: Dig appropriate-sized holes in the soil of the planter boxes and carefully place the plants, making sure the root system is spread out and covered with soil. Gently firm the soil around the plants.
- Watering: Provide your plants with adequate water based on their individual needs. Monitor the moisture level of the soil and water whenever necessary, ensuring not to overwater or underwater your plants.
- Fertilizing: Feed your plants with a balanced fertilizer to promote healthy growth. Follow the recommended instructions based on the specific plant requirements and adjust accordingly.
- Pest and disease control: Regularly inspect your plants for any signs of pests or diseases. Take preventive measures such as using organic pesticides or providing appropriate ventilation to minimize the risk of infestations.
- Pruning and training: Prune your plants to remove dead or diseased parts and promote balanced growth. Some plants may require training and support, such as tying them to stakes or trellises for vertical growth.
- Monitor temperature and ventilation: Maintain the temperature and airflow within the greenhouse to create optimal growing conditions for your plants. Use ventilation systems, fans, or windows to control temperature fluctuations and prevent heat buildup.
- Harvest and enjoy: As your plants grow and bear fruits or flowers, harvest them at the appropriate times for peak flavor and freshness. Enjoy the fruits of your labor and share your bountiful harvest with family and friends!
Regularly attend to your greenhouse planter boxes, providing care, attention, and adjustments as needed. Each plant is unique, so it’s important to understand the specific needs and requirements of the plants you have chosen for your greenhouse.
By following these steps and maintaining proper care, you will soon witness the beauty and abundance that your greenhouse planter boxes can provide. Enjoy the process of nurturing and growing your own plants, and relish in the rewards of a fruitful garden!
Conclusion
Congratulations on successfully building your greenhouse planter boxes! With careful planning, diligent construction, and proper maintenance, you have created a thriving environment for your plants to grow and flourish.
Throughout this DIY project, we covered everything from choosing the right location to designing and building the frame, attaching the panels, installing the roof, and adding the planter boxes. We also discussed the importance of soil preparation, planting techniques, and ongoing maintenance.
By following these steps, you have created a space that provides optimal growing conditions for your plants. The controlled environment of your greenhouse planter boxes allows for extended growing seasons, protection from external elements, and the ability to cultivate a wide range of plants.
Now, it’s up to you to continue nurturing and caring for your plants. Regularly monitor their growth, water them as needed, provide balanced nutrition, and address any pests or diseases that may arise. With proper attention and maintenance, your greenhouse planter boxes will support healthy plant growth and provide you with a bountiful harvest.
Not only will your greenhouse planter boxes enhance the beauty and appeal of your garden, but they will also provide you with the satisfaction of growing your own fresh produce, flowers, or herbs. The joy of enjoying the fruits of your labor and sharing them with loved ones cannot be overstated.
Remember to experiment with different plant varieties and cultivation techniques to discover what works best for you and your specific conditions. Embrace the learning process and enjoy the journey of becoming a skilled greenhouse gardener.
We hope this comprehensive guide has empowered you to embark on this exciting DIY project and create a thriving greenhouse garden. Now, grab your gardening tools and get ready to witness the wonders of nature unfolding within your greenhouse planter boxes!