Home>Gardening Techniques>DIY Projects>How To Build Your Own Greenhouse On A Budget
DIY Projects
How To Build Your Own Greenhouse On A Budget
Modified: January 22, 2024
Learn how to build your own inexpensive greenhouse with these DIY projects. Start growing your own plants and vegetables today!
(Many of the links in this article redirect to a specific reviewed product. Your purchase of these products through affiliate links helps to generate commission for Chicagolandgardening.com, at no extra cost. Learn more)
Table of Contents
- Introduction
- Benefits of Building Your Own Greenhouse
- Choosing the Right Location for Your Greenhouse
- Selecting the Design and Size of Your Greenhouse
- Gathering Materials and Tools
- Building the Foundation
- Assembling the Frame of the Greenhouse
- Installing the Greenhouse Covering
- Ventilation Systems and Temperature Control
- Setting Up Irrigation and Watering Systems
- Adding Benches and Shelves
- Energy Efficiency and Sustainable Practices
- Maintaining and Caring for Your Greenhouse
- Conclusion
Introduction
Building your own greenhouse is an exciting and rewarding DIY project that allows you to create an ideal environment for growing plants all year round. Whether you are a seasoned gardener or a beginner, a greenhouse provides numerous benefits and opportunities to expand your gardening skills. Not only does it extend the growing season, but it also offers protection from harsh weather conditions, pests, and diseases.
Welcome to the world of greenhouse gardening, where you can cultivate your favorite flowers, vegetables, herbs, or even exotic plants regardless of the climate you live in. This comprehensive guide will take you through the step-by-step process of building your own greenhouse, providing you with the knowledge and confidence to embark on this green adventure.
By constructing your own greenhouse, you have the freedom to design and customize it to suit your specific needs and available space. This DIY approach also offers the opportunity to save money compared to buying a pre-fabricated greenhouse. Plus, it allows you to create a sustainable and eco-friendly structure by incorporating energy-efficient features and utilizing recycled materials.
Throughout this guide, we’ll explore the essential steps involved in building your own greenhouse, from choosing the right location and size to installing the necessary systems for ventilation, irrigation, and temperature control. We’ll also cover topics such as energy efficiency, sustainable practices, and maintenance to ensure the longevity and success of your greenhouse.
Whether you dream of growing fresh vegetables year-round, cultivating a beautiful flower garden, or propagating plants for your nursery, a greenhouse offers endless possibilities. So, let’s get started on this green journey and create a thriving sanctuary where your plants can flourish.
Benefits of Building Your Own Greenhouse
Building your own greenhouse opens up a world of possibilities for gardeners and plant enthusiasts. Here are some of the key benefits you can enjoy by embarking on this DIY project:
1. Extended Growing Season: With a greenhouse, you can extend your growing season and enjoy fresh produce and blooms throughout the year. By controlling the environment inside the greenhouse, you can protect your plants from frost, cold temperatures, and other adverse weather conditions.
2. Greater Plant Variety: A greenhouse allows you to experiment with a wider range of plants that may not be suitable for your local climate. You can grow exotic plants, tropical species, and even start seeds earlier than the outdoor growing season, giving you a vast choice of plants to nurture and enjoy.
3. Pest and Disease Protection: Greenhouses act as a barrier against pests and diseases, providing a controlled environment that keeps unwanted critters at bay. Additionally, the enclosed space of a greenhouse minimizes the risk of contamination from neighboring gardens or the wind, reducing the chances of viruses or fungal infections affecting your plants.
4. Improved Plant Health: In a greenhouse, you can closely monitor and control factors such as temperature, humidity, and air circulation. This optimal environment promotes healthier plant growth, minimizes stress, and reduces the likelihood of issues like wilting or nutrient deficiencies. As a result, your plants will be stronger, more vibrant, and more likely to thrive.
5. Customized Design: When you build your own greenhouse, you have the flexibility to design it according to your preferences and gardening needs. You can choose the size, shape, and layout that suits your available space, allowing you to maximize productivity and functionality.
6. Cost Savings: Building your own greenhouse can be more cost-effective compared to purchasing a pre-fabricated one. By sourcing materials locally and using recycled or repurposed items whenever possible, you can significantly reduce costs. Additionally, maintaining your own greenhouse allows you to save money on store-bought produce and plants.
7. Educational Experience: Constructing and managing a greenhouse provides a valuable learning opportunity for both adults and children. It allows you to gain knowledge about plant care, plant propagation, and the intricate workings of a greenhouse ecosystem. This hands-on experience deepens your understanding of horticulture and nurtures a sense of accomplishment.
8. Personal Satisfaction: There is a special satisfaction that comes from growing your own plants and witnessing them flourish under your care. Building and maintaining a greenhouse allows you to create a personalized oasis where you can nurture your passion for gardening and enjoy the beauty of nature.
These are just a few of the many benefits that come with building your own greenhouse. From providing a controlled environment for plant growth to expanding your gardening opportunities, a greenhouse becomes a focal point for creativity, self-sufficiency, and the joy of watching your plants thrive.
Choosing the Right Location for Your Greenhouse
The location of your greenhouse plays a vital role in its overall performance and success. Here are some factors to consider when selecting the right spot:
1. Sunlight: The most important consideration for your greenhouse location is sunlight exposure. Choose an area that receives maximum sunlight throughout the day, especially during the winter months. South-facing locations are ideal, as they receive the most direct sunlight. Avoid areas shaded by trees, buildings, or other structures that may obstruct sunlight.
2. Wind Exposure: Assess the wind patterns in your area and choose a location protected from strong winds. Greenhouses should be shielded from gusty winds that can damage the structure and inhibit plant growth. Consider natural windbreaks such as fences, hedges, or existing buildings when selecting the site for your greenhouse.
3. Accessibility: Ensure that your greenhouse is easily accessible for daily tasks such as watering, fertilizing, and plant maintenance. Choose a location that allows convenient access to utilities like water and electricity if needed. Additionally, consider pathways and space around the greenhouse for easy movement and maneuverability.
4. Drainage: Proper drainage is essential to prevent water buildup and excess moisture around your greenhouse. Select a location with good natural drainage or consider incorporating a drainage system if needed. Avoid areas prone to flooding or low-lying spots that can cause waterlogging around the greenhouse.
5. Proximity to Water Source: Having a water source close to your greenhouse is convenient for irrigation and maintaining optimal moisture levels for your plants. Consider locating your greenhouse near a water tap or installing a rainwater harvesting system for easy access to water.
6. Local Building Codes and Regulations: Before finalizing the location of your greenhouse, check with local authorities regarding building codes, permits, and regulations. Ensure that you adhere to any restrictions or requirements that may apply. This will prevent any legal issues and ensure that your greenhouse is built safely and in compliance with local laws.
7. Future Expansion: Consider the future growth and expansion of your greenhouse. If you plan to expand or modify your greenhouse in the future, choose a location that allows for expansion without significant constraints. This will save you time and effort when you decide to scale up your greenhouse operation.
By carefully considering these factors, you can select the optimal location for your greenhouse, maximizing its potential for plant growth and ensuring a smooth and enjoyable gardening experience.
Selecting the Design and Size of Your Greenhouse
When it comes to choosing the design and size of your greenhouse, it’s important to consider factors such as available space, budget, and your specific gardening needs. Here are some key considerations to help you make the right decisions:
1. Available Space: Evaluate the amount of space you have for your greenhouse. Consider the dimensions, shape, and layout of your garden or backyard. Take into account any existing structures or landscaping elements that could impact the placement and size of your greenhouse. Make sure to leave ample room for pathways and additional features such as benches or shelves.
2. Budget: Determine your budget for the greenhouse project. This will influence the type of materials, features, and complexity of the design you can afford. Consider whether you want to invest in additional features like heating, shading, or automation systems, as these can add to the overall cost.
3. Purpose: Identify the main purpose of your greenhouse. Are you planning to grow vegetables, herbs, flowers, or a combination of plants? Different types of plants have varying space requirements and environmental needs. Understanding your purpose will help you determine the size and design elements necessary to create a conducive environment for your plants.
4. Climate: Consider the climate in your region. If you live in an area with harsh winters, you may need a greenhouse with stronger materials and insulation to withstand the cold temperatures. In warmer climates, proper ventilation and shading become important to prevent overheating. Tailor the design and features of your greenhouse to suit your specific climate conditions.
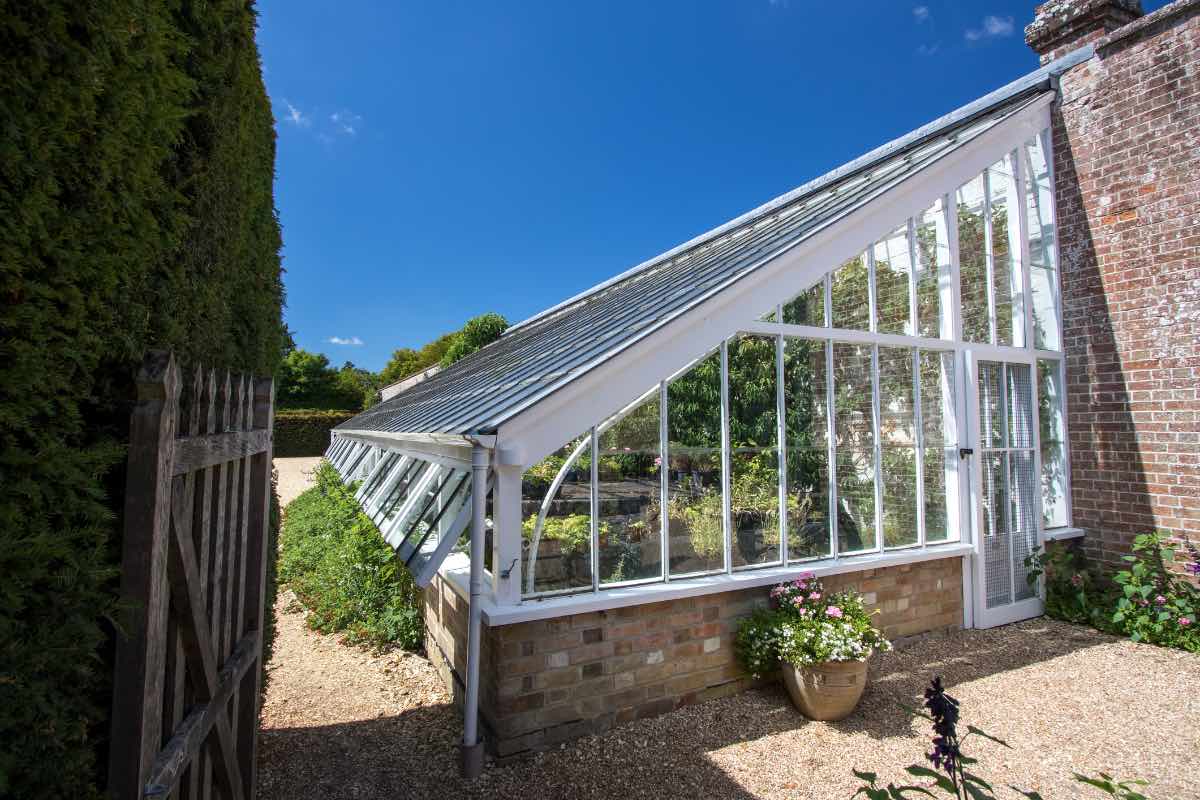
5. Structure Types: There are various types of greenhouse structures to choose from, including freestanding, lean-to, and hoop houses. Freestanding structures are independent and can be placed anywhere on your property. Lean-to greenhouses are attached to an existing building, utilizing its support and sharing a wall. Hoop houses are typically hoop-shaped structures made of metal or PVC pipes covered in greenhouse film. Each structure type has its advantages and limitations, so select one that suits your space and requirements.
6. Glazing Options: The choice of glazing material for your greenhouse affects its insulation properties and overall efficiency. Common options include glass, polycarbonate, and greenhouse film. Glass provides excellent clarity and durability but is heavier and more expensive. Polycarbonate is lightweight and offers better insulation but may need periodic replacement. Greenhouse film is affordable and easy to install, but it may not offer the same level of durability or insulation as glass or polycarbonate.
7. Future Expansion: Consider the future growth of your gardening activities. If you plan to expand your plant collection or dedicate more space to gardening, choose a greenhouse design that allows for easy expansion. This will save you time and effort down the line if you decide to increase the size of your greenhouse.
By carefully considering the available space, your budget, purpose, climate, and other factors, you can select the right size and design for your greenhouse. Remember, the design should not only meet your current needs but also provide flexibility for future growth and enjoyment of your greenhouse gardening journey.
Gathering Materials and Tools
Before embarking on the construction of your greenhouse, it’s important to gather all the necessary materials and tools. Here’s a list of essential items you’ll need to ensure a smooth and successful building process:
1. Framing Materials: The type of framing material will depend on your chosen greenhouse design. Common options include wood, aluminum, or PVC. Calculate the amount of material needed based on the size and design of your greenhouse.
2. Glazing Materials: Depending on your budget and preference, choose the appropriate glazing material for your greenhouse, such as glass, polycarbonate sheets, or greenhouse film. Purchase the required amount to cover the entire greenhouse structure.
3. Fasteners: You’ll need a variety of fasteners, including screws, nails, bolts, washers, and brackets to secure the greenhouse frame and attach the glazing material. Be sure to select fasteners suitable for the materials you are working with and the weather conditions in your area.
4. Foundation Materials: If your greenhouse requires a foundation, gather the necessary materials like concrete, concrete blocks, or gravel. Consider the size and weight of your greenhouse when determining the appropriate foundation materials.
5. Tools: Make sure you have the required tools for the construction process, including a tape measure, level, drill, screwdriver, saw (hand or power), hammer, ladder, and a utility knife. These tools will help you accurately measure, cut, assemble, and secure the materials.
6. Safety Equipment: Don’t forget to prioritize safety during the construction process. Wear appropriate safety gear, such as gloves, safety goggles, and sturdy shoes, to protect yourself from potential injuries while handling materials and using tools.
7. Other Supplies: Consider any additional supplies you may need, such as sealants or adhesives for joining materials, insulation material for colder climates, shading material for warmer climates, and weatherstripping to ensure an airtight greenhouse environment.
8. Optional Accessories: Depending on your budget and requirements, you may want to invest in additional accessories such as heating systems, ventilation fans, automatic watering systems, shelving units, or workbenches. Plan and gather these items beforehand, to ensure they are integrated seamlessly into your greenhouse construction.
9. Recycled or Upcycled Materials: Consider using recycled or upcycled materials where possible, not only for environmental sustainability but also for cost savings. Look for opportunities to repurpose items like old windows, doors, or lumber, which can be utilized effectively in your greenhouse construction.
Make a comprehensive checklist of the materials and tools you’ll need based on your chosen design and size of the greenhouse. Take your time to gather all the necessary items to avoid any delays or interruptions during the construction process. By being well-prepared, you’ll be ready to embark on your DIY greenhouse project with confidence and enthusiasm.
Building the Foundation
The foundation of your greenhouse is a crucial element that provides stability and support for the entire structure. Building a solid foundation ensures that your greenhouse withstands external forces and maintains its integrity over time. Here are the key steps to follow when constructing the foundation for your greenhouse:
1. Site Preparation: Clear the area of any debris, rocks, or vegetation where the greenhouse will be installed. Level the ground using a shovel and a level, ensuring that it is even and free from any uneven bumps or slopes.
2. Determine Foundation Type: Select the appropriate type of foundation based on the materials and design of your greenhouse. Common options include concrete slab, concrete footings, or concrete blocks. Consider factors such as local building codes, soil conditions, and budget when choosing the foundation type.
3. Excavation: If you’re building a foundation with a concrete slab, dig a trench around the perimeter of the greenhouse area. The depth and width of the trench will depend on the climate and soil conditions in your area. Follow local building codes and guidelines when determining the depth of the trench and the required amount of drainage stone or gravel.
4. Leveling and Compacting: Once the trench is excavated, use a level and a tamper to ensure the bottom of the trench is level and compacted. A compacted base is essential to prevent uneven settling and ensure a sturdy foundation for your greenhouse.
5. Install Forms: If you’re using a concrete slab foundation, install wooden or metal forms around the perimeter of the trench to contain the concrete. Ensure that the forms are level and secure, as they will determine the shape and size of the foundation.
6. Reinforcement and Drainage: Depending on the size and design of your greenhouse, you may need to add reinforcement to the foundation. This can be done by placing rebar or wire mesh within the forms before pouring the concrete. Additionally, consider incorporating a drainage system, such as perforated pipes, to prevent water accumulation around the foundation.
7. Pouring Concrete: Mix concrete according to the manufacturer’s instructions and pour it into the forms, working in sections. Use a trowel and a float to level the concrete surface, ensuring it’s smooth and even. Pay attention to the edges and corners, as they are often prone to cracking or unevenness.
8. Curing and Drying: Allow the concrete to cure and dry completely, following the recommended time on the concrete bag or the advice of a professional. During this time, keep the concrete moist by periodically spraying it with water. This helps prevent cracking and promotes proper curing.
9. Remove Forms and Finish: Once the concrete is fully cured, remove the forms and inspect the foundation for any imperfections. Patch any cracks or uneven areas with an appropriate concrete patching compound. You can also consider adding a sealant or a waterproofing membrane to protect the foundation from moisture infiltration.
Building a solid foundation is a crucial step in the construction of your greenhouse. Take the time to properly prepare the site and follow the steps carefully to ensure a sturdy and durable foundation that will support your greenhouse for years to come.
Assembling the Frame of the Greenhouse
Once you have prepared the foundation, it’s time to start assembling the frame of your greenhouse. The frame is the backbone of the structure, providing support and stability for the walls, roof, and glazing materials. Here’s a step-by-step guide to help you assemble the frame of your greenhouse:
1. Gather Materials and Tools: Ensure you have all the necessary framing materials, fasteners, and tools at hand. Refer to your greenhouse design plans to determine the specific materials required for your frame.
2. Layout and Mark Positions: Begin by laying out the frame components on the foundation according to your greenhouse design. Use a measuring tape and pencil to mark the positions and ensure accurate alignment.
3. Attach Frame Components: Start by connecting the corner posts and primary beams according to the design specifications. Use appropriate fasteners such as screws or bolts to securely attach the frame components. Ensure everything is tightly fastened and levelled using a spirit level.
4. Install Secondary Supports: Install secondary supports such as purlins or rafters to reinforce the frame structure. These additional support beams help distribute the weight of the roof and improve the overall stability of the greenhouse. Secure them in place using fasteners.
5. Add Door and Vent Supports: Install the door and vent supports, following the instructions provided with your greenhouse kit or design plans. These supports are necessary for attaching doors, windows, and ventilation systems later on.
6. Check Alignment and Squareness: Periodically check the alignment and squareness of the frame as you assemble it. This is important for ensuring a level and structurally sound greenhouse. Make any necessary adjustments to maintain proper alignment and squareness.
7. Secure the Frame to the Foundation: Once the frame is assembled, secure it to the foundation using anchor bolts or other appropriate fasteners. This step is vital for anchoring the greenhouse and preventing it from shifting or being affected by strong winds.
8. Incorporate Bracing Elements: Depending on the design and size of your greenhouse, you may need to install additional bracing elements to enhance the structural integrity. These elements, such as diagonal braces, provide extra support and stability to the frame.
9. Double-Check and Make Adjustments: Before proceeding to the next steps of greenhouse construction, carefully inspect the frame for any deficiencies or areas that require adjustment. Address any issues promptly to ensure a solid and correctly assembled frame.
Assembling the frame of your greenhouse requires attention to detail and precise execution. Follow the design plans or instructions provided with your greenhouse kit, pay close attention to alignment and squareness, and ensure that all frame components are securely fastened. With a well-constructed frame in place, your greenhouse is ready for the next stages of installation, such as adding the greenhouse covering and ventilation systems.
Installing the Greenhouse Covering
Installing the greenhouse covering is an exciting step that brings your greenhouse to life. The covering not only protects your plants but also provides insulation and controls the internal environment. Here’s a step-by-step guide to help you install the greenhouse covering:
1. Choose the Right Covering Material: There are various options for greenhouse coverings, including glass, polycarbonate, and greenhouse film. Consider factors such as durability, insulation properties, light transmission, and budget when selecting the appropriate material for your greenhouse.
2. Start with the End Walls: Begin the installation process by working on the end walls of your greenhouse. Carefully measure and cut the covering material to fit the dimensions of each end wall. Secure the material to the frame using the recommended fasteners for the specific covering material chosen.
3. Move to the Side Walls: Once the end walls are covered, proceed to the side walls. Measure and cut the covering material accordingly, ensuring a proper fit. Attach the material to the frame, making sure it is taut and securely fastened.
4. Install the Roof Covering: Next, install the covering material on the roof of your greenhouse. Depending on the design, this may involve individual panels or larger sheets. Follow the instructions provided with the specific covering material to ensure proper installation techniques and procedures.
5. Secure the Covering Material: As you install the covering material, make sure to secure it tightly to the frame to prevent gaps or loose areas. Pay attention to corners, edges, and seams, ensuring that they are properly sealed and protected against any potential water leaks or drafts.
6. Incorporate Ventilation Openings: Depending on the design and purpose of your greenhouse, you may need to incorporate ventilation openings. These can be vents or windows that allow for air circulation and temperature control. Install these features according to the instructions provided, ensuring a proper seal when closed and the ability to open and close them as needed.
7. Consider Shading and Insulation: If required for your climate, consider adding shading or insulation material to the greenhouse covering. This helps regulate temperature and protect plants from excessive heat or cold. Follow the specific recommendations for the covering material chosen and install the shading or insulation accordingly.
8. Inspect and Make Adjustments: Once the greenhouse covering is in place, carefully inspect the entire structure for any deficiencies or areas that require adjustment. Check for tightness, secure fastening, and proper sealing. Make any necessary adjustments to ensure a well-sealed and protected greenhouse environment.
Installing the greenhouse covering requires precision and attention to detail. Follow the specific instructions provided with your chosen covering material and pay close attention to sealing and securing the material to the frame. With a properly installed greenhouse covering, your plants will enjoy a protected and controlled environment where they can thrive.
Ventilation Systems and Temperature Control
Proper ventilation is essential for maintaining a healthy and optimal environment inside your greenhouse. It helps regulate temperature, humidity, and air circulation, ensuring that your plants thrive. Here are some key aspects to consider when installing ventilation systems for temperature control:
1. Natural Ventilation: Utilize natural ventilation methods whenever possible. This can include strategically placed vents, windows, or louvers that allow hot air to escape and fresh air to enter the greenhouse. Consider the prevailing wind direction and position openings accordingly to maximize airflow.
2. Ventilation Fans: Install ventilation fans to supplement natural ventilation. These fans help move air throughout the greenhouse, promoting better circulation and maintaining a consistent temperature. Set up the fans at opposite ends of the greenhouse to create a cross-flow of air.
3. Automatic Vent Openers: Consider using automatic vent openers that respond to changes in temperature. These devices automatically open and close vents or windows based on preset temperature thresholds, ensuring that excessive heat is released and the greenhouse stays within a desirable temperature range.
4. Shade Cloth: Install shade cloth or shade paint to regulate the amount of sunlight and prevent excessive heat buildup during hot summer months. This helps protect plants from sunburn and reduces the risk of overheating. Choose a shade cloth with an appropriate percentage of shade based on your specific climate and plant requirements.
5. Thermometers and Hygrometers: Place thermometers and hygrometers inside the greenhouse to monitor temperature and humidity levels. This allows you to make informed decisions about adjusting ventilation and temperature control systems as needed.
6. Evaporative Cooling Systems: In hotter climates, consider incorporating evaporative cooling systems to reduce temperatures inside the greenhouse. These systems typically involve the use of misting or fogging devices that cool the air through evaporation, helping maintain optimal growing conditions for plants.
7. Heating Systems: For colder climates or during the winter season, install a heating system to maintain a suitable temperature inside the greenhouse. Options include radiant heaters, forced-air heaters, or electric heating mats. Choose a heating system that matches the size and requirements of your greenhouse.
8. Insulation: Properly insulate your greenhouse to reduce heat loss during colder periods. Insulation materials such as bubble wrap, polystyrene sheets, or double-layered glazing can help retain heat, minimize energy consumption, and ensure a more stable temperature inside the greenhouse.
9. Use Ventilation Control Systems: Consider integrating advanced ventilation control systems that automate the opening and closing of vents, fans, and other ventilation devices. These systems use sensors to monitor environmental conditions and make adjustments accordingly, offering precise control over temperature and humidity levels.
When it comes to ventilation systems and temperature control, striking a balance is crucial. Regularly monitor the temperature and humidity levels within your greenhouse, making adjustments as necessary to provide the most favorable conditions for your plants. With proper ventilation and temperature control, your greenhouse will be a nurturing haven for healthy and flourishing plant growth.
Setting Up Irrigation and Watering Systems
Proper watering is essential for the health and growth of your plants in the greenhouse. Setting up an effective irrigation and watering system ensures that your plants receive the right amount of water at the right time. Here are some key considerations when establishing your greenhouse’s irrigation and watering systems:
1. Determine Watering Methods: There are several methods you can choose from for watering your greenhouse plants, including hand watering, drip irrigation, sprinkler systems, or misting systems. Consider factors such as the size of your greenhouse, the type of plants you are growing, and your personal preferences when deciding on the most suitable watering methods.
2. Drip Irrigation: Drip irrigation is a popular and efficient method that delivers water directly to the plant’s root zone. It saves water by minimizing evaporation and reduces the risk of fungal diseases caused by wet foliage. Install a drip irrigation system with emitters or micro tubing to provide precise and controlled watering.
3. Sprinkler Systems: Sprinklers are effective for watering larger areas of the greenhouse. They distribute water evenly over the plants, simulating natural rainfall. Choose sprinklers that provide adjustable spray patterns and flow rates to ensure proper coverage and avoid water waste.
4. Misting Systems: Misting systems create a fine mist of water in the greenhouse, increasing humidity levels and providing gentle moisture to the plants. This method is particularly suitable for delicate plants or those that thrive in high humidity environments, such as orchids or tropical plants.
5. Automatic Timers: Utilize automatic timers to control the watering schedule. Timers allow you to set specific intervals and durations for watering, ensuring consistency and preventing over or underwatering. Set the irrigation system to run during early morning hours to minimize water loss due to evaporation.
6. Proper Drainage: Ensure your greenhouse has proper drainage to avoid waterlogging and prevent root rot or other water-related issues. Incorporate a system that collects excess water and directs it away from the plants and the greenhouse structure. Consider installing a sump or drainage system if necessary.
7. Monitor Soil Moisture: Regularly monitor soil moisture levels to ensure plants receive adequate hydration. Use a moisture meter or simply check the soil by hand. This will help you adjust the watering schedule, preventing underwatering or overwatering.
8. Rainwater Harvesting: Consider implementing a rainwater harvesting system to collect and store rainwater for irrigation purposes. This sustainable practice helps conserve water and reduces reliance on traditional water sources. Install gutters and downspouts on the greenhouse to direct rainwater into storage tanks or barrels.
9. Fertilizer Application: Incorporate a fertilizer delivery system into your irrigation system to provide essential nutrients to your plants. This can be done by using fertilizer injectors or drippers that deliver a precise amount of fertilizer with each irrigation cycle.
Implementing an effective irrigation and watering system is crucial for maintaining healthy plants in your greenhouse. Consider the specific needs of your plants, the size of your greenhouse, and the available resources when selecting the most suitable watering methods. With proper irrigation, your plants will flourish and thrive, creating a vibrant and lush environment in your greenhouse.
Adding Benches and Shelves
Adding benches and shelves to your greenhouse not only enhances the functionality and organization of the space but also provides additional growing areas for your plants. Here are some key considerations when incorporating benches and shelves into your greenhouse:
1. Determine Size and Placement: Assess the available space in your greenhouse and determine the appropriate size and placement for your benches and shelves. Consider factors such as the layout of your greenhouse, the height of your plants, and the ease of access for maintenance and watering.
2. Material Selection: Choose materials that are durable, moisture-resistant, and suitable for the greenhouse environment. Common materials include treated or rot-resistant wood, metal, or plastic. Ensure the materials are non-toxic and safe for your plants.
3. Bench Height: Determine the height of your benches based on the types of plants you’ll be growing and your preferred working level. Consider a range of heights to accommodate different plant heights and growth stages.
4. Shelving Design: Decide on the design of your shelves. Adjustable shelves allow you to customize the spacing and accommodate plants of varying heights. Slatted shelves offer better airflow and drainage, preventing water from accumulating and ensuring better growth conditions.
5. Assembly and Installation: Follow the manufacturer’s instructions or design plans when assembling your benches and shelves. Ensure all connections are secure and stable. If attaching to the greenhouse structure, use appropriate hardware and fasteners to secure the benches and shelves in place.
6. Optimize Space: Arrange your benches and shelves to maximize the use of available space. Consider adding additional tiers or utilizing vertical space by installing hanging brackets or hooks. This allows you to accommodate more plants and create a visually appealing display.
7. Organization and Accessibility: Group plants with similar watering and lighting requirements together to make maintenance tasks easier. Arrange your benches and shelves in a way that allows easy access for watering, pruning, and plant care. Consider incorporating a workspace or storage area for tools, pots, and supplies.
8. Lighting Considerations: If you have plants that require specific lighting conditions, consider incorporating additional grow lights or installing shelves near windows to optimize natural sunlight exposure. Position shelves and plants to avoid shading and maximize light distribution.
9. Adaptability and Flexibility: Design your benches and shelves to be adaptable and flexible. Include features such as wheels or casters for easy movement, removable shelves or trays for cleaning and rearrangement, and adjustable components to accommodate changing plant needs or different growing seasons.
Adding benches and shelves to your greenhouse not only provides functional space for organizing and displaying your plants but also enhances the overall aesthetics of the environment. Consider the available space, materials, and plant requirements when designing and installing your benches and shelves. With careful planning and arrangement, your greenhouse becomes an efficient and visually pleasing space for nurturing your plants.
Energy Efficiency and Sustainable Practices
Creating an energy-efficient and sustainable greenhouse not only reduces environmental impact but also saves you money in the long run. By incorporating sustainable practices, you can create a greener and more sustainable gardening space. Here are some key considerations for enhancing energy efficiency and implementing sustainable practices in your greenhouse:
1. Insulation: Proper insulation helps retain heat during colder months and prevents heat buildup during warmer months. Consider using insulation materials such as double-glazed windows, bubble wrap, or polystyrene sheets to minimize heat loss and regulate temperature inside the greenhouse.
2. Natural Lighting: Maximize the use of natural light to reduce energy consumption. Orient your greenhouse towards the sun and design it with ample windows or clear panels to allow for optimal sunlight exposure. This not only provides sufficient light for the plants but also reduces the need for artificial lighting.
3. Energy-Efficient Lighting: If supplemental lighting is necessary, choose energy-efficient options such as LED grow lights. LED lights are highly efficient, consume less energy, and have a longer lifespan compared to traditional lighting options.
4. Rainwater Harvesting: Implement a rainwater harvesting system to collect and store rainwater for irrigation purposes. Connect gutters to downspouts and direct the water into storage tanks or barrels. This reduces the reliance on municipal water sources and conserves water resources.
5. Water Efficiency: Optimize water usage by using efficient irrigation methods such as drip irrigation or micro sprinklers. Install moisture sensors or timers to ensure watering is done only when needed. Mulching the soil surface can also help reduce evaporation and water loss.
6. Sustainable Materials: Use sustainable and eco-friendly materials when constructing or renovating your greenhouse. Look for options such as reclaimed wood, recycled plastic, or locally sourced materials that have a lower environmental impact. Choose materials that can be easily recycled or reused when it’s time to replace or upgrade.
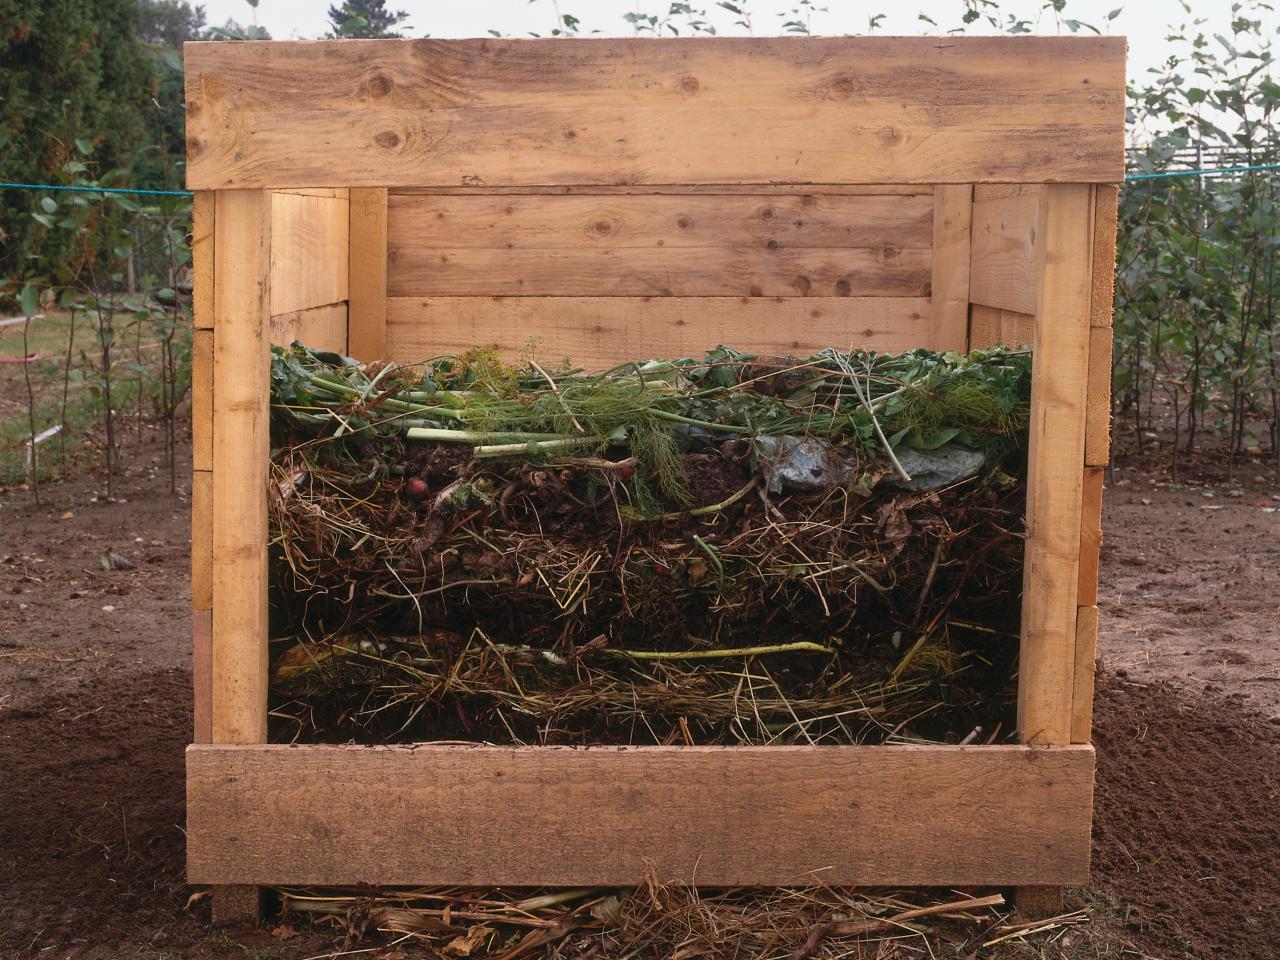
7. Composting and Recycling: Set up a composting system to turn organic waste into nutrient-rich compost for your greenhouse. Properly sort and recycle materials like plastic pots, trays, and packaging to minimize waste going to landfills. This reduces your carbon footprint and promotes a circular economy.
8. Energy-Efficient Equipment: Choose energy-efficient equipment and appliances for your greenhouse, such as fans, heaters, or ventilation systems. Look for Energy Star-rated products that are designed to minimize energy consumption while maximizing performance.
9. Integrated Pest Management: Implement an integrated pest management (IPM) system to control pests without relying on harmful chemicals. This may include using biological control methods, insect traps, or companion planting to reduce the need for pesticides.
By adopting energy-efficient practices and implementing sustainable measures, your greenhouse becomes a more environmentally friendly and cost-effective space. Incorporate these practices into your greenhouse design and daily operations to create a greener and more sustainable growing environment.
Maintaining and Caring for Your Greenhouse
Maintaining and caring for your greenhouse is essential to ensure the health and vitality of your plants. Regular maintenance helps prevent issues, promotes optimal growth conditions, and extends the lifespan of your greenhouse. Here are some key maintenance and care practices to keep in mind:
1. Regular Cleaning: Clean your greenhouse regularly to remove dirt, debris, and plant residue that can harbor pests and diseases. Sweep the floors, wipe down surfaces, and wash the glazing material. Pay special attention to vents, gutters, and equipment, ensuring they are free from clogs and blockages.
2. Pest and Disease Management: Implement a proactive pest and disease management strategy. Regularly inspect plants for signs of pests or disease, such as yellowing leaves, discoloration, or wilting. Use organic pest control methods whenever possible and promptly address any issues to prevent further damage to your plants.
3. Pruning and Plant Maintenance: Regularly prune your plants to remove dead or damaged foliage, encourage air circulation, and maintain their shape. Trim back overgrown branches that may impede sunlight or cause crowding. Conduct routine plant maintenance tasks such as removing spent flowers, staking tall-growing plants, and providing support if needed.
4. Watering and Irrigation: Monitor soil moisture levels and adjust your watering schedule as necessary. Avoid overwatering or underwatering by ensuring plants receive the right amount of water for their specific needs. Regularly inspect and maintain your irrigation system, checking for leaks or malfunctioning equipment.
5. Fertilization: Provide regular fertilization to ensure your plants receive essential nutrients for healthy growth. Use organic fertilizers or slow-release fertilizers that release nutrients gradually over time. Follow recommended dosage instructions and avoid over-fertilizing, which can lead to nutrient imbalances or burn the plants.
6. Ventilation and Temperature Control: Regularly inspect and maintain the ventilation systems, fans, and temperature control mechanisms in your greenhouse. Clean or replace filters, lubricate moving parts, and ensure they are functioning properly. Regularly monitor temperature and humidity levels to make adjustments as necessary.
7. Monitor for Weeds: Routinely check for weeds that may invade your greenhouse. Remove weeds promptly to prevent competition for nutrients and space. Consider using organic weed control methods or mulching to suppress weed growth.
8. Seasonal Maintenance: Adjust your greenhouse maintenance practices according to the seasons. Insulate windows or coverings during colder months to retain heat. Clean debris from gutters, downspouts, and drainage systems before the rainy season. Ensure proper shading and ventilation during hot summer months to prevent excessive heat buildup.
9. Equipment Maintenance: Regularly inspect and maintain your greenhouse equipment, such as fans, heaters, and irrigation systems. Clean or replace filters, lubricate moving parts, and perform any necessary repairs. Schedule routine professional maintenance, if needed, to ensure proper functioning of the equipment.
Regularly maintaining and caring for your greenhouse promotes a healthy and thriving growing environment. By implementing these practices, you’ll create an optimal space for your plants to flourish and enjoy the benefits of a well-maintained greenhouse.
Conclusion
Congratulations on embarking on the journey of building and maintaining your own greenhouse! By following the steps outlined in this guide, you have gained the knowledge and confidence to create a thriving and productive space for your plants. Building your own greenhouse allows you to extend the growing season, protect your plants from harsh weather conditions, and create a customized environment tailored to your gardening needs.
From selecting the right location and size to assembling the frame and installing the greenhouse covering, each step in the process contributes to the success of your greenhouse. By considering factors such as sunlight exposure, wind exposure, and proper ventilation, you can create an optimal environment for your plants to grow and flourish.
Incorporating benches and shelves provides functional space for organization and display, while implementing energy-efficient practices and sustainable measures helps reduce your environmental impact and save on energy costs.
Remember to maintain and care for your greenhouse regularly, ensuring cleanliness, pest control, proper watering, and equipment maintenance. By doing so, you will create a healthy and thriving environment for your plants to thrive.
Building and maintaining your own greenhouse is an ongoing journey. Continuously learn and adapt, experiment with different plants, and refine your greenhouse operations. Over time, you’ll become more attuned to the needs of your plants and discover what works best for your specific gardening goals.
Enjoy the process, observe the beauty of nature, and relish in the joy of watching your plants grow and flourish in your very own greenhouse. Happy gardening!