Home>Gardening Techniques>DIY Projects>How Do You Make Your Own Compost
DIY Projects
How Do You Make Your Own Compost
Modified: January 22, 2024
Learn how to make your own compost with these easy DIY projects. Reduce waste and create nutrient-rich soil for your garden.
(Many of the links in this article redirect to a specific reviewed product. Your purchase of these products through affiliate links helps to generate commission for Chicagolandgardening.com, at no extra cost. Learn more)
Table of Contents
Introduction
Welcome to the world of DIY composting! Making your own compost is not only a rewarding and environmentally friendly activity, but it also provides numerous benefits for your garden and the planet. Composting is the process of decomposing organic materials, such as food scraps, yard waste, and other biodegradable materials, into nutrient-rich soil amendment.
By creating your own compost, you can reduce waste, save money on fertilizers, and improve the overall health of your plants. Whether you have a small backyard or a balcony garden, composting is a simple and effective way to enhance your gardening efforts.
In this article, we will explore the benefits of making your own compost and provide you with practical tips on getting started. We will delve into the different composting methods, discuss the materials needed for composting, guide you on how to build and maintain a compost pile, and troubleshoot common issues that you may encounter during the process. Finally, we will explore the various ways you can use your finished compost to nourish your plants.
Get ready to embark on an exciting journey towards sustainable gardening and discover how you can turn your kitchen and garden scraps into “black gold” for your plants. Let’s dig in!
Benefits of Making Your Own Compost
Composting offers a multitude of benefits, both for your garden and the environment. Let’s explore some of the key advantages of making your own compost:
- Nutrient-rich soil amendment: Compost is a natural fertilizer that enriches the soil with essential nutrients, such as nitrogen, phosphorus, and potassium. These nutrients are essential for healthy plant growth and development. By incorporating compost into your garden beds or containers, you are providing your plants with a steady supply of nourishment.
- Reduces waste: Composting allows you to divert kitchen and yard waste from landfills, where it would otherwise contribute to methane gas production. By composting these organic materials, you are turning them into a valuable resource rather than contributing to environmental pollution.
- Improves soil structure and moisture retention: Compost helps improve soil structure by enhancing its ability to retain moisture. It creates a loose and crumbly texture, allowing for better root penetration and air circulation. This improves water drainage and reduces the risk of soil erosion, ultimately leading to healthier plant growth.
- Enriches beneficial soil microorganisms: Compost provides a rich habitat for beneficial microorganisms, such as bacteria and fungi. These microorganisms break down organic matter and make nutrients more available to plants. They also help suppress harmful pathogens and diseases, creating a balanced and thriving soil ecosystem.
- Reduces the need for chemical fertilizers and pesticides: By using compost, you can reduce your reliance on synthetic fertilizers and pesticides. Compost naturally boosts plant health and resilience, reducing the need for chemical interventions. This promotes a more sustainable and environmentally friendly approach to gardening.
By understanding and harnessing these benefits, you can unleash the power of composting to transform your garden into a thriving oasis of lush, healthy plants. So, let’s explore how you can get started with composting!
Getting Started with Composting
Starting a composting project is easier than you might think. With a few simple steps, you can begin transforming your kitchen and garden waste into nutrient-rich compost. Here’s how to get started:
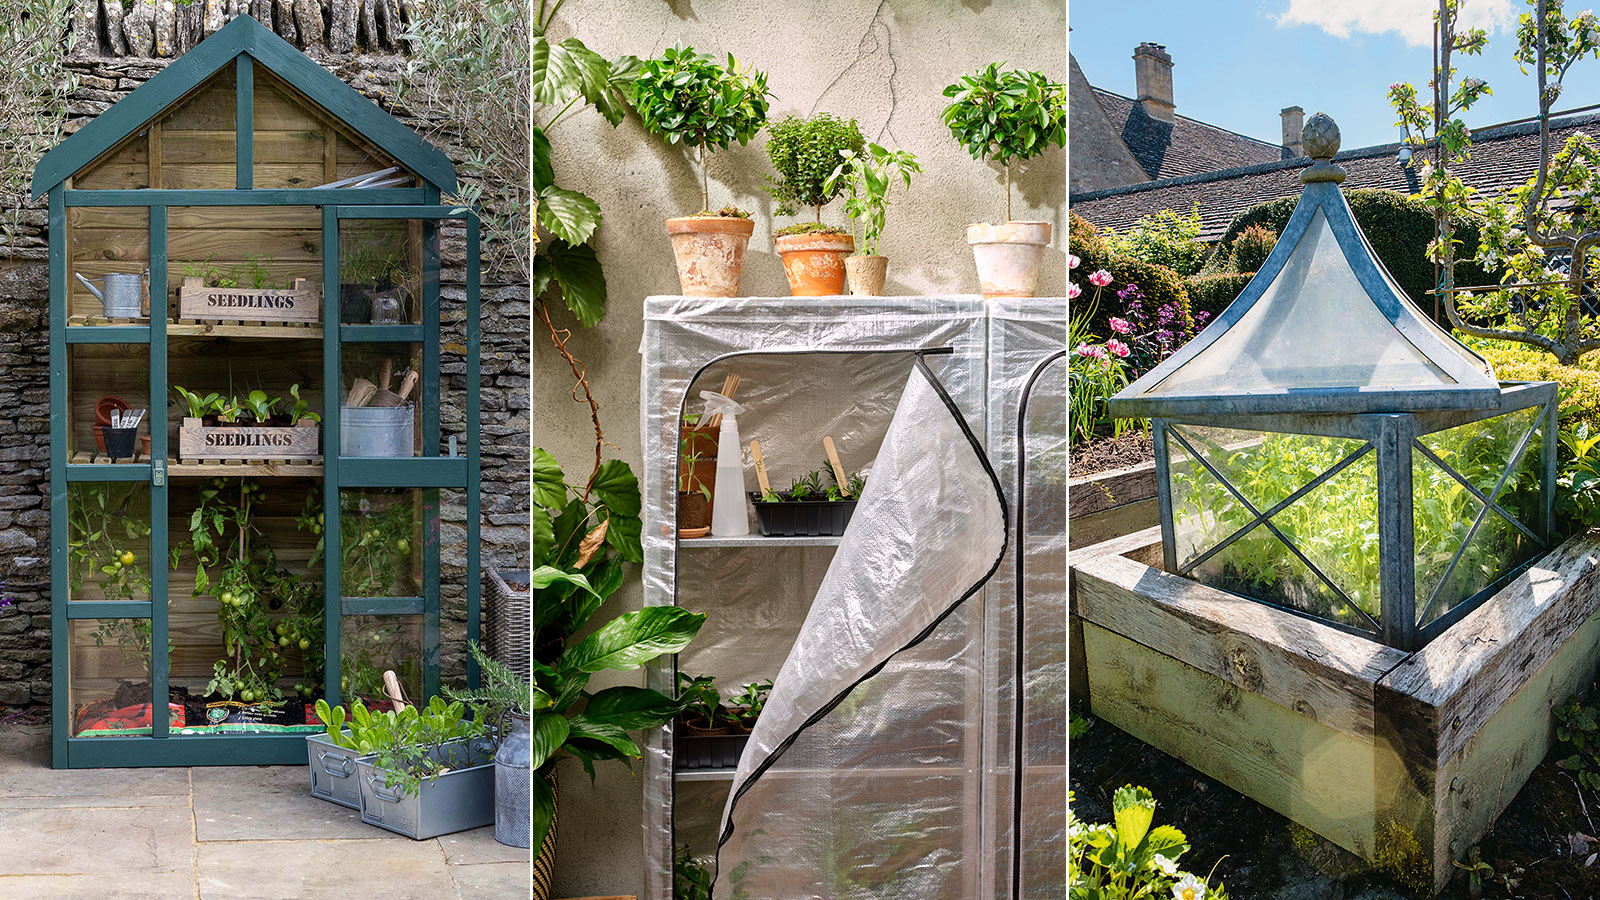
- Select a composting method: There are various composting methods to choose from, depending on your available space, time commitment, and preferences. Common methods include traditional compost piles, compost bins, vermicomposting (using worms), and compost tumblers. Research each method to determine which one suits your needs.
- Designate a composting area: Find a convenient spot in your yard or garden where you can place your composting setup. Ensure it is easily accessible for adding materials and monitoring the composting process.
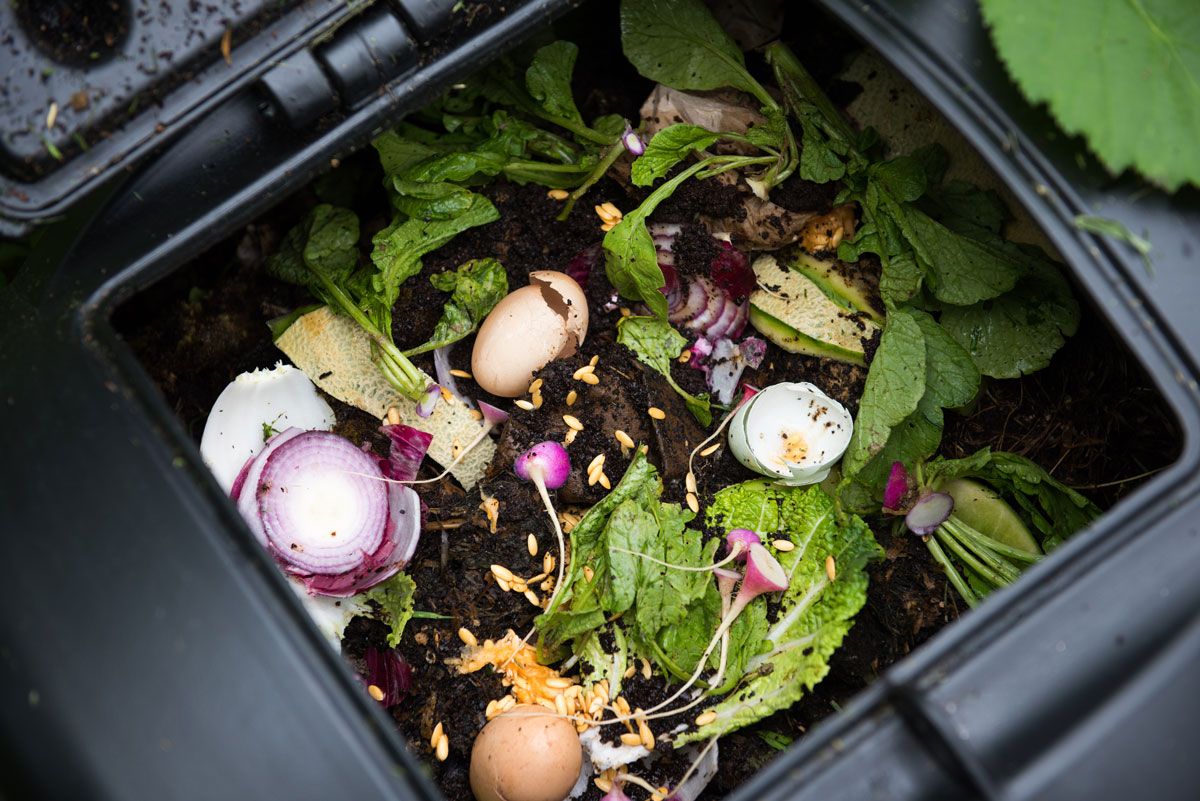
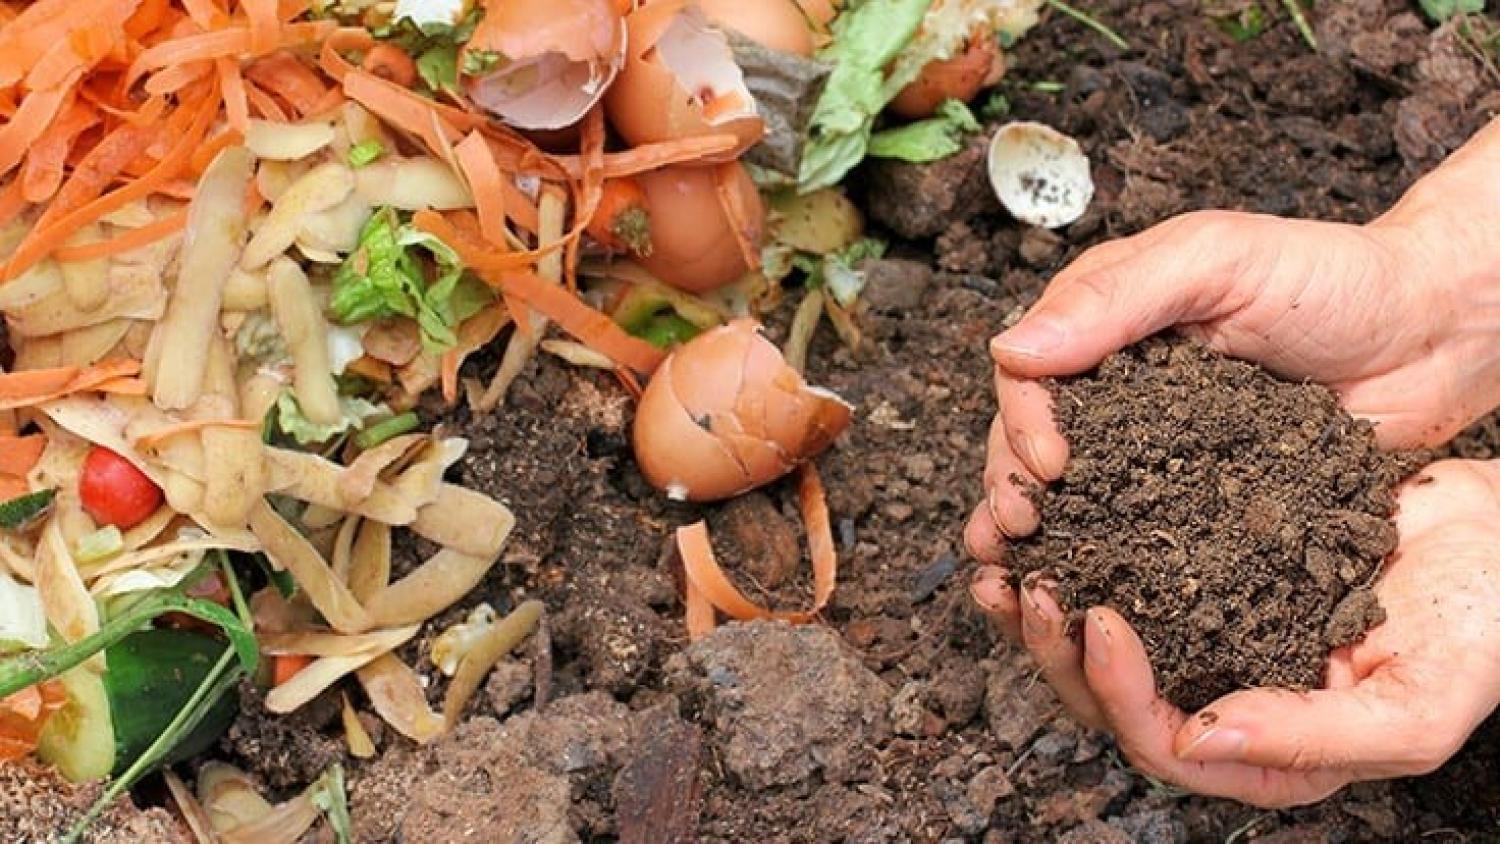
- Collect compostable materials: Start collecting kitchen scraps, such as fruit and vegetable peels, coffee grounds, and eggshells. Also, gather yard waste such as leaves, grass clippings, and small branches. Avoid adding meat, dairy products, and oily items, as they can attract pests.
- Build the compost pile: Layer your compostable materials in the designated area. Aim for a balance of “green” (nitrogen-rich) and “brown” (carbon-rich) materials. Greens include fresh grass clippings and kitchen scraps, while browns include dry leaves, straw, and shredded newspaper. Alternate layers of greens and browns to create an optimal environment for decomposition.
- Keep the compost moist: Your compost pile should be consistently moist, similar to a wrung-out sponge. Regularly sprinkle water over the pile to maintain proper moisture levels. Avoid over-watering, as it can lead to anaerobic conditions.
- Aerate the compost pile: Regularly turn or mix the compost pile with a pitchfork or garden tool to introduce air and promote decomposition. This helps distribute moisture and oxygen throughout the pile and speeds up the breakdown process.
- Monitor the temperature: Composting generates heat as organic materials break down. Use a compost thermometer to monitor the internal temperature. Ideally, it should stay between 130-160°F (55-71°C). If the temperature drops below this range, turn the pile to reactivate the decomposition process.
- Be patient and consistent: Composting takes time, so be patient and give it several months to fully transform into usable compost. Continue adding organic materials and maintaining the compost pile regularly to keep the process going.
By following these steps, you will be well on your way to creating your own nutrient-rich compost. The next section will guide you on selecting the right composting method for your needs.
Choosing the Right Composting Method
When it comes to composting, there are several methods to choose from. Each method has its own set of advantages and considerations. Here are some popular composting methods to help you select the one that suits you best:
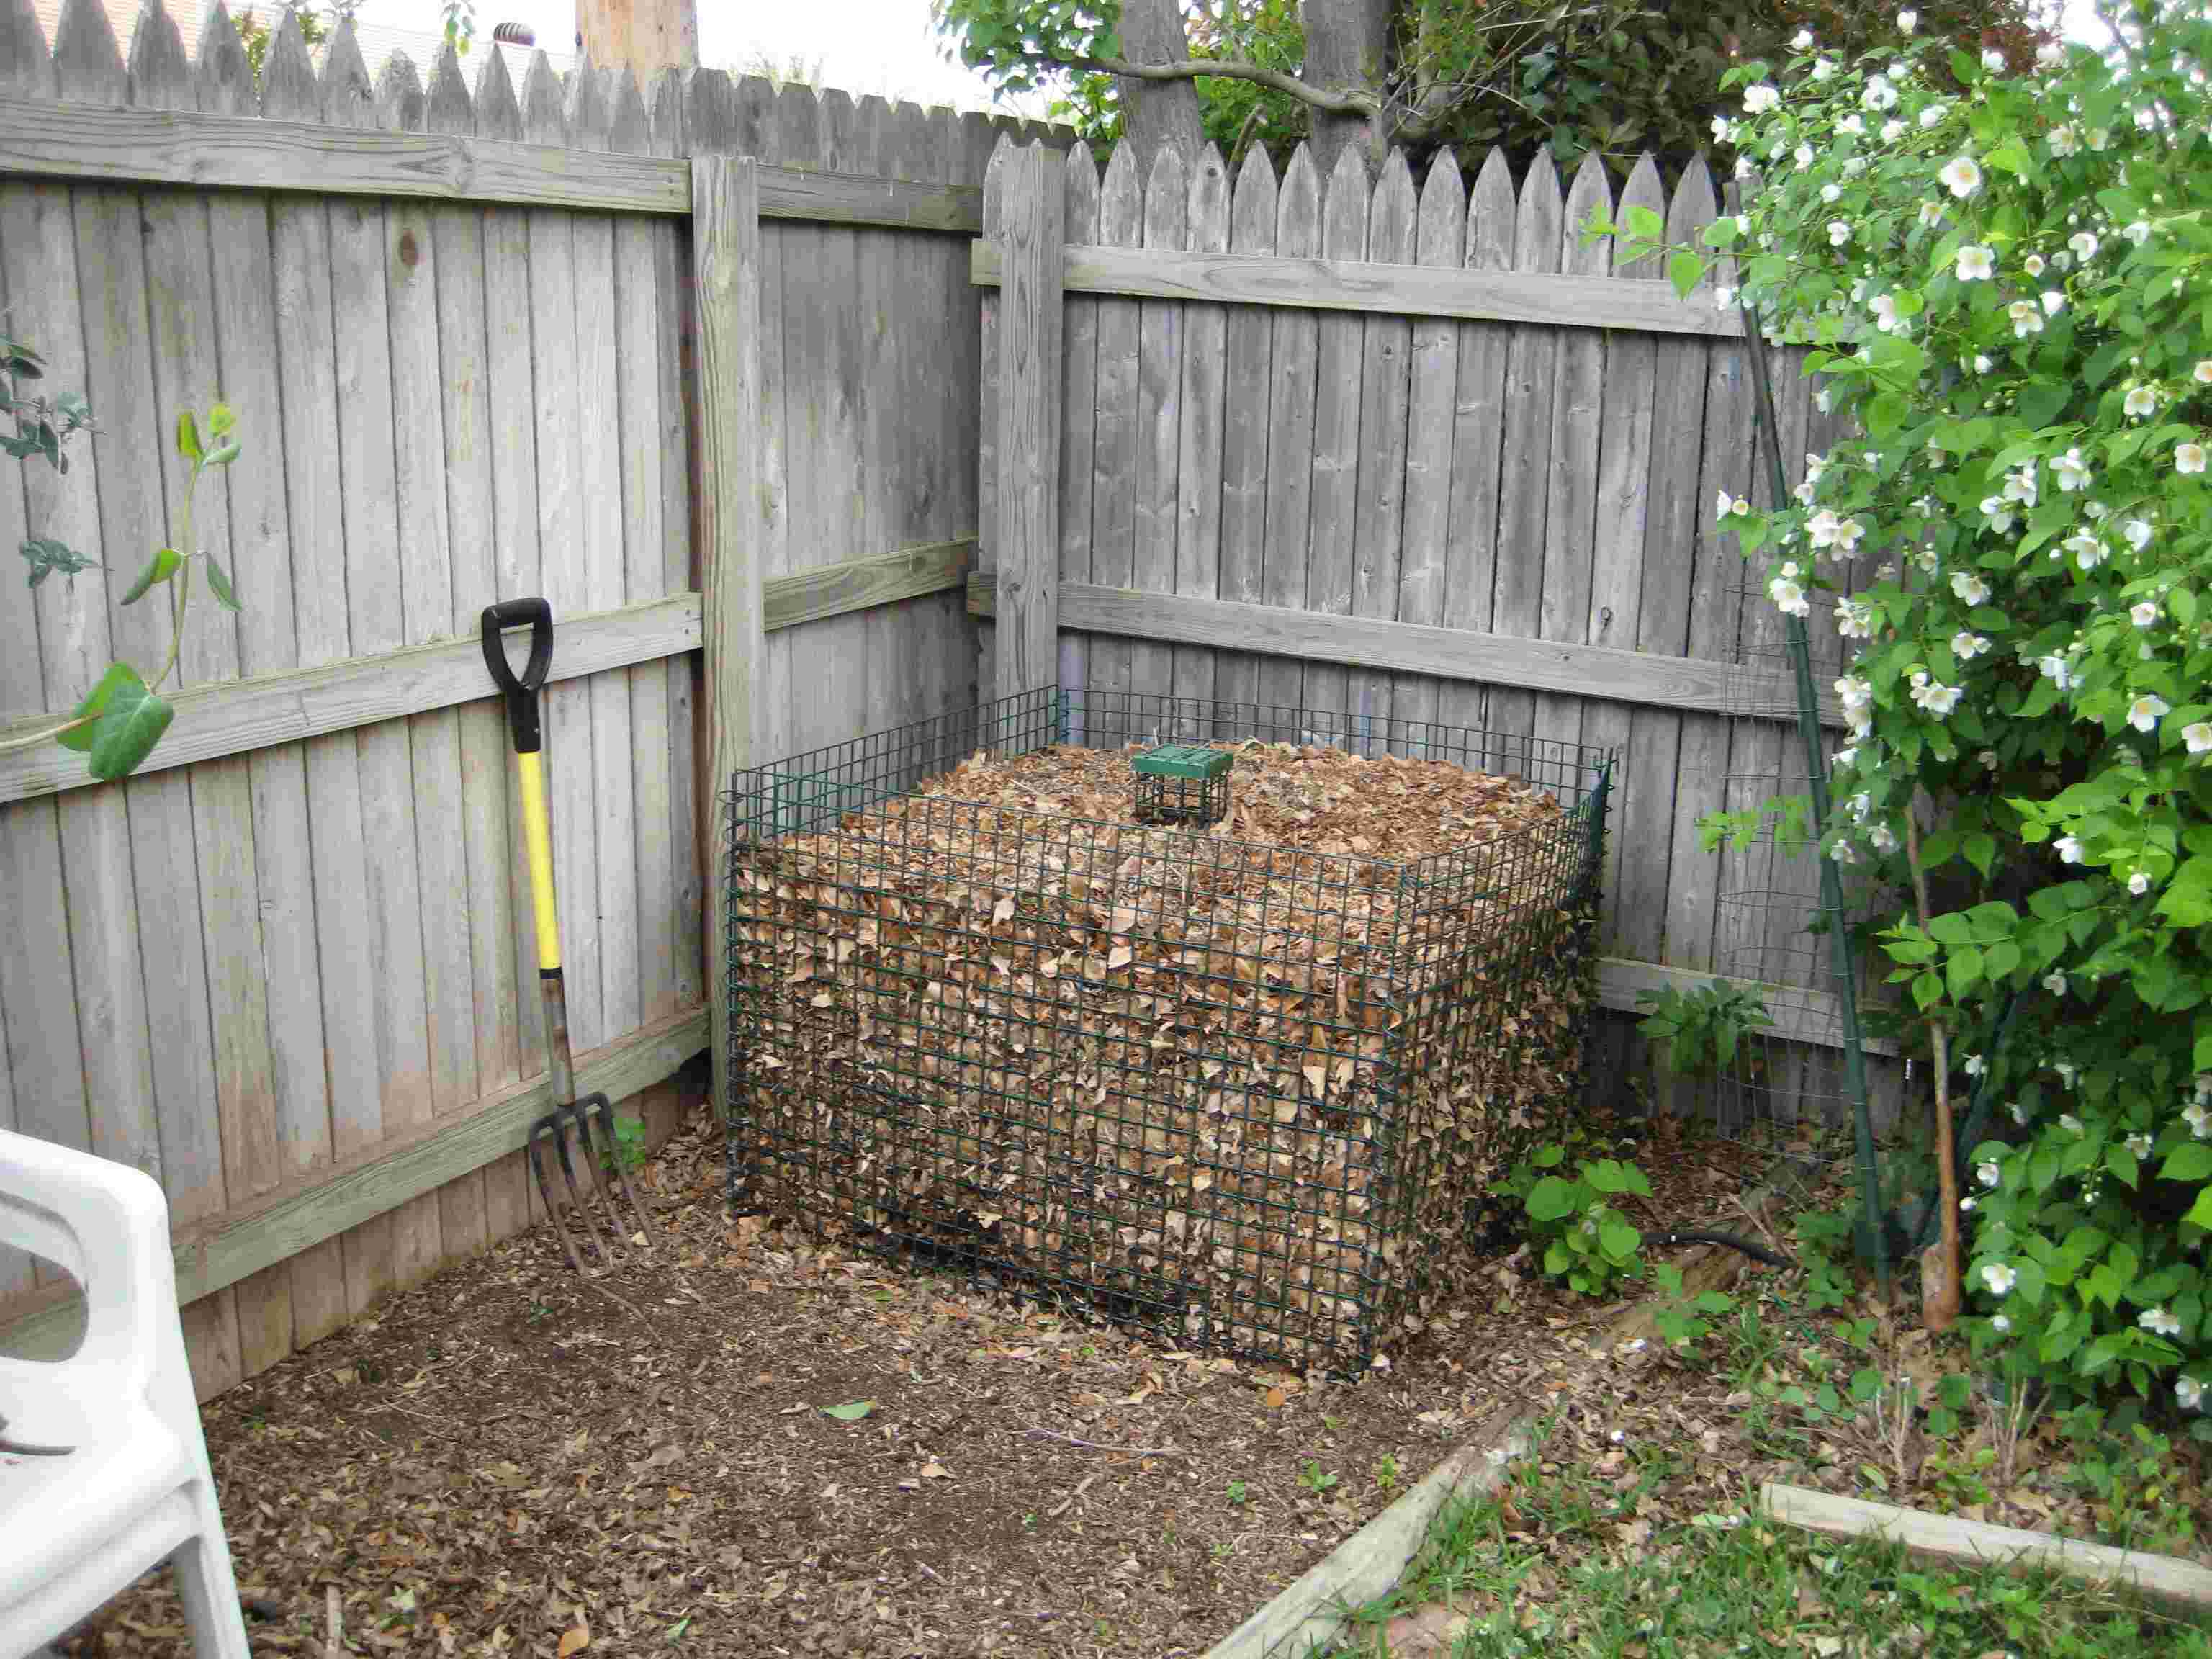
- Traditional Compost Piles: This method involves creating a simple pile or heap of organic waste in your yard. It requires ample space and offers excellent airflow, allowing for efficient decomposition. Traditional composting is suitable if you have a large yard and prefer a low-cost, no-frills approach.
- Compost Bins: Compost bins come in various sizes and styles, such as plastic bins, wooden structures, or wire mesh containers. They offer a more organized and contained approach to composting. Bins help retain heat, keep pests out, and make it easier to turn the compost. They are ideal for smaller spaces and for those who prefer a neater aesthetic.
- Vermicomposting: Vermicomposting involves using worms, usually red wigglers, to break down organic waste into nutrient-rich castings. This method is suitable for those with limited outdoor space, such as apartment dwellers. Vermicomposting bins can be kept indoors or on a balcony. Worms require a controlled environment, proper bedding, and a regular supply of organic matter.
- Compost Tumblers: Compost tumblers are rotating barrels or drums that make turning and aerating the compost easier. They are ideal for those who want a faster composting process or have limited physical mobility. Tumblers provide good heat retention and help keep pests away. However, they may have a smaller capacity compared to traditional compost piles.
- In-Ground Composting: In-ground composting involves digging a pit or trench in your garden and burying organic waste directly. This method works well for those who prefer a discreet composting approach and have plenty of space. It requires regular turning and monitoring to ensure proper decomposition.
Consider your available space, time commitment, and personal preferences when choosing a composting method. Remember that successful composting relies on a balance of moisture, oxygen, and organic materials. Regardless of the method you choose, the key to successful composting is consistency and proper maintenance.
Now that you have a better understanding of the different composting methods, let’s move on to the next section, where we will discuss the materials needed for composting.
Materials for Composting
Composting requires a mix of organic materials to create the perfect environment for decomposition. Here are the key materials you will need for successful composting:
- Greens: Also known as nitrogen-rich materials, greens provide the necessary nutrients for composting. Examples include fruit and vegetable scraps, coffee grounds, tea leaves, fresh grass clippings, and green plant trimmings. Greens are rich in nitrogen, which helps break down organic matter quickly.
- Browns: Browns, also known as carbon-rich materials, help balance the nitrogen content in your compost. Examples of browns include dried leaves, shredded newspaper, straw, wood chips, and dry plant materials. Browns provide a source of carbon, which helps absorb excess moisture and prevents unpleasant odors in the compost pile.
- Air and Water: Adequate airflow and moisture are essential for the composting process. Keep your compost pile moist but not overly saturated, similar to a damp sponge. Regularly turn the pile to introduce oxygen and prevent it from becoming compacted. If your pile becomes too dry, add water. If it becomes too wet, add more browns to balance the moisture level.
- Avoid: To maintain a healthy composting environment, it’s important to avoid certain materials. These include meat and dairy products, oily or greasy items, pet waste, weeds with mature seeds, and diseased plant materials. These items can attract pests, introduce harmful pathogens, or disrupt the balance of your compost.
Remember to maintain a balance of both greens and browns in your compost pile. Aim for roughly equal amounts by volume, although browns may slightly outweigh greens due to their slower decomposition rate.
It’s also worth noting that you can enhance your compost pile by adding additional organic matter. This includes items such as eggshells, crushed seashells (for calcium), coffee filters, shredded cardboard, and small amounts of wood ash. These materials help provide additional nutrients and improve the overall quality of your compost.
Now that you are armed with the knowledge of composting materials, we can move on to the next section, where we will explore how to build and maintain a compost pile.
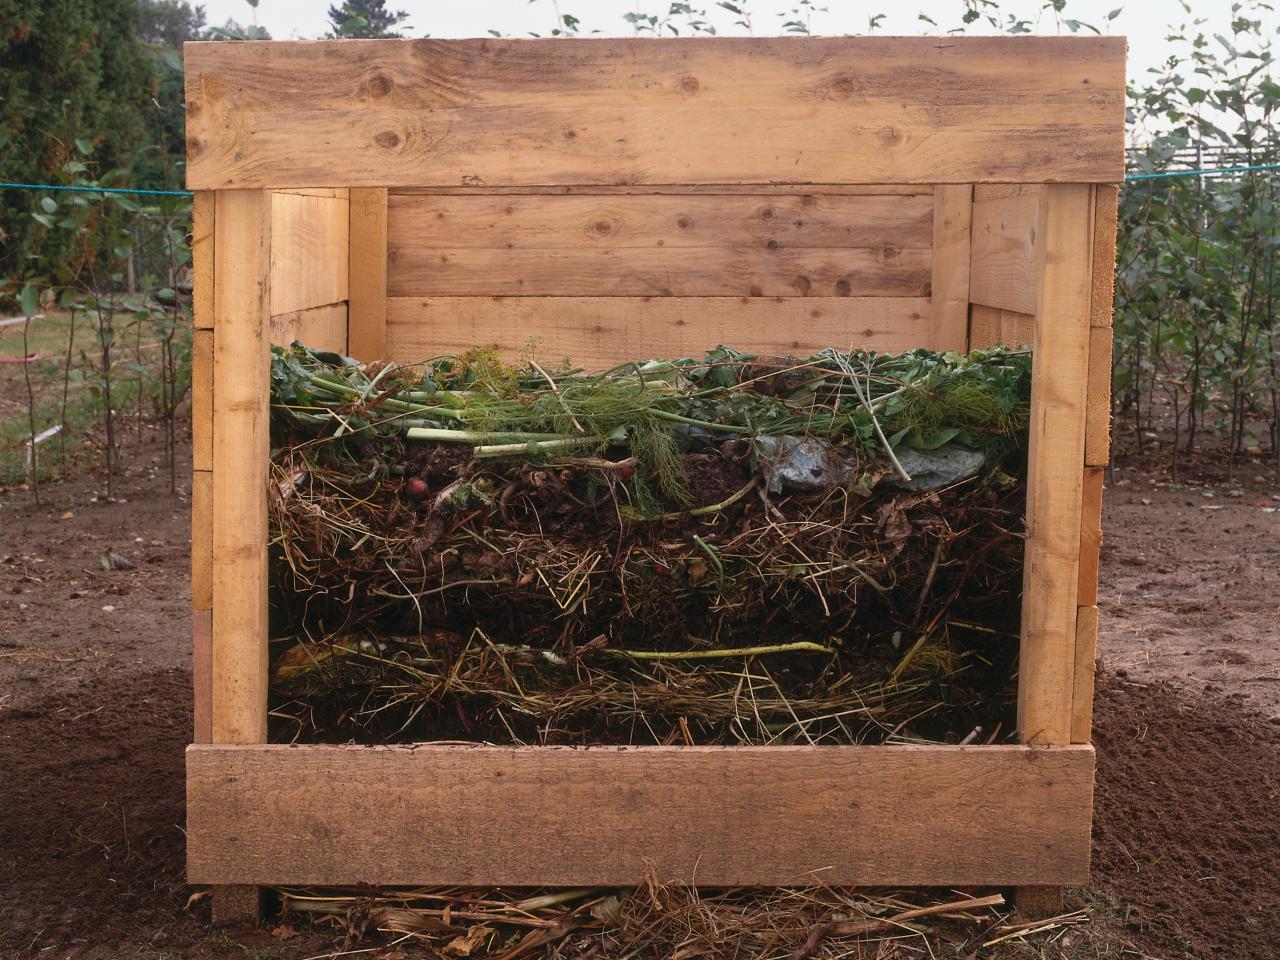
Building and Maintaining a Compost Pile
Building and maintaining a compost pile is a foundational step in the composting process. A well-constructed pile ensures efficient decomposition and helps create nutrient-rich compost. Here’s how you can build and maintain a compost pile:
- Select a composting area: Choose a level, well-drained spot in your yard or garden for your compost pile. Ensure it is easily accessible for adding materials and turning the pile.
- Start with a base layer: Begin by creating a base layer of carbon-rich materials, such as dried leaves or straw. This helps with aeration and drainage.
- Add alternate layers: Layer your compostable materials, starting with a layer of greens (such as fruit and vegetable scraps) followed by a layer of browns (such as dried leaves). Repeat this alternating pattern until you have used all your compostable materials.
- Moisten the pile: As you build the layers, moisten them slightly with water. The pile should be consistently moist, resembling a damp sponge, but not waterlogged.
- Size matters: For efficient decomposition, aim for a compost pile that is at least 3 feet (1 meter) in both width and height. This size allows for proper heat retention and airflow.
- Aerate the pile: Periodically turn or mix the compost pile using a pitchfork or garden tool. This introduces oxygen into the pile and helps break up clumps, facilitating the decomposition process. Aim to turn the pile every few weeks, or when the internal temperature drops below the optimal range (130-160°F or 55-71°C).
- Monitor temperature and moisture: Regularly check the internal temperature of the compost pile using a compost thermometer. If needed, adjust the moisture levels by adding water or more browns to maintain the desired moisture content. Too dry, and the pile will decompose slowly; too wet, and it may become anaerobic and smell bad.
- Keep carbon-to-nitrogen ratio in balance: Maintaining a proper balance of greens and browns is critical. Aim for a carbon-to-nitrogen (C:N) ratio of around 25-30 parts carbon to 1 part nitrogen. This helps promote efficient decomposition and prevents odors. You can use a compost calculator or reference guide to determine the C:N ratio of different materials.
- Patience and consistency: Composting takes time. It can take several months for organic materials to break down into compost. Be patient and consistent with adding new materials, turning the pile, and maintaining the proper moisture and aeration. Soon enough, you will have nutrient-rich compost ready to use in your garden.
By following these steps and maintaining an attentive approach to your compost pile, you will create a thriving ecosystem that transforms organic waste into valuable compost. In the next section, we will discuss how to monitor and troubleshoot common issues that may arise during the composting process.
Turning and Monitoring the Compost Pile
Turning and monitoring your compost pile is essential for successful composting. Regularly tending to your pile helps maintain optimal conditions for decomposition and ensures the production of high-quality compost. Here’s how to effectively turn and monitor your compost pile:
- Why turn the compost pile: Turning the compost pile promotes oxygen flow, which is crucial for the growth of aerobic microorganisms that break down organic matter. Turning the pile also redistributes moisture and helps break up any clumps or compacted areas.
- When to turn the compost pile: Aim to turn the pile every few weeks, or when the internal temperature drops below the desired range of 130-160°F (55-71°C). Turning the pile at these intervals ensures proper decomposition and helps avoid any potential issues.
- How to turn the compost pile: Use a pitchfork or a compost turning tool to carefully lift and turn the materials. Move the outer layer of the pile to the center and vice versa. Aim to mix the materials thoroughly, ensuring that the newly turned materials are evenly distributed throughout the pile.
- Monitoring compost temperature and moisture: Regularly check the internal temperature of the compost pile using a compost thermometer. The temperature range of 130-160°F (55-71°C) is ideal as it promotes efficient decomposition. If the temperature is too low, turn the pile to reactivate the process. If the compost is too dry, add water to maintain proper moisture levels.
- Signs of a healthy compost pile: A healthy compost pile should have an earthy smell, like damp soil, and should generate heat as organic materials break down. The pile should also maintain a consistently moist but not overly wet or dry condition, similar to a wrung-out sponge.
- Troubleshooting common composting issues: Keep an eye out for signs of potential problems in your compost pile. Foul odors may indicate anaerobic conditions, which can be resolved by turning the pile more frequently and adding more browns for better aeration. Excessive fruit flies or other pests may indicate an imbalance in the pile, such as too many greens or not enough browns.
- Covering the compost pile: While not necessary, covering the compost pile with a tarp or lid can help retain moisture and heat during rainy or colder seasons. It can also prevent excess water from entering the pile.
- Patience and regular maintenance: Composting is a process that takes time. Be patient and consistent with turning and monitoring your compost pile. With regular maintenance, you will eventually achieve nutrient-rich compost that is ready to use in your garden.
By regularly turning and monitoring your compost pile, you create an optimal environment for decomposition, ensuring a successful composting process. In the next section, we will discuss some common troubleshooting tips for handling composting issues.
Troubleshooting Common Composting Issues
Composting is a natural process, and sometimes issues may arise along the way. However, with a little troubleshooting, you can address these common composting issues and keep your compost pile on track. Here are some common problems and their solutions:
- Foul Odors: If your compost pile emits a foul odor, it may indicate anaerobic conditions or an imbalance of greens and browns. To resolve this, turn the pile more frequently to introduce oxygen and ensure adequate air circulation. Add more browns, such as dried leaves or shredded newspaper, to absorb excess moisture and restore balance to the pile.
- Slow Decomposition: If your compost pile is taking longer to decompose, it could be due to a lack of nitrogen-rich materials or insufficient moisture. Ensure there is a good mix of greens, like kitchen scraps, and browns, like dried leaves, to maintain the carbon-to-nitrogen (C:N) ratio. Adjust the moisture levels by adding water or more greens if the pile is too dry.
- Pest Infestation: Fruit flies, ants, or other pests can be attracted to your compost pile if there is an abundance of decaying fruit or sugary materials. To combat this issue, bury the kitchen scraps deeper within the pile or cover them with a layer of browns. This helps deter pests from accessing the food source.
- Excessive Moisture: If your compost pile becomes too wet and soggy, it can become anaerobic and hinder decomposition. To rectify this, add more browns, like dried leaves or shredded newspaper, to absorb excess moisture. Turn the pile to improve aeration and allow excess water to evaporate. If necessary, cover the pile during heavy rain to prevent it from getting overly saturated.
- Lack of Heat: Insufficient heat in your compost pile can slow down the decomposition process. Ensure that your pile has enough nitrogen-rich materials (greens) to generate heat during decomposition. If the temperature remains low, try turning the pile more frequently or increasing its size to promote better heat retention.
- Unshredded or Large Materials: Large or unshredded materials take longer to decompose. Chop or shred larger items such as branches or thick stems into smaller pieces before adding them to the compost pile. This speeds up the decomposition process and ensures a more even breakdown of materials.
Remember that composting is a learning process, and it may take some trial and error to find the right balance for your specific compost pile. Regular monitoring and problem-solving will help you overcome any obstacles and yield nutrient-rich compost for your garden.
In the next section, we will explore the exciting ways you can use your finished compost to nourish your plants.
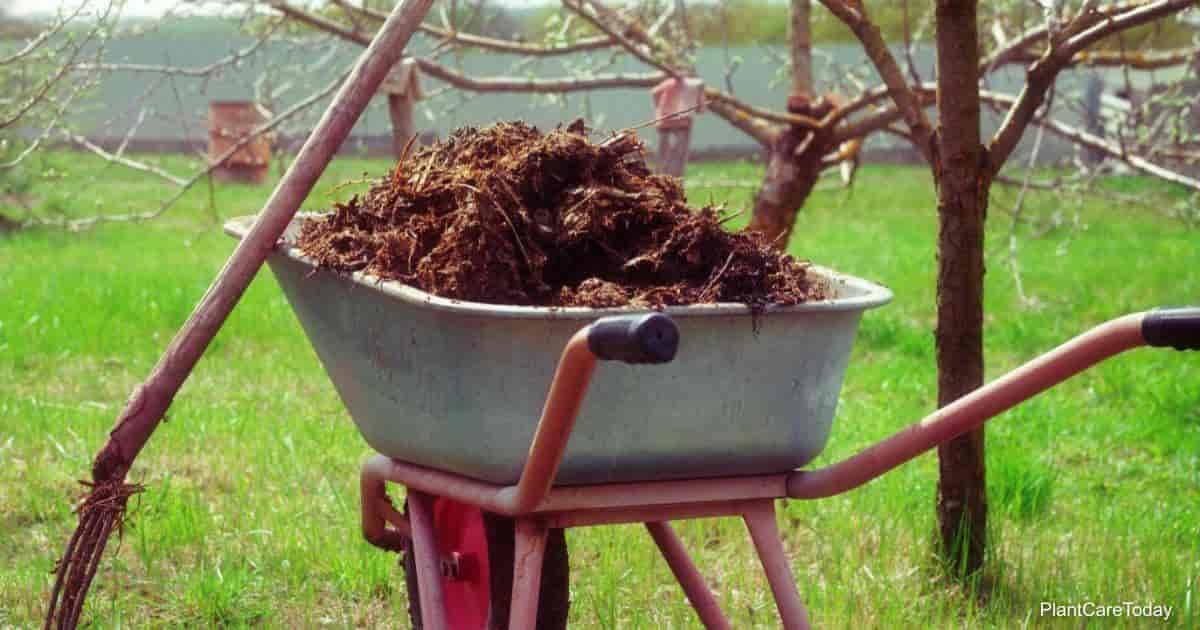
Using Your Finished Compost
Congratulations on successfully completing your composting journey! Now that you have a batch of nutrient-rich compost ready, it’s time to put it to use in your garden. Here are some fantastic ways to utilize your finished compost:
- Amending Garden Soil: One of the primary uses of compost is to amend garden soil. Incorporate a generous amount of compost into your garden beds or containers before planting. The compost will improve soil structure, enhance nutrient content, and promote healthy plant growth.
- Topdressing and Mulching: Apply a layer of compost around existing plants to provide a nutrient boost and help retain moisture. This topdressing acts as a natural mulch, suppressing weeds and insulating plant roots.
- Creating Potting Mixes: Mix compost with other organic matter, such as peat moss, coconut coir, or vermiculite, to create your own homemade potting mixes. This provides a nourishing and well-draining substrate for potted plants.
- Making Compost Tea: Compost tea is a liquid fertilizer made by steeping compost in water. Use a cloth or mesh bag to submerge compost in water and allow it to steep for a few days. Use the resulting tea to feed your plants with a nutrient-rich boost.
- Seed Starting: Mix compost with vermiculite or perlite to create a lightweight and nutrient-rich medium for starting seeds. The organic matter in compost provides essential nutrients for young seedlings as they establish their roots.
- Revitalizing Lawn: Spread a thin layer of compost over your lawn and gently rake it into the grass. This helps improve soil quality, increase microbial activity, and promote a healthier, greener lawn.
- Composting Mulch: Use compost as a feedstock for future composting endeavors. Layer compost with other organic materials, such as leaves or grass clippings, to create a new compost pile. This recycling process continues the cycle of nutrient-rich soil amendment.
These are just a few examples of how you can utilize your finished compost. Experiment with different applications and see how your plants thrive with the addition of this organic wonder. As you continue composting, remember to save a portion of your finished compost as a starter for your next batch.
Now that you’ve unlocked the potential of your compost, it’s time to put your knowledge into practice. Start enriching your garden and enjoying the benefits of your hard work and dedication. Happy gardening!
Conclusion
Congratulations on completing this comprehensive guide to making your own compost! By embarking on the journey of composting, you have taken a significant step towards sustainable gardening and reducing waste. Through this process, you have learned about the numerous benefits of composting, such as creating nutrient-rich soil, reducing waste, and minimizing the need for synthetic fertilizers and pesticides.
We discussed the fundamental steps of getting started with composting, including selecting an appropriate composting method, gathering the necessary materials, and building and maintaining a compost pile. You now have the knowledge and skills to establish a thriving compost system that can transform your kitchen and garden waste into valuable “black gold” for your plants.
Additionally, we explored troubleshooting strategies for addressing common composting challenges, such as odors, slow decomposition, and pest infestations. Remember that composting is a dynamic process that requires patience, consistency, and problem-solving. These skills will help you overcome any hurdles you may encounter along the way.
Finally, we discussed the exciting ways to use your finished compost, including soil amendment, mulching, creating potting mixes, making compost tea, and revitalizing lawns. This nutrient-rich compost will nourish your plants, promote healthy growth, and contribute to the overall health of your garden ecosystem.
Now it’s time to put your knowledge into action and start composting! As you continue on your composting journey, remember to adapt your practices to suit your specific needs and environment. The more you compost, the better you will become at fine-tuning your process and producing high-quality compost.
Thank you for joining us on this amazing journey of DIY composting. By making your own compost, you are not only improving your garden but also making a positive impact on the planet. So, get your hands dirty, embrace the cycle of organic matter, and enjoy the benefits of sustainable gardening. Happy composting!