Home>Gardening Tips and Tricks>Eco-Friendly Gardening>How To Store Compost

Eco-Friendly Gardening
How To Store Compost
Modified: January 22, 2024
Discover the best eco-friendly gardening practices with our guide on how to store compost. Enhance your garden's sustainability and nutrient-rich soil with these helpful tips.
(Many of the links in this article redirect to a specific reviewed product. Your purchase of these products through affiliate links helps to generate commission for Chicagolandgardening.com, at no extra cost. Learn more)
Table of Contents
- Introduction
- Step 1: Choosing a Compost Storage Container
- Step 2: Selecting the Right Location
- Step 3: Preparing the Compost Storage Area
- Step 4: Storing Compost in a Pile or Heap
- Step 5: Using Compost Bins or Tumblers for Storage
- Step 6: Maintaining Temperature and Moisture Levels
- Step 7: Turning and Mixing Compost Regularly
- Step 8: Protecting Compost from Pests and Animals
- Step 9: Harvesting and Using Finished Compost
- Conclusion
Introduction
Welcome to the world of eco-friendly gardening! One of the key principles of sustainable gardening is composting. By recycling organic waste and turning it into nutrient-rich compost, you can nourish your plants, reduce waste, and make a positive impact on the environment.
Compost is a natural fertilizer that enriches the soil, improves its structure, and promotes healthy plant growth. It contains a balanced mix of organic matter, such as kitchen scraps, yard waste, and other biodegradable materials. However, the process of composting doesn’t end with creating the perfect mix; it also involves proper storage and management.
In this article, we will guide you on how to store compost effectively. Whether you’re a seasoned gardener or just starting your composting journey, these steps will help you maintain the quality of your compost while minimizing odors, pests, and potential problems.
So, let’s dive in and discover the best practices for compost storage, ensuring that you have a steady supply of nutrient-rich compost to support your garden’s health and productivity!
Step 1: Choosing a Compost Storage Container
The first step in storing compost is selecting the right container. The container you choose will depend on the amount of compost you generate, available space, and personal preference. Here are a few options to consider:
- Compost Bins: These are enclosed containers specifically designed for composting. They come in various sizes and materials, such as plastic, wood, or metal. Compost bins provide a convenient and organized way to store compost while allowing airflow and protection from pests.
- Compost Tumblers: These containers are designed to make composting easier by allowing you to rotate the bin, helping to aerate and mix the compost. Compost tumblers are ideal for smaller gardens or limited spaces as they are often compact and can be easily turned.
- Wire Mesh Bins: If you prefer a more budget-friendly option, you can construct a compost storage area using wire mesh or chicken wire. These bins allow for airflow and are suitable for larger quantities of compost. They are flexible and can be expanded as needed.
- Piles or Heaps: Another option is to store compost in simple open piles or heaps. This is the most basic method and requires no additional containers. While it may not provide the same level of organization and protection, it can be suitable for larger gardens with ample space.
When choosing a compost storage container, consider factors such as durability, ease of use, and aesthetics. It’s also important to select a container that allows for proper airflow and drainage to prevent the compost from becoming too wet or compacted.
Remember, the container you choose will be the home for your compost, so it’s important to choose one that suits your needs and preferences. Once you have selected the right container, you can move on to the next step: finding the right location for your compost storage.
Step 2: Selecting the Right Location
Choosing the right location for your compost storage is crucial for its overall success. Here are a few factors to consider when selecting the ideal spot:
- Sunlight: Place your compost storage container in an area that receives partial to full sunlight. Sunlight helps to heat up the compost, promoting the decomposition process.
- Accessibility: Consider the convenience of accessing your compost. Locate it near your garden or kitchen for easy transportation of materials and finished compost.
- Drainage: Ensure that the chosen location has good drainage. Avoid areas that are prone to flooding or hold water for extended periods, as excess moisture can lead to a smelly and anaerobic compost pile.
- Proximity to Water Source: It’s beneficial to have a water source nearby for watering purposes. Compost requires moisture to break down properly, so having easy access to water makes regular watering hassle-free.
- Pest and Animal Control: Consider the proximity to natural habitats or areas with high pest activity. Ideally, keep your compost away from areas with a large population of rodents or other animals that may be attracted to the compost pile.
- Odor Management: While composting does produce some odor, placing your compost storage container downwind from your living spaces or entertainment areas can help minimize any potential inconvenience.
Once you’ve considered these factors, choose a location that meets most, if not all, of your requirements. Remember that the location may vary depending on the type of compost storage container you’ve chosen, such as a bin, tumbler, or pile.
Now that you’ve selected the right container and location for your compost storage, it’s time to move on to the next step: preparing the compost storage area.
Step 3: Preparing the Compost Storage Area
Before you start storing compost, it’s important to prepare the storage area to optimize the composting process and prevent any potential issues. Here are the key steps to follow:
- Clean the Area: Clear the selected area of any debris, rocks, or weeds. This will provide a clean space for your compost storage and reduce the chances of unwanted materials contaminating the compost.
- Provide a Base: Consider placing a layer of organic materials, such as leaves or straw, at the bottom of your compost storage area. This acts as a base layer and helps improve airflow and drainage.
- Consider a Barrier: If you’re storing compost in an open pile or heap, consider surrounding the area with a barrier to contain the compost and prevent it from spreading. This can be a wooden frame, chicken wire, or any other sturdy material.
- Create Compost Divisions: If you have multiple compost storage areas or bins, consider creating divisions between them. This helps keep different stages of compost separate and easily accessible.
- Label the Storage Areas: If you have different compost storage areas for specific purposes, such as “Garden Compost” and “Kitchen Compost,” it’s helpful to label them accordingly. This ensures that you use the appropriate compost for different areas of your garden.
- Ensure Proper Drainage: If you’re using a container with a bottom, ensure that there are drainage holes to allow excess moisture to escape. Inadequate drainage can lead to a waterlogged compost pile, which hinders decomposition.
By preparing the storage area properly, you create an environment that is conducive to composting. This sets the stage for successful compost storage and helps maintain the quality of your compost.
Now that your compost storage area is ready, it’s time to move on to the next step: storing compost in a pile or using compost bins or tumblers.
Step 4: Storing Compost in a Pile or Heap
If you’ve chosen to store your compost in a pile or heap, follow these guidelines to ensure it’s done effectively:
- Choose an Appropriate Size: Start by creating a compost pile that is at least 3 feet high and 3 feet wide. This size allows for proper heat insulation and airflow within the compost pile.
- Add Ingredients Gradually: As you accumulate organic waste, add it to the compost pile in layers. Alternate between green materials (rich in nitrogen, like kitchen scraps or fresh grass clippings) and brown materials (rich in carbon, like dry leaves or straw). This helps create a balanced compost pile.
- Moisten the Pile: Keep the compost pile moist but not overly wet. Water each layer as you build the pile, ensuring that it is evenly damp. This helps facilitate the decomposition process.
- Aerate the Pile: Turn and mix the compost pile regularly using a garden fork or compost aerator. This introduces oxygen and helps break down the organic materials more efficiently. Aim to turn the compost pile every few weeks.
- Maintain the Right Balance: Ensure a balance of green and brown materials in the compost pile. Too much green material can result in a smelly, slimy pile, while too much brown material can slow down decomposition. Adjust the ratio, if needed, to maintain a healthy balance.
- Monitor Temperature and Moisture: Regularly check the temperature of the compost pile. It should ideally reach temperatures between 120-160°F (49-71°C) for efficient decomposition. If the pile becomes too hot or too dry, adjust the moisture content by watering or adding more dry materials accordingly.
- Patience and Time: Remember that composting is a natural process that takes time. Depending on various factors such as temperature, materials used, and turning frequency, it may take several months to a year for the compost to fully mature and transform into rich, crumbly compost.
Storing compost in a pile or heap is a cost-effective and straightforward method. By following these steps, you can ensure an efficient composting process and achieve high-quality compost for your garden.
Now that you know how to store compost in a pile, let’s explore the option of using compost bins or tumblers for compost storage in the next step.
Step 5: Using Compost Bins or Tumblers for Storage
If you’ve opted for compost bins or tumblers to store your compost, follow these steps to effectively use them:
- Fill the Bin or Tumbler: Start by filling your compost bin or tumbler with a mixture of green and brown organic materials. Layer them as you would in a compost pile, alternating between nitrogen-rich green materials and carbon-rich brown materials.
- Moisten the Contents: Just like with a compost pile, ensure that the materials in the bin or tumbler are moist but not oversaturated. Add water to the mix if it feels too dry, aiming for a damp sponge-like consistency.
- Secure the Lid: If your compost bin or tumbler has a lid, make sure it is securely closed. This helps retain moisture and heat within the container, promoting an efficient composting process.
- Turn or Rotate the Bin/Tumbler: Regularly turn or rotate the contents of the compost bin or tumbler. This mixing action helps aerate the compost, speeding up decomposition. Follow the manufacturer’s guidelines for the recommended frequency of turning or rotating.
- Monitor Moisture Levels: Check the moisture levels inside the compost bin or tumbler regularly. If it feels too dry, add water to maintain the desired moisture content. Avoid overwatering, as it can lead to a waterlogged and smelly compost mix.
- Manage Temperature: Compost bins and tumblers often generate heat as the organic materials decompose. Monitor the temperature inside the container using a compost thermometer. Aim for temperatures between 120-160°F (49-71°C) for optimal decomposition.
- Harvest Finished Compost: Once the materials inside the compost bin or tumbler have transformed into dark, crumbly compost, it’s time for harvest. Open the bin or tumbler and transfer the finished compost to a separate container or directly to your garden beds.
Compost bins and tumblers offer a contained and organized approach to compost storage. They allow for better control over moisture, aeration, and temperature, resulting in faster composting times and easier harvest.
Now that you understand how to use compost bins or tumblers for storage, let’s move on to the next step: maintaining temperature and moisture levels in your compost.
Step 6: Maintaining Temperature and Moisture Levels
Maintaining the right temperature and moisture levels is crucial for successful composting. Proper management of these factors helps accelerate the decomposition process and ensures the production of high-quality compost. Here’s how you can maintain temperature and moisture levels:
- Monitoring Temperature: Regularly check the temperature of your compost pile or bin. Use a compost thermometer to measure the internal temperature. Ideally, the compost should reach temperatures between 120-160°F (49-71°C). If the temperature is lower, it may indicate slower decomposition, while excessively high temperatures can kill beneficial microorganisms.
- Adjusting Moisture Levels: Compost needs the right amount of moisture to thrive. The moisture level should resemble that of a damp sponge. If the compost feels too dry, add water to the mix. Conversely, if it’s overly wet, incorporate dry materials like straw or shredded leaves to promote better drainage. Regularly monitor and adjust the moisture levels as needed.
- Covering the Compost: Covering your compost pile or bin can help retain moisture and provide insulation. Use a tarp, plastic sheet, or the lid of your compost bin to protect it from excess rain and evaporation. This covering also prevents the compost from drying out in hot weather or getting waterlogged during heavy rains.
- Aerating the Compost: Proper aeration is essential for temperature regulation and decomposition. Turn the compost pile with a garden fork or use the rotating mechanism of a compost tumbler to mix the materials well. This promotes oxygen flow, prevents compaction, and allows beneficial microorganisms to thrive.
- Utilizing Insulation: In colder climates, insulating the compost pile or bin helps maintain the temperature necessary for decomposition. Surround the compost with straw bales or cover it with a thick layer of insulation material like leaves or wood chips to trap heat and keep it insulated.
By consistently monitoring and adjusting the temperature and moisture levels, you can create an optimal environment for the composting process. This ensures that your compost decomposes efficiently and produces nutrient-rich organic matter for your garden.
Now that you know how to maintain temperature and moisture levels, let’s move on to the next step: turning and mixing your compost regularly.
Step 7: Turning and Mixing Compost Regularly
Regularly turning and mixing your compost is an essential step to ensure proper decomposition and accelerate the breakdown of organic materials. By following these guidelines, you can maintain a well-mixed and aerated compost pile:
- Frequency of Turning: Aim to turn your compost pile at least once every two to three weeks. More frequent turning can speed up the decomposition process, but avoid excessive turning, as it may disrupt the beneficial microorganisms that are breaking down the organic matter.
- Tools for Turning: Use a garden fork or a compost aerator tool to turn the compost pile. These tools help to mix and aerate the materials without causing excessive compaction or damage to beneficial microbes.
- Layering and Mixing: As you turn the compost, aim to mix and layer the materials from the outer edges of the pile into the center. This ensures that all parts of the compost receive adequate oxygen and moisture, promoting uniform decomposition.
- Breaking Up Clumps: During the turning process, break up any clumps or compacted areas within the compost pile. This allows for better airflow and prevents the formation of anaerobic pockets, which can slow down decomposition.
- Adding Amendments: If you notice any imbalances in your compost, such as too much green material causing a strong odor or a slow decomposition rate, you can add amendments to adjust the carbon-to-nitrogen ratio. This can include adding more brown materials like dried leaves or shredded paper to balance the mix.
- Monitoring Moisture Content: While turning the compost, pay attention to the moisture content. If the compost feels too dry, add water during the turning process to maintain the desired moisture levels. Conversely, if it’s excessively wet, incorporate dry materials to improve drainage.
Regularly turning and mixing the compost helps distribute moisture, oxygen, and beneficial microorganisms throughout the pile. This encourages the breakdown of organic materials, accelerates decomposition, and ultimately produces a rich, crumbly compost.
Now that you know the importance of turning and mixing your compost regularly, let’s move on to the next step: protecting your compost from pests and animals.
Step 8: Protecting Compost from Pests and Animals
Protecting your compost from pests and animals is essential to maintain its integrity and prevent unwanted disturbances. Here are some strategies to safeguard your compost:
- Secure Containers: If you’re using compost bins or tumblers, make sure they have tight-fitting lids or secure locking mechanisms. This prevents access to pests and animals that may be attracted to the compost.
- Use Wire Mesh: Enclose your compost pile with wire mesh or chicken wire to create a physical barrier against larger animals, such as raccoons or rodents. Ensure that the mesh has small enough openings to prevent animals from squeezing through.
- Avoid Attractants: Keep food waste, especially meat, bones, dairy, and oily scraps, out of your compost. These materials can attract pests and animals. Stick to vegetable and plant-based organic matter to minimize the chances of unwanted visitors.
- Layer in Peels or Citrus: Some pests, like slugs and snails, can be deterred by placing citrus peels or crushed eggshells around the perimeter of your compost pile. They tend to avoid these materials due to their abrasive texture or acidic properties.
- Turn Regularly: Regularly turning your compost helps disrupt the habitat of pests and animals that may have taken up residence. This discourages them from nesting or feeding in the compost pile.
- Consider Compost Covers: If you notice persistent issues with pests or animals, consider using a compost cover. These covers are made of breathable material and can be secured over your compost pile or bin. They help deter pests while allowing airflow and temperature regulation.
- Avoid Petroleum-Based Products: Avoid using petroleum-based products, such as oils or fats, in your compost. These can attract pests and animals due to their strong smell and high caloric content.
- Regular Inspections: Periodically inspect your compost pile for signs of pests or animals. Look for burrows or tracks that indicate unwanted visitors. If you notice any issues, take appropriate action to mitigate the problem.
By implementing these protective measures, you can minimize the risk of pests and animals disrupting your compost pile. This ensures that your compost remains undisturbed and continues to decompose efficiently.
Now that you know how to protect your compost from pests and animals, let’s move on to the next step: harvesting and using finished compost.
Step 9: Harvesting and Using Finished Compost
After patiently waiting for the composting process to work its magic, it’s time to harvest and utilize the finished compost. Here’s how you can effectively harvest and use your compost:
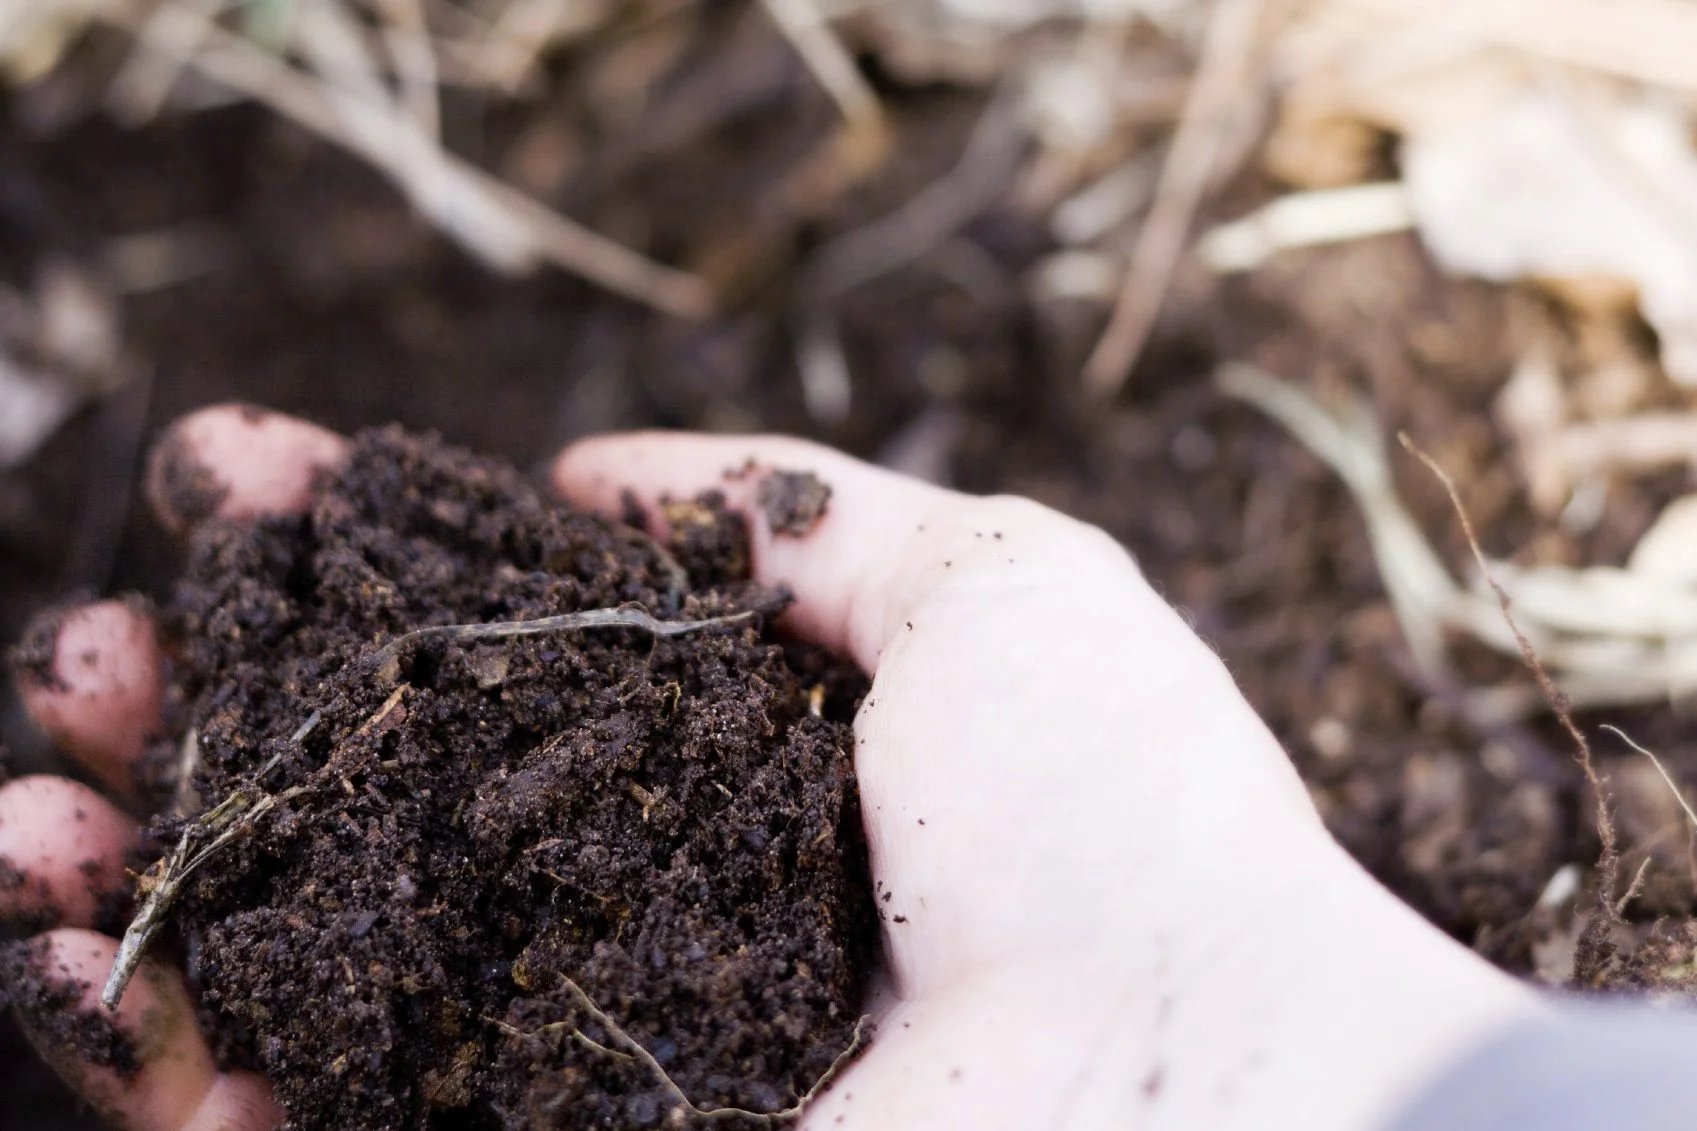
- Visual Cues: Look for signs that your compost is ready for harvest. Finished compost is dark and crumbly, with an earthy smell. The original materials used to create the compost should no longer be recognizable.
- Separate Unfinished Material: Before harvesting, separate any unfinished materials, such as larger twigs or undecomposed food scraps, from the finished compost. You can either return unfinished material back to the compost bin for further decomposition or set them aside for a future batch.
- Remove from Container: If you’re using a compost bin or tumbler, open the container and carefully remove the finished compost. Use a garden fork or shovel to scoop out the compost, working from the top down.
- Sift the Compost (Optional): For a finer texture, you can sift the harvested compost through a mesh screen or compost sifter. This helps remove any larger particles or debris, resulting in a smooth and consistent finished product.
- Apply to Garden or Potted Plants: Once harvested, apply the finished compost to your garden beds or use it to enrich the soil in potted plants. Spread a layer of compost around the base of plants, avoiding direct contact with plant stems.
- Mix with Potting Soil: Incorporate the finished compost into potting soil to enhance its fertility and nutrient content. Aim for a ratio of 1:1 or a 20-30% compost to soil mixture, depending on the plant’s requirements.
- Topdress Lawns or Turf: For lawns or turf areas, spread a thin layer of compost as a topdressing. This helps improve soil structure and provides essential nutrients to the grass.
- Compost Tea: Use finished compost to make compost tea—a liquid fertilizer. Simply soak a bag of compost in water for a few days, then use the resulting infusion to water your plants. Compost tea provides a concentrated boost of nutrients to support plant growth.
- Store Unused Compost: If you have leftover finished compost, store it in a dry, covered container or compost bin. This allows you to have a ready supply of compost for future gardening projects.
Harvesting and utilizing your finished compost adds valuable organic matter to your soil, enriching it with essential nutrients and improving its overall structure. By applying the compost to your garden or potted plants, you’ll promote healthy plant growth and enhance the vitality of your green spaces.
Congratulations! You’ve completed the final step of the composting process. Now you can enjoy the benefits of your hard work and continue nurturing your garden with nutrient-rich compost.
Conclusion
Congratulations on mastering the art of storing compost! By following the steps outlined in this guide, you’re well-equipped to maintain a steady supply of nutrient-rich compost for your garden. Remember, composting is not only beneficial for your plants but also for the environment, as it reduces waste and promotes sustainability.
From choosing the right compost storage container to harvesting and utilizing the finished compost, each step plays a vital role in ensuring the success of your composting journey. By selecting an appropriate container, such as a compost bin or tumbler, you can organize and manage your compost more effectively.
Next, carefully selecting the location for your compost storage area is crucial for optimal decomposition. Consider factors such as sunlight, accessibility, and pest control when deciding on the perfect spot.
Preparing the compost storage area, whether it’s clearing debris or providing a base layer, helps create an environment conducive to the composting process. It’s important to ensure proper drainage and create divisions for different types of compost if necessary.
Depending on your preference and available space, you may choose to store compost in a pile or use compost bins or tumblers. Each method has its advantages, but both require regular maintenance and attention to temperature and moisture levels.
Turning and mixing your compost is key to achieving efficient decomposition. Regularly aerating the pile or rotating the contents of a bin or tumbler helps create a well-balanced and fertile compost.
Protecting your compost from pests and animals ensures that it remains undisturbed and healthy. Using secure containers, wire mesh barriers, and avoiding attractants are effective strategies to keep unwanted visitors at bay.
Finally, harvesting and utilizing your finished compost is the ultimate reward for your efforts. Apply the nutrient-rich compost to your garden, mix it with potting soil, or create compost tea for your plants’ nourishment.
By following these steps and incorporating eco-friendly gardening practices, you’re making a positive impact on the environment and creating a thriving garden. So, continue your eco-friendly gardening journey, reap the rewards of composting, and watch your garden flourish!

