Home>Gardening Tips and Tricks>Problem Solving>How To Fix Irrigation Pipe
Problem Solving
How To Fix Irrigation Pipe
Modified: January 22, 2024
Learn how to fix irrigation pipe problems with our comprehensive guide. Discover effective problem-solving techniques for a well-maintained irrigation system.
(Many of the links in this article redirect to a specific reviewed product. Your purchase of these products through affiliate links helps to generate commission for Chicagolandgardening.com, at no extra cost. Learn more)
Table of Contents
Introduction
Having an efficient and reliable irrigation system is essential for maintaining lush and healthy outdoor spaces. However, over time, irrigation pipes can become damaged due to various factors such as age, weather conditions, or accidental impacts. If you have encountered a leak or a burst pipe in your irrigation system, fixing it as soon as possible is crucial to prevent water waste and damage to your landscape.
In this article, we will guide you through the steps required to fix an irrigation pipe effectively. Whether you are a homeowner or a professional landscaper, this comprehensive guide will provide you with the necessary knowledge and skills to tackle the problem and restore your irrigation system to full functionality.
Before we dive into the repair process, it’s important to note that different types of irrigation systems exist, including PVC, polyethylene, and galvanized steel pipes. The repair methods may vary depending on the type of pipe and the extent of the damage. Therefore, it is essential to identify the problem accurately and gather the appropriate tools and materials before beginning the repair process.
Remember, it’s always better to fix a pipe as soon as you notice an issue. Ignoring leaks or bursts can lead to wasted water, increased water bills, and potential damage to your landscape. So, let’s get started with the first step – identifying the problem.
Step 1: Identify the problem
The first step in fixing an irrigation pipe is to identify the problem accurately. This involves locating the area where the pipe is damaged, whether it’s a leak, a burst, or a crack. Identifying the problem enables you to determine the best course of action to repair the pipe effectively.
Here are a few signs that indicate a potential issue with your irrigation pipe:
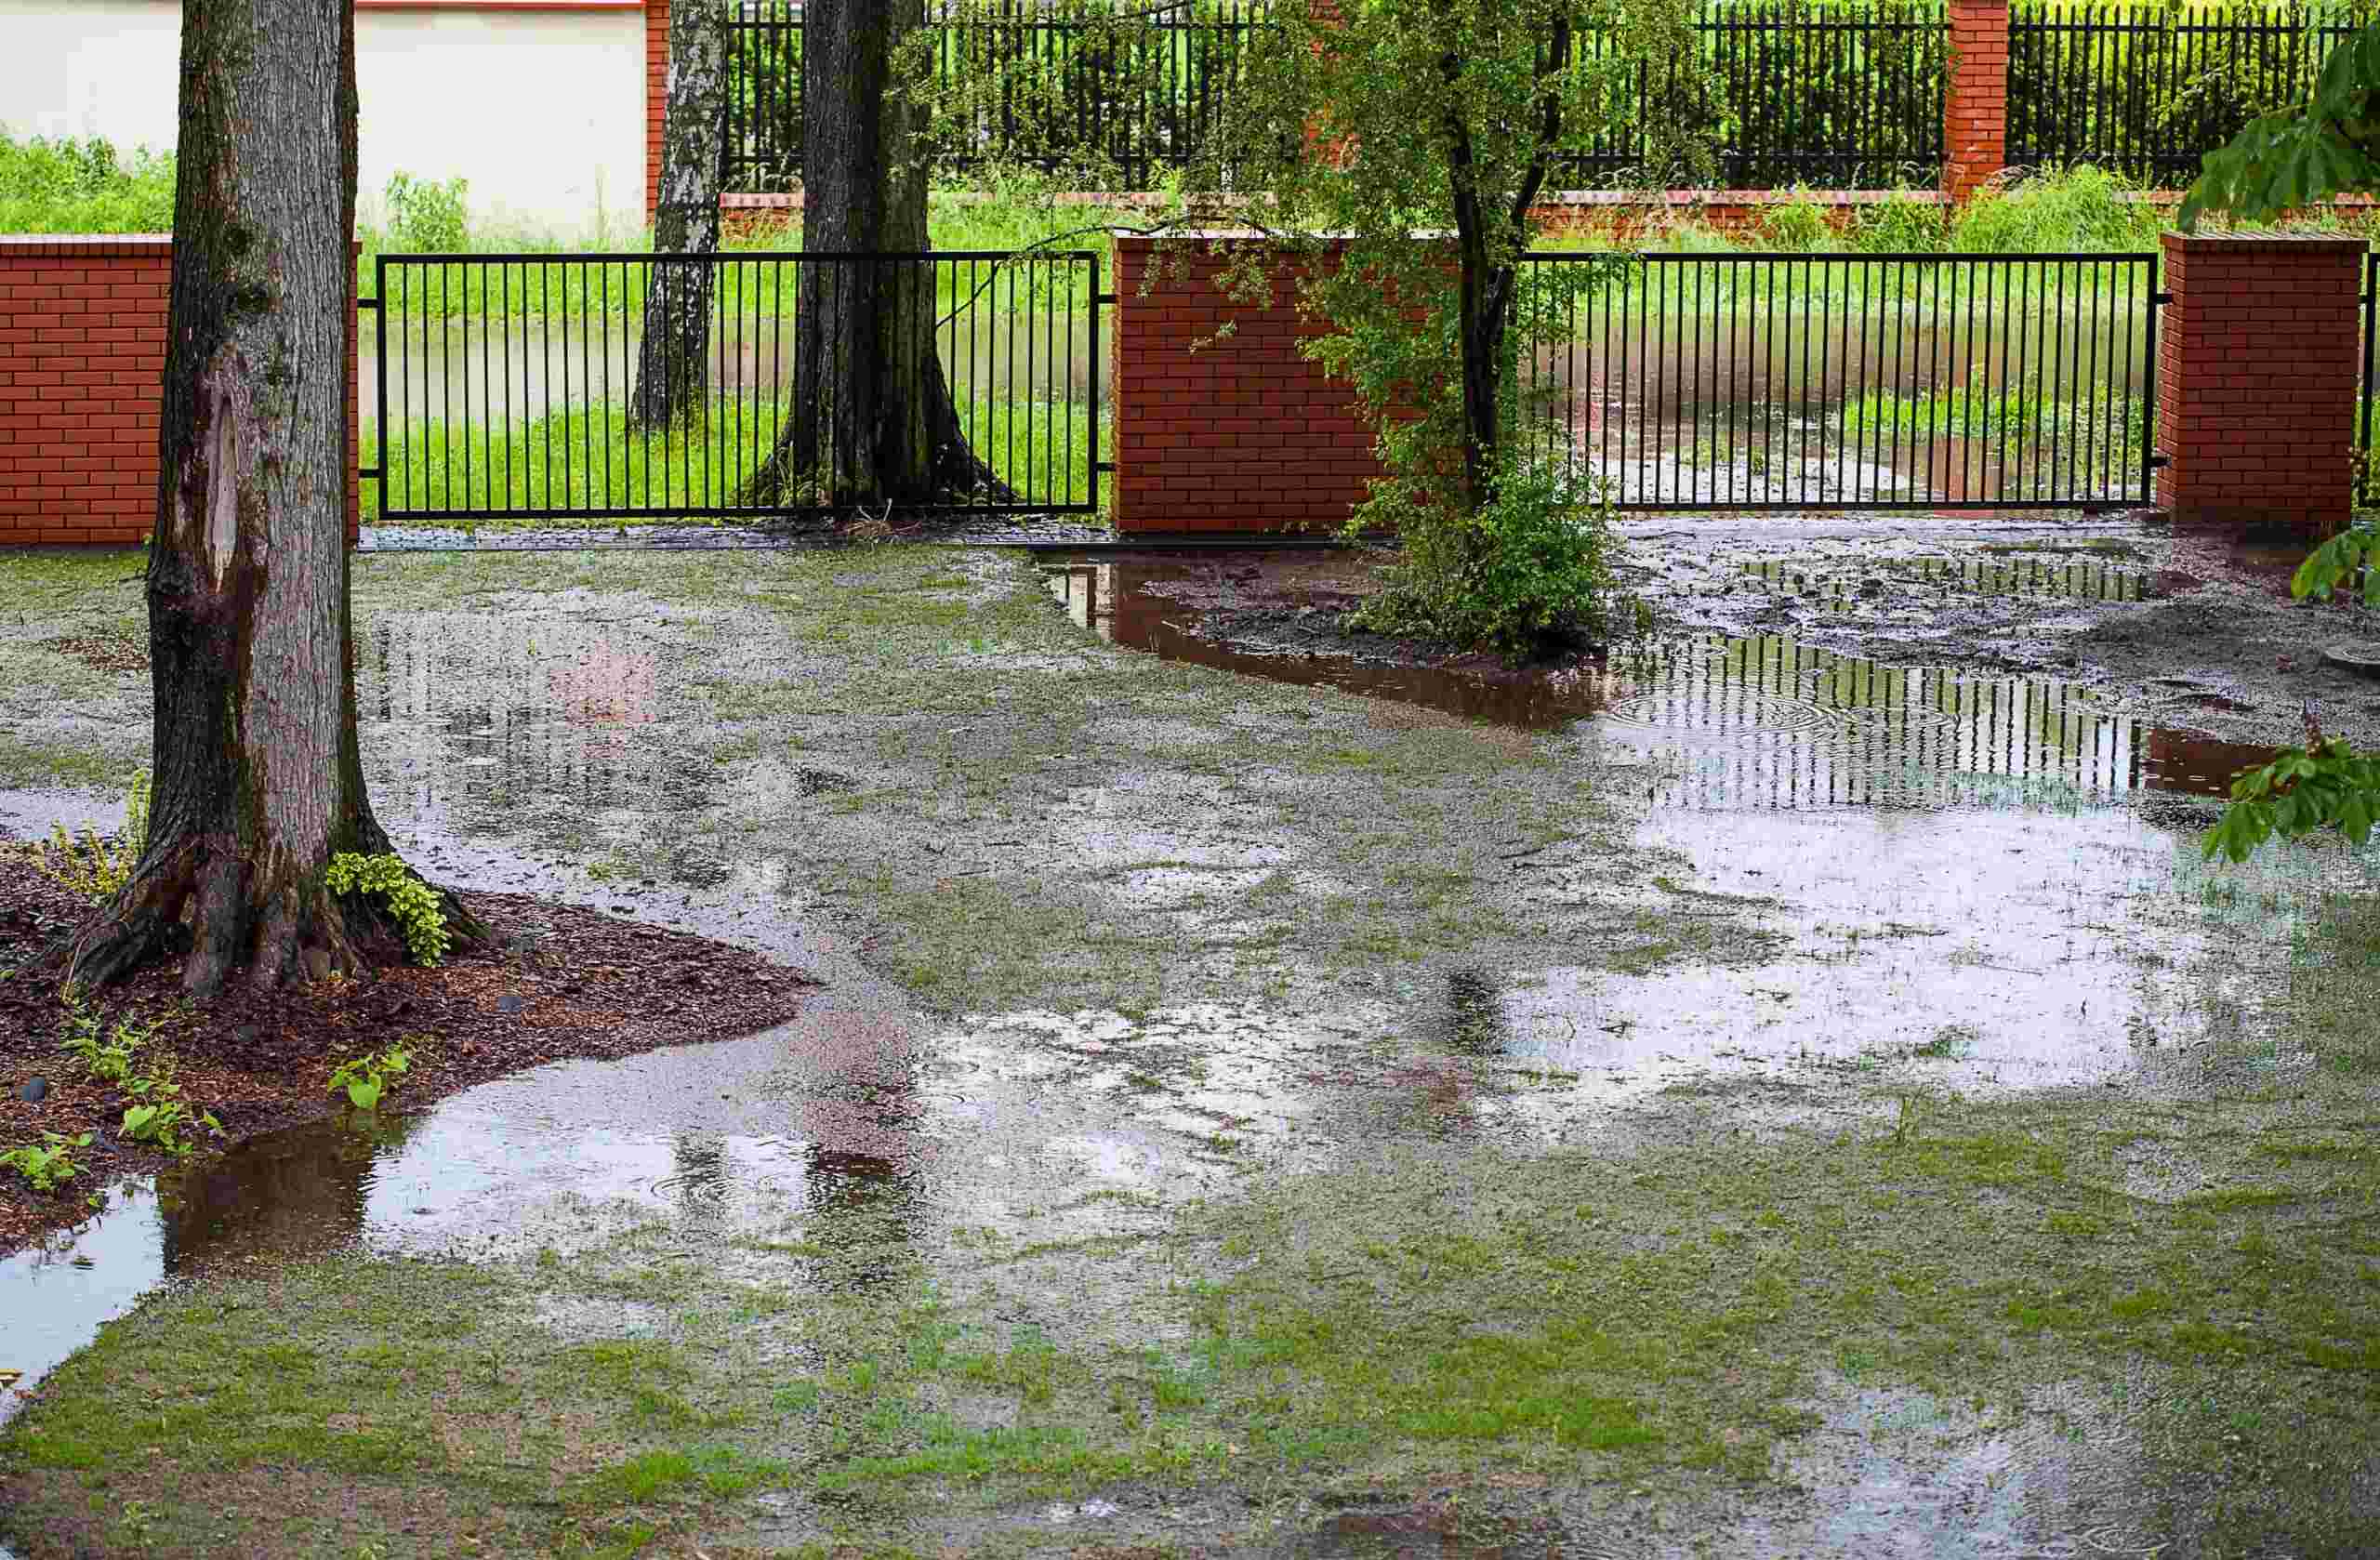
- Puddles of water: If you notice water pooling in a specific area of your landscape, it could indicate a leak in the irrigation pipe beneath the surface.
- Decreased water pressure: If the water pressure from your sprinkler heads is lower than usual, it may be a sign of a damaged pipe.
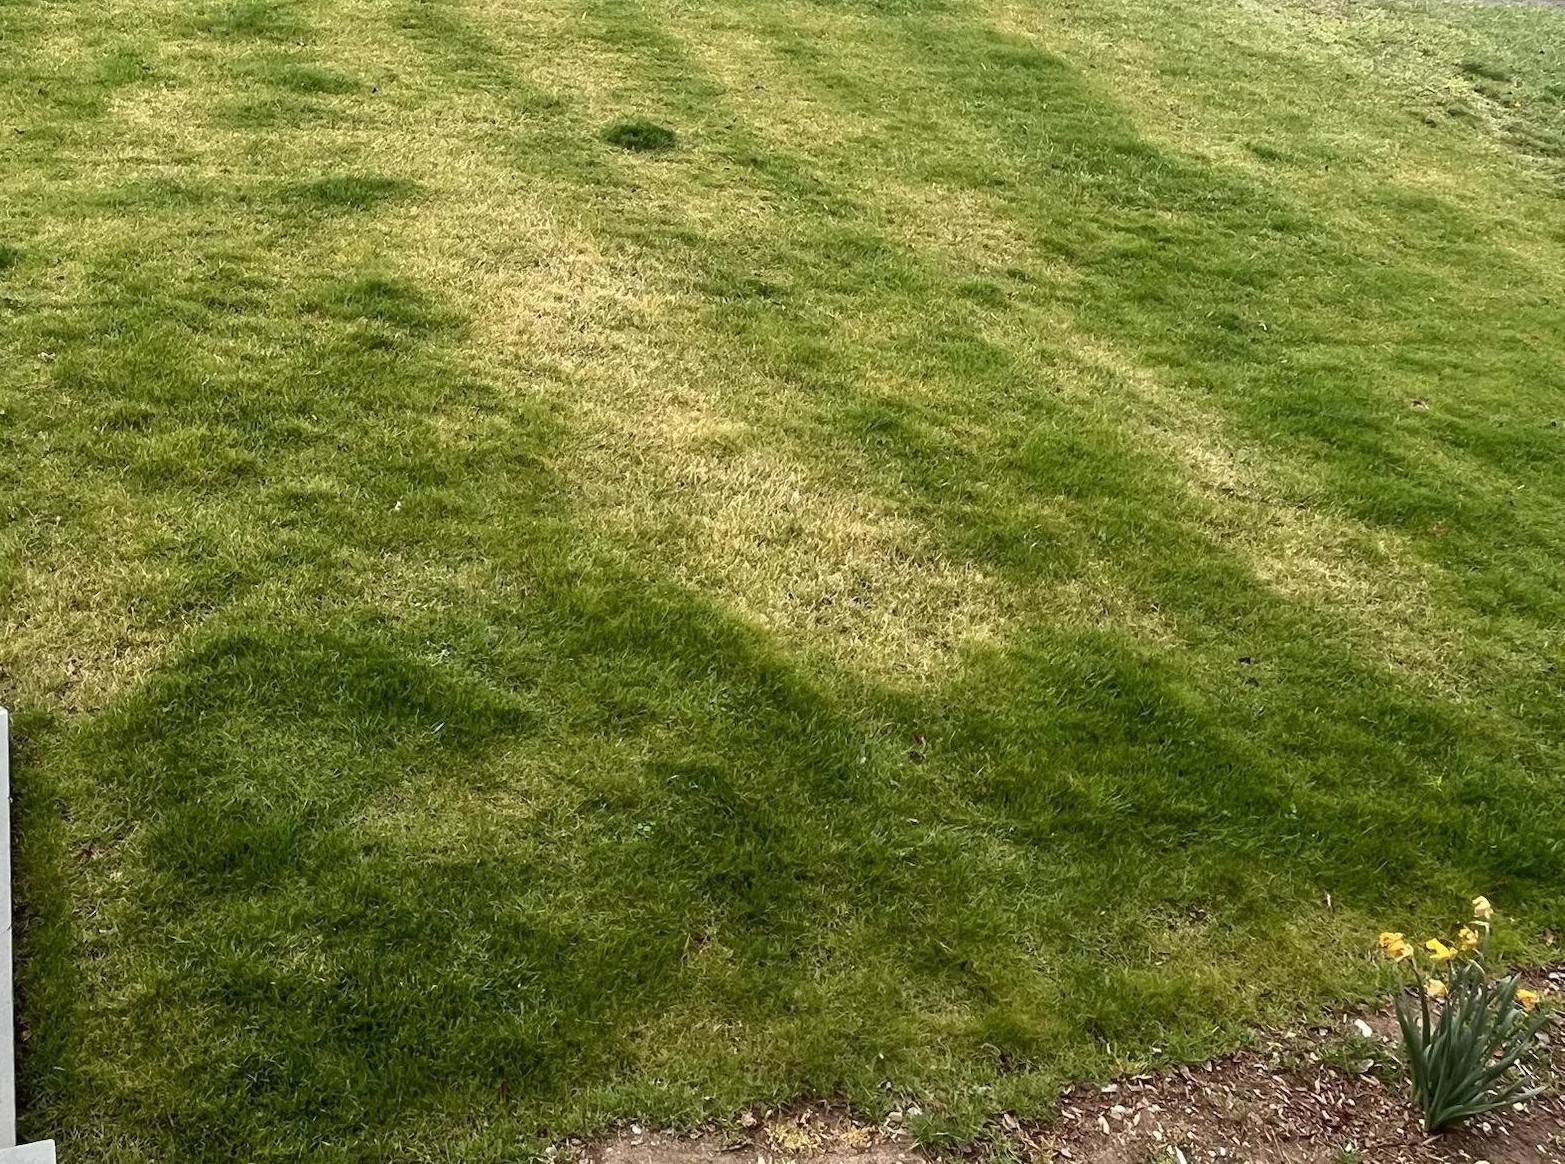
- Unusual plant growth: Keep an eye out for areas of your lawn or garden where the vegetation appears greener or more lush than the surrounding areas. This could be an indication of a leak in the irrigation system.
- Audible hissing sound: If you hear a hissing sound near the irrigation pipes, it could be a sign of a small leak.
Once you have identified the problem, it’s important to determine the extent of the damage. Minor leaks or cracks can often be repaired using simple solutions, while major bursts may require cutting out and replacing a larger section of the pipe. Assessing the severity of the damage will help you plan the repair process and ensure you have the necessary tools and materials at hand.
Remember, safety is paramount when working with irrigation systems. Before inspecting or repairing the pipes, always ensure the water supply is turned off to avoid any accidents or further damage.
Now that you have identified the problem and assessed the extent of the damage, it’s time to gather the necessary tools and materials for the repair. This will be our next step in fixing the irrigation pipe.
Step 2: Gather necessary tools and materials
Before you can start repairing the irrigation pipe, it is essential to gather all the necessary tools and materials. Having everything prepared ahead of time will make the repair process smoother and more efficient.
Here is a list of commonly used tools and materials for repairing an irrigation pipe:
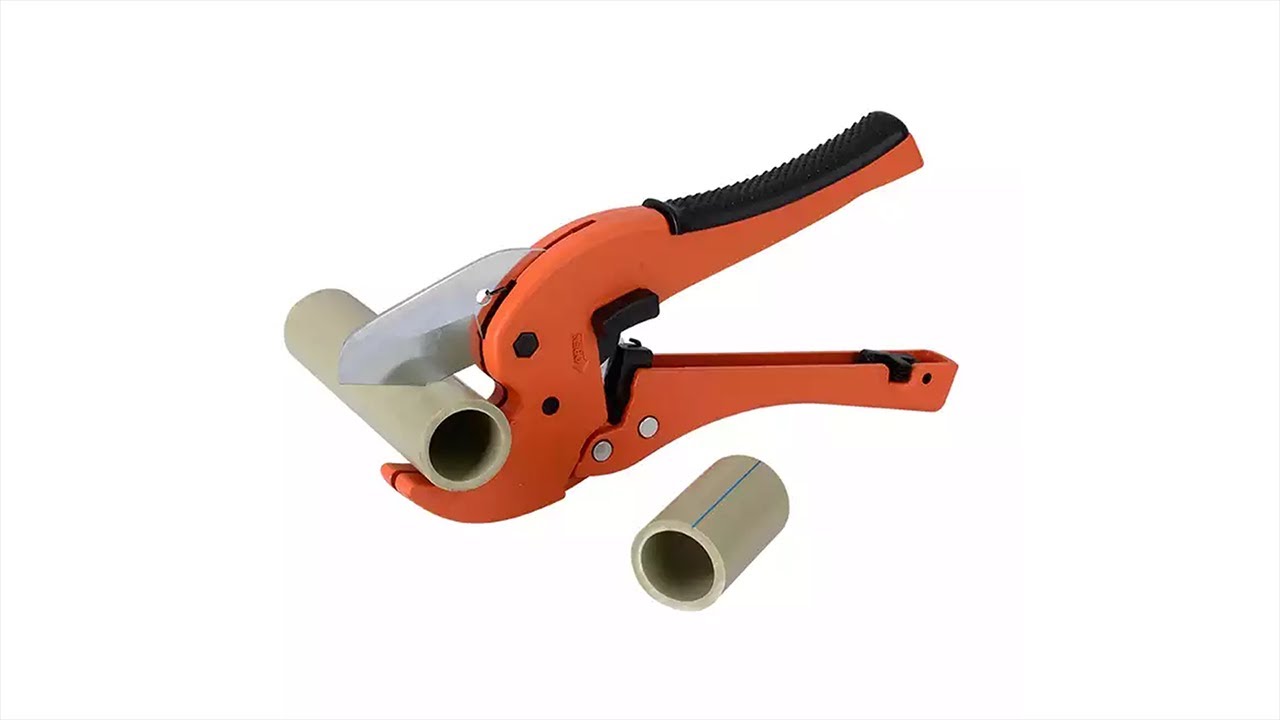
- Pipe cutters: These are used to cut out the damaged section of the pipe. Make sure you have the appropriate pipe cutter for the type of pipe you are working with.
- New pipe section: Prepare a new section of pipe that matches the material and size of the damaged section. It should be long enough to replace the cut-out portion.
- Pipe fittings: Depending on the type of connection used in your irrigation system, you may need couplings, elbows, or tees to connect the new section of pipe.
- PVC primer and cement: If you are working with PVC pipes, you will need primer and cement to create a strong and secure bond between the pipes and fittings.
- Compression fittings or clamps: These fittings are commonly used for repairing polyethylene pipes. They provide a tight seal without the need for glue or cement.
- Teflon tape: Teflon tape is used to create a watertight seal between threaded fittings, such as sprinkler heads or valves.
- Pipe wrench: A pipe wrench is useful for tightening or loosening fittings and nuts.
- Trenching tool: If the damaged pipe is buried underground, you may need a trenching tool to expose the pipe for repair.
- Safety gear: Always wear safety glasses, gloves, and appropriate clothing when working with irrigation pipes to protect yourself from potential hazards.
Ensure you have all the necessary tools and materials readily available before proceeding with the repair. This will save you time and prevent any interruptions during the process.
Now that you have gathered the tools and materials required for the repair, the next step is to turn off the water supply to the irrigation system. We will discuss this in detail in the next step.
Step 3: Turn off water supply
Before you begin working on the irrigation pipe, it is crucial to turn off the water supply to the system. This step ensures that no water is flowing through the pipes during the repair process, minimizing the risk of flooding or further damage.
The location of the main shut-off valve may vary depending on the layout of your irrigation system. Here are a few common places where you can find the shut-off valve:
- Water meter: If your irrigation system is connected to a water meter, there may be a shut-off valve located near it.
- Main water supply: The shut-off valve could be located near the main water supply line entering your property. Look for a valve that controls the flow of water to the entire irrigation system.
- Control panel or valve box: In some cases, the shut-off valve is located within the control panel or valve box of the irrigation system. Check for a valve that can be manually turned off.
Once you have located the shut-off valve, turn it clockwise to close it and stop the flow of water to the irrigation system. To ensure that the water supply is completely turned off, open a faucet or a sprinkler head and check if the water flow stops. This is an important precautionary step to prevent any accidental flooding or damage during the repair process.
If you are uncertain about the location or operation of the shut-off valve, it’s recommended to consult a professional plumber or an experienced irrigation technician for guidance. They can help you locate and turn off the water supply safely.
Now that the water supply is turned off, you can proceed to the next step – determining the type of irrigation pipe you are working with. This will help you select the appropriate repair method and materials for the job.
Step 4: Determine the type of irrigation pipe
Before you can effectively repair the irrigation pipe, it is important to determine the type of pipe you are working with. Different types of irrigation pipes require different repair methods and materials. Here are some common types of irrigation pipes you may encounter:
- PVC (Polyvinyl Chloride) pipe: PVC pipes are rigid and commonly used in irrigation systems. They are lightweight, durable, and resistant to corrosion. PVC pipes are usually white or gray in color.
- Polyethylene (PE) pipe: Polyethylene pipes are flexible and widely used in irrigation systems. They are resistant to chemicals and can withstand freezing temperatures. Polyethylene pipes are typically black in color but can also be found in other colors.
- Galvanized steel pipe: Galvanized steel pipes are strong and durable. They are less common in modern irrigation systems but may be found in older installations. Galvanized steel pipes are silver or gray in color.
To determine the type of irrigation pipe, you can visually inspect the pipe or refer to any documentation or records you have regarding your irrigation system. If you are unsure, you can consult a professional plumber or an irrigation specialist who can help identify the type of pipe.
Identifying the type of pipe is important because each type requires different repair methods and materials. For example, PVC pipes are typically repaired using PVC primer and cement to create watertight connections, while polyethylene pipes may utilize compression fittings or clamps to secure the connections.
Knowing the type of pipe will also help you select the appropriate tools and materials for the repair. PVC pipe cutters are used for cutting PVC pipes, while polyethylene pipes may require specialized polyethylene cutters.
By determining the type of irrigation pipe, you can proceed with confidence in selecting the right repair method and ensuring a successful and long-lasting fix. Now that you know the type of pipe you are working with, it’s time to move on to the next step – cutting out the damaged section of the pipe.
Step 5: Cut out the damaged section
Once you have identified the type of irrigation pipe and gathered the necessary tools and materials, it’s time to cut out the damaged section of the pipe. This step involves removing the portion of the pipe that is leaking, cracked, or damaged, in order to prepare for the installation of a new section.
Here’s a step-by-step guide on how to cut out the damaged section:
- Measure and mark: Use a measuring tape to determine the length of the damaged section. Mark the cutting points on both ends of the damaged area using a permanent marker.
- Secure the pipe: If the pipe is above ground, secure it using a vise or pipe clamps to prevent it from moving during the cutting process.
- Use the appropriate tool: Depending on the type of pipe, use pipe cutters or a specialized cutter designed for that particular material. Make sure to follow the manufacturer’s instructions for the tool you are using.
- Position the cutter: Position the cutter’s blade on the marked cutting point and align it perpendicular to the pipe. Apply firm and even pressure to make a clean cut. Repeat the process on the other marked cutting point.
- Remove the damaged section: Once the cuts are complete, carefully remove the damaged section of the pipe. Be cautious to avoid any further damage to the surrounding area.
It is essential to make clean cuts to ensure a proper fit when connecting the new section of pipe. Avoid using saws or other tools that may produce uneven or jagged edges.
After cutting out the damaged section, inspect the pipe ends to ensure they are smooth and free of debris. Use a utility knife or sandpaper to remove any rough edges or burrs that could interfere with the installation of the new pipe section.
Now that you have successfully cut out the damaged section, the next step is to attach the new section of pipe. We will explore this process in detail in the following step.
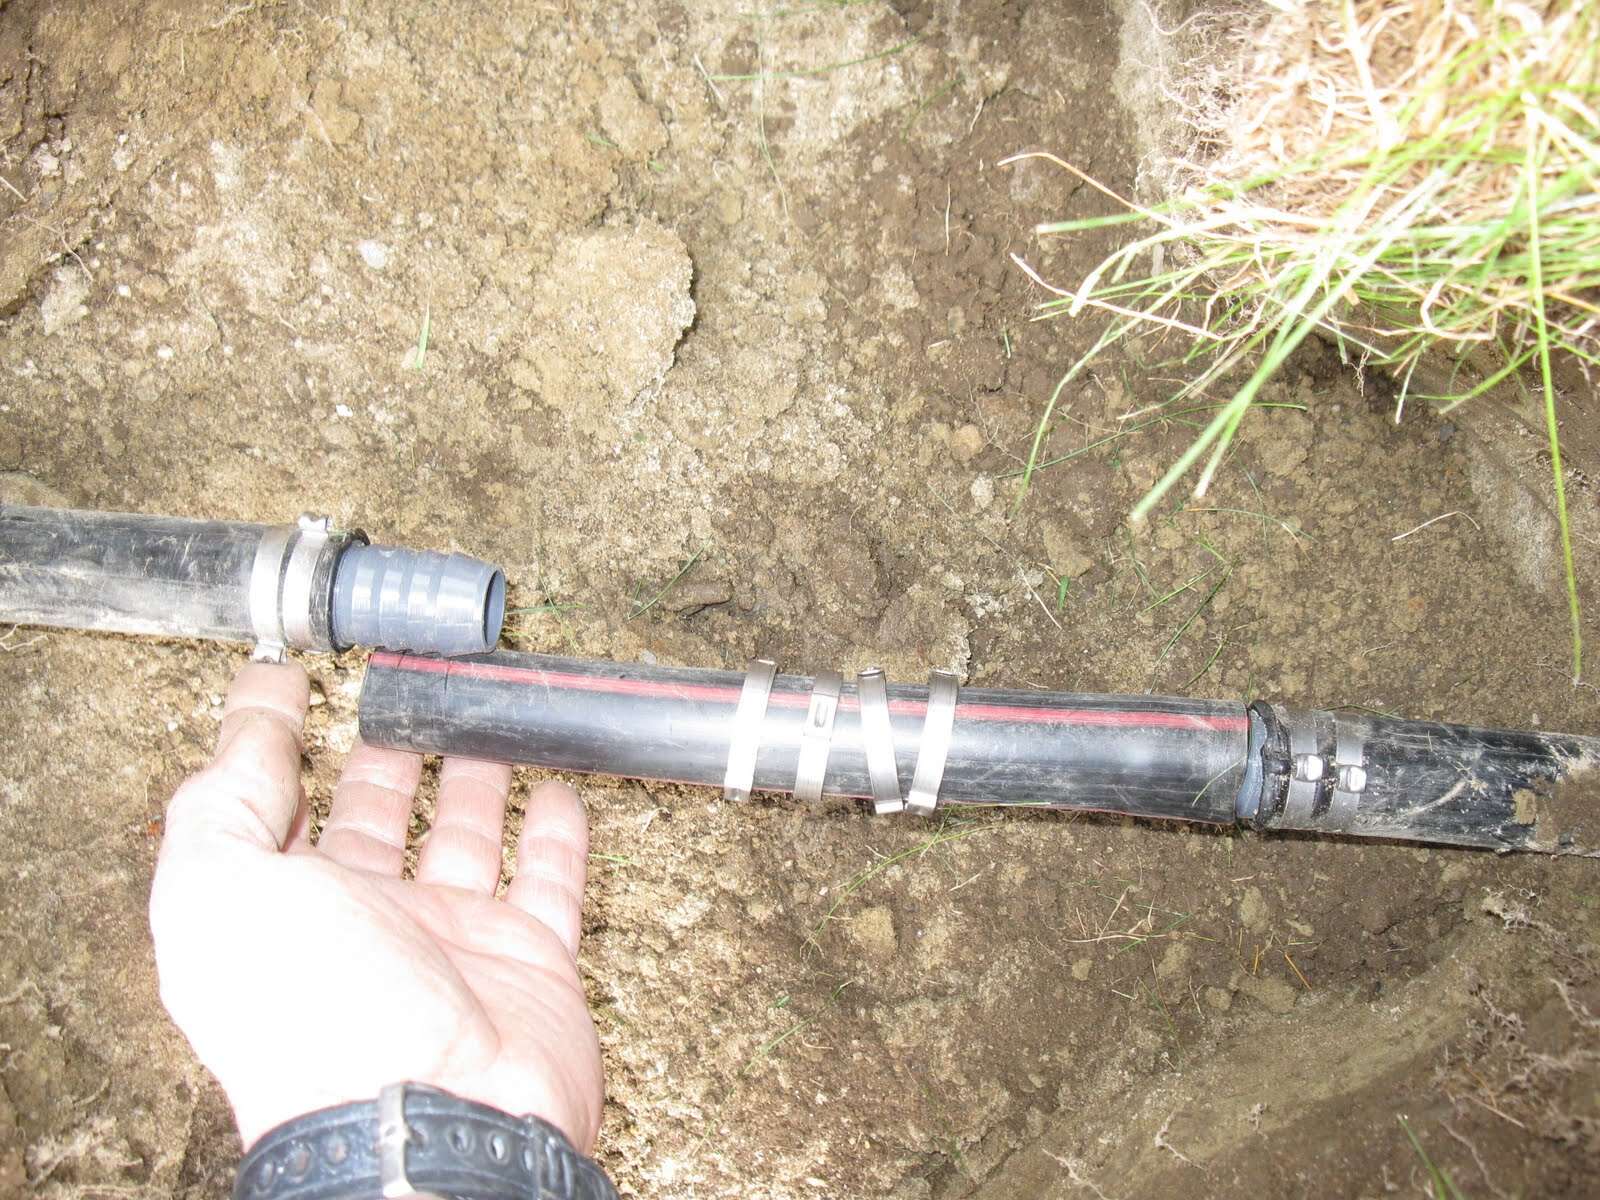
Step 6: Attach a new section of pipe
With the damaged section of the irrigation pipe removed, it’s time to attach a new section to complete the repair. The new pipe section should match the material and size of the existing pipe to ensure a proper fit and functionality.
Here are the steps to attach the new section of pipe:
- Measure and cut: Measure and cut a new section of pipe to match the length of the area you removed. Use a pipe cutter or a specialized cutter designed for the specific pipe material.
- Clean the pipe ends: Thoroughly clean the pipe ends of both the existing and new sections using a cloth or brush to remove any dirt, debris, or residue. This ensures a clean surface for a secure connection.
- Prepare fittings: Depending on the type of connection used in your irrigation system, prepare the necessary fittings. Apply PVC primer and cement for PVC pipes, or prepare compression fittings or clamps for other materials.
- Apply primer and cement: If working with PVC pipes, apply PVC primer to the outside of the pipe ends and the inside of the fittings. Follow by applying PVC cement to both surfaces. Be sure to work quickly, as the cement bonds rapidly.
- Connect the new section: Insert the new section of pipe into one end of the fitting, making sure it is fully seated and aligned. Repeat the process for the other end of the new section, connecting it to the adjacent fitting or the existing pipe.
For materials like polyethylene, use compression fittings or clamps to secure the connections. Follow the manufacturer’s instructions for proper installation and tightening of the fittings.
After connecting the new section, ensure that the fittings are securely tightened, but be cautious not to overtighten, as it may damage the pipe or the fittings.
Remember to follow safety precautions and wear appropriate protective gear, such as gloves and safety glasses, when working with the pipe fittings and adhesives.
Now that you have successfully attached the new section of pipe, the next step is to secure the connection to ensure a leak-free and reliable repair. We will discuss this in detail in the following step.
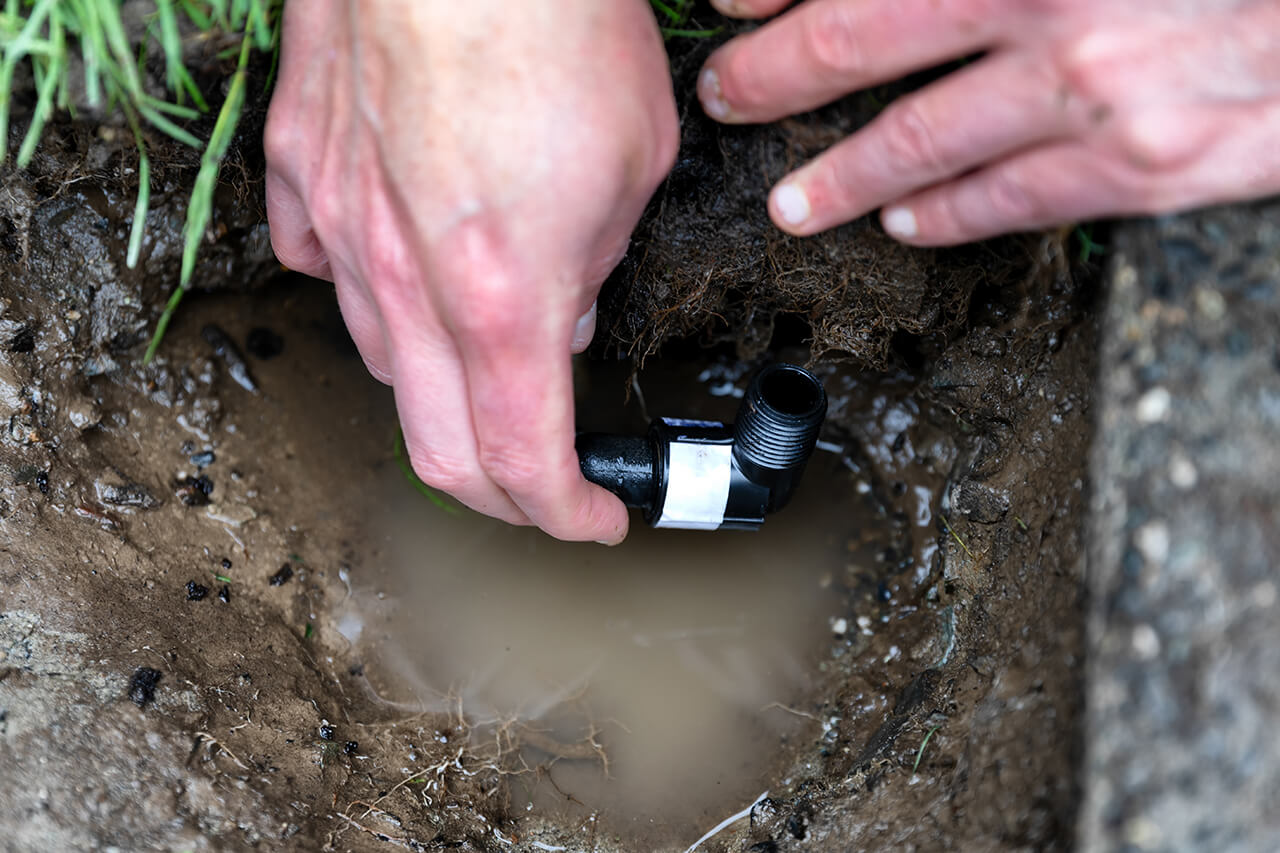
Step 7: Secure the connection
Once the new section of pipe is attached, it’s crucial to secure the connection to ensure a leak-free and reliable repair. This step ensures that the pipe remains connected and maintains proper water flow throughout the irrigation system.
Here are the steps to secure the connection:
- Allow time for curing: If you used PVC primer and cement, allow sufficient time for the adhesive to cure. Follow the manufacturer’s instructions for the specific curing time.
- Inspect for leaks: Conduct a visual inspection and check for any signs of leaks at the connection points. Look for any drips or moisture around the fittings or pipe joints.
- Make adjustments if necessary: If you detect any leaks, carefully inspect the connection and fittings. Tighten or adjust the fittings as needed to achieve a proper seal and eliminate any leaks.
- Apply Teflon tape: If you are working with threaded fittings, such as sprinkler heads or valves, apply Teflon tape to ensure a watertight seal. Wrap the tape around the threaded portion of the fittings in a clockwise direction.
- Tighten fittings: Use a pipe wrench or suitable tools to tighten the threaded fittings. Be careful not to overtighten, as it may damage the fittings or strip the threads.
Ensure that all connections are secure and properly sealed. A reliable and watertight connection is essential to prevent any future leaks or water loss within the irrigation system.
Once the connection is secured, it is recommended to conduct a final inspection to ensure everything is in order. Check for any visible signs of leaks or abnormalities at the repaired section and surrounding areas.
Remember, periodic maintenance and inspection are crucial to ensure the longevity and efficiency of your irrigation system. Regularly monitor the repaired section and the entire system for any signs of leaks or damage.
With the connection secured, the next step is to test the repair and ensure that everything is functioning as expected. We will discuss this in detail in the following step.
Step 8: Test the repair
After completing the repair, it’s important to test the functionality and effectiveness of the repair to ensure that the irrigation system is working properly. Testing the repair will help identify any potential issues or leaks, allowing you to make any necessary adjustments before concluding the repair process.
Here are the steps to test the repair:
- Turn on the water supply: Open the shut-off valve gradually to allow water to flow into the irrigation system. Monitor the repaired section closely for any signs of leakage.
- Inspect for leaks: Check the repaired section and all the connections for any visible signs of leaks. Look for drips, water seepage, or any spraying water.
- Check water flow and pressure: Observe the water flow from the sprinkler heads and other outlets. Ensure that the water pressure is consistent and that all areas of the irrigation system are adequately irrigated.
- Monitor for any abnormalities: Pay attention to any unusual noises, vibrations, or changes in water flow that could indicate a problem. Investigate and address any abnormalities promptly.
- Make adjustments as needed: If you detect any leaks or issues during the testing process, make the necessary adjustments. Tighten fittings, apply additional sealing materials, or call a professional if the problem persists.
Continue to monitor the repair for a period of time after testing to ensure that it remains leak-free and operates smoothly. Periodic checks and maintenance are key to keeping your irrigation system in excellent condition.
By thoroughly testing the repair, you can have confidence that the issue has been resolved and that your irrigation system is functioning properly. This will help avoid any potential water waste or damage to your landscape.
With the repair tested and confirmed, you can now enjoy the benefits of a fully functioning irrigation system, providing the necessary water to keep your lawn and plants healthy and thriving.
Conclusion
Repairing an irrigation pipe doesn’t have to be a daunting task. By following the steps outlined in this guide, you can successfully fix a damaged or leaking pipe and restore the functionality of your irrigation system.
Remember to start by identifying the problem accurately and gathering the necessary tools and materials. Turning off the water supply is essential to ensure a safe working environment. Determining the type of irrigation pipe will help you choose the appropriate repair method and materials to use.
Cutting out the damaged section and attaching a new section of pipe is a critical step in the repair process. Take your time to ensure a proper fit and secure the connection effectively. The final step is to test the repair, inspect for leaks, and make any necessary adjustments to ensure the irrigation system is functioning optimally.
Regular maintenance and periodic inspection of your irrigation system are crucial to prevent future issues and maintain its efficiency. Keep an eye out for any warning signs and address them promptly to avoid water waste and potential damage to your landscape.
With a little knowledge and the right tools, you can confidently tackle irrigation pipe repairs yourself. However, if you are uncertain or the repair seems complex, it’s always advisable to seek the assistance of a professional plumber or irrigation specialist.
By taking proper care of your irrigation system and promptly addressing any issues that arise, you can ensure that your landscape receives the water it needs to flourish, while also conserving water and minimizing waste.
So, roll up your sleeves, put on your safety gear, and get ready to fix that irrigation pipe. Your flourishing landscape will thank you!