Home>Gardening Tips and Tricks>Problem Solving>How To Fix Irrigation
Problem Solving
How To Fix Irrigation
Modified: January 22, 2024
Learn how to solve irrigation problems and fix your irrigation system with our step-by-step guide. Explore effective solutions for common issues and optimize your watering process.
(Many of the links in this article redirect to a specific reviewed product. Your purchase of these products through affiliate links helps to generate commission for Chicagolandgardening.com, at no extra cost. Learn more)
Table of Contents
Introduction
Welcome to our comprehensive guide on how to fix irrigation issues. Are your sprinklers not working as efficiently as they used to? Is your lawn suffering due to poor irrigation? Don’t worry, we’re here to help. A well-functioning irrigation system is crucial for maintaining a healthy and vibrant landscape.
Whether you are dealing with leaks, clogged sprinkler heads, or low water pressure, this article will provide you with step-by-step instructions on how to diagnose and fix common irrigation problems. By following these guidelines, you can save time, water, and money while ensuring your plants and lawn receive the proper amount of moisture they need to thrive.
Before we dive into the specific steps of fixing irrigation issues, it’s essential to emphasize the importance of regular maintenance. A well-maintained irrigation system not only delivers water efficiently but also helps to conserve water in an era where water scarcity is a growing concern. Regular maintenance also prevents costly repairs and ensures the longevity of your system.
So, whether you’re a seasoned gardener or a beginner, let’s get started on troubleshooting and fixing your irrigation system. With a little bit of knowledge and some basic tools, you can restore your system’s functionality and enjoy a lush and vibrant landscape.
Step 1: Check for Leaks
The first step in fixing irrigation issues is to check for leaks in your system. Leaks can waste a significant amount of water and lead to a decrease in water pressure, resulting in inadequate irrigation. Here’s how to identify and fix leaks in your irrigation system:
- Inspect visible pipes and connections: Start by visually inspecting the pipes and connections in your irrigation system. Look for any signs of water pooling or wet spots around the pipes. If you notice any leaks, tighten the connections or replace damaged pipes.
- Check sprinkler heads: Leaky or damaged sprinkler heads are a common cause of water wastage in irrigation systems. Inspect each sprinkler head for signs of leaks, such as water spraying in the wrong direction or excessive water pooling around the base. If you identify any leaks, replace the faulty sprinkler head. Ensure that the new head is compatible with your system and properly installed.
- Examine valve boxes: Valve boxes are underground containers that house the valves and other components of your irrigation system. Occasionally, leaks can occur inside these boxes due to loose connections or damaged valves. Carefully open the valve boxes and inspect for any signs of leaks. If you find any, tighten the connections or replace the defective valve.
- Perform a meter test: To check for hidden leaks, perform a meter test. Ensure that no water is being used inside or outside the house and then locate your water meter. Note down the reading and wait for two hours without using any water. After two hours, check the meter again. If the reading has changed, it indicates a leak in your irrigation system. You may need professional assistance to locate and repair the hidden leak.
By regularly checking for leaks in your irrigation system, you can prevent water wastage and save on your water bills. Fixing leaks promptly is crucial to ensure the optimal functionality of your irrigation system and to avoid any further damage.
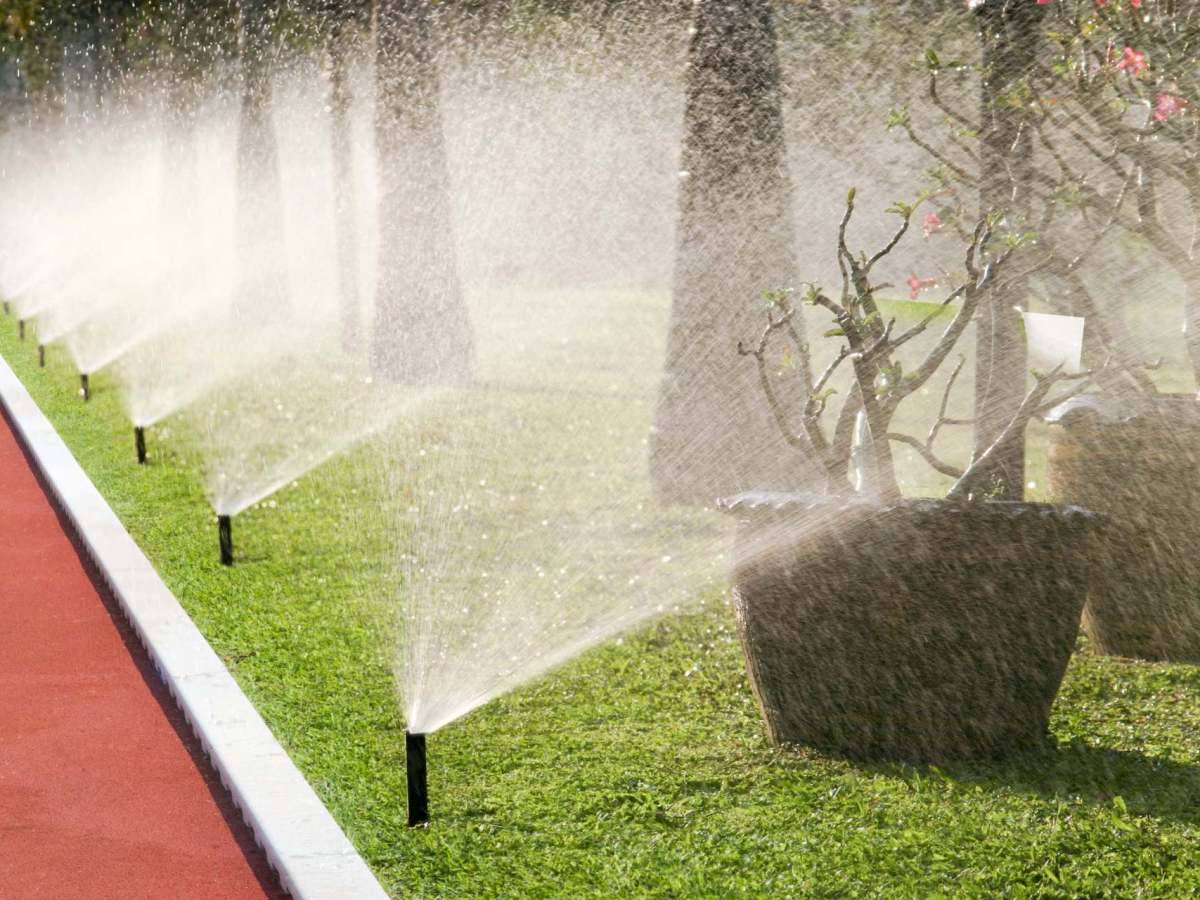
Step 2: Clean or Replace Clogged Sprinkler Heads
Clogged sprinkler heads can lead to uneven watering and poor irrigation coverage. Over time, debris, dirt, and mineral deposits can accumulate in the sprinkler heads, affecting their performance. Follow the steps below to clean or replace clogged sprinkler heads:
- Turn off the system: Before you begin working on the sprinkler heads, make sure to turn off the irrigation system. This will prevent any accidental water flow during the cleaning or replacement process.
- Remove the sprinkler head: Use a wrench or a specialized sprinkler head removal tool to unscrew the clogged sprinkler head from its riser. Be careful not to damage the riser or any other components when removing the head.
- Clean the sprinkler head: Inspect the sprinkler head for any visible debris, such as grass clippings or dirt. Gently scrub the head with a toothbrush or a small brush to remove the clogs. If the clogging is severe or if the head is damaged, it is better to replace it with a new one.
- Replace the sprinkler head: If cleaning the sprinkler head does not improve its performance or if it is damaged beyond repair, it is time to replace it. Purchase a new sprinkler head that matches the specifications of your current system. Screw the new head onto the riser, ensuring a snug fit without overtightening.
- Test the sprinkler head: Turn on the irrigation system and observe the newly cleaned or replaced sprinkler head. Check for proper water flow and coverage. Adjust the spray pattern and distance if necessary to ensure efficient irrigation.
Cleaning or replacing clogged sprinkler heads is essential to maintain proper irrigation and prevent water waste. By performing this simple maintenance task, you can ensure that your landscape receives uniform and adequate water distribution, leading to healthier plants and a thriving lawn.
Step 3: Adjust Water Pressure
Proper water pressure is crucial for the optimal performance of your irrigation system. If the water pressure is too high or too low, it can cause issues such as misting, uneven watering, or even damage to the system. Follow these steps to adjust the water pressure in your irrigation system:
- Install a pressure gauge: Start by installing a pressure gauge at the beginning of your irrigation system. This will allow you to accurately measure the water pressure. Ensure that the gauge is connected to a section of pipe without any obstructions or restrictions.
- Check the recommended pressure range: Consult the user manual or contact the manufacturer of your irrigation system to determine the recommended pressure range. The optimal pressure range typically falls between 30 and 50 pounds per square inch (psi).
- Adjust the pressure regulator: If the water pressure is too high, locate the pressure regulator in your system. The pressure regulator is usually located near the main water supply. Use a flat-head screwdriver to adjust the regulator and decrease the water pressure. Turn the screw clockwise to reduce the pressure, ensuring it falls within the recommended range.
- Check for water pressure reducers: Some sprinkler heads may have built-in pressure reducers. Inspect your sprinkler heads and determine if they have pressure-reducing features. If not, you can replace the existing heads with ones that have built-in pressure regulators.
- Test the adjusted pressure: Once you have made the necessary adjustments to regulate the water pressure, turn on the irrigation system and observe the performance of the sprinkler heads. Check for even water distribution and coverage. Make further adjustments if needed until you achieve the desired pressure and uniform irrigation.
Correcting the water pressure in your irrigation system is essential for maintaining an efficient and effective watering schedule. By regulating the pressure, you can prevent water waste, ensure proper irrigation coverage, and prolong the lifespan of your system.
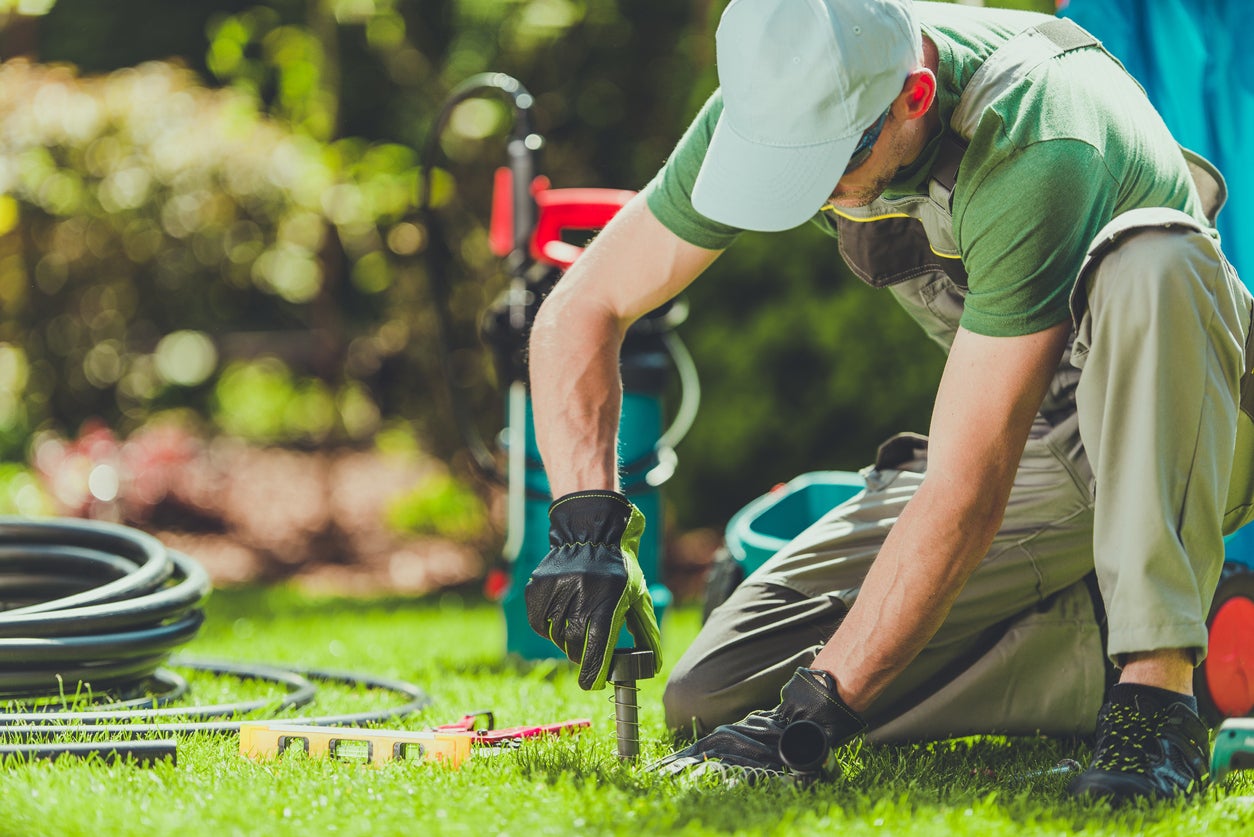
Step 4: Inspect and Repair Damaged Pipes
Damaged pipes in your irrigation system can lead to leaks, inefficient watering, and water wastage. It is important to regularly inspect and repair any damaged pipes to maintain the integrity and performance of your irrigation system. Follow these steps to inspect and repair damaged pipes:
- Check for signs of damage: Examine the visible pipes in your irrigation system for any signs of cracks, leaks, or wear. Pay special attention to areas where the pipes connect to valves, sprinkler heads, or other components, as these are prone to damage.
- Perform a pressure test: To identify hidden leaks or damaged pipes, perform a pressure test on your system. Turn off the water supply and pressurize the system by slowly opening a valve or turning on the controller. Monitor the system for any pressure drops, which may indicate leaks or damaged pipes. Mark the areas where pressure drops occur for further inspection and repair.
- Repair small cracks or leaks: For small cracks or leaks in pipes, use waterproof tape or a pipe sealant to temporarily seal the damaged area. Make sure to clean and dry the pipe before applying the sealant. However, it’s important to note that these solutions are temporary fixes, and the damaged section should be replaced as soon as possible.
- Replace damaged pipes: If the damage to the pipes is extensive, it is recommended to replace the affected sections. Measure and cut out the damaged portion of the pipe. Purchase a replacement pipe of the same size and material. Use appropriate fittings and connectors to join the new pipe with the existing pipeline. Ensure a secure and watertight connection.
- Perform a final system test: After repairing or replacing the damaged pipes, turn on the irrigation system and conduct a final test to check for any leaks or irregularities. Monitor the performance of the system and ensure proper water flow and distribution.
Maintaining and repairing damaged pipes is crucial for the efficient functioning of your irrigation system. By promptly addressing any issues, you can prevent water wastage, minimize damage to your landscape, and extend the lifespan of your system.
Step 5: Calibrate the System
Calibrating your irrigation system is an important step to ensure accurate water distribution and prevent overwatering or underwatering. By calibrating the system, you can fine-tune the watering schedule and optimize water usage. Follow these steps to calibrate your irrigation system:
- Measure the water output: Start by collecting a few empty and shallow containers, such as rain gauges or tuna cans, and place them randomly throughout your lawn or garden. Ensure that each container is placed within the coverage area of a sprinkler head.
- Run the irrigation system: Turn on the irrigation system and let it run for a set period of time, ideally 15-30 minutes. This will allow the sprinklers to distribute water and fill up the containers.
- Measure the water collected: After the designated time has elapsed, carefully collect the containers and measure the water collected in each one. Record the amount of water for each container.
- Calculate the average: Add up the individual measurements and calculate the average water output. Divide the total by the number of containers to determine the average water collected per container. This will provide an estimate of the water distribution by the sprinklers.
- Adjust the watering schedule: Compare the average water collected to the recommended water requirements for your lawn or garden. If the sprinklers are delivering too much water, adjust the watering schedule accordingly to avoid oversaturation. If the water collected is less than the recommended amount, increase the watering duration or frequency to ensure adequate irrigation.
- Perform a test run: After making adjustments to the watering schedule, run the irrigation system again for the same duration as before. Check the water distribution in the containers to verify that it aligns with the desired watering level. Make further adjustments as needed.
Calibrating your irrigation system helps to optimize water usage and ensure that your landscape receives the right amount of water. This not only promotes healthy plant growth but also prevents water wastage, ultimately benefiting both the environment and your water bills.
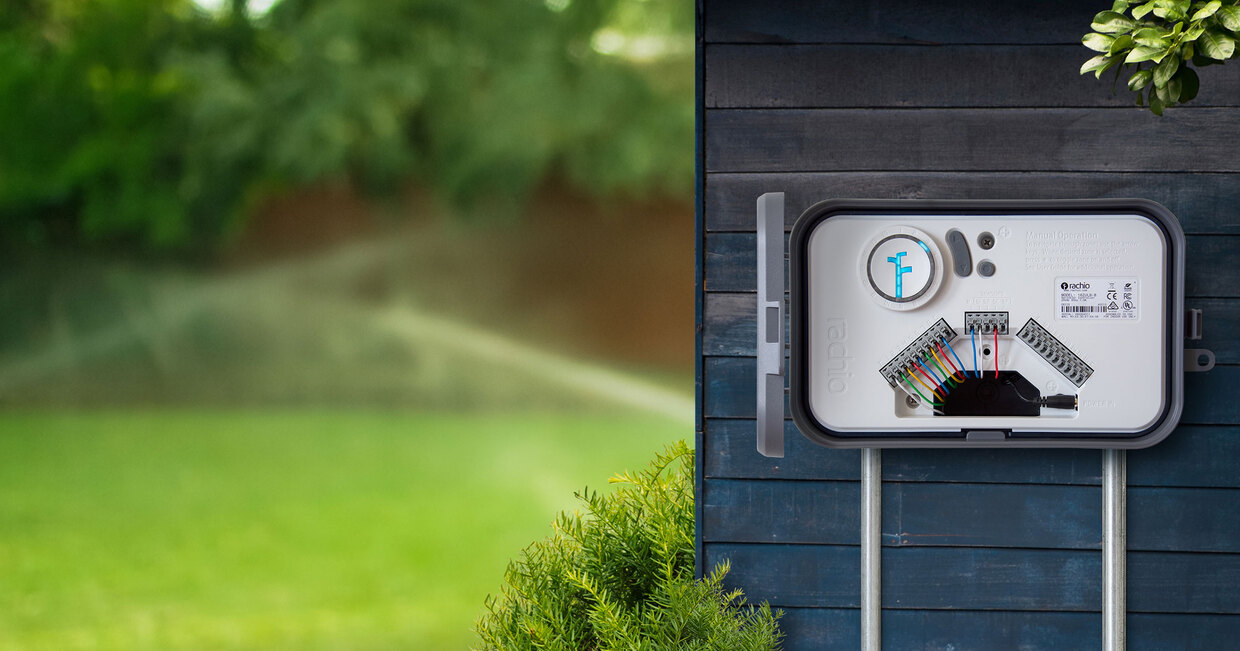
Step 6: Check the Controller Settings
The controller settings of your irrigation system play a crucial role in determining the watering schedule and frequency. By carefully reviewing and adjusting these settings, you can ensure that your landscape receives the appropriate amount of water at the right times. Follow these steps to check and optimize the controller settings:
- Access the controller: Locate the irrigation controller, which is typically installed near the main water supply or in a convenient indoor location. Open the controller panel or remove the cover to access the settings.
- Review the current settings: Take note of the existing settings, including the start time, duration, and days of the week for each zone. Ensure that the settings align with the specific irrigation needs of your lawn, plants, and soil type.
- Consider weather-based programming: Many modern irrigation controllers offer weather-based programming options that adjust the watering schedule based on local weather conditions. If your controller has this feature, consider enabling it to ensure efficient water usage and adaptability to changing weather patterns.
- Update the watering schedule: Evaluate the watering schedule of each zone and make adjustments as necessary. Consider factors such as soil type, plant water requirements, shade coverage, and local water restrictions. Aim to create a balanced and customized schedule that optimizes water efficiency and promotes healthier plant growth.
- Set seasonal adjustments: Some controllers allow you to set seasonal adjustments, which automatically increase or decrease the watering duration as the seasons change. Utilize this feature to accommodate varying weather conditions and prevent overwatering or underwatering.
- Save and activate the changes: Once you have reviewed and adjusted the controller settings, save the changes and activate the new schedule. Some controllers may require manual input, while others can be programmed remotely or synchronized with smartphone apps.
Regularly checking and fine-tuning the controller settings is essential for maintaining an efficient and effective irrigation system. By optimizing the watering schedule, you can conserve water, reduce water bills, and promote healthier and more sustainable landscaping.
Step 7: Install a Rain Sensor
An effective way to enhance the efficiency of your irrigation system is by installing a rain sensor. Rain sensors detect rainfall and automatically pause or adjust the irrigation schedule accordingly. This ensures that your landscape is not unnecessarily watered during or after rainy weather conditions. Follow these steps to install a rain sensor:
- Choose the right rain sensor: Research and select a rain sensor that is compatible with your irrigation system. There are wired and wireless options available, so choose one that best suits your needs and the layout of your system.
- Find an optimal installation location: Determine the best location for installing the rain sensor. It should be exposed to an open area where it can detect rainfall accurately. Avoid areas where obstructions like trees or buildings may shield it from rain.
- Mount the rain sensor: Securely mount the rain sensor using the appropriate mounting hardware. Follow the specific instructions provided by the manufacturer of the rain sensor for proper installation. Ensure that it is positioned level and stable.
- Connect the rain sensor: If you have a wired rain sensor, connect the sensor wires to the designated terminals on the irrigation controller. Refer to the controller and rain sensor manuals for guidance on the specific wiring connections. For wireless rain sensors, follow the manufacturer’s instructions to synchronize the sensor with the irrigation controller.
- Test the rain sensor: After installation, test the rain sensor to ensure that it is functioning properly. Activate the sensor by spraying water on it or simulating rainfall using a bucket of water. Confirm that the sensor interrupts or adjusts the irrigation schedule accordingly.
- Adjust the rain sensor settings: Some rain sensors have adjustable settings for rainfall sensitivity and rain delay duration. Fine-tune these settings according to your preferences and local weather patterns for optimal performance.
Installing a rain sensor is an easy and effective way to conserve water and prevent overwatering. By incorporating this device into your irrigation system, you can save both water and money while maintaining a healthy and well-maintained landscape.
Step 8: Monitor and Adjust Regularly
Once you have completed the necessary steps to fix and optimize your irrigation system, it’s important to maintain regular monitoring and make adjustments as needed. By actively observing the performance of your system and fine-tuning its settings, you can ensure long-term efficiency and proper irrigation. Follow these guidelines to monitor and adjust your irrigation system:
- Observe plant health and water absorption: Regularly observe the health of your plants and the overall absorption of water in your landscape. Look for signs of overwatering or underwatering, such as wilted or yellowing foliage. Adjust the watering schedule or duration accordingly to meet the specific needs of your plants.
- Check for any new leaks or damaged components: Routinely inspect your irrigation system for any new leaks, damaged pipes, or malfunctioning sprinkler heads. Address these issues promptly to prevent water wastage and ensure efficient water distribution.
- Monitor weather conditions: Stay informed about local weather forecasts and track the amount of rainfall your area receives. By adjusting the watering schedule based on weather patterns, you can avoid unnecessary watering during rainy periods and potentially save on water usage.
- Review and update controller settings: Regularly review the settings on your irrigation controller, especially as seasons change or landscape requirements evolve. Consider making adjustments to the watering schedule, duration, or frequency to optimize water usage and accommodate shifting environmental factors.
- Consider using smart irrigation technology: Explore the option of upgrading to smart irrigation technology, which uses real-time data and weather sensors to automatically adjust irrigation schedules. Smart systems can save water and optimize irrigation based on factors like soil moisture levels and evapotranspiration rates.
- Stay informed about water restrictions: Keep yourself updated regarding any water restrictions or guidelines in your area. This will help ensure that you comply with local regulations and contribute to responsible water management practices.
Regular monitoring and adjustment are essential for maintaining the efficiency and effectiveness of your irrigation system. By staying attentive to the changing needs of your landscape and making necessary modifications, you can preserve water resources, promote plant health, and achieve a beautiful and sustainable outdoor environment.
Conclusion
Fixing irrigation issues and optimizing the performance of your irrigation system are crucial for maintaining a healthy and vibrant landscape. By following the steps outlined in this guide, you can address common irrigation problems and ensure efficient water usage. Regular maintenance, inspection, and adjustment are key to preventing water wastage, promoting plant health, and saving on water bills.
Start by checking for leaks and repairing any damaged pipes or sprinkler heads. Adjusting water pressure and calibrating the system will further enhance the efficiency of your irrigation setup. It is also important to review and fine-tune the controller settings to match the specific needs of your landscape and adapt to changing weather conditions. Installing a rain sensor can help conserve water by automatically adjusting the irrigation schedule based on rainfall. Lastly, regular monitoring and adjustment will ensure ongoing optimization and prevent overwatering or underwatering.
Maintaining an efficient irrigation system not only benefits your landscape but also contributes to environmental sustainability. Conserving water is becoming increasingly important, and by implementing these steps, you can do your part in responsible water management.
Remember, proper irrigation is an ongoing process that requires attentiveness and adjustment. By investing time and effort into fixing and optimizing your irrigation system, you can enjoy a beautiful and healthy landscape while making a positive impact on the environment.