Home>Gardening Tips and Tricks>Problem Solving>How To Fix A Leak In Drip Irrigation
Problem Solving
How To Fix A Leak In Drip Irrigation
Modified: January 22, 2024
Learn how to solve the problem of a leak in your drip irrigation system with our step-by-step guide. Fix the issue and save water efficiently.
(Many of the links in this article redirect to a specific reviewed product. Your purchase of these products through affiliate links helps to generate commission for Chicagolandgardening.com, at no extra cost. Learn more)
Table of Contents
- Introduction
- Understanding the Basics of Drip Irrigation Systems
- Identifying a Leak in a Drip Irrigation System
- Tools and Materials Required
- Step 1: Turn Off the Water Supply
- Step 2: Locate the Leak
- Step 3: Clean and Prepare the Area
- Step 4: Fixing a Leak Using a Hose Repair Kit
- Step 5: Fixing a Leak Using Drip Irrigation Tape
- Step 6: Testing the Repaired System
- Conclusion
Introduction
Welcome to the world of drip irrigation systems, where water efficiency and convenience go hand in hand. Drip irrigation is a method of watering plants by delivering small, precise amounts of water directly to their roots. This system not only saves water but also ensures that plants receive the right amount of moisture to thrive.
However, like any other irrigation system, drip irrigation may encounter leaks from time to time. These leaks can result in wasted water, decreased system efficiency, and potential damage to your plants. The good news is that fixing a leak in a drip irrigation system is a relatively straightforward process that can be done by anyone with a little know-how and the right tools.
In this article, we will guide you through the steps to identify and fix leaks in a drip irrigation system. You will learn about the basic components of a drip irrigation system, the tools required to fix a leak, and the step-by-step process to address the issue. Whether you are a seasoned gardener or a beginner, this article will equip you with the skills and knowledge needed to keep your drip irrigation system in top shape.
By taking the time to understand and address leaks in your drip irrigation system, you can ensure that your plants receive the water they need while conserving this precious resource. So let’s get started by delving into the basics of drip irrigation systems.
Understanding the Basics of Drip Irrigation Systems
Drip irrigation systems are a popular choice for gardeners and farmers alike due to their efficiency and water-saving capabilities. Unlike traditional sprinkler systems that spray water over a large area, drip irrigation systems deliver water directly to the roots of plants, minimizing evaporation and runoff.
At the heart of a drip irrigation system is the main water supply line, which connects to a series of smaller tubes called drip lines. These lines, equipped with emitters, deliver water in a slow and controlled manner to individual plants. The emitters, often in the form of drip emitters, micro-sprayers, or drip tapes, regulate the flow and distribution of water throughout the system.
One of the key advantages of a drip irrigation system is its flexibility. It can be customized to fit the unique needs of different plants by adjusting the number and placement of emitters. This allows for targeted watering, ensuring that each plant receives the required amount of water without wasting any.
Another benefit of drip irrigation is its ability to reduce weed growth. Since the water is delivered directly to the plant’s roots, the surface soil remains relatively dry, discouraging weed germination. This not only saves water but also cuts down on the need for herbicides.
In addition to water conservation, drip irrigation systems also aid in disease prevention. By delivering water directly to the roots, the foliage of plants remains dry, minimizing the opportunity for fungal diseases to take hold. This is particularly important for vulnerable plants, such as tomatoes and roses.
Drip irrigation systems can be utilized in various settings, from flower beds and vegetable gardens to orchards and commercial farmlands. They are especially beneficial in areas with water scarcity or in regions with strict water regulations, as they maximize efficiency and minimize water consumption.
Now that we have a solid understanding of drip irrigation systems, it’s time to learn how to identify and fix leaks within this system. Grab your tools, and let’s start troubleshooting!
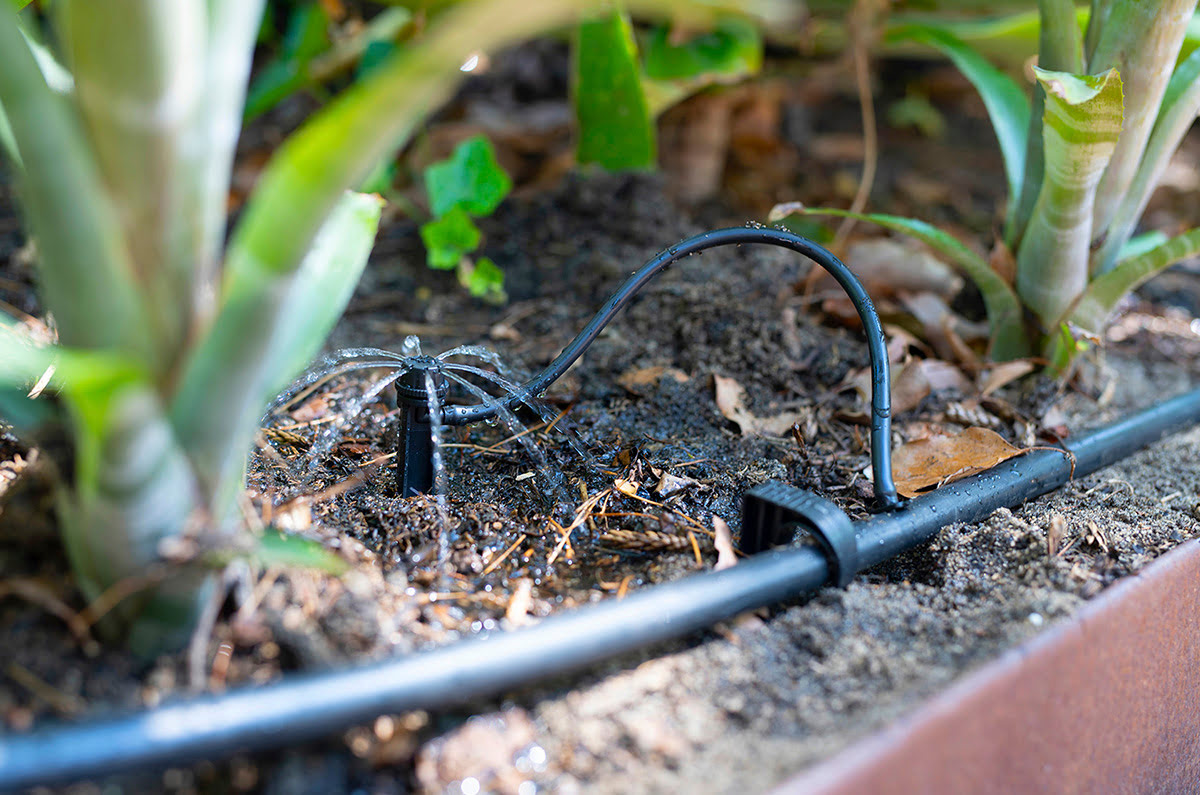
Identifying a Leak in a Drip Irrigation System
Before we can fix a leak in a drip irrigation system, we need to identify its source. Leaks can occur in various parts of the system, including the main water supply line, the drip lines, and the emitters. Here are a few signs to look out for when trying to identify a leak:
- Visible water pooling: If you notice standing water or puddles around your plants that are not due to recent watering or rain, it could be a sign of a leak.
- Unusual plant growth: Pay attention to any plants that are growing faster or greener than others. The excess water from a leak can cause uneven growth patterns.
- Low or fluctuating water pressure: If you notice a decrease in water pressure in your system or inconsistent flow, it could indicate a leak.
- Audible hissing or dripping sounds: Listen carefully for any unusual sounds near your irrigation system, as leaks can often produce hissing or dripping noises.
- Increased water usage: If you see a spike in your water bill without any other logical explanation, it may be due to a leak in your irrigation system.
Once you have identified the presence of a leak, the next step is to pinpoint its exact location. This can be done by visually inspecting the system or by using specialized leak detection tools. Check the main water supply line, the connections between the drip lines and emitters, and any fittings or valves for signs of moisture or water seepage.
It’s worth noting that leaks are not always obvious and can be subtle, especially if they are underground. In such cases, you may need to dig around the suspected area or use a soil probe to determine if there is moisture present.
By carefully observing these signs and thoroughly inspecting your drip irrigation system, you should be able to identify the source of the leak. Once you have a clear understanding of its location, you can proceed with fixing the issue.
Tools and Materials Required
Fixing a leak in a drip irrigation system requires a few essential tools and materials. Having these on hand will greatly simplify the repair process. Here’s a list of what you’ll need:
- Tape measure or ruler: To measure distances accurately and determine the length of drip lines or tubing needed for replacement.
- Utility knife: A sharp utility knife will come in handy for cutting and removing damaged sections of drip lines.
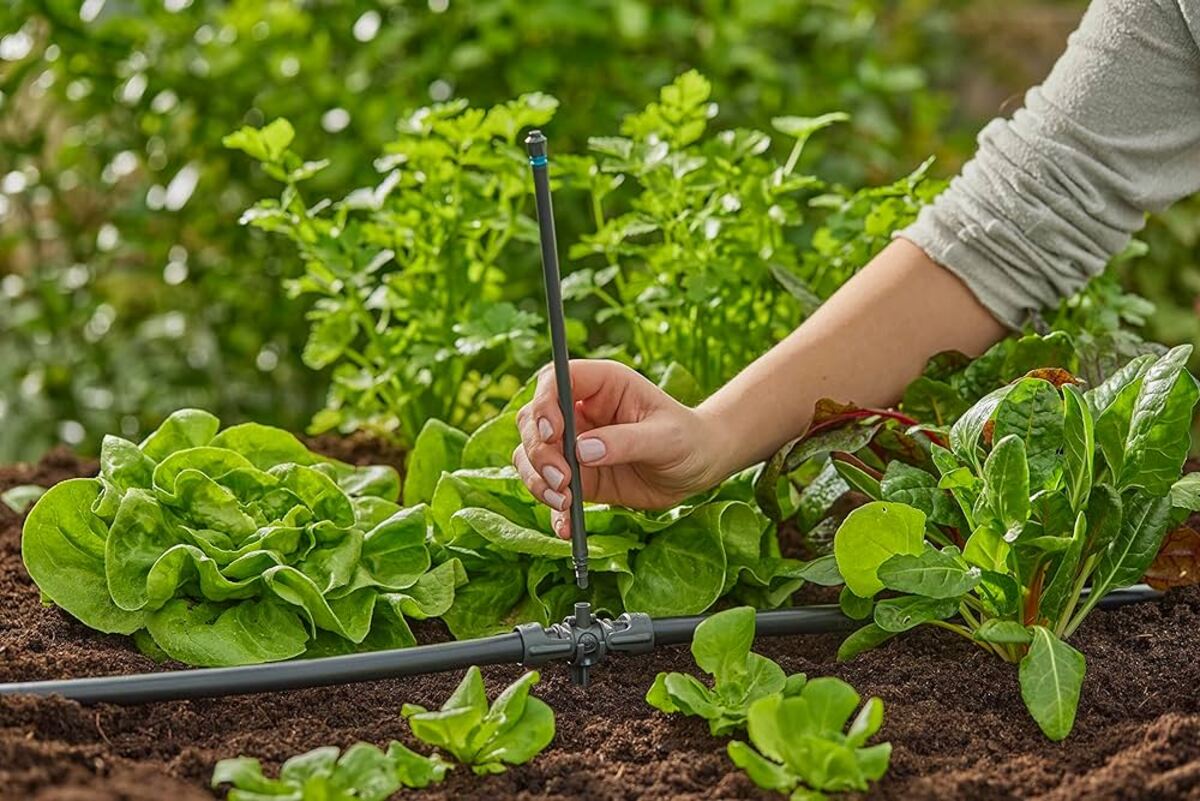
- Hose repair kit: This kit contains various fittings, connectors, and clamps that are specifically designed for repairing leaks in drip irrigation systems. It typically includes barbed connectors, compression couplings, and end caps.
- Drip irrigation tape: Drip irrigation tapes are an alternative to using a hose repair kit. They are self-adhesive and can be wrapped around the damaged section of the drip line to seal the leak.
- Wire brush or sandpaper: These tools are used to clean the surface of the drip line before applying any repair solutions. They help ensure a secure and watertight connection.
- Gloves: Wearing gloves will protect your hands from dirt, sharp objects, and potential chemical exposure.
- Teflon tape or pipe sealant: These sealants are used to create a watertight seal when connecting threaded fittings or connectors.
- Bucket or container: A bucket or container will be useful for catching excess water and minimizing any mess during the repair process.
It’s important to note that the specific tools and materials required may vary depending on the type and complexity of your drip irrigation system. Be sure to assess your system and identify any additional tools or materials you may need before starting the repair.
With these tools and materials in hand, you’re now well-equipped to tackle the task of fixing the leak in your drip irrigation system. Next, we’ll walk you through the step-by-step process to repair the leak using either a hose repair kit or drip irrigation tape, depending on your preference and the extent of the leak.
Step 1: Turn Off the Water Supply
Before you begin any repair work on your drip irrigation system, it is crucial to turn off the water supply. This step will ensure your safety and prevent any further water leakage during the repair process.
Locate the main water supply valve for your irrigation system. This valve is typically connected to the mainline or located near the water source, such as a faucet or valve box. Shut off the valve by turning it clockwise until it is fully closed.
Once the water supply is turned off, test the system by opening a faucet or running an outdoor hose. This will release any built-up pressure in the system and drain any remaining water in the lines.
By turning off the water supply, you eliminate the risk of accidental water flow while working on the repair. This step is crucial to ensure a safe and dry environment for the rest of the repair process.
Now that the water supply is turned off, you can move on to the next step: locating the leak within your drip irrigation system.
Step 2: Locate the Leak
Once you have turned off the water supply, the next step in fixing a leak in a drip irrigation system is to locate the exact source of the leak. This step is crucial as it will help you determine the best method for repair and ensure that the problem is resolved effectively.
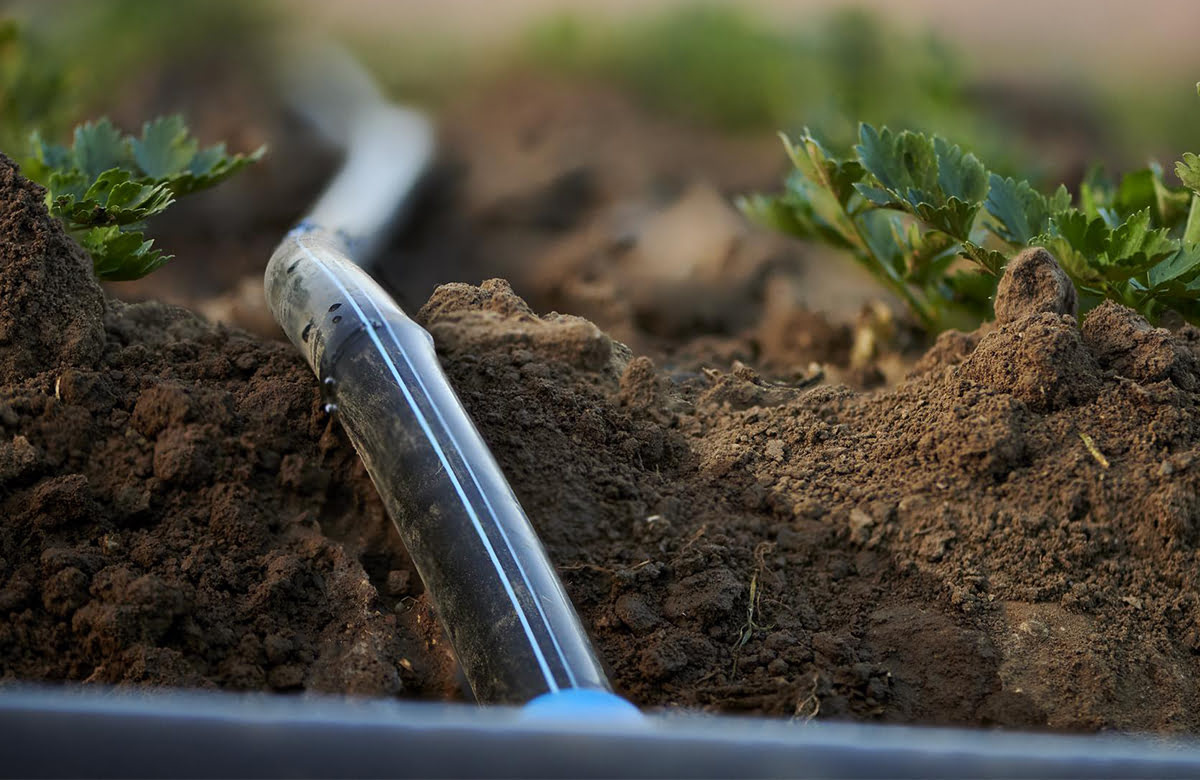
Start by visually inspecting the drip irrigation system, paying close attention to the main water supply line, the drip lines, and the emitters. Look for any signs of moisture, puddles, or dripping water around these areas. In some cases, you may even notice water bubbling up from the ground, indicating an underground leak.
If the leak is not immediately visible, you may need to do some detective work. Carefully examine the plants and the soil around them for any signs of excessive moisture or discoloration that may indicate water leakage. Follow the drip lines and inspect them closely, looking for any visible damage or misalignment.
Another effective method for locating leaks is by pressurizing the system. To do this, turn on the water supply momentarily and then turn it off again. Listen carefully for any hissing or dripping sounds, which can help pinpoint the location of the leak. You can also run your hand along the drip lines to feel for any moisture or changes in temperature.
If the leak is underground, you may need to use a soil probe or carefully dig around the suspected area to uncover the source. Take caution not to damage any other parts of the system or disrupt the plant’s root system.
By systematically examining the drip irrigation system and utilizing the pressurization method, you will be able to locate the leak and move on to the next steps of the repair process. Once the leak is identified, it’s time to clean and prepare the area for the repair.
Step 3: Clean and Prepare the Area
Once you have located the leak in your drip irrigation system, the next step is to clean and prepare the area for repair. This step is essential to ensure a secure and reliable fix that will prevent future leaks and maintain the efficiency of your system.
Start by clearing away any debris or dirt surrounding the leak. Use a small garden trowel or your hands to remove any soil or plant matter that may be obstructing the area. This will give you a clear view and better access to the damaged section of the drip line.
Next, use a wire brush or sandpaper to clean the surface of the drip line around the leak. This step is necessary to remove any dirt, residue, or corrosion that might hinder the adhesive or sealing properties of the repair materials.
If the leak is in a section with existing connectors, remove them carefully using pliers or a wrench. Inspect the removed fittings for any damage or wear and replace them if necessary. Be sure to clean the area where the old fittings were attached before proceeding with the repair.
For optimal results, it is recommended to cut out the damaged section of the drip line rather than attempting to repair it directly. With a sharp utility knife or pipe cutter, make clean cuts on either side of the leak, ensuring that the ends are straight and free from any burrs or obstructions.
After cutting out the damaged portion, flush the system briefly to remove any loose debris or particles that may have entered the lines during the cutting process.
By cleaning and preparing the area, you create a clean, smooth surface to work with, promoting a strong and secure repair. With the area prepped, you are now ready to proceed to the next step: fixing the leak using either a hose repair kit or drip irrigation tape, depending on your preference and the extent of the leak.
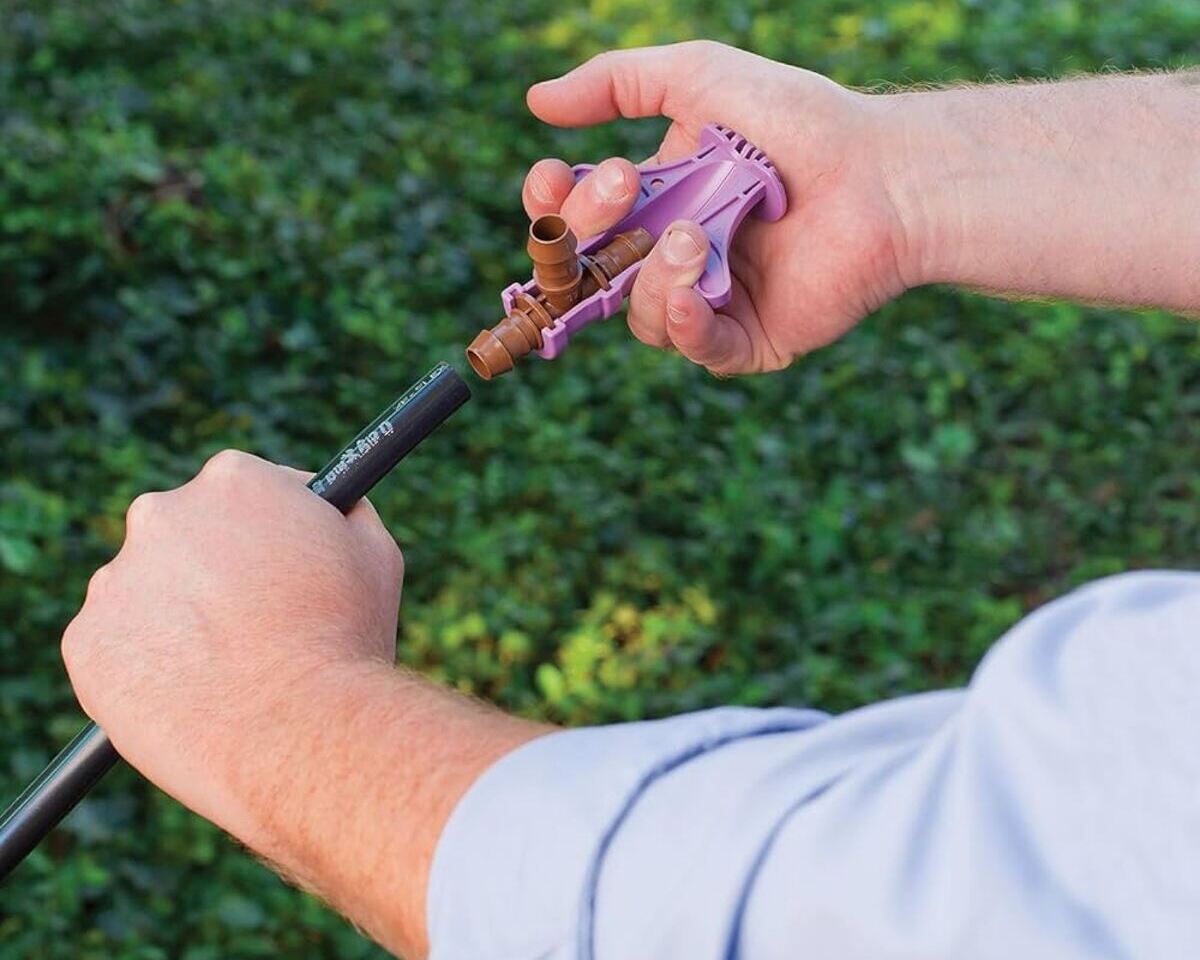
Step 4: Fixing a Leak Using a Hose Repair Kit
If you have identified a leak in your drip irrigation system and have chosen to use a hose repair kit for the fix, follow these step-by-step instructions:
- Measure and cut: Using a tape measure or ruler, measure the length of the damaged section of the drip line. Add an extra inch to the measurement to allow space for the repair fittings. With a sharp utility knife or pipe cutter, make clean cuts on either side of the leak.
- Clean and prepare: Use a wire brush or sandpaper to clean the ends of the drip line that you have just cut. Remove any dirt, debris, or irregularities that may hinder the effectiveness of the repair.
- Connect the repair fittings: Take the appropriate connectors from the hose repair kit. Insert one end of the connector into the cut end of the drip line, ensuring a tight and secure fit. Repeat the process for the other end of the connector, attaching it to the new section of drip line.
- Secure with clamps: Slide the provided clamps over the connectors and tighten them using pliers or a screwdriver. Ensure that the clamps are snug and secure, preventing any water leakage.
- Test the repair: Once the repair fittings and clamps are securely in place, turn on the water supply to test the repaired section. Look for any signs of water leakage or dripping. If everything appears to be in order, you have successfully fixed the leak using a hose repair kit.
It is important to note that different hose repair kits may have slightly different instructions and fittings. Always refer to the manufacturer’s guidelines and follow their specific instructions for the best results.
With the leak fixed using a hose repair kit, you can move on to the final step: testing the repaired system to ensure its proper functioning.
Step 5: Fixing a Leak Using Drip Irrigation Tape
If you prefer to use drip irrigation tape to fix a leak in your drip irrigation system, follow these step-by-step instructions:
- Measure and cut: Measure the length of the damaged section of the drip line using a tape measure or ruler. Cut a piece of drip irrigation tape that is slightly longer than the measured length to ensure complete coverage.
- Clean and prepare: Use a wire brush or sandpaper to clean the surface of the drip line around the leak. Remove any dirt, debris, or corrosion that may hinder the adhesive properties of the drip irrigation tape.
- Apply the tape: Peel the protective backing off the drip irrigation tape and carefully wrap it around the damaged section of the drip line. Make sure the tape is tightly wrapped and covers the entire length of the damaged area. Apply pressure along the tape to ensure a secure bond.
- Test the repair: Turn on the water supply to test the repaired section. Check for any signs of water leakage or dripping. If the system is functioning properly without any leaks, you have successfully fixed the leak using drip irrigation tape.
When using drip irrigation tape, it is important to ensure that the tape is compatible with your specific drip irrigation system and can withstand the water pressure in your system. Different types and brands of drip irrigation tape may have different adhesive properties, so be sure to follow the manufacturer’s instructions for optimal performance.
After successfully fixing the leak using drip irrigation tape, move on to the final step: testing the repaired system to ensure its proper functioning.
Step 6: Testing the Repaired System
Now that you have completed the necessary repairs to fix the leak in your drip irrigation system, it’s time to test the system to ensure that the repair was successful and that everything is functioning as it should.
Turn on the water supply and observe the repaired section closely. Check for any signs of water leakage, dripping, or irregular water flow. Inspect the connections, fittings, and repaired areas for any potential issues.
Walk around your garden or designated irrigation area and examine the plants. Make sure that each plant is receiving adequate water through the drip emitters or micro-sprayers. Look for any dry spots or areas that are receiving excessive water.
Observe the water pressure in the system. Ensure that the pressure is consistent and that there are no significant fluctuations. It is normal to have a slight decrease in pressure when multiple emitters are in use, but if the pressure is too low or inconsistent, you may need to further inspect the system for other leaks or blockages.
If you have multiple zones or sections in your drip irrigation system, test each zone individually to ensure proper functionality and water distribution. This will help you identify any potential leaks or issues that may be specific to a particular zone.
Take note of any additional leaks or problems that may have gone unnoticed during the repair process. It’s important to address these issues promptly to maintain the efficiency and effectiveness of your drip irrigation system.
If you observe any issues or leaks during the testing phase, repeat the necessary repair steps to address them. It is essential to tackle any problems early on before they escalate and potentially cause further damage to your system or plants.
By testing the repaired system and ensuring its proper functioning, you can have peace of mind knowing that your drip irrigation system is back in top shape and delivering the optimal amount of water to your plants.
Congratulations on successfully fixing the leak in your drip irrigation system and optimizing its performance!
Conclusion
Fixing a leak in a drip irrigation system is a manageable task that can save water, preserve the health of your plants, and maintain the efficiency of your irrigation system. By following the step-by-step process outlined in this article, you can identify and repair leaks, ensuring that your drip irrigation system operates at its best.
We began by understanding the basics of a drip irrigation system and the benefits it offers in terms of water conservation, targeted watering, weed control, and disease prevention. Armed with this knowledge, we moved on to identifying leaks by observing visible signs, testing water pressure, and listening for hissing sounds.
Once the leak was identified, we discussed the tools and materials required for the repair process. From tape measures and utility knives to hose repair kits and drip irrigation tape, having the right supplies on hand is crucial for a successful repair.
We then outlined the step-by-step process for turning off the water supply, locating the leak, and cleaning and preparing the area for repair. Next, we covered the two methods of fixing leaks – using a hose repair kit or drip irrigation tape. Each method offers its own benefits, allowing you to choose the best approach for your specific situation.
Finally, we concluded with the importance of testing the repaired system to ensure its proper functioning. By checking for leaks, inspecting water flow, and analyzing pressure levels, you can have confidence that your drip irrigation system is back in working order.
With the knowledge and skills gained from this article, you are equipped to tackle future repairs and maintain your drip irrigation system’s efficiency. Remember, regular inspection and maintenance can help prevent leaks and keep your system operating smoothly for years to come.
So roll up your sleeves, put on your gloves, and have confidence in your ability to fix any leaks that may arise in your drip irrigation system. Enjoy the benefits of water conservation and healthy, thriving plants that come with a well-maintained drip irrigation system!