Home>Gardening Tips and Tricks>Problem Solving>How To Locate Irrigation Valves
Problem Solving
How To Locate Irrigation Valves
Modified: January 22, 2024
Learn effective problem-solving techniques to easily locate irrigation valves in your garden. Follow our step-by-step guide for a hassle-free irrigation system setup.
(Many of the links in this article redirect to a specific reviewed product. Your purchase of these products through affiliate links helps to generate commission for Chicagolandgardening.com, at no extra cost. Learn more)
Table of Contents
- Introduction
- Understanding Irrigation Valves
- Step 1: Gathering Equipment
- Step 2: Locating the Main Water Shut-Off Valve
- Step 3: Identifying the Valve Boxes
- Step 4: Opening the Valve Boxes
- Step 5: Locating the Irrigation Valves within the Boxes
- Step 6: Turning Off the Valves
- Step 7: Performing Maintenance or Repairs
- Conclusion
Introduction
Welcome to the world of irrigation! Whether you are a seasoned gardener or a novice landscaper, knowing how to locate irrigation valves is an essential skill. Understanding the location and operation of these valves will enable you to effectively control the flow of water to your plants, ensuring they receive the right amount of moisture for optimal growth.
Irrigation valves act as the gateway between your water source and your irrigation system. They regulate the flow of water, allowing you to turn on or off specific zones or areas of your landscape. By being able to locate these valves, you can perform maintenance, make repairs, or simply adjust the watering schedule to accommodate changing weather conditions.
While locating irrigation valves may seem like a daunting task, fear not! In this comprehensive guide, we will take you through the step-by-step process to help you find these elusive valve boxes and gain control over your irrigation system. So grab your equipment and let’s get started!
Understanding Irrigation Valves
Before we dive into the process of locating irrigation valves, let’s take a moment to understand how these components work. By gaining a better understanding of irrigation valves, you’ll be better equipped to find and operate them effectively.
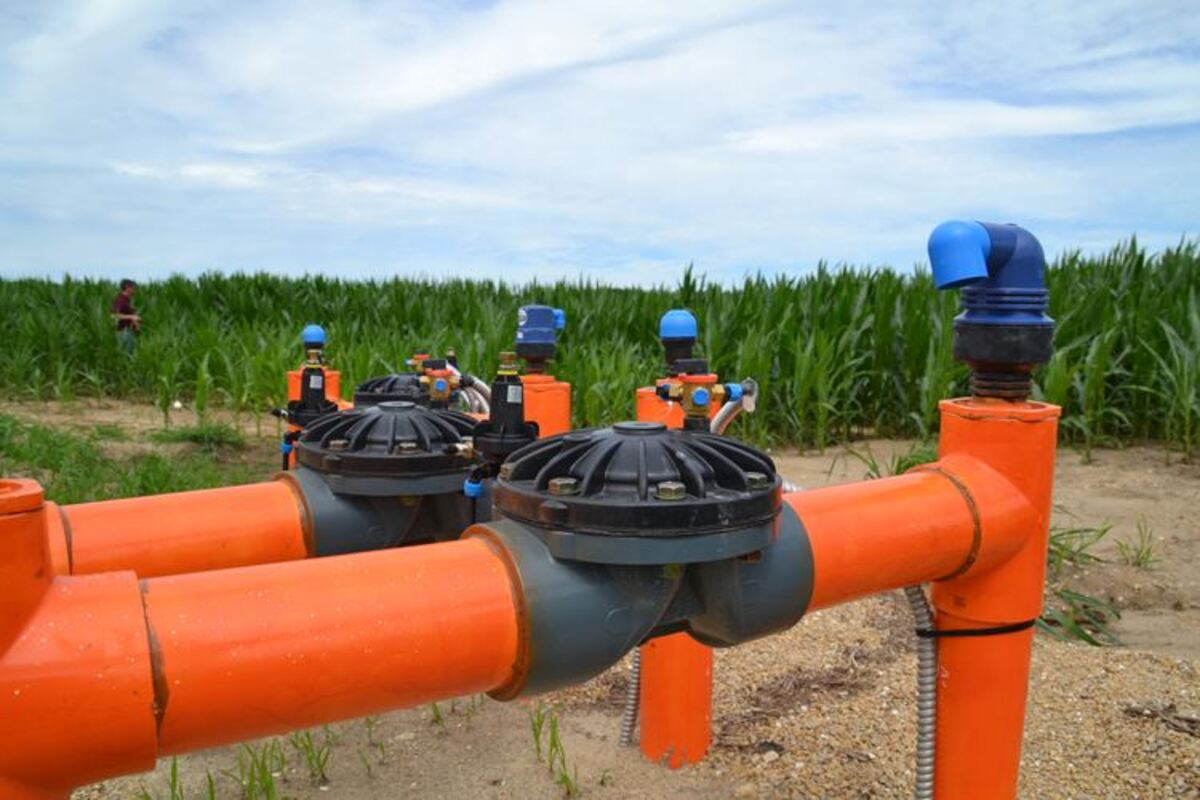
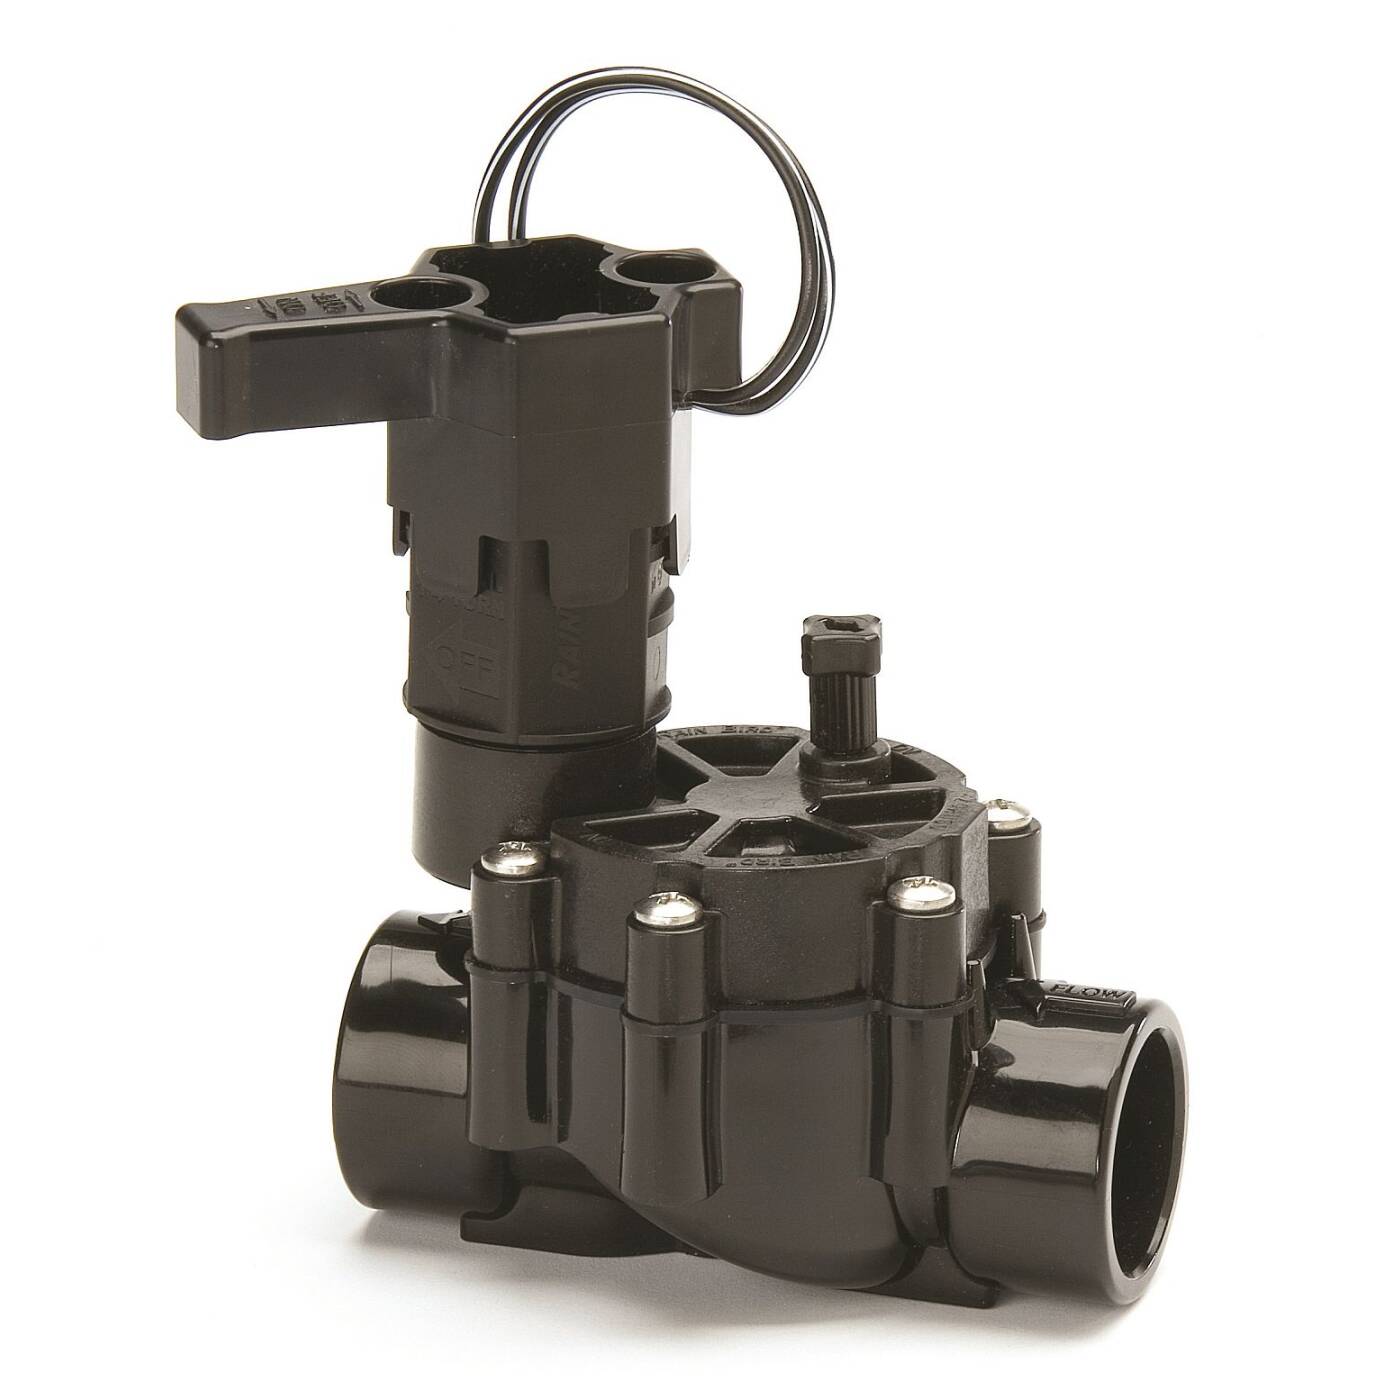
Irrigation valves are devices that control the flow of water in an irrigation system. These valves are typically located in valve boxes buried underground, protecting them from the elements. They are designed to open and close to control the flow of water to different zones or areas of your landscape.
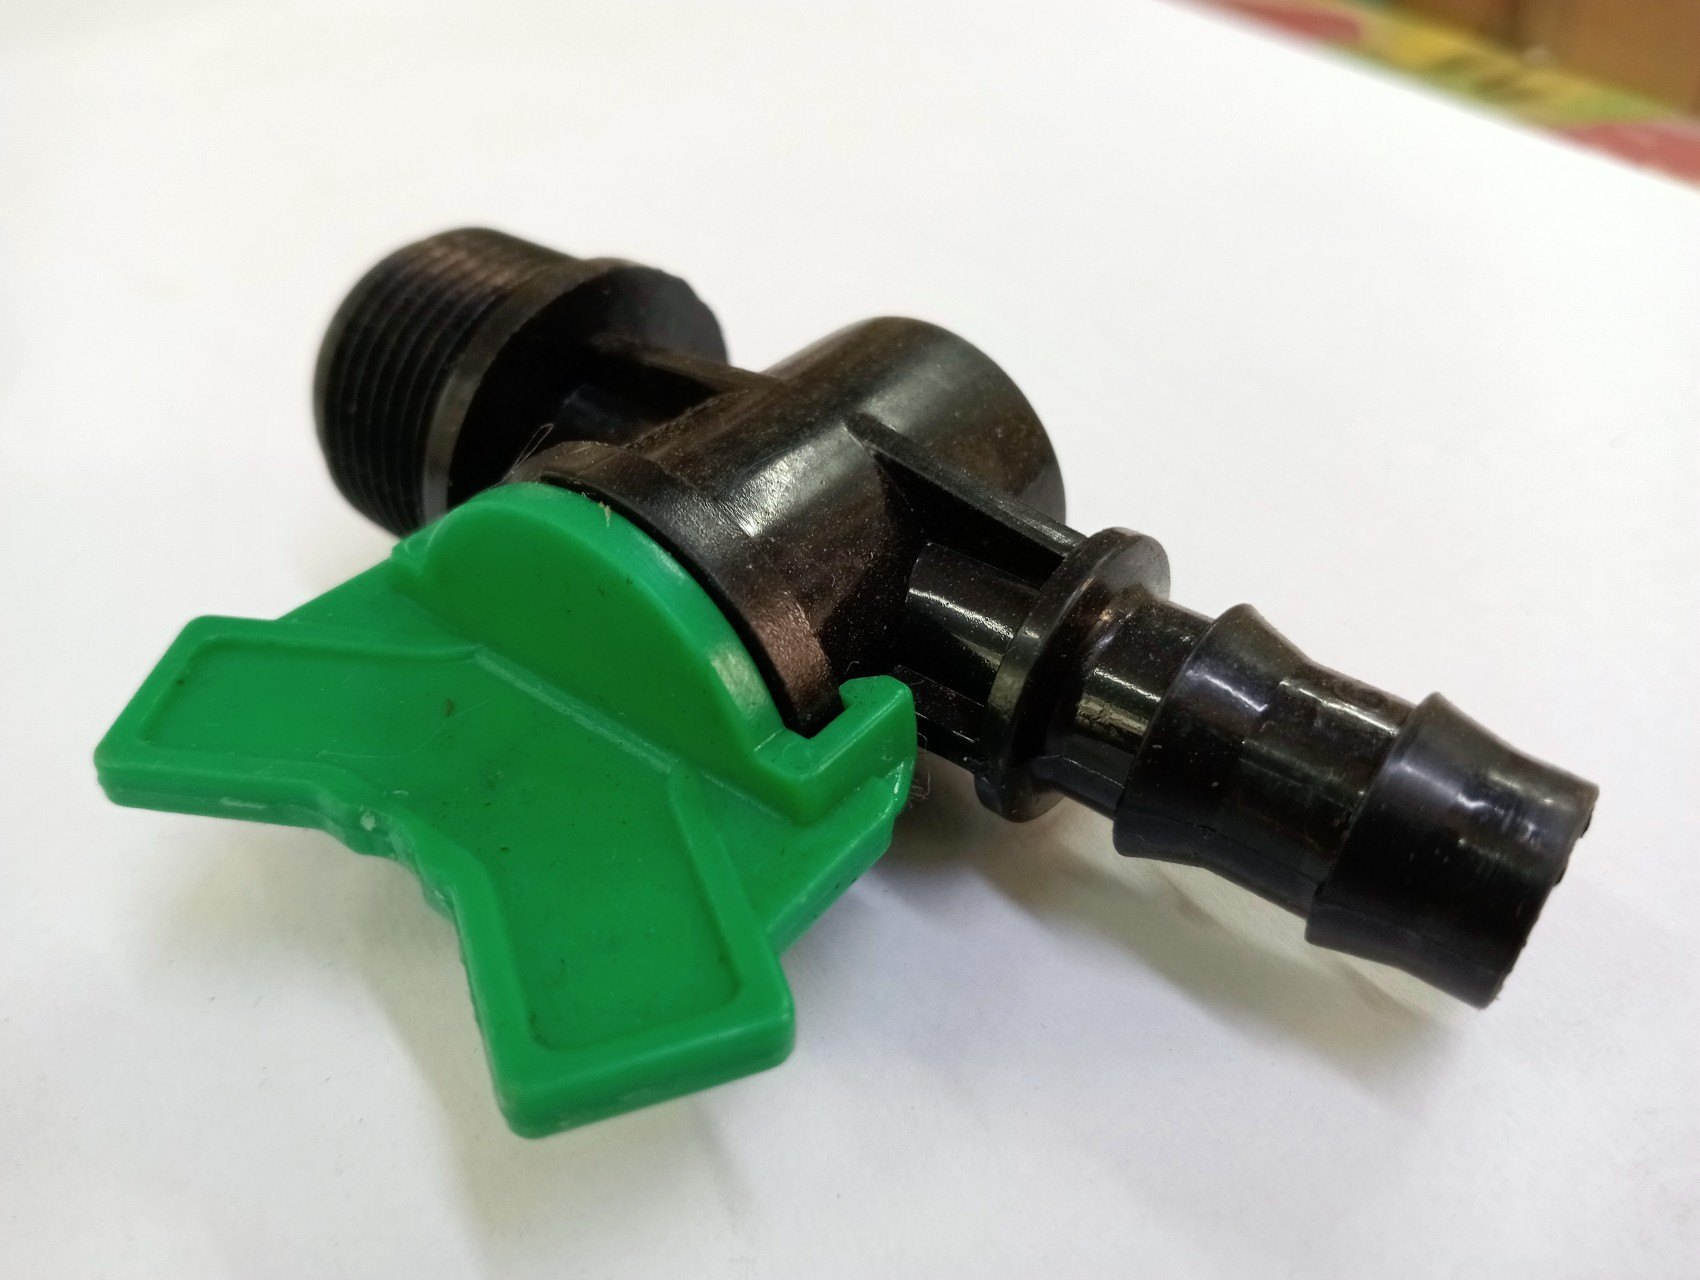
There are two main types of irrigation valves: manual valves and automatic valves. Manual valves require physical intervention to turn them on or off. This can be done by manually turning a handle or lever. Automatic valves, on the other hand, are equipped with electronic or mechanical mechanisms that allow them to open and close at predetermined times, often controlled by a timer or irrigation controller.
One important feature of irrigation valves is the solenoid valve. Solenoid valves are electro-mechanical devices that control the opening and closing of the valve. When an electric current is applied to the solenoid, it creates a magnetic field that lifts a plunger, allowing water to flow. When the current is removed, the plunger drops back down, closing off the water flow.
Irrigation valves are typically labeled or color-coded to indicate the specific zones or areas they control. This makes it easier to identify and operate the valves when making adjustments or repairs. It’s important to familiarize yourself with the labeling or color-coding system of your irrigation system to ensure the correct valve is being operated.
Now that we have a basic understanding of irrigation valves, it’s time to gather the necessary equipment to begin the process of locating them. Let’s move on to the next step!
Step 1: Gathering Equipment
Before embarking on the task of locating irrigation valves, it’s important to gather the right equipment. Having the necessary tools on hand will make the process smoother and more efficient. Here are the essential items you’ll need:
- A shovel: A shovel is necessary for digging and uncovering the valve boxes. Opt for a shovel with a sturdy handle and a sharp blade to make digging easier.
- A valve locating tool: A valve locating tool is a useful gadget that sends an electrical signal through the ground, helping you pinpoint the location of buried valves. It saves time and effort by eliminating guesswork.
- A notepad and pen: Keeping a notepad and pen handy allows you to jot down any important information, such as valve box locations, valve labels, or any maintenance or repair needs you may encounter.
- A flashlight: In case the valve boxes are in a dimly lit area, a flashlight ensures you have adequate visibility while working.
- A camera or smartphone: Taking photos or videos of the valve boxes and valves can serve as a helpful reference for future maintenance or troubleshooting.
Remember to wear appropriate clothing and protective gear, such as gloves and safety glasses, to ensure your safety while digging and handling any potential debris.
Once you have gathered all the necessary equipment, you are ready to proceed to the next step: locating the main water shut-off valve. This valve will help you control the water flow to your entire irrigation system. Let’s move on!
Step 2: Locating the Main Water Shut-Off Valve
Locating the main water shut-off valve is an important first step in the process of finding your irrigation valves. This valve controls the entire water supply to your irrigation system. Here’s how you can locate it:
- Check near your water meter: In most cases, the main water shut-off valve is located near your water meter. The water meter is usually installed in a green box at the front of your property. Look for a valve or a lever attached to the water line entering the meter box.
- Trace the water line: If you’re unable to locate the shut-off valve near the water meter, you can try tracing the water line from the meter to your property. Look for where the water line enters your house or outdoor irrigation control panel. The shut-off valve may be located nearby.
- Check your basement or crawl space: If you have a basement or crawl space, the shut-off valve may be located there. It is often found near the point where the main water line enters your property. Check along the walls or close to the water heater.
- Ask a professional: If you’re unable to locate the shut-off valve on your own, or if you’re not comfortable doing so, it’s best to consult a professional plumber or irrigation expert. They have the knowledge and experience to locate and operate the shut-off valve safely.
Once you have located the main water shut-off valve, make a note of its location. This valve will be used to turn off the water supply to your irrigation system when performing maintenance or repairs on the valves or irrigation lines.
Now that you know the location of the main water shut-off valve, it’s time to move on to the next step: identifying the valve boxes in your landscape. Let’s continue!
Step 3: Identifying the Valve Boxes
With the main water shut-off valve located, it’s time to turn our attention to identifying the valve boxes in your landscape. Valve boxes are typically buried underground and house the irrigation valves, providing protection and easy access for maintenance and repairs. Here’s how you can identify these valve boxes:
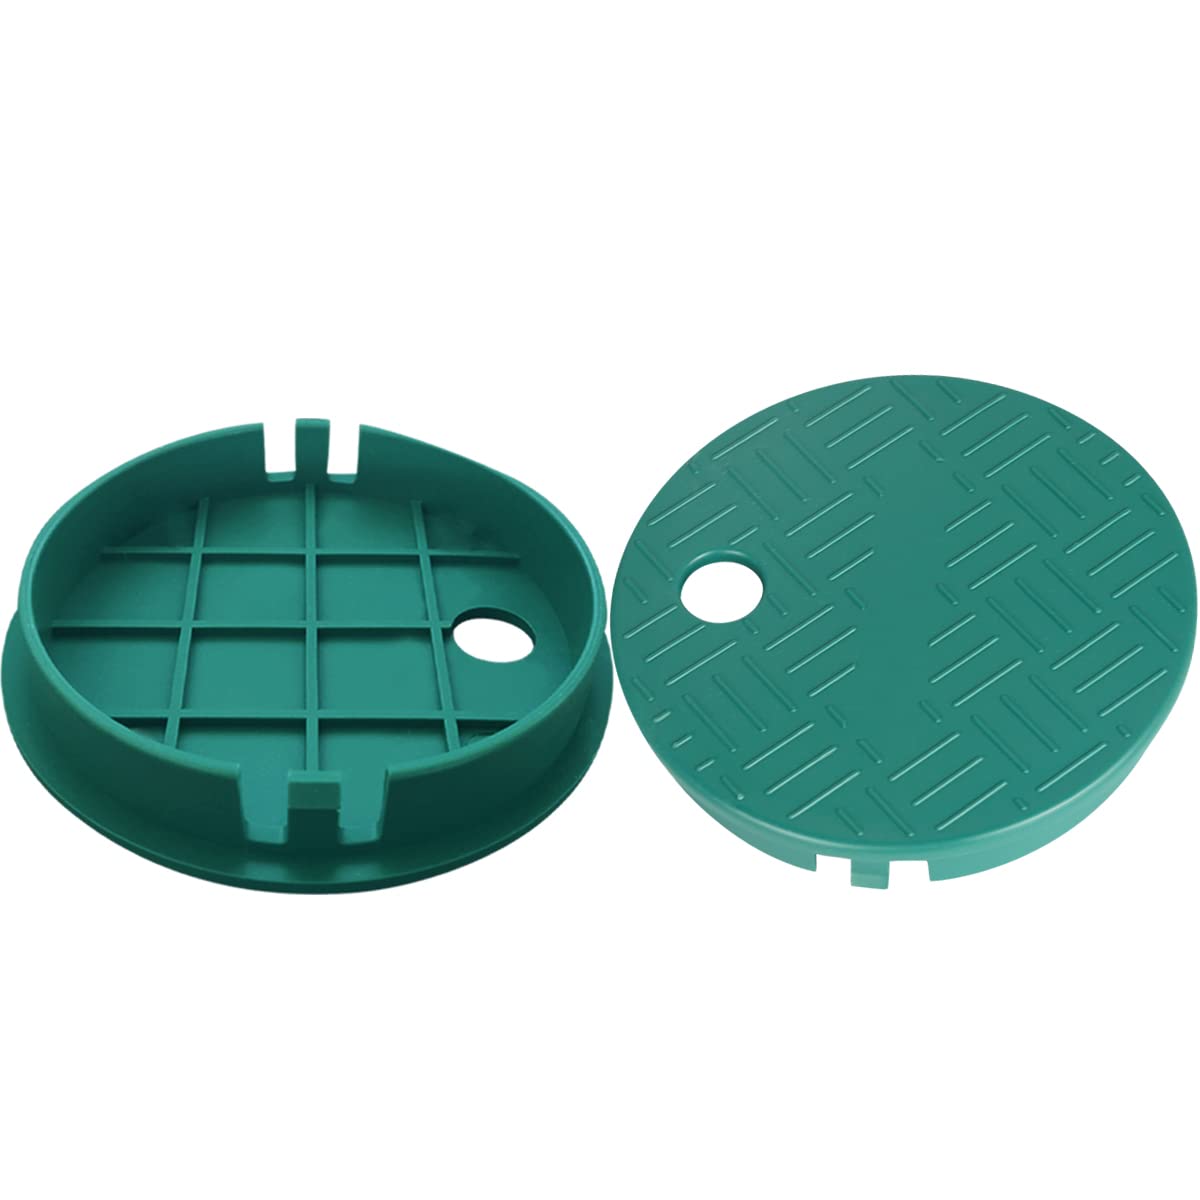
- Look for rectangular or circular lids: Valve boxes are usually covered by rectangular or circular lids made of plastic or metal. These lids are designed to be flush with the ground and may have a small handle or keyhole for easy removal.
- Check along the perimeters of your landscape: Valve boxes are often installed along the perimeters of gardens, lawns, or flower beds. They may be placed near the foundation of your house or at the corners of your property.
- Follow the irrigation lines: Trace the path of your irrigation lines from the main water source or control panel. Valve boxes are typically positioned near the point where the irrigation lines branch out into different zones or areas.
- Look for signs of disturbance: Valve boxes may be covered with grass or foliage, making them difficult to spot. Look for areas where the ground appears to be disturbed or where the grass may be greener or taller, indicating the presence of a valve box beneath.
- Consult your irrigation system plans: If you have access to your property’s landscape plans or irrigation system blueprints, they can provide valuable information about the location of valve boxes.
As you find valve boxes, take note of their positions and mark them for future reference. This will make it easier to locate and access the irrigation valves within them. Once you have identified the valve boxes, it’s time to proceed to the next step: opening the valve boxes. Let’s move forward!
Step 4: Opening the Valve Boxes
Now that you have identified the valve boxes in your landscape, it’s time to open them up to reveal the irrigation valves inside. Opening the valve boxes will give you access to the valves, allowing you to inspect, operate, or perform any necessary maintenance or repairs. Here’s how you can open the valve boxes:
- Clear the area around the valve box: Remove any debris, grass, or plants covering the valve box lid. This will allow you to lift the lid easily and prevent any obstruction while working inside the valve box.
- Use a valve box key: Some valve box lids may require a specific key or tool to open. These keys are designed to fit into the handle or keyhole of the lid, providing leverage to pry it open. If you have a valve box key, insert it into the keyhole and twist or lift to remove the lid.
- Try using a flathead screwdriver: If you don’t have a valve box key, a flathead screwdriver can also be used to gently pry open the lid. Insert the screwdriver into the gap between the lid and the box and apply slight pressure to lift the lid.
- Be cautious of underground wires or pipes: While opening the valve box, be mindful of any underground wires or pipes that may be present. Avoid damaging or disturbing them to prevent any disruptions or hazards.
- Inspect the inside of the valve box: Once the lid is off, take a moment to visually inspect the inside of the valve box. Look for any signs of damage, debris, or water accumulation that may indicate a problem with the valves or the box itself.
Remember to be careful when working with valve boxes, as they may contain sharp edges or objects. Take your time and proceed with caution.
Now that the valve boxes are open, you’re one step closer to locating the irrigation valves within. In the next step, we’ll explore how to find these valves within the valve boxes. Let’s continue!
Step 5: Locating the Irrigation Valves within the Boxes
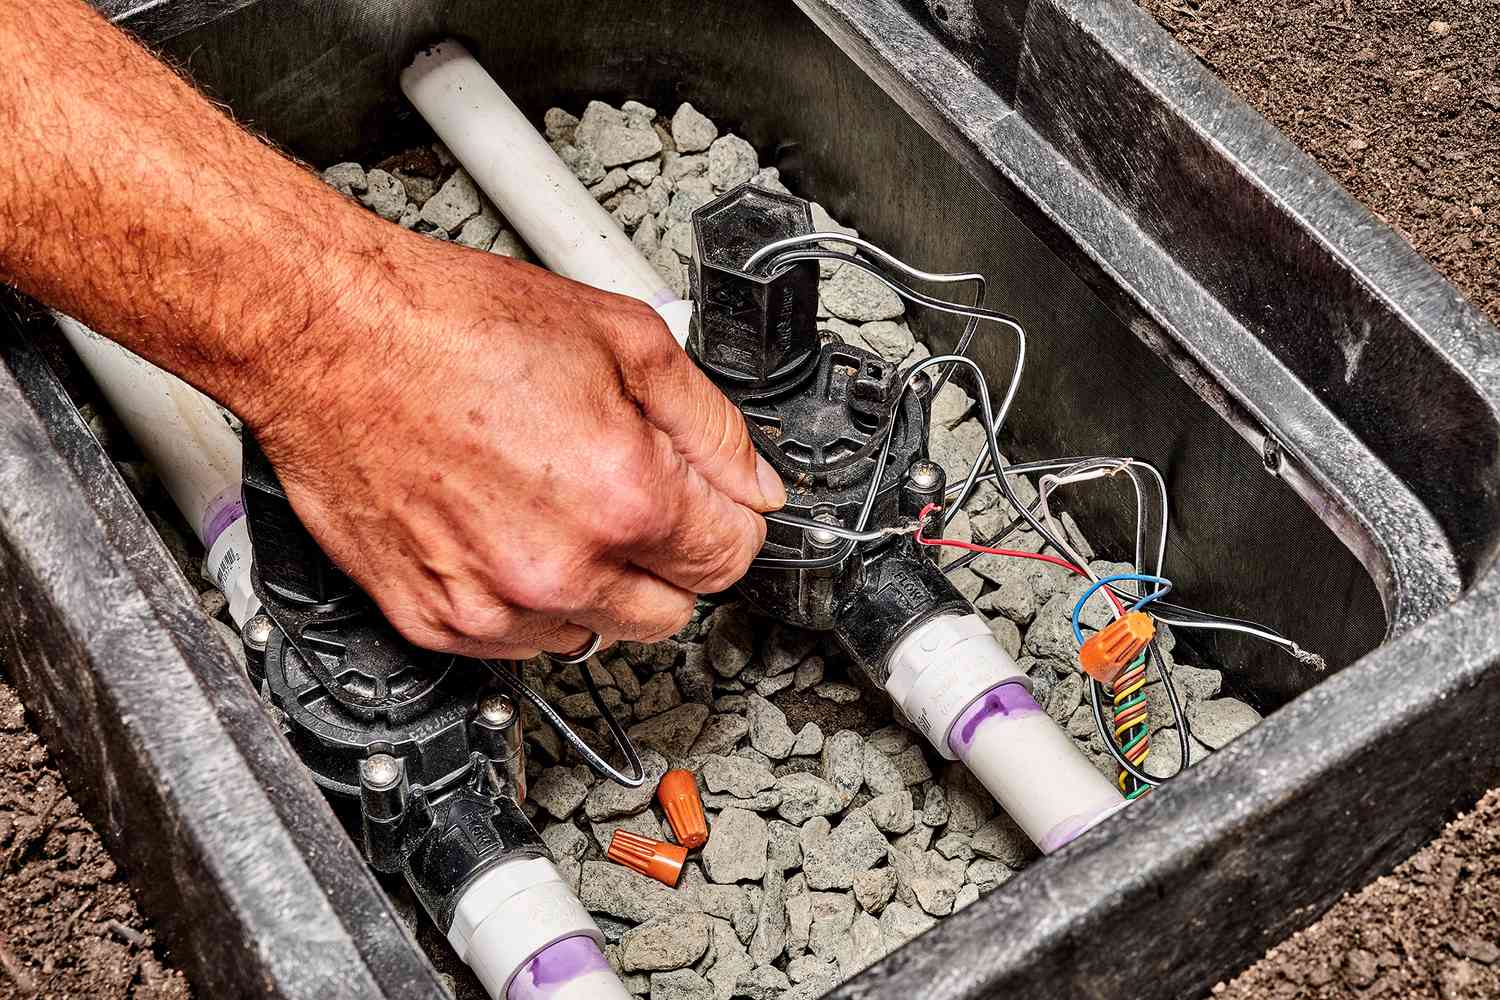
With the valve boxes open, it’s time to locate the irrigation valves within them. These valves control the flow of water to different zones or areas of your landscape. By finding and identifying these valves, you’ll be able to control and operate them as needed. Here’s how you can locate the irrigation valves within the valve boxes:
- Inspect the interior of the valve box: Take a close look inside the valve box and observe any visible pipes or fittings. Look for any labels or color codes that indicate the presence of irrigation valves.
- Follow the irrigation lines: Trace the path of the irrigation lines entering and exiting the valve box. The valves are typically located near where the lines connect to fittings or tee-off into different zones.
- Identify the solenoid valves: Solenoid valves are a key component of irrigation valves, and they are typically located on top of the valves. Look for small cylindrical devices with wires attached to them. These are the solenoid valves that control the opening and closing of the irrigation valves.
- Check for valve labels or color codes: Many irrigation valves are labeled or color-coded to indicate the specific zones or areas they control. Look for labels or colored markings on the valve bodies or nearby pipes. These will help you identify the purpose or location of each valve.
- Operate the valves: Once you have located the irrigation valves, you can operate them to ensure they are functioning properly. Turn the valve handles or use the appropriate tool to open or close the valves. This will allow you to control the water flow to specific zones or areas of your landscape.
Take note of the location and function of each irrigation valve. Keeping a record will be helpful for future maintenance, repairs, or adjustments to your irrigation system.
Now that you have located the irrigation valves within the valve boxes, it’s time to move on to the next step: turning off the valves. Let’s continue!
Step 6: Turning Off the Valves
Now that you have located the irrigation valves within the valve boxes, it’s time to learn how to turn them off. Turning off the valves is important when performing maintenance, repairs, or adjustments to your irrigation system. Here’s how you can effectively turn off the valves:
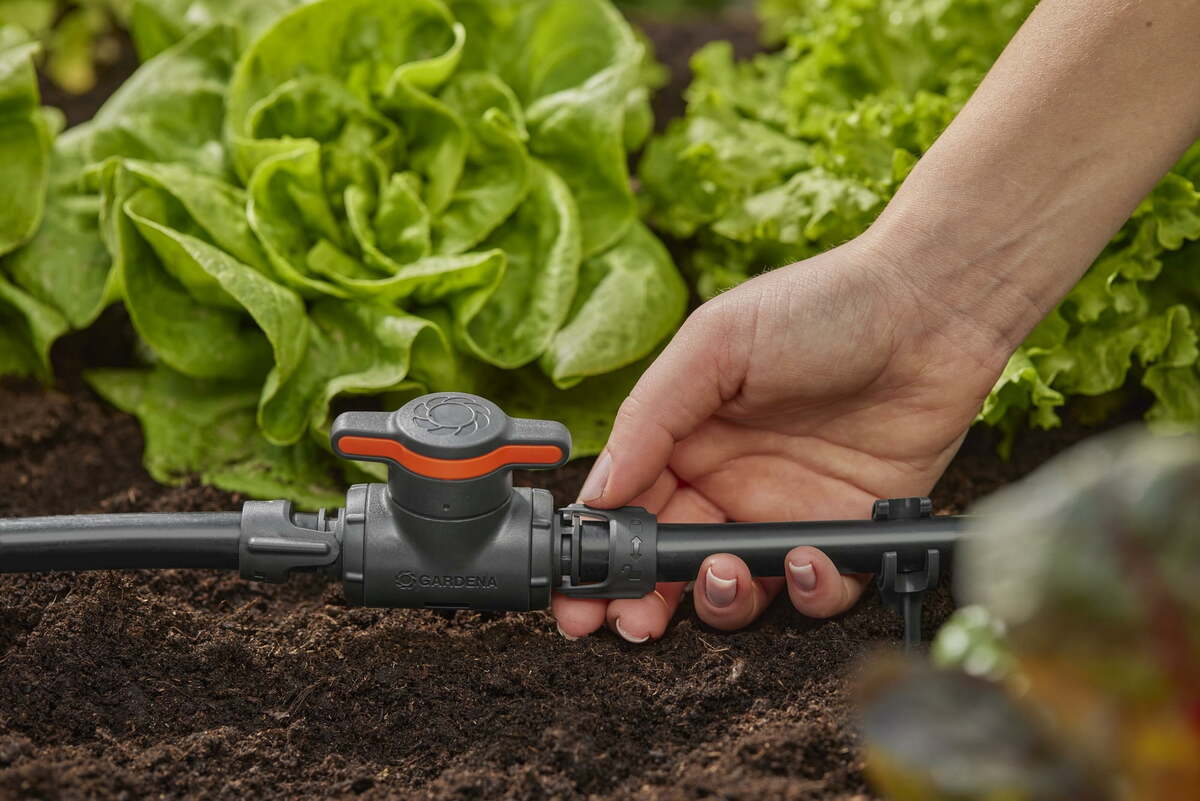
- Identify the valve handles: Take note of the handles or levers attached to the irrigation valves. These are used to open or close the valves. Most handles will have an “on” and “off” position, or they may rotate to control the flow of water.
- Turn off each valve: Locate the handle for each irrigation valve and turn it to the “off” position. This will shut off the water flow to that specific zone or area of the landscape. Ensure that all valves are completely closed to prevent any leaks or water waste.
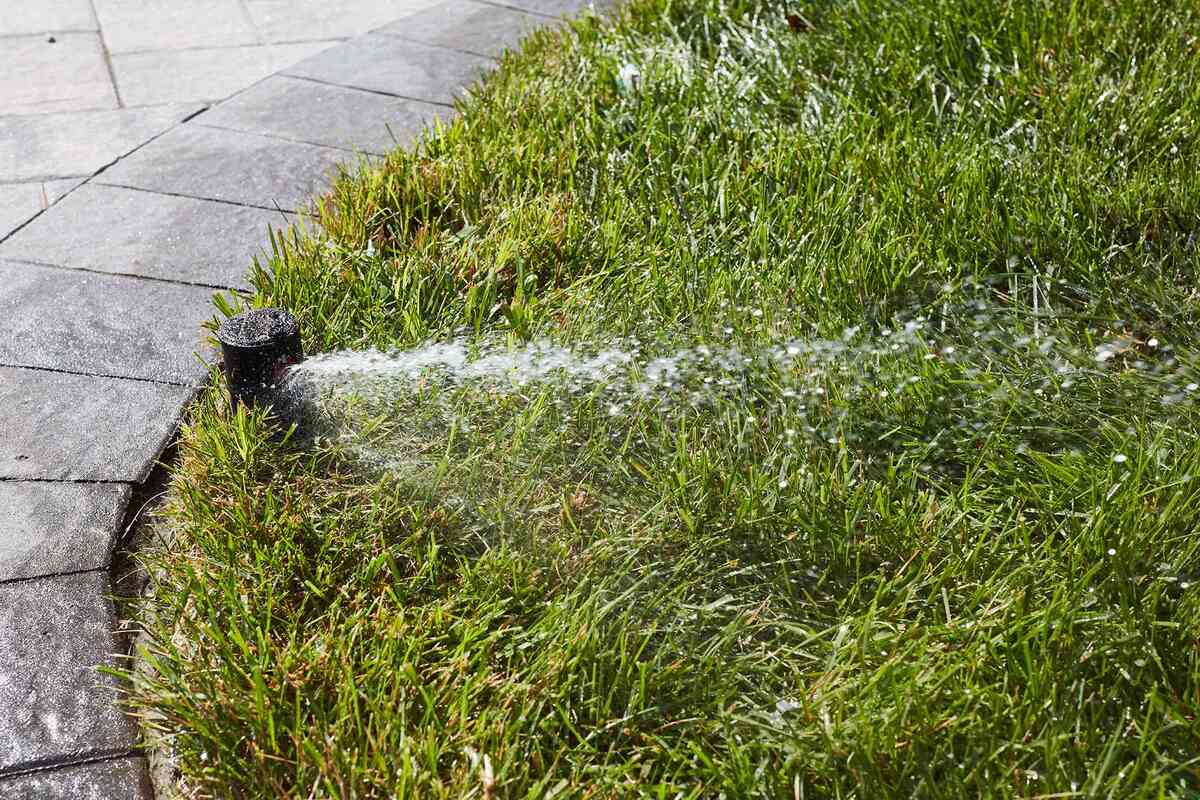
- Verify the water flow: After turning off the valves, observe the water flow in your irrigation system. Check that there is no water running or leaking from the sprinkler heads or pipes. This will confirm that the valves have been successfully turned off.
- Turning off the main shut-off valve: If you need to completely shut off the water supply to your irrigation system, remember to also turn off the main water shut-off valve that you located in the earlier steps. This will effectively stop the flow of water throughout your entire irrigation system.
By turning off the valves, you can perform maintenance tasks, make repairs, or adjust your irrigation system without the risk of water damage or wastage. Remember to turn the valves back on once you have completed the necessary work.
With the valves turned off, you can confidently move on to the next step: performing maintenance or repairs on your irrigation system. Let’s explore this step in detail!
Step 7: Performing Maintenance or Repairs
Now that you have successfully turned off the irrigation valves, you can proceed with performing maintenance or repairs on your irrigation system. Regular maintenance is crucial to ensure the proper functioning of your system and to prevent any potential issues. Here’s what you can do:
- Clean debris from valve boxes: Use a brush or a cloth to clean any dirt, debris, or vegetation that may have accumulated inside the valve boxes. This will prevent clogs and ensure smooth operation of the valves.
- Inspect valves for leaks and damage: Carefully examine the irrigation valves for any signs of leaks, cracks, or other damage. Pay attention to the solenoid valves, seals, and valve bodies. Replace any faulty or worn-out components to ensure proper functioning.
- Flush irrigation lines: To remove any sediment or accumulated dirt from the irrigation lines, flush them with water. This will help maintain optimal water flow and prevent clogging.
- Adjust or replace sprinkler heads: Inspect the sprinkler heads in each zone and adjust them to ensure proper coverage. Replace any damaged or malfunctioning sprinkler heads to ensure efficient water distribution.
- Check for proper water pressure: Use a pressure gauge to measure the water pressure in your irrigation system. Adjust the pressure regulator, if necessary, to ensure the optimal pressure for efficient and even watering.
- Program or adjust irrigation controller: If you have an irrigation controller or timer, program or adjust it according to your watering needs. Ensure that each zone is set to the desired watering duration and frequency.
- Inspect and repair irrigation pipes: Check the irrigation pipes for any leaks, cracks, or damage. Repair or replace any faulty sections of piping to prevent water loss and system inefficiency.
By performing regular maintenance and addressing any necessary repairs, you can prolong the lifespan of your irrigation system and ensure optimal performance. Remember to follow manufacturer guidelines and seek professional assistance if needed.
With the maintenance or repairs completed, you can now turn the irrigation valves back on and restore water flow to your system. Enjoy the benefits of a well-maintained and efficiently operating irrigation system!
Conclusion
Congratulations! You have successfully learned how to locate irrigation valves and perform essential maintenance or repairs on your irrigation system. By following the step-by-step process outlined in this guide, you have gained the knowledge and skills to take control of the water flow to your landscape and ensure optimal performance.
Understanding the function and location of irrigation valves is crucial for any home gardener or landscaper. These valves act as the vital link between your water source and your irrigation system, allowing you to effectively control the watering of your plants.
Throughout this guide, you learned how to gather the necessary equipment, locate the main water shut-off valve, identify valve boxes, open them up to access the irrigation valves, turn off the valves, and perform maintenance or repairs on the system.
Regular maintenance and periodic checks of your irrigation system will help you catch any issues early, prevent water waste, and ensure your plants receive the proper amount of water for healthy growth. By understanding the intricacies of your irrigation system, you are better equipped to make adjustments based on changing weather conditions and the specific needs of your landscape.
Remember, safety is paramount during the entire process, so always exercise caution when working with irrigation valves and equipment. If you encounter any complex issues or require professional assistance, don’t hesitate to consult with a plumber or irrigation expert.
By mastering the art of locating irrigation valves and maintaining your irrigation system, you are well on your way to creating a lush and vibrant landscape that will be the envy of your neighborhood.
So go forth and apply your newfound knowledge to keep your plants happy, healthy, and flourishing!