Home>Garden Design>Landscape Design>How To Cut Landscaping Bricks
Landscape Design
How To Cut Landscaping Bricks
Modified: January 22, 2024
Learn the best techniques on how to cut landscaping bricks for your landscape design projects. Master the art of cutting bricks with our step-by-step guide and create stunning designs.
(Many of the links in this article redirect to a specific reviewed product. Your purchase of these products through affiliate links helps to generate commission for Chicagolandgardening.com, at no extra cost. Learn more)
Table of Contents
Introduction
Welcome to the world of landscaping! If you’re looking to give your outdoor space a fresh, polished look, then cutting landscaping bricks is a skill you need to master. Whether you’re creating a beautiful patio, a walkway or a retaining wall, the ability to cut bricks accurately and efficiently is essential for achieving professional-grade results.
Landscaping bricks, also known as pavers, come in various sizes and shapes, and they are made from materials like clay, concrete, or natural stone. These bricks provide a durable and versatile option for creating stunning landscapes. However, it’s important to know the proper techniques for cutting them to fit your specific design needs.
In this article, we will guide you through the process of cutting landscaping bricks, including the tools and materials needed, different cutting options, techniques for straight and angled cuts, and essential safety precautions to keep in mind.
By the end of this article, you’ll have the knowledge and confidence to tackle any brick-cutting project, and you’ll be well on your way to transforming your outdoor space into a breathtaking oasis.
Tools and Materials Needed
Before you begin cutting landscaping bricks, it’s essential to gather the necessary tools and materials. Here’s a list of what you’ll need:
- Safety Gear: Safety should always be your top priority when working with tools. Make sure to wear safety goggles to protect your eyes from flying debris, sturdy work gloves to protect your hands, and ear protection if you’re using loud machinery.
- Measuring Tools: Accurate measurements are crucial for achieving precise cuts. You’ll need a measuring tape or a ruler to measure the dimensions of your bricks and the area you’re working on.
- Marking Tools: To ensure accurate cuts, you’ll need marking tools such as a pencil or chalk to outline where the bricks need to be cut.
- Cutting Tools: Depending on your cutting method preference, the following tools may be required:
- – Circular Saw with a masonry blade for straight cuts
- – Brick splitter for quick and precise cuts
- – Chisel and hammer for small, detailed cuts
- Masonry Chisel: If you’re using a chisel and hammer, invest in a good-quality masonry chisel that is sharp and sturdy.
- Protective Mask: Cutting bricks will create dust, so it’s advisable to wear a protective mask to avoid inhaling harmful particles.
- Broom or Vacuum: It’s important to clean up any debris after cutting bricks to keep your work area safe and tidy.
By ensuring you have the right tools and materials on hand, you’ll be well-prepared to tackle your landscaping brick cutting project with ease and efficiency.
Preparation
Proper preparation is key to a successful landscaping brick cutting project. Before you begin cutting, follow these steps to ensure you’re ready to tackle the task:
- Plan Your Design: Take some time to plan and visualize your landscaping design. Determine where you want to place the bricks and how many cuts you’ll need to make. This step will help you estimate the quantity of bricks required and minimize waste.
- Gather Your Materials: Double-check that you have all the necessary tools and materials mentioned earlier in the article. This will save you time and frustration when you’re in the middle of the cutting process.
- Prepare Your Work Area: Clear the work area of any obstacles, such as plants, furniture, or debris, to create a safe and spacious environment for cutting the bricks. Lay down a drop cloth or tarp to catch dust and debris.
- Put on Safety Gear: Always prioritize safety when working with tools. Put on your safety goggles, work gloves, and protective mask to protect yourself from potential hazards.
- Read the Instructions: If you’re using power tools, carefully read the manufacturer’s instructions to familiarize yourself with their proper usage and safety precautions. This will ensure you handle the tools correctly.
- Secure the Bricks: To prevent them from shifting during the cutting process, secure the bricks firmly in place using clamps or by placing them on a stable surface.
- Double-Check Measurements: Measure twice, cut once! Double-check your measurements before making any cuts to avoid any costly mistakes or wastage.
By taking the time to properly prepare yourself and your work area, you’ll set yourself up for a smooth and efficient brick cutting process. Remember, patience and attention to detail in the preparation stage will pay off in the end result of your landscaping project.
Marking the Bricks
Accurate and precise marking is crucial when cutting landscaping bricks. Properly marked bricks will ensure that you make clean and straight cuts, resulting in a professional-looking finished product. Follow these steps to effectively mark your bricks:
- Measure and Mark: Use your measuring tape or ruler to measure the desired length or angle at which you need to cut the brick. Mark the measurement on the brick’s surface with a pencil or chalk. Make sure the mark is clear and visible.
- Use a Straight Edge: For straight cuts, place a straight edge, such as a ruler or a piece of wood, along the marked line. This will ensure a straight cutting path when using a circular saw or a chisel and hammer.
- Angle Markings: If you need to make angled cuts, use a protractor or angle finder to determine the desired angle accurately. Use a straight edge to connect the appropriate angle measurement to the brick’s edges, forming a clear cutting line.
- Multiple Cuts: If you need to make several identical cuts, mark the first brick and use it as a template for marking the others. This will help maintain consistency in your cuts and save time.
- Double-Check: Before proceeding with the cutting process, double-check your markings to ensure they are accurate. This will help prevent costly mistakes and unnecessary wastage.
Remember, taking the time to accurately mark your bricks will directly impact the quality of your cuts and the overall success of your landscaping project. Take care to be precise and thorough when marking the bricks, and you’ll be on your way to creating stunning and seamless brickwork.
Cutting Options
When it comes to cutting landscaping bricks, there are several methods you can choose from based on your project requirements and the tools available to you. Let’s explore three popular cutting options:
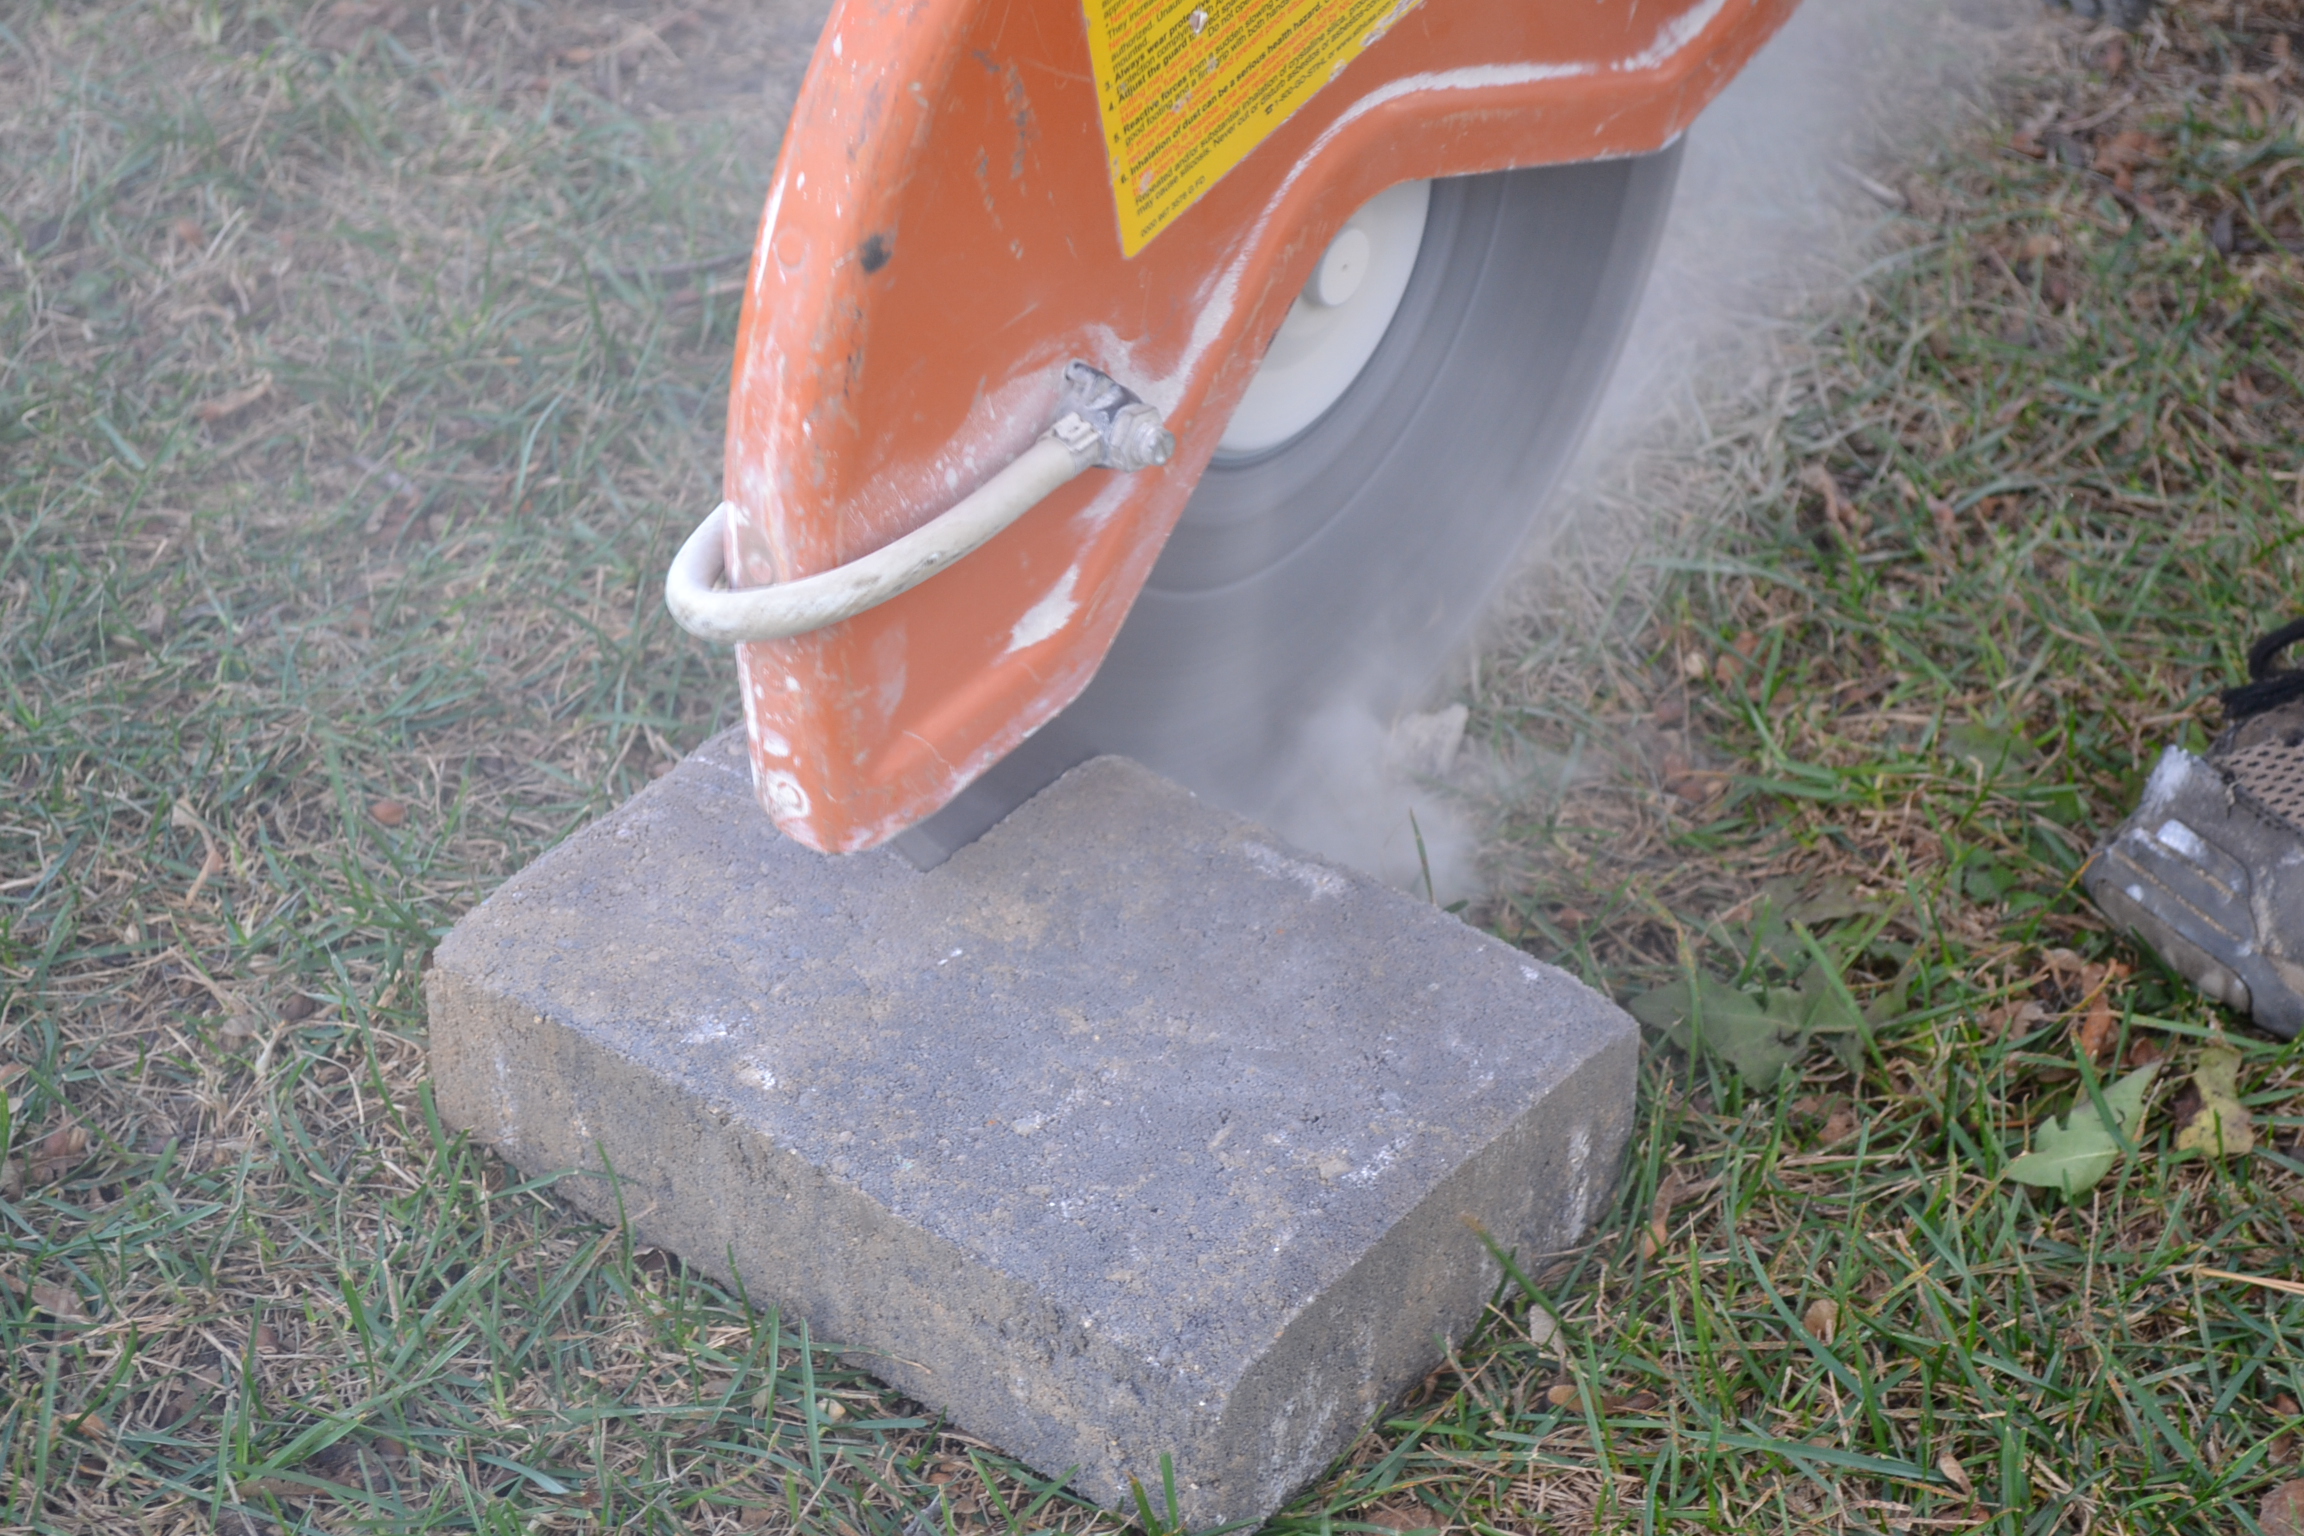
- Option 1: Using a Circular Saw: A circular saw equipped with a masonry blade is a powerful tool for making straight cuts in landscaping bricks. This method is ideal for larger projects that require clean, precise cuts. Circular saws provide quick and efficient cutting, allowing you to tackle a significant amount of brickwork in a shorter period. However, this method requires caution and proper safety measures due to the high speed and potential kickback of the saw.
- Option 2: Using a Brick Splitter: Brick splitters are specialized tools designed to cut bricks with speed and accuracy. This method is ideal for projects that require quick and repetitive cuts, such as cutting bricks for a low wall or garden bed edging. Brick splitters work by applying pressure to the brick, breaking it cleanly along a predetermined line. They are easy to use and require minimal physical effort, making them a popular choice for DIY enthusiasts. However, brick splitters may not be suitable for certain brick materials or intricate cutting designs.
- Option 3: Using a Chisel and Hammer: For small, detailed cuts, a chisel and hammer can be a simple and effective option. This method requires precision and patience but allows for more intricate and customized cuts. Using a chisel and hammer is particularly useful when working with natural stone or irregularly shaped bricks. It does involve more manual labor and may be more time-consuming, but it provides the flexibility to achieve unique and personalized cuts.
Each cutting option has its advantages and considerations. Assess the needs of your project, the available tools, and your personal comfort level to determine the best cutting method for your landscaping brick cutting needs.
Option 1: Using a Circular Saw
If you’re looking for a powerful and efficient method for cutting landscaping bricks, using a circular saw with a masonry blade is a popular choice. This option allows you to make straight and precise cuts, making it ideal for larger projects that require clean and accurate brickwork.
Here’s how you can use a circular saw to cut landscaping bricks:
- Prepare: Ensure you have the necessary safety gear, including safety goggles and gloves. Set up your work area on a stable surface and secure the brick firmly in place.
- Measure and Mark: Measure the desired length on the brick and mark it clearly using a pencil or chalk. Use a straight edge, such as a ruler or a piece of wood, to create a straight cutting line along the marked measurement.
- Set the Depth: Adjust the depth of the circular saw’s blade to match the thickness of the brick. This will ensure that the blade cuts through the brick without going too deep. Follow the manufacturer’s instructions for adjusting the depth of the saw.
- Position the Saw: Position the saw alongside the cutting line, ensuring that the blade is aligned with the marking. Hold the saw firmly with both hands, keeping a firm grip throughout the cut.
- Start the Saw and Cut: Activate the saw’s power and slowly guide the blade into the brick along the marked cutting line. Move the saw steadily and smoothly to maintain a straight and even cut. Apply steady pressure but avoid forcing the saw through the brick to prevent any kickback.
- Finish the Cut: Once you have reached the end of the cutting line, release the power trigger and allow the blade to come to a complete stop before lifting the saw away from the brick. Gently brush away any loose debris or dust.
Remember to prioritize safety by wearing protective gear and using caution when handling the circular saw. Take breaks as needed to prevent overheating, and clean any accumulated dust or debris from the saw as you work.
Using a circular saw with a masonry blade allows for efficient and precise cuts in landscaping bricks. With practice and proper technique, you’ll be able to create clean and professional-looking brickwork for your outdoor space.
Option 2: Using a Brick Splitter
If you’re looking for a quick and efficient method to cut landscaping bricks, using a brick splitter is a popular choice. Brick splitters are specialized tools that allow for precise and clean cuts, making them ideal for projects that require repetitive cutting, such as creating low walls or garden bed edging.
Here’s how you can use a brick splitter to cut landscaping bricks:
- Prepare: Ensure you have the necessary safety gear, such as safety goggles and gloves, to protect yourself during the cutting process. Set up your work area on a stable surface, and secure the brick firmly in place.
- Measure and Mark: Measure the desired length on the brick and mark it clearly using a pencil or chalk. The marking should align with the cutting edge of the brick splitter.
- Position the Brick: Place the marked portion of the brick in the cutting area of the brick splitter, making sure it is aligned with the cutting edge and firmly secured.
- Activate the Brick Splitter: Release the lever or activate the hydraulic mechanism of the brick splitter to apply pressure. The pressure will gradually increase and break the brick along the marked line.
- Complete the Cut: Once the brick has been split, release the pressure and remove the cut pieces. Check the edges to ensure a clean and precise cut. Repeat the process for additional cuts as needed.
Using a brick splitter offers several advantages, including quick and repetitive cutting, minimal physical effort, and clean and precise results. However, it’s important to note that brick splitters may not be suitable for certain brick materials or intricate cutting designs.
Always follow the manufacturer’s instructions and take appropriate safety precautions when using a brick splitter. Keep the cutting area clear of any obstructions, and be mindful of your hand placement during the cutting process.
Incorporating a brick splitter into your cutting process can help you achieve professional-looking results with speed and efficiency, making it an excellent option for your landscaping brick cutting needs.
Option 3: Using a Chisel and Hammer
If you’re looking for a method that offers more control and precision for cutting landscaping bricks, using a chisel and hammer can be an effective option. This method is especially useful for smaller, detailed cuts or when working with natural stone or irregularly shaped bricks.
Here’s how you can use a chisel and hammer to cut landscaping bricks:
- Prepare: Ensure you have the necessary safety gear, such as safety goggles and gloves, to protect yourself during the cutting process. Set up your work area on a stable surface and secure the brick firmly in place.
- Measure and Mark: Measure the desired length on the brick and mark it clearly using a pencil or chalk. The marking will serve as a guide for your chisel.
- Score the Brick: Use the chisel to create a shallow, straight groove along the marked line. Position the chisel vertically on the brick, aligning it with the marking, and tap the top of the chisel gently with the hammer. This will create a score line that will guide the chisel during the cutting process.
- Cut Along the Score Line: Position the chisel at the beginning of the score line, slightly angling it towards the waste side of the brick. Use the hammer to strike the chisel firmly but not forcefully. Repeat this process along the score line, gradually increasing the force until the brick starts to split along the score line.
- Complete the Cut: Once the brick has started to split, continue chiseling along the score line, alternating sides of the brick if necessary, until the cut is complete. Be patient and take your time to ensure accuracy and a clean cut.
Using a chisel and hammer allows for more control and intricate cuts, making it a suitable option for projects that require detailed brickwork. However, keep in mind that this method may require more time and physical effort compared to other cutting options.
Ensure you have a sharp and sturdy masonry chisel, and take caution to avoid hitting the chisel or your hands with excessive force. Work in a well-lit area to clearly see the score line and ensure accurate cutting.
By using a chisel and hammer, you can achieve customized and precise cuts for your landscaping bricks, adding a unique touch to your outdoor space.
Cutting Techniques
When cutting landscaping bricks, it’s important to understand and utilize different cutting techniques depending on the desired outcome of your project. Whether you need straight cuts for a uniform look or angled cuts for unique designs, mastering these techniques will help you achieve professional-grade results. Here are two common cutting techniques:
- Technique 1: Straight Cuts: Straight cuts are commonly used to achieve clean lines and precise fitting of bricks. To make straight cuts, follow these steps:
- – Measure and mark the desired length on the brick, ensuring clear and visible markings.
- – Use a straight edge, such as a ruler or a piece of wood, to create a straight cutting line along the marked measurement.
- – Depending on the cutting option you choose, whether a circular saw, brick splitter, or chisel and hammer, align your tool with the cutting line and make controlled and steady cuts.
- – Repeat the process for each brick, ensuring consistency in your cutting technique for a seamless result.
Mastering the technique of straight cuts will enable you to create neat and professional-looking brickwork.
- Technique 2: Angled Cuts: Angled cuts are often needed to fit bricks together at corners, create curved edges, or achieve complex patterns. To make angled cuts, follow these steps:
- – Measure and mark the desired angle on the brick, using a protractor or angle finder to ensure accuracy.
- – Use a straight edge to connect the appropriate angle measurement to the brick’s edges, forming a clear cutting line.
- – Depending on the cutting option you choose, adjust your tool or technique accordingly to achieve the desired angle.
- – Take your time and make controlled cuts along the marked angle line, ensuring the bricks fit together seamlessly at the desired angle.
Mastering the technique of angled cuts will allow you to bring creativity and customization to your landscaping brick projects.
Practice and patience are key when mastering these cutting techniques. Take the time to familiarize yourself with the tools and materials you’re using, and always prioritize safety throughout the cutting process.
By employing these cutting techniques, you’ll be able to create beautifully crafted brickwork that enhances the aesthetic appeal and functionality of your outdoor space.
Technique 1: Straight Cuts
Straight cuts are a fundamental cutting technique used in landscaping brick projects. Whether you’re creating a patio, walkway, or retaining wall, mastering this technique is essential for achieving clean lines and precise fitting of the bricks.
To make straight cuts, follow these steps:
- Measure and Mark: Measure the desired length on the brick and mark it clearly using a pencil or chalk. Ensure that the markings are visible and aligned with the cutting line.
- Use a Straight Edge: To ensure a straight cutting line, place a straight edge, such as a ruler or a piece of wood, along the marked line. This will guide your cutting tool and help you achieve a clean and accurate cut.
- Select Your Cutting Tool: Depending on the available tools and your preference, choose the appropriate cutting tool for straight cuts. Options include a circular saw with a masonry blade, a brick splitter, or a chisel and hammer.
- Align and Execute the Cut: Align your cutting tool with the marked cutting line. If using a circular saw, activate the saw and guide the blade along the straight edge, ensuring a steady and controlled motion. If using a brick splitter, position the brick correctly and engage the mechanism to apply pressure and split the brick along the line. If using a chisel and hammer, position the chisel along the groove and tap the top with the hammer gradually until the brick splits along the line.
- Repeat and Maintain Consistency: Repeat the process for each brick, ensuring consistency in your cutting technique. This will ensure a seamless result and a professional-looking final product.
Mastering the technique of straight cuts requires practice and attention to detail. It’s important to take your time, especially when using power tools, to ensure accuracy and safety. Always wear appropriate safety gear and keep the work area clean and free from obstructions.
By mastering the technique of straight cuts, you’ll be able to achieve precise and uniform brickwork that enhances the aesthetic appeal and functionality of your outdoor space.
Technique 2: Angled Cuts
Angled cuts are a crucial technique for creating intricate and unique designs with landscaping bricks. Whether you’re fitting bricks together at corners, creating curved edges, or achieving complex patterns, mastering this technique will allow you to bring creativity and customization to your outdoor space.
To make angled cuts, follow these steps:
- Measure and Mark: Measure the desired angle on the brick using a protractor or angle finder. Ensure that the markings are clear and accurately represent the intended angle.
- Use a Straight Edge: Connect the appropriate angle measurement to the edges of the brick using a straight edge. This will create a clear cutting line that guides your cutting tool.
- Select Your Cutting Tool: Based on the available tools and your preference, choose the appropriate cutting tool for making angled cuts. Options include a circular saw with a masonry blade, a brick splitter, or a chisel and hammer.
- Adjust Cutting Technique: Align your cutting tool with the marked cutting line, considering the desired angle. Adjust the cutting technique accordingly to achieve the desired angle. For circular saws, adjust the cutting angle of the saw or adjust the positioning of the brick for angled cuts. For brick splitters, position the brick to acquire the desired angle in the split. For chisel and hammer, adjust the angle at which you strike the chisel to achieve the desired angle in the cut.
- Execute the Cut: Using your chosen cutting tool, make controlled and precise cuts along the marked line that represents the desired angle. Take your time and ensure that each cut is accurate and in line with the intended design.
Mastering the technique of angled cuts requires attention to detail and practice. It’s important to work in a well-lit area, use appropriate safety gear, and take breaks as needed to prevent fatigue and maintain focus.
By mastering the technique of angled cuts, you’ll be able to create stunning and intricate brickwork that adds a unique touch to your landscaping design.
Safety Precautions
When working with tools and cutting landscaping bricks, it’s crucial to prioritize safety to prevent injuries and accidents. Here are some important safety precautions to keep in mind:
- Protective Gear: Always wear appropriate safety gear, including safety goggles to protect your eyes from flying debris, work gloves to protect your hands, and ear protection if you’re using loud machinery. Additionally, consider wearing a protective mask to prevent inhaling dust particles.
- Read the Instructions: Before using any power tools, carefully read and understand the manufacturer’s instructions. Familiarize yourself with the proper usage, safety precautions, and maintenance procedures for each tool.
- Secure Your Work Area: Clear your work area of any potential hazards, such as plants, furniture, or debris. Ensure that the workspace is well-lit, clean, and free from any tripping or slipping hazards.
- Sharp Tools: Maintain sharp cutting tools to ensure efficient and safe cutting. Dull tools can lead to accidents and require more force, increasing the risk of injuries. Regularly inspect and sharpen your tools as necessary.
- Proper Handling: Handle tools with care, keeping a firm grip and using them only for their intended purposes. Avoid carrying tools by their power cords and never leave them unattended while they are still running.
- Controlled Cutting: Maintain proper control and stability when cutting bricks. Exercise caution with power tools and ensure that the blade or mechanism is properly aligned before making any cuts. Avoid forcing or rushing the cutting process.
- Work with a Buddy: When handling heavy materials or using power tools, consider having someone else present as a safety precaution. This person can help stabilize materials and provide assistance if an accident occurs.
- Clean as You Go: Regularly clean up any debris and dust that may accumulate during the cutting process. This will help maintain a safe working environment and prevent slips or falls.
- Take Breaks: Take regular breaks to avoid fatigue and maintain focus. Cutting bricks can be physically demanding work, and taking breaks can help prevent accidents caused by lack of concentration or exhaustion.
Always prioritize safety when working with tools and cutting landscaping bricks. By adhering to these safety precautions, you can minimize the risk of accidents and injuries, allowing you to complete your project safely and successfully.
Conclusion
Cutting landscaping bricks is a valuable skill that allows you to create beautiful and precise designs in your outdoor space. By following the right techniques and using the appropriate tools, you can achieve professional-grade results.
In this comprehensive guide, we explored various cutting options, such as using a circular saw, brick splitter, or a chisel and hammer. Each method offers its own advantages and considerations, allowing you to choose the best option based on your project needs and available tools.
We also discussed essential preparation steps, including measuring and marking the bricks accurately, as well as safety precautions that should be taken to ensure a safe cutting process. Proper preparation and adherence to safety guidelines will help you complete your project without any accidents or injuries.
Whether you’re making straight cuts for a uniform appearance or angled cuts for intricate designs, mastering these cutting techniques will enable you to achieve the desired look for your landscaping project.
Remember to use proper safety gear, read instructions carefully, and exercise caution throughout the cutting process. Take breaks as needed and maintain a clean and organized work area to prevent accidents and ensure a smooth workflow.
By honing your skills in cutting landscaping bricks and following the tips and techniques outlined in this guide, you’ll be able to bring your landscaping visions to life with precision and creativity.
So, grab your tools, put on your safety gear, and get ready to transform your outdoor space into a stunning oasis with beautifully cut landscaping bricks!