Home>Types of Gardening>Ornamental Gardening>How To Plant Cut Sunflowers
Ornamental Gardening
How To Plant Cut Sunflowers
Modified: January 22, 2024
Learn the art of ornamental gardening with our step-by-step guide on how to plant cut sunflowers. Transform your garden into a vibrant oasis with these beautiful, easy-to-grow flowers.
(Many of the links in this article redirect to a specific reviewed product. Your purchase of these products through affiliate links helps to generate commission for Chicagolandgardening.com, at no extra cost. Learn more)
Table of Contents
Introduction
Welcome to the world of ornamental gardening! If you’re looking to add a touch of vibrant color and beauty to your garden, then growing sunflowers is the perfect way to do so. These majestic flowers not only bring joy and a sense of cheerfulness, but they also attract pollinators like bees and butterflies, making them a wonderful addition to any garden.
Sunflowers are easy to grow and are known for their tall, sturdy stalks and large, striking blooms. They come in a variety of sizes and colors, from the classic yellow to vibrant reds and oranges. Whether you have a spacious backyard or a small balcony, sunflowers can be grown in pots, containers, or directly in the ground, making them a versatile choice for any gardener.
In this article, we will guide you through the process of planting cut sunflowers, from choosing the right varieties to harvesting and enjoying their glorious blooms. Whether you’re a seasoned gardener or a beginner, you’ll find the tips and techniques outlined here valuable in creating a stunning sunflower display.
So, roll up your sleeves, grab your gardening tools, and let’s dive into the world of planting cut sunflowers!
Choosing the Right Sunflower Varieties
When it comes to selecting sunflower varieties for your garden, there are a few factors to consider. First, determine the purpose of your sunflowers. Are you looking for tall and majestic sunflowers to create a backdrop in your garden? Or do you prefer smaller, compact varieties for container gardening or borders?
There are three main categories of sunflowers to choose from:
- Traditional Sunflowers: These are the iconic, large-headed sunflowers that reach heights of 6 to 12 feet. They are a popular choice for creating a stunning visual impact in the garden. Varieties like ‘Russian Giant’ and ‘American Giant’ are well-known examples.
- Dwarf Sunflowers: If space is limited or you prefer smaller plants, dwarf sunflowers are the way to go. These compact varieties grow to heights of around 1 to 3 feet and are perfect for containers or borders. Check out ‘Sunspot’ or ‘Teddy Bear’ for adorable dwarf sunflowers.
- Multipurpose Sunflowers: As the name suggests, these sunflowers offer a balance between height and size. Standing at 3 to 6 feet tall, they are versatile and work well in various garden settings. ‘Autumn Beauty’ and ‘Mammoth Grey Stripe’ are popular choices in this category.
Consider the color of the sunflower blooms as well. While yellow is the classic choice, sunflowers also come in captivating shades of red, orange, and even bi-color combinations. Think about how the colors will complement your existing garden palette or if you want to create a bold, contrasting display.
Another important aspect to consider is the maturity time of the sunflowers. Some varieties reach maturity in as little as 60 days, while others may take up to 100 days or more. If you live in a region with a short growing season, opt for early-maturing varieties to ensure a successful bloom before the end of the season.
Ultimately, choose sunflower varieties that align with your preferences and the specific requirements of your garden. The variety options are vast, so take your time, explore catalogs or online resources, and envision the stunning sunflower display you want to create.
Preparing the Planting Area
Before planting sunflowers, it’s crucial to prepare the planting area properly. Sunflowers require a sunny location with well-drained soil to thrive and reach their full potential. Here are the steps to prepare the planting area:
- Choose a sunny spot: Sunflowers need at least 6-8 hours of direct sunlight daily. Select a spot in your garden that receives ample sunlight throughout the day.
- Clear the area: Remove any weeds, rocks, or debris from the chosen planting area. Sunflowers thrive best when they have access to an unobstructed growing space.
- Loosen the soil: Use a garden fork or a tiller to loosen the soil to a depth of 12-15 inches. This will allow the sunflower roots to penetrate easily and promote healthy plant growth.
- Improve soil fertility: If your soil is lacking in nutrients, amend it with organic matter such as compost or well-rotted manure. This will enrich the soil and provide the necessary nutrients for robust sunflower growth.
- Level the soil: Rake the soil to create a smooth and even surface. This will ensure that water is distributed evenly and prevent water pooling around the sunflowers.
It’s important to note that sunflowers are known for their ability to tolerate a wide range of soil conditions, including sandy or slightly acidic soil. However, they prefer soil that is well-drained to avoid waterlogged conditions, which can lead to root rot.
If you are planting sunflowers in containers or pots, choose a container with adequate drainage holes to prevent waterlogging. Use a good-quality potting mix that is lightweight and well-draining.
By preparing the planting area properly, you create an optimal environment for your sunflowers to grow and thrive. Taking the time to prepare the soil ensures that your sunflowers have a strong foundation for healthy and robust growth.
Germinating Sunflower Seeds
The first step in growing sunflowers from scratch is to germinate the seeds. This process involves providing the seeds with the optimal conditions to sprout and develop into seedlings. Here’s how to germinate sunflower seeds:
- Choose high-quality seeds: Start with fresh sunflower seeds from a reputable source. Look for seeds that are plump, firm, and free from any signs of damage or mold.
- Soak the seeds (optional): To speed up the germination process, you can soak the sunflower seeds in warm water for 12-24 hours before planting. This softens the seed coat and helps with quicker sprouting.
- Prepare seed-starting trays or pots: Fill seed-starting trays or small pots with a well-draining seed-starting mix. Moisten the mix slightly so that it’s damp but not waterlogged.
- Plant the seeds: Make a small indentation in the soil (about 1 inch deep) and place a sunflower seed in each indentation. Cover the seeds with soil and gently press it down. Aim for a spacing of 6-12 inches between each seed, depending on the variety.
- Provide warmth and moisture: Place a plastic dome or cover over the trays or pots to create a greenhouse-like environment. This helps to trap moisture and heat, promoting seed germination. Keep the soil consistently moist but avoid overwatering, as this can lead to rotting.
- Ensure proper lighting: Once the seeds have sprouted and the seedlings emerge, remove the plastic cover and place the trays or pots in a well-lit area. Sunflowers require full sunlight, so a south-facing window or a sunny spot in the garden is ideal.
- Thin out seedlings: If multiple seedlings emerge from the same seed, thin them out by snipping off the weaker ones at the soil level. This allows the remaining seedlings to grow stronger and reduces competition for resources.
Within 7-10 days, you should start to see the sunflower seedlings emerge from the soil. As they grow, make sure to water them regularly, keeping the soil evenly moist throughout the germination and early growth stages.
By following these steps, you can successfully germinate sunflower seeds and set the stage for healthy seedlings. Soon, you’ll witness the beauty of your sunflowers as they grow and develop into magnificent plants.
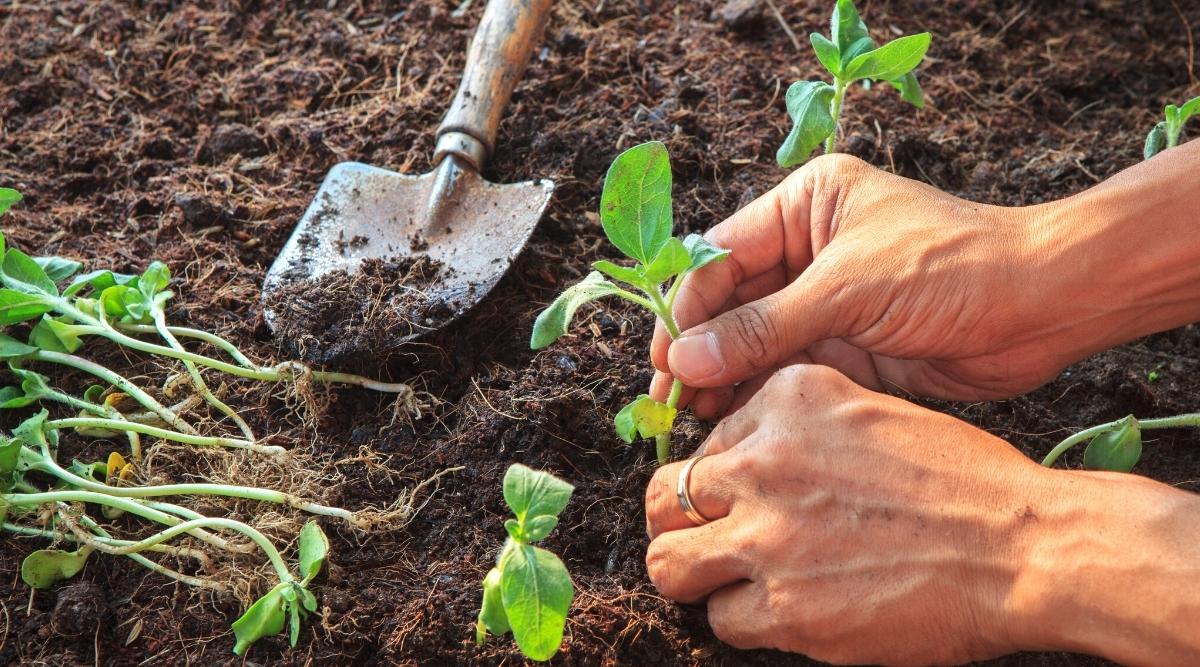
Transplanting Sunflower Seedlings
Once your sunflower seedlings have grown to a height of about 4-6 inches and have developed a few sets of true leaves, it’s time to transplant them into their permanent location in the garden. Transplanting sunflower seedlings allows them to have more space to grow and thrive. Follow these steps to ensure a successful transplant:
- Choose the right time: Wait until all risk of frost has passed and the soil has warmed up before transplanting your sunflower seedlings. This is usually around 2-3 weeks after the last frost date in your area.
- Prepare the planting holes: Dig a hole in the garden that is slightly larger than the root ball of your sunflower seedling. Space the holes according to the recommended spacing for the specific sunflower variety you are planting.
- Remove the seedlings gently: Carefully remove the sunflower seedlings from their pots or trays, making sure to handle them by the leaves, not the stem. This helps to prevent damage to the delicate stem and roots.
- Place the seedlings in the holes: Position each sunflower seedling in its respective planting hole, making sure that the top of the root ball is level with or slightly above the soil surface. Gently backfill the hole with soil, firming it around the base of the seedling to provide stability.
- Water the transplanted seedlings: After transplanting, give the seedlings a thorough watering to settle the soil around the roots and provide hydration. Be careful not to overwater, as excessively wet soil can lead to root rot.
- Provide support (if necessary): If you are growing tall varieties of sunflowers, such as the traditional or multipurpose types, it’s a good idea to provide support to prevent them from toppling over in strong winds. Stake the seedlings using bamboo stakes or install a trellis for them to lean against as they grow.
Keep an eye on the transplanted seedlings during the first few days after transplanting. Watch for any signs of stress or wilting, and water as needed to ensure they have adequate moisture. The sunflower seedlings will gradually adjust to their new location and continue to grow and flourish.
By following these transplanting guidelines, you can give your sunflower seedlings the best chance of thriving in their new home. Soon, you’ll be rewarded with tall, sturdy sunflower stalks and vibrant blooms that will bring joy and beauty to your garden.
Direct Sowing Sunflower Seeds
If you prefer a more hands-on approach and want to skip the step of starting sunflower seeds indoors, you can directly sow the seeds into the garden. Direct sowing is a simple and rewarding method, especially for those with ample garden space. Here’s how to sow sunflower seeds directly into the ground:
- Choose the right time: Wait until all danger of frost has passed and the soil has warmed up before sowing sunflower seeds directly. This is typically in late spring or early summer.
- Prepare the soil: Clear the area of any weeds, rocks, or debris. Loosen the soil to a depth of about 6-8 inches using a garden fork or a tiller. This allows the sunflower roots to penetrate the soil easily.
- Sow the seeds: Dig small holes or furrows in the soil, spaced according to the recommended spacing for the sunflower variety you are planting. Drop a sunflower seed into each hole and cover it with about 1 inch of soil. Alternatively, you can scatter the seeds in the furrow and then cover them with soil.
- Water the seeds: After sowing, water the area gently but thoroughly to ensure good seed-to-soil contact. This will help initiate the germination process for the sunflower seeds.
- Provide protection: Depending on your local climate and garden conditions, you may want to protect the newly sown seeds from birds or other animals. Consider using a mesh or netting to cover the area until the seedlings reach a more robust stage.
- Thin out seedlings: Once the sunflower seedlings emerge and grow a few inches tall, thin them out to provide sufficient space for each plant to grow. Maintain the recommended spacing according to the variety you are growing.
Direct sowing sunflower seeds directly into the garden gives the plants a chance to establish themselves in their permanent location from the start. This method works particularly well for larger garden spaces or when you want a more natural and organic approach to growing sunflowers.
Keep the soil consistently moist but not waterlogged during the germination and seedling stages. As the sunflowers grow, monitor their progress and water as needed to support their growth and development. Provide support, such as stakes or trellises, if growing taller sunflower varieties to prevent them from bending or toppling over in strong winds.
By following these steps and nurturing the sunflower seedlings as they emerge, you can enjoy the excitement of watching your sunflowers grow from tiny seeds into majestic plants, adding beauty and vibrancy to your garden.
Providing Proper Sunflower Care
To ensure healthy growth and abundant blooms, sunflowers require proper care throughout their growing season. By providing the following care tips, you can help your sunflowers reach their full potential:
- Watering: Sunflowers have a deep root system and can tolerate some drought, but regular watering is crucial, especially during dry spells. Water the plants deeply once a week, providing about 1 inch of water. Avoid overwatering, as excess moisture can lead to root rot.
- Mulching: Applying a layer of organic mulch around the base of the sunflowers helps to retain moisture, regulate soil temperature, and suppress weeds. Use materials like straw, wood chips, or dried leaves to create a mulch layer about 2-3 inches thick.
- Fertilizing: Sunflowers can thrive in moderately fertile soil, but if your soil lacks nutrients, you can apply a balanced fertilizer, such as a 10-10-10 or 5-10-10 formula, during planting. Remember to follow the manufacturer’s instructions for proper application rates.
- Support: Taller sunflower varieties may require additional support to prevent them from bending or toppling over. Stake the plants using bamboo stakes or install a trellis nearby for the sunflower stalks to lean against as they grow.
- Pruning: Sunflowers generally do not require pruning, but if you notice any damaged or diseased leaves or flower heads, it’s best to remove them promptly. This helps to improve air circulation and prevent the spread of diseases.
- Deadheading: After your sunflowers have bloomed, you can deadhead the spent flower heads to promote additional blooms or to prevent the plant from producing seeds. Simply cut off the faded flower heads just below the base and discard them.
- Pest and disease management: While sunflowers are relatively resistant to pests and diseases, occasional issues may arise. Keep an eye out for common pests like aphids or caterpillars and take appropriate measures, such as using organic insecticides or employing natural pest control methods. If you notice signs of disease, such as fungal spots or wilting, remove the affected parts or treat the plants with appropriate fungicides.
Regular monitoring, along with proper watering, fertilizing, and protection against pests and diseases, will help keep your sunflowers healthy and thriving. With proper care, your sunflowers will reward you with a stunning display of vibrant blooms that will be the envy of your garden.
Harvesting and Enjoying Sunflowers
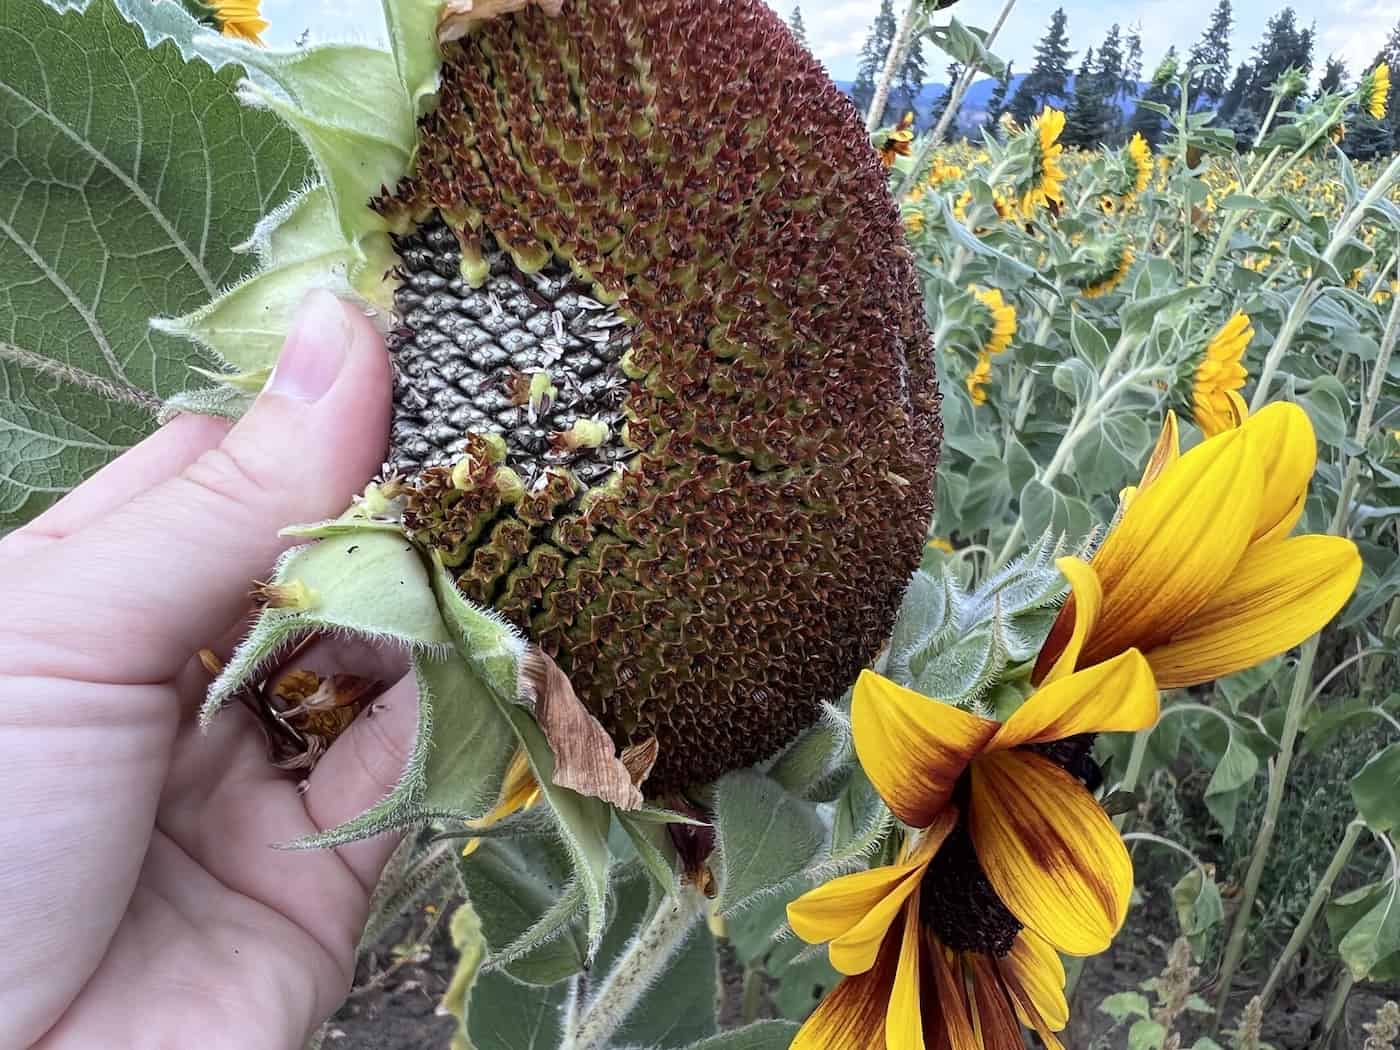
Once your sunflowers have reached maturity and their brilliant blooms have brought joy to your garden, it’s time to harvest and enjoy the fruits of your labor. Harvesting sunflowers not only allows you to enjoy their beauty indoors but also gives you the opportunity to collect the seeds for future planting or culinary use. Here’s how to harvest and enjoy sunflowers:
- Timing: Sunflowers are ready for harvest when the petals have wilted, and the back of the flower head has turned yellow or brown. The center disk of the flower head should be firm and dry to the touch.
- Prepare cutting tools: Use clean and sharp gardening shears or pruners to cut the sunflower stalks. You can also leave a longer stem if you plan to display the cut sunflowers in a vase.
- Cut the sunflower stalks: Cut the stalks of the sunflowers about 12-18 inches below the flower head. This provides enough stem length for arranging in vases or floral decorations.
- Drying the flower heads: Hang the harvested sunflower heads upside down in a well-ventilated area, such as a dry and warm room or a covered porch. Allow the flower heads to dry completely for about 2-3 weeks.
- Collecting seeds: Once the sunflower heads are thoroughly dry, it’s time to collect the seeds. Gently rub or shake the flower heads to dislodge the seeds. You can remove the larger seeds by hand and use a sieve or colander to separate them from smaller debris.
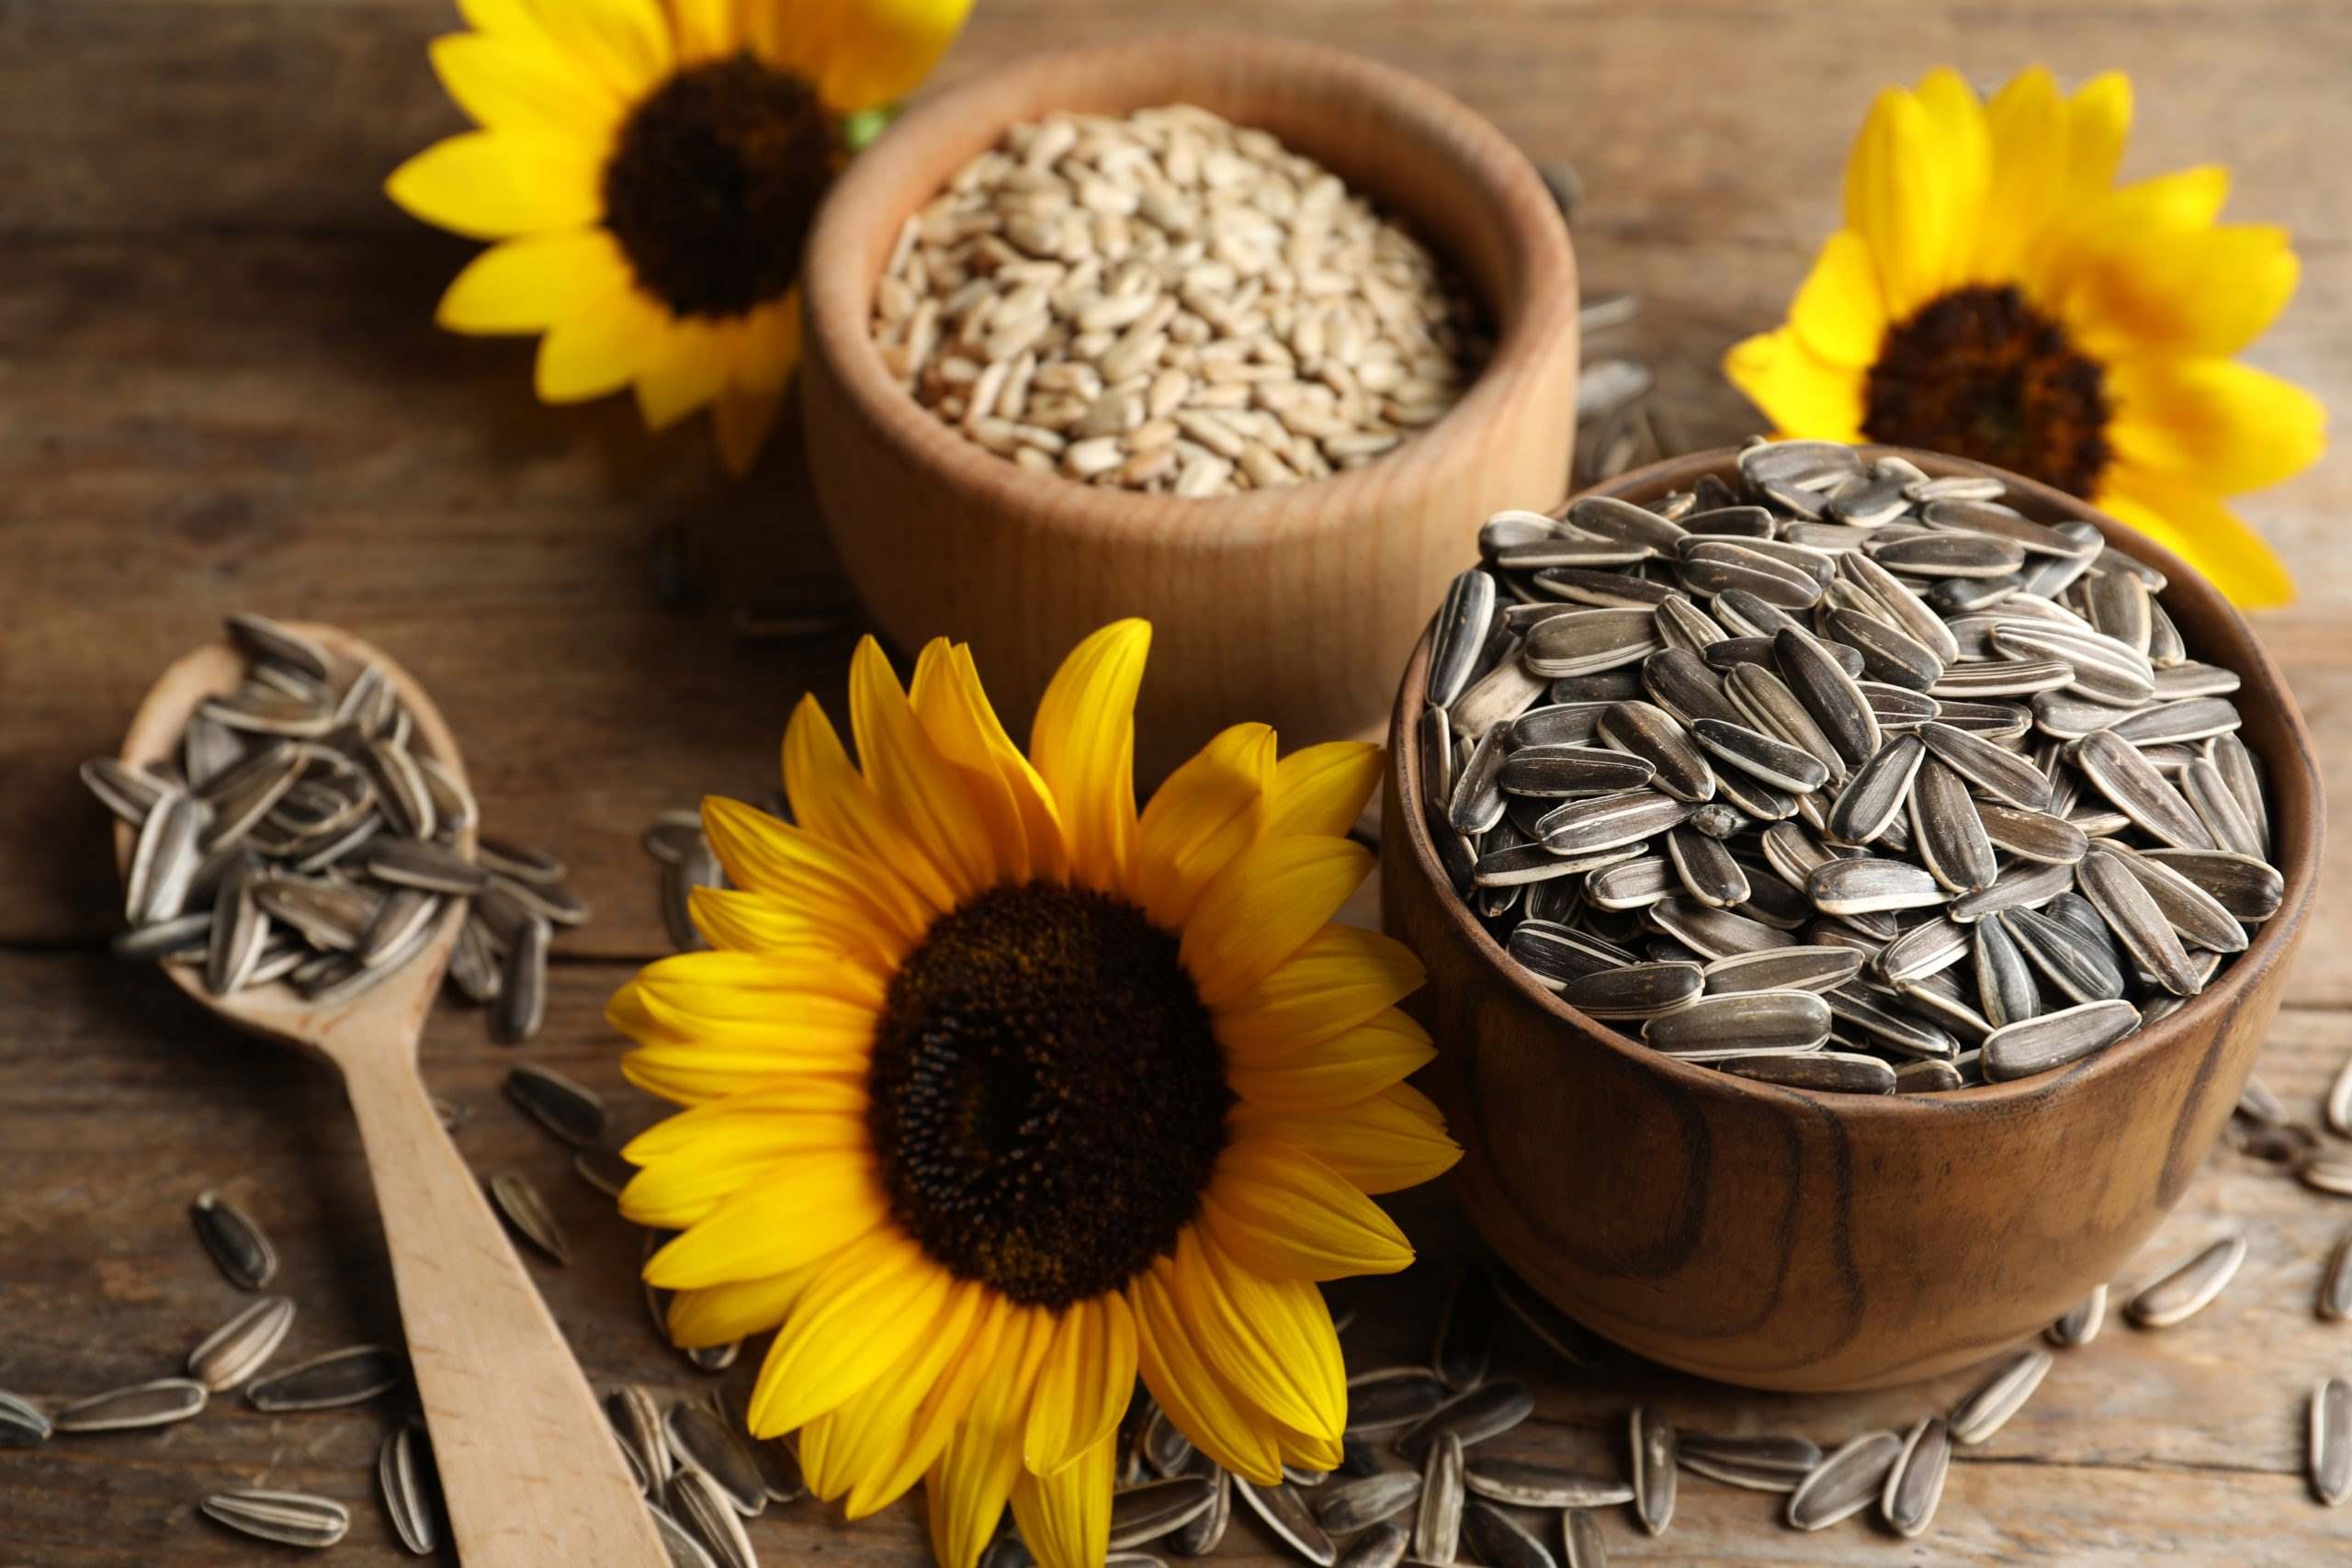
- Storing the seeds: Store the sunflower seeds in a cool, dry place in an airtight container or a paper bag. Properly stored seeds can remain viable for planting for up to a year.
- Using sunflower seeds: Sunflower seeds can be enjoyed as a nutritious snack, added to salads, baked into bread or muffins, or used in various recipes. They are packed with healthy fats, protein, and essential nutrients.
- Decorating with dried sunflowers: Dried sunflower heads can be used to create charming rustic decorations. You can display them as they are or use them in wreaths, floral arrangements, or other craft projects.
Whether you choose to use your sunflowers for culinary purposes, decorate your home, or save the seeds for future planting, harvesting them is a rewarding experience. Enjoy the vibrant beauty and the versatility of sunflowers both inside and outside of your garden.
Conclusion
Growing and caring for sunflowers is a delightful journey that brings beauty, color, and joy to any garden. Whether you choose to plant cut sunflowers to admire their stunning blooms or to harvest their seeds for future use, the process is rewarding and enjoyable.
From choosing the right varieties to preparing the planting area, germinating the seeds, and providing proper care, each step plays a vital role in the success of your sunflower garden. Selecting the appropriate sunflower varieties allows you to create the desired visual impact, while preparing the planting area and providing proper care ensure healthy growth and abundant blooms.
Whether you opt for transplanting seedlings or direct sowing the seeds, each method offers its own advantages and can suit different preferences and garden spaces. Once your sunflowers begin to bloom, you can enjoy their vibrant colors and fascinating structures while attracting beneficial pollinators to your garden.
Harvesting and enjoying sunflowers adds another level of satisfaction to your gardening experience. From cutting and drying the flower heads to collecting and storing the seeds, the harvest provides opportunities for culinary use, decorative creations, or future planting.
So, whether you’re a seasoned gardener or a beginner, embrace the world of planting cut sunflowers and let your garden come alive with the beauty and charm of these remarkable flowers. With a little love, care, and attention, your sunflower garden will flourish and become a captivating haven for both you and nature’s most cherished visitors.