Home>Types of Gardening>Ornamental Gardening>How To Propagate Shrubs From Cuttings
Ornamental Gardening
How To Propagate Shrubs From Cuttings
Modified: January 22, 2024
Learn how to propagate shrubs from cuttings with this comprehensive guide on ornamental gardening. Start growing your own beautiful plants today!
(Many of the links in this article redirect to a specific reviewed product. Your purchase of these products through affiliate links helps to generate commission for Chicagolandgardening.com, at no extra cost. Learn more)
Table of Contents
Introduction
Welcome to the world of ornamental gardening, where the beauty of nature meets the art of crafting stunning landscapes. One of the most rewarding aspects of ornamental gardening is the ability to propagate shrubs from cuttings. This technique allows you to create new plants from existing ones, expanding your garden without having to rely on purchasing new shrubs. Whether you’re a beginner or a seasoned gardener, propagating shrubs from cuttings is a valuable skill to learn.
Imagine transforming a single shrub into a multitude of thriving plants, each adding charm and vibrancy to your garden. With a little knowledge and some patience, you can easily propagate a wide variety of shrubs, from flowering beauties to foliage favorites.
In this article, we will guide you through the process of propagating shrubs from cuttings, from preparing the cuttings to eventually transplanting them into your garden. With some basic equipment and a little bit of know-how, you’ll be well on your way to expanding your plant collection.
Not only is propagating shrubs from cuttings a cost-effective way to add plants to your garden, but it also allows you to preserve the unique characteristics of a specific shrub. By propagating from cuttings, you can ensure that the new plants will retain the qualities that made the original shrub a standout in your garden.
Before we dive into the step-by-step process of propagating shrubs from cuttings, let’s take a closer look at some of the benefits of this technique:
- Cost-effective: Propagating shrubs from cuttings eliminates the need to purchase new plants, saving you money in the long run.
- Preservation of desired traits: By propagating from cuttings, you can ensure that the new plants inherit the desirable characteristics of the parent shrub, such as flower color, foliage texture, or growth habit.
- Increased garden diversity: Propagating from cuttings allows you to expand your plant collection with a variety of shrubs, contributing to the overall diversity and beauty of your garden.
- Personal satisfaction: Successfully propagating shrubs from cuttings can be a fulfilling and rewarding experience, increasing your confidence as a gardener.
Step 1: Prepare the cutting
Before you can begin propagating shrubs from cuttings, it’s essential to select a healthy parent plant and prepare the cutting properly. Follow these steps:
- Select a healthy parent plant: Choose a shrub that is vigorous and free from any signs of disease or pest infestation. Look for plants with strong stems and lush foliage.
- Timing: The best time to take cuttings is during the plant’s active growth period, typically in spring or early summer. This is when the shrub is producing new growth and is more likely to root successfully.
- Choose the right cutting: Select a stem that is young and flexible, about 4-6 inches long. It should have at least 2-3 pairs of healthy leaves.
- Prepare your tools: Use clean and sharp pruning shears or a knife to make a clean cut. Dirty or dull tools can damage the cutting and increase the risk of infection.
- Remove lower leaves: Strip the lower leaves from the bottom 2 inches of the cutting. This will create a clean stem that can be inserted into the rooting medium.
- Optional: Use a rooting hormone: Applying a rooting hormone to the cut end of the stem can help stimulate root growth. Choose a powder or gel rooting hormone and follow the instructions for application.
By taking the time to properly prepare your cutting, you are setting the stage for successful propagation. Remember to handle the cutting with care to avoid damaging the delicate root-forming tissues.
Step 2: Rooting hormone application
Once you have prepared the cutting, you have the option to apply a rooting hormone. While not mandatory, using a rooting hormone can significantly increase the chances of successful root development. Here’s how you can apply the rooting hormone:
- Choose the right rooting hormone: There are different types of rooting hormones available in powder, gel, or liquid form. Select a rooting hormone suitable for woody plant cuttings to ensure optimal results.
- Dip the cutting: Pour a small amount of the rooting hormone into a clean container. Take the prepared cutting and dip the cut end into the rooting hormone, making sure to cover about an inch of the stem.
- Tap off excess: Gently tap the cutting to remove any excess rooting hormone. You want a thin and even coating on the stem, as applying too much can hinder root development.
- Dispose of unused rooting hormone: If you have any leftover rooting hormone in the container, discard it. Do not return it to the original container, as it may become contaminated.
The rooting hormone contains substances that help stimulate root formation and enhance the cutting’s ability to develop new roots. It acts as a boost for the cutting, increasing its chances of successfully rooting and establishing itself as a new plant.
While using a rooting hormone is not necessary, it can be especially beneficial for woody shrubs or plants that are known to be difficult to propagate. It is important to note that the rooting hormone is not a guarantee of success, but rather a tool that can increase the chances of successful root formation.
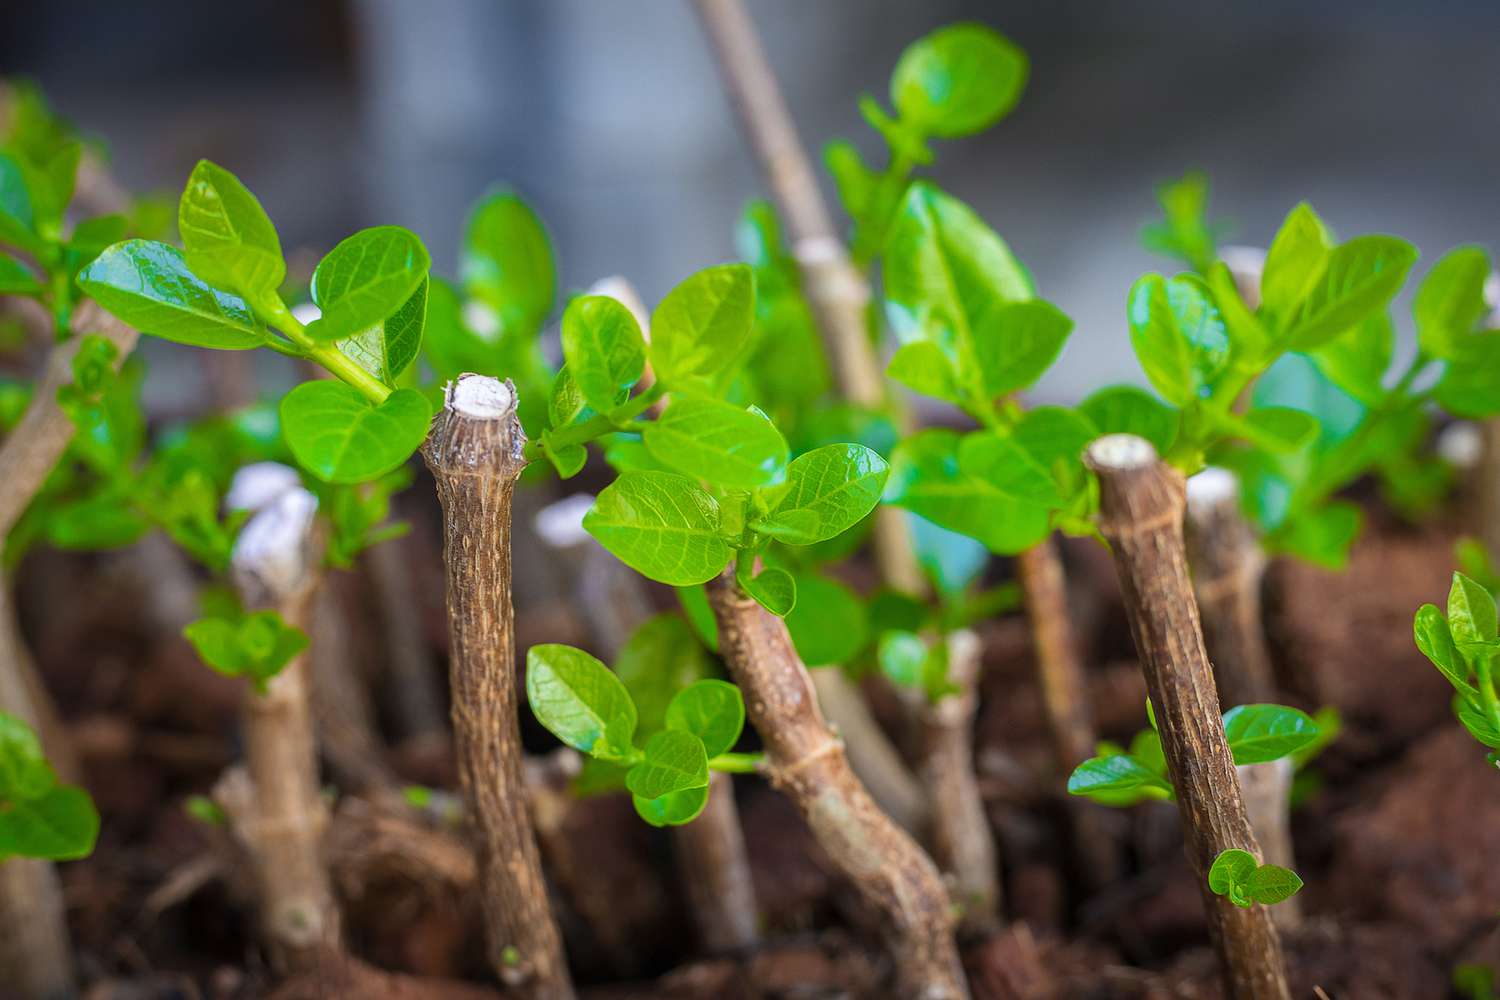
Step 3: Planting the cutting
After preparing the cutting and applying the rooting hormone, it’s time to plant it in a suitable medium that will encourage root development. Follow these steps to effectively plant the cutting:
- Select the right planting medium: Use a well-draining and lightweight medium, such as a mixture of equal parts perlite and peat moss or a pre-packaged seed starting mix. Avoid heavy soils that may retain too much moisture and lead to rotting.
- Prepare the container: Fill a clean pot or tray with the planting medium, leaving about an inch of space at the top. Moisten the medium slightly to create a suitable environment for the cutting.
- Make a hole for the cutting: Use a pencil or your finger to create a hole in the planting medium that is deep enough to accommodate the cutting. Make sure the hole is wide enough for the stem without damaging it.
- Insert the cutting: Carefully place the cut end of the stem into the prepared hole, ensuring that at least two nodes or leaf pairs are below the surface of the medium. Gently firm the medium around the base of the cutting to hold it in place.
- Space the cuttings: If you are planting multiple cuttings, ensure proper spacing between them to allow for air circulation and prevent the spread of disease.
Planting the cutting in a suitable medium provides the necessary support and moisture for the development of new roots. The lightweight nature of the medium helps prevent the cutting from becoming waterlogged, reducing the risk of rot.
Once the cutting is planted, ensure that it is secure in the medium and that the nodes or leaf pairs are properly buried. These are the areas where new roots will emerge, so proper placement is crucial for successful root development.
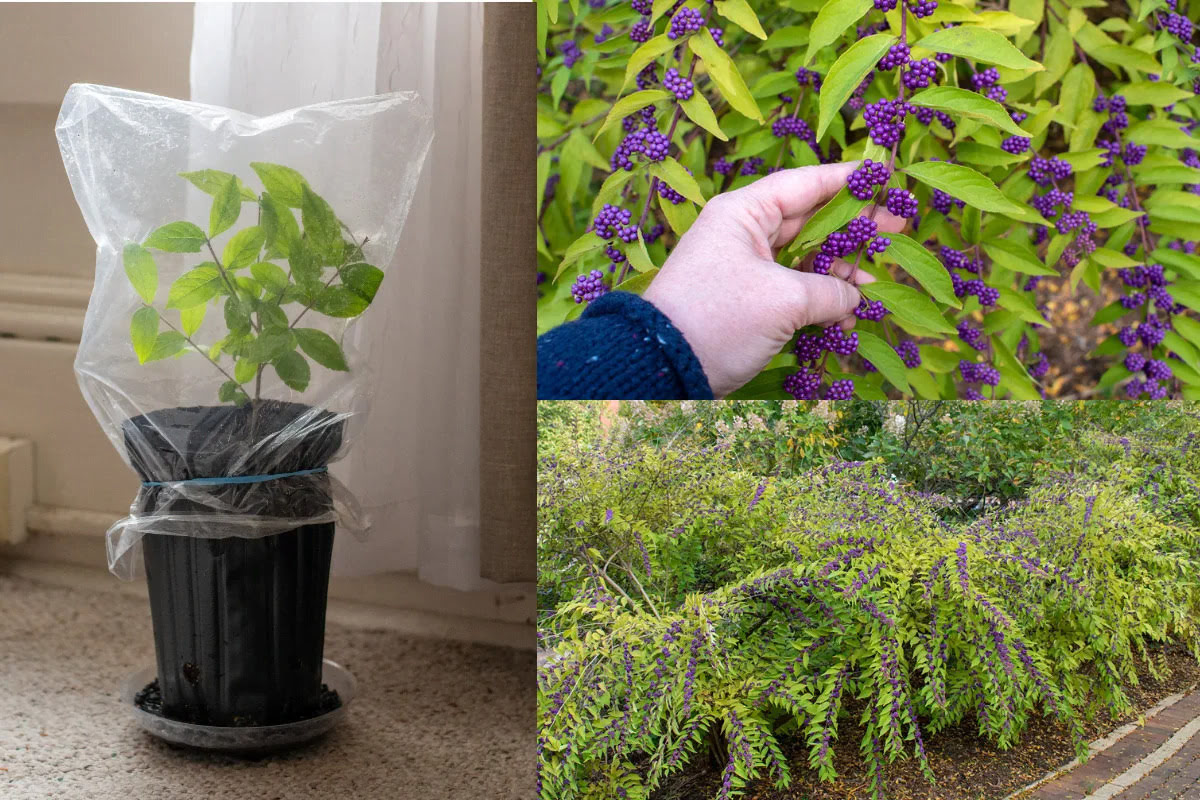
Step 4: Provide the right environment
Creating the ideal environment for your newly planted cuttings is essential for their successful rooting and growth. Here’s how you can provide the right conditions:
- Temperature: Most shrub cuttings root best in temperatures between 65°F and 75°F (18°C and 24°C). Ensure that the cuttings are kept in a warm and stable environment to promote root development.
- Humidity: Cuttings thrive in a humid environment, as it helps prevent excessive moisture loss and aids in root development. You can increase humidity by placing a clear plastic bag or a propagator cover over the cuttings, creating a mini greenhouse effect.
- Light: While most cuttings benefit from bright, indirect light, they should not be exposed to direct sunlight, as it can cause excessive heat buildup and damage the delicate new growth. Place the cuttings in a spot that receives bright, filtered light throughout the day.
- Watering: Proper moisture levels are crucial for successful rooting. Keep the planting medium consistently moist but not waterlogged. Check the moisture level regularly and water when the top inch of the medium feels slightly dry. Avoid overwatering, as it can lead to rotting.
- Air circulation: Adequate air circulation helps prevent the development of fungal diseases. Ensure that there is enough space between the cuttings and provide gentle air movement, either through natural ventilation or by using a fan on a low setting.
By creating the right environment, you are providing the optimal conditions for the cuttings to develop roots and establish themselves as new plants. Keep a close eye on the temperature, humidity, light, and moisture levels to ensure that the cuttings have the best chance of success.
Remember, each plant may have slightly different preferences, so it’s important to research the specific requirements of the shrub you are propagating to provide the most suitable environment.
Step 5: Monitor and care for the cutting
Once the cuttings are planted and placed in the right environment, it’s crucial to monitor their progress and provide proper care. Follow these tips to ensure the success of your propagated shrubs:
- Monitor moisture levels: Check the moisture level of the planting medium regularly. Maintain consistent moisture by watering whenever the top inch of the medium feels slightly dry. Avoid overwatering, as it can lead to rotting.
- Inspect for disease or pests: Keep a close eye on the cuttings for any signs of disease or pest infestation. Remove any affected leaves or cuttings promptly to prevent the spread of issues.
- Provide light: Ensure that the cuttings receive bright, indirect light throughout the day. Consider using supplemental grow lights if natural light is limited.
- Adjust humidity: As the cuttings begin to root and develop, gradually open the propagation cover or remove the plastic bag to acclimate them to lower humidity levels. This will help prevent the risk of fungal diseases.
- Fertilize sparingly: Once the cuttings have rooted and started to grow, you can begin applying a diluted, balanced fertilizer. Use it sparingly to avoid overfeeding the young plants.
- Transplant as needed: As the roots develop and fill the container, it may be necessary to carefully transplant the cuttings into larger pots or directly into the garden. Ensure the new planting location provides the right conditions for the specific shrub.
Monitoring and caring for the cuttings require patience and attention to detail. By regularly assessing their needs and providing the necessary care, you are giving your propagated shrubs the best chance of thriving.
Remember that each plant may have specific care requirements, so research the particular shrub you are propagating for more detailed guidelines.
Step 6: Transplanting the rooted cutting
Once the cuttings have rooted and developed into healthy young plants, it’s time to transplant them into their permanent growing location. Transplanting gives the shrubs more space to grow and allows them to thrive. Follow these steps for successful transplanting:
- Select the right location: Choose a planting spot that provides the optimal growing conditions for the specific shrub, including the right amount of sunlight, soil type, and drainage.
- Prepare the soil: Ensure that the soil in the planting hole is well-draining and enriched with organic matter. Remove any weeds or debris and loosen the soil to allow the roots to establish easily.
- Remove the cutting from the container: Gently tap the container to loosen the root ball, then carefully lift the plant out, supporting the stem near the base. If the roots are tightly wound, gently tease them apart to encourage outward growth.
- Plant at the right depth: Dig a hole slightly larger than the root ball of the cutting. Place the shrub in the hole, ensuring that it is planted at the same depth as it was in the container. Backfill the hole with soil, firming it gently around the base of the plant.
- Water thoroughly: After transplanting, give the shrub a generous amount of water to help settle the soil and provide hydration to the roots. Continue to water regularly for the first few weeks to establish the plant.
- Mulch the area: Apply a layer of organic mulch around the base of the shrub to help retain soil moisture and suppress weeds. Ensure that the mulch does not touch the stem to prevent rotting.
Transplanting rooted cuttings is an exciting moment, as it marks the transition of your propagating efforts to a permanent home in your garden. Take care to provide the right conditions, including proper soil preparation and watering, to ensure the successful establishment of the shrubs.
Remember to monitor the new transplants closely and continue to provide appropriate care as they adapt to their new surroundings. With time and attention, your propagated shrubs will grow and flourish, adding beauty and character to your garden.
Conclusion
Congratulations! You have successfully learned the art of propagating shrubs from cuttings. By following the step-by-step process, from preparing the cutting to transplanting the rooted shrub, you have gained the knowledge and skills to expand your garden in a cost-effective and rewarding way.
Propagating shrubs from cuttings not only allows you to increase your plant collection without breaking the bank, but it also helps preserve the desired traits of your favorite shrubs. The ability to propagate shrubs from cuttings gives you the creative freedom to explore different varieties and create a diverse and captivating ornamental garden.
Remember, each shrub may have unique requirements, so it’s important to research and understand the specific needs of the plants you are propagating. Pay attention to factors such as timing, selection of cuttings, use of rooting hormone, and creating the right environment for successful root development.
By monitoring and caring for the cuttings throughout their growth journey, you increase their chances of thriving and establishing themselves as healthy, vibrant shrubs. From adjusting humidity levels and providing adequate light to ensuring proper watering and fertilization, your attention to detail will play a crucial role in their success.
Once your cuttings have developed into rooted plants, the final step is transplanting them into their permanent locations. This allows them to flourish and add beauty to your garden for years to come.
Now, armed with the knowledge and skills of propagating shrubs from cuttings, get ready to create an ornamental garden that reflects your personal style and gardening expertise. Experiment with different shrub varieties, combine them with other plants, and watch your garden come alive with colors, textures, and fragrances.
So, grab your pruners, gather your enthusiasm, and let the journey of propagating shrubs from cuttings begin. Happy gardening!