Home>Gardening Tips and Tricks>Maximizing Yield>Where To Cut Vines For Propagation

Maximizing Yield
Where To Cut Vines For Propagation
Modified: February 9, 2024
Discover the best techniques for maximizing yield when cutting vines for propagation. Explore where to strategically cut vines to optimize growth and increase your plant's productivity.
(Many of the links in this article redirect to a specific reviewed product. Your purchase of these products through affiliate links helps to generate commission for Chicagolandgardening.com, at no extra cost. Learn more)
Table of Contents
Introduction
When it comes to propagating vines, knowing where to make the right cuts is crucial for successful growth and development. Whether you’re interested in expanding your garden, creating vibrant landscapes, or starting a vineyard, understanding the proper techniques for cutting vines is essential.
Propagating vines offers numerous benefits, including cost savings, the ability to clone your favorite plants, and the opportunity to share your green thumb with others. By cutting and re-rooting vines, you can rapidly multiply your plant collection and maximize your yield.
However, it’s important to note that not all vines are suitable for propagation. Some plants propagate better through other methods, such as division or layering. Before diving into the cutting process, take the time to research and select the right vine species or cultivars for propagation.
This article will guide you through the process of determining where to cut vines for propagation, providing step-by-step instructions and tips to ensure successful growth. From selecting the right vines to creating optimal rooting conditions, you’ll learn how to maximize your yield and create thriving plants.
So grab your gardening gloves and let’s dive into the wonderful world of vine propagation!
Selecting the Right Vines for Propagation
Before you start cutting vines for propagation, it’s important to choose the right ones. Not all vines are suitable for this method, so selecting the appropriate species or cultivars is essential for success.
First, consider the health and vigor of the vine. Look for plants that are disease-free, pest-resistant, and have strong growth habits. These traits indicate that the plant is well-suited for propagation and has a higher chance of thriving.
Additionally, consider the purpose of the vine. Are you looking to propagate for ornamental purposes, to create a dense privacy screen, or for edible fruits? Different vines serve different purposes, so choose ones that align with your gardening goals.
It’s also important to consider the propagation requirements of the vine. Some plants, such as grapes and bougainvillea, root easily and have a high success rate. Others, like wisteria, can be more challenging and may require specific techniques or conditions for successful propagation.
Research the specific requirements of the vine you’re interested in propagating. This includes factors such as optimal cutting length, recommended time of year for cutting, and rooting hormone application. Understanding these details will increase your chances of success.
Finally, if you’re unsure about the suitability of a vine for propagation, consult local horticulture experts or experienced gardeners. Their knowledge and experience can provide valuable insights and advice on which vines are best for your specific growing conditions.
By selecting the right vines for propagation, you set the foundation for successful growth and an abundant yield. So take the time to research and choose wisely before making the first cut.
Tools and Materials Needed
Before you begin cutting vines for propagation, gather the necessary tools and materials to ensure a smooth and effective process. Having the right equipment on hand will make your job easier and increase your chances of successful rooting.
Here are some essential tools and materials you’ll need:
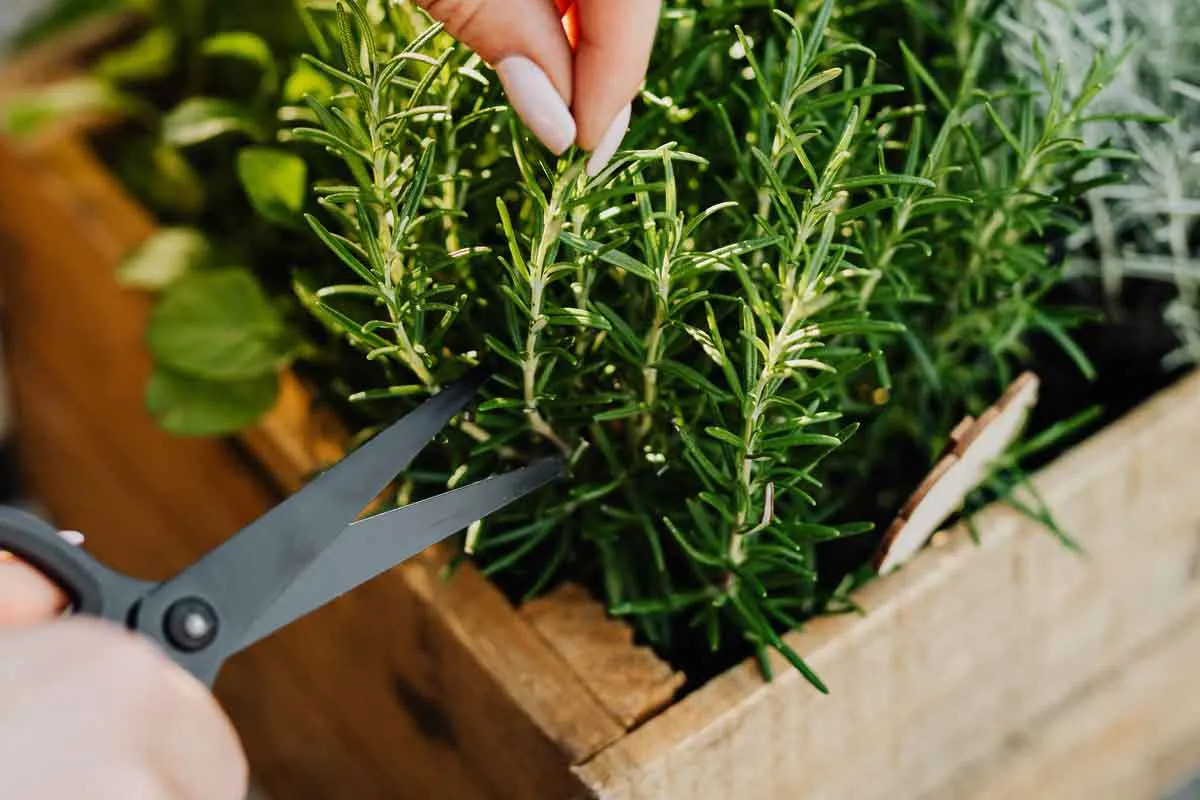
- Sharp Pruning Shears: Invest in a high-quality pair of pruning shears specifically designed for cutting woody vines. The sharp blades will make clean cuts, minimizing damage to the plant.
- Disinfectant: To prevent the spread of diseases, sanitize your pruning shears by wiping them with a disinfectant solution or rubbing alcohol before and after each use.
- Rooting Hormone: This optional but helpful ingredient promotes the development of roots in the cutting. Look for a rooting hormone powder or gel that is appropriate for the type of vine you’re propagating.
- Growing Medium: Prepare a suitable growing medium in which to root your cuttings. This can be a mixture of perlite, vermiculite, peat moss, or a specially formulated rooting soil.
- Pots or Containers: Have small pots or containers ready to hold the cuttings during the rooting process. Ensure they have drainage holes to prevent waterlogged soil.
- Mist Sprayer: Maintain the proper level of moisture around the cuttings by using a mist sprayer. This will help prevent drying out while promoting root growth.
- Transparent Plastic Bags or Domes: Create a humid microclimate for the cuttings by covering them with clear plastic bags or using a transparent dome. This helps retain moisture and encourages successful rooting.
Having these tools and materials readily available will streamline the cutting and propagation process. It’s always better to be prepared in advance to ensure the health and success of your newly propagated vines.
Identifying the Best Spots for Cutting Vines
When it comes to cutting vines for propagation, selecting the right spots to make the cuts is crucial. Identifying the best locations for cutting will promote healthy and successful root development.
Here are some key considerations to help you determine the ideal spots for cutting vines:
- Healthy Growth: Look for sections of the vine that exhibit healthy and vigorous growth. Avoid branches that are wilted, damaged, or show signs of disease. Cutting from healthy sections increases the chances of successful rooting.
- Mature Wood: Choose sections of the vine that have mature wood, which is strong and woody. Avoid cutting from soft, new growth as it may not root successfully.
- Node Placement: Nodes are the areas on the vine where leaves, buds, or lateral branches emerge. Look for nodes that are well-formed and spaced evenly along the vine. Cutting just above a node promotes the development of new shoots.
- Internodal Length: Consider the length of the space between nodes. For most vines, an internodal length of 4-6 inches is recommended. This length provides sufficient space for developing roots and allows for easier handling during the propagation process.
- Number of Buds: Ideally, choose sections that have at least two to three buds. These buds can develop into new shoots and leaves once the cutting starts to root.
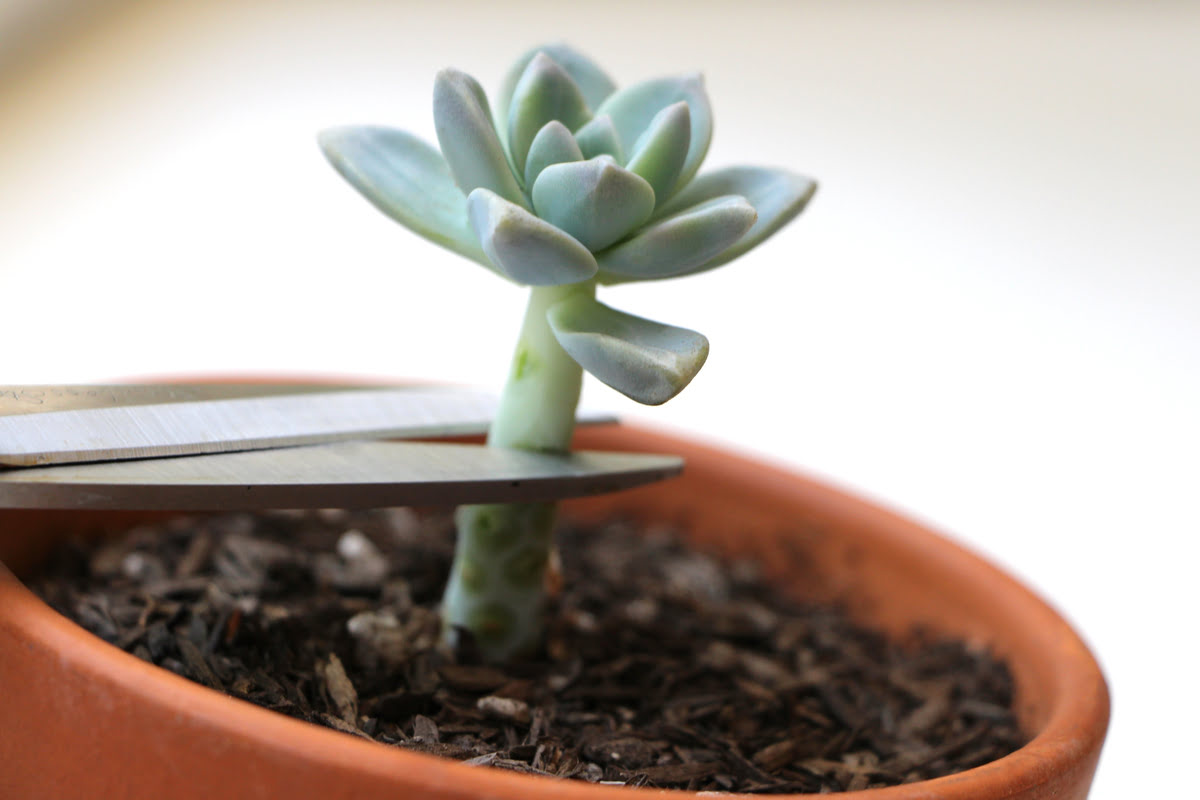
- Angle of Cut: Make a clean, diagonal cut just above the chosen node. This angle helps prevent water accumulation on the cut surface and promotes better root formation.
- Leaf Count: While not necessary, leaving a few sets of leaves on the cutting can provide energy for the rooting process. However, remove any excess leaves to prevent excessive moisture loss.
By carefully selecting the best spots for cutting vines, you give your cuttings the best chance to develop strong roots and thrive. Take your time to evaluate the vine and choose sections that exhibit the desired characteristics for successful propagation.
Cutting Techniques for Propagation
Once you’ve identified the best spots on the vine for cutting, it’s time to employ the right techniques to ensure successful propagation. Proper cutting techniques play a vital role in promoting the growth of healthy roots and maximizing the yield of your propagated vines.
Here are some cutting techniques to follow for successful vine propagation:
- Use Clean and Sharp Tools: Before making any cuts, sanitize your pruning shears with a disinfectant solution. This helps prevent the spread of diseases and ensures a clean cut. Make sure your tools are sharp to avoid crushing or tearing the plant tissue.
- Make an Angle Cut: Position the pruning shears at a 45-degree angle, just above a healthy node or bud. This angle allows water to run off the cut surface and promotes successful rooting.
- Choose the Right Cutting Length: The length of the cutting will depend on the specific vine species or cultivar you’re propagating. In general, aim for cuttings that are 4-8 inches long. Make the cut just below a node to encourage new shoot development.
- Remove Excess Leaves: Trim away any excess leaves from the lower portion of the cutting. Leave a few sets of leaves near the top, as they will help provide energy for the rooting process. Removing excessive foliage reduces moisture loss and prevents the cutting from becoming top-heavy.
- Apply Rooting Hormone (Optional): If the vine you’re propagating requires it, dip the cut end of the vine into rooting hormone powder or gel. This step can enhance root development and improve the success rate of rooting.
Once you’ve made the cuts, place the cuttings in a container with water to prevent them from drying out. This will buy you some time to prepare the growing medium and pots for the rooting process.
Remember, the success of your vine propagation depends on proper cutting techniques. Take the time to make clean, angled cuts, and follow the specific requirements of the vine species or cultivar you’re working with.
Preparing the Cuttings for Rooting
After making the cuts, it’s important to properly prepare the vine cuttings to maximize their chances of rooting successfully. Preparing the cuttings involves a few key steps to ensure optimal conditions for root development and growth.
Here’s a step-by-step guide on how to prepare vine cuttings for rooting:
- Remove Excess Foliage: Trim away any excess leaves from the lower portion of the cutting. This helps prevent excessive moisture loss and redirects energy towards root development.
- Apply Rooting Hormone (Optional): If your vine species or cultivar requires it, dip the cut end of the vine into rooting hormone powder or gel. This helps stimulate root growth and can improve the success rate of rooting.
- Prepare the Growing Medium: Fill small pots or containers with a well-draining and sterile growing medium. A mixture of perlite, vermiculite, peat moss, or a specialized rooting soil works well. Avoid using garden soil, as it may contain pests, diseases, or debris that can hinder root development.
- Create Holes in the Growing Medium: Use a pencil or a dowel to create holes for inserting the cuttings into the growing medium. The holes should be deep enough to support the lower portion of the cutting and hold it securely in place.
- Plant the Cuttings: Gently insert the lower portion of the cutting into the prepared hole in the growing medium. Make sure the cutting is positioned securely and upright, with the leaves above the soil line. Lightly press the soil around the cutting to provide stability.
- Mist the Cuttings: Using a mist sprayer, spray water onto the cuttings and the surrounding soil. This helps settle the soil and provide moisture to the plant. Avoid overwatering, as it can lead to rot and hinder root development.
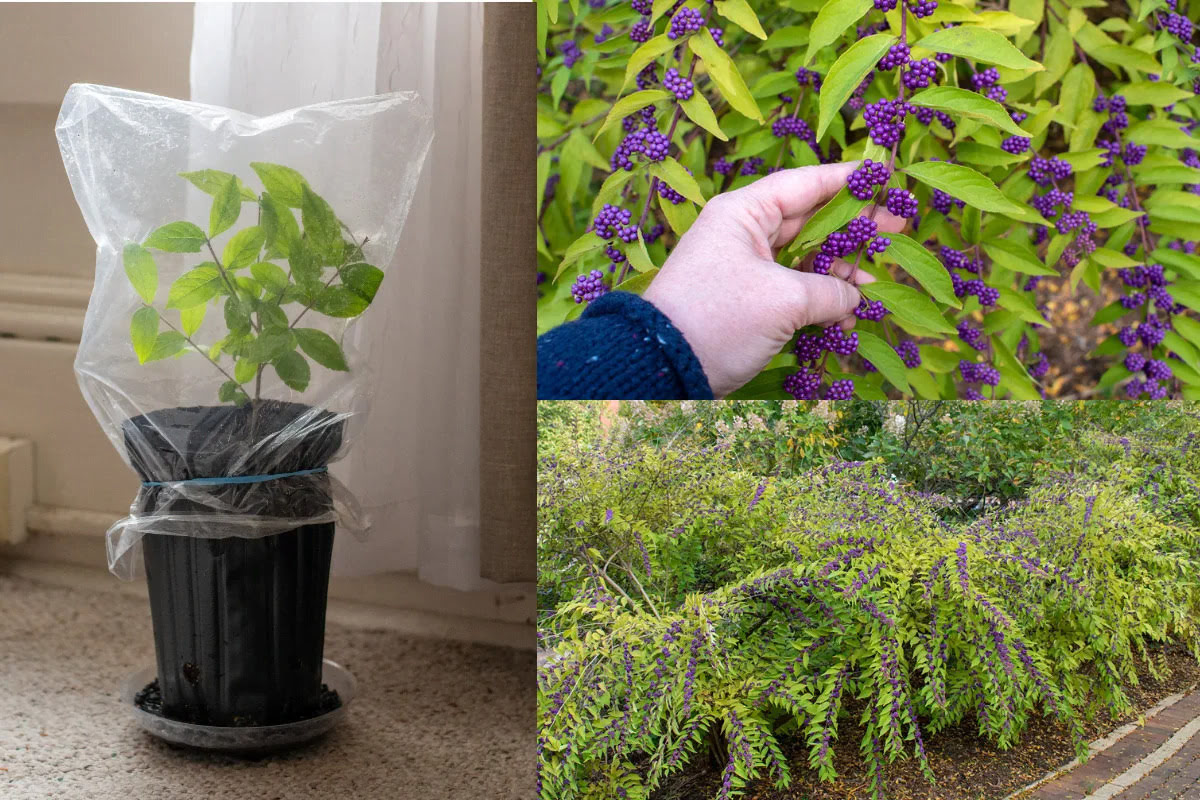
- Cover the Cuttings: Place a transparent plastic bag or a clear plastic dome over the planted cuttings to create a humid environment. This helps retain moisture and encourages successful rooting. Make sure the cover is tall enough to accommodate the height of the cuttings without touching them.
Once the cuttings are prepared and planted, place them in a warm and well-lit area, but out of direct sunlight. Monitor the moisture levels regularly and mist the cuttings as needed to maintain the proper moisture balance.
By following these steps to prepare the cuttings for rooting, you’ll create an optimal environment for successful root development and growth.
Creating Ideal Conditions for Rooting
Creating the ideal conditions for rooting is crucial to ensure the success of your vine cuttings. By providing the right environment, you can promote healthy root development and increase the chances of your cuttings thriving. Here are some key factors to consider when creating ideal conditions for rooting:
- Temperature: Most vine species prefer temperatures between 65-75°F (18-24°C) for optimal rooting. Maintaining a consistent temperature in this range will encourage root growth. Avoid extreme temperature fluctuations, as they can stress the cuttings and hinder root development.
- Humidity: High humidity levels are essential for successful rooting. Keep the air around the cuttings moist by misting them regularly or using a humidifier in the rooting area. The plastic covering or dome placed over the cuttings will also help create a humid microclimate.
- Lighting: While some vines may root in low light conditions, most benefit from bright, indirect light. Place the cuttings in a location with bright, filtered light to promote healthy growth. Avoid placing them in direct sunlight, as it can lead to excessive drying and damage the delicate new roots.
- Watering: Proper moisture levels are crucial for successful rooting. Keep the growing medium consistently moist but not waterlogged. Overwatering can lead to rot, while underwatering can cause the cuttings to dry out and fail to root. Monitor the moisture levels regularly and adjust watering accordingly.
- Air Circulation: Adequate air circulation is important to prevent fungal diseases and promote healthy growth. Ensure there is some airflow around the cuttings, but avoid placing them in drafts or excessively windy areas that can dry out the cuttings.
As the cuttings start to root, it’s important to monitor their progress and make adjustments to the growing conditions if necessary. Look for signs of new growth, such as the emergence of leaves or root development through the drainage holes of the pots.
Remember that different vine species may have slightly different requirements, so it’s important to research and understand the specific needs of the vine you’re propagating.
By providing the ideal conditions of temperature, humidity, lighting, watering, and air circulation, you’ll create a favorable environment for successful rooting and ensure the healthy development of your vine cuttings.
Transplanting Rooted Cuttings
Once your vine cuttings have successfully rooted, it’s time to transplant them into their permanent growing locations. Transplanting rooted cuttings is an exciting step as it marks the transition from propagation to establishing fully-grown plants. Proper transplanting techniques are essential to ensure the continued growth and success of your newly propagated vines.
Here are some steps to follow when transplanting rooted cuttings:
- Choose the Right Time: Transplant your rooted cuttings when they have developed a healthy root system. Typically, this occurs a few weeks after rooting. Avoid transplanting during extreme weather conditions or when the plants are under stress.
- Prepare the Planting Site: Select a suitable location for your vines, considering factors such as sunlight exposure, soil quality, and spacing requirements. Prepare the planting site by clearing away any weeds, removing rocks or debris, and amending the soil if needed.
- Dig the Hole: Dig a hole that is wide and deep enough to accommodate the root system of the cutting. Make sure the hole is loosened to allow for proper root expansion and growth.
- Remove the Cutting from the Pot: Gently remove the rooted cutting from its pot, taking care not to disturb the roots. If the roots are tightly packed, gently loosen them to encourage outward growth.
- Place in the Hole: Lower the cutting into the hole, positioning it so that the soil level matches the same depth as it was in the pot. Avoid burying the plant too deep, as this can hinder growth and suffocate the roots.
- Backfill and Firm the Soil: Fill the hole with soil, gently firming it around the base of the cutting to provide stability. Ensure that the soil is in contact with the roots, eliminating any air pockets.
- Water Thoroughly: After transplanting, give the vine a thorough watering to help settle the soil and provide hydration to the roots. Use a gentle stream of water to avoid displacing the soil around the newly transplanted cutting.
- Provide Support (if needed): Some vine species may require support structures such as trellises, stakes, or arbors. Install these structures at the time of transplanting to avoid damage to the growing plant later on.
- Mulch and Monitor: Apply a layer of organic mulch around the base of the vine to help retain moisture, control weeds, and regulate soil temperature. Regularly monitor the newly transplanted vines for signs of stress or complications and provide proper care and attention.
Remember to water the transplanted cuttings regularly, especially during the establishment phase. Monitor their growth, providing any necessary support or pruning as they continue to develop into mature and thriving vines.
By following these transplanting steps and providing proper care, you’ll give your rooted cuttings the best chance to establish and grow into beautiful, thriving plants.
Common Mistakes to Avoid
While propagating vines can be a rewarding experience, there are some common mistakes that gardeners often make when cutting and propagating. By being aware of these mistakes, you can avoid them and increase your chances of success. Here are some common mistakes to avoid when propagating vines:
- Using Dull or Dirty Tools: Using dull pruning shears can result in messy cuts that can damage the plant. Additionally, using dirty tools can increase the risk of disease transmission. Keep your tools clean and sharp for clean and precise cuts.
- Choosing Unhealthy Vines: Selecting unhealthy vines for cutting can lead to poor growth or failure to root. Look for vines that are disease-free, pest-resistant, and exhibit strong growth habits.
- Ignoring Specific Vine Requirements: Each vine species or cultivar may have specific requirements for successful cutting and propagation. Research and understand the needs of the specific vine you’re working with to ensure the best chance of success.
- Improper Cutting Length: Cutting vines too short or too long can affect the success of rooting. Follow guidelines for the appropriate cutting length specific to the vine species or cultivar you’re propagating.
- Skipping Rooting Hormone: Rooting hormone can significantly enhance the success rate of rooting for certain vine species. Don’t skip this step if the vine you’re propagating requires it.
- Overwatering or Underwatering: Incorrect watering practices can lead to root rot or dehydration, both of which can hinder rooting. Keep the growing medium consistently moist but not waterlogged, and adjust watering based on the specific needs of the vine.
- Improper Transplanting Techniques: When transplanting rooted cuttings, be gentle and avoid damaging the delicate roots. Plant the cutting at the appropriate depth and provide support if needed.
- Neglecting Maintenance and Monitoring: Once the cuttings are transplanted, they still require proper care and monitoring. Regularly check for signs of stress, pests, or diseases, and provide appropriate maintenance and attention.
By avoiding these common mistakes, you can increase the chances of successful propagation and ensure the healthy development of your vines. Take the time to learn proper techniques, understand the specific needs of your vines, and provide the necessary care throughout the propagation process.
Conclusion
Propagating vines through cutting is an excellent way to expand your garden, create beautiful landscapes, and maximize your yield. By understanding the process of cutting vines for propagation and following the proper techniques, you can increase your chances of success and enjoy the rewards of a thriving plant collection.
In this article, we explored the importance of selecting the right vines for propagation, the tools and materials needed, identifying the best spots for cutting, cutting techniques, preparing cuttings for rooting, creating ideal conditions for rooting, transplanting rooted cuttings, and common mistakes to avoid.
Remember, each vine species has its unique requirements, so it’s important to research and understand the specific needs of the vine you’re working with. Proper timing, cutting techniques, and environmental conditions play major roles in the success of your propagation efforts.
Whether you’re a seasoned gardener or just starting, taking the time to learn and practice the art of cutting vines for propagation can be a rewarding experience. Watching your cuttings take root and grow into healthy, flourishing vines is a testament to your skills and dedication as a gardener.
So, equip yourself with the necessary tools, select suitable vines, make clean cuts, and create optimal conditions for root development. With a bit of patience and care, you’ll be on your way to maximizing your yield and enjoying the beauty and abundance of propagated vines in your garden.