Home>Gardening Techniques>DIY Projects>How To Compost Juice Pulp
DIY Projects
How To Compost Juice Pulp
Modified: February 10, 2024
Learn how to compost juice pulp effectively with this DIY project. Transform your organic waste into nutrient-rich compost for your garden.
(Many of the links in this article redirect to a specific reviewed product. Your purchase of these products through affiliate links helps to generate commission for Chicagolandgardening.com, at no extra cost. Learn more)
Table of Contents
- Introduction
- Benefits of Composting Juice Pulp
- Getting Started with Composting Juice Pulp
- Choosing the Right Composting Method
- Preparing the Juice Pulp for Composting
- Building a Compost Pile with Juice Pulp
- Maintaining and Turning the Compost Pile
- Troubleshooting Common Issues in Composting Juice Pulp
- Using the Finished Compost in Your Garden
- Conclusion
Introduction
Welcome to the world of DIY projects! If you’re someone who enjoys taking matters into your own hands and finding creative solutions, then you’ve come to the right place. DIY projects not only allow you to save money, but they also give you the satisfaction of accomplishing something on your own. From home renovations to crafts and repairs, the possibilities are endless.
In this article, we will delve into the world of DIY projects and explore the various benefits they offer. Whether you’re a seasoned DIY enthusiast or just starting out, this guide will provide you with the information you need to embark on your next successful project.
First and foremost, DIY projects empower you to transform your surroundings to reflect your personal style and preferences. Instead of settling for mass-produced items or standardized designs, you have the opportunity to create unique and customized pieces that are tailor-made for your needs. Whether it’s refurbishing old furniture or building your own decor, DIY projects allow you to infuse your personality into every aspect of your living space.
Furthermore, engaging in DIY projects can be a wonderful learning experience. As you take on different projects, you will acquire new skills and expand your knowledge base. From basic carpentry and electrical work to plumbing and painting, you will gain valuable expertise that can be applied to future projects or even utilized in everyday life. Learning these skills not only saves you money by avoiding the need to hire professionals but also instills a sense of pride and accomplishment.
In addition to personal growth, DIY projects also promote sustainability and environmentally-friendly practices. By repurposing items, recycling materials, and reducing waste, you contribute to the conservation of resources and help minimize the impact on the environment. This can include upcycling old furniture, using reclaimed materials for your projects, or even creating your own natural cleaning products.
Moreover, DIY projects can be a great source of entertainment and stress relief. Engaging in hands-on activities allows you to disconnect from screens and immerse yourself in the creative process. The satisfaction of completing a project with your own two hands can be immensely rewarding and serve as a welcome distraction from the hustle and bustle of daily life.
Whether you’re looking to add a personal touch to your home, save money on repairs, or simply enjoy the process of creating something from scratch, DIY projects offer a world of possibilities. So roll up your sleeves, gather your tools, and let your creativity soar as we embark on this DIY adventure together!
Benefits of Composting Juice Pulp
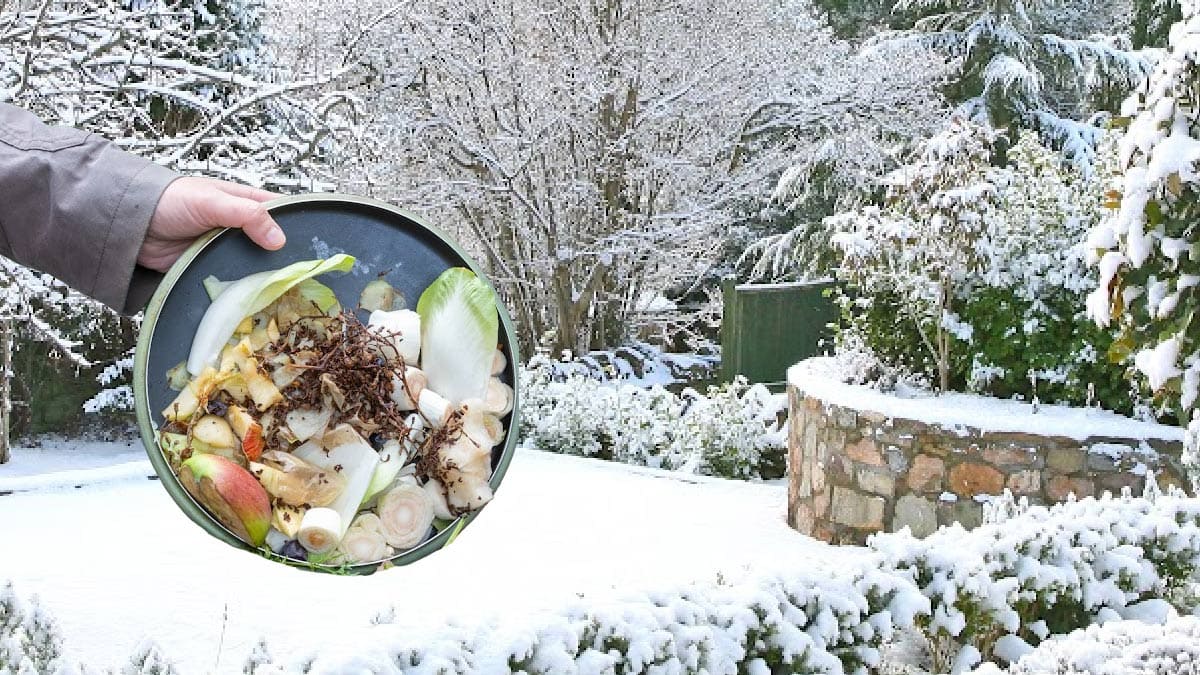
Do you have a juicer at home and find yourself left with a substantial amount of leftover fruit and vegetable pulp? Don’t throw it away! Instead, consider composting it. Composting juice pulp offers several benefits, both for the environment and for your garden. Let’s explore some of these benefits below.
- Nutrient-rich organic matter: Juice pulp is packed with nutrients, including vitamins, minerals, and organic compounds. By composting it, you can transform this waste into a valuable source of organic matter for your garden. When the pulp decomposes, it releases nutrients that nourish the soil and promote healthy plant growth.
- Reduced waste: Composting juice pulp helps divert waste from landfills. According to the Environmental Protection Agency (EPA), around 21% of the waste in landfills consists of food scraps and yard waste. By composting juice pulp and other organic materials, you can contribute to reducing the amount of waste sent to landfills.
- Improved soil structure: Incorporating composted juice pulp into your soil improves its structure, making it more crumbly and enhancing its ability to retain moisture. This is particularly beneficial for sandy or clay soils that have poor drainage or nutrient-holding capacity. Compost helps improve soil aeration and water holding capacity, creating an optimal environment for plant roots to grow and thrive.
- Enriched soil fertility: Compost derived from juice pulp adds essential nutrients to the soil, improving its fertility. These nutrients, such as nitrogen, phosphorus, and potassium, are key for healthy plant growth. By enriching the soil with compost, you can enhance its fertility naturally, minimizing the need for chemical fertilizers that can harm the environment.
- Enhanced microbial activity: Composting juice pulp promotes the growth of beneficial microorganisms in the soil. These microorganisms break down organic matter, making nutrients more readily available to plants. Additionally, these microbes contribute to the overall health and balance of the soil ecosystem, creating a thriving environment for beneficial organisms.
Composting juice pulp is a sustainable practice that not only reduces waste but also benefits your garden. By recycling this organic material, you can enrich your soil, improve its structure, and foster a healthy environment for plant growth. So next time you make a batch of fresh juice, don’t toss away the pulp. Put it to good use by starting a compost pile and reap the rewards of a thriving garden.
Getting Started with Composting Juice Pulp
Composting juice pulp is a simple and rewarding way to reduce waste and improve your garden’s soil fertility. If you’re ready to get started, follow these steps to begin your composting journey:
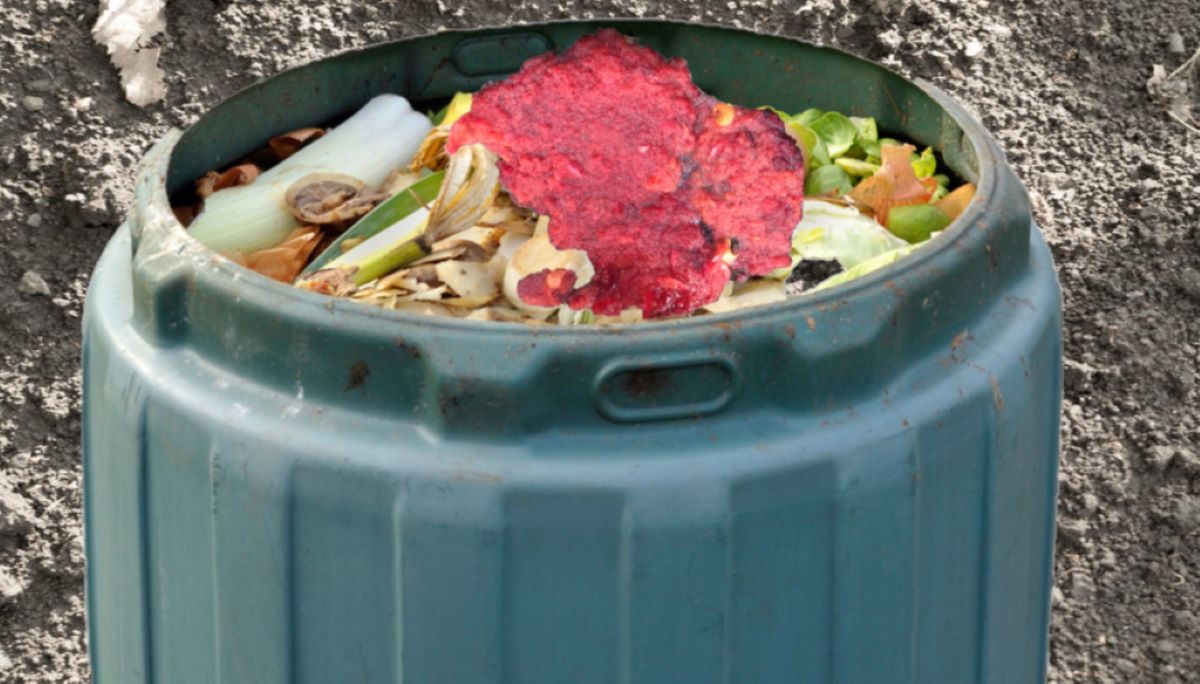
- Collect your juice pulp: Every time you make fresh juice, collect the leftover pulp in a container. It’s best to use pulp from organic fruits and vegetables to avoid introducing pesticides or other harmful chemicals into your compost pile.
- Choose a composting method: There are several composting methods to choose from, including traditional composting, vermicomposting (using worms), or composting in a tumbler. Consider your available space, time commitment, and desired outcome when selecting a method.
- Prepare a composting area: Find an appropriate spot in your yard for your compost pile or bin. Ideally, it should be well-drained and receive some sunlight. If you’re concerned about pests or odor, you can use a closed bin or compost in a designated area away from sensitive spaces.
- Add a carbon source: Juice pulp is rich in nitrogen, so to create a balanced compost pile, add a carbonaceous material such as dried leaves, shredded paper, or cardboard. The ideal carbon to nitrogen ratio is about 30:1, so mix the pulp with carbon materials in equal parts.
- Moisten the compost pile: It’s essential to maintain adequate moisture in your compost pile. Juice pulp already has some moisture content, but if it feels dry, you can add a little water during the layering process. Aim for a damp sponge consistency and periodically check the moisture level to ensure it remains within the optimal range.
- Turn and aerate the compost pile: To encourage decomposition and prevent odors, it’s important to regularly turn and aerate your compost pile. Every few weeks, use a pitchfork or shovel to gently mix the materials, ensuring oxygen reaches all parts of the pile.
- Monitor the temperature: Composting generates heat, so keep an eye on the temperature of your compost pile. It should ideally range between 120 to 160 degrees Fahrenheit (50 to 70 degrees Celsius). If the pile becomes too hot, turn it to cool it down.
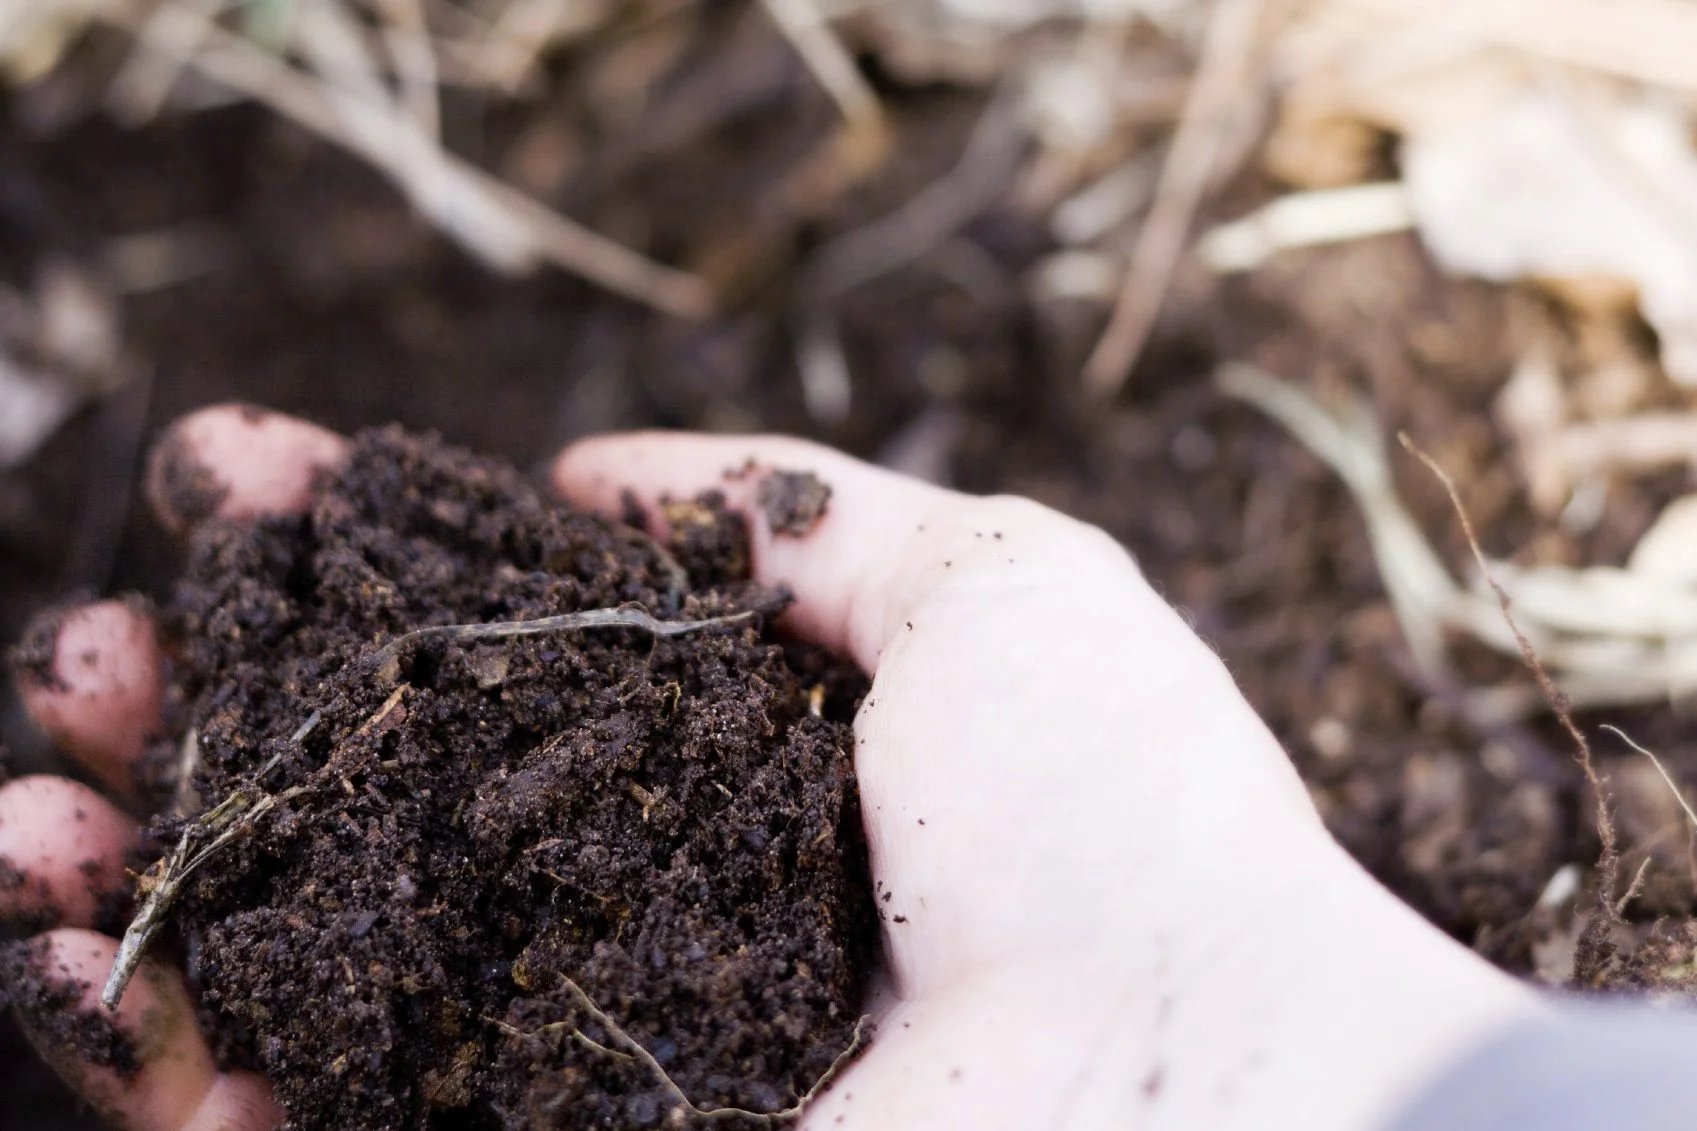
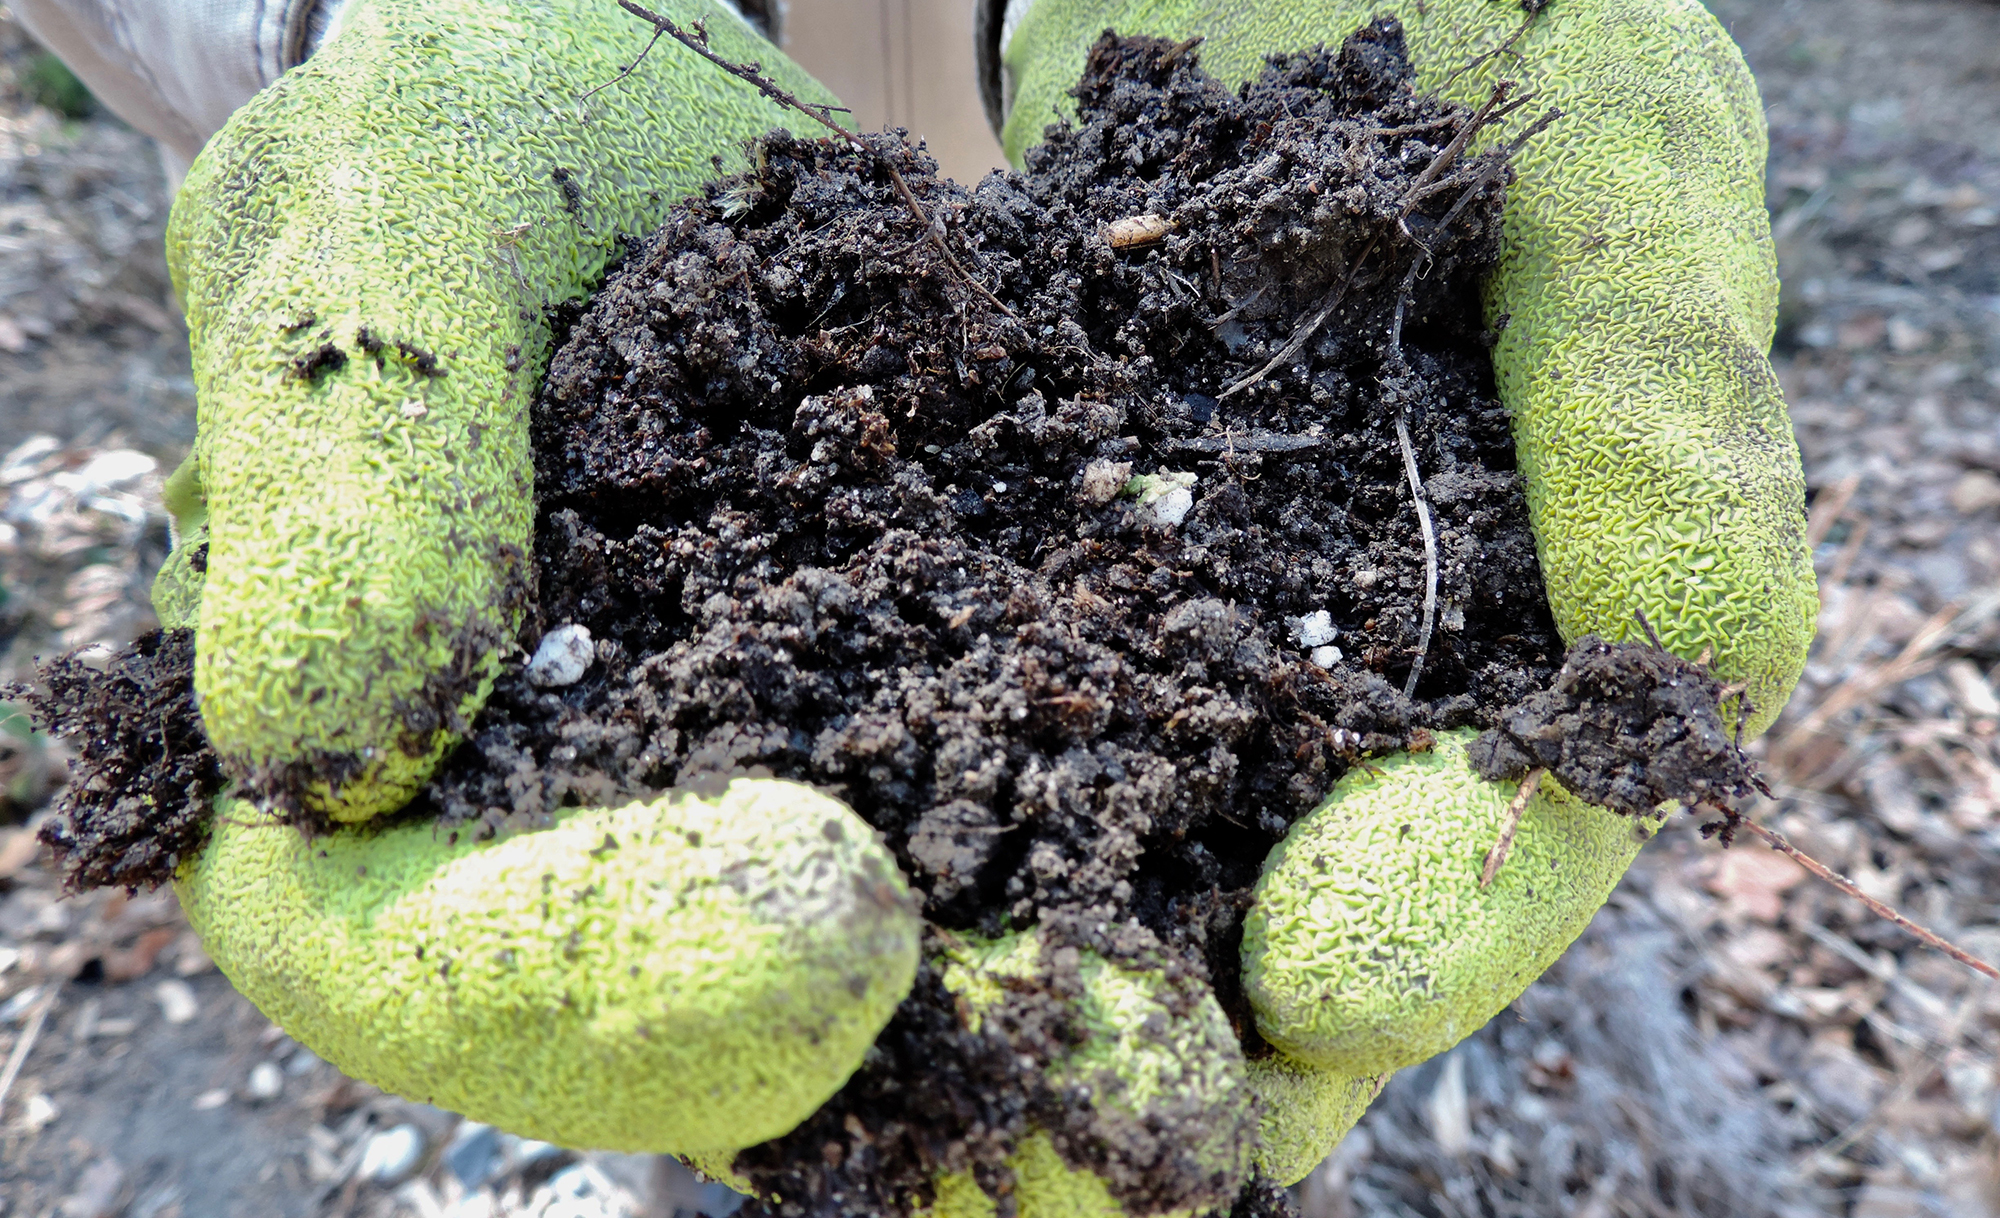
- Wait for the compost to mature: Composting takes time, and juice pulp can take several months to fully decompose. Monitor the progress and wait until the materials have broken down into a dark, crumbly, and earthy-smelling compost.
Remember, composting is a natural process, and the time it takes for the juice pulp to break down will depend on various factors such as temperature, moisture, and the frequency of turning. Once your compost is mature, you can use it to enrich your garden soil, top-dress your plants, or mix it with potting soil for container gardening. Embrace the art of composting and witness the transformation of waste into valuable organic matter that nourishes and supports healthy plant growth.
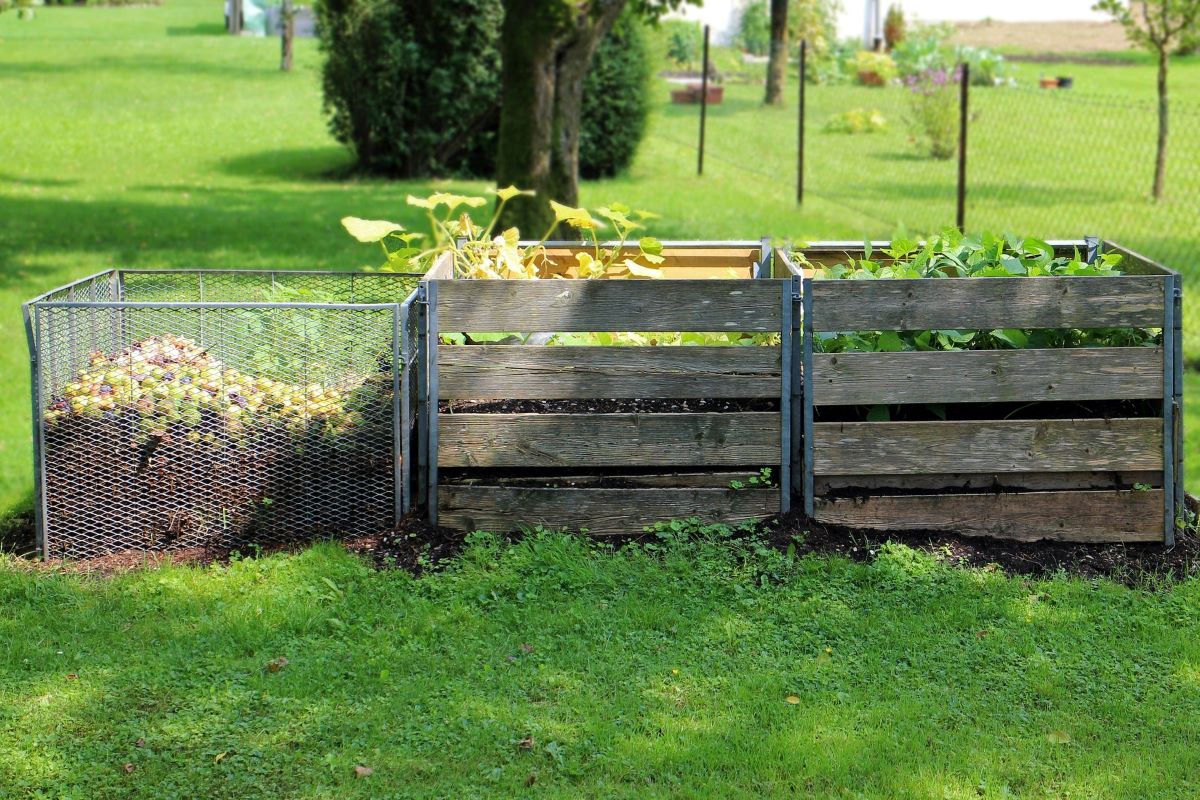
Choosing the Right Composting Method
When it comes to composting juice pulp, there are several methods to choose from. Each method has its own advantages and considerations, so it’s important to assess your specific needs and available resources. Here are a few popular composting methods to consider:
- Traditional composting: This is the most common and straightforward method of composting. Simply create a compost pile in a designated area of your yard and let nature take its course. This method requires minimal investment and is suitable for those with ample outdoor space.
- Vermicomposting: Vermicomposting involves using worms, specifically red wigglers, to break down organic materials. Worms consume the juice pulp along with other food scraps, producing nutrient-rich worm castings, or vermicompost. This method is ideal for those with limited outdoor space or who want to compost indoors.
- Composting bins or tumblers: Composting bins or tumblers offer a neat and contained way to compost juice pulp. These units provide better pest control and odor prevention compared to open piles. They also allow for easier turning and faster decomposition due to increased aeration. This method works well for those concerned about aesthetics or have limited space.
- Sheet composting: Also known as lasagna gardening or sheet mulching, this method involves layering organic materials, including juice pulp, directly onto the soil. Over time, the materials break down and enrich the soil. Sheet composting is a great option for those looking to improve soil fertility and minimize the need for digging or turning compost piles.
When choosing the right composting method, consider factors such as available space, time commitment, desired outcome, and personal preferences. If you have limited outdoor space, options like vermicomposting or using a composting bin/tumbler may be more suitable. If you prefer a low-maintenance approach, sheet composting may be the way to go. Evaluate your specific needs and select a method that aligns with your goals and resources.
Regardless of the method you choose, remember to keep track of the key elements required for successful composting: a proper balance of green (nitrogen-rich) and brown (carbon-rich) materials, adequate moisture levels, regular turning or mixing, and patience for the process to occur. By selecting the right composting method, you can efficiently recycle your juice pulp and contribute to a greener and healthier environment.
Preparing the Juice Pulp for Composting
Before adding your juice pulp to the compost pile, it’s essential to take a few steps to prepare it for optimal decomposition and avoid potential issues. Follow these guidelines to ensure that your juice pulp is ready for composting:
- Remove any non-compostable elements: Before composting, make sure to remove any non-compostable elements from the juice pulp. This includes seeds, large chunks of fruit or vegetable peels, and any non-organic materials that may have accidentally mixed in. These items could take longer to decompose or even hinder the composting process.
- Shred or chop the pulp: Breaking down the juice pulp into smaller pieces helps speed up decomposition. You can use a blender, food processor, or simply chop it into small chunks. By increasing the surface area of the pulp, microorganisms have more access to break it down, leading to faster composting.
- Mix the pulp with other organic materials: While juice pulp is nitrogen-rich, it’s beneficial to combine it with carbon-rich materials for a balanced compost pile. This helps prevent odor and encourages proper decomposition. Add dried leaves, shredded paper, or cardboard in equal parts to create the ideal carbon to nitrogen ratio.
- Avoid compacting the pulp: Juice pulp can be dense and easily clump together, leading to poor airflow within the compost pile. Avoid compacting the pulp when adding it to the compost. Instead, crumble it apart and mix it well with other compost materials to ensure proper aeration.
- Layer the pulp in the compost pile: Layering is key to creating a well-balanced compost pile. Alternate layers of juice pulp with other organic materials, such as dry leaves or garden trimmings. This helps maintain the carbon to nitrogen ratio, promotes even decomposition, and prevents the pile from becoming too soggy or compacted.
- Moisten the compost pile: Juice pulp already contains some moisture, but it’s essential to maintain proper moisture levels throughout the composting process. If the pile feels dry, add water during the layering process. Aim for a damp sponge consistency, where the materials hold together but are not overly wet.
By following these steps to prepare your juice pulp for composting, you can create a well-balanced compost pile that promotes efficient decomposition. Remember, the key is to create a balance between green (nitrogen-rich) and brown (carbon-rich) materials, provide adequate moisture, and ensure proper aeration to foster a healthy composting environment. With a little preparation, your juice pulp will transform into nutrient-rich compost that can help nourish your garden and support sustainable gardening practices.
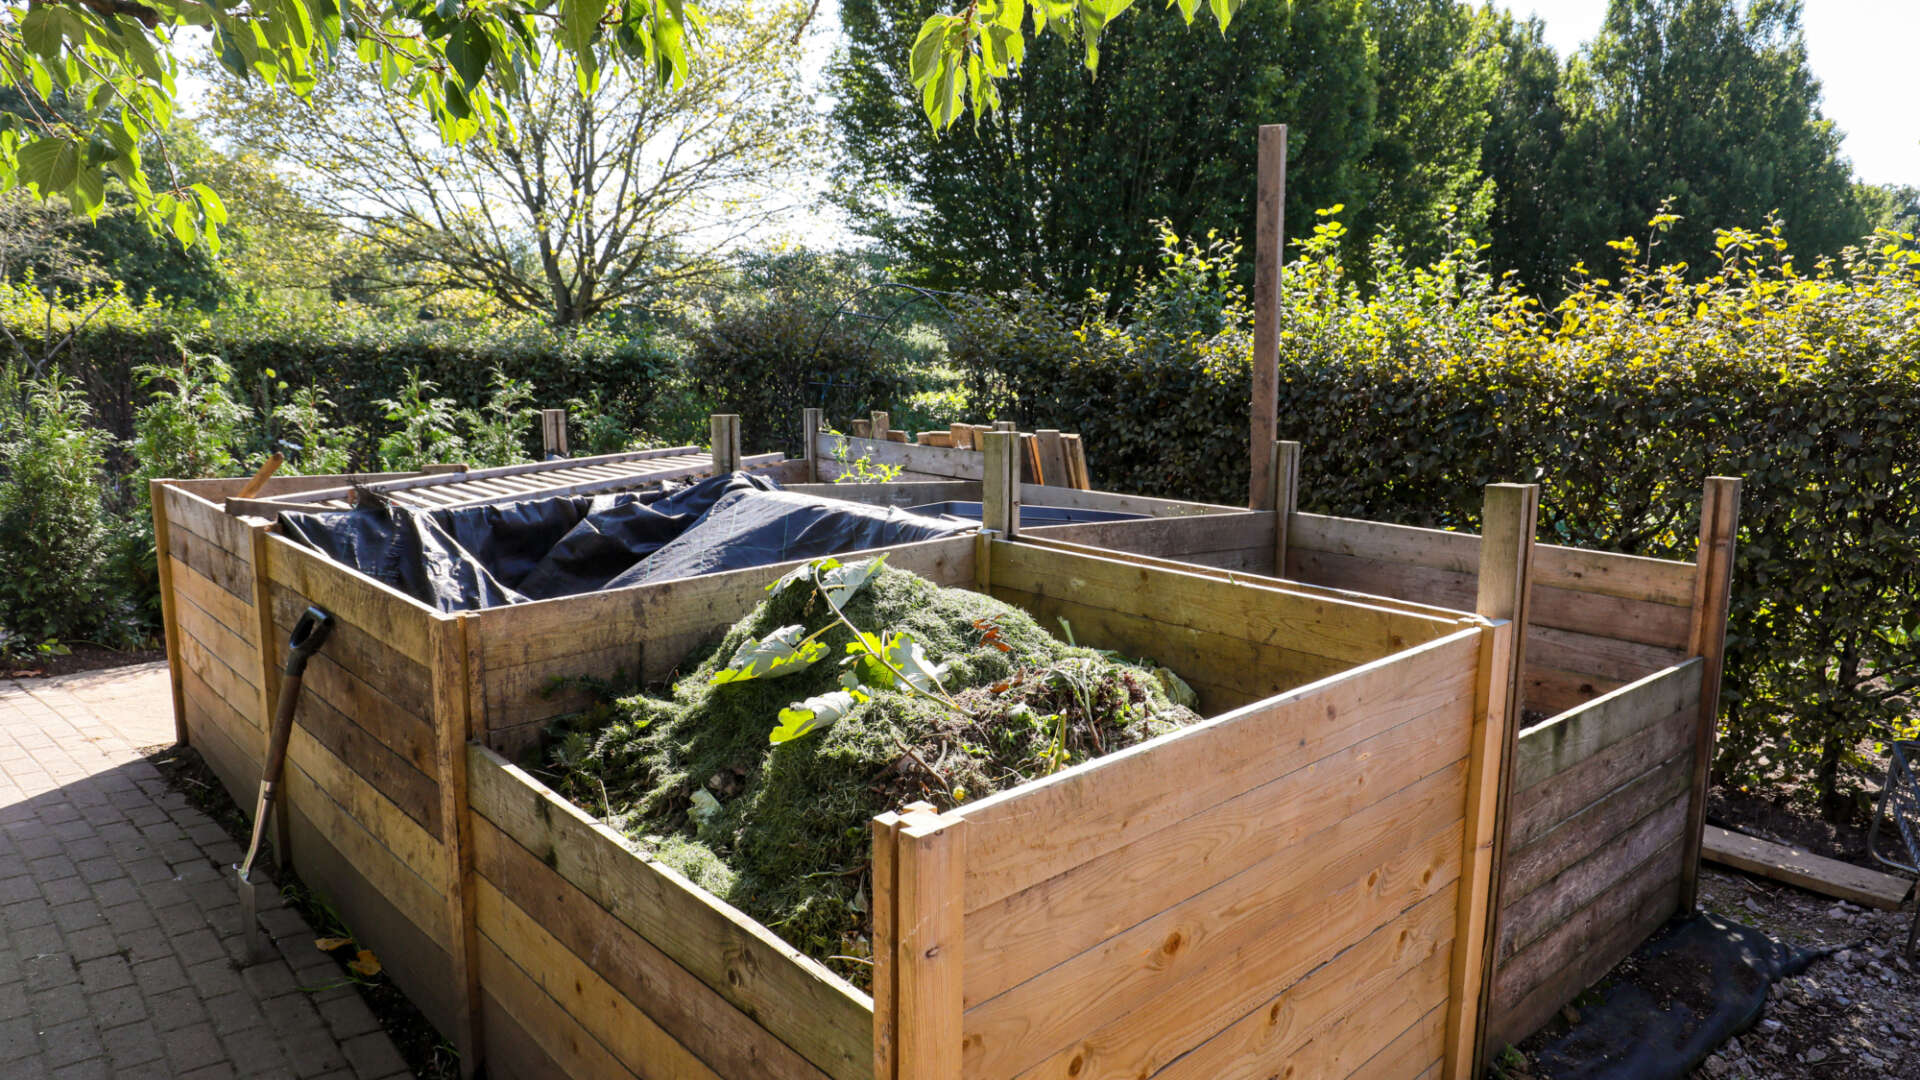
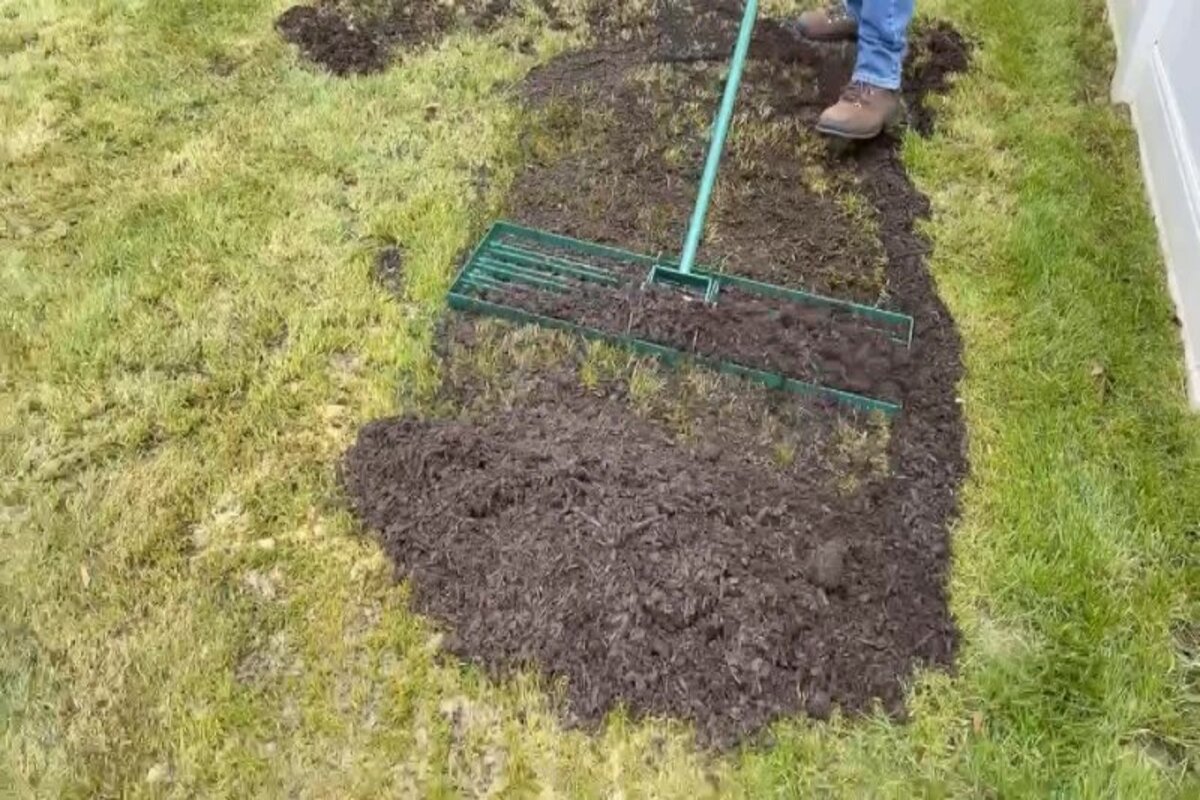
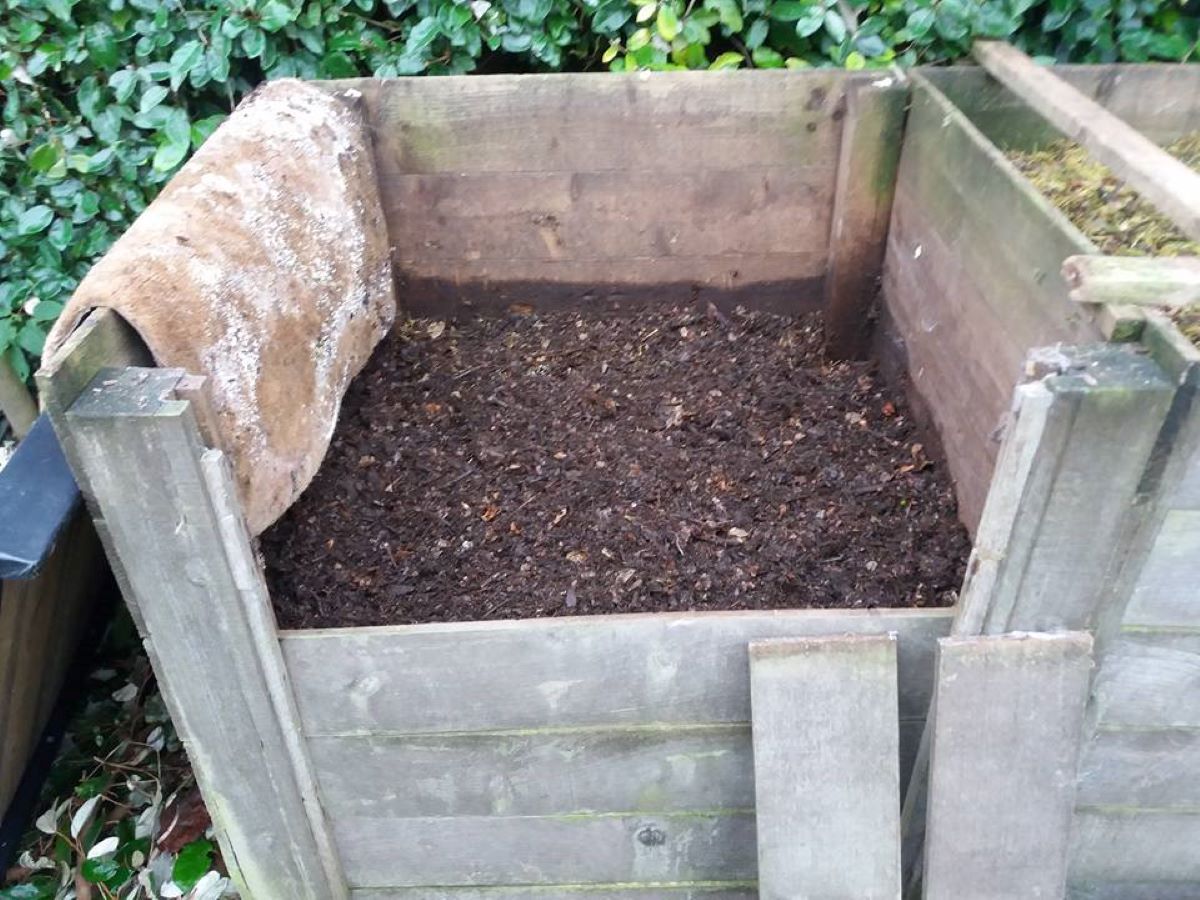
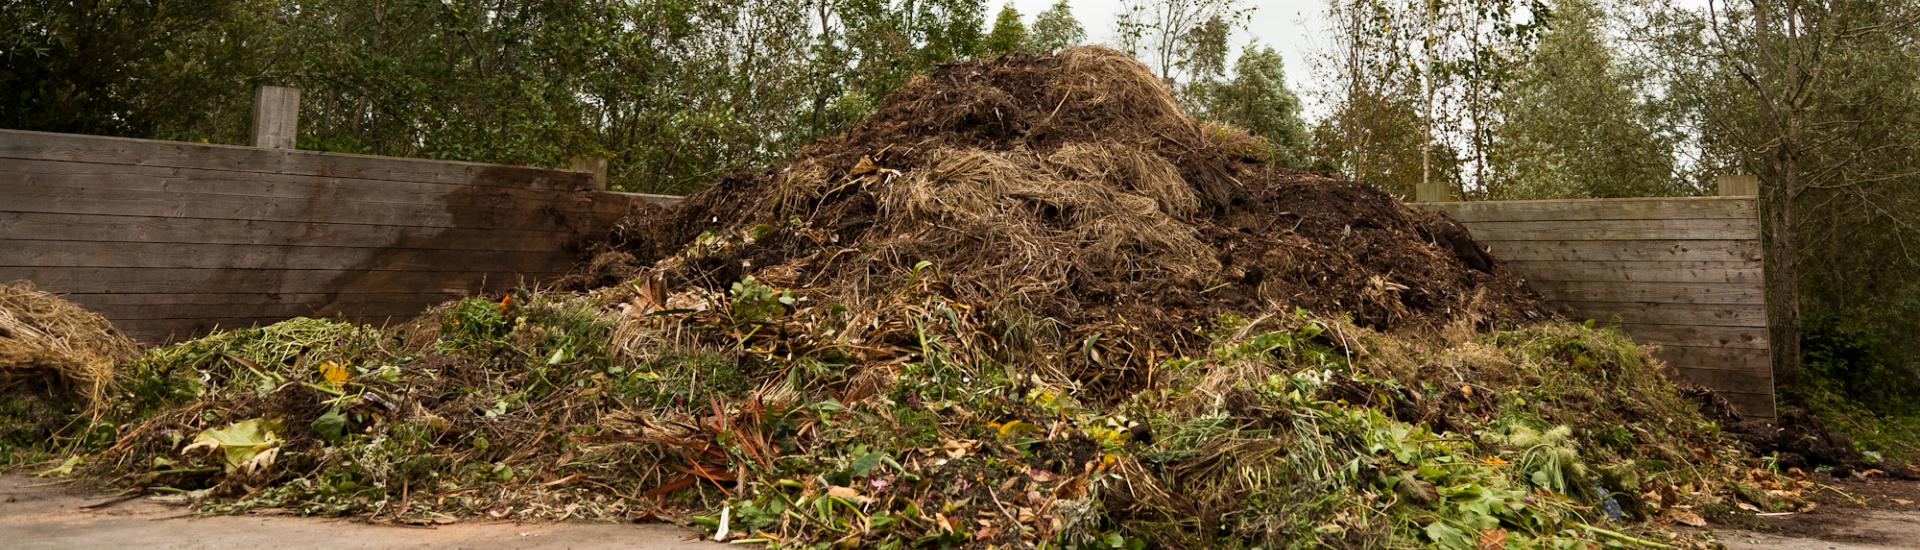
Building a Compost Pile with Juice Pulp
Building a compost pile with juice pulp is a fantastic way to recycle organic waste and create nutrient-rich compost for your garden. Follow these guidelines to construct an effective compost pile:
- Select an appropriate location: Find a suitable spot in your yard for the compost pile. Choose an area that is well-drained, receives some sunlight, and is easily accessible for adding and turning the compost materials.
- Prepare the base: Start by preparing the base of your compost pile. Lay down a layer of twigs or straw to promote airflow and drainage. This helps prevent the pile from becoming waterlogged and aids in proper decomposition.
- Add the first layer of juice pulp: Spread a layer of shredded or chopped juice pulp evenly on top of the base. It’s recommended to mix the pulp with other organic materials, such as dried leaves or shredded paper, to create a balanced compost pile.
- Alternate layers: Continue layering the compost pile with alternating green and brown materials. Green materials include juice pulp, fresh grass clippings, or kitchen scraps, while brown materials can consist of dried leaves, straw, or cardboard. Aim for a ratio of roughly equal parts green and brown materials.
- Moisten each layer: As you add each layer of materials, it’s important to moisten them. Use a hose or watering can to lightly sprinkle water over the materials. The pile should be moist, similar to a damp sponge, but not overly saturated.
- Repeat the layering process: Continue adding layers of juice pulp and other organic materials until the compost pile reaches the desired size. Remember to maintain the proper balance of green and brown materials and ensure adequate moisture with each layer.
- Cover the compost pile: Once the compost pile has reached the desired height, consider covering it with a tarp or a layer of straw to help retain moisture and regulate temperature. This also helps prevent excess moisture loss and keeps pests away from the pile.
Building a compost pile with juice pulp requires layering and proper moisture to create an environment conducive to decomposition. By following these steps, you can ensure that your compost pile is well-balanced, provides optimal conditions for microorganisms, and facilitates the breakdown of organic materials.
Remember to periodically monitor the moisture level and turn the compost pile every few weeks using a pitchfork or garden fork. This helps mix the materials, aerate the pile, and promote even decomposition. As the materials break down, the compost pile will shrink in size and transform into dark, crumbly, and earthy-smelling compost.
With a well-built compost pile, you can efficiently compost juice pulp and other organic materials, reduce waste, and create valuable compost that will enrich your garden soil and nourish your plants naturally.
Maintaining and Turning the Compost Pile
Proper maintenance and regular turning are essential to ensure the success of your compost pile. By following these guidelines, you can create an optimal environment for decomposition and achieve rich, nutrient-dense compost:
- Monitor moisture levels: Regularly check the moisture content of your compost pile. It should be moist, similar to a damp sponge. If the pile appears too dry, use a hose or watering can to add water. Conversely, if it’s too wet, consider adding dry carbon materials like dried leaves or straw to help absorb excess moisture.
- Aerate the compost pile: Turning or aerating the compost pile is crucial for proper decomposition. Every few weeks, use a pitchfork or garden fork to gently mix the materials. This helps provide oxygen to the microorganisms and prevents the pile from becoming compacted, which can slow down the decomposition process.
- Monitor the temperature: Composting generates heat, and the temperature inside the compost pile can rise significantly. Monitor the temperature periodically with a thermometer. Ideally, the temperature should reach between 120 to 160 degrees Fahrenheit (50 to 70 degrees Celsius), indicating active decomposition. If the pile becomes too hot, turning it can help cool it down.
- Balance green and brown materials: Maintaining a proper balance of green (nitrogen-rich) and brown (carbon-rich) materials is crucial for successful composting. Too much green material can result in a smelly and slimy pile, while too much brown material can slow down decomposition. Aim for a ratio of roughly equal parts green and brown materials to ensure a balanced and healthy compost pile.
- Protect the compost pile: While it’s important to provide airflow to the pile, you should also protect it from excessive moisture and pests. Consider covering the pile with a tarp or using a compost bin with a lid. This helps prevent excess moisture loss during heavy rainfall and keeps pests away from the pile.
Maintaining and turning your compost pile on a regular basis helps create an ideal environment for decomposition. It promotes the breakdown of organic materials, accelerates the composting process, and helps eliminate odors. Remember to be patient, as composting takes time. The duration can vary depending on factors such as temperature, moisture levels, and the materials being composted.
As you continue to maintain and turn your compost pile, you’ll notice the gradual transformation of the materials into dark, crumbly compost. This rich compost can be used to amend garden soil, improve plant health, and promote sustainable gardening practices. By actively maintaining and turning your compost pile, you are actively participating in the natural recycling process and contributing to healthier and more vibrant gardens.
Troubleshooting Common Issues in Composting Juice Pulp
Composting juice pulp can sometimes pose challenges that may hinder the composting process. However, with a few adjustments and troubleshooting techniques, you can overcome these common issues. Here are some solutions to help you troubleshoot specific problems:
- Odor: If your compost pile emits a foul smell, it may be due to an imbalance of green and brown materials. Add more carbon-rich materials like dried leaves or shredded paper to absorb excess moisture and neutralize the odor. Avoid adding any meat, dairy, or oily foods, as they can contribute to unpleasant smells in the compost pile.
- Excessive moisture: A compost pile that is overly wet can slow down decomposition and create a slimy, anaerobic environment. To remedy this, add more dry carbon materials like shredded paper or dried leaves to absorb the excess moisture. You can also increase aeration by turning the pile more frequently.
- Pest infestation: If you notice pests like flies or rodents in your compost pile, it may be due to the presence of uncovered food scraps or an imbalance of materials. To prevent pests, always bury food scraps within the compost pile and cover it with a layer of carbon materials. Consider using a covered compost bin to further deter pests.
- Slow decomposition: If your compost pile is taking longer than expected to decompose, it may be due to a lack of oxygen or an imbalance of green and brown materials. Turn the pile more frequently to provide oxygen and ensure proper aeration. Additionally, make sure you have a balanced mix of nitrogen-rich juice pulp and carbon-rich materials to facilitate decomposition.
- Lumpy texture: If your compost pile appears lumpy or clumpy, it may indicate poor aeration or insufficient layering. Ensure that you mix the materials thoroughly during the layering process and turn the pile regularly to promote better air circulation. Consider adding more coarse materials like shredded branches to create air pockets in the compost pile.
It’s important to remember that composting is a natural process, and challenges may arise along the way. Patience, monitoring, and adjustments are key to troubleshooting these issues. By addressing these common problems, you can create a healthier and more productive compost pile.
Additionally, maintaining ideal composting conditions, such as the right balance of green and brown materials, proper moisture levels, and regular turning, will help prevent most common issues from occurring. With time and practice, you’ll become more adept at managing your compost pile and successfully composting juice pulp to create nutrient-rich organic matter for your garden.
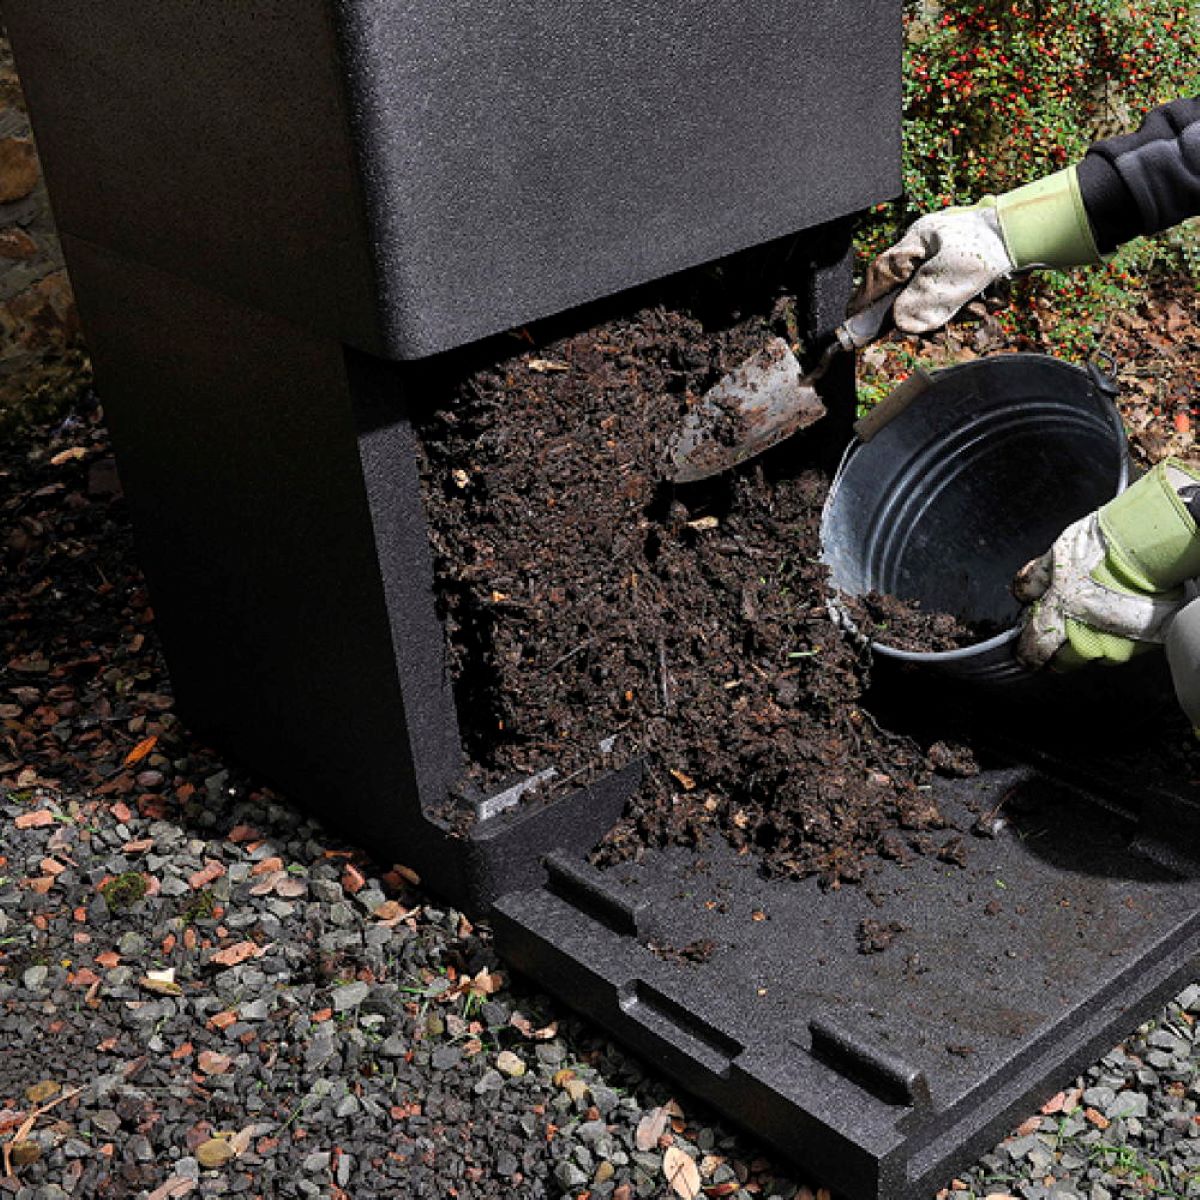
Using the Finished Compost in Your Garden
After patiently waiting for the composting process to complete, you are left with a valuable resource: nutrient-rich finished compost. Now it’s time to harvest and put that compost to good use in your garden. Here are some ways to utilize the finished compost:
- Soil amendment: Incorporating the finished compost into your garden soil is one of the best ways to improve its structure and fertility. Spread a layer of compost over your garden beds and gently mix it into the top few inches of soil. This enriches the soil with a diverse array of nutrients, enhances water retention, and promotes beneficial microbial activity.
- Top-dressing: For established plants, apply a thin layer of compost around the base of the plant, avoiding direct contact with the stems. This top-dressing acts as a slow-release fertilizer and provides a boost of nutrients to your plants throughout the growing season. It also helps conserve moisture and suppresses weed growth.
- Potting mix ingredient: Mix the finished compost into your potting soil to create a nutrient-rich and well-draining growing medium for container plants. The compost improves soil structure, increases water-holding capacity, and supplies essential nutrients to your potted plants.
- Seed starting medium: Blend the compost with other materials like vermiculite or perlite to create a homemade seed starting mix. The compost adds beneficial microbes and nutrients, creating an ideal environment for germinating seeds and nurturing young seedlings.
- Compost tea: Steep a handful of finished compost in water to create a nutrient-rich compost tea. Use this liquid fertilizer to feed your plants by either spraying it on the foliage or watering it directly into the soil. Compost tea provides a quick boost of nutrients and beneficial microorganisms to support plant growth.
Regardless of how you choose to use your finished compost, remember that it’s a valuable organic resource that promotes soil health and plant vitality. It replaces the need for synthetic fertilizers, reduces dependency on chemical inputs, and fosters a more sustainable approach to gardening.
As you incorporate the finished compost into your garden, observe the positive changes it brings. Improved soil structure, increased moisture retention, healthier plants, and a more fruitful harvest are some of the benefits you can expect. Regularly replenishing your garden with compost will maintain a fertile and thriving ecosystem, nurturing a vibrant and productive space for all your plantings.
Conclusion
Embarking on DIY projects can be a fulfilling and rewarding experience. Whether you’re refurbishing furniture, building structures, or creating unique crafts, DIY projects allow you to unleash your creativity, save money, and customize your surroundings. The world of DIY projects offers endless possibilities, empowering you to take control of your home and embrace your inner handyman or craftsperson.
By engaging in DIY projects, you not only save money by completing tasks yourself but also learn new skills and expand your knowledge base. From basic repairs and renovations to more complex projects, DIY gives you the opportunity to develop your abilities and become more self-sufficient.
Moreover, DIY projects promote sustainability and eco-friendly practices. Applying the principles of reduce, reuse, and recycle, DIY enthusiasts can repurpose items, reduce waste, and create personal and unique solutions that demonstrate a commitment to the environment.
In addition to the practical benefits, DIY projects also provide a creative outlet and serve as a source of entertainment and stress relief. Engaging in hands-on activities allows you to disconnect from technology, immerse yourself in the present moment, and experience the joy of creating something with your own two hands.
Composting juice pulp is just one example of a DIY project that offers numerous benefits. It provides a sustainable solution for repurposing organic waste, reduces landfill waste, and creates nutrient-rich compost for your garden. By following the steps outlined in this guide, you can turn juice pulp into a valuable resource and contribute to the health of your garden and the environment.
So, seize the opportunity to explore the world of DIY projects. Let your creativity soar, embrace the learning process, and relish in the satisfaction that comes from completing projects that enhance your home and surroundings. With each DIY endeavor, you’ll refine your skills, build your confidence, and continue to uncover the joys of hands-on creation.