Home>Gardening Techniques>DIY Projects>How To Make Compost Hot
DIY Projects
How To Make Compost Hot
Modified: January 22, 2024
Learn how to make compost hot with this simple DIY project. Turn your kitchen and garden waste into nutrient-rich compost quickly and effectively.
(Many of the links in this article redirect to a specific reviewed product. Your purchase of these products through affiliate links helps to generate commission for Chicagolandgardening.com, at no extra cost. Learn more)
Table of Contents
- Introduction
- What is Hot Composting?
- Benefits of Hot Composting
- Creating the Right Compost Mixture
- Choosing the Right Location for Hot Composting
- Building the Compost Pile
- Monitoring and Maintaining Heat Levels
- Turning and Aerating the Compost Pile
- Troubleshooting Common Issues
- Harvesting and Using Hot Compost
- Conclusion
Introduction
Welcome to the world of DIY projects! If you’re someone who loves getting your hands dirty and finding creative ways to improve your home or garden, then you’ve come to the right place. DIY projects not only allow you to unleash your creativity, but they also give you the opportunity to save money and customize your living space to suit your unique style.
Whether you’re a seasoned DIY enthusiast or just starting out, this comprehensive guide is designed to help you navigate the world of DIY projects with ease. From simple home repairs to ambitious renovations, we’ll cover a wide range of projects that you can tackle on your own. No matter your skill level or budget, there’s always a DIY project that’s perfect for you.
In this guide, you’ll find expert tips, step-by-step instructions, and valuable insights to make your DIY projects a success. We’ll delve into various topics such as home improvement, woodworking, gardening, and more. Each section will provide you with the knowledge and inspiration you need to confidently take on your next DIY endeavor.
Remember, the beauty of DIY projects lies in the journey as much as the final result. Embrace the process, learn from your mistakes, and enjoy the satisfaction of creating something with your own two hands. So grab your tools, unleash your creativity, and let’s embark on an exciting DIY adventure together!
What is Hot Composting?
Hot composting is a method of composting that utilizes high temperatures to rapidly break down organic materials. Unlike traditional cold composting, where decomposition occurs slowly over several months, hot composting speeds up the process by providing an optimal environment for microorganisms to thrive and break down the materials more efficiently.
The key to hot composting lies in achieving and maintaining the right temperature range, typically between 130°F and 160°F (55°C and 71°C). These high temperatures promote the activity of thermophilic bacteria, which are responsible for the decomposition process. As the bacteria consume the organic matter, they generate heat, causing the pile to reach and sustain the desired temperature.
Hot composting offers several advantages over cold composting. Firstly, it significantly reduces the composting time, usually taking only a few weeks to a few months to produce rich, nutrient-dense compost. This is particularly beneficial for gardeners who want to use the compost sooner rather than later.
Additionally, hot composting has the added advantage of killing weed seeds, pathogens, and harmful bacteria due to the high temperatures reached in the pile. This makes the resulting compost safer to use in your garden and helps prevent the spread of weeds or diseases.
Furthermore, hot composting can handle a wider range of materials compared to cold composting. Items such as meat, dairy products, and diseased plant matter, which should be avoided in cold composting due to the potential for pests and odor issues, can be safely composted in a hot compost pile.
To achieve hot composting, you need to create the right compost mixture, provide the ideal conditions for heat generation, and properly manage the pile. In the following sections, we’ll explore the steps and techniques involved in hot composting, so you can get started and enjoy the numerous benefits this method brings to your gardening and sustainability efforts.
Benefits of Hot Composting
Hot composting offers a range of benefits that make it a preferred method for many gardeners and environmental enthusiasts. Let’s explore some of the key advantages of hot composting:
1. Rapid Decomposition: One of the primary benefits of hot composting is the accelerated decomposition process. The high temperatures generated in the compost pile speed up the breakdown of organic materials, resulting in a finished compost much faster compared to traditional cold composting methods. This means you can enjoy nutrient-rich compost for your garden in a matter of weeks or months rather than waiting for several months or even a year.
2. Weed Seed and Pathogen Reduction: The heat generated during hot composting is particularly effective in killing weed seeds, pathogens, and harmful bacteria. This helps ensure that the resulting compost is free from unwanted weeds and reduces the risk of transmitting diseases to your plants. Hot composting provides a more reliable way to eliminate these unwanted elements from the composting process, resulting in healthier garden soil.
3. Versatile Material Acceptance: Hot composting can handle a wider range of organic materials compared to cold composting. This includes kitchen scraps, meat, dairy products, and diseased plant materials that are generally discouraged from being composted in cold compost piles due to the potential for pests and odors. The high temperatures reached during hot composting effectively break down and sanitize these materials, making them safe for use in the compost pile.
4. Improved Nutrient Content: The thermophilic bacteria that thrive in a hot compost pile are highly efficient at breaking down organic matter and releasing essential nutrients. This leads to the production of compost that is rich in nitrogen, phosphorus, potassium, and other micronutrients. When added to your garden soil, hot compost can significantly enhance its fertility, providing the nourishment your plants need for healthy growth and abundant yields.
5. Sustainable Waste Management: Hot composting is an excellent way to reduce waste and practice sustainable waste management. By diverting organic materials from the landfill and turning them into valuable compost, you are minimizing the environmental impact of waste disposal. This not only benefits your garden but also contributes to the larger effort of reducing greenhouse gas emissions and promoting a more sustainable lifestyle.
Incorporating hot composting into your gardening routine can bring significant benefits, both for your plants and the environment. With its efficiency, versatility, and nutrient-rich results, hot composting is a valuable tool for any gardener looking to create healthy, thriving gardens while minimizing waste.
Creating the Right Compost Mixture
Creating the right compost mixture is crucial for successful hot composting. A balanced blend of organic materials is essential to provide the necessary nutrients and microorganisms for efficient decomposition. Here are some key considerations when constructing your compost pile:
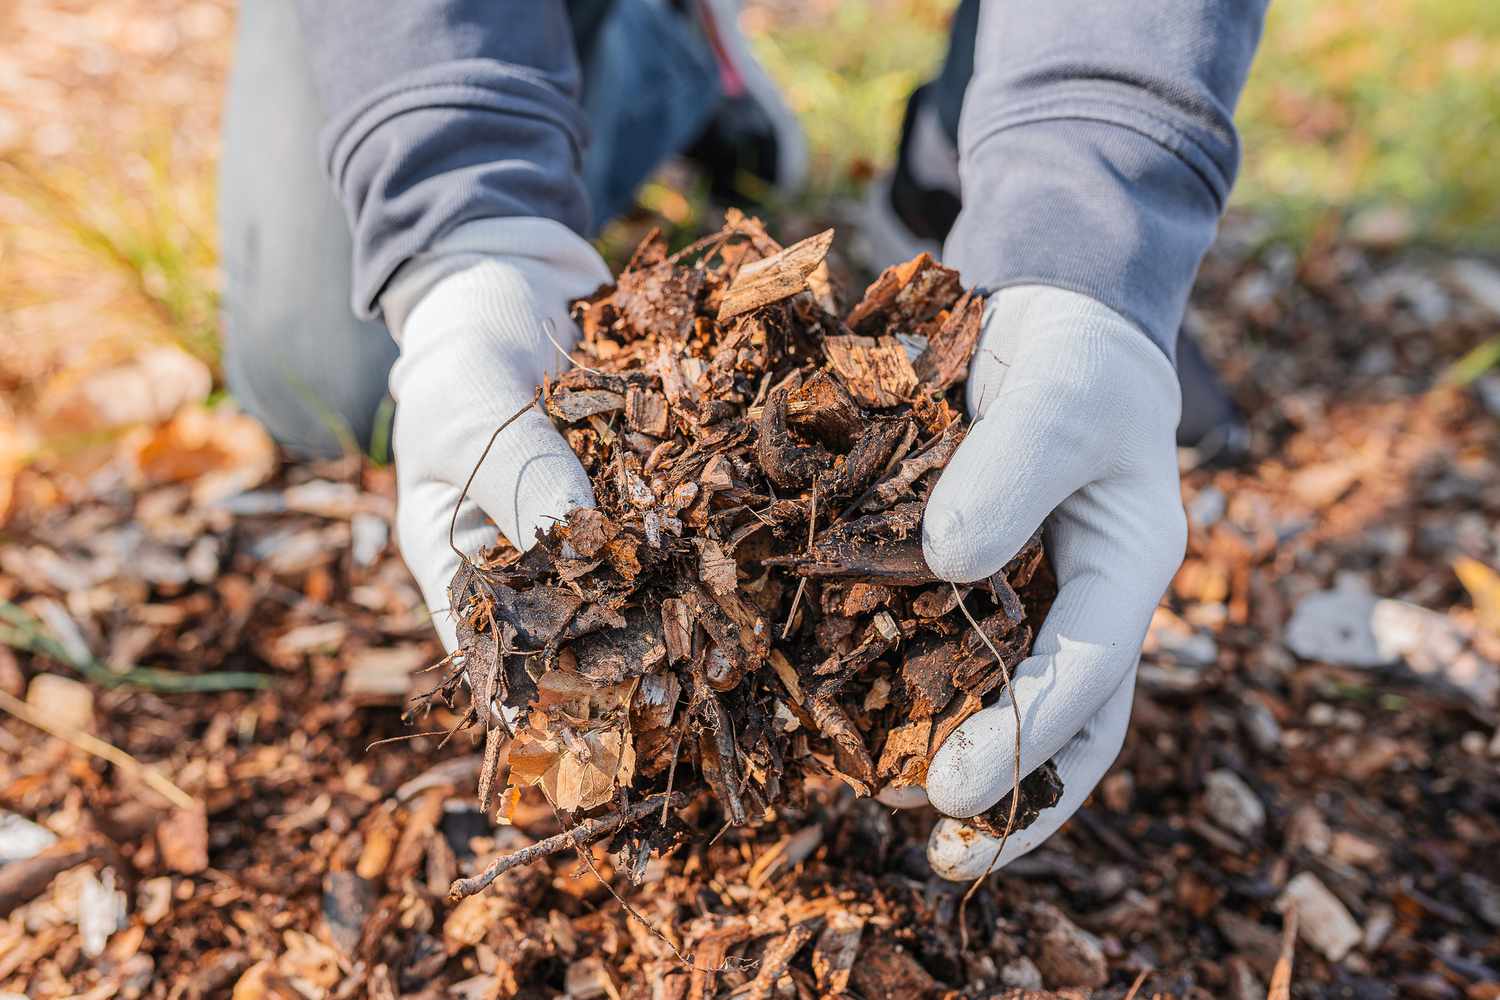
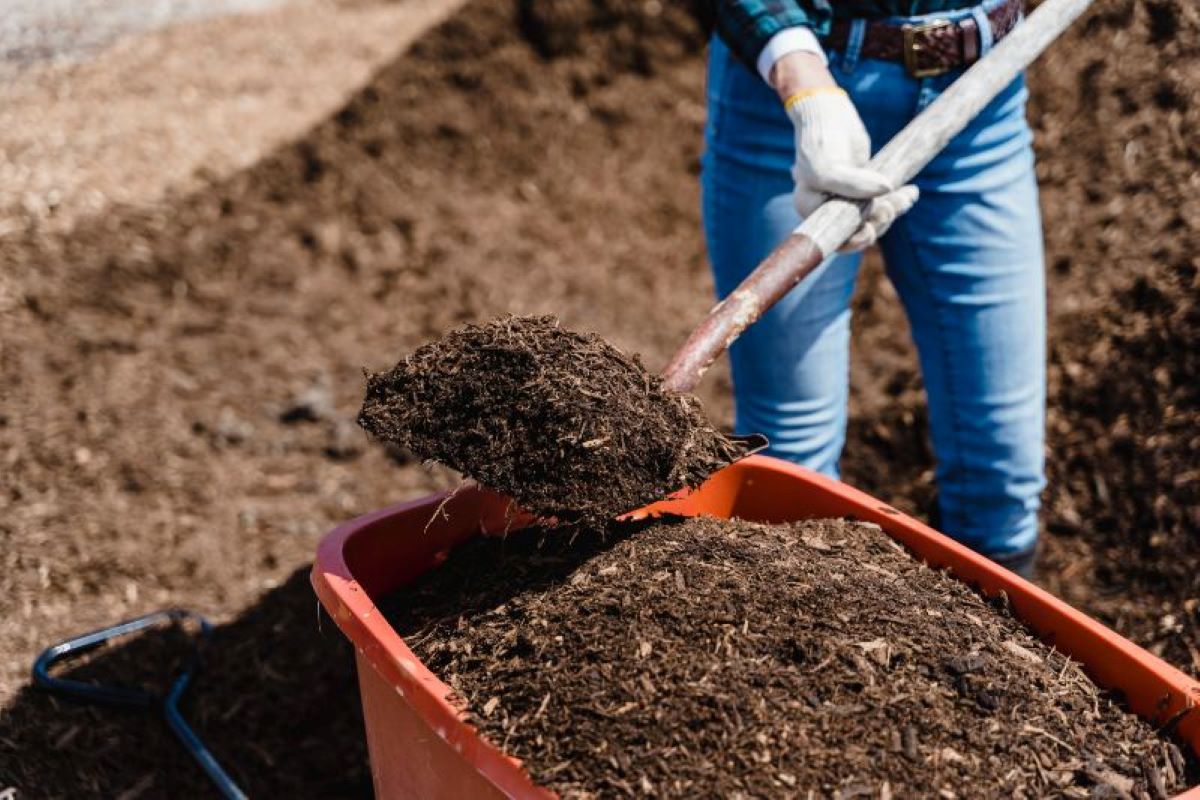
1. Carbon to Nitrogen Ratio: Achieving the right balance between carbon-rich (browns) and nitrogen-rich (greens) materials is vital. The ideal carbon to nitrogen ratio is around 30 parts carbon to 1 part nitrogen. Carbon-rich materials include dry leaves, straw, wood chips, and paper. Nitrogen-rich materials include grass clippings, kitchen scraps, manure, and fresh plant debris. Aim for a mix that provides adequate nitrogen to support the activity of the thermophilic bacteria responsible for hot composting.
2. Chop and Shred: To speed up the composting process, it’s beneficial to chop or shred the organic materials into smaller pieces. This increases the surface area available for microbial activity and promotes faster decomposition. Be sure to cut up larger materials such as tree branches or prunings before adding them to the compost pile.
3. Moisture Content: Proper moisture levels are crucial for the decomposition process. The compost pile should be consistently moist, similar to a wrung-out sponge. Too much moisture can lead to anaerobic conditions and unpleasant odors, while too little moisture can slow down decomposition. Regularly monitor the moisture level and add water or dry materials as needed to maintain optimal moisture.
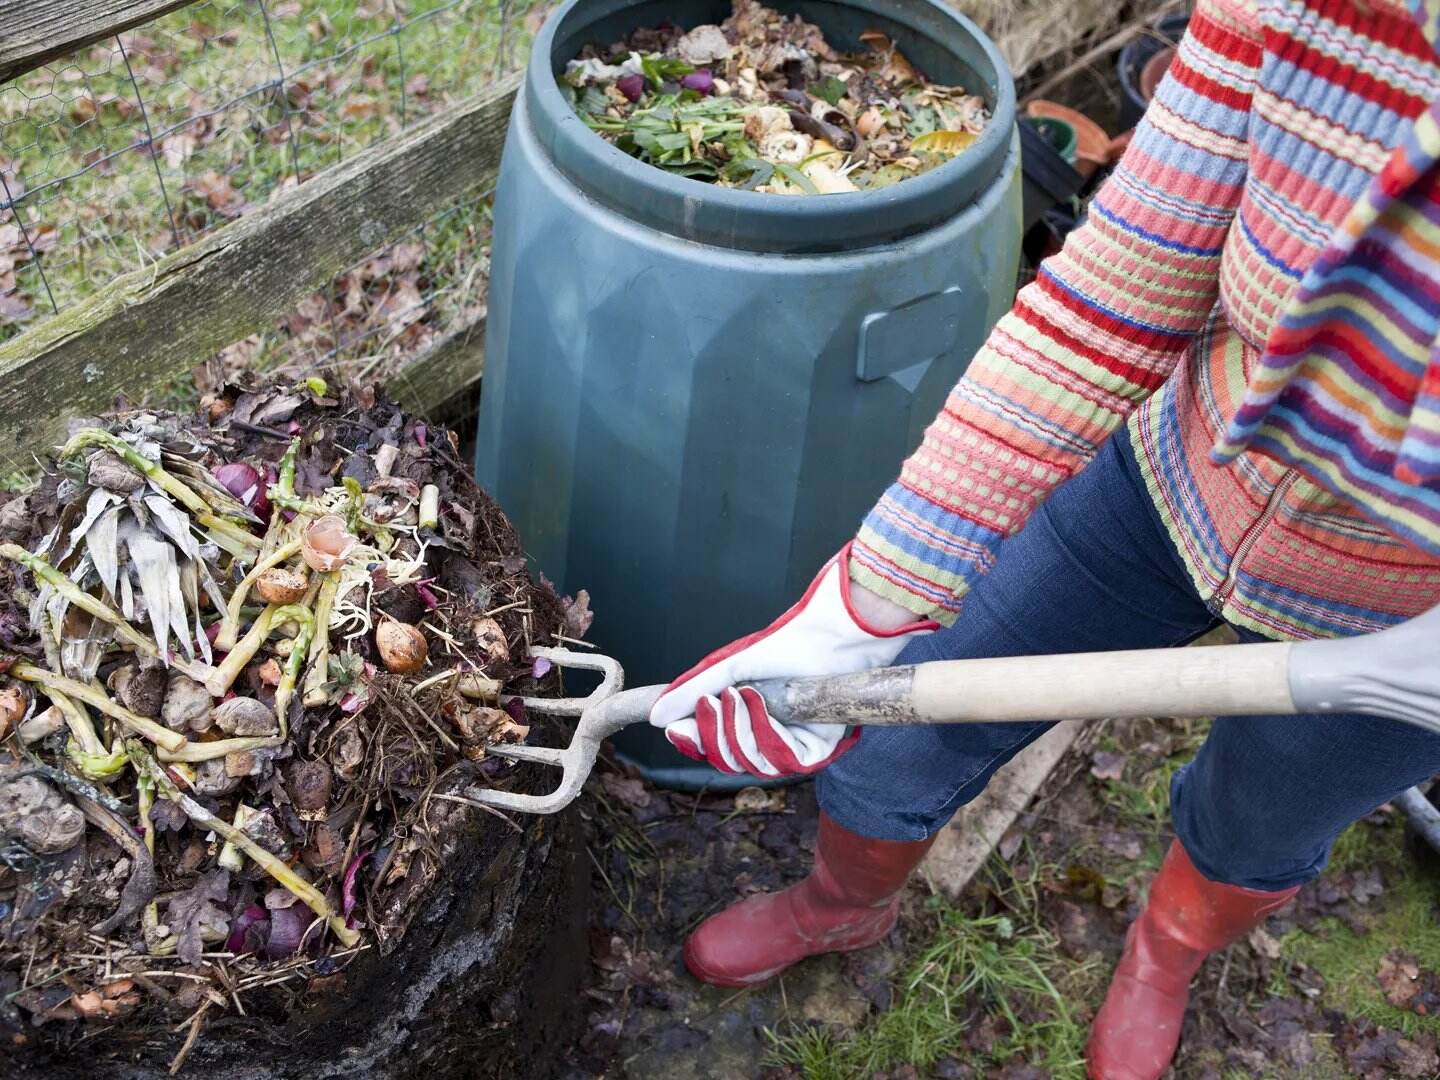
4. Aeration and Oxygen: Adequate airflow and oxygen supply are essential for the microbial activity involved in hot composting. To ensure proper aeration, regularly turn or mix the compost pile using a garden fork or compost turning tool. This helps distribute oxygen and prevents the pile from becoming compacted. Alternatively, consider using a compost bin or tumbler that allows for easy aeration.
5. Temperature Monitoring: Monitoring the temperature of the compost pile is crucial to ensure hot composting is taking place. Use a compost thermometer to check the internal temperature of the pile regularly. Adjust the mixture or pile size if needed to maintain the optimal temperature range of 130°F to 160°F (55°C to 71°C). Remember that the heat generation is a result of active microbial activity, so maintaining the right conditions is key.
By carefully selecting and blending the right mix of organic materials, you can create an optimal composting environment that supports hot composting. Experiment with different combinations and ratios to find what works best for your specific compost pile. Remember to continue adding materials in layers, alternating between carbon-rich and nitrogen-rich components, as you build your compost pile.
In the next section, we will explore the importance of choosing the right location for your hot compost pile and how it can impact the overall success of your composting efforts.
Choosing the Right Location for Hot Composting
Selecting the right location for your hot compost pile can greatly impact the success of your composting efforts. Here are some factors to consider when deciding where to set up your composting area:
1. Sunlight: Choose a location that receives ample sunlight throughout the day. The heat from the sun will contribute to raising the temperature of the compost pile, aiding in the decomposition process. Aim for at least six to eight hours of direct sunlight, although more is even better. Avoid placing the compost pile in areas that are predominantly shaded or obstructed by buildings or trees.
2. Drainage: Good drainage is essential to prevent the compost pile from becoming waterlogged and creating anaerobic conditions. Avoid low-lying areas or places prone to collecting water, as excessive moisture can slow down decomposition and lead to unpleasant odors. Look for a spot with natural slope or consider adding drainage materials like gravel or a layer of straw to improve drainage.
3. Accessibility: Consider the convenience and accessibility of the location. You’ll want a spot that is easily accessible for adding new materials, turning the pile, and harvesting the finished compost. It’s recommended to have a clear path and enough space around the compost pile to comfortably maneuver and carry out these tasks.
4. Odor Control: While hot composting should minimize any unpleasant odors, it’s still a good idea to choose a location that is downwind from your living area or neighbor’s property. This helps prevent any potential odor issues from disturbing nearby spaces. If odor becomes a concern, you can cover the compost pile with a layer of straw or leaves to help contain odors.
5. Consideration of Neighbors: If you live in a close-knit neighborhood or have nearby neighbors, it’s courteous to consider their proximity and potential concerns. Place your compost pile at a reasonable distance from their properties to minimize any potential disturbances. Communicating and educating them about your composting efforts can also help address any concerns they may have.
6. Space: Evaluate the available space you have for your compost pile. Depending on the volume of materials you plan to compost, you may need a larger or smaller area. If space is limited, consider using a compost bin or tumbler, which can help contain the compost pile while allowing for efficient decomposition.
Remember that the location you choose for your hot composting pile will have a direct impact on its performance. By considering these factors and finding the ideal location, you can optimize the conditions for heat generation and create a productive composting system.
In the next section, we will explore the steps involved in building the compost pile and the essential elements to include for successful hot composting.
Building the Compost Pile
Building a compost pile is an important step in hot composting. Here’s a step-by-step guide to help you construct a successful compost pile:
1. Choose the Right Spot: Begin by selecting the location for your compost pile, taking into consideration the factors mentioned earlier. Ensure it has access to sunlight and proper drainage.
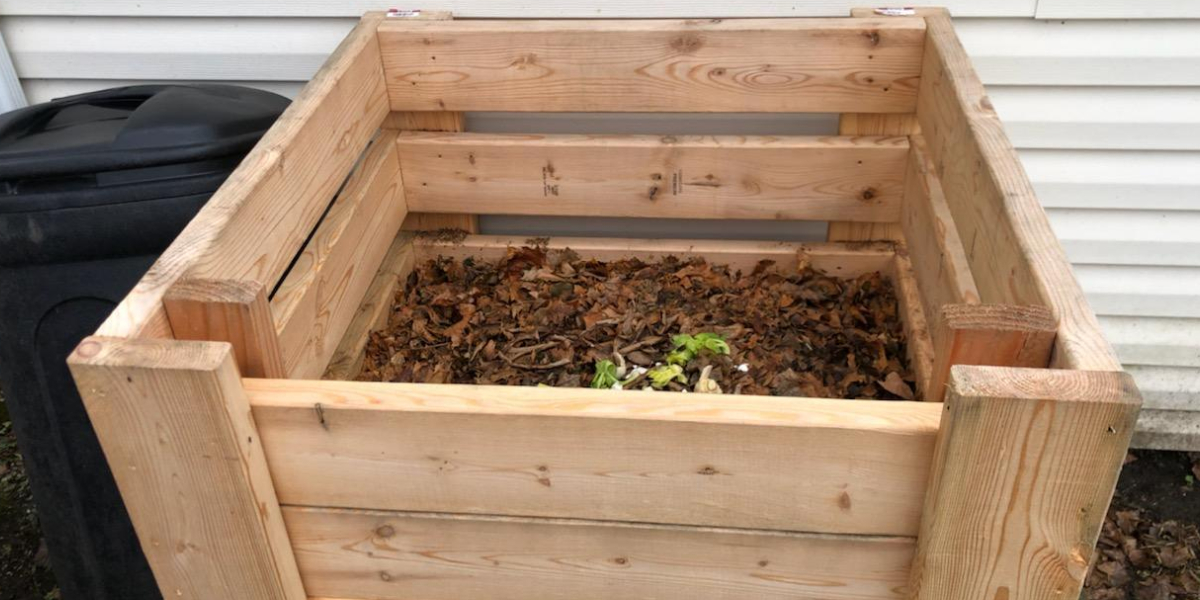
2. Prepare the Base: Clear the area and remove any grass or weeds. It’s beneficial to place a layer of twigs or small branches at the bottom of the pile. This helps improve airflow and drainage, preventing the compost pile from becoming waterlogged.
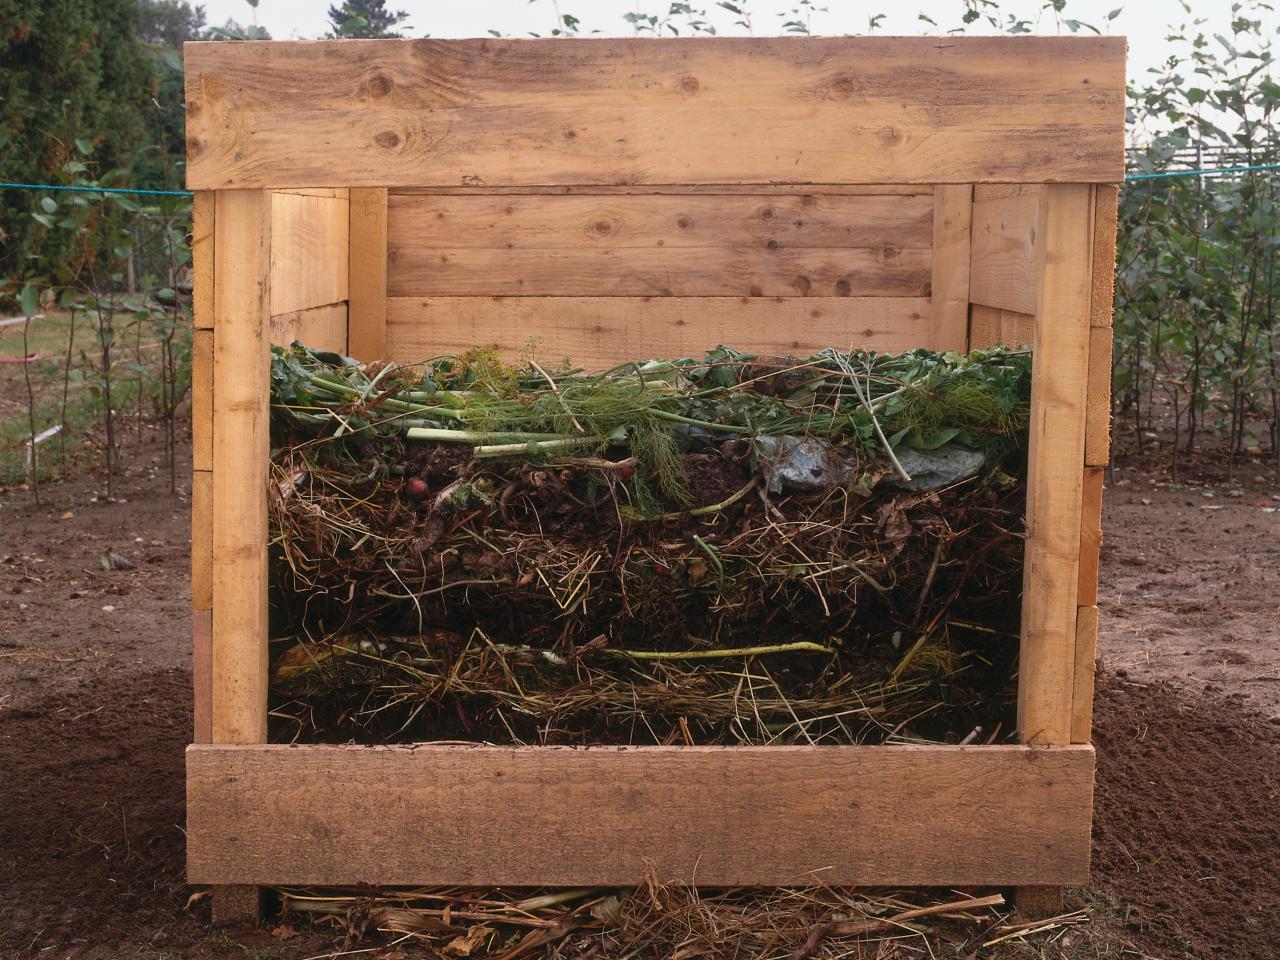
3. Add Browns and Greens: Start building the compost pile by adding a layer of carbon-rich “browns,” such as dry leaves, shredded paper, or straw. Follow this with a layer of nitrogen-rich “greens,” such as grass clippings, kitchen scraps, or fresh plant material. Alternate between layers of browns and greens to create a well-balanced mixture.
4. Moisten the Layers: As you build the compost pile, lightly moisten each layer with water. The goal is to achieve a moist, but not saturated, environment. The moisture will help promote decomposition and maintain optimal conditions for the microorganisms to thrive.
5. Repeat the Layers: Continue adding alternating layers of browns and greens until the compost pile reaches the desired size. Aim for a pile that is at least three feet high and three feet wide. This size provides enough mass to generate and sustain the heat necessary for hot composting.
6. Cover the Pile: Once the compost pile is built, cover it with a layer of straw, leaves, or a tarp. This cover helps retain heat and moisture, creating a controlled environment within the pile. It also prevents the pile from drying out or getting waterlogged during rainy periods.
7. Monitor and Adjust: Regularly monitor the temperature of the compost pile using a compost thermometer. Ensure it stays within the optimal range of 130°F to 160°F (55°C to 71°C). If the temperature is too low, add more nitrogen-rich greens. If it’s too high, add more carbon-rich browns or turn the pile to improve airflow.
8. Turning the Pile: To maintain a consistent temperature and promote even decomposition, turn the compost pile every one to two weeks. This helps remix the materials, introduces oxygen, and prevents the pile from compacting. Aim to bring the outer materials to the center of the pile and vice versa.
Building a well-constructed compost pile is the foundation for successful hot composting. By layering the right mix of organic materials, maintaining proper moisture levels, and regularly turning the pile, you create the optimal conditions for efficient decomposition and heat generation.
In the next section, we will explore how to monitor and maintain heat levels in the compost pile to ensure successful hot composting.
Monitoring and Maintaining Heat Levels
Monitoring and maintaining heat levels in your compost pile is essential for successful hot composting. Here are some important steps to help you effectively manage the temperature:
1. Use a Compost Thermometer: Invest in a compost thermometer to regularly monitor the internal temperature of your compost pile. Insert the thermometer into the center of the pile, away from the edges. This will give you an accurate reading of the heat generated by the decomposition process.
2. Check the Temperature Regularly: It’s important to check the temperature of your compost pile at least once a week, preferably in the morning before adding fresh materials. Record the temperature and track its progress over time. This will help you understand how well your compost pile is heating up and give you an indication of the decomposition process.
3. Maintain the Optimal Temperature Range: The ideal temperature range for hot composting is between 130°F and 160°F (55°C and 71°C). If the temperature falls below this range, you may need to add more nitrogen-rich green materials to increase the heat. If the temperature exceeds this range, you can add more carbon-rich brown materials or turn the pile to allow for better airflow and heat dissipation.
4. Adjust the Compost Mixture: If your compost pile isn’t reaching the desired temperature, it may be due to an imbalance in the carbon to nitrogen ratio. An abundance of carbon-rich browns can slow down the decomposition process and prevent the pile from heating up. Add more nitrogen-rich greens to provide additional fuel for the thermophilic bacteria and increase the heat generation.
5. Turn the Compost Pile: Regularly turning the compost pile helps distribute heat evenly and promotes better decomposition. Turning the pile once every one to two weeks will introduce oxygen into the pile, invigorate the microbial activity, and aid in maintaining consistent heat levels. Use a garden fork or compost turning tool to gently mix the materials in the pile.
6. Water Management: Proper moisture levels are crucial for heat generation in a compost pile. If your compost pile is too dry, it may struggle to reach and maintain the desired temperature range. Water the pile lightly as needed to maintain a moist, but not soggy, environment. Avoid overwatering, as this can lead to anaerobic conditions and unpleasant odors.
By regularly monitoring the temperature of your compost pile and making necessary adjustments, you can maintain optimal heat levels for hot composting. Remember that the heat generated by the compost pile is a natural byproduct of microbial activity. By providing the right conditions and closely observing the temperature, you can ensure successful hot composting.
In the next section, we will explain the importance of turning and aerating the compost pile to further enhance the hot composting process.
Turning and Aerating the Compost Pile
Turning and aerating the compost pile is an essential step in hot composting. Properly mixing the materials and introducing oxygen helps promote decomposition and maintain optimum heat levels. Here are some key considerations for turning and aerating your compost pile:
1. Turn Regularly: Turning the compost pile at regular intervals is crucial for even decomposition and heat distribution. Aim to turn the pile every one to two weeks, or whenever the temperature drops or becomes stagnant. Use a garden fork or compost turning tool to lift and mix the materials. Turning the pile brings the outer materials to the center, ensuring that everything undergoes uniform decomposition.
2. Introduce Oxygen: Oxygen is vital for the activity of aerobic microorganisms responsible for hot composting. Turning the pile introduces fresh oxygen into the pile, revitalizing the microbial activity and fueling the decomposition process. As you turn the pile, mix the materials thoroughly to maximize aeration. This will help break down the organic matter more efficiently and prevent the pile from becoming compacted.
3. Add Bulking Agents: Incorporating bulking agents into your compost pile can improve aeration and moisture management. Bulking agents such as coarse wood chips, straw, or shredded cardboard create air pockets in the pile, allowing for better oxygen circulation. These materials also help prevent the pile from becoming too dense, ensuring that water drains properly and maintaining a healthy balance of moisture.
4. Moisture Check: When turning the compost pile, take the opportunity to check its moisture content. Add water if the pile appears too dry, or mix in dry carbon-rich materials if it seems too wet. Proper moisture levels ensure the optimal environment for microbial activity and heat generation. Aim for a moist, sponge-like consistency that allows the materials to decompose effectively.
5. Layering Technique: As you turn the compost pile, consider layering the materials to enhance aeration. This can be done by separating the pile into multiple smaller windrows or creating air channels within the pile. These layers or channels allow for better air circulation and facilitate the breakdown of organic matter.
6. Temperature Monitoring: When turning the compost pile, take the opportunity to monitor its temperature using a compost thermometer. The temperature should be within the optimal range of 130°F to 160°F (55°C to 71°C). If the temperature is lower than desired, turning the pile can help reactivate and distribute heat. Adjust the mixture or pile size if needed to maintain the desired temperature.
By regularly turning and aerating your compost pile, you create a well-balanced and oxygen-rich environment for hot composting. This stimulates microbial activity, enhances decomposition, and maintains the necessary heat levels. Remember to be gentle when turning the pile to avoid disturbing beneficial organisms and to maintain the structure of the pile.
In the next section, we’ll discuss common issues that may arise during hot composting and how to troubleshoot them effectively.
Troubleshooting Common Issues
While hot composting can be a highly effective method, certain issues may arise along the way. Here are some common problems that you may encounter during hot composting and how to troubleshoot them:
1. Insufficient Heat: If your compost pile is not reaching the desired temperature range of 130°F to 160°F (55°C to 71°C), it may indicate an imbalance in the carbon to nitrogen ratio or insufficient moisture. Adjust your compost mixture by adding more nitrogen-rich greens or adjusting the moisture levels. Turning the pile and ensuring proper aeration can also help reactivate heat-generating microbial activity.
2. Unpleasant Odors: Foul smells from your compost pile can indicate anaerobic conditions or the presence of improper materials. Ensure proper aeration by turning the pile regularly and adding bulking agents to improve airflow. Avoid adding excessive amounts of high-nitrogen materials such as fresh grass clippings or kitchen scraps. If odors persist, consider adding a layer of carbon-rich materials like straw or leaves, or adjusting the pile to increase oxygen circulation.
3. Slow Decomposition: If your compost pile is not decomposing as quickly as expected, it may be due to an inadequate carbon to nitrogen ratio, low moisture levels, or insufficient oxygen supply. Adjust the mixture by adding more nitrogen-rich greens or moisture as needed. Turn the pile more frequently to foster oxygen circulation. Chop or shred larger materials to increase surface area and promote faster breakdown.
4. Pests and Rodents: If your compost pile attracts pests or rodents, it could be due to the presence of meat, dairy products, or oily/greasy materials. Avoid adding these items to your hot compost pile, as they can attract unwanted creatures. Additionally, make sure your compost pile is well-contained and secure. Consider using a compost bin or tumbler that is pest-proof to minimize the risk of infestation.
5. Excessive Moisture: If your compost pile becomes too wet, it can lead to anaerobic conditions, unpleasant odors, and slow decomposition. Monitor moisture levels and adjust accordingly. Add dry carbon-rich materials such as leaves, straw, or shredded paper to absorb excess moisture. Ensure proper drainage in the compost pile location to prevent waterlogging.
6. Weed Seeds and Disease Spread: If your hot compost pile is not reaching sufficiently high temperatures, it may not effectively kill weed seeds or pathogens. Ensure that your compost pile is maintaining optimal heat levels through proper monitoring and adjustments. Avoid adding diseased plant materials or persistent weeds that can survive hot composting temperatures.
By identifying and troubleshooting these common issues, you can address any challenges that may arise during the hot composting process. Remember that hot composting is a dynamic process, and it may require adjustments and fine-tuning to achieve optimal results.
Now that we have covered troubleshooting, let’s move on to the next section, where we will explore the final step of hot composting, which is harvesting and using your compost.
Harvesting and Using Hot Compost
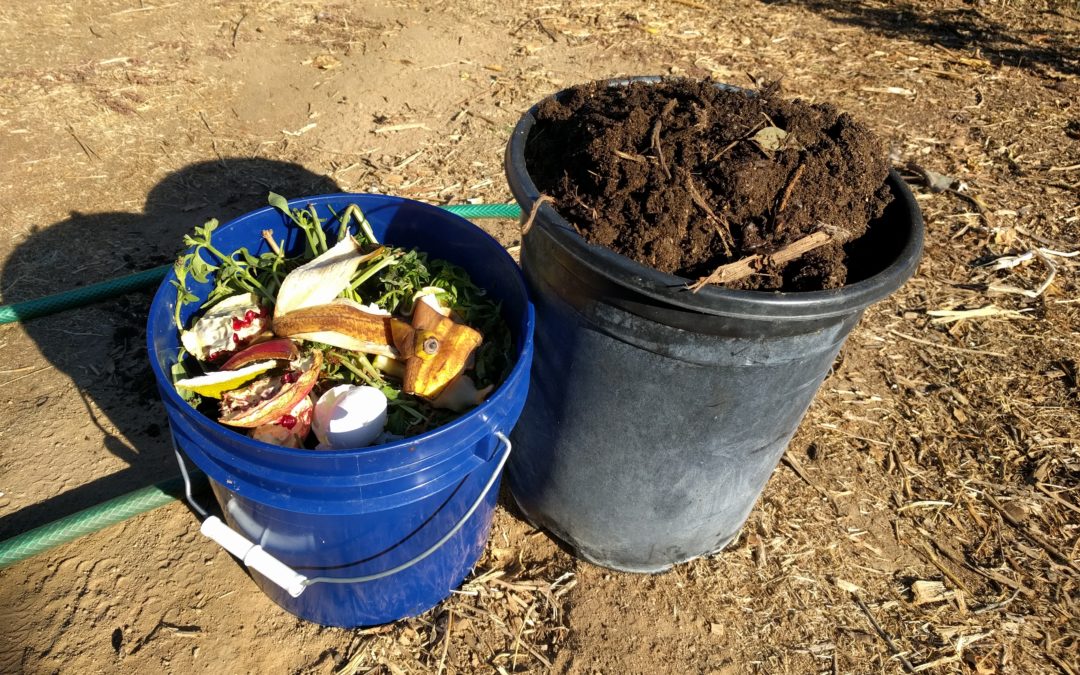
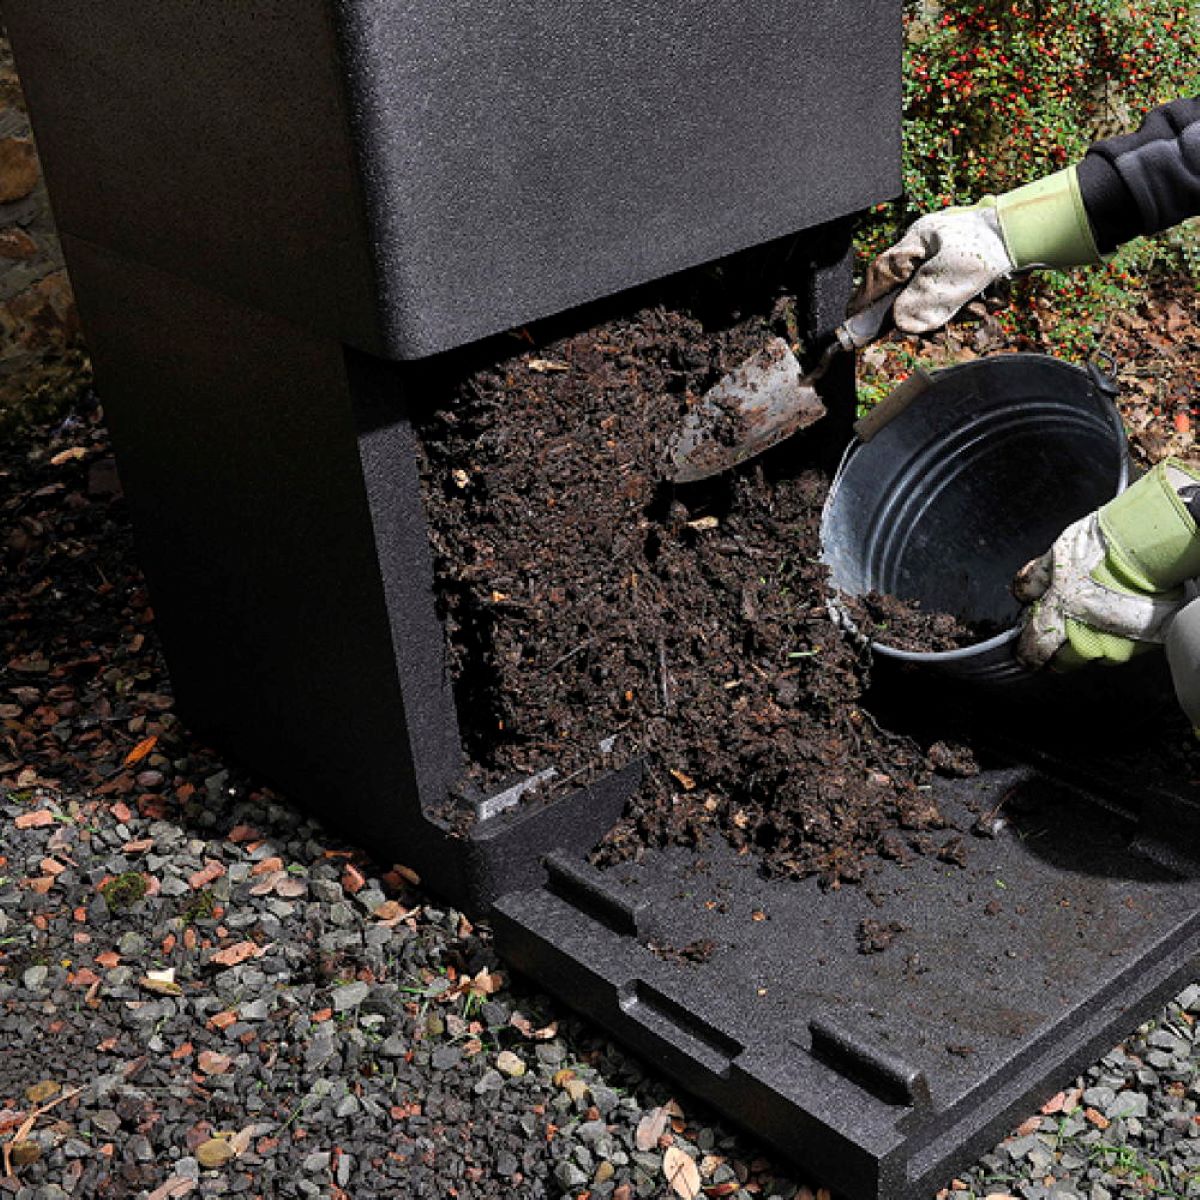
After weeks or months of hot composting, your compost pile will have transformed into a nutrient-rich, dark, and crumbly material ready to be harvested and used in your garden. Here are the steps to follow for harvesting and utilizing your hot compost:
1. Evaluate Maturity: Before harvesting, assess the maturity of your compost. The compost should be dark brown or black in color, with a pleasant earthy smell. If there are still visible traces of the original organic materials, it may need more time to fully decompose. Mature compost is crucial for optimal nutrient availability and performance in the garden.
2. Remove Uncomposted Material: If there are any visible pieces of uncomposted materials, such as woody twigs or larger chunks, you can sift or remove them before using the compost. Using a screen or mesh to filter out these materials can help ensure a finer and more consistent texture.
3. Apply the Compost: Once your compost is ready, it’s time to apply it to your garden. Spread a layer of compost about 1-2 inches thick across your soil surface. Gently rake or till the compost into the top few inches of soil. This helps incorporate the nutrients and organic matter, improving the soil structure and fertility.
4. Top Dressing: If your plants are already established, you can apply compost as a top dressing around their base. Spread a thin layer of compost, about half an inch thick, over the soil surface. This helps provide a slow-release source of nutrients and improves moisture retention around the plants’ root zones.
5. Mulching: Use compost as a mulch to help suppress weeds, retain soil moisture, and regulate soil temperature. Apply a layer of compost, typically 2-3 inches thick, around the base of plants, leaving a gap around the stem to prevent rot. Reapply mulch annually or as needed to maintain an adequate layer.
6. Compost Tea: Another way to utilize your hot compost is by making compost tea. Mix a few scoops of compost in a bucket of water, letting it steep for 24-48 hours. Strain the liquid and use it as a nutrient-rich liquid fertilizer for your plants. Dilute the compost tea with water before applying it to avoid over-fertilization.
7. Store Excess Compost: If you have more compost than you can use right away, store it in a cool, dry place or in sealed containers. This will help preserve its nutrients and prevent the compost from losing its beneficial microbial activity. Use stored compost as needed throughout the gardening season.
By following these steps, you can successfully harvest and utilize your hot compost to enrich your garden soil, boost plant growth, and promote overall garden health. Enjoy the benefits of your hard work and dedication to sustainable gardening practices.
In the next section, we will conclude our comprehensive guide to DIY projects, providing a summary of the key takeaways and encouraging you to continue exploring the world of DIY creativity.
Conclusion
Congratulations! You’ve reached the end of our comprehensive guide to DIY projects. We’ve covered a wide range of topics, from hot composting to troubleshooting common issues, and provided you with valuable insights to help you succeed in your DIY endeavors.
Throughout the guide, we’ve emphasized the importance of creativity, learning, and experimentation. DIY projects offer an exciting opportunity to unleash your imagination and transform your living environment. Whether you’re tackling home improvements, woodworking, or gardening, the key is to approach each project with enthusiasm and a willingness to learn.
Remember, DIY projects are not just about the final result but also about the journey itself. Embrace the process, overcome any challenges that come your way, and enjoy the satisfaction of creating something with your own two hands. Don’t be afraid to make mistakes along the way; they are opportunities for growth and improvement.
As you venture into the world of DIY projects, keep in mind the value of optimizing your content for search engines. While it’s important to create engaging and informative content, incorporating SEO techniques can help improve your visibility and reach a wider audience. Familiarize yourself with the basics of SEO, such as keyword research and on-page optimization, to enhance the effectiveness of your online presence.
Whether you’re a seasoned DIY enthusiast or just getting started, this guide serves as a valuable resource to inspire and guide you on your DIY journey. From creating the right compost mixture to troubleshooting common issues, we hope you’ve gained valuable insights and practical knowledge to embark on your next project with confidence.
Remember, you have the power to transform your living space, embrace sustainability, and save money through DIY projects. So, grab your tools, unleash your creativity, and let your imagination soar. With each project you undertake, you not only enhance your skills but also create a more personalized and unique living environment.
Thank you for joining us on this DIY adventure. We wish you the best of luck in all your future projects. Happy DIYing!