Home>Gardening Techniques>DIY Projects>How To Make Compost Indoors
DIY Projects
How To Make Compost Indoors
Modified: January 22, 2024
Learn how to make compost indoors with these DIY projects. Create nutrient-rich soil for your plants using simple methods and materials.
(Many of the links in this article redirect to a specific reviewed product. Your purchase of these products through affiliate links helps to generate commission for Chicagolandgardening.com, at no extra cost. Learn more)
Table of Contents
Introduction
Welcome to the world of indoor composting! If you are someone who is passionate about sustainable living and wants to reduce your carbon footprint, then indoor composting is a great way to start. Composting is the process of decomposing organic materials, such as kitchen scraps and yard waste, into nutrient-rich soil. It not only helps to reduce waste that would otherwise end up in landfills, but it also provides valuable compost that can be used to nourish your plants and gardens.
While traditional composting is typically done in outdoor compost bins, indoor composting offers a convenient solution for those who have limited outdoor space, live in apartments, or simply prefer to compost year-round. By composting indoors, you have the opportunity to make use of your kitchen waste and create a sustainable cycle in your own home.
Indoor composting is not only eco-friendly but also a rewarding and educational experience. It allows you to be more mindful of your consumption habits and helps you appreciate the value of organic waste. Plus, the added benefit of producing nutrient-rich compost ensures healthier plants and gardens.
In this guide, we will take you through the step-by-step process of setting up and maintaining an indoor composting system. You will learn about selecting the right container, choosing the appropriate materials, creating the compost pile, and troubleshooting common issues. By the end, you will have all the knowledge you need to successfully compost indoors and enjoy the benefits of nutrient-rich soil for your plants.
So, let’s dive in and discover the world of indoor composting!
Benefits of Indoor Composting
Indoor composting offers a range of benefits for both you and the environment. Here are some of the key advantages of incorporating indoor composting into your sustainable living practices:
- Reduces waste: By composting your kitchen scraps and other organic materials indoors, you can significantly reduce the amount of waste that ends up in landfills. This helps to minimize the production of greenhouse gases and contributes to a healthier environment.
- Convenient and space-saving: One of the main advantages of indoor composting is that it can be done in small spaces, such as apartments or homes with limited outdoor areas. You can use compact containers or specialized composting systems that fit neatly in your kitchen or balcony – making composting accessible to everyone.
- Year-round composting: Unlike traditional outdoor composting, indoor composting allows you to compost all year round, regardless of the weather conditions. This means you can continue diverting organic waste from landfills even during the winter months when outdoor composting may be challenging.
- Creates nutrient-rich compost: Indoor composting allows you to produce high-quality compost that is rich in nutrients and beneficial microorganisms. This nutrient-rich compost can be used to enrich your potted plants, indoor herbs, or gardens, providing them with natural fertilization and improving the overall health and productivity of your plants.
- Reduces reliance on chemical fertilizers: By using compost produced from indoor composting, you can reduce your reliance on synthetic fertilizers. Compost aids in improving soil structure, water retention, and nutrient availability, promoting healthier plants without the need for chemical additives.
- Educational and rewarding: Indoor composting offers a unique opportunity for learning and teaching about the natural cycle of organic waste. It allows you to engage in hands-on activities, observe the decomposition process, and gain a deeper appreciation for the environment and the importance of sustainable practices.
As you can see, indoor composting is not only beneficial for the environment but also offers practical advantages for the composting enthusiast. It allows you to play an active role in reducing waste, creating nutrient-rich soil, and cultivating a greener lifestyle.
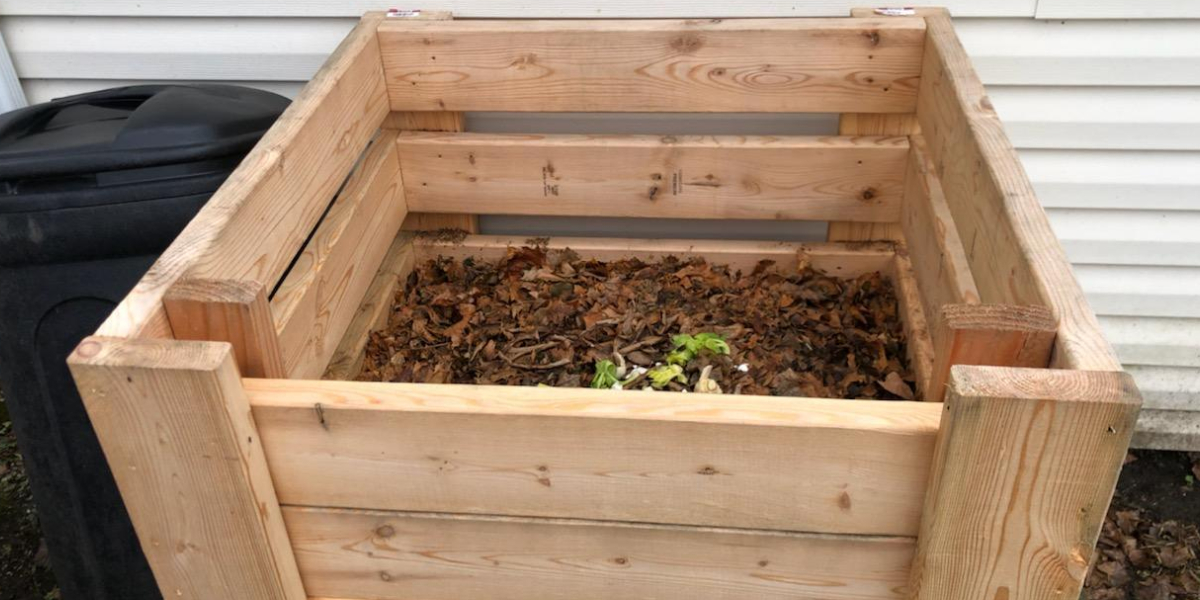
Choosing the Right Container
When it comes to indoor composting, selecting the right container is essential for a successful composting process. Here are some factors to consider when choosing the container for your indoor composting system:
- Size and capacity: The size of your container will depend on the amount of waste you generate and the available space in your home. Consider the volume of kitchen scraps and other organic materials you will be composting on a regular basis. Aim for a container that is large enough to accommodate your needs without taking up too much space.
- Airtight and odor control: To prevent odors and the attraction of pests, choose a container with an airtight lid or sealable cover. This will help contain any unpleasant smells and keep your indoor composting system hygienic and odor-free.
- Durability and insulation: Look for a container made from sturdy and durable materials that can withstand the decomposition process. Insulated containers are particularly beneficial in maintaining proper temperature levels for decomposition, especially in colder climates.
- Drainage and moisture control: Proper drainage is crucial to prevent excess moisture and the development of unpleasant odors. Choose a container with drainage holes or a tray at the bottom to collect excess moisture. Alternatively, you can place a layer of absorbent material like newspaper or cardboard at the bottom to soak up excess liquid.
- Compact and space-saving: Consider the available space in your home and opt for a container that fits well in your kitchen or balcony. There are numerous compact and space-saving options available, such as countertop compost bins or specialized composting systems designed for indoor use.
- Easy to clean and maintain: Look for a container that is easy to clean and maintain to ensure proper hygiene. Removable parts or compostable liners can make cleaning a breeze and help keep your indoor composting system in good condition.
Remember, the choice of container will depend on your specific needs and preferences. It’s important to find a container that suits your space, lifestyle, and composting goals. Whether it’s a small countertop bin or a larger composting system, selecting the right container is the first step towards successful indoor composting.
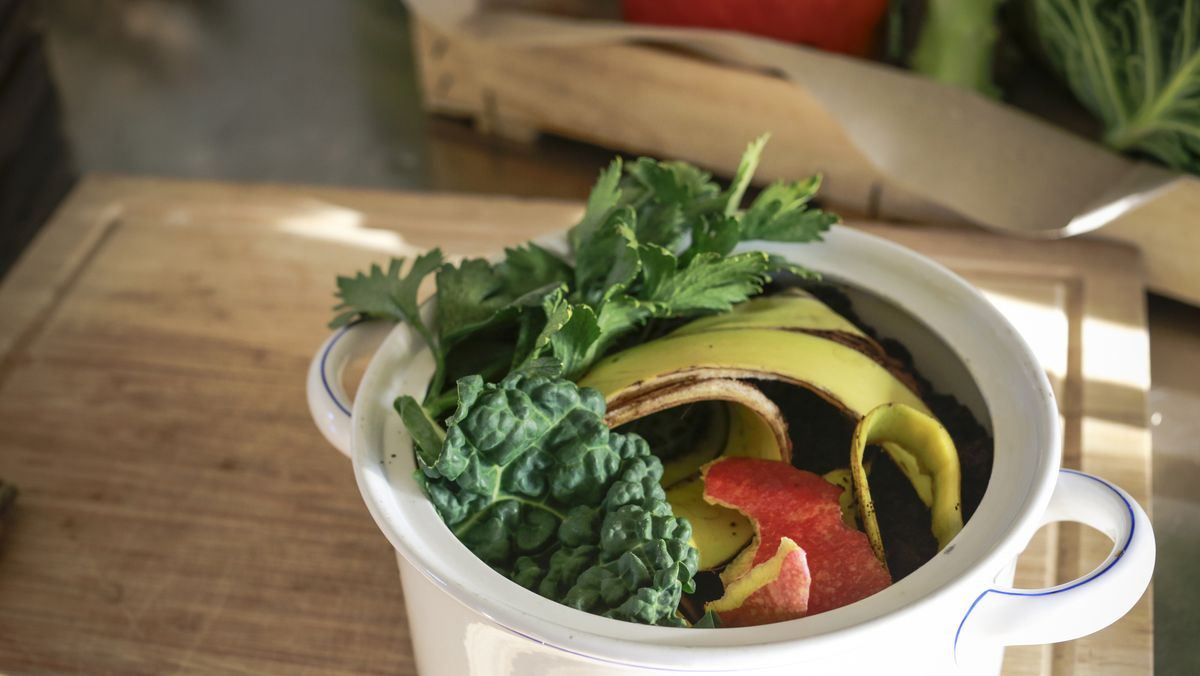
Selecting the Right Materials
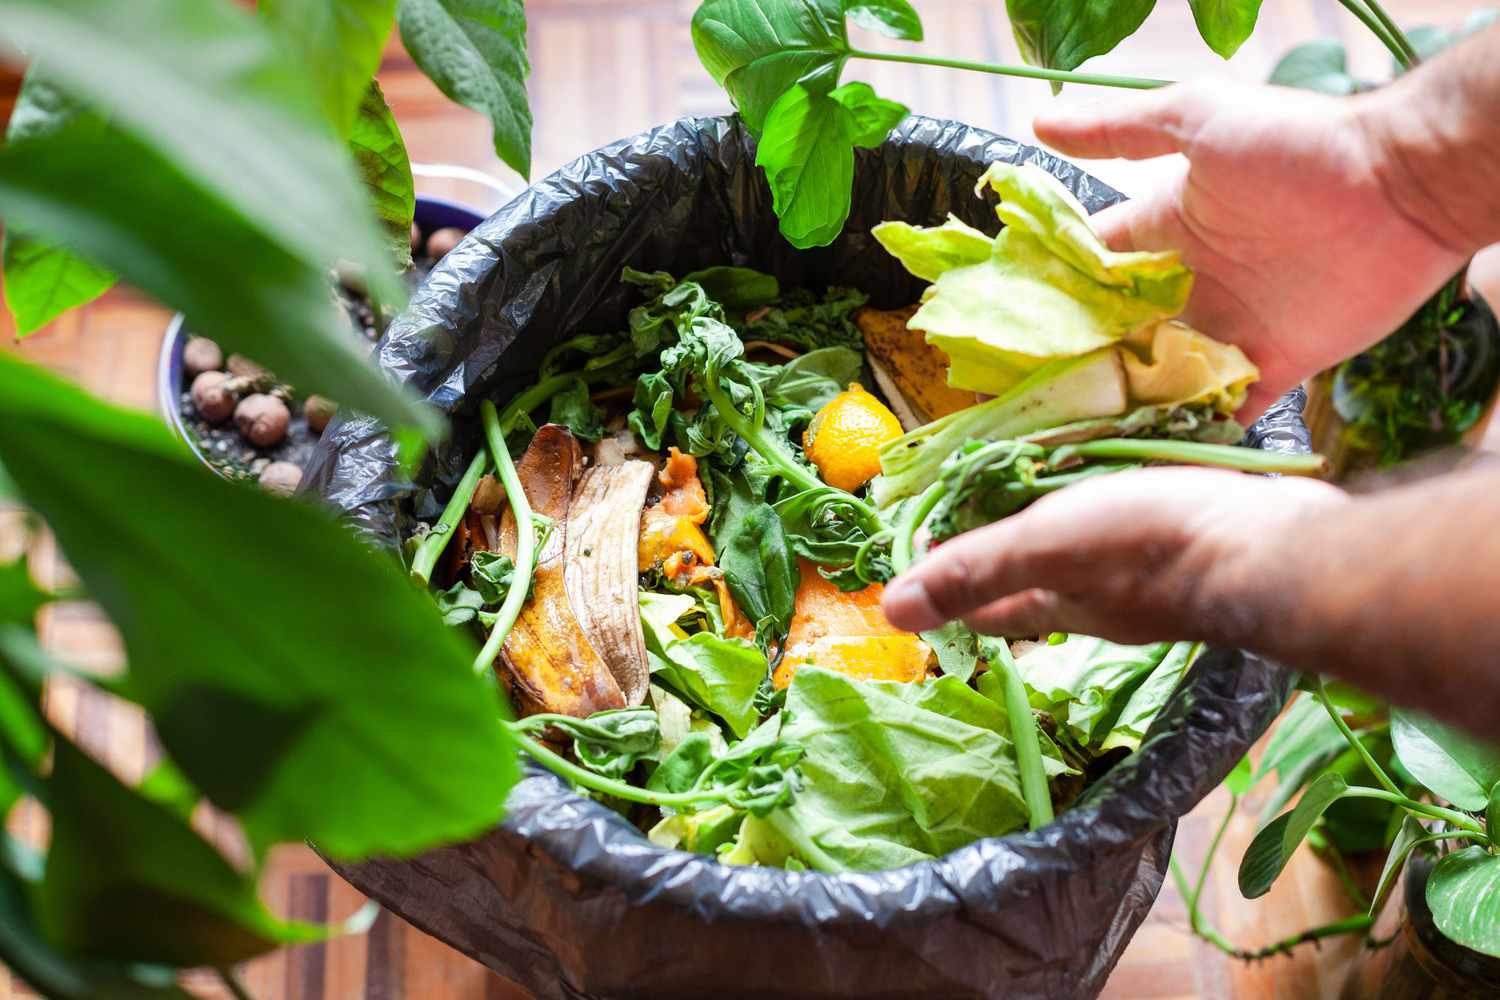
When it comes to indoor composting, selecting the right materials is crucial for efficient decomposition and producing high-quality compost. Here are some key considerations when choosing what materials to include in your indoor composting system:
- Green and brown materials: It’s important to have a balanced mix of green and brown materials in your compost. Green materials include nitrogen-rich items like fruit and vegetable scraps, coffee grounds, and grass clippings. Brown materials are carbon-rich and include items like dried leaves, shredded paper, and cardboard. Aim for a 2:1 ratio of brown to green materials to maintain the proper carbon-to-nitrogen balance for effective composting.
- Avoid meat, dairy, and oily foods: It’s best to avoid adding meat, dairy products, and oily foods to your indoor composting system. These items can attract pests, create unpleasant odors, and take longer to decompose. Stick with plant-based kitchen scraps and organic materials to ensure a clean and healthy composting process.
- Chop or shred larger materials: To speed up the composting process, consider chopping or shredding larger materials into smaller pieces. This allows for faster decomposition and helps create a more homogeneous mixture. Smaller pieces also take up less space in your composting container.
- Avoid invasive weeds or diseased plants: Be cautious about including invasive weeds or diseased plants in your indoor compost. If these materials are not properly composted at high temperatures, they can survive and potentially spread in your garden when you use the compost. Stick to healthy plant waste and avoid potentially problematic materials.
- Avoid chemically treated materials: Chemicals from treated materials can harm beneficial microorganisms and affect the quality of your compost. Avoid adding materials that have been treated with pesticides, herbicides, or other chemicals. Stick to organic waste and materials to ensure a safe and chemical-free composting process.
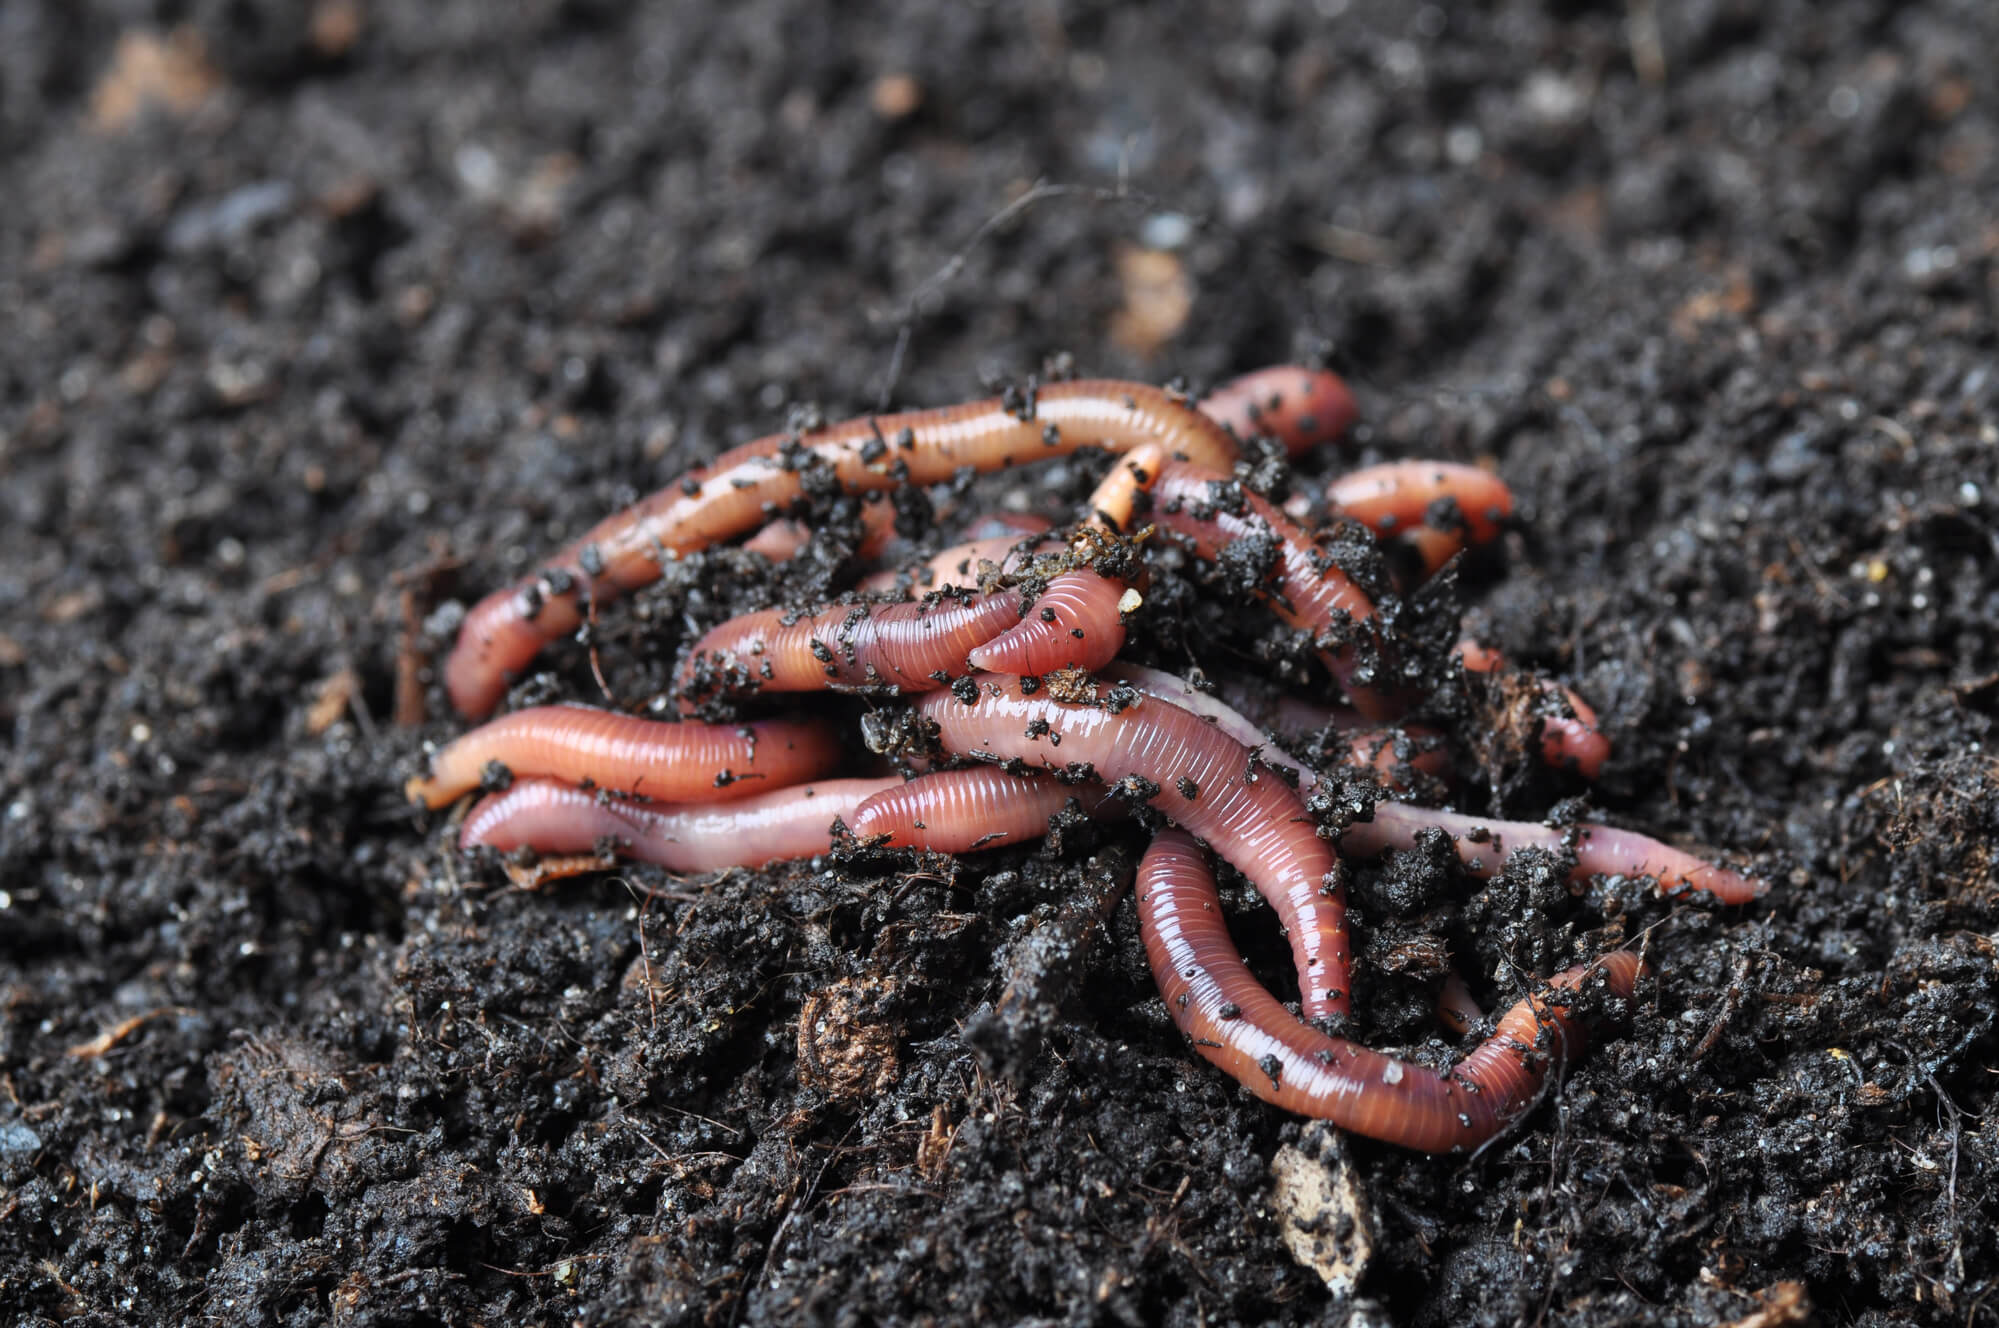
- Eggshells and coffee grounds: Eggshells and coffee grounds are excellent additions to your indoor composting system. Eggshells provide calcium, while coffee grounds add nitrogen to the compost. Both of these materials are readily available, help balance the pH levels, and contribute to the overall quality of your compost.
Remember to regularly add a mix of green and brown materials to your indoor composting system to maintain a healthy and balanced environment for decomposition. By selecting the right materials, you can ensure a successful composting process and produce nutrient-rich compost for your plants and gardens.
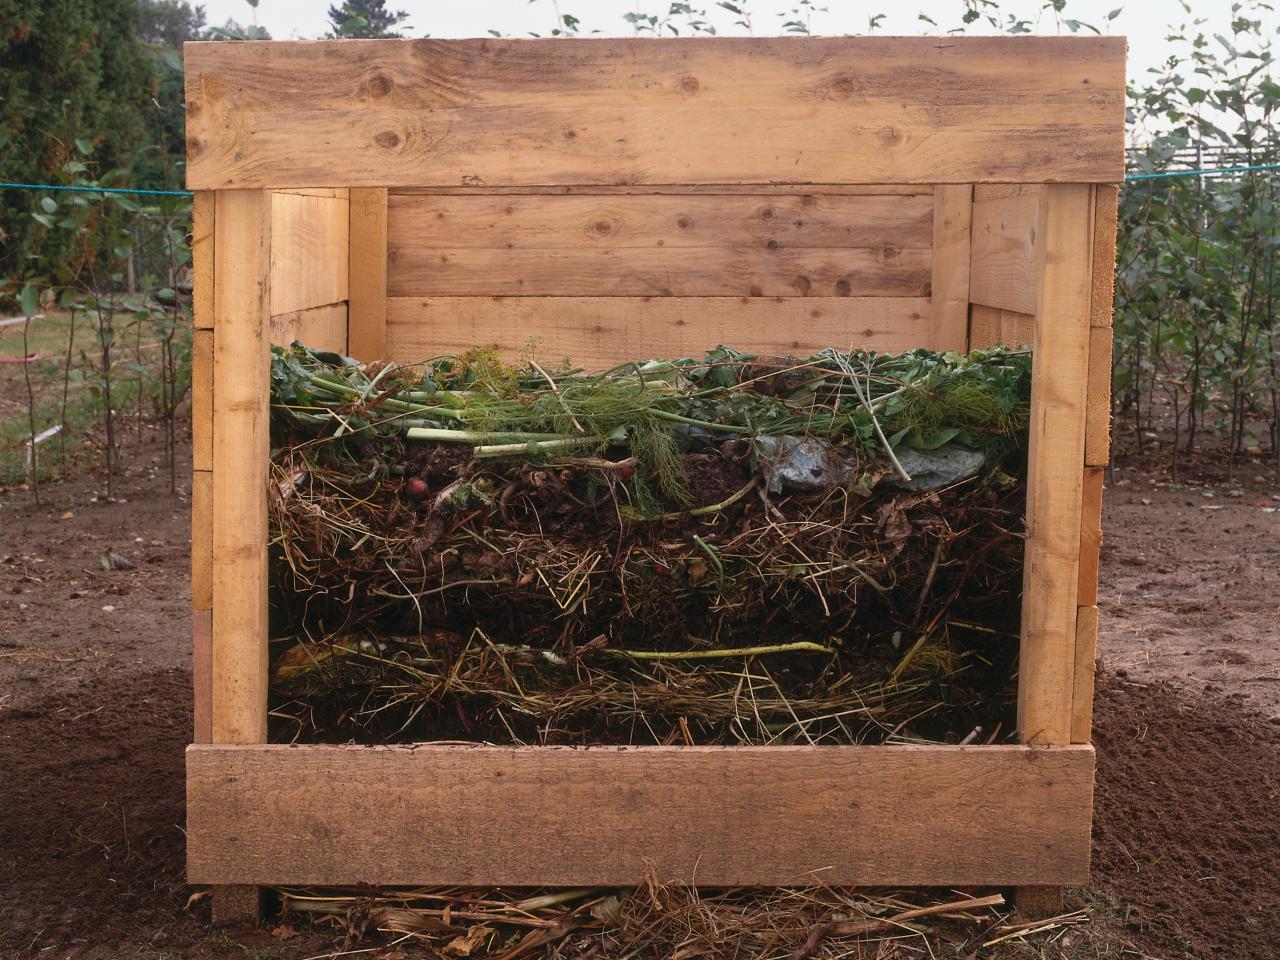
Creating the Compost Pile
Creating a compost pile is an essential step in indoor composting. It involves layering and arranging the compostable materials in a way that promotes decomposition and airflow. Here’s a step-by-step guide on how to create an effective compost pile:
- Prepare your container: Make sure your composting container is clean and ready for use. If using a specialized indoor composting system, follow the manufacturer’s instructions for setup.
- Create a bottom layer: Start by adding a layer of brown materials at the bottom of your container. This layer helps with drainage and prevents the compost from becoming too wet. Shredded paper or dried leaves work well for this bottom layer.
- Add green materials: Layer green materials on top of the brown layer. This can include kitchen scraps like fruit and vegetable peels, coffee grounds, or grass clippings. Be sure to chop or shred larger materials to speed up decomposition.
- Add more brown materials: On top of the green layer, add another layer of brown materials. This helps balance the carbon-to-nitrogen ratio and prevents the compost pile from becoming too wet and smelly.
- Alternate layers: Continue layering green and brown materials in alternating layers, ensuring equal distribution throughout the pile. Aim for a mix of roughly two parts brown materials to one part green materials for optimal composting conditions.
- Moisten the pile: As you build the compost pile, periodically moisten it with water. The pile should be moist, but not soaked or dripping with water. Proper moisture levels are important for the decomposition process.
- Aerate the pile: To facilitate airflow and promote decomposition, occasionally turn or mix the compost pile. This helps prevent compaction and allows beneficial microorganisms to access the materials for decomposition. If using a specialized indoor composting system, follow the manufacturer’s instructions for turning or mixing.
- Monitor the temperature: Keep an eye on the temperature of your compost pile. Ideally, the compost should reach temperatures between 120°F and 160°F (49°C and 71°C) to promote rapid decomposition and kill pathogens and weed seeds. Use a compost thermometer to monitor the temperature or check for signs of steam rising from the pile.
Remember to continue adding layers of green and brown materials as you generate kitchen scraps and other organic waste. Maintaining a well-layered and properly aerated compost pile will help speed up the decomposition process and ensure the production of nutrient-rich compost.
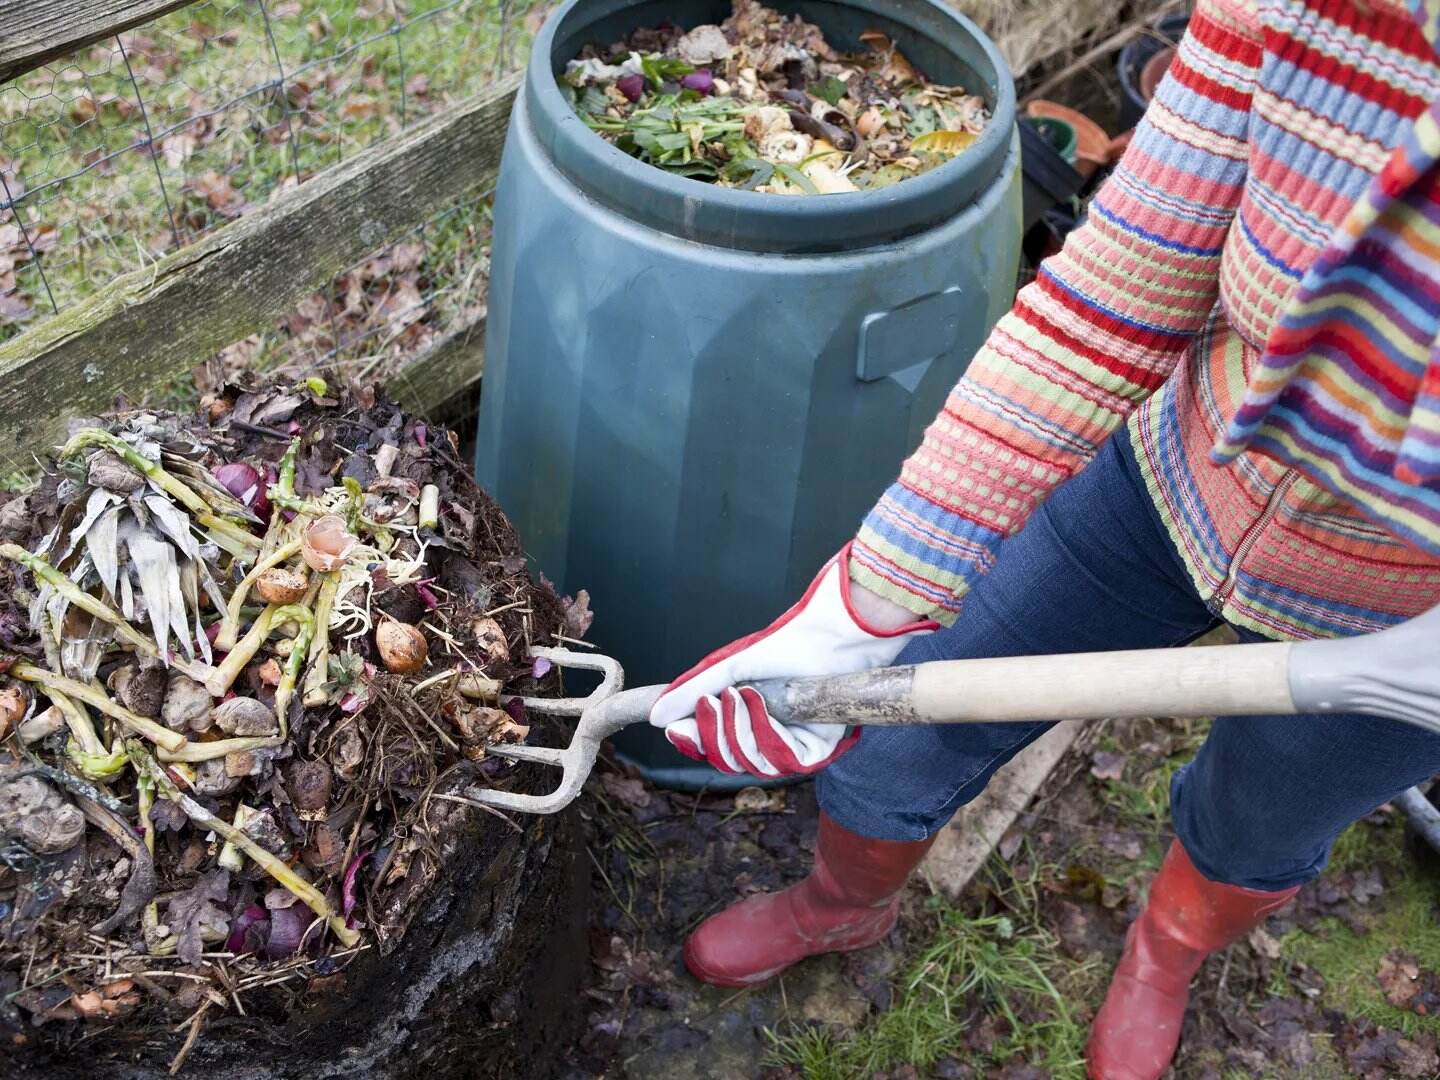
Maintaining the Compost
Maintaining your indoor compost is crucial to ensuring a healthy and productive composting process. Here are some key steps to follow to maintain your compost effectively:
- Monitor moisture levels: Regularly check the moisture levels of your compost pile. It should be consistently moist, similar to a wrung-out sponge, to support decomposition. If the pile becomes too dry, add water to moisten it. If it’s too wet, add more brown materials to absorb excess moisture. Maintaining proper moisture levels is vital for the activity of beneficial microorganisms.
- Mix or turn the compost: Aerate the compost pile by mixing or turning it regularly. This helps promote airflow and prevents the formation of compacted layers. Turning the compost every couple of weeks using a shovel or pitchfork allows oxygen to reach the materials and promotes faster decomposition. If using a specialized indoor composting system, follow the manufacturer’s instructions for turning or mixing.
- Balance the carbon-to-nitrogen ratio: Keep an eye on the carbon-to-nitrogen ratio in your compost pile. If the pile starts to smell or decompose slowly, it may indicate an imbalance. Adjust the ratio by adding more brown materials if it’s too wet, or more green materials if it’s too dry. Maintaining a balanced ratio ensures efficient decomposition and minimizes odors.
- Avoid adding problematic items: It’s important to be mindful of what you add to your compost pile. Avoid adding items such as meat, dairy products, and oily foods, as they can attract pests and impede the composting process. Additionally, avoid adding invasive weeds or diseased plants that may survive the composting process and cause issues in your garden.
- Cover and insulate (if necessary): If you’re composting indoors in a container without insulation, consider covering the compost pile with a layer of straw or shredded leaves. This helps insulate the pile and maintain a consistent temperature for decomposition. Insulation can be especially beneficial if you live in colder climates where maintaining optimal temperatures for decomposition is challenging.
- Be patient: Composting is a natural process that takes time. Be patient and allow the materials to decompose at their own pace. Depending on the size of your compost pile, it can take several weeks to several months to produce finished compost. Regularly monitor the progress and make adjustments as needed, but remember that patience is key.
By following these maintenance practices, you can ensure a healthy and thriving composting process. Consistency in moisture levels, proper aeration, and maintaining the carbon-to-nitrogen balance will ultimately result in nutrient-rich compost that you can use to enrich your plants and gardens.
Troubleshooting Common Issues
While indoor composting is generally a straightforward process, there may be occasional challenges along the way. Here are some common issues that may arise during indoor composting and how to troubleshoot them:
- Odors: Unpleasant odors can occur if the compost pile is too wet or if improper materials, such as meat or dairy, are added. To combat odors, check the moisture level of the pile and ensure a proper balance of green and brown materials. If necessary, add more brown materials to absorb excess moisture or adjust the carbon-to-nitrogen ratio if it’s imbalanced.
- Pests: Pests like fruit flies or ants can sometimes be attracted to the compost pile. To avoid this, make sure your composting container has an airtight lid or a sealable cover to keep pests out. Additionally, ensure that you are not adding any food waste that may attract pests. If you are facing a persistent pest problem, you can try freezing the kitchen scraps before adding them to the compost or burying the food waste deeper within the compost pile.
- Slow decomposition: If your compost pile is not decomposing as quickly as expected, it may be due to a lack of proper aeration or an imbalance in the carbon-to-nitrogen ratio. To address this, turn or mix the compost pile to introduce oxygen and promote decomposition. Adjust the carbon-to-nitrogen ratio by adding more green or brown materials as needed. Additionally, ensure that the pile is consistently moist, but not overly wet or dry.
- Unpleasant smells: Foul or putrid smells can occur if there is an excess of green materials, inadequate aeration, or overly wet conditions. Stabilize the compost pile by adding more brown materials, ensuring proper aeration by turning or mixing the pile, and adjusting the moisture levels. These steps will help eliminate the odor and create a more balanced and healthier composting environment.
- Mold or fungus: Mold or fungus can appear on the surface of the compost pile, especially if it is too wet or lacks proper aeration. While some molds are harmless, excessive growth may indicate an issue. To address this, reduce moisture levels by adding more dry brown materials and increase aeration by turning the pile more frequently. A well-balanced compost pile will discourage excessive mold growth.
- Unpleasant appearance: If your compost pile has an unappealing appearance or is attracting attention, consider using a compost bin or specialized indoor composting system that conceals the compost. Alternatively, you can camouflage the compost pile with a layer of wood chips or straw. This will help improve the visual appeal and maintain a neat and tidy composting area.
Remember that troubleshooting is an essential part of the indoor composting process. By identifying and addressing issues promptly, you can ensure a successful composting experience and produce nutrient-rich compost for your plants.
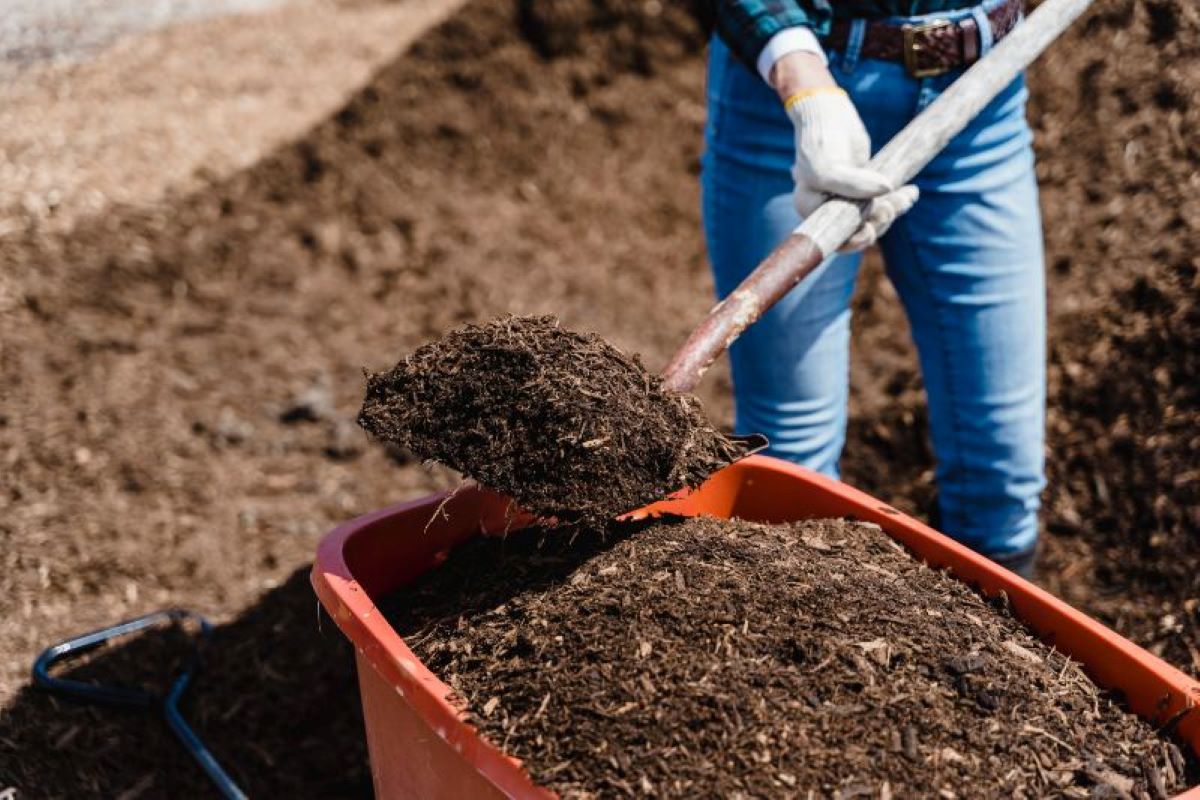
Harvesting and Using the Compost
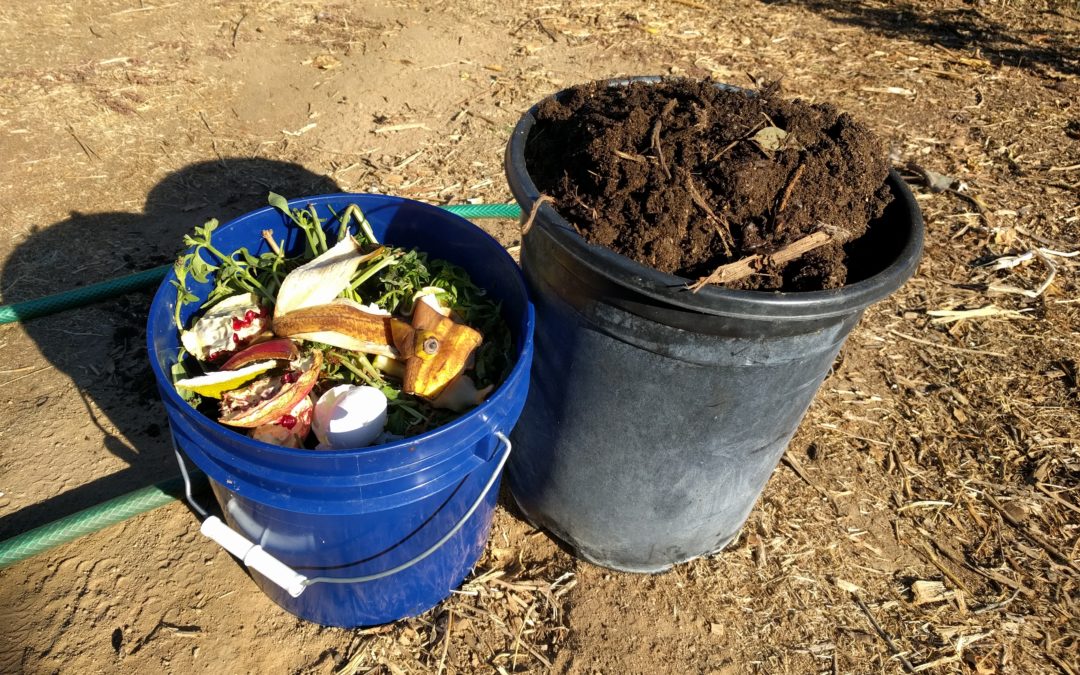
After patiently waiting for the decomposition process to occur, it’s time to harvest and utilize the finished compost from your indoor composting system. Here’s how to effectively harvest and use your compost:
- Check for readiness: Before harvesting the compost, ensure that it has fully decomposed and transformed into a dark, crumbly, and earthy-smelling material. The compost should no longer resemble its original organic components.
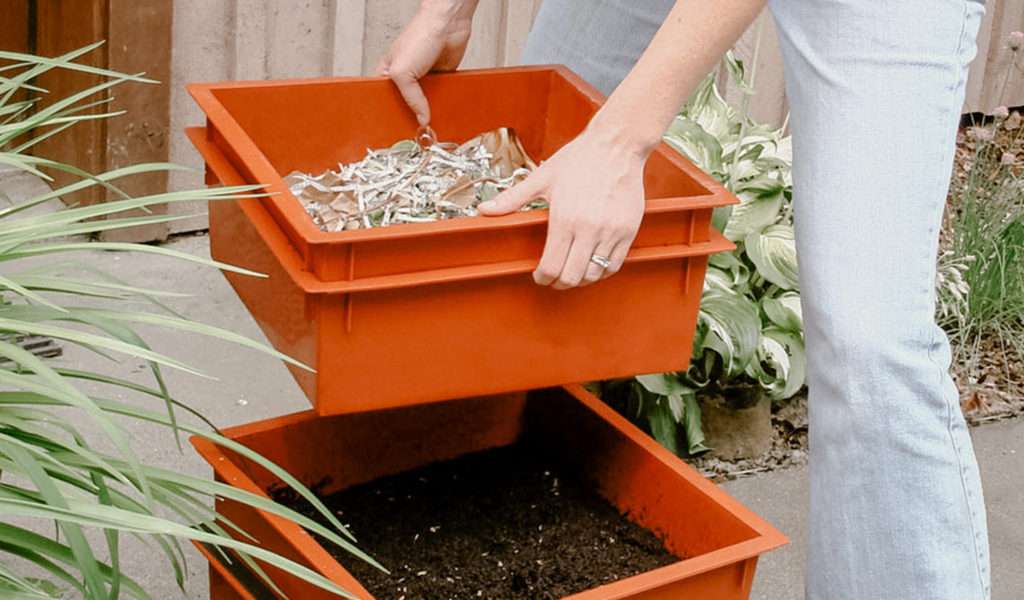
- Separate the finished compost: If your composting system has separate chambers or compartments, transfer the finished compost to one compartment while leaving any unfinished material in the other. If you’re using a single container, remove the finished compost from the top layer, leaving behind any unfinished material for further decomposition.
- Sift or screen: If desired, you can sift the finished compost through a screen or mesh to remove any larger particles or undecomposed materials. This will result in a finer and more uniform compost texture that is easier to spread and use for various purposes.
- Use the compost: The finished compost can be used in various ways to nourish your plants and gardens. Here are a few common uses for compost:
- Amend garden soil: Mix the compost into your garden soil to improve its structure, fertility, and moisture-retention abilities. This will provide essential nutrients, beneficial microorganisms, and promote healthy root growth for your plants.
- Top-dress potted plants: Sprinkle a layer of compost on the surface of potted plants to replenish nutrients and enhance soil health. Gently mix it into the top layer of soil or use it as a mulch to conserve moisture and suppress weeds.
- Boost seedlings and transplants: Prior to planting seedlings or transplanting plants, layer a small amount of compost at the bottom of the planting hole to provide extra nutrition and encourage strong root development.
- Make compost tea: Steep a handful of compost in a bucket of water to create a nutrient-rich compost tea. Use this mixture to water your plants or as a foliar spray for a boost of nutrients.
- Store excess compost: If you have more compost than you need, store the excess in a covered container or a compost bin for future use. It will retain its nutrient content for several months or even longer if stored in a cool, dry place.
By harvesting and utilizing your finished compost, you are closing the loop on your sustainable practices and turning waste into a valuable resource for your garden. Enjoy the benefits of healthier plants, improved soil fertility, and a more sustainable approach to gardening.
Conclusion
Congratulations! You have now learned the ins and outs of indoor composting. By embracing this sustainable practice, you are effectively reducing waste, improving soil health, and fostering a greener lifestyle. Indoor composting allows you to make use of kitchen scraps and other organic materials, transforming them into nutrient-rich compost for your plants and gardens.
Throughout this guide, we explored the benefits of indoor composting, the importance of selecting the right container, choosing the appropriate materials, creating and maintaining the compost pile, troubleshooting common issues, and harvesting and using the compost. By following these steps, you can create a thriving composting system right in the comfort of your own home.
Remember to balance the carbon-to-nitrogen ratio, maintain proper moisture levels, and regularly aerate your compost pile to ensure optimal conditions for decomposition. Be patient with the process, as composting takes time. The end result will be worth the effort – nutrient-rich compost that nourishes your plants and reduces your impact on the environment.
So, go ahead and get started with your indoor composting journey. Take pride in diverting waste from landfills, promoting sustainability, and cultivating a healthier ecosystem in your own home. Happy composting!