Home>Gardening Techniques>Plant Care>How To Change Soil In Potted Plants

Plant Care
How To Change Soil In Potted Plants
Published: February 11, 2024
Learn how to change the soil in your potted plants with our step-by-step guide. Improve your plant care routine and promote healthier growth for your indoor garden.
(Many of the links in this article redirect to a specific reviewed product. Your purchase of these products through affiliate links helps to generate commission for Chicagolandgardening.com, at no extra cost. Learn more)
Table of Contents
Introduction
Welcome to the world of plant care! Whether you are a seasoned plant enthusiast or a beginner looking to embark on a new green journey, one thing is certain – taking care of your potted plants is essential for their overall health and growth. Alongside regular watering and adequate sunlight, one key aspect of plant care is maintaining the quality of the soil in which your plants are potted.
The soil in a pot plays a vital role in providing nutrients, proper drainage, and the necessary support for plant roots. Over time, however, soil can become compacted, depleted of nutrients, and harbor harmful organisms. This is why periodically changing the soil in your potted plants is crucial to ensure their continued well-being.
Changing the soil can sound like a daunting task, especially for beginners. But fear not! In this article, we will guide you through the process of changing the soil in your potted plants, step-by-step. From assessing the need for a soil change to choosing the right soil mix and properly repotting your plant, we have got you covered.
So, if you are ready to give your plants a fresh start, let’s dive into the wonderful world of soil change for potted plants!
Assessing the Need for Soil Change
Before diving into the process of changing the soil in your potted plants, it’s important to assess whether or not a soil change is necessary. While it’s recommended to change the soil annually for most plants, some factors may indicate the need for a more immediate soil change.
First, consider the overall health of your plant. If you notice stunted growth, yellowing leaves, or wilting, it could be a sign that the soil is depleted or has become compacted, hindering the plant’s ability to absorb nutrients and water.
Next, observe the condition of the soil itself. If it appears excessively dry or does not retain moisture despite regular watering, it may be time for a soil change. Additionally, if you notice an unpleasant odor emanating from the potting mix or see any signs of pests or diseases, it’s crucial to address these issues promptly with a soil change.
Another factor to consider is the size of the pot. Over time, as the plant grows and its root system expands, the pot may become crowded with roots. This can result in poor drainage and insufficient oxygen reaching the roots, leading to plant stress. If you notice roots protruding from the drainage holes or wrapping tightly around the root ball, it’s a clear indication that a larger pot with fresh soil is needed.
Lastly, if you’ve been using the same soil for many years without replenishing it with nutrients or organic matter, it’s likely that the soil has become depleted and requires a change. This is especially true for high-demanding plants that rely heavily on nutrient-rich soil for optimal growth.
By closely monitoring your plants and observing these key indicators, you can determine when a soil change is necessary. Doing so will ensure that your plants continue to thrive and remain healthy, setting the stage for successful growth and blossoming foliage.
Choosing the Right Soil
When it comes to changing the soil in your potted plants, selecting the right type of soil is crucial for the overall health and well-being of your plants. The ideal soil mix provides a balance of nutrients, proper drainage, and the right texture to support root growth.
One important consideration is the type of plants you have. Different plants have different soil requirements. Some prefer well-draining soil that holds moisture but doesn’t become waterlogged, while others thrive in soil with higher water retention. Research the specific needs of your plants to ensure you choose a soil mix that will meet their requirements.
General-purpose potting mixes are widely available and suitable for a wide range of plants. They usually consist of a blend of peat moss, perlite, and vermiculite, which provide good drainage and moisture retention. These mixes also often contain added nutrients to support plant growth. However, if you have specific plant preferences or requirements, you may consider specialty mixes tailored to those needs.
In addition to the type of soil, consider adding organic matter to improve the nutritional content and structure of the soil. Organic matter, such as compost or well-rotted manure, helps increase soil fertility, provides beneficial microorganisms, and improves moisture retention. Adding organic matter also helps combat soil compaction and aids in nutrient absorption by plant roots.
While it can be tempting to use garden soil for potting, it is generally not recommended. Garden soil can be heavy, which hampers proper drainage in pots. It may also contain pathogens, pests, or weed seeds that can harm your potted plants. It’s best to use a well-draining potting mix specifically formulated for container gardening.
Lastly, consider the pH level of the soil. Most plants prefer a slightly acidic to neutral pH range. You can test the pH level of your soil using a pH testing kit and adjust it if necessary. Some plants, like blueberries, azaleas, or hollies, may require more acidic soil, while others, like succulents, prefer slightly alkaline conditions.
By carefully selecting the right type of soil and considering your plant’s specific requirements, you set a solid foundation for healthy root development and optimal growth. Remember, the quality of the soil greatly influences the overall health and vitality of your potted plants.
Gathering Materials and Tools
Before embarking on the process of changing the soil in your potted plants, it’s essential to gather all the necessary materials and tools. Having everything prepared in advance will make the task more efficient and streamline the process.
Here is a list of items you’ll need:
- Gloves: Protect your hands from dirt and potential irritants.
- Pots: If you decide to repot your plants into larger containers, have them ready.
- Trowel or Hand Fork: Useful for gently loosening the root ball and removing the old soil.
- Plastic Bags or Tarp: Lay these down to catch any excess soil and make for easier cleanup.
- Bucket or Container: For temporarily holding the plant during the repotting process.
- New Soil: The type of soil you selected based on your plant’s needs.
- Organic Matter: Optional, but helpful for improving soil fertility and structure.
- Watering Can: For watering the plants after the soil change is complete.
Make sure you have enough of each item for all the plants you plan to repot. It’s best to gather all the materials and tools in one place, convenient to your working area, to avoid unnecessary trips back and forth.
Additionally, consider the environment in which you’ll be working. If you’ll be indoors, ensure proper ventilation to minimize dust inhalation and make cleanup easier. If you’ll be working outside, choose a well-lit and comfortable area, free from strong winds or direct sunlight that can stress the plants during the repotting process.
By preparing all the necessary materials and tools ahead of time, you’ll be ready to tackle the soil change efficiently and effectively. This ensures a smooth and successful repotting experience for both you and your precious plants.
Removing the Plant from the Pot
Now that you have gathered all the necessary materials and tools, it’s time to start the process of changing the soil in your potted plant. The first step is to carefully remove the plant from its current pot.
Follow these steps to safely remove the plant:
- Water the plant: Thoroughly water the plant a day or two before the planned soil change. This will help soften the soil and make it easier to remove the plant without damaging the roots.
- Prepare a workspace: Lay down a plastic bag or tarp to catch any soil that may be spilled during the process. This will make cleanup much easier.
- Gently loosen the root ball: Carefully tap the sides of the pot to release the plant from the edges. Use a trowel or hand fork to gently loosen the compacted soil around the edges of the pot. Be cautious not to damage the roots.
- Turn the pot upside down: With one hand securely holding the plant’s stem or base, use your other hand to turn the pot upside down. Gently tap the bottom of the pot or give it a gentle squeeze to help loosen the plant from the pot.
- Remove the pot: Once the plant is loose, gently lift the pot away. If the plant is stuck, tap the sides of the pot or slide a knife along the inner edge to loosen any stubborn soil.
As you remove the plant from the pot, be cautious not to pull it forcefully or yank it out. This can damage the roots or cause them to break, leading to stress and potential harm to the plant.
If the plant is root-bound, meaning its roots have wrapped tightly around the root ball, you may need to gently tease or prune the roots. This will encourage new root growth and prevent the plant from becoming root-bound in its new pot.
With patience and care, you can safely remove your plant from its pot, ready to proceed to the next steps of the soil change process.
Removing Old Soil
Once you have successfully removed the plant from the pot, the next step in changing the soil is to remove the old soil from the root ball. This process helps eliminate compacted soil, old roots, and any potentially harmful organisms that may be present.
Follow these steps to remove the old soil:
- Inspect the root ball: Take a close look at the root ball of your plant. Gently untangle any loose, old roots and remove any dead or decaying ones. This will promote healthy root development in the new soil.
- Gently shake or tap the root ball: Holding the plant over a bucket or tarp, gently shake or tap the root ball to dislodge loose soil. Be careful not to apply excessive force, as this can damage the roots.
- Use your hands or a tool: Depending on the root structure and plant size, you can use your hands or a trowel to gently loosen and remove the remaining soil. Start from the outer edges of the root ball and work your way towards the center. Take your time to avoid damaging the roots.
- Inspect for pests or diseases: While removing the old soil, keep an eye out for any pests, such as insects or larvae, or signs of diseases, such as rot or mold. If necessary, treat the plant with appropriate measures before proceeding with the soil change.
It’s important to note that some plants, such as orchids or epiphytes, may have specialized root structures or require a different approach when removing old soil. Research the specific needs of your plant to ensure proper handling.
Once you have removed the majority of the old soil, you may lightly rinse the root ball under running water to further clean and inspect it. Be gentle and avoid using water that is too cold or hot, as extreme temperatures can damage sensitive roots.
By diligently removing the old soil and ensuring that the root ball is in good condition, you are preparing a healthy foundation for your plant to thrive in its fresh potting mix.
Preparing the New Soil
Now that the old soil has been removed, it’s time to prepare the new soil for your potted plant. Preparing the new soil ensures that it is properly enriched with nutrients and has the right texture for optimal root growth and moisture retention.
Follow these steps to prepare the new soil:
- Choose the right soil mix: Refer to the specific soil requirements of your plant and select a high-quality potting mix that suits its needs. Consider factors such as drainage, moisture retention, and nutrient content.
- Incorporate organic matter: If desired, mix in some organic matter, such as well-rotted compost or manure, to improve the soil’s fertility and structure. Organic matter helps retain moisture, provides beneficial microorganisms, and releases nutrients slowly over time.
- Ensure proper moisture: Before repotting the plant, ensure that the new soil mix is damp but not soggy. This will help prevent the plant from experiencing a moisture shock when it is placed in the new soil.
- Fill the pot: Fill the bottom of the new pot with a layer of the prepared soil mix, ensuring enough depth to support the plant and allow for root growth. Leave enough space at the top to accommodate the plant’s root ball.
- Center the plant: Place the plant’s root ball in the center of the pot, making sure it sits at the appropriate height. Gently adjust the position, ensuring that the plant stands upright and that the root ball is level with or slightly below the rim of the pot.
- Fill with soil: Carefully fill the remaining space around the root ball with the prepared soil mix, lightly pressing it down to eliminate any air pockets. Leave a small gap between the soil surface and the pot rim to allow for easy watering.
During the repotting process, it’s essential to handle the plant and soil with care and avoid compacting the soil too tightly around the roots. This ensures proper oxygen circulation and root development.
After preparing the new soil and planting your potted plant, it’s time to move on to the next crucial step: ensuring proper watering and care to help the plant settle into its new environment.
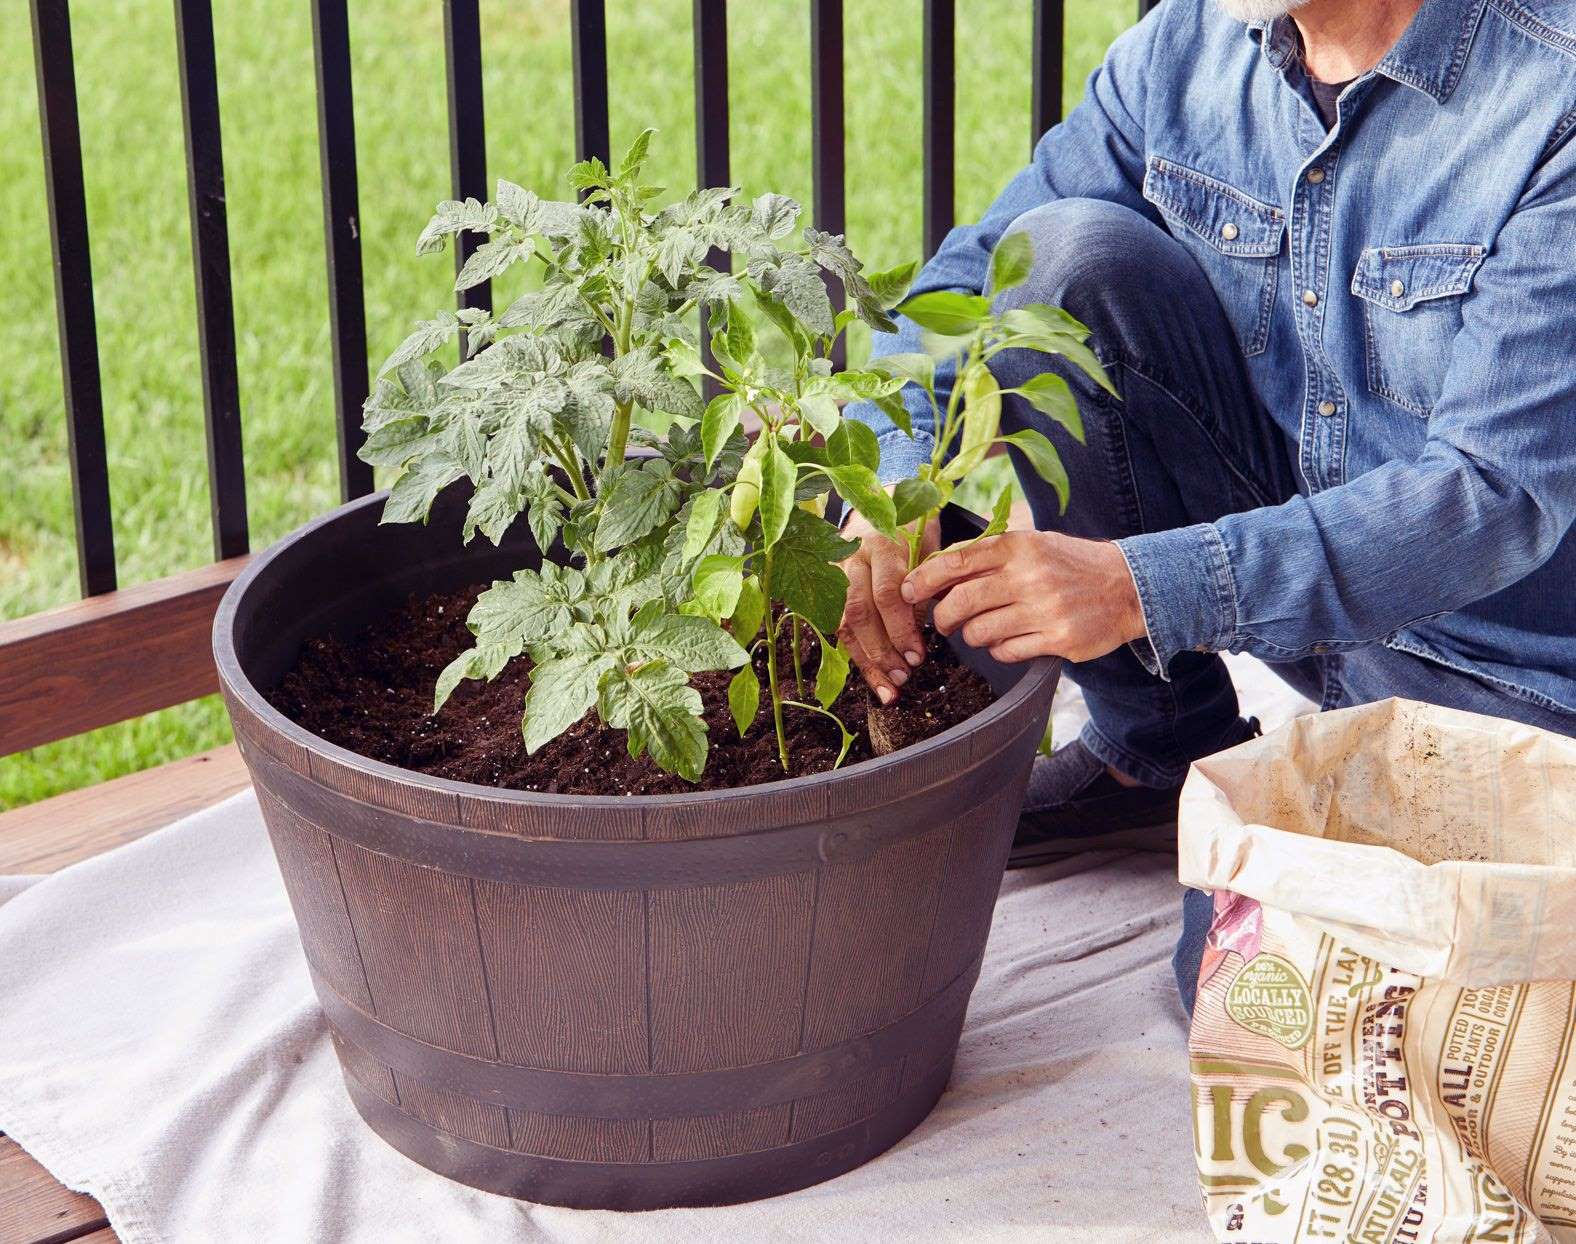
Repotting the Plant
Now that the new soil has been prepared, it’s time to repot your plant and give it a fresh start in its new home. Proper repotting ensures that the plant is securely planted, has adequate space for root growth, and receives the right amount of nutrients and moisture.
Follow these steps to repot your plant:
- Prepare the new pot: If you’ve decided to change to a larger pot, make sure it has drainage holes at the bottom to allow excess water to escape. Cover the drainage holes with a mesh or a few pieces of broken pottery to prevent soil from escaping.
- Place a layer of new soil: Fill the bottom of the new pot with a layer of the prepared soil, creating a mound in the center. This will help support the plant and distribute water evenly.
- Remove the plant from the temporary container: Gently grasp the plant at the base and gently tug it out of the temporary container. If the plant is root-bound, gently tease or prune the roots to encourage new growth.
- Center the plant in the new pot: Place the plant’s root ball in the center of the new pot, making sure it sits at the appropriate height. The top of the root ball should be level with or slightly below the rim of the pot.
- Add soil around the roots: Carefully fill in the space around the root ball with the prepared soil, ensuring that the roots are covered but not buried too deeply. Tamp down the soil gently with your hands to remove any air pockets.
- Water the plant: After repotting, thoroughly water the plant to settle the soil and ensure proper hydration. Allow any excess water to drain out through the drainage holes.
Once the plant is repotted, place it in an appropriate location that suits its light and temperature requirements. Avoid placing it in direct sunlight or drafts, which can stress the plant.
Remember, repotting is a delicate process, and it’s essential to handle the plant and its roots with care. By following these steps, you will provide a healthy and spacious environment for your plant to thrive and grow.
Watering and Caring for the Repotted Plant
After repotting your plant, proper watering and ongoing care are essential to help it adjust to its new environment and promote healthy growth. Here are some tips for watering and caring for your repotted plant:
Watering:
- Water thoroughly: After repotting, give your plant a deep watering, ensuring that the soil is evenly moist. This helps settle the soil and initiates root growth.
- Monitor soil moisture: Check the moisture level of the soil regularly. Stick your finger about an inch deep into the soil. If it feels dry, it’s time to water. If it feels moist, wait a bit longer before watering again.
- Avoid overwatering: Overwatering can lead to root rot and other plant diseases. Ensure that the new pot has proper drainage to allow excess water to escape. Empty any standing water from trays or saucers.
- Adjust watering frequency: As your plant settles into its new pot, its watering needs may change. Observe how quickly the soil dries out and adjust your watering frequency accordingly.
Caring for the Repotted Plant:
- Provide proper sunlight: Place your plant in a location that suits its light requirements. Some plants prefer bright indirect light, while others thrive in direct sunlight or shade. Research the specific needs of your plant.
- Monitor temperature and humidity: Ensure that the temperature and humidity levels are suitable for your plant. Avoid placing it near cold drafts, heaters, or air conditioning vents, as extreme temperatures can stress the plant.
- Fertilize as needed: Depending on the nutritional needs of your plant, you may need to fertilize it regularly or periodically. Choose a balanced fertilizer or one specific to your plant’s needs and follow the recommended instructions.
- Prune if necessary: If your plant has any damaged, diseased, or leggy growth, consider pruning it to encourage new growth and maintain its shape. Use clean and sharp pruning tools to avoid damaging the plant.
- Provide support if needed: For tall or vining plants, consider providing support, such as stakes or trellises, to help keep them upright and enhance their aesthetics.
By providing the right amount of water, proper light, and overall care, you will give your repotted plant the best chance to thrive and flourish in its new pot. Regularly monitor its growth and make adjustments to its care routine as necessary.
Conclusion
Congratulations! You have successfully learned the process of changing the soil in your potted plants. By assessing the need for soil change, choosing the right soil mix, gathering the necessary materials and tools, removing the old soil, preparing the new soil, and repotting the plant, you have provided your green companions with a fresh start for optimal growth and health.
Remember, maintaining the quality of the soil in your potted plants is essential for their overall well-being. By periodically changing the soil, you prevent compaction, replenish nutrients, and promote proper drainage and root development. This, in turn, encourages healthier foliage, vibrant blooms, and long-lasting plant vitality.
Throughout the entire process, it’s important to handle your plant with care, ensuring that the roots are not damaged and the soil is properly watered. Observe your plant closely, monitoring its growth and adjusting the watering and care routine as necessary.
Now armed with the knowledge and step-by-step guidance, you can confidently embark on changing the soil in your potted plants whenever it’s needed. Whether you’re a seasoned plant enthusiast or just starting your plant care journey, your potted plants will thrive with the care and attention you provide.
So go ahead, give your plants a fresh start by changing their soil, and enjoy the beauty and rewards of a healthy and thriving indoor garden.