Home>Types of Gardening>Edible Gardening>How To Grow Rosemary Bought From The Store
Edible Gardening
How To Grow Rosemary Bought From The Store
Modified: February 9, 2024
Learn how to grow your own edible rosemary garden at home with our step-by-step guide. Start from store-bought plants and enjoy fresh herbs all year round.
(Many of the links in this article redirect to a specific reviewed product. Your purchase of these products through affiliate links helps to generate commission for Chicagolandgardening.com, at no extra cost. Learn more)
Table of Contents
- Introduction
- Choosing and preparing the right pot
- Selecting the ideal location for your rosemary plant
- Proper soil mixture for rosemary growth
- Transplanting the rosemary from the store-bought container
- Watering techniques for healthy rosemary growth
- Pruning and shaping your rosemary plant
- Fertilizing your rosemary to promote growth
- Dealing with common pests and diseases in rosemary plants
- Harvesting and using your homegrown rosemary
- Conclusion
Introduction
Welcome to the wonderful world of edible gardening! Growing your own herbs and vegetables is not only a rewarding and fulfilling experience, but it also allows you to have complete control over the quality and freshness of the produce you consume. One herb that is particularly popular among home gardeners is rosemary. Its fragrant aroma, versatile culinary uses, and attractive evergreen foliage make it a valuable addition to any garden or kitchen.
If you’re new to gardening or simply looking to expand your herb collection, you may be wondering how to grow rosemary that you’ve bought from the store. Well, you’ve come to the right place! In this article, we will guide you through the step-by-step process of successfully growing and caring for store-bought rosemary plants.
Before we dive into the specifics, it’s important to note that rosemary is a perennial herb that thrives in Mediterranean-like conditions. This means that it prefers hot, dry summers and mild winters. However, with the right care and attention, you can successfully grow rosemary in a variety of climates.
So, whether you have a spacious garden, a small balcony, or even just a sunny windowsill, you can enjoy the beauty and flavor of homegrown rosemary. Let’s explore the essential steps and strategies to ensure your rosemary plant flourishes and provides you with an abundant harvest.
Choosing and preparing the right pot
When it comes to growing rosemary bought from the store, selecting the right pot is crucial for its health and growth. The pot should be large enough to accommodate the root system of the plant and allow for adequate drainage. Here are some important factors to consider:
- Size: Choose a pot that has a diameter of at least 12 inches and a depth of 10-12 inches. Rosemary plants have long taproots, so a deeper pot will provide ample room for root development.
- Material: Opt for a pot made of terracotta or a porous material that allows for better aeration and drainage. This helps prevent root rot and ensures the plant’s overall health.
- Drainage: Make sure the pot has drainage holes at the bottom to prevent waterlogging. Excess moisture can lead to root rot and hinder the plant’s growth.
Once you’ve chosen the right pot, it’s important to prepare it before planting your rosemary. Start by cleaning the pot thoroughly to remove any debris or residue from previous plants. You can use a solution of mild dish soap and water to wash it, ensuring it’s rinsed well afterwards.
Next, fill the pot with a well-draining potting mix. A suitable mix for rosemary consists of equal parts of sterile potting soil, perlite, and coarse sand. This blend promotes good drainage and prevents the soil from becoming compacted. Avoid using heavy garden soil as it retains too much moisture, which can be detrimental to rosemary.
Before planting your rosemary in the pot, it’s helpful to moisten the soil slightly to provide a conducive environment for root growth. However, ensure that the soil is not soaking wet, as excessive moisture can lead to root rot.
Once the pot is prepared and the soil is slightly moistened, you’re ready to transplant the rosemary from its store-bought container. In the next section, we’ll discuss how to successfully transfer the plant without causing damage to its roots.
Selecting the ideal location for your rosemary plant
Choosing the right location for your rosemary plant is crucial for its overall health and growth. Rosemary thrives in full sun, so it’s important to select a spot that receives at least 6-8 hours of direct sunlight per day.
Outdoor growers should look for a sunny spot in their garden or patio where the plant will be exposed to ample sunlight. Remember that rosemary is native to the Mediterranean region and loves heat, so try to find a location that offers protection from strong winds, particularly in cooler climates.
For those with limited outdoor space, rosemary can be grown indoors as well. Choose a south-facing window or a spot near a bright, sunny window where your rosemary can receive adequate sunlight. You may need to supplement the natural light with fluorescent grow lights during the winter months when daylight hours are shorter.
It’s important to note that rosemary is a relatively drought-tolerant herb and prefers drier conditions. Therefore, the ideal location for your rosemary plant should have well-draining soil to prevent waterlogged roots.
When considering pot placement, make sure the pot is elevated slightly off the ground or has feet to allow for proper airflow and drainage. This helps prevent root rot and fungal diseases that can occur with stagnant water.
Additionally, consider the surrounding plants in your garden or indoor space. Rosemary is known to deter some pests, such as carrot flies and cabbage moths, making it a great companion plant in vegetable gardens. However, it may attract bees and other pollinators, so be mindful of the placement in relation to outdoor seating areas or high-traffic areas where interactions with bees may not be ideal.
By selecting the ideal location for your rosemary plant, you are setting the foundation for successful growth and a bountiful harvest. In the next section, we will discuss the proper soil mixture for rosemary to ensure optimal nutrition and growth.
Proper soil mixture for rosemary growth
The right soil mixture is essential for the healthy growth of your rosemary plant. Rosemary prefers well-draining soil that mimics its native Mediterranean habitat. Here are some tips for creating the proper soil mixture:
- Drainage is key: Rosemary roots despise sitting in waterlogged soil. To ensure proper drainage, use a well-draining soil mixture. A common recipe is equal parts of potting soil, perlite, and coarse sand. This blend allows excess water to flow through, preventing root rot.
- Organic matter: While rosemary doesn’t require rich soil, adding some organic matter can provide beneficial nutrients. Consider incorporating compost or well-rotted manure into the soil mixture before planting your rosemary.
- Texture: Rosemary prefers a sandy or loamy soil texture. This provides good aeration and allows the roots to penetrate the soil easily. If your soil is heavy or clay-like, mixing in some sand or organic matter can help improve its texture.
When planting rosemary in containers, be sure to choose a pot with drainage holes and use the same well-draining soil mixture mentioned above. This will help prevent water from pooling at the bottom of the pot and ensure optimal root health.
It’s important to note that once established, rosemary is quite drought-tolerant. Overwatering can lead to root rot and other problems, so it’s better to err on the side of underwatering rather than overwatering.
By providing the proper soil mixture, you are ensuring that your rosemary plant has a healthy and nutrient-rich environment to grow and thrive. In the next section, we will discuss the step-by-step process of transplanting the rosemary from its store-bought container into its new home.
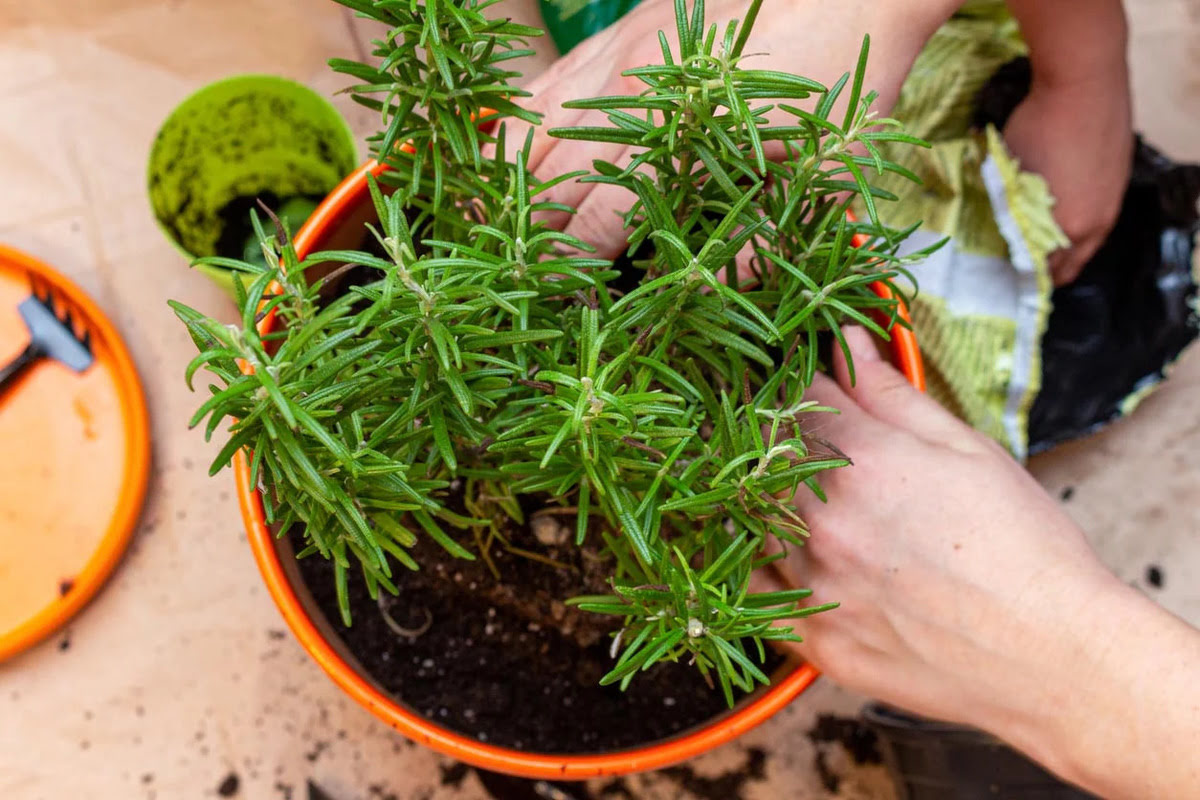
Transplanting the rosemary from the store-bought container
Transplanting your store-bought rosemary into a larger pot or into your garden is an important step to ensure its continued growth and development. Here’s a step-by-step guide on how to transplant your rosemary:
- Choose the right time: The best time to transplant your rosemary is in the spring or early fall when the weather is mild. Avoid transplanting during extreme heat or cold as this can stress the plant.
- Prepare the new location: If you’re transplanting your rosemary outdoors, ensure that the soil is well-drained and has been amended with organic matter if needed. Clear away any weeds or debris from the planting area.
- Water the rosemary: Before removing the plant from its container, water it thoroughly. This will help moisten the soil and make it easier to extract the root ball.
- Gently remove the rosemary plant: Carefully tap or squeeze the sides of the container to loosen the root ball. Turn the container upside down while supporting the plant with your hand and let the plant slide out. If needed, tap the container to release the plant.
- Inspect and tease the roots: Once the plant is out of the container, examine the root ball for any circling roots. If there are any, gently tease them apart or make a few shallow cuts to encourage outward growth.
- Plant the rosemary: Dig a hole in the new planting location that is slightly larger than the root ball. Place the rosemary in the hole, ensuring that the top of the root ball is level with or slightly above the soil surface. Backfill the hole with soil, gently firming it around the plant.
- Water and mulch: After transplanting, water the rosemary thoroughly to settle the soil and ensure good root-to-soil contact. Apply a layer of organic mulch around the plant to help retain moisture and suppress weeds.
- Care for the transplanted rosemary: Place the transplanted rosemary in a location that receives full sun and water it deeply but infrequently to encourage deep root growth. Avoid overwatering, as rosemary prefers drier conditions.
Transplant shock is common when moving plants, but with proper care and watering, your rosemary will quickly adapt and continue to grow. In the next section, we will discuss effective watering techniques to keep your rosemary plant healthy and thriving.
Watering techniques for healthy rosemary growth
Proper watering is essential for the health and successful growth of your rosemary plant. While it is a relatively drought-tolerant herb, it still requires regular and consistent watering to thrive. Here are some watering techniques to keep your rosemary plant healthy:
- Water deeply and infrequently: Rosemary prefers to be watered deeply but less frequently. This means saturating the soil around the roots and allowing it to dry out before watering again. Aim to water your rosemary every 7-10 days during hot, dry weather or when the top inch of soil feels dry to the touch.
- Avoid overwatering: Overwatering can lead to root rot and other issues, so it’s important not to keep the soil constantly wet. Allow the top layer of soil to dry out between waterings to prevent waterlogged conditions.
- Water at the base of the plant: When watering your rosemary, aim to water at the base of the plant rather than overhead. This helps prevent fungal diseases and allows the water to reach the roots directly.
- Consider the weather and season: Adjust your watering frequency depending on the weather conditions and the season. During hot summers, your rosemary will likely require more frequent watering, while in cooler seasons, it may require less.
- Monitor for signs of stress: Keep an eye out for signs of underwatering or overwatering. Wilting, yellowing leaves, and a droopy appearance can indicate that your rosemary needs more water. On the other hand, if the leaves are turning yellow or the plant shows signs of root rot, you may be overwatering.
- Use mulch to retain moisture: Applying a layer of organic mulch around your rosemary plants can help retain moisture in the soil and regulate temperature. This reduces water evaporation and helps keep the roots cool during hot weather.
Remember, it’s better to slightly underwater rosemary than to overwater it. Rosemary prefers drier conditions and can tolerate some drought. By following these watering techniques, you’ll ensure that your rosemary plant remains healthy and thrives in your garden or container. In the next section, we’ll discuss the importance of pruning and shaping your rosemary plant.
Pruning and shaping your rosemary plant
Pruning is an essential part of caring for your rosemary plant and promoting healthy growth. Regular pruning helps maintain the plant’s shape, prevents it from becoming too leggy, and encourages bushier growth. Here are some tips for pruning and shaping your rosemary:
- Timing: Prune your rosemary plant in the spring or early summer, just before the new growth begins. This allows the plant to recover quickly and minimizes any stress on the plant.
- Tools: Use sharp and clean pruning shears or scissors to minimize damage to the plant and reduce the risk of spreading diseases. Sterilize your tools in a solution of equal parts water and rubbing alcohol before and after use.
- Remove dead or damaged growth: Start by removing any dead or damaged branches or stems. These can hinder the plant’s overall health and attract pests or diseases.
- Shape the plant: As rosemary tends to grow upright, pruning can help maintain a compact and bushy shape. Trim the outer branches by cutting back about one-third of the length. This encourages branching and results in a denser and more attractive plant.
- Thin out crowded areas: If your rosemary plant has become overcrowded with branches or stems, selectively remove some of them to improve airflow and allow more light to reach the inner portions of the plant.
- Harvest while pruning: Take advantage of pruning to harvest fresh rosemary for culinary use. Trim off stems from the outer parts of the plant, just above a leaf node or set of leaves. This promotes new growth and provides you with fragrant and flavorful herbs.
- Monitor growth throughout the season: Regularly check on your rosemary plant during the growing season to ensure it maintains its shape. If necessary, perform light pruning to remove any straggly or wayward branches.
Remember, pruning stimulates new growth, so it’s important not to remove too much foliage at once. Aim to maintain a balanced shape and size that suits your aesthetic preferences and the available space.
By practicing proper pruning techniques, you will not only enhance the appearance of your rosemary plant, but also promote healthier growth and ensure a bountiful harvest of fresh herbs. In the next section, we’ll discuss the importance of fertilizing your rosemary to provide it with essential nutrients.
Fertilizing your rosemary to promote growth
Fertilizing your rosemary plant is important to ensure its optimal growth and overall health. While rosemary is relatively low-maintenance when it comes to fertilization, providing it with the right nutrients can encourage vigorous growth and enhance the flavor of its leaves. Here are some tips for fertilizing your rosemary:
- Choose the right fertilizer: When selecting a fertilizer for rosemary, opt for a balanced, slow-release organic fertilizer. This type of fertilizer provides a gradual and consistent release of nutrients, which is ideal for the slow-growing nature of rosemary.
- Timing: Fertilize rosemary plants in the early spring, just before new growth begins. This gives the plant a boost of nutrients as it starts actively growing for the season.
- Follow package instructions: Read and carefully follow the instructions on the fertilizer package. Different products may have specific guidelines for application rates and frequency.
- Apply sparingly: Rosemary doesn’t require excessive amounts of fertilizer. Over-fertilization can lead to excessive vegetative growth at the expense of essential oil production and flavor. Apply the fertilizer sparingly to avoid nutrient imbalances and potential burn to the plant’s roots.
- Avoid fertilizing in winter: Refrain from fertilizing your rosemary plant during the winter months when growth is slow or dormant. Fertilizing in this period can disrupt the natural growth cycle and lead to weak, leggy growth.
- Compost as a natural alternative: Instead of using commercial fertilizers, you can opt for organic alternatives like compost. Applying a layer of well-rotted compost around the base of the plant in spring can provide a slow-release source of nutrients.
- Monitor plant response: Watch for signs of nutrient deficiency or excess in your rosemary plant. Yellowing leaves, stunted growth, or leaf drop may indicate a need for additional nutrients. Adjust your fertilization practices accordingly.
Remember that rosemary is a resilient herb that can tolerate nutrient-poor soils. In most cases, a balanced and organic fertilizer application once a year is sufficient to meet its nutritional needs. However, if you notice poor growth or weak foliage, it may be a sign that your plant requires additional nutrients.
By providing the right fertilization, you will support the healthy growth and development of your rosemary plant, resulting in abundant foliage for culinary use and a visually appealing plant in your garden or containers. In the next section, we’ll discuss some common pests and diseases that can affect rosemary plants and how to deal with them.
Dealing with common pests and diseases in rosemary plants
While rosemary is generally a hardy and resilient plant, it can still be susceptible to certain pests and diseases. Being vigilant and taking prompt action can help protect your rosemary and ensure its continued health and productivity. Here are some common pests and diseases that can affect rosemary plants and how to deal with them:
- Aphids: These small, soft-bodied insects can cluster on the leaves, sucking sap and causing distortion or yellowing. To control aphids, you can spray a mixture of water and mild soap on the affected areas, or use insecticidal soap or neem oil. Encouraging beneficial insects, such as ladybugs, can also help control aphid populations.
- Spider mites: These tiny pests can cause yellow stippling and webbing on the leaves. Regularly misting the foliage to increase humidity, washing leaves with water, or applying insecticidal soap can help control spider mites. Avoid over-fertilizing, as it can make the plant more susceptible to infestations.
- Root rot: Excessive moisture, poor drainage, or overwatering can lead to root rot in rosemary plants. To prevent root rot, ensure that the pot has drainage holes and the soil is well-draining. Water the plant only when the top inch of soil feels dry, and consider using a fungicide if root rot is severe.
- Powdery mildew: This fungal disease appears as a white powdery coating on the leaves and stems. To control powdery mildew, improve air circulation around the plant, avoid overhead watering, and apply a fungicide approved for use on edible plants, following the label instructions.
- Leaf spot: Leaf spot diseases present as dark spots or lesions on the leaves. To prevent leaf spot, avoid overhead watering, allow for proper air circulation, and remove and dispose of affected leaves. Applying a copper-based fungicide can help control leaf spot.
Regularly inspecting your rosemary plant for any signs of pests or diseases is crucial. Early detection allows for quicker intervention and better chances of successful treatment. Additionally, practicing proper cultural care, such as providing adequate sunlight, well-draining soil, and proper watering techniques, can help prevent pest and disease issues.
If the infestation or disease becomes severe or persists despite treatments, consider consulting with a local horticulturist or plant disease specialist for further guidance and assistance.
By being proactive and addressing pest and disease issues promptly, you can ensure the continued health and vitality of your rosemary plants, allowing them to thrive and provide you with a bountiful harvest. In the next section, we’ll explore the process of harvesting and using your homegrown rosemary.
Harvesting and using your homegrown rosemary
One of the joys of growing rosemary is being able to harvest and utilize the flavorful and aromatic foliage in your culinary endeavors. Here’s a guide on how to harvest and use your homegrown rosemary:
- Timing: Harvest rosemary leaves when the plant has sufficient foliage, typically after it reaches 6-8 inches in height. Regularly trim the plant during the growing season to encourage bushy growth and ensure a continuous supply of fresh leaves.
- Choose the right time of day: Harvest rosemary in the morning, after the dew has dried but before the heat of the day. This is when the essential oils in the leaves are at their highest concentration, resulting in the best flavor and aroma.
- Pinch or cut stems: To harvest rosemary, you can either pinch off individual leaves or cut 2-3 inch stems from the plant. Pinching encourages new growth, while cutting allows you to gather larger amounts of leaves for immediate use or drying.
- Storage: Fresh rosemary can be used immediately, but if you’ve harvested more than you need, you can store it for later use. Store fresh rosemary in a plastic bag in the refrigerator for up to a week. Alternatively, you can freeze rosemary leaves by stripping them from the stem and placing them in airtight containers or freezer bags.
- Drying rosemary: To dry rosemary, hang small bunches upside down in a cool, well-ventilated area out of direct sunlight. Alternatively, you can spread the leaves on a drying rack or a tray lined with parchment paper. Once completely dry, remove the leaves from the stems and store them in airtight containers in a cool, dark place.
- Using rosemary in cooking: Rosemary is a versatile herb that can enhance the flavor of various dishes. Its robust flavor complements roasted meats, poultry, potatoes, vegetables, marinades, and soups. Simply strip the leaves from the stem and finely chop them before adding them to your recipes. Remember that a little goes a long way, as rosemary has a strong flavor.
- Infused oils and vinegars: Another way to enjoy the flavor of rosemary is by infusing it into oils or vinegars. Add a few sprigs of fresh rosemary to a bottle of olive oil or vinegar and let it steep for a couple of weeks. This will infuse the liquid with the herb’s distinct aroma and taste.
Homegrown rosemary not only elevates the flavors of your dishes but also provides a sense of satisfaction knowing that you’ve cultivated this aromatic herb yourself. Experiment with different recipes and techniques to fully appreciate the unique qualities of rosemary in your culinary creations.
With the knowledge of harvesting and using your homegrown rosemary, your culinary adventures are sure to be infused with the flavors and aromas of this delightful herb. In the final section, we’ll recap the key points and conclude our guide to growing rosemary bought from the store.
Conclusion
Congratulations! You now have all the knowledge you need to successfully grow and care for rosemary bought from the store. From choosing the right pot and location to preparing the soil mixture, transplanting, watering, pruning, fertilizing, and dealing with pests and diseases, you are equipped with the essential techniques to ensure your rosemary plants thrive.
Remember, rosemary prefers full sun, well-draining soil, and regular but infrequent watering. Proper pruning and shaping will keep your plants compact and bushy, while fertilizing with a balanced organic fertilizer will promote healthy growth. Monitor your plants for common pests and diseases, and take appropriate action to prevent and treat any issues.
Once your rosemary is ready for harvest, don’t forget to enjoy the flavorful leaves in your culinary adventures. Whether you’re adding it to roasted meats, vegetables, or infusing oils and vinegars, rosemary will bring a delightful aroma and taste to your dishes.
Now that you have the tools and knowledge, it’s time to get your hands dirty and start growing your own rosemary garden. Enjoy the satisfaction of knowing that you’re cultivating a versatile and beautiful herb that can enhance your cooking and enrich your gardening experience.
So, go ahead and start nurturing your rosemary plants. With a little care and attention, they will reward you with their vibrant green foliage, fragrant aroma, and delightful flavor. Happy gardening and happy cooking!