Home>Gardening Tips and Tricks>Eco-Friendly Gardening>How To Grow Moringa From Seeds

Eco-Friendly Gardening
How To Grow Moringa From Seeds
Modified: January 22, 2024
Learn how you can grow Moringa from seeds with our eco-friendly gardening tips. Discover the secrets to successfully growing this nutritious plant at home.
(Many of the links in this article redirect to a specific reviewed product. Your purchase of these products through affiliate links helps to generate commission for Chicagolandgardening.com, at no extra cost. Learn more)
Table of Contents
Introduction
Welcome to the fascinating world of eco-friendly gardening! If you’re passionate about sustainability and the environment, you’ve come to the right place. In this article, we will delve into the rewarding process of growing moringa from seeds. Moringa, also known as the “miracle tree,” is a versatile plant that offers numerous health benefits and can thrive in various climates.
Whether you’re an enthusiastic gardener or a beginner, growing moringa from seeds is an excellent way to contribute to a greener planet while nurturing your own supply of nutritious superfood. By following a few simple steps and best practices, you can successfully cultivate this remarkable plant.
Moringa is a tropical plant, native to parts of Africa and Asia. It has gained popularity worldwide due to its rich nutritional value and a wide array of potential uses. From its leaves, you can make teas, salads, and even face masks. The seeds are used for oil extraction, while the roots and bark have medicinal properties.
One of the biggest advantages of growing moringa is its resilience. It can tolerate a wide range of soil conditions, including poor and sandy soils, and it can withstand periods of drought. Additionally, the tree grows relatively fast, often reaching heights of up to 25 feet within just a few years. This fast growth makes it an excellent choice for those looking to establish a sustainable garden or add greenery to their landscape quickly.
In the following sections, we will guide you through the entire process of growing moringa from seeds, from selecting the right seeds to harvesting the plant’s bounty. So, grab your gardening gloves and let’s get started on this eco-friendly gardening adventure!
Step 1: Seed Selection
The first and perhaps most crucial step in growing moringa from seeds is selecting high-quality seeds. Good quality seeds will give you the best chance of successful germination and healthy plant growth. Here are some key points to consider when choosing your moringa seeds:
- Source: Obtain seeds from a reputable source, such as a trusted nursery or online supplier. This ensures that you’re getting seeds from a reliable and knowledgeable source, increasing the chances of obtaining viable seeds.
- Freshness: Look for recently harvested seeds to ensure their freshness. Seeds that have been stored for too long may have reduced germination rates and viability.
- Variety: Moringa comes in different varieties, each with its own unique characteristics and purposes. Select a variety that suits your specific needs, whether it’s for culinary purposes, medicinal uses, or simply for ornamental value.
- Organic and Non-GMO: Opt for organic and non-genetically modified organism (GMO) seeds to ensure that you’re growing your moringa plant in an eco-friendly and sustainable manner.
When assessing the quality of the seeds, look for those that are plump, firm, and intact. Avoid seeds that appear damaged, discolored, or shriveled, as they may have lower viability. Additionally, it’s helpful to soak the seeds in water for about 24 hours before planting. This can help identify any seeds that float to the top, indicating they are not viable.
Remember, seed selection is the foundation of successful moringa cultivation. By choosing high-quality seeds, you set yourself up for a greater chance of success in the subsequent steps of the growing process.
Step 2: Seed Treatment
After selecting your moringa seeds, the next step is to properly treat them before planting. This seed treatment process can enhance germination rates and overall plant health. Here are some essential seed treatment methods:
- Scarification: Moringa seeds have a hard outer shell that can impede water absorption and germination. To improve germination rates, scarify the seeds by gently scraping or nicking the seed coat with a sharp knife or sandpaper. This process helps water penetrate the seed, promoting quicker and more successful germination.
- Soaking: Soaking the scarified seeds in water overnight can further enhance water absorption and soften the seed coat. This step is particularly useful if the seeds are old or have a thick seed coat.
- Pre-Soaking in Nutrient Solution: For an extra boost, you can pre-soak the seeds in a nutrient-rich solution before planting. This method helps provide essential nutrients to the germinating seed, promoting healthy and vigorous growth.
- Hot Water Treatment: If your moringa seeds come from an unknown source or have been stored for an extended period, it’s prudent to perform a hot water treatment to eliminate any potential pathogens or fungal spores. Immerse the seeds in hot water (around 122°F/50°C) for a few minutes, then transfer them to room temperature water to cool down before planting.
Remember to handle the seeds with care during the treatment process to avoid damaging their delicate structure. Once you have treated the seeds, they are ready for germination and planting.
Seed treatment is a vital step that can significantly impact the success of your moringa gardening endeavors. By using these methods, you can increase germination rates and give your seeds a head start for healthy growth.
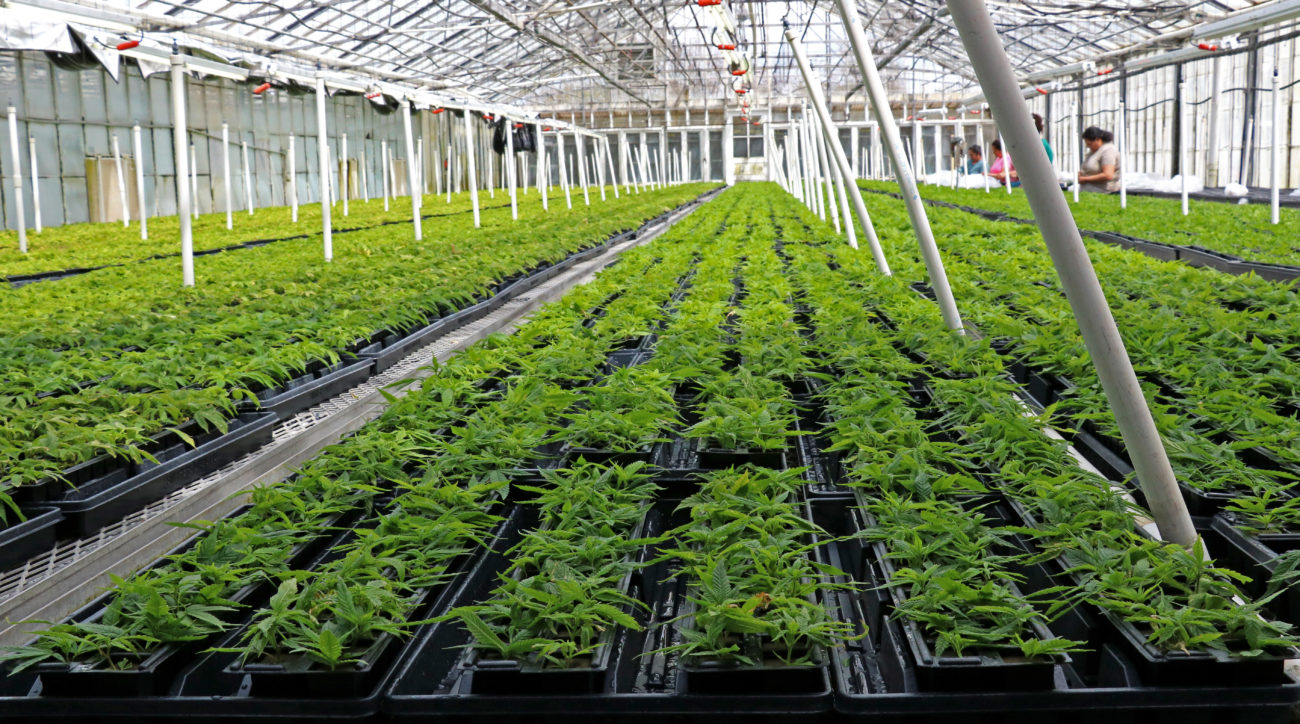
Step 3: Germination Process
Now that your moringa seeds are treated and prepared, it’s time to move on to the germination process. Germination is the stage where the seeds begin sprouting and develop into seedlings. Follow these steps to ensure successful germination:
- Planting Medium: Prepare a suitable planting medium that is well-draining and nutrient-rich. A mix of compost, sand, and soil in equal parts works well for moringa seeds. Fill small pots or seed trays with this planting medium.
- Planting Depth: Plant the moringa seeds approximately 1 inch deep in the planting medium. Space the seeds about 2 inches apart to allow room for root development.
- Moisture: Keep the planting medium consistently moist but not waterlogged. Mist the seeds regularly with a spray bottle to maintain moisture levels. Avoid overwatering, as excessive moisture can lead to fungal issues and rot.
- Temperature and Light: Place the pots or trays in a warm and well-lit area. Moringa seeds germinate best in temperatures around 77°F (25°C). Provide adequate sunlight or use artificial grow lights to ensure the seedlings receive sufficient light for healthy growth.
- Patience and Monitoring: Germination can take anywhere from 1 to 3 weeks, so be patient and monitor the progress of the seeds. Once the seedlings emerge, continue to provide the right conditions for their growth.
During the germination process, it’s important to provide the ideal conditions for the seeds to sprout and develop. The right moisture levels, temperature, and light will promote healthy germination and vigorous growth of the seedlings.
Once the seedlings have emerged and established a few sets of true leaves, they are ready to be transplanted into individual containers or into your garden. We will explore the transplanting process in the next step of your moringa growing journey.
Step 4: Planting the Seeds
Now that your moringa seeds have successfully germinated, it’s time to plant them in their permanent location. Whether you choose to grow moringa in containers or directly in your garden, here are the key steps to follow:
- Location: Choose a sunny spot for planting your moringa seeds. Moringa thrives in full sun and prefers at least 6 hours of direct sunlight each day. Ensure that the planting location has well-draining soil to prevent waterlogging.
- Soil Preparation: If you’re planting your moringa in the ground, prepare the soil by removing any weeds or debris and loosening it with a garden fork or tiller. You can also amend the soil with compost or well-rotted organic matter to improve its fertility and drainage.
- Container Selection: If you intend to grow moringa in containers, choose pots or containers that are at least 18 inches deep and have good drainage holes. This will provide enough space for the roots to grow and prevent waterlogging.
- Transplanting Seedlings: Gently remove the germinated moringa seedlings from their original pots or trays. Dig a hole in the soil or fill your chosen container with well-draining planting medium. Place the seedling in the hole or container, ensuring the base of the stem is at soil level. Backfill with soil or planting medium, gently firming it around the seedling.
- Watering: After planting, water the newly transplanted seedlings thoroughly to settle the soil and provide adequate moisture. Water regularly, but avoid overwatering, as moringa plants are susceptible to root rot if the soil is consistently waterlogged.
- Mulching: Consider applying a layer of organic mulch around the base of the seedlings to help retain moisture, suppress weed growth, and regulate soil temperature.
By following these steps, you will ensure that your moringa seeds are planted in the right location and provided with the necessary growing conditions. With proper care and maintenance, your moringa plants will flourish and yield a bountiful harvest of nutritious leaves and seeds.
Step 5: Proper Care and Maintenance
Once your moringa plants are planted and established, it’s important to provide them with proper care and maintenance to ensure their optimal growth and productivity. Follow these guidelines to keep your moringa plants healthy:
- Watering: Moringa trees have a deep root system and can tolerate drought conditions, but they still require regular watering, especially during dry spells. Water deeply once a week, ensuring the soil is moist but not waterlogged. Adjust the frequency of watering based on the weather conditions and the moisture level of the soil.
- Fertilization: Moringa plants benefit from regular fertilization to support their growth and productivity. Use a balanced organic fertilizer or compost to provide essential nutrients. Apply the fertilizer according to the manufacturer’s instructions or based on the needs of your specific moringa variety.
- Pruning: Regular pruning helps maintain the shape of the moringa tree and encourages bushier growth. Prune off any dead or damaged branches and trim back excessive growth to promote airflow and prevent overcrowding. You can also harvest leaves and pods as part of the pruning process to enjoy their nutritional benefits.
- Weed Control: Keep the area around your moringa plants free from weeds. Weeds compete with moringa for nutrients and water, so regular weeding is essential. Apply a layer of mulch around the base of the plants to suppress weed growth and conserve moisture.
- Pest and Disease Management: Monitor your moringa plants regularly for any signs of pests or diseases. Common pests that may affect moringa include aphids, caterpillars, and spider mites. Use organic pest control methods such as neem oil or introduce beneficial insects to keep pest populations in check. Maintain good hygiene by removing any fallen leaves or debris, as they can attract pests and lead to diseases.
- Protection from Frost: If you live in a region with frost during the winter season, it’s crucial to protect your moringa plants. Cover them with frost blankets or bring them indoors until the frost has passed.
By providing proper care and maintenance to your moringa plants, you will promote healthy growth, maximize their productivity, and ensure a thriving garden. Regular monitoring and timely intervention will help address any issues that arise and keep your moringa plants in optimal condition.
Step 6: Transplanting the Seedlings
As your moringa seedlings grow, you may find the need to transplant them to larger containers or to a permanent spot in your garden. Transplanting allows the roots to spread out and ensures your moringa plants have enough space to grow and thrive. Follow these steps to successfully transplant your moringa seedlings:
- Timing: Wait until the seedlings have developed a strong root system and a few sets of true leaves before transplanting. This usually occurs when the seedlings reach a height of 6 to 8 inches.
- Prepare the Soil: If transplanting into the ground, prepare the planting area by removing any weeds or grass and adding compost or organic matter to enrich the soil. Make sure the soil is well-draining to prevent waterlogging.
- Choose the Right Spot: Select a location that receives full sun and has enough space for the moringa plants to grow to their full height. Ensure there is adequate airflow around the plants to prevent the development of fungal diseases.
- Transplant Carefully: Dig a hole slightly larger than the root ball of the seedling. Gently remove the seedling from its current container, being careful not to damage the delicate roots. Place the seedling in the hole, ensuring it is at the same soil level as it was before. Backfill the hole with soil, gently firming it around the seedling. Water the transplanted seedlings thoroughly after planting.
- Maintain Adequate Watering: Keep the newly transplanted seedlings well-watered to help them establish in their new location. Water deeply, ensuring the water reaches the roots. Monitor the moisture levels and adjust watering frequency based on the weather conditions.
- Provide Support (if needed): If you expect your moringa plants to grow tall or encounter strong winds, it may be necessary to provide support for the trunk by using stakes or ties. This will help prevent the plants from bending or breaking.
Transplanting seedlings can be a delicate process, but with proper care and attention, your moringa plants will adapt to their new surroundings and continue to thrive. Be sure to monitor their growth and provide the necessary care as they establish themselves in their new home.
Step 7: Protection from Pests and Diseases
Keeping your moringa plants protected from pests and diseases is essential for their overall health and productivity. Here are some key steps to protect your plants:
- Regular Inspection: Conduct regular visual inspections of your moringa plants to identify any signs of pests or diseases early on. Look for damaged leaves, unusual growth patterns, or the presence of pests on the leaves, stems, or soil.
- Natural Pest Control: Implement natural pest control methods to minimize pest populations without relying on harmful chemicals. Some options include introducing beneficial insects like ladybugs or lacewings, using insecticidal soaps or oils, or making homemade organic pest sprays using ingredients like neem oil or garlic.
- Companion Planting: Planting companion plants that naturally repel pests can help protect your moringa plants. For instance, marigolds, basil, and chrysanthemums can act as natural pest deterrents when planted alongside moringa.
- Proper Hygiene: Maintain good garden hygiene to prevent the spread of diseases. Remove fallen leaves, pruned branches, or any plant debris from the vicinity of the moringa plants. This reduces the chances of fungal diseases and eliminates potential breeding grounds for pests.
- Organic Fungicides: If your moringa plants are susceptible to fungal diseases, such as powdery mildew or leaf spot, consider using organic fungicides. These products are less harmful to the environment and can help control or prevent the spread of fungal infections.
- Regular Watering: Be mindful of your watering practices, as overwatering can lead to root rot and attract pests. Water the plants at the soil level, avoiding wetting the leaves excessively, as this can create a favorable environment for fungal diseases to develop.
- Vigilance: Stay vigilant and continue monitoring your moringa plants throughout their growth cycle. Regular observation allows for early detection of pests or diseases, improving the chances of effective intervention.
By implementing these protective measures, you can minimize the impact of pests and diseases on your moringa plants, ensuring their health, growth, and productivity. Taking preventive action and staying proactive will help you maintain a thriving garden.
Step 8: Harvesting Moringa
After months of care and nurturing, the time will come when you can finally harvest the abundant rewards of your moringa plants. Harvesting moringa leaves and pods at the right time is crucial to ensure optimal flavor and nutritional value. Here’s what you need to know:
- Leaf Harvesting: Moringa leaves can be harvested once the plant has reached a height of 3 to 4 feet. Select fully grown mature leaves, as they have the highest nutrient content. Use pruning shears or sharp scissors to cut the leaves from the branches, leaving a few leaves intact at each harvest point to encourage continuous growth.
- Pod Harvesting: Moringa pods are ready to be harvested when they reach a length of 8 to 12 inches. The pods should be firm, yet still green and tender. Use a knife or garden pruners to carefully cut the pods from the tree, ensuring you don’t damage the branches or the neighboring pods. Harvest regularly to encourage the growth of more pods.
- Seed Harvesting: If you’re interested in harvesting moringa seeds, allow the pods to fully mature on the tree until they turn brown and start to crack open naturally. Collect the pods and allow them to dry further in a well-ventilated area. Once completely dry, gently remove the seeds from the pods and store them in a cool, dry place for future use.
- Storing Harvested Produce: After harvesting the moringa leaves and pods, rinse them under cold water to remove any dirt or debris. Pat them dry with a clean towel or paper towel, and refrigerate them in a sealed container to help retain their freshness and nutritional value. Use the harvested produce as soon as possible for the best flavor and nutritional benefits.
Remember to always harvest mindfully, ensuring that you don’t strip the plant entirely and allow it to regrow. Regular harvesting promotes continuous leaf and pod production, ensuring a steady supply of fresh moringa throughout the growing season.
By following these steps, you can enjoy a bountiful harvest of moringa leaves, pods, and seeds, savoring their incredible nutritional value and incorporating them into your meals, teas, or other creative uses.
Conclusion
Congratulations on successfully navigating the process of growing moringa from seeds! By following the steps outlined in this guide, you have acquired the knowledge and skills to cultivate this remarkable plant in an eco-friendly manner. From selecting high-quality seeds to harvesting the nutritious leaves and pods, you have embarked on a rewarding journey of sustainable gardening.
Moringa’s versatility, resilience, and numerous health benefits make it a fantastic addition to any garden, whether you have a small balcony or a spacious backyard. Not only does moringa offer a sustainable source of nutrient-dense food, but it also contributes to the well-being of the environment through its carbon sequestration abilities and soil improvement properties.
Remember, as you continue to care for your moringa plants, be mindful of their watering needs, provide adequate nutrition, protect them from pests and diseases, and enjoy the process of watching them flourish. Regularly harvesting the leaves and pods will ensure a continuous supply of fresh, nutritious produce throughout the growing season.
Whether you use moringa to enrich your meals, brew healing teas, or explore its medicinal properties, your eco-friendly garden will bring you a sense of satisfaction and joy. As you engage in sustainable gardening practices, you contribute to the well-being of the planet and inspire others to embrace environmentally-conscious lifestyles.
So, go ahead and embrace the wonders of eco-friendly gardening with moringa. Embark on this journey of nurturing plants, delighting in the harvest, and reaping the benefits of a sustainable and environmentally-friendly garden.